
Fuel Injector Operation
High-pressure fuel is supplied from the Bosch VP44 injection pump, through a high-pressure fuel line, through a steel connector, and into the fuel injector. When fuel pressure rises to approximately 31,026 kPa (4,500 psi), the needle valve spring tension is overcome. The needle valve rises and fuel flows through the spray holes in the injector nozzle tip into the combustion chamber. The pressure required to lift the needle valve is the nozzle opening pressure. This is sometimes referred to as the “pop” pressure setting.
Each fuel injector is connected to each high-pressure fuel line with a steel connector. This steel connector is positioned into the cylinder head and sealed with an o-ring. The connectors are sealed to the high-pressure fuel lines with fittings. The ferrule on the end of the high-pressure fuel line pushes against the steel connector when the fuel line fitting is torqued into the cylinder head. This torquing force provides a sealing pressure between both the fuel line to the connector and the fuel connector-to-fuel injector. The fitting torque is very critical. If the fitting is under-torqued, the mating surfaces will not seal and a high-pressure fuel leak will result. If the fitting is over torqued, the connector and injector will deform and also cause a high-pressure fuel leak. This leak will be inside the cylinder head and will not be visible. The result will be a possible fuel injector miss-fire and low power.
The fuel injectors use hole-type nozzles. High-pressure flows into the side of the injector and causes the injector needle to lift and fuel to be injected. The clearances in the nozzle bore are extremely small and any sort of dirt or contaminants will cause the injector to stick. Because of this, it is very important to do a thorough cleaning of any lines before opening up any fuel system component. Always cover or cap any open fuel connections before a fuel system repair is performed.
Each fuel injector connector tube contains an edge filter that breaks up small contaminants that enter the injector. The edge filter uses the injectors pulsating high pressure to break up most particles so they are small enough to pass through the injector. The edge filters are not a substitute for proper cleaning and covering of all fuel system components during repair.
The bottom of each fuel injector is sealed to the cylinder head with a 1.5mm thick copper shims (gasket). The correct thickness shim must always be re-installed after removing an injector.
Fuel pressure in the injector circuit decreases after injection. The injector needle valve is immediately closed by the needle valve spring and fuel flow into the combustion chamber is stopped. Exhaust gasses are prevented from entering the injector nozzle by the needle valve.
Fuel Injector Removal
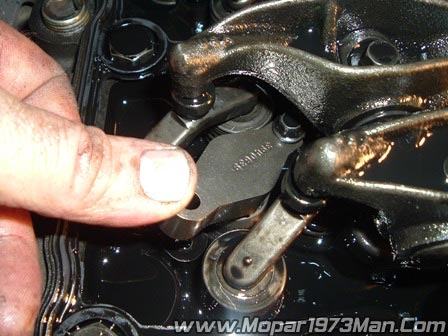
The fuel injectors are located in the top of the cylinder head between the intake/exhaust valves.
1. Disconnect both negative battery cables from both batteries. Cover and isolate end of cables. Each fuel injector is connected to each high-pressure fuel line with a steel connector tube. This steel connector is positioned into the cylinder head and sealed with an o-ring. The connectors are connected to high-pressure fuel lines with fittings.
2. If injector at #1 or #2 cylinder is being removed, intake manifold air heater assembly must be removed.
3. If injector at #5 cylinder is being removed, remove engine lifting bracket (2 bolts).
4. Thoroughly clean area around injector and injector high-pressure lines before removal.
5. Remove necessary high-pressure fuel lines. (Refer to - Injection Lines). Do not bend any high-pressure fuel line to gain access to the fuel injector. Cover or cap any open fuel connections.
6. Remove valve cover.
Mopar's Notes
Most of us will be doing full injector upgrades or replacements. So I know the service manual talks as if replacing 1 or 2 injectors. I highly suggest you remove every as pictured below.
APPS Sensor - Removal. Leave the throttle cable attached and lay on the PDC box.
Remove the intake and grid heaters by pulling the 4 bolts and the band clamp. Lay the intake and grid heater aside on the PDC box.
Remove the valve cover.
Remove the injection lines

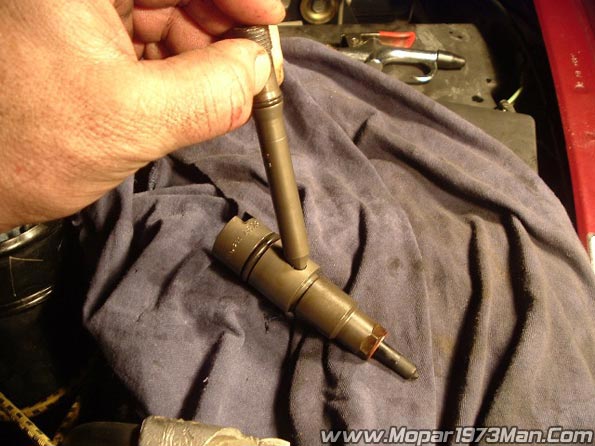
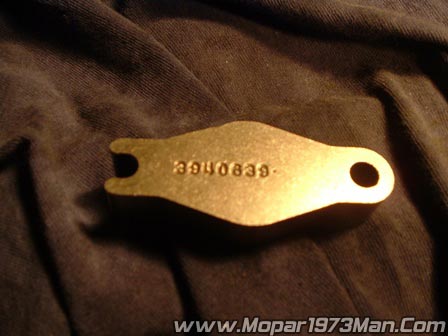
7. Thread Special Tool 8324 (Fuel Injector Connector Tube Remover) onto the end of injector connector tube.
| Mopar's Notes |
|---|
| You can use a small flat blade screwdriver. Just hook one of the threads on the connector tube and lightly pry out. |
| WARNING! |
|---|
| Be aware and not scratch the mating surface of where the tube and high-pressure line and the connector tube meet if you do there will be a fuel leak. |
8. Pull injector connector tube from the cylinder head. The injector connector tube must be removed before attempting to remove fuel injector or serious damage to fuel injector and tube will result.

9. Remove and discard old o-ring from injector connector tube.
10. Remove fuel injector hold down clamp bolt at the front end of the clamp. Do not loosen or remove special (2 shouldered) bolt at the rear end of the clamp. Remove injector clamp by sliding it from shoulders on rear clamp bolt.
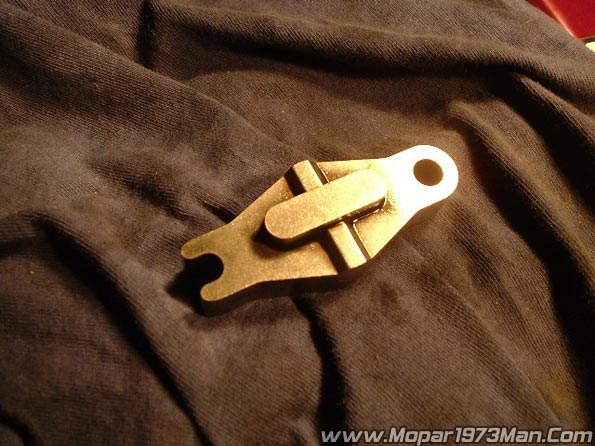
11. Thread rod from Special Tool number 8318 (Fuel Injector Remover) into the top of the fuel injector.
| Mopar's Notes |
|---|
| Take one of your short intake bolts and thread it into the head of the injector. |
12. Tighten nut on 8318 tool to pull (remove) fuel injector from the cylinder head.
| Mopar's Notes |
|---|
| Use a screwdriver and pry the injector straight up carefully. |
13. Remove and discard old o-ring from the fuel injector.
14. Remove and discard copper sealing washer (shim) from the bottom of the injector. If copper sealing washer has remained in the cylinder head, it must be removed.
Fuel Injector Installation
The fuel injectors are located in the top of the cylinder head between the intake/exhaust valves.
1. Inspect fuel injector.
a. If necessary, perform a pressure test of the injector.
b. Look for burrs on injector inlet.
c. Check nozzle holes for hole erosion or plugging.
d. Inspect end of the nozzle for burrs or rough machine marks.
e. Look for cracks at the nozzle end.
f. Check nozzle color for signs of overheating. Overheating will cause the nozzle to turn a dark yellow/ tan or blue (depending on overheating temperature).
g. If any of these conditions occur, replace the injector.
2. Thoroughly clean fuel injector cylinder head bore with special Cummins wire brush tool or equivalent. Blow out bore hole with compressed air.
3. The bottom of the fuel injector is sealed to cylinder head bore with a copper sealing washer (shim) of a certain thickness. A new shim with correct thickness must always be re-installed after removing injector. Measure thickness of injector shim. Shim Thickness: 1.5 mm (.060”)
4. Install new shim (washer) to the bottom of the injector. Apply a light coating of clean engine oil to the washer. This will keep washer in place during installation.
5. Install new o-ring to fuel injector. Apply a small amount of clean engine oil to o-ring.
6. Note fuel inlet hole on the side of the fuel injector. This hole must be positioned towards injector connector tube. Position injector into cylinder head bore being extremely careful not to allow injector tip to touch sides of the bore. Press fuel injector into cylinder head with finger pressure only. Do not use any tools to press fuel injector into position. Damage to machined surfaces may result.
7. Position fuel injector hold down clamp into shouldered bolt while aligning slot in the top of the injector into the groove in the bottom of the clamp. Tighten opposite clamp bolt to 10 N·m (89 in. lbs.) torque.
8. Install new o-ring to fuel injector connector tube. Apply a small amount of clean engine oil to o-ring.
9. Press injector connector tube into cylinder head with finger pressure only. Do not use any tools to press tube into position. Damage to machined surfaces may result.
10. Connect high-pressure fuel lines. Refer to High-Pressure Fuel Lines Removal/Installation. The fuel line fitting torque is very critical. If the fitting is under-torqued, the mating surfaces will not seal and a high-pressure fuel leak will result. If the fitting is over torqued, the connector and injector will deform and also cause a high-pressure fuel leak. This leak will be inside cylinder head and will not be visible resulting in a possible fuel injector miss and low power. (28 ft. lbs.)
11. Install valve cover.
12. (If necessary) install intake manifold air heater assembly. Refer to Intake Manifold Air Heater Removal/Installation.
13. (If necessary) install engine lifting bracket. Tighten 2 bolts to 77 N·m (57 ft. lbs.) torque.
14. Connect negative battery cables to both batteries.
15. Bleed air from high-pressure lines. Refer to Reprime fuel system procedure.
-
 2
2
-
 1
1