Jump to content
  • Welcome To Mopar1973Man.Com LLC

    We are a privately owned support forum for the Dodge Ram Cummins Diesels. All information is free to read for everyone. To interact or ask questions you must have a subscription plan to enable all other features beyond reading. Please go over to the Subscription Page and pick out a plan that fits you best. At any time you wish to cancel the subscription please go back over to the Subscription Page and hit the Cancel button and your subscription will be stopped. All subscriptions are auto-renewing. 
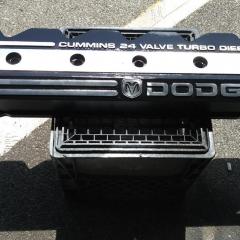
Replacement dash


Recommended Posts

Bought mine from dashskin.com. Lifetime warranty. First one showed up cracked, they sent a new one right away. 


Edit: looks like they don't offer a full dash replacement anymore, very happy with mine however

Edited by Bojon
Link to comment
Share on other sites

  • 2 weeks later...

I got the fiberglass one from Amazon. Looks pretty good but I'll see how it fits when the weather warms up. I'm going to make a gauge pod out of glass and glass in some bosses for screws for the vents. Going to hit the local yards and see if i can find a lower dash thats better than mine. I'd like to be able to do everything on the bench before i pull it apart.

Link to comment
Share on other sites

I spent 2 or 3 days on mine. I had time to do it and just did not get in any hurry. Some beer breaks were taken also.

My son helped me reinstall the dash. And beings some of the screws for the dash have to be installed from the back having him was benefical. I also rebuilt the hvac box while itmwas out.

Edited by dripley
Link to comment
Share on other sites

If you're doing a dash top I'd pull steering column, pull dash completely out and do dash top on bench. Get new plastic nut inserts for it too. Need 4. Know it says storage compartment nut but it is what snaps into firewall for upper dash screws. I get them from the dealer we contract with for about $5 each.

Screenshot_2020-01-21-11-03-50.png

Edited by Gregturley
Link to comment
Share on other sites

@Doubletrouble replace the a/c dryer while you have it apart. That should be the last part installed when doing the job. You dont want it open to the atmosphere any longer than necessary. Measure and add the correct amount and type of oil. 

 It is also a time to clean the box and refoam the doors. I used contact glue and foam i got local when i did my old trucks.

  • Like 1
Link to comment
Share on other sites

44 minutes ago, Doubletrouble said:

This is a project I will definitely be doing at some point. It may be a while but it will be on the list. I will try to have all the pieces and parts needed before tearing into the dash in an effort to make it a little quicker and smoother with good end results. 

It is good project especially if you plan to keep the truck for while. And the benefit to your eyes is priceless. Felt like I had a new truck again. Having the AC back was almost secondary.


And just to add the method @Gregturley describes is good if you have some help and would definitely make the dash pad install easier. There are 2 screws on the drivers side that are very tough to get to with the dash still in the truck, but not impossible. i have never pulled the steering column to know what time that adds to the job.

Link to comment
Share on other sites

I usually get the box installed as soon as possible then get the vacuum pump going while I hang a dash. By the time the dash and column are done its ran enough to charge. I'm not wasting time waiting for the vacuum.

I pull column because it makes it so i can easily roll the dash on the seats. I can then slide it out and onto saw horses by myself. 

@dripley Only adds a few bolts, connectors, and shift linkage. 30 minutes R&R total maybe but less to work around. DO NOT forget to lock the key so steering wheel doesn't spin and mess up the clock spring.

Edited by Gregturley
Link to comment
Share on other sites

  • Staff
On 1/2/2020 at 4:07 PM, dripley said:

Now thats what 50 pound dash pad looks like. I smeared a bunch of silicone on the back of my dash bezel to hold it together. Worked pretty good but I was scared to to pull it off for anything. The top was very fragile.

I just repaired my dash bezel because It's  harder to get a wood grain bezel like mine and the top was like an old relic cracking apart. So with ABS pipe glue I glued leather to the underside and put all the pieces back together on the top. Spot putty and sanding got it fair to midland and then masked the underside and sprayed Raptor bedliner to reinforce everything underneath. Then masking the front you run a razor knife between the top and the front. It has a groove there seperating the front from the top to guide your razor knife perfectly. With the front all masked off and only the top showing, I put 4 coats of Raptor Bedliner out of their rattle can. It came out really cool and better than new and is strong. :thumb1:

  • Like 1
Link to comment
Share on other sites

31 minutes ago, Gregturley said:

Only adds a few bolts, connectors, and shift linkage. 30 minutes R&R total maybe but less to work around. DO NOT forget to lock the key so steering wheel doesn't spin and mess up the clock spring.

Edited 21 minutes ago by Gregturley

I would disagree with one thing. I have no shift linkage except for the stick sticking out of the floor. One less thing to do. All good to know though. Thanks

Link to comment
Share on other sites

16 minutes ago, JAG1 said:

I just repaired my dash bezel because It's  harder to get a wood grain bezel like mine and the top was like an old relic cracking apart. So with ABS pipe glue I glued leather to the underside and put all the pieces back together on the top. Spot putty and sanding got it fair to midland and then masked the underside and sprayed Raptor bedliner to reinforce everything underneath. Then masking the front you run a razor knife between the top and the front. It has a groove there seperating the front from the top to guide your razor knife perfectly. With the front all masked off and only the top showing, I put 4 coats of Raptor Bedliner out of their rattle can. It came out really cool and better than new and is strong. :thumb1:

Next time I am down by the parts guy I found out of Charlotte I will see if he has a burl bezels and see what wants for one.

  • Thanks 1
Link to comment
Share on other sites

39 minutes ago, JAG1 said:

I just repaired my dash bezel because It's  harder to get a wood grain bezel like mine and the top was like an old relic cracking apart. So with ABS pipe glue I glued leather to the underside and put all the pieces back together on the top. Spot putty and sanding got it fair to midland and then masked the underside and sprayed Raptor bedliner to reinforce everything underneath. Then masking the front you run a razor knife between the top and the front. It has a groove there seperating the front from the top to guide your razor knife perfectly. With the front all masked off and only the top showing, I put 4 coats of Raptor Bedliner out of their rattle can. It came out really cool and better than new and is strong. :thumb1:

Got any photos?

Link to comment
Share on other sites

×
×
  • Create New...