Relentless70
Unpaid Member
-
Joined
-
Last visited
Everything posted by Relentless70
-
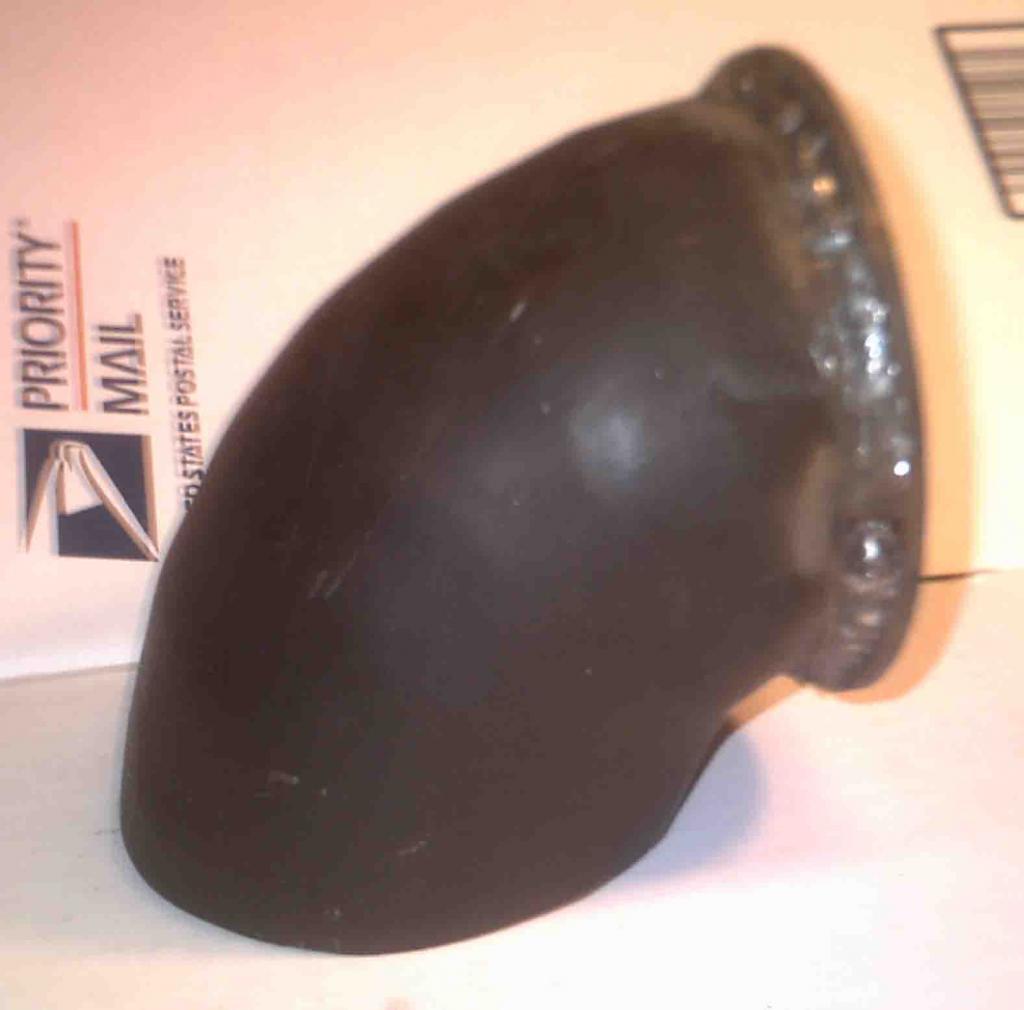
I finally finished the intake horn.....good lord I hate grinding lol......all that is left to do is cut my output side intercooler tube to the correct length and install the intake horn . I hope to be able to get it all done tomorrow.


-
Added 2 more segments to the tube. I'm not gonna post anymore pics until the unit is done.....no need to bore you guys with the small stuff. I hope to have it finished by the end of this weekend

-
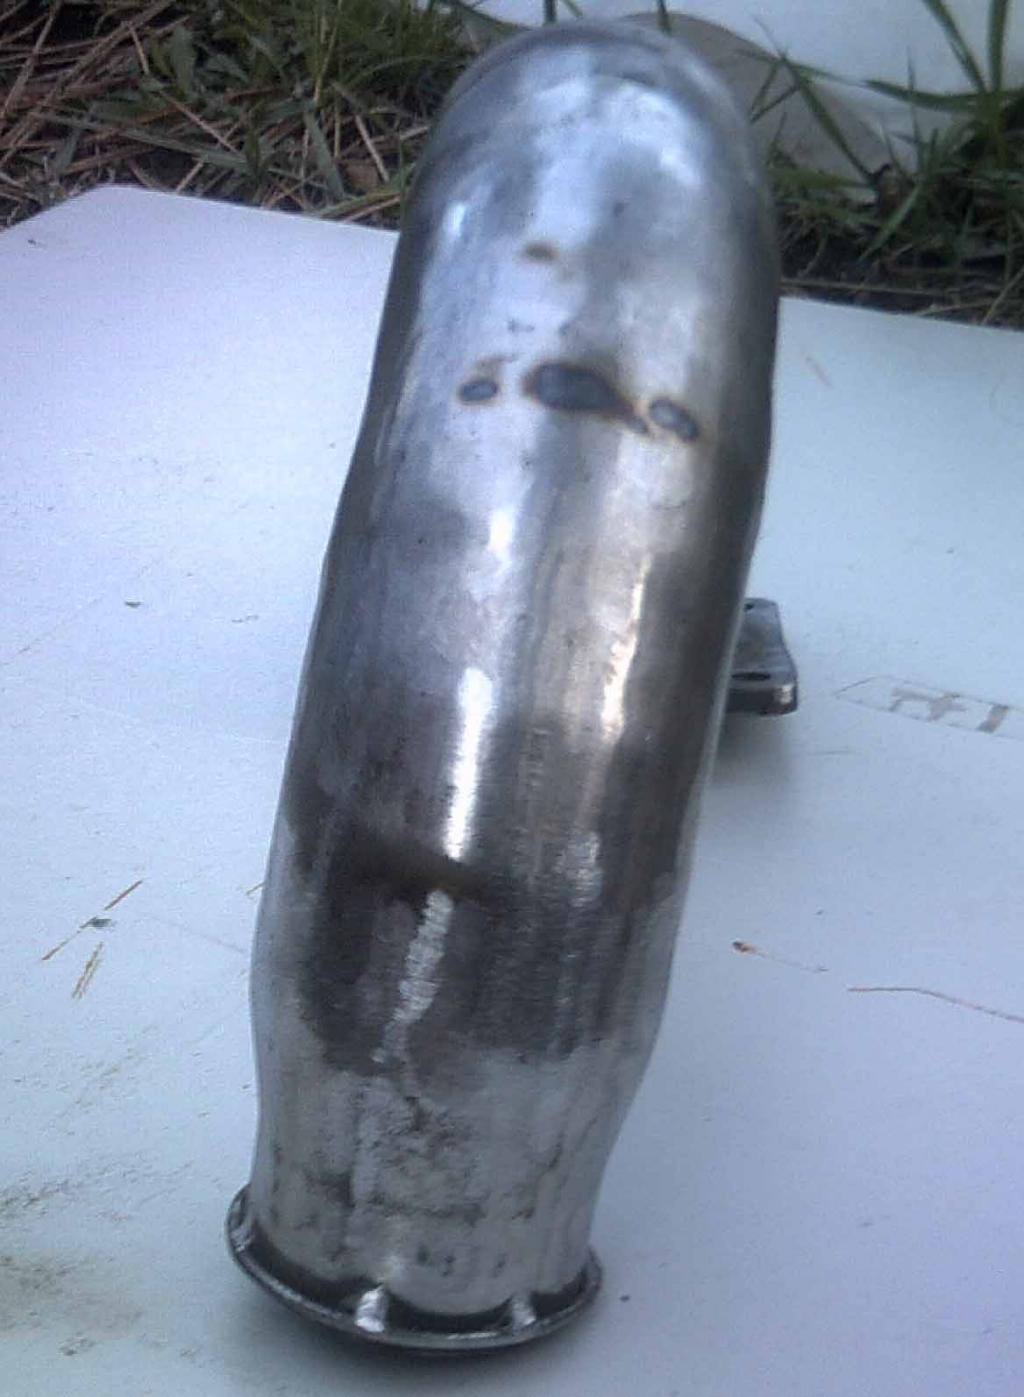
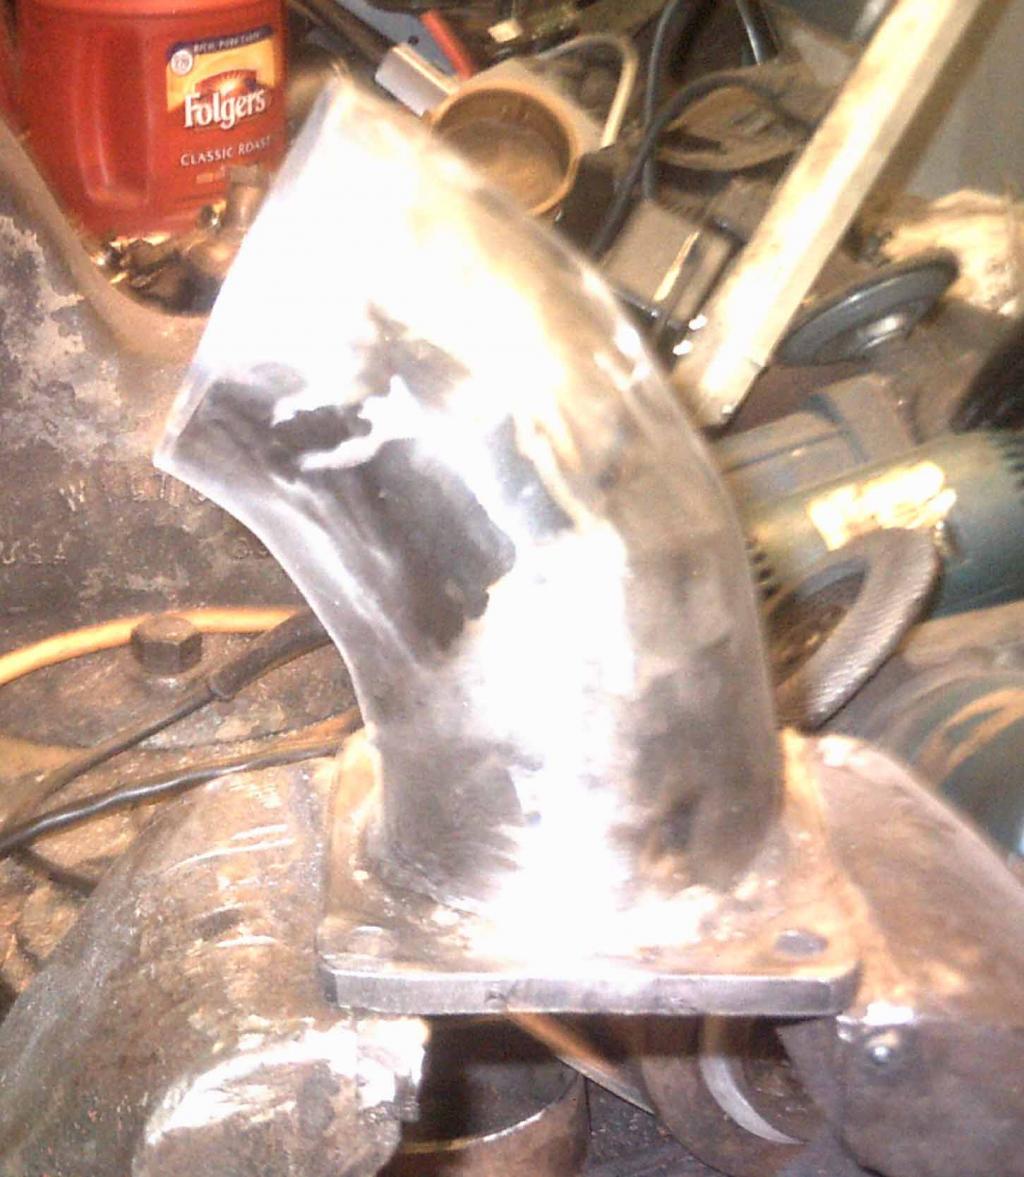
Sorry for the delay in replying. Here is a pic of the inside of the tube so far. I'm not done smoothing it out yet.
-
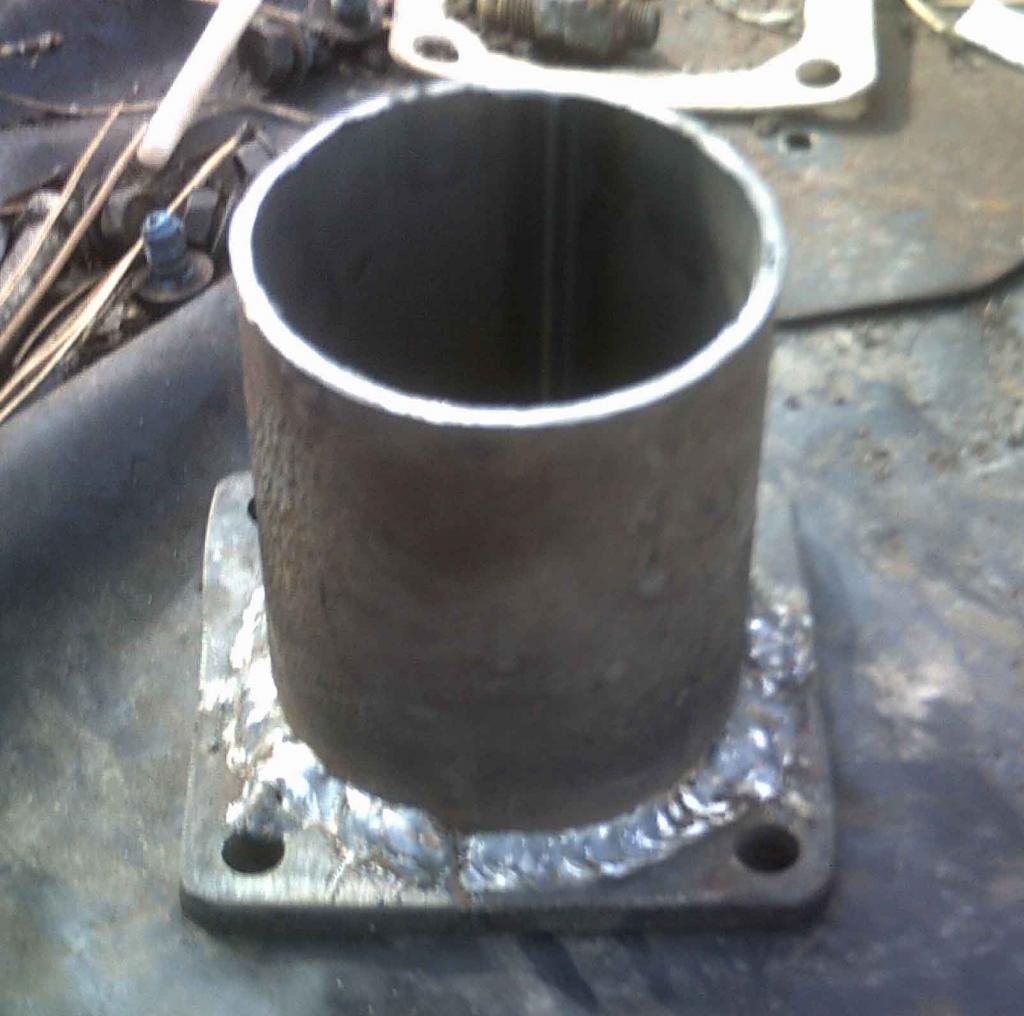
Welds cleaned up here.
-
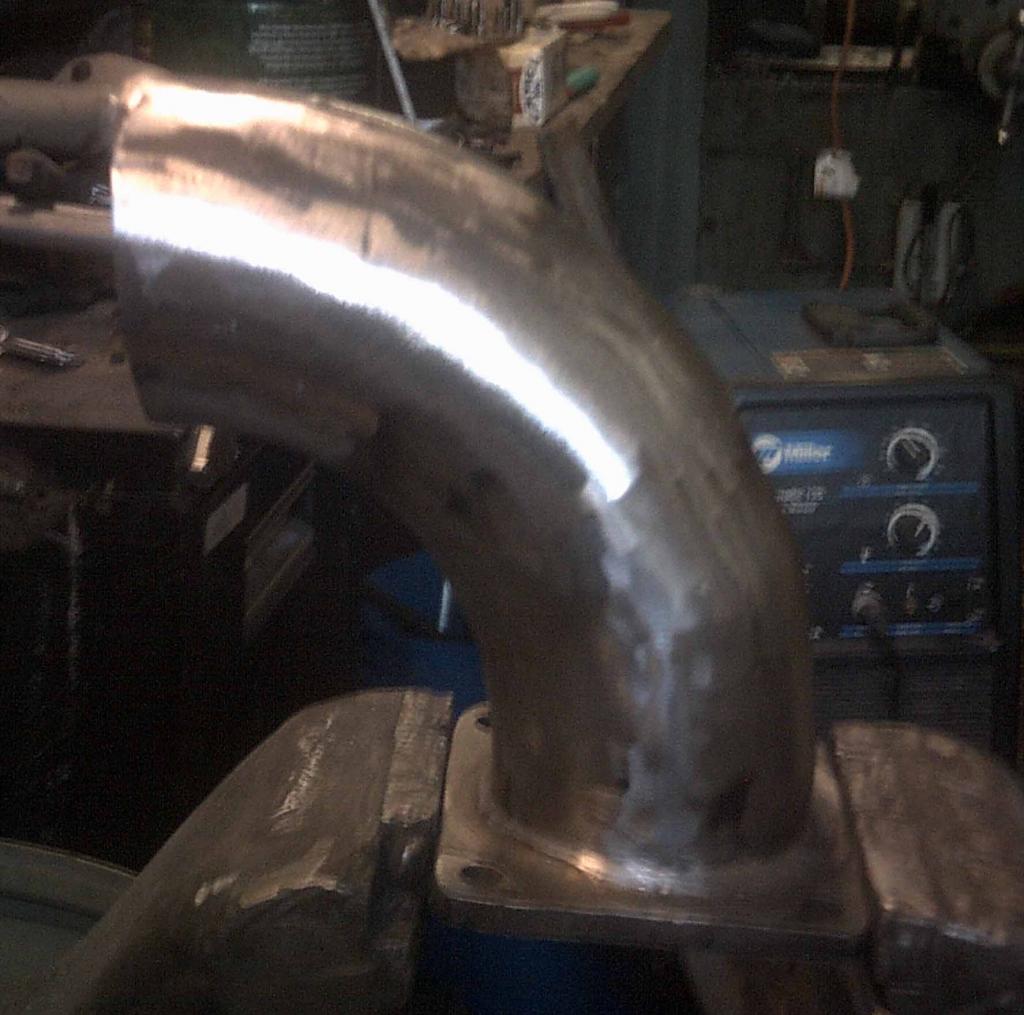
Added 2 more segments cut at 4.5 degrees per end, short side cut at 9/16". I'm liking the radius that developing now .

-
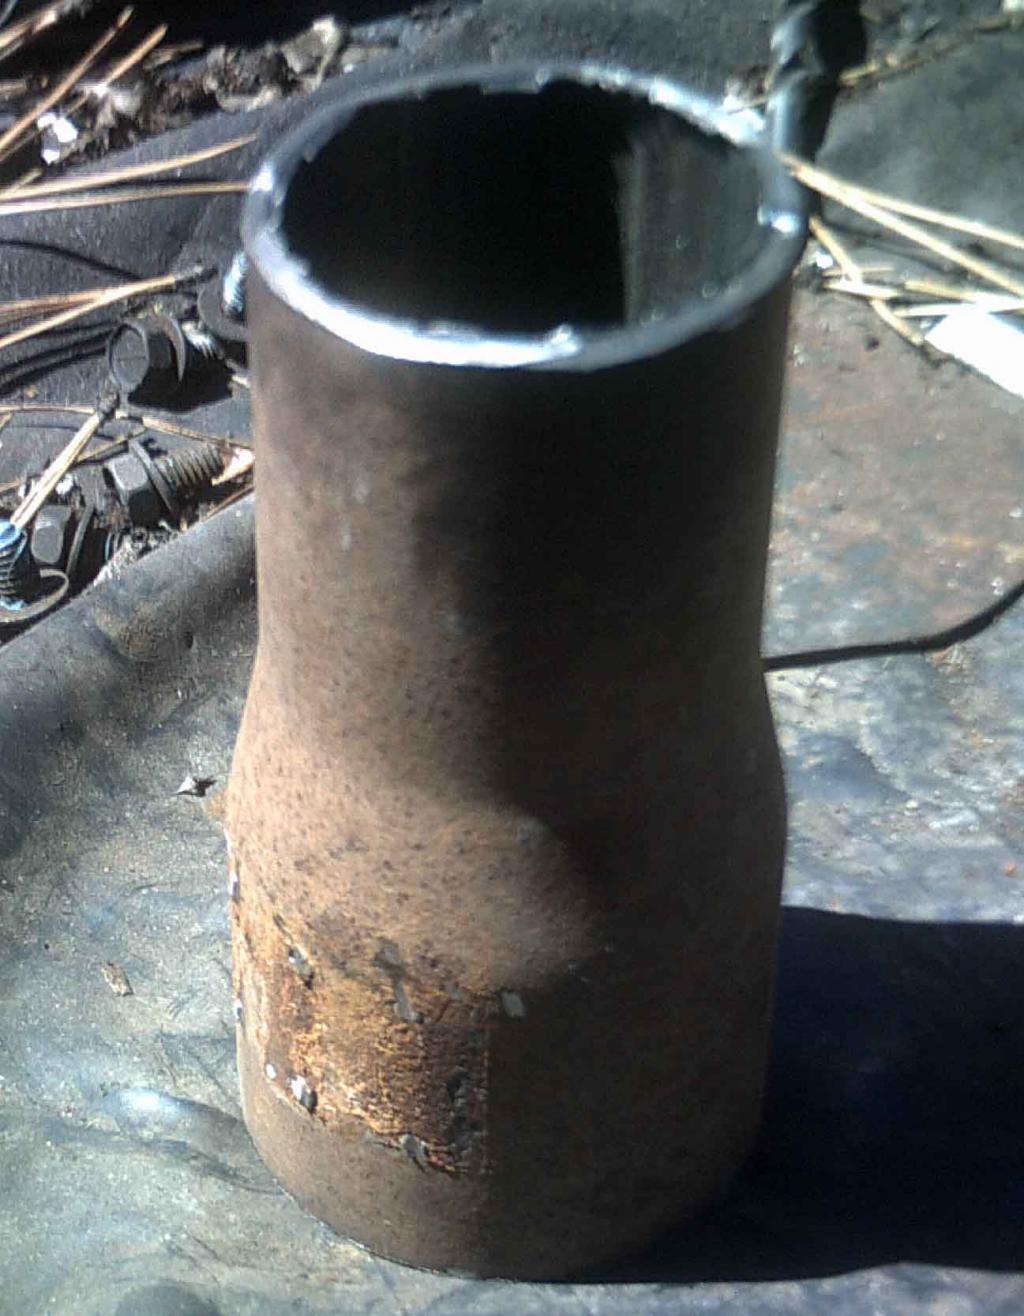
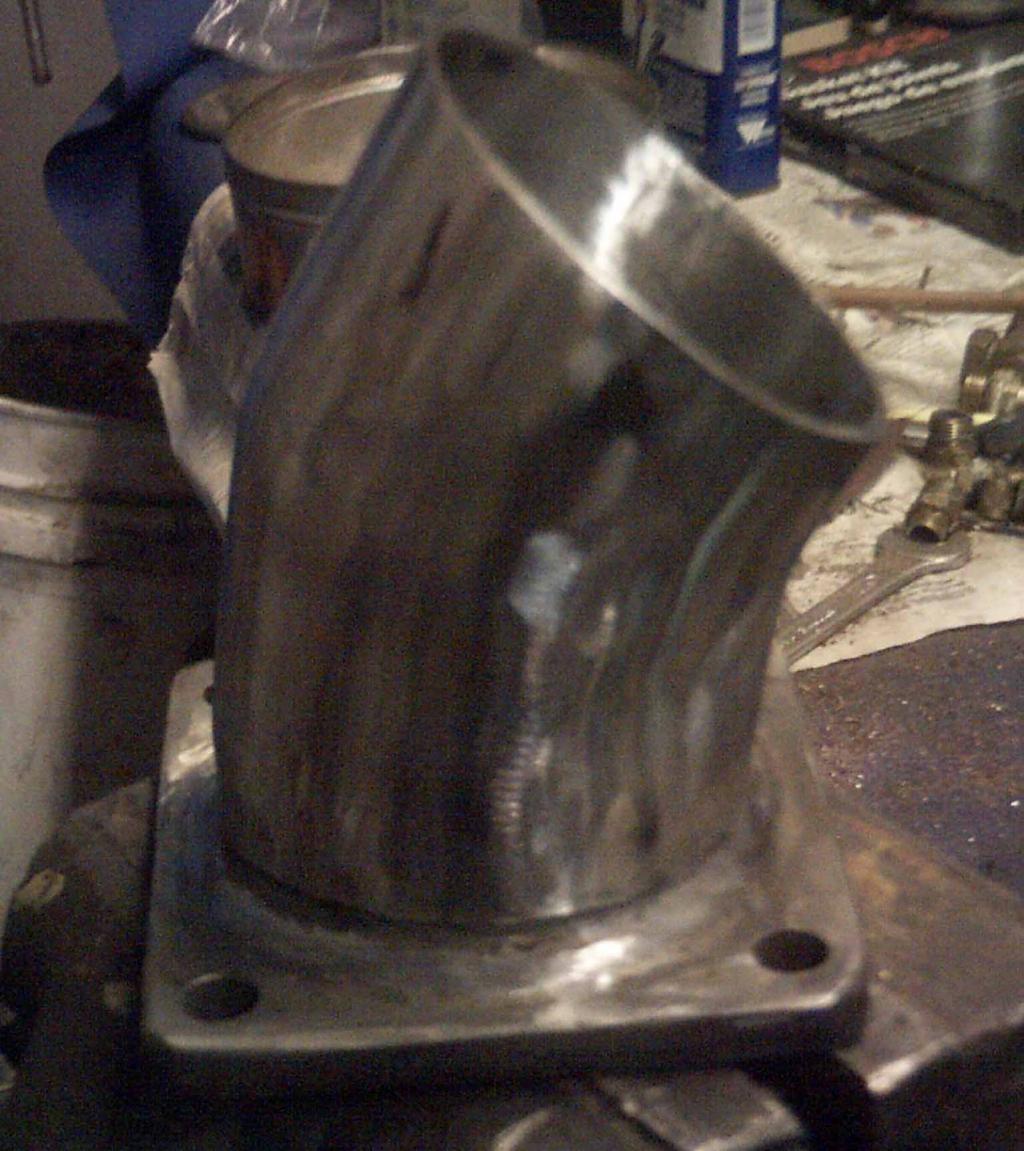
Here is a pic of the unit with the welds cleaned up, inside and out. I'm thinking of cutting the angles shallower, 'cause I don't like those sharp bends it is making. It will require more cutting and welding, but its all good
-
After triple-checking some measurements, I ended up cutting off 3 inches of the tube. I have 2 segments welded to the flange now.

-
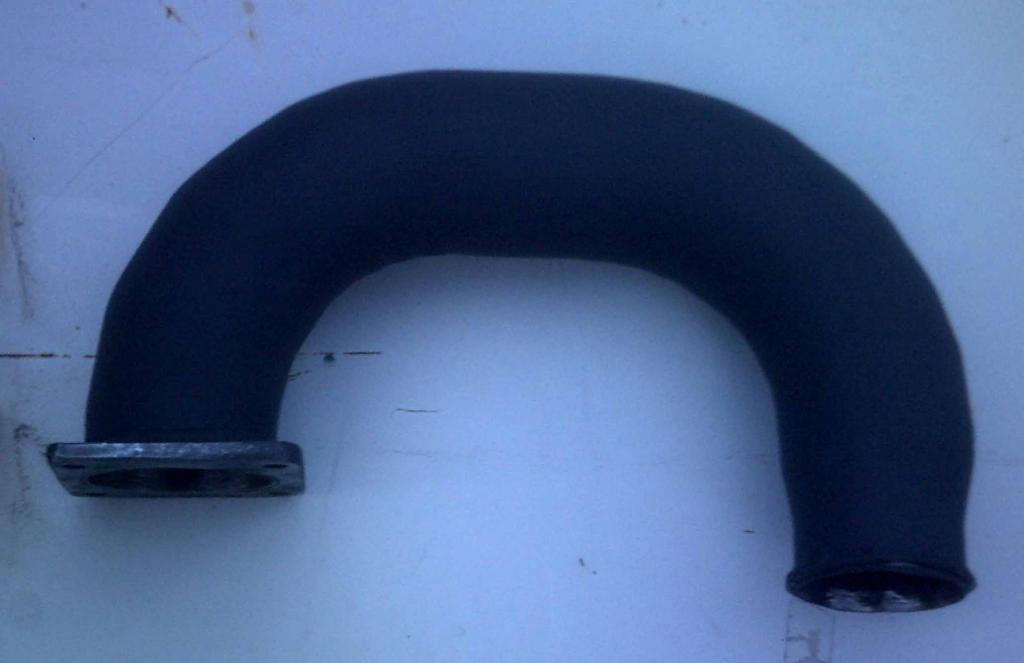
I'm not gonna powder coat it, but I'll shoot some flat black paint on it
-
Cleaned up the weld somewhat, and used a wirewheel to blow off the rust. I'll have more pics tomorrow .

-
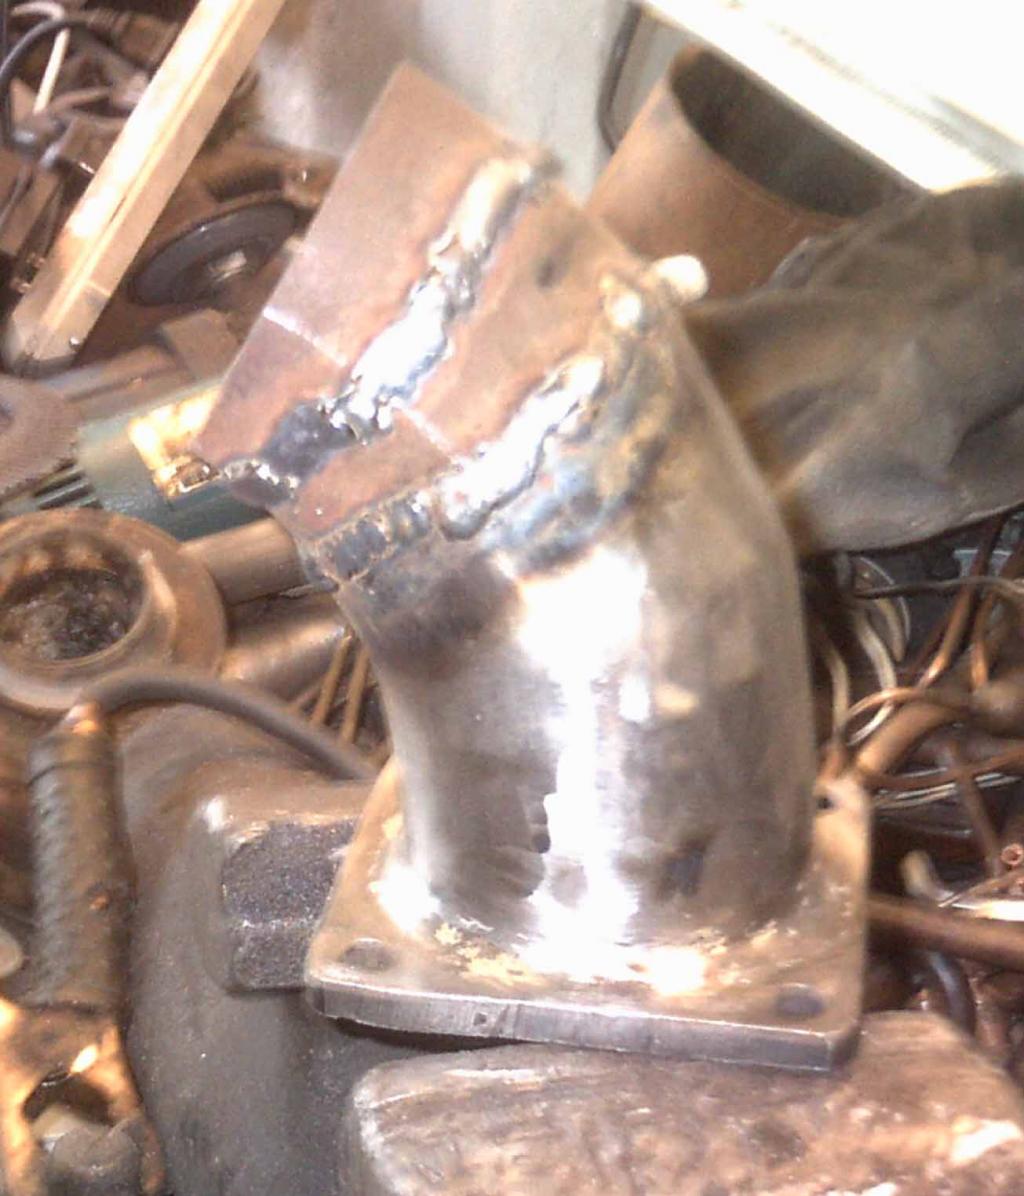
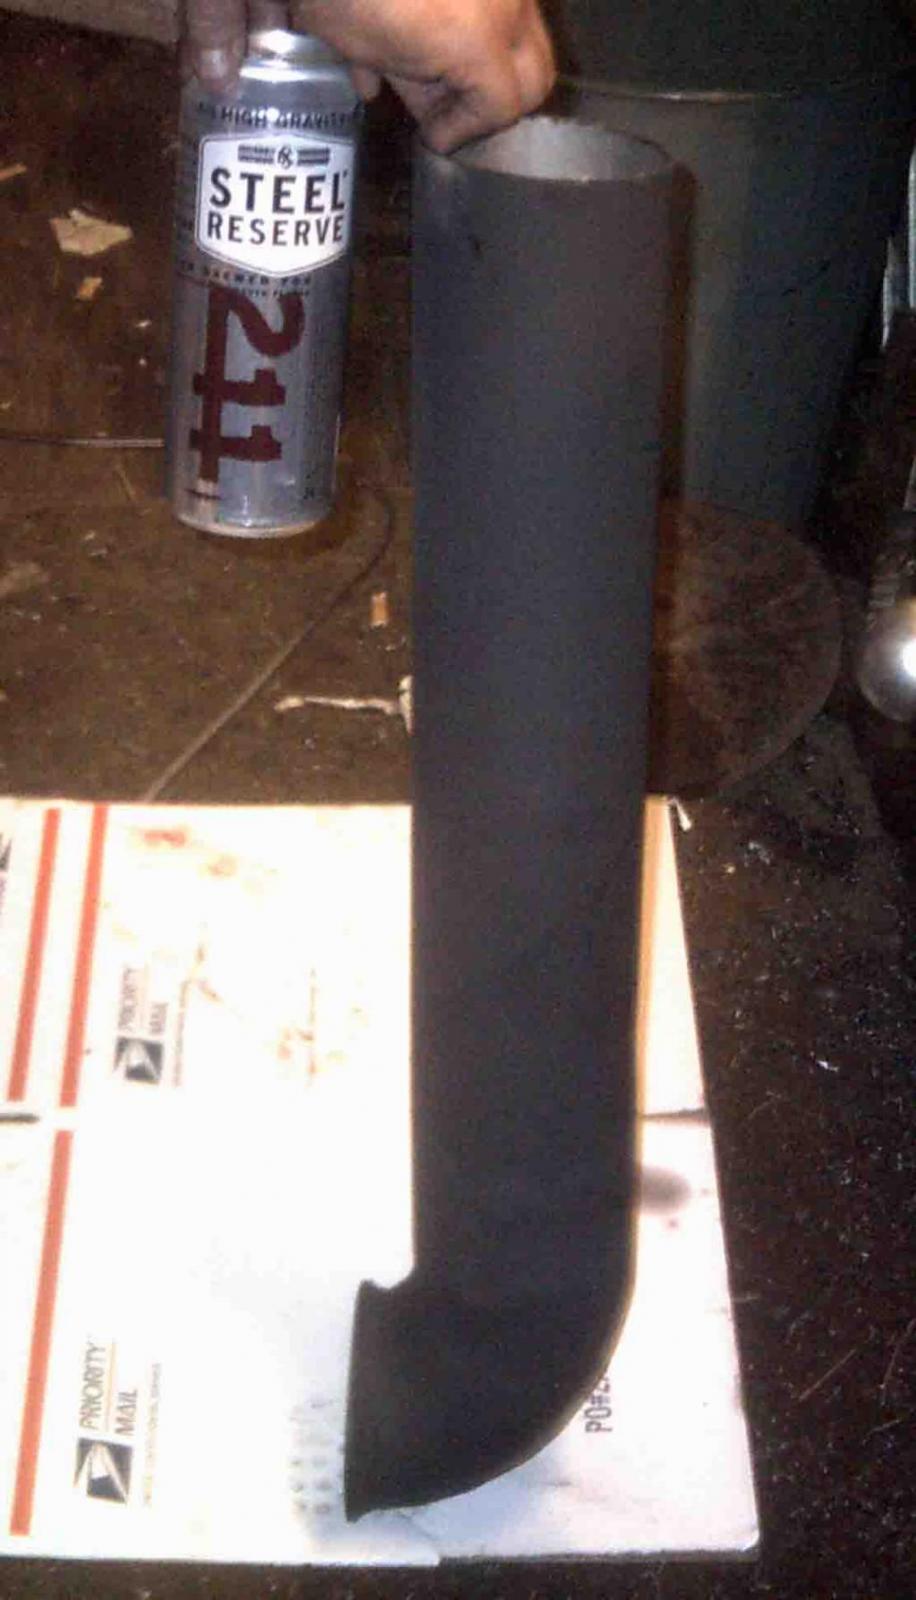
I welded on a 4" long piece of 3" pipe to the flange. I'll end up cutting some of it off.....better safe than sorry .

-
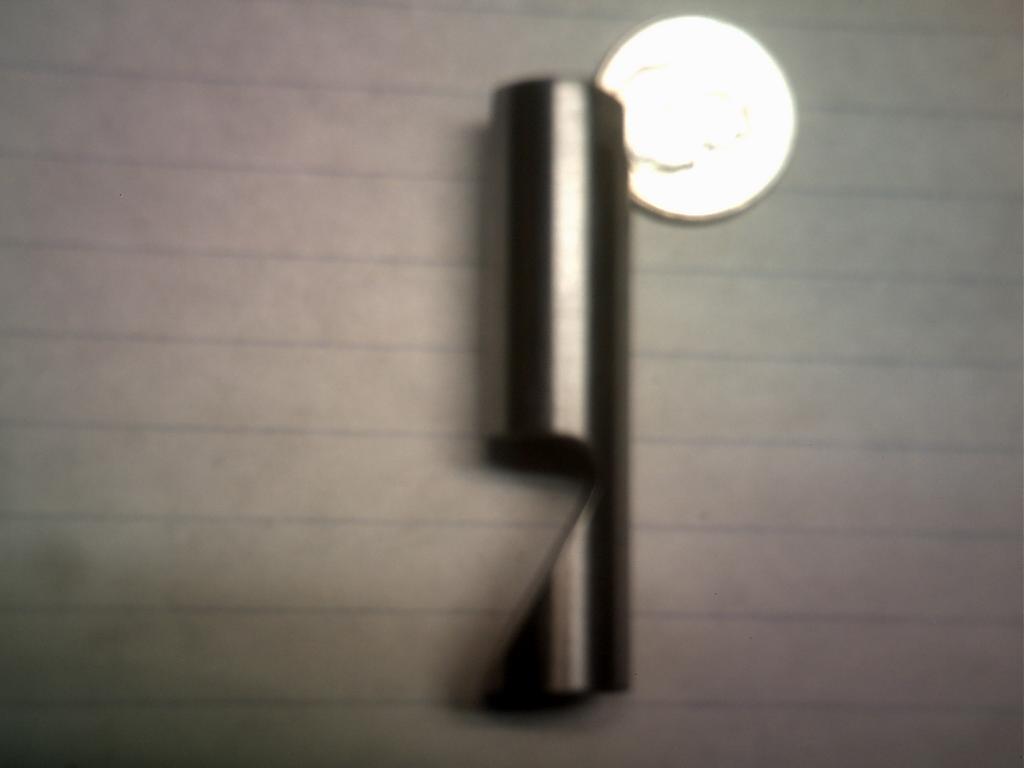
The driveshaft is necked down to nearly the same size as my existing intercooler tube, which means I won't need to buy a rubber boot.

-
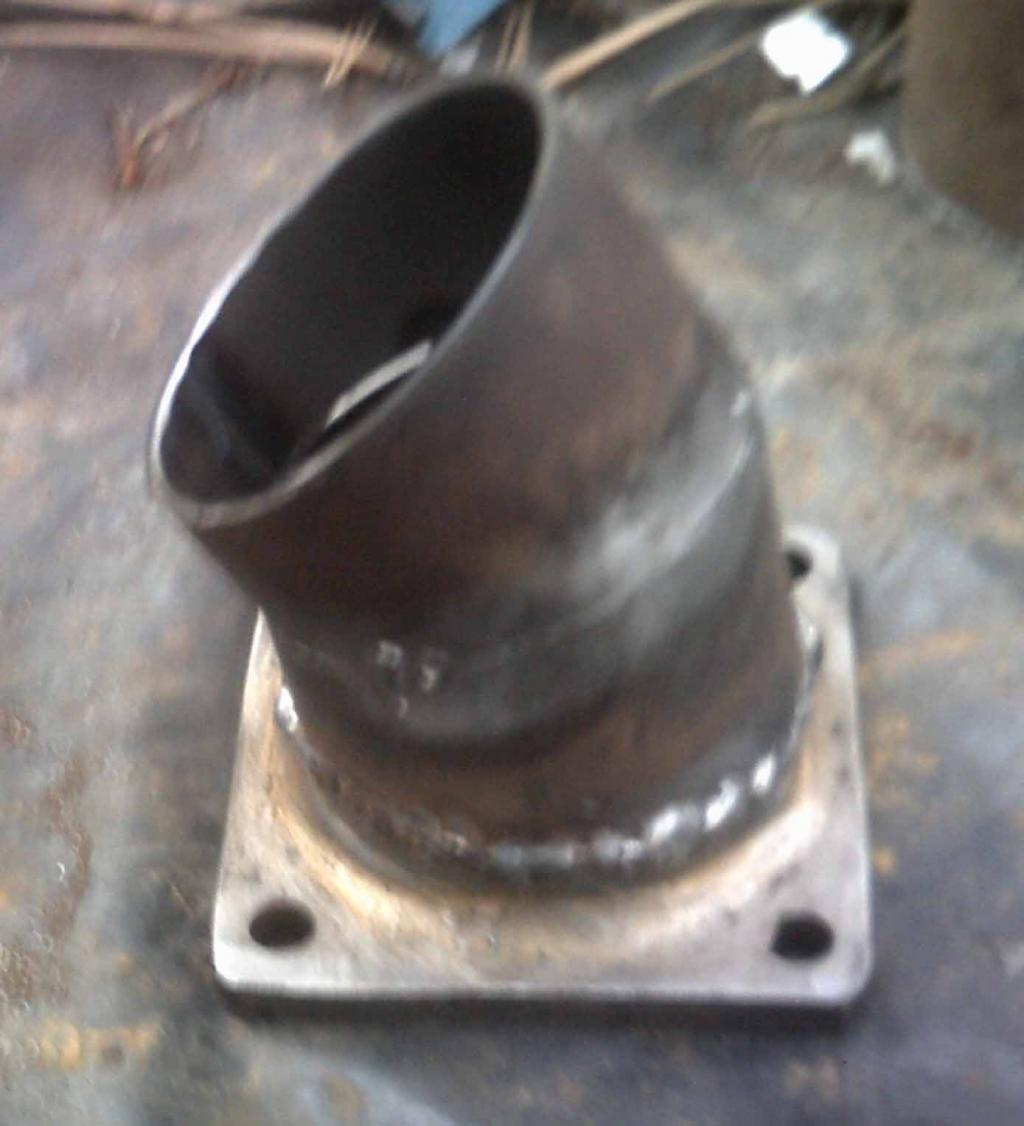
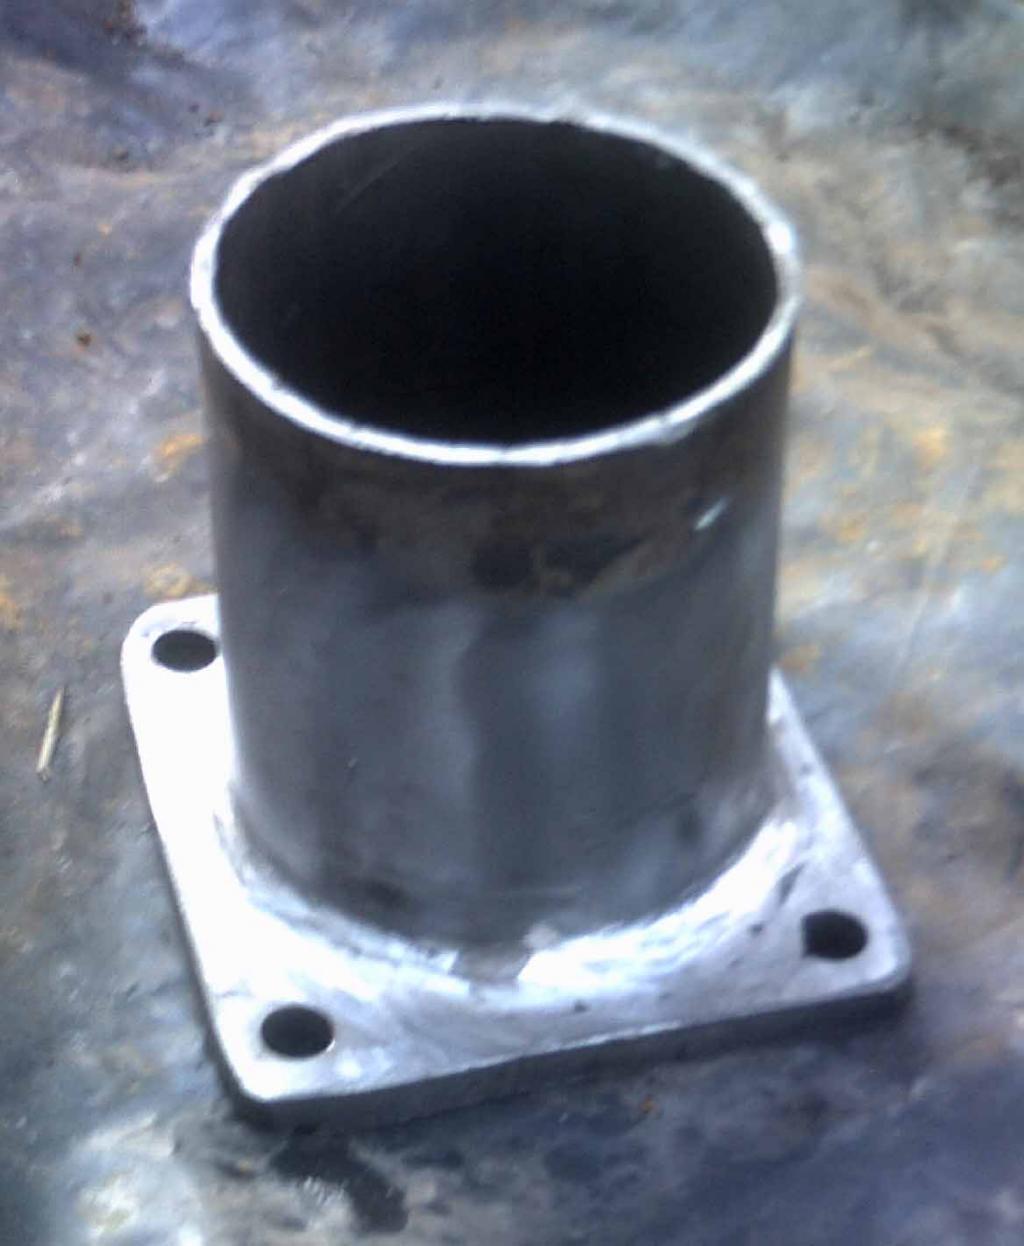
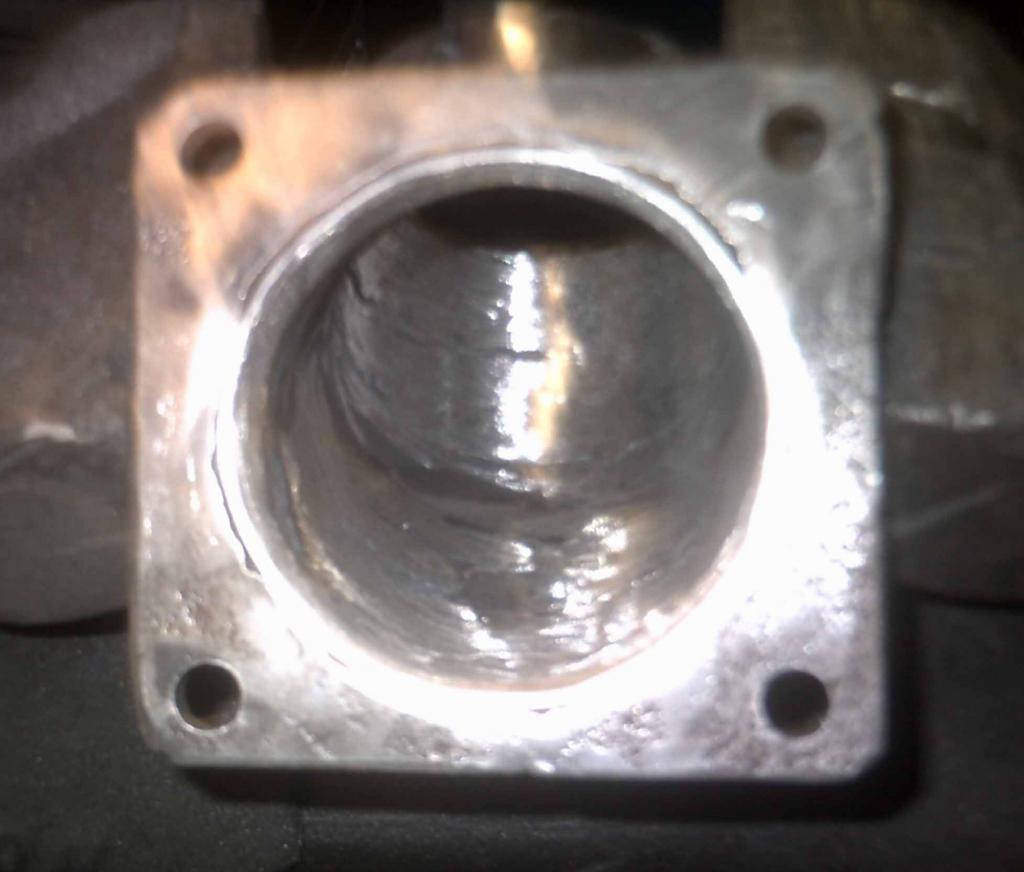
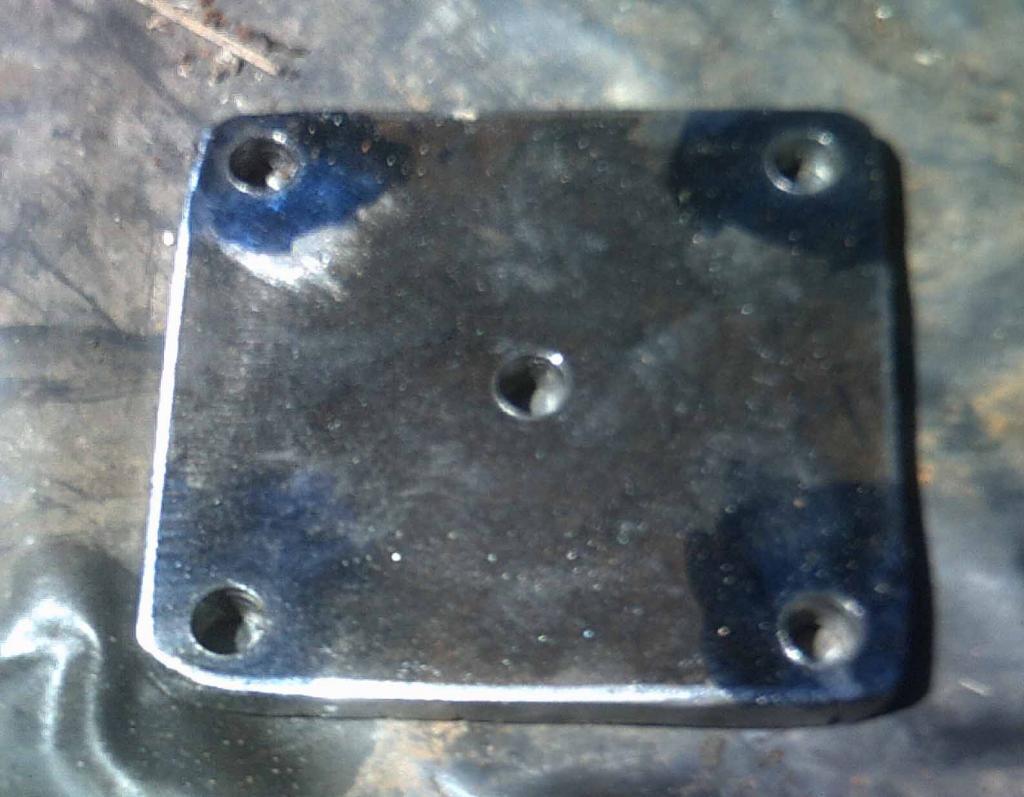
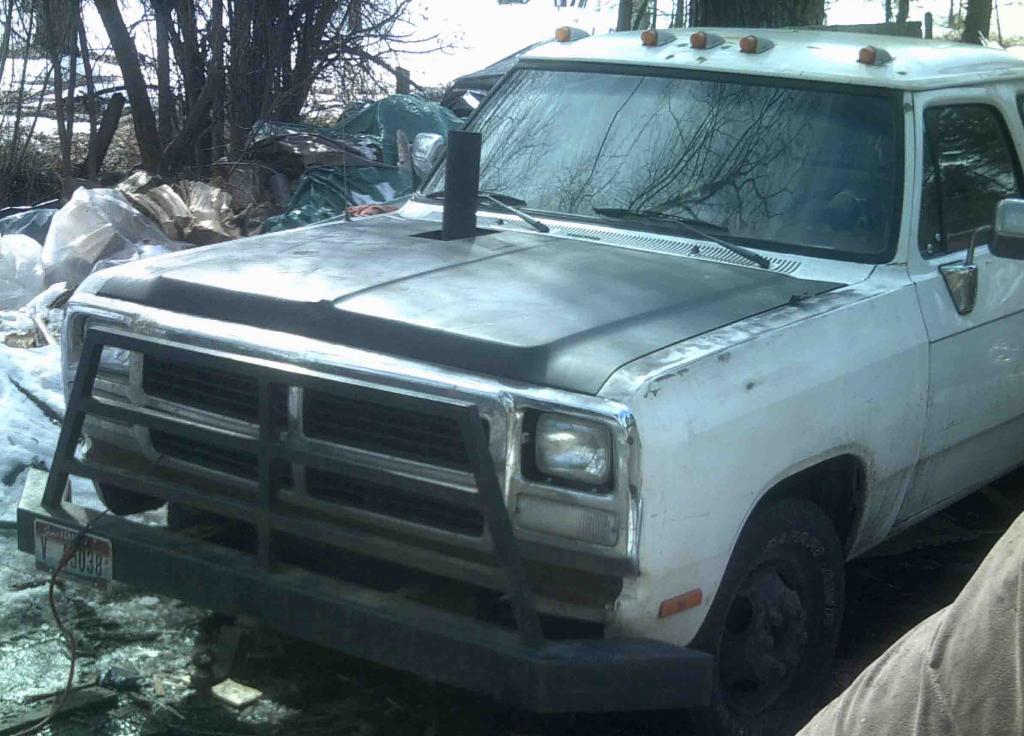
I am in the process of making my own intake horn. I'm too cheap to buy one, and I have the materials, the time, and the equipment to do it. I will also temporarily eliminate the grid heater until September or October. The intake tube will be 3" OD, made from driveshaft tubing from a 1985 Dodge 3/4 ton truck. The first pic is the flange that bolts directly to the intake manifold. The center hole in the flange is to make it easier for me to torch out the 3" circle......it gives me an easy starting point.
-
I have not heat-treated my pin at all, and only mild grooving on my pin......I think the grooving has more to do with the squared off end of the horizontal fuel rack pin that causes the groove. If I can can find a spare fuel rack pin to measure, I might be able to solve these grooving issues. My best friend has a 91.5 CTD with a stock fuel pin. I inspected his stock fuel pin on Dyno Day Mar. 17, and his pin was severely grooved. I'm sure the squared off end of the fuel rack pin cut the groove in his fuel pin.
-
You know guys, I would be willing to sell these pins for pretty cheap, say $50 plus 5 or 6 bucks shipping. PM me if interested
-
Here is the finished pin. Ran the truck into town earlier today. The new pin sure made a difference! The truck now wants to pull the front end off the suspension at a bit over 1/2 throttle. It was definitely a worthy project!
-
I used an adjustable turntable clamped to the bed of the milling machine. IMHO, that turntable is the most important tool that is used with the milling machine .
-
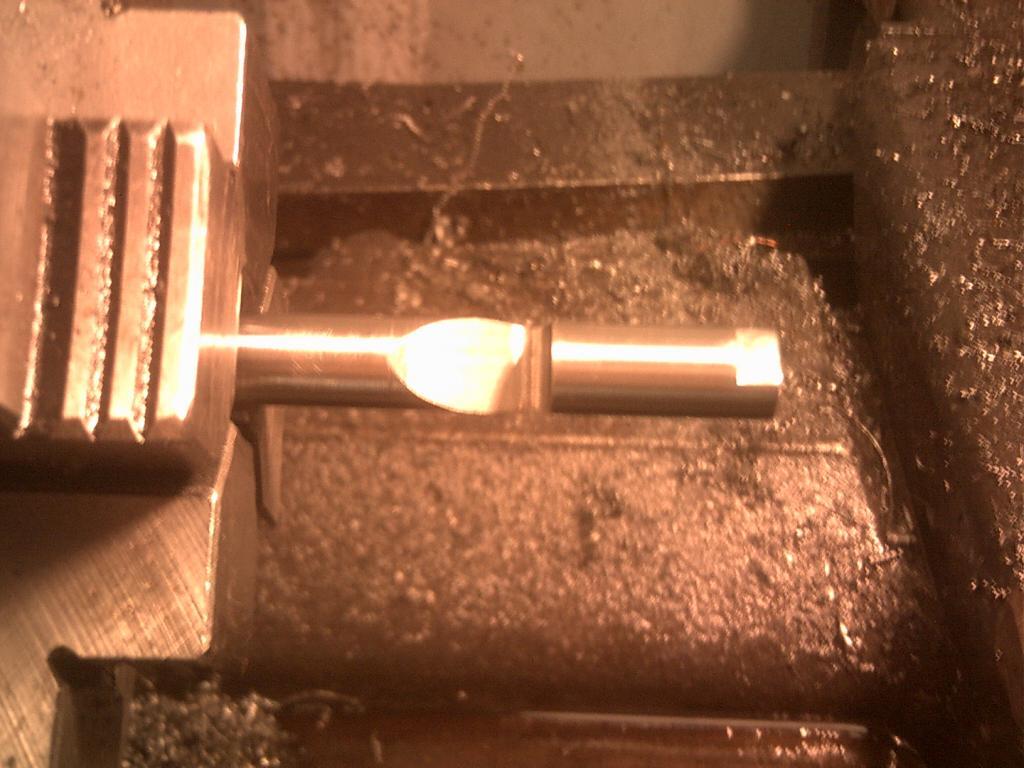
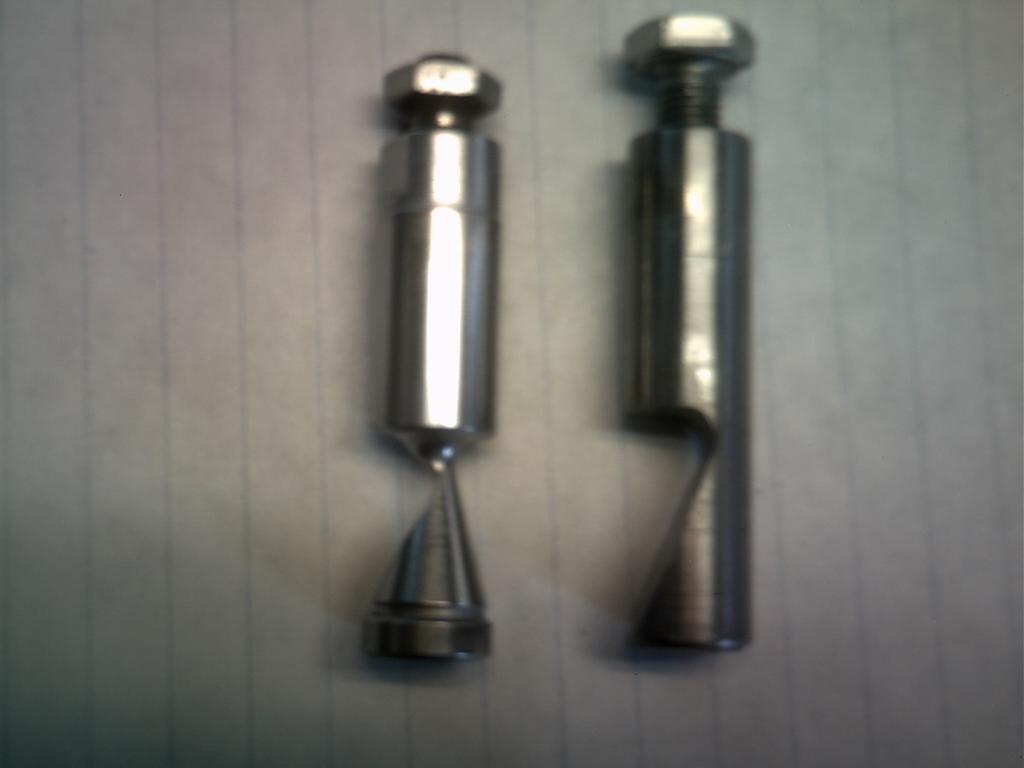
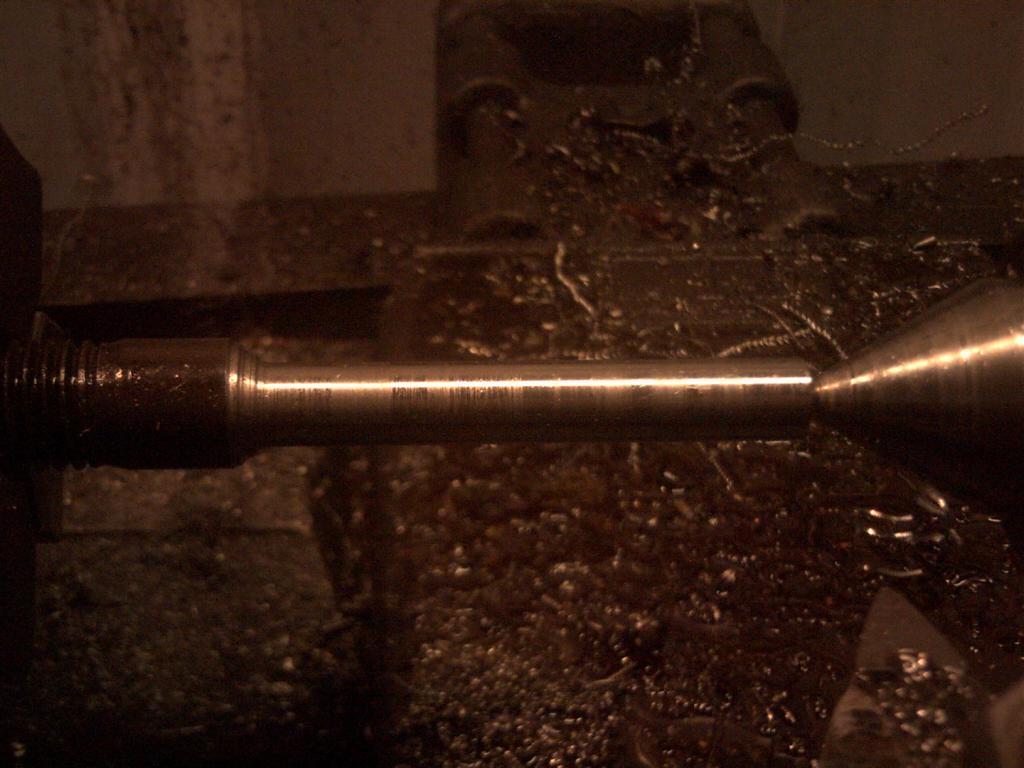
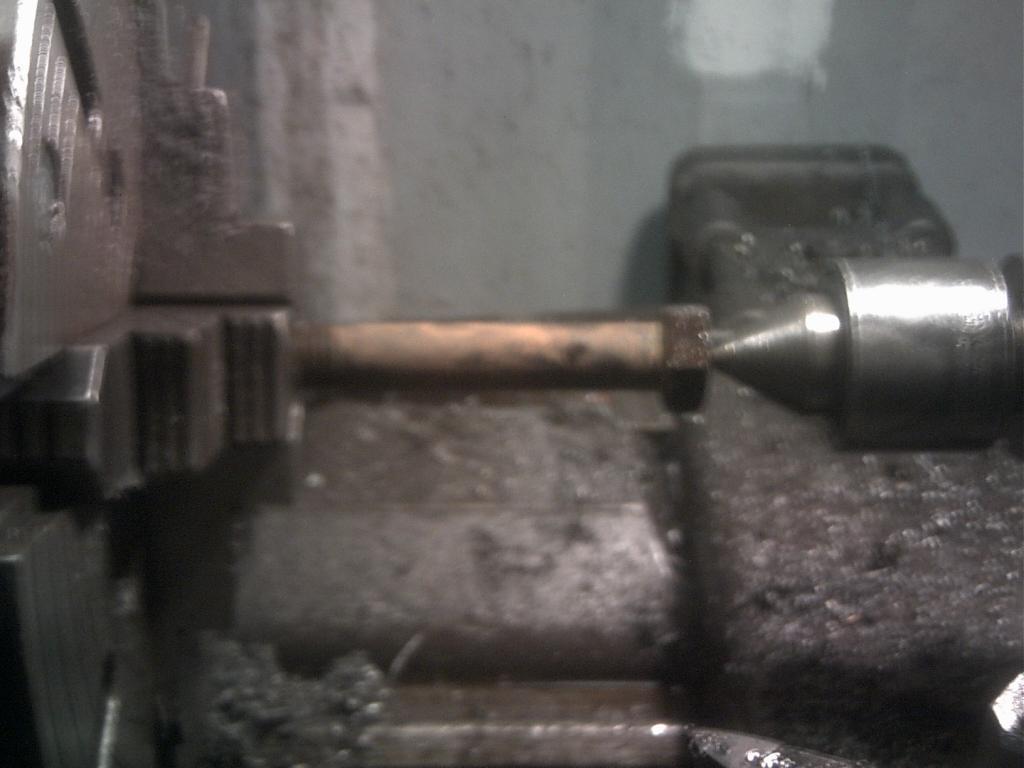
Here are a couple of pics of the profile cut into the new pin. The thinnest part of the pin measures .115". My current fuel pin's thinnest part measures .145". The factory stock fuel pin at its deepest setting is measured at .245". I used a milling machine to cut the profile, and in these pics, the pin is chucked into an old Reed-Prentiss lathe to be cut off.

-
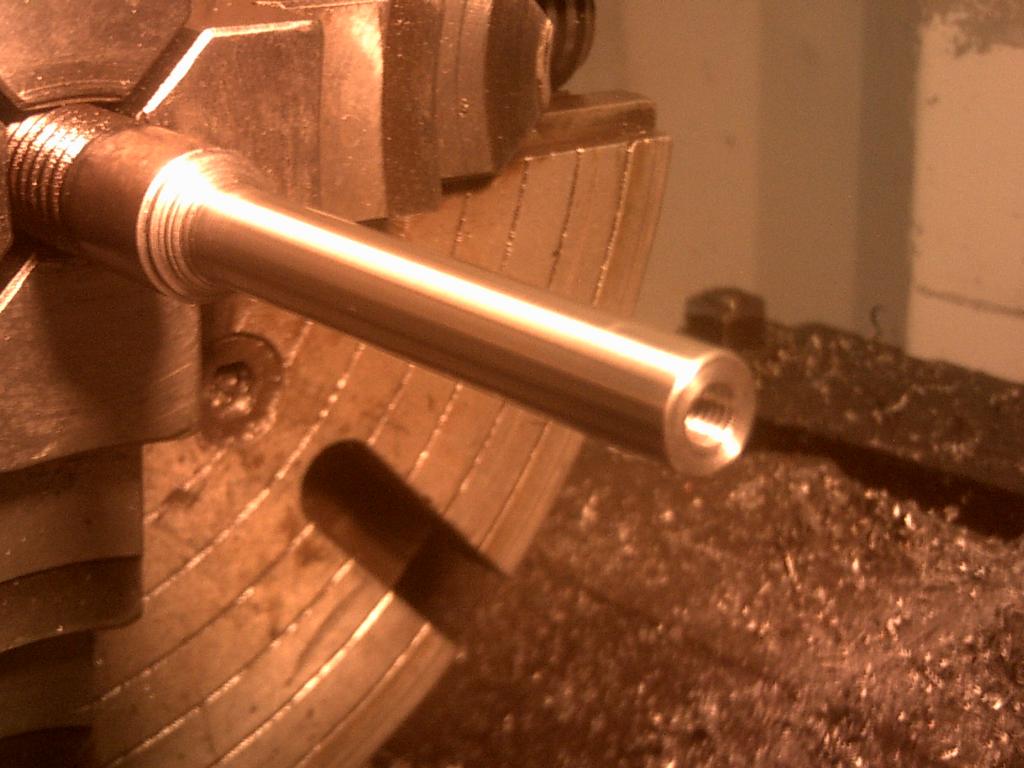
Here is the pin drilled and tapped for a 1/4x28 bolt. I have also polished the pin down to .468" using 220 grit emery cloth. I wish I had some 320 grit stuff, but this pin is already looking much better than my 1st pin . Virtually no tooling marks on the pin. So far, so good(knock on wood).

-
This pic shows the 1st successful fuel pin I cut, on the left is the stock pin. The next one is gonna be cut a bit deeper
-
In this pic, the bolt has been machined down to .475. I'll use emery cloth coated with thread cutting oil to reduce the pin to .467-..468" diameter.
-
I'm working on a more aggressive fuel pin for my '92 Dodge . I used a Grade 8, 3/4" diameter 4" long bolt for the basis of the pin. More to come!
-
No video yet.....I need to commandeer Mopar1973man and his video camera . Rest assured we will be taking some good video.
-
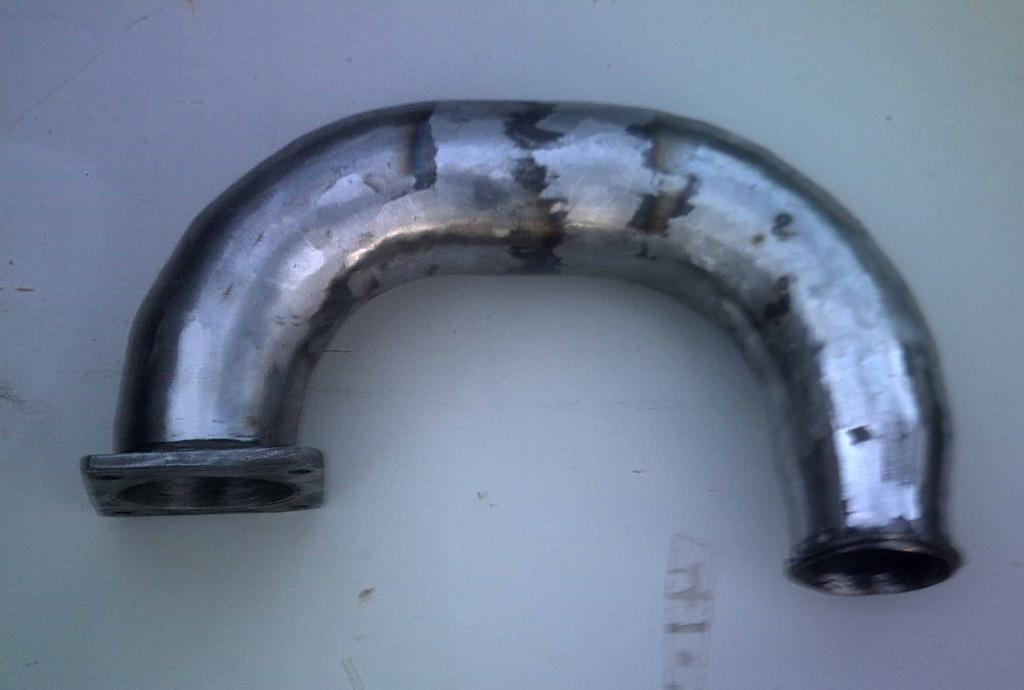
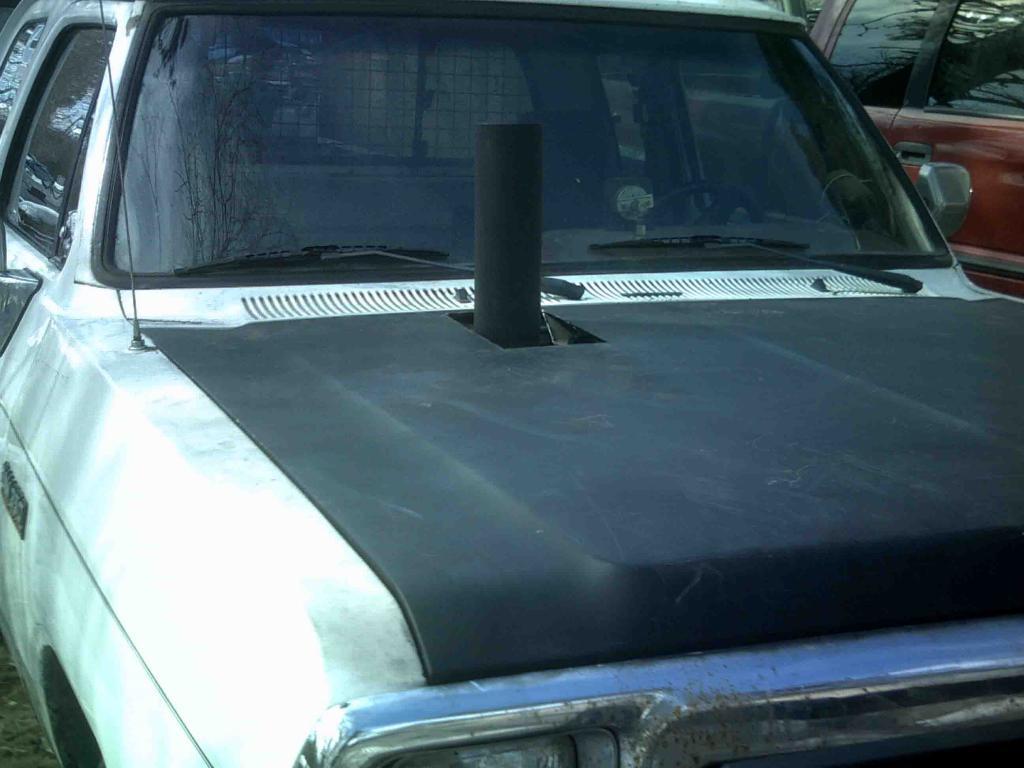
Well, here it is installed . I'll need to make a flapper for it to keep out the rain and snow.

-
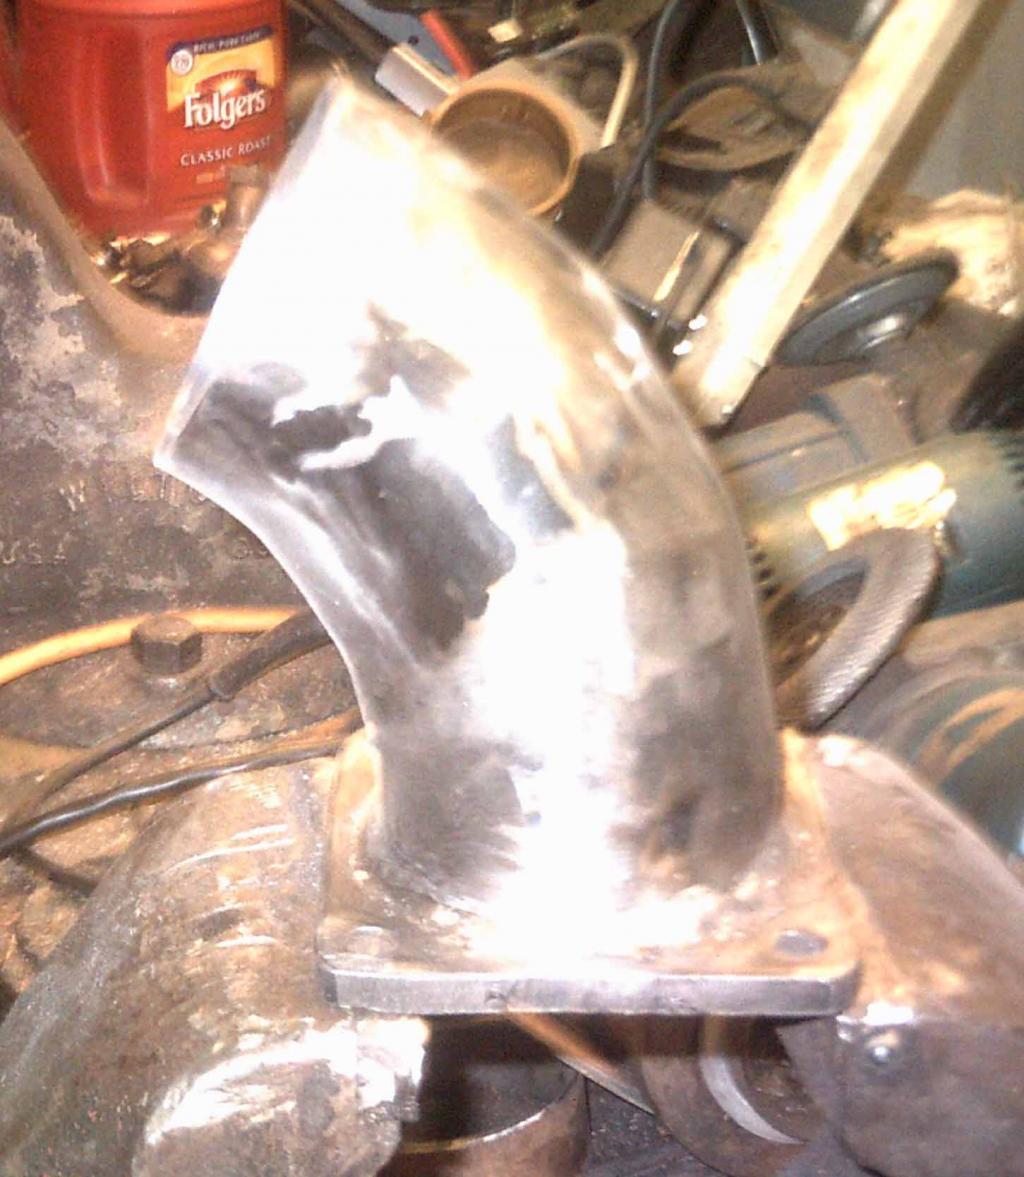
The elbow and pipe have been welded together, welds cleaned up, and painted in this pic.
-
I just finished welding up the flange to the elbow, and I had to add a piece of pipe to the leftover pipe I purchased from NAPA. If it weren't for the rust on the additional pipe, you would not be able to tell I welded another piece to the leftover pipe.