


TUNE PARAMETERS
Side note, if you would rather have a pre built tune to start with you can checkout our tune repository.
https://mopar1973man.com/forum/182-quadzilla-v2-custom-tune-repository/
Number of Power Levels
Range of Values: 6 to 15
Default Value: 11
First off let me state there are fixed levels on the Quadzilla Adrenaline that you cannot change. This is levels 0 to 3 which are listed below.
- Stock - Quadzilla Adrenline is disabled and Stock ECM tune is used.
- Valet Mode - Explained below.
- CAN Bus limited to 100% - Quadzilla CAN Bus fuel is used until it reaches your 100% mark, then stops and holds 100% up from there.
- CAN Bus fuel - Full CAN Bus fuel table is used.
Level 0 - Allow you to shut down the Quadzilla Adrenaline completely. The ECM is in full control with stock fueling. This level also is used during engine warm up and limits your fuel to your 0 PSI fuel setting.
Level 2 - This is good for finding your spooling curve. Once you found your starting percentage using Valet Mode you can now build a fuel curve using Level 2 keeping the smoke under control. So for example, if you find that 80% is your 0 PSI position then do +1 percent for the first 5 PSI then step up doing +2 percent which will have you at 9 PSI at 99%. Then you can test this part of your tune by doing several heavy throttle launches and watching your smoke. Note that Any value over %100 is ignored. OEM duration is max duration on level 2.
Level 3 - Now you can test your full CAN Bus fueling map as an entire tune. This level could be used for people with weak transmissions or clutches to extend its lifespan just a touch longer. Level 3 might also be helpful for winter driving conditions keeping traction better.
From level 4 on up to 15 are wiretap levels which are divided up in a percentage of cut of power. Like I prefer using 7 levels. This gives you 4 wiretap levels which becomes...
- 25% wiretap power
- 50% wiretap power
- 75% wiretap power
- 100% wiretap power
So you can divide up 12 times of the wiretap if you wish.
RPM Limit
Range of Values: 3200 to 3700
Default Value: 3200
This is the governor setting of the Quadzilla Adrenaline. This is the maximum RPM that Quadzilla Adrenaline will fuel too. Without supporting modification I don't suggest higher than normal RPM limits. Stock RPM limit is 3200.
VALET MODE PARAMETERS
Maximum Valet Mode Power
Range of Values: 0 to 100
Default Value: 50%
Quadzilla Adrenaline Valet mode has a few different purposes which is level 1. It can be used for what the title states which is a cut of power for valet mode to use your vehicle but not allow them to use the full power. Valet mode can be used to find your starting fuel amount without smoke. Then the last thing is using it as a security feature where the truck will start and run but only travel at super slow speeds.
As for finding your starting fueling you would select level 1 and then set your valet mode amount. Depending on how big your injectors you may be higher or lower than me. I'm using DAP (7 x 0.0085) injectors which has a clean start out at 80%. So you would set your percentage and do several heavy throttle launches watching you smoke amount. Start low and bump up slowly till you see haze then back off slightly. This will be your 0 percent value you will use in your CAN Bus fueling table.
As for security you can set the Valet Mode as low as about 20% and it will start and run but at full throttle, a thief will struggle to build speed beyond 20 to 30 MPH. If you set this too low it can cause it to stall out when you give it throttle.
As for Valet Mode you want to set enough for a person to drive the vehicle normally in a parking lot or at speed you wish. You'll have to experiment with values to you find what you like.
PUMP TAP PARAMETERS
Maximum Fuel Stretch
Range of Values: 1200 to 2200
Default Value: 1800
This value is pulse time in microseconds that Quadzilla Adrenaline will give to the wiretap to the fuel solenoid. When the CANBus fuel end this is the amount of time (microseconds) in fuel signal added to the fuel solenoid holding it open. My suggestion is to start out at the 1200 setting and work your way up till you get your fuel to boost figured out. There is very little reason to even get close to 2200 setting which in most cases will result in excessive black smoke which does mean you are overfueling.
TPS Pump Maximum
Range of Values: 0 to 100
Default Value: 100
This is the TPS value that Quadzilla Adrenaline wiretap will peak out at. The wiretap will continue at the power level you at that TPS value. Typically this is just left at 100%.
TPS Pump Minimum
Range of Values: 0 to 100
Default Value: 20
This is the TPS value that Quadzilla Adrenaline wiretap will start at. You can specify TPS percentage that will trigger wiretap. If this is set for zero and then the Pump Low Boost Scale PSI is used. If both values are set for non-zero then both conditions must be met before wiretap occurs. Typically I would leave this set for zero. I've tried 30% setting a few times but it makes the wiretap start point rather random being that you have to make both boost pressure and TPS conditions true to make it start. Best to use boost pressure as a trigger and leave this set for zero.
Minimum Pump Tap Fueling Percentage
Range of Values: 0 to 50
Default Value: 0
This is the minimum amount of Quadzilla Adrenaline wiretap to start out with. Most for daily driving will leave the wiretap set for zero.
Pump Low Boost Scale PSI
Range of Values: 0 to 25
Default Value: 5
Quadzilla Adrenaline Pump Low Boost Scale PSI is the boost pressure that will start the wiretap. You should set this just high enough so the turbo is just getting spooled off the CAN Bus fuel and then you can kick in the wiretap without much smoke change.
Boost Scaling
Range of Values: 20 to 40
Default Value: 38
Quadzilla Adrenaline Boost Scaling is the point at which the wiretap will hit 100% wiretap. The lower in the boost number the quicker it reaches 100% wiretap. Basically, in a nutshell Pump Low Boost Scale PSI is the starting boost pressure to start the wiretap and Boost Scaling is the point that wiretap will reach 100%.
TIMING PARAMETERS
Max Load Timing Offset
Range of Values: 0 to 3
Default Value: 3
Quadzilla Adrenaline Max Load Timing Offset is used for giving the amount of retard over a range of engine load. For example, if your set for 3 then you would have -3° retard at 0% engine load and at 100% engine load you would have 0° retard.
Example if you have 14, 18, 22, 26 for timing with 2 Max Load Timing Offset. You can see the Timing max values in the 100% column.

The way to check the impact of the Max Load Timing Offset is to get to a cruise speed near 1,500 RPM and then add some grade or add throttle to increase the load to fall out of the Light Throttle Load Limit and just as it does the timing should drop to its lowest point now. Using the table above for an example if the Light Throttle Load Limit is set for 30% that means it should fall to about 12.6°. This gives you an idea that you have to figure +2° to allow for the Max Load Timing Offset the room to retard the amount you've set.
Checking this setting can be rather difficult for varying road conditions. What you want to look for in your data logs as the timing vs engine load. As engine load rises past the Light Throttle Load Limit (Percent) and drops into the performance range then the timing should drop this set amount look and see what the timing value is and if it's retarding too deeply at this point.
Low PSI Timing Reduct
Range of Values: 0 to 5
Default Value: 2
Low PSI Timing Reduct is the amount of timing Quadzilla Adrenaline will retard during heavy throttle conditions. This is to aid in quick spool up of the turbo. Value can be altered by the Timing Reduct Scaling below. Both the Low PSI Timing Reduct and Timing Reduct Scaling work during low boost acceleration like below 5 PSI of boost.
Timing Reduct Scaling
Range of Values: 0 to 100
Default Value: 100
Time Reduct Scaling is a percent value. For example, if you have 5° of Low PSI Timing Reduct and you have Timing Reduct Scaling set for 50% then you only going to get 2.5° of retard to the timing for 50%- 100% of the TPS. A rather Difficult setting to explain but the Timing Reduct scaling is basically the steepness that affects both the amount of timing and range of the TPS. If you to apply 60% TPS then you will still be left with 2.5* of timing retard. If you set this for 100% then you get 5° of retard increase in a linear fashion until you hit %100 TPS.
These functions are a limit function of Timing reduct, to give a faster pull of timing with limited TPS input. Once 10 psi is reached there is no longer timing retard given by the Quadzilla Adrenaline.
Light Throttle Timing Adv
Range of Values: 0 to 8
Default Value: 2
Quadzilla Adrenaline adds this number of degrees of timing added on top of the RPM Timing Max. If you have 14, 17, 20, 23 set for timing then have Light Throttle Timing Adv set for 3 then the result would be 17, 20, 23, 26. This is only base numbers. When in light throttle condition Max load timing and timing reduct are not considered.
Light Throttle Load Limit (Percent)
Range of Values: 0 to 40
Default Value: 30
Quadzilla Adrenaline Light Throttle Load Limit is the engine load value that Light Throttle Timing Adv will end. Like my tunes I've been using 30% so from 0 to 30% engine load the Light Throttle Timing Adv is added to the timing value. Once the engine load rises above this set number then Light Throttle Timing is no longer added. You want to set this value to something that allows your normal flat ground cruise to stay within cruise timing. I suggest building this around 65 MPH speeds. Like my truck, I hold right about 25% engine load at 65 MPH on flat ground 30% gives me a bit of wiggle room for the roll of the land. Excessive high settings will hold the advanced timing too long and make it counterproductive if you hit a hill or grade the advanced timing will prevent boost to build easy. You want it to drop this and switch can to a more retarded state to build boost for power. This will now flip back Max Load Timing Offset.
RPM TIMING MAX
RPM Timing Max
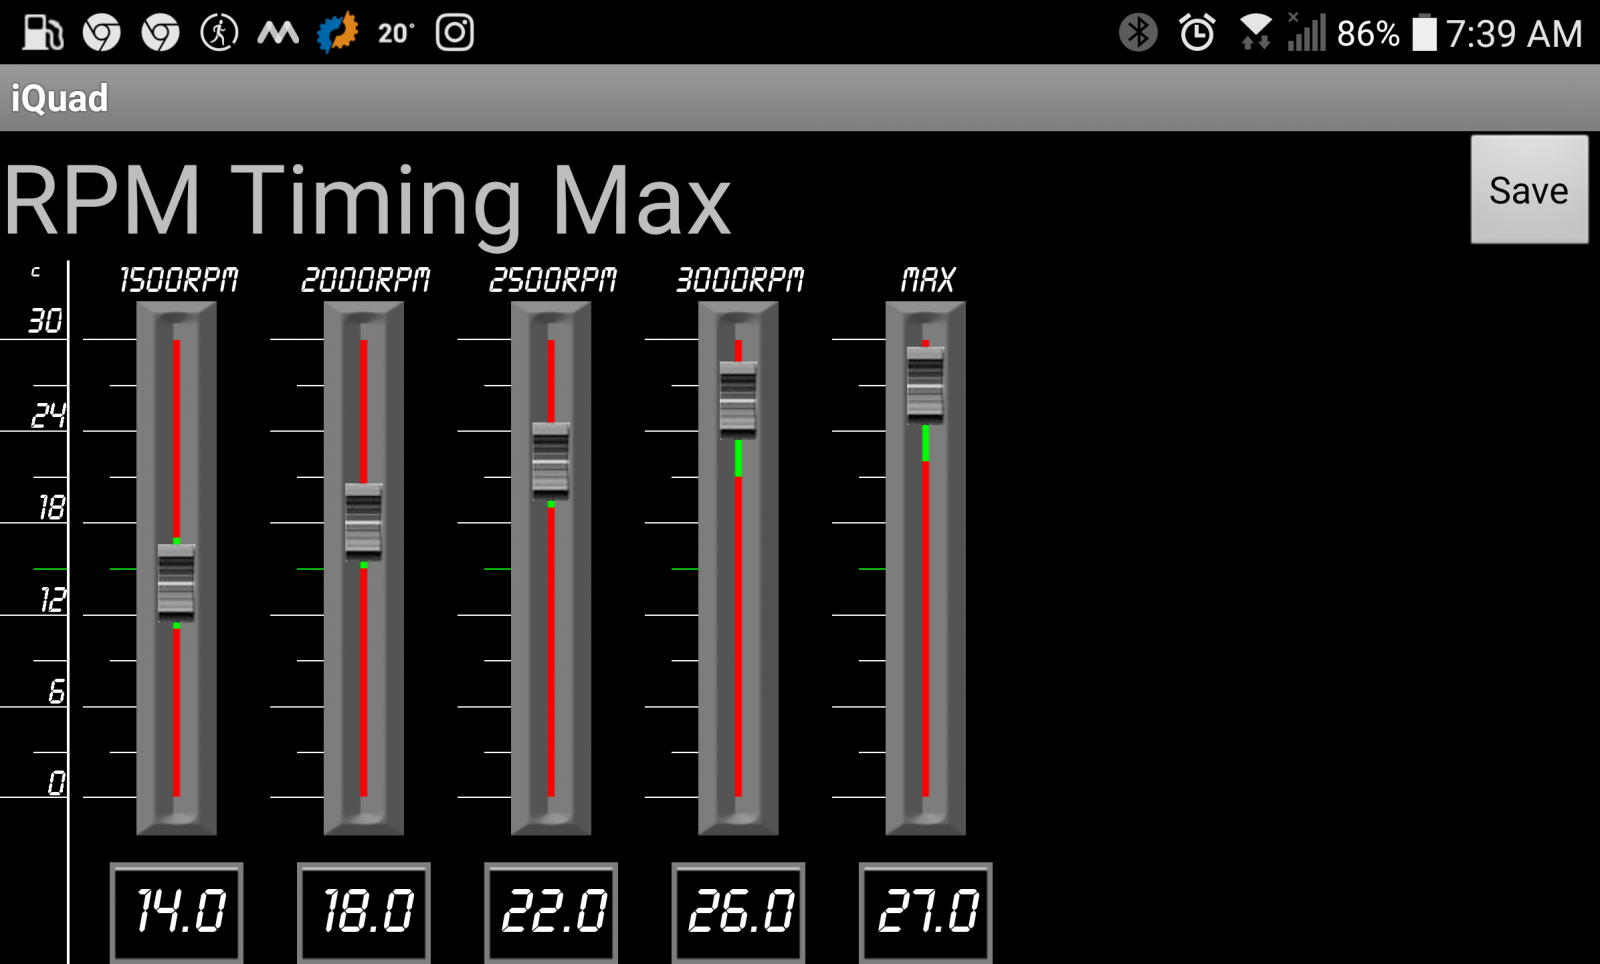
Default Values: 15°, 18°, 21°, 23°, 25°
Mopar1973Man Suggested: 14°, 18°, 22°, 26° ***adding more timing up top will result in more power, but my goals are mpg.
NOTE: The green bands are considered safe ranges for a stock unmodified engine. If you wish to experiment beyond the safe ranges we highly suggest installing the supporting modification like head studs etc before experimenting with high timing values.
RPM Timing Max this is the maximum amount of performance timing you can reach per RPM band. Used normally this timing structure replaces the ECM completely. You can build a timing curve any way you which and any curvature you want. In my example, I'm running an offset between bands at +4. 13+4=17. So forth. Notice the max timing slider I've set for +3 only which is to match the cruise timing value this prevents cruise timing from being canceled on this limit.
What to set your timing too? What we are finding out there is such a wide range of variance in peoples tunes. There is no exact formula for timing. The rule of thumb most tend to fallback too is that Light Throttle Timing at 2,000 RPM should be in the 19° to 20° range roughly. If you have a 3 set for Light Throttle Timing Adv and then you now see 17° plus 3° you come out at 20° Light Throttle Timing. Now if the Light Throttle Load Limit is set for 30% then when you exceed that It will drop back to 17° minus the Max Load Timing Offset. As you can see the low engine load end up with a bit extra retard to allow for building boost pressure to carry the load.
MAX Slider controls the absolute MAX timing advancement you can have. For example, if your Light Throttle Timing Adv is large enough to push the timing above this setting the Light Throttle Timing Adv will be canceled and push back to RPM Timing Max. You will basically lose you cruise timing at this point and be forced back to performance timing.
QUADZILLA SECRET: If you set all TIMING PARAMETERS to ZERO then on the RPM Timing Max slide up what you want to add to the stock ECM timing you can now run ECM timing plus a value compared to the fully replaced timing that Quadzilla normally does. Timing add limit is 5* in this mode.
Bucking and backfire are typically signs of excessive advanced timing. Then if you are too far retarded you'll see more of bluish grey haze and cutting out.
Timing Steepness
Some idea on timing. Consider the span between bands as how steep the timing is. Like for example of 15°,18°, 21°, 24° this is +3 between bands. Now, look at +4 between bands 15°, 19°, 23°, 27°. As you can see timing is much steeper curve. Amount of step between bands is going to affect the steepness of the timing curve.
Fixed Point Timing
Another one that is common people want to call out a 2,000 RPM timing point. You can do this. Let's say you wanted to have 19° at 2,000 RPM now figure up and down from that point using the amount of step between bands. This is kind of common when you building tunes for daily driving because the 1,500 and 2,000 RPM bands are you common RPM span of a daily driver.
Anchored Ended Timing
What I mean here is you can start from a low end or high end as an anchored point then build from that point. For example, you have 13°, 17°, 21°, 25° (+4 step) you can anchor the high end and then suck the low end up given advancement. 14.5°, 18°, 21.5°, 25° so I built this backward starting from the fixpoint of 25 and minus 3.5 downward. This is handy if you know your max timing limit you can build downward.
Bit Shift Timing
This is a way of advancing or retarding the entire table in on adjustment. For example, you have 13°, 17°, 21°, 25° for current timing you could plus +1° to all bands and then end up with 14°, 18°, 22°, 26° for timing. Be aware changing timing like this affects the cruise timing as well. If you shift towards advancement then cruise timing will too, and the same said about retarding in this method.
Timing Limits (What is too far?)
It's rather difficult to specify an exact number of degrees as a limit for each truck. There are variables like injector pop pressure, injection pump accuracy, cetane of the fuel, coolant and air temperature that play a role in the amount of timing each truck will require. I can give clues on what to look for. Bucking or Backfiring is a sign of too far advanced in timing. Pay attention to the RPM realm that the bucking occurs and then try dropping that band 1° worth of timing or bit shift the RPM Timing Max table retard 1° degree and see if that helps. If you retard too deeply typically you notice the engine seems very quiet and tends to produce more white/bluish smoke. Builds boost rather well but launch power seems a bit slow to build though. Most applications the green bands on the RPM Timing Max table are very safe realms to work in.
Retarding timing will allow for building boost pressure by pushing some of the expanding gases through the turbo. Advancing timing puts the majority of the energy to the piston as long as it's not too advanced which in turn can produce "negative torque" where the piston is being slowed down by the expanding gases but then breaks over the TDC and the gain power again. This is non-productive in negative torque state.
It is important to remember that nearly all box tuners for 2nd gens max out timing at high boost and ~2500+ rpm. Max theoretical timing is 32° degrees of timing.
Fuel Cetane
Things to stay aware of setting timing. ECM and VP44 cannot detect cetane level. As cetane goes up the ignition quality of the fuel is better and faster so less timing is required typically for winter fuels with high cetane. Same can be said true about summer fuel added timing advancement will be required because of lower cetane typically in the summer. Keep in mind cetane is backward to octane. More information on cetane rating here. Cetane tends to carry more weight in tuning than IAT temperature so consider your "Winter Time Fuel" first before considering IAT temperatures.
IAT Temperatures
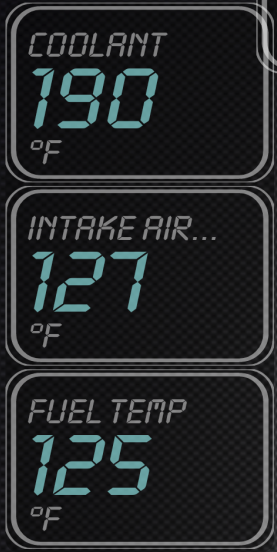
As the air gets colder it takes longer for the fuel to go from the atomized mist, to vapor to ignition (BANG!). Stock ECM can step up over 4° advancement as IAT falls below +80°F IAT. Since diesel engines and diesel fuel ignite based on heat in the cylinder things like coolant temperature, IAT temperature and cetane all have to be considered when building your timing tables. Stock head on the Cummins ISB has the IAT sensor within a few inches of the coolant jacket in the head. If you watch both fuel temperature and IAT you will find that both follow closely together in temperature as long as the stock fuel filter can and fuel heater still active. This is why if you monitor the cold start run of the ECM (level 0) you see extremely high timing like 21° at road speed. This was to aid in cold fuel and cold air running.
BOOST LEVEL FUELING - CAN BUS
Boost Level Fueling - CAN Bus

NOTE: The green band is considered safe normal ranges.
QUADZILLA SECRET: If you set 100% in all positions you would have ECM stock fuel table. All values are ECM fuel value times the percentage given. Like 0PSI value is 85% so if I command WOT the most I could get is 85%. ECM (100% fuel) x Quadzilla (85% Limit) = 85% This makes it possible to have below stock fuel rates for large injectors and control fuel to boost pressure and keeping smoke under control.
This is your CAN Bus fueling table. I will suggest when your building your tune to work with Level 3 to omit the wiretap temporarily.
Finding a starting point. I mention it a bit back with the Valet Mode level 1 you can set level 1 and vary the Valet Mode power up and down till your heavy throttle launch is clean or just a light haze. To build the curve to 100% now you would use level 2. Now you can build the fuel curve from your starting point you found with Valet Mode level 1 to your 100%. Most of us use a +1% as seen above but I only did it to 4 PSI. Then jumped to +2. Once you are happy with your fuel to 100% now you can jump up to level 3 and now build from the 100% mark on up to 150% fuel if you wish. You don't have to use the full 150%. There is no absolute formula for calculating fueling tables. There is way too many variables like injector size, pop pressures, turbo size, timing setting etc. In a nutshell, the best suggestion to build off your smoke and keeping it down to mere haze.
Towing suggestion. I typically build the CAN Bus only to hold towing if need be. Like towing my 8,000 pound RV I can set Level 3 and never reach 1,200°F towing on a 7% grade. What you want to do is build you fuel table based on EGT's not HP/TQ. This way you can tow without huge worries of EGT temperature issues. Again you are not required to use all 150% of the fuel table.
When starting to add wiretap into your tunes you should always remember that your canbus fueling should make up the meat of your "off the line power" and wiretap should be used for "wrapping it out" Canbus fueling can offer more than enough duration to smoke out the world. If you feel you need more power than the canbus fueling can offer alone then it is time to consider an injector upgrade.
NOTE: Your 0 PSI slider value will be the maximum fuel you get during warm up phase till you reach Warmup Mode Setting coolant temperature.
How to get the most from your tune for a daily driver?
I highly suggest you look into an app for your cell phone or mobile device to track your MPG closely.
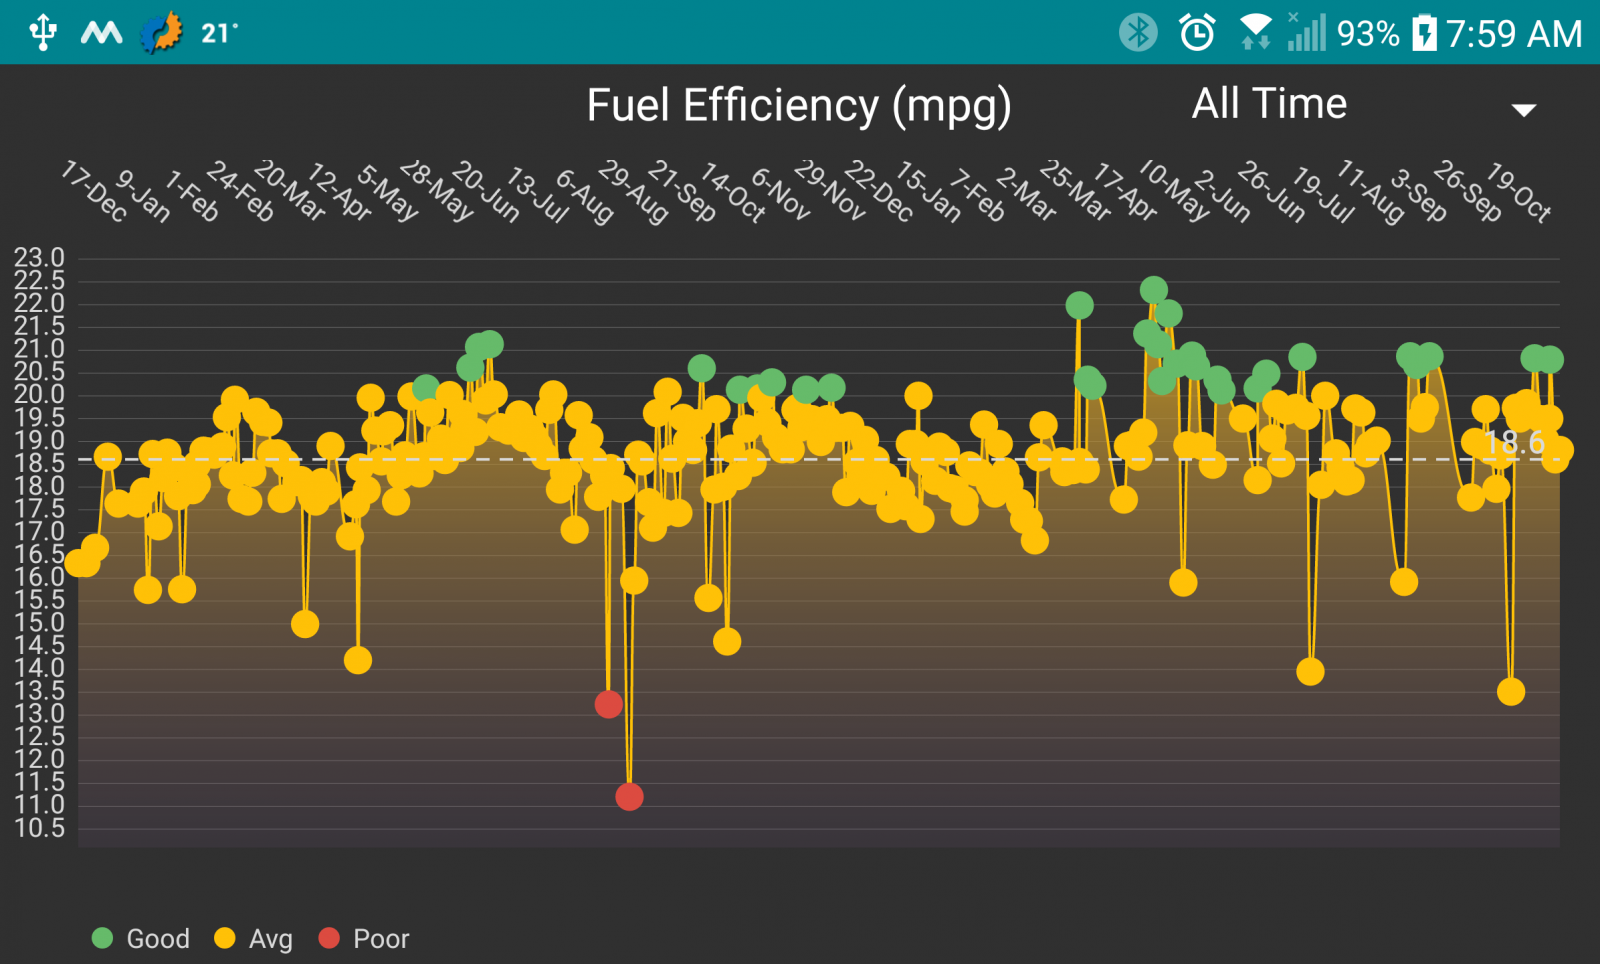
This little app is very handy for keeping track of your MPG and fuel logs. This way you can make informed choices on your tunning for your truck. Wonderful app it tracks even your repairs and fuel logs for you reminding you of maintenance that needs to be done on your vehicle.
-
 3
3
-
 1
1
There are no reviews to display.