After 18 years of interesting CTD enthusiasts and transmission specialty outlets all contributing their method, or fix, to the well known TC lock unlock syndrome, I can no longer remain silent.
Extensive review of many posts regarding TC lock unlock, the rerouting methodes, the add on filters for APPS and last, but not least,...the "tin-foil hat" brigade. I do realize that each individual or company that contributed to the vast amount of information on the web had good intentions and I must acknowledge that some of the procedures caused me to closely examine what these people were trying to do. I believe it is well known that even a blind mouse occasionally finds a morsel of cheese.
Again, as it is well known @Mopar1973Man was the only entity who positively identified the instigating source of this key issue. My entry today is not about alternators...it is about what Daimler/Chrysler did in regard to production of these Cummins powered platforms and the complete disregard of common sense Electronic Engineering. Please note, this applies to automatic and manual transmissions as each platform is plagued in the same manor with different quirks.
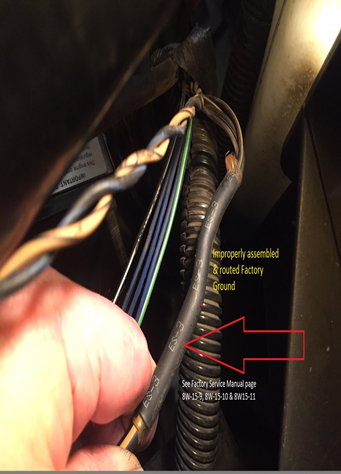
This Blk/Tan #8 gage wire is quite critical in the scheme of things. It is contained within a 1" plastic conduit passing along the front of the engine. It contains water temp sensor leads, air conditioning leads, alternator/PCM leads and the #6 gage alternator charge line to the PDC. This #8 gage Blk/Tan passes over the top/backend of the alternator and is "eventually" connected to the Auxiliary Battery (passenger side) negative terminal.
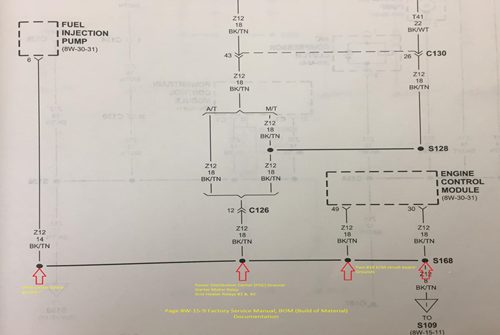
This snapshot of the Factory Service manual documents "four critical ground leads" that are "spliced" in an unconventional method.
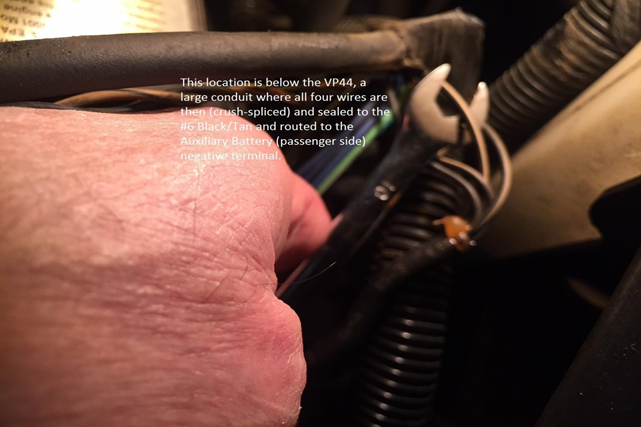
This photo depicts the three #18 gage wires and the single #14 gage wire entering the shrink-tubing where the "crush-splice" occurs. This bundle exits the large plastic conduit below the VP44

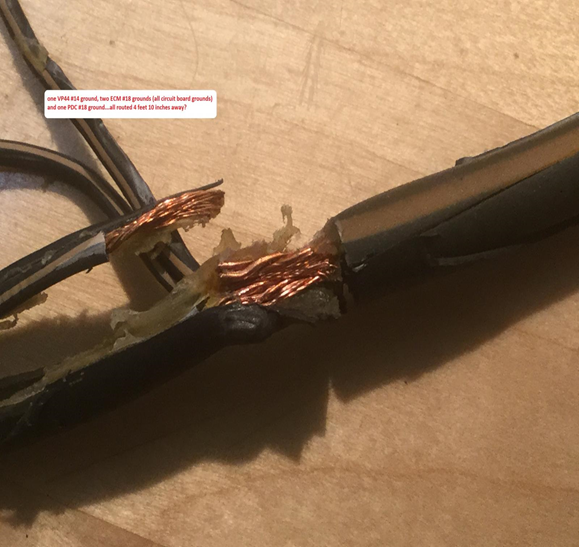
This again is a most disturbing depiction of the Daimler/Chrysler method of splicing critical ground leads and then routing this across the top of the alternator and "eventually" bringing this to ground reference.
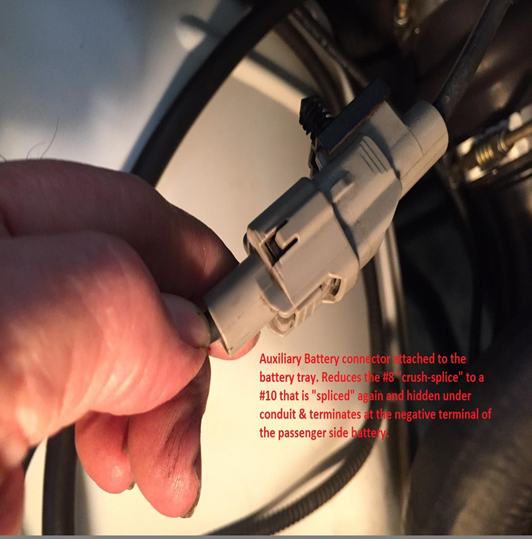
This photo depicts where this #8 gage Blk/Tan first connects on the way to "eventual" ground...yes this is the Auxiliary Battery tray connector. Please note: it is spliced again and joins the PCM circuit board grounds...which are critical in their own nature...and "eventually" terminate at the negative post of the Auxiliary Battery's negative terminal. ![]()
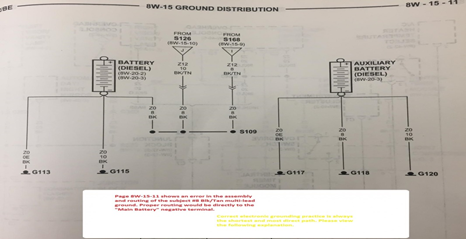
This photo is very interesting, it is the Factory Service manual and the assembly line documentation follows this as a road map in the matrix during production. Please NOTE the title "NAME" to each battery...I looked at this for a considerable amount of time before I realized the assembly line coordinators tried to work with the documentation from the Engineering Staff to "make it as it looks"...Could this single oversight be the reason of a four foot ten inch critical ground wire combination traveling the distance to "EVENTUALLY" terminate at ground? From a basic engineering standpoint regarding ground...you "NEVER CHOOSE THE PATH OF EVENTUAL GROUND" !!!
It is to be the shortest and most concise connection in reference to ground...this is biblical in ALL ELECTRONICS...including pickup trucks. ![]() !
!
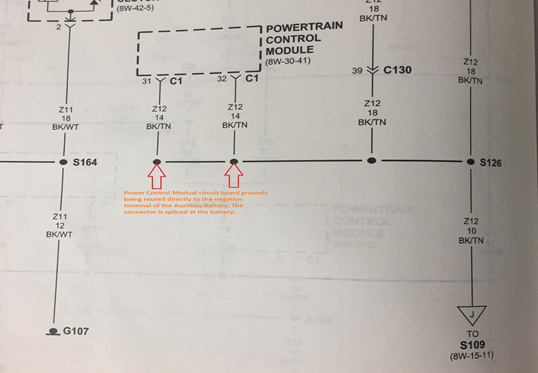
Here is the Factory Service manual documenting the PCM circuit board reference ground starting as a pair of #14 gage wires being spliced into a #10 gage bundle and arriving at the Auxiliary Battery through another connector that joins a #8 gage wire that is "splice-joined" under plastic conduit in a Y configuration joining the rouge #8 gage "after passing over the alternator" traversing the entire engine compartment from the driver side of the vehicle. Seriously ![]()
I have been drinking excessively, most recently, due to the nature of this blatant discovery.![]()
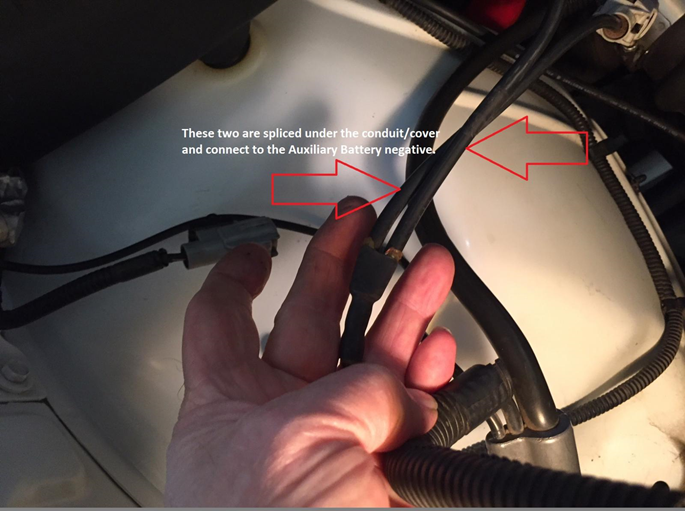
This is the hidden Y splice at the Auxiliary Battery where the "mess" EVENTUALLY terminates for ground reference.
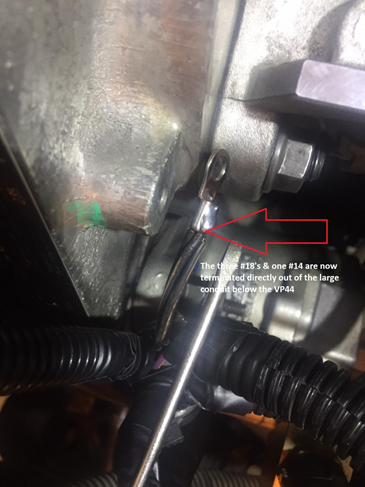
This photo shows the correct "HOLE" of where to apply ground for the VP44, ECM and the PDC...note the logical location
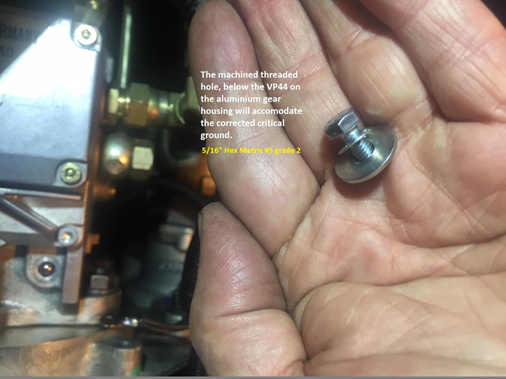
It took a little research to find the size and proper thread-pitch.
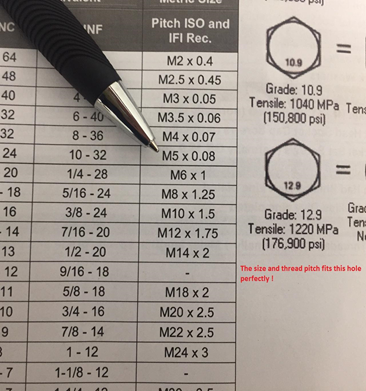
Metric M5 with a 5/16" hex head is perfect
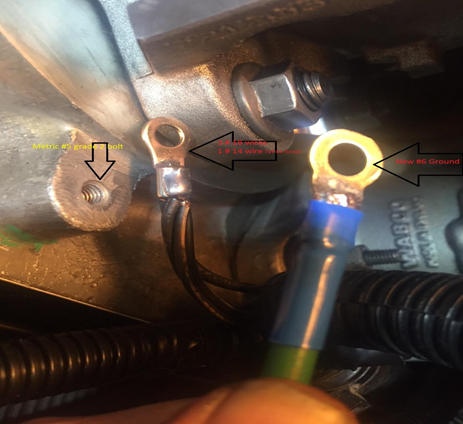
This is where you apply a fresh "quality" #6 gage ground and terminate this at the Main Battery negative post on the drivers side for absolute ground reference for the VP44 and ECM
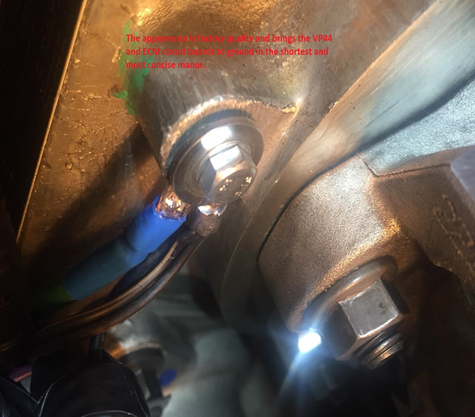
This is a very short and concise reference to ground.
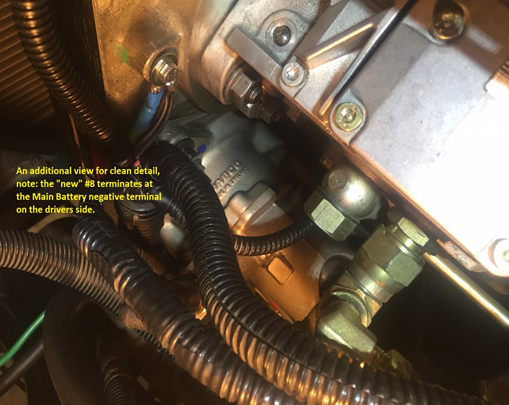
This is the corrected procedure for a rather critical ground.
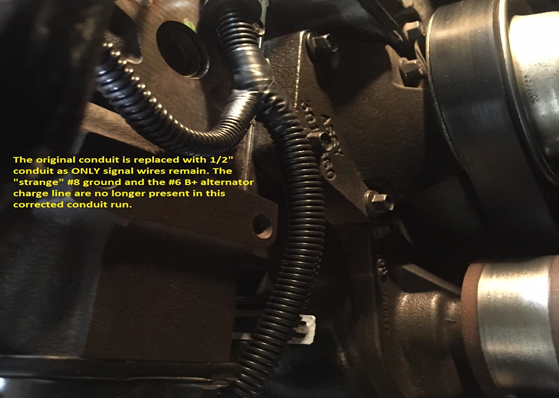
The two largest wires originally contained within the 1 inch conduit are no longer present and located well away from the alternator.
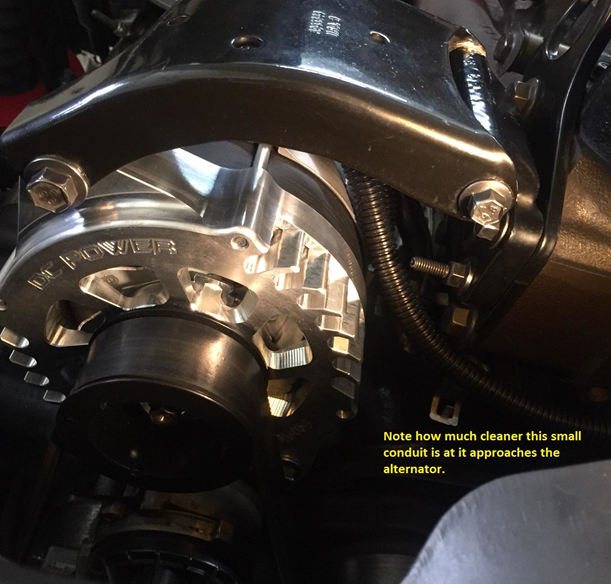
My alternator B+ "charge" line is now a #4 gage line directly connected to the Auxiliary Battery and when my new battery terminals arrive and they are secured, I'll provide photos of a completed Master Power Supply System within this engine bay.
With these corrections, I would hypothesize that a poor ripple specification on a given alternator would be overcome by the immense capacitance of the parallel batteries and would become less prone to causing the dreaded TC lock/unlock for automatics and cruise-control abnormalities for the manual transmission platforms.
The #8 gage Blk/Tan passing over the alternator as an "EVENTUAL" ground is gone...the PCM, ECM, VP44 and the PDC are now grounded in accordance of standard Electronic Engineering practices.
Respectfully
W-T


Recommended Comments