


Mopar1973Man Cummins High Idle Switch install
Parts supplied:
Switch x 1
Switch Harness x 1

Switch Face Sticker x 2
Tools Needed:
Drill + 3/8” bit
Cleaning Wipe
Pliers
Small Flathead
Installing:
First unplug the batteries to prevent any shorting while installing. The Mopar1973Man High Idle Switch
can be mounted anywhere that the harness will reach. The Harness is a total of 10’ long. 4 feet of the
harness is required under the hood. A good place to mount the Mopar1973man.com Cummins High Idle Switch is on the Kick Panel
under the steering wheel.
There are a total of 5 plugs on the harness.
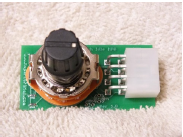
Mopar1973man Cummins High Idle Board Plug
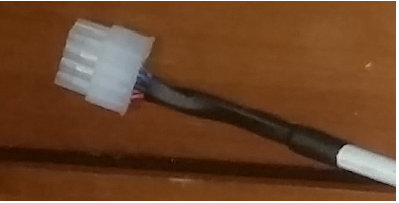
The 8 pin plug on the end plugs into the Mopar1973man Cummins High Idle Switch Board. It is keyed so it will only fit in one way.
Don‘t plug this in until later. It is easier to install the Harness without the Board attached.
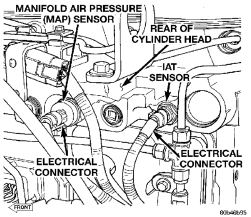
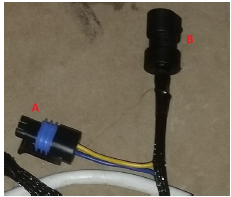
IAT Plugs
The 2 pin white plugs are the Intake Air Temp sensor plugs.
Plug A plugs into the OEM Sensor on the Engine
Plug B Plugs into the OEM wiring Harness
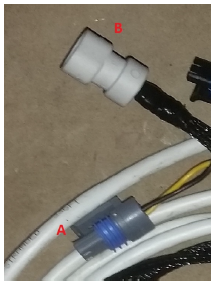
You can see the OEM Plug/Sensor Location This is the rear Drivers side of the Engine
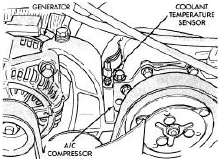
ECT Plugs
The 2 black 2 pin plugs are Engine Coolant Temp sensor plugs
Plug A plugs into the OEM Sensor on the Engine
Plug B Plugs into the OEM wiring Harness
You can see the OEM Plug Location This is the Front Of the
engine
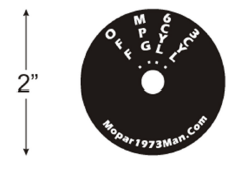
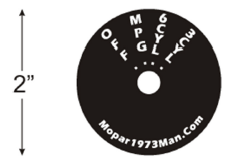
Mopar1973man Cummins High Idle Switch Faceplate Sticker
The Sticker should be placed where you intend to install the Switch. ENSURE YOU CLEAN THE SURFACE
THROUGHLY BEFORE APPLING THE STICKER. Ensure that there is at least 2” of clearance behind the switch location to prevent any possibility of shorting on the back of the switch. The center white section of the Faceplate should be drilled out once placed on the surface. This hole is what the switch will mount through. The High idle Switch will ship with 2 Stickers just in case one gets messed up during the install process.
Power Leads:
These power leads need to go to a fused 12v source, Red goes to 12v and black goes to ground. They power the LED on the Switch to give you a Green light in MPG mode and a Red / Orange light in high idle mode.
The switch will work without these wires being connected.
If you need more please contact Support@mopar1973man.com
After plugging in the harness plugs to the OEM Sensors and OEM Harness, run the 8 pin Molex through
the firewall. Gently pull the harness through the Firewall until there is no slack. Run the Harness to
where you plan on installing the Mopar1973man Cummins High Idle Switch. Ensure to tie up any slack in the harness if it is hanging down.
Remove the Knob on the switch by loosening the set screw on the back of the knob, then remove the
lock nut on the switch. Install the Mopar1973man.com Cummins High Idle Switch through the hole drilled in the sticker. Reinstall the
lock nut to hold the switch tightly. Reinstall the Knob and tighten the set screw.
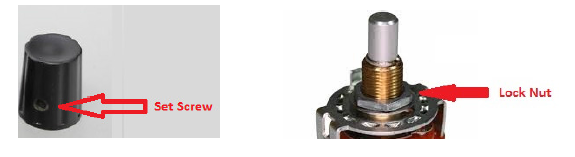
Plug the harness into the Mopar1973man Cummins High Idle Switch Board. Ensure the Switch position is lined up with the sticker face plate. Turning the switch all the way counter clock wise will be the off position. You can rotate the switch position vs the sticker then tighen the lock nut.
I have also created a couple of videos showing the process.
(Part 1)
(Part 2)
(Part 3)
Installing the Mopar1973man.com high idle kit harness
-
 1
1
There are no reviews to display.