SailingSanta
Unpaid Member
-
Joined
-
Last visited
-
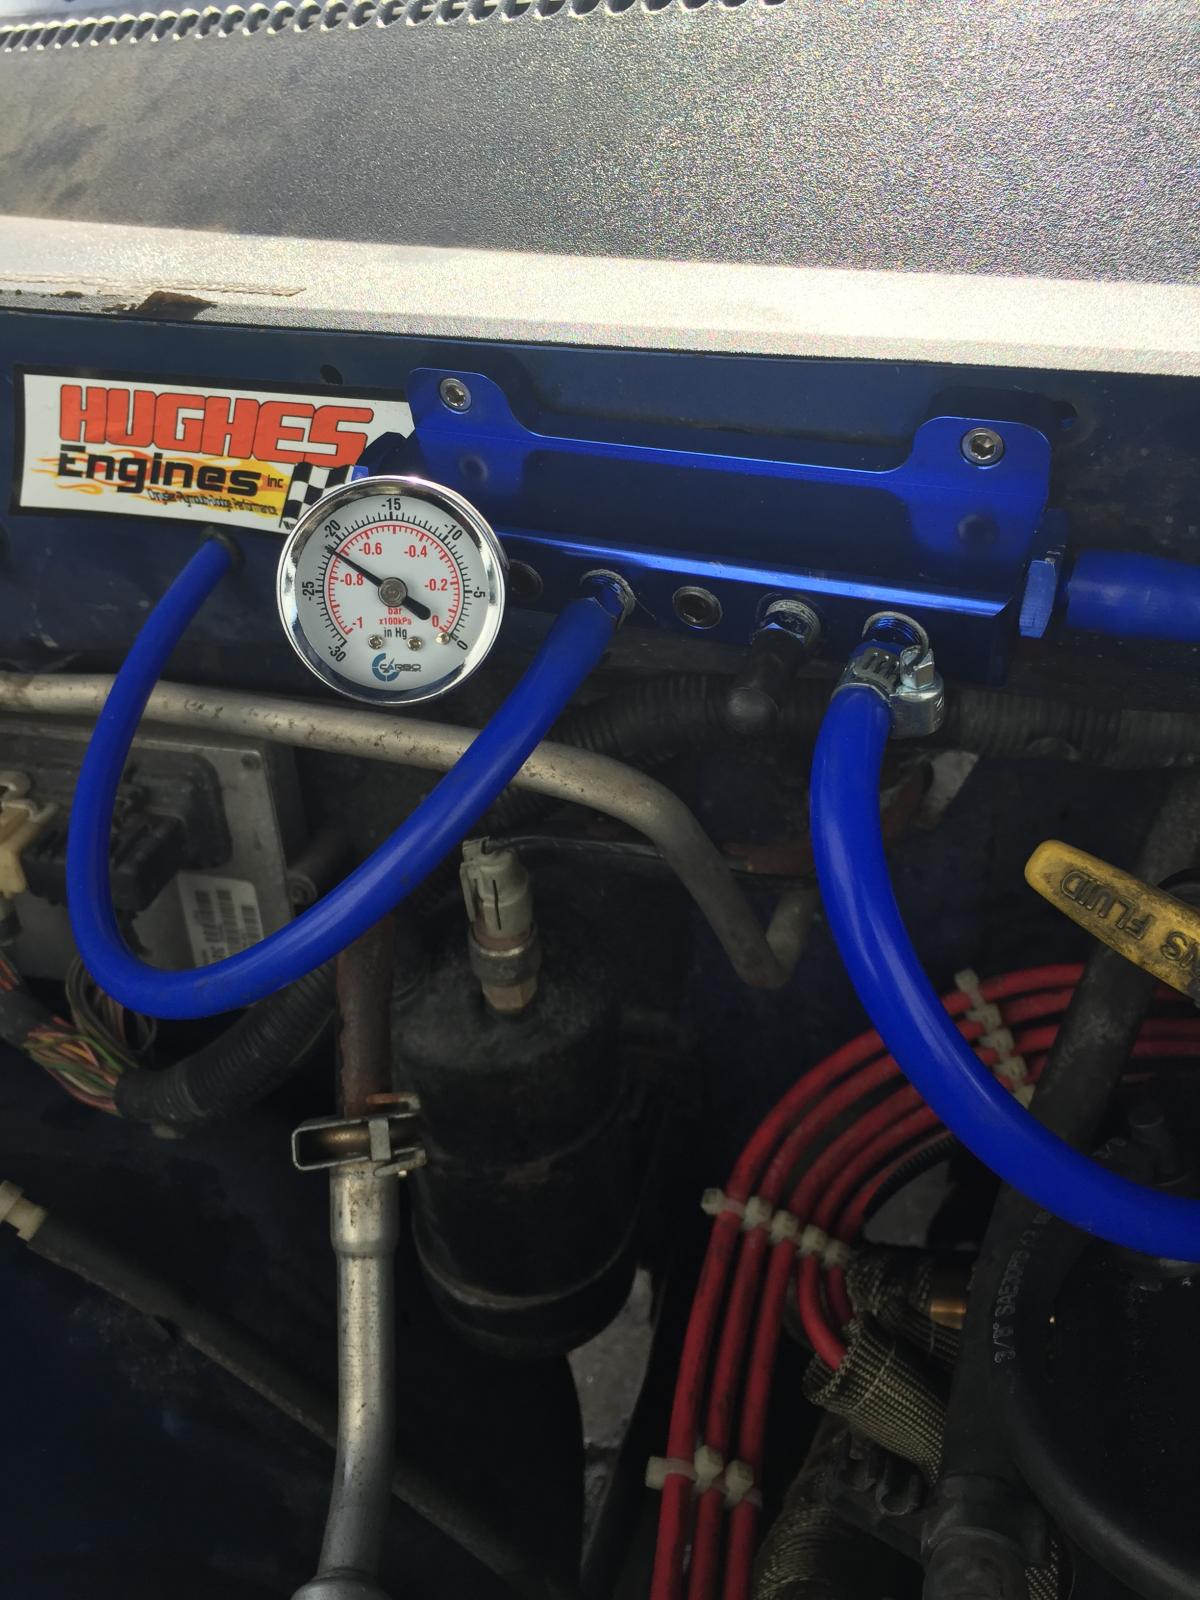
Easy and cheap. Ebay. Boost / Vacuum manifold for rice rockets. Only thing I would do differently is put the gauge on the input side of the check valve instead of in the manifold. It’d be nice to see what the engine is producing in real time. Maybe I’ll just add a second gauge. $2 eBay. Right to left.. on the edge obviously is input with a check valve. Then cruise control with its own dedicated check valve. Next will be for the 4x4 system. Further will be for HVAC and finally that hose sneaks through to the vacuum reservoir. I never relayed the latest in this sh*t show. I took the truck to the local (Merritt Island FL) Dodge dealership service department so I could - 1: Get the engine correctly timed and the fuel synced. 2: Find the cause of sounding like maracas when you accelerate. 3: Find out why it wants to overheat. ...and fix all of the above. I dropped it off at 10:00 for a 1pm appointment. Reasonable I thought. I showed back up at 3:30 and it had not been touched. All of a sudden the truck is in the service bay. Less than 30 minutes later, the service manager tells me (while doing the ‘wipe your hands on a dirty shop rag’ thing) that everything is good to go. They fixed the timing, synced fuel and couldn’t see anything that would cause an overheating problem. Gold star and pat on the back, I’m out the door. 26 miles down the interstate, the truck sounds like maracas again, doesn’t have any gut... and the radiator self destructs. Oh. I was towing a darn near empty trailer. Mind you, this engine was built with towing in mind and I believe it’s a 258 cam. Over $400 in towing charges later, the truck and trailer are back in my yard and I had to rent a uHaul for this road trip. Sometimes you're the dog sometimes you're the hydrant.
-
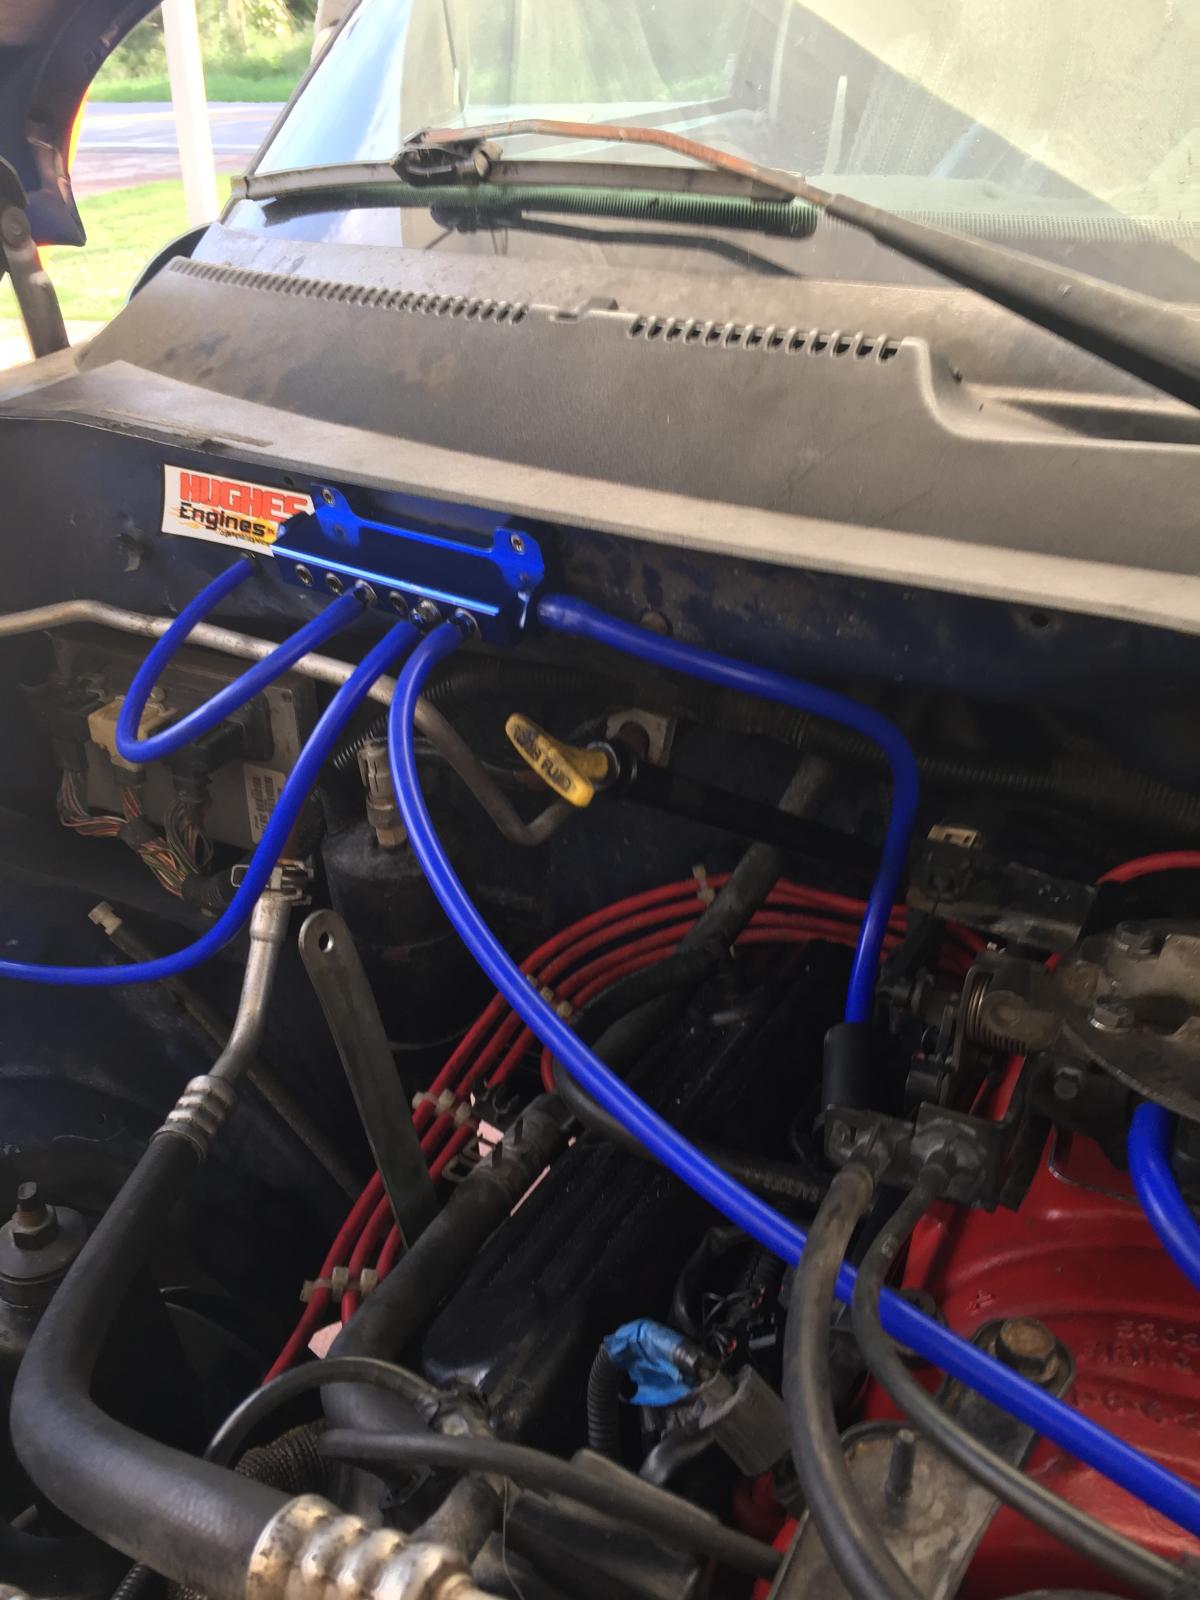
Thank you. Obviously I’ll be cleaning up the routing of the hoses later. My primary concern - the headers fit, although I’m dubious about one spot of the titanium wrap rubbing. Exhaust and muffler all in and clamped. Now I’ve got to find somewhere to hook up to a “good” (definition: expensive as hell) engine monitor to sync my fuel. I’ve got it running but the idle is still suspect. I’ve got to keep tickling the throttle so it doesn’t konk out. No pressure. I leave for a 1300 mile road trip in three days, towing a trailer. I’m telling you though, with the new, taller cammed engine and 3” long tube headers and pipes all the way back, she’s a throaty little girl.
-
Update: I pulled the distributor this morning and fiddled my way into lifting and turning the gear so the distribution rotor now points the right way. Distributor - foreign to all things diesel. Anyway, All pleased with myself, it was time for installation of the battery to see if I was successful or I would witness flames and fluids everywhere. With trembling hands, I put the key into the ignition,.. and turned... nuthin. The battery had gone to the great beyond. Not even enough juice to make the buzzer work. Now proud owner of a very friggin expensive battery. Repeating this morning’s stomach butterflies I turned the key while the coil was disconnected. I’ve got oil pressure. Go team me. Attached the coil wire and tried again. It huffed once... and then again about every three/four turns. It got surface of the sun hot so I’ve knocked off for the day. Tomorrow I wanna try to see if advancing or regarding does anything. I may even give it a half shot of premium right in the intake. Any and all suggestions are greatly appreciated. Did start art working on the vacuum plenum. Factory way is ****. The gauge hasn’t gotten here yet but will be installed on the left side of the rail.
-
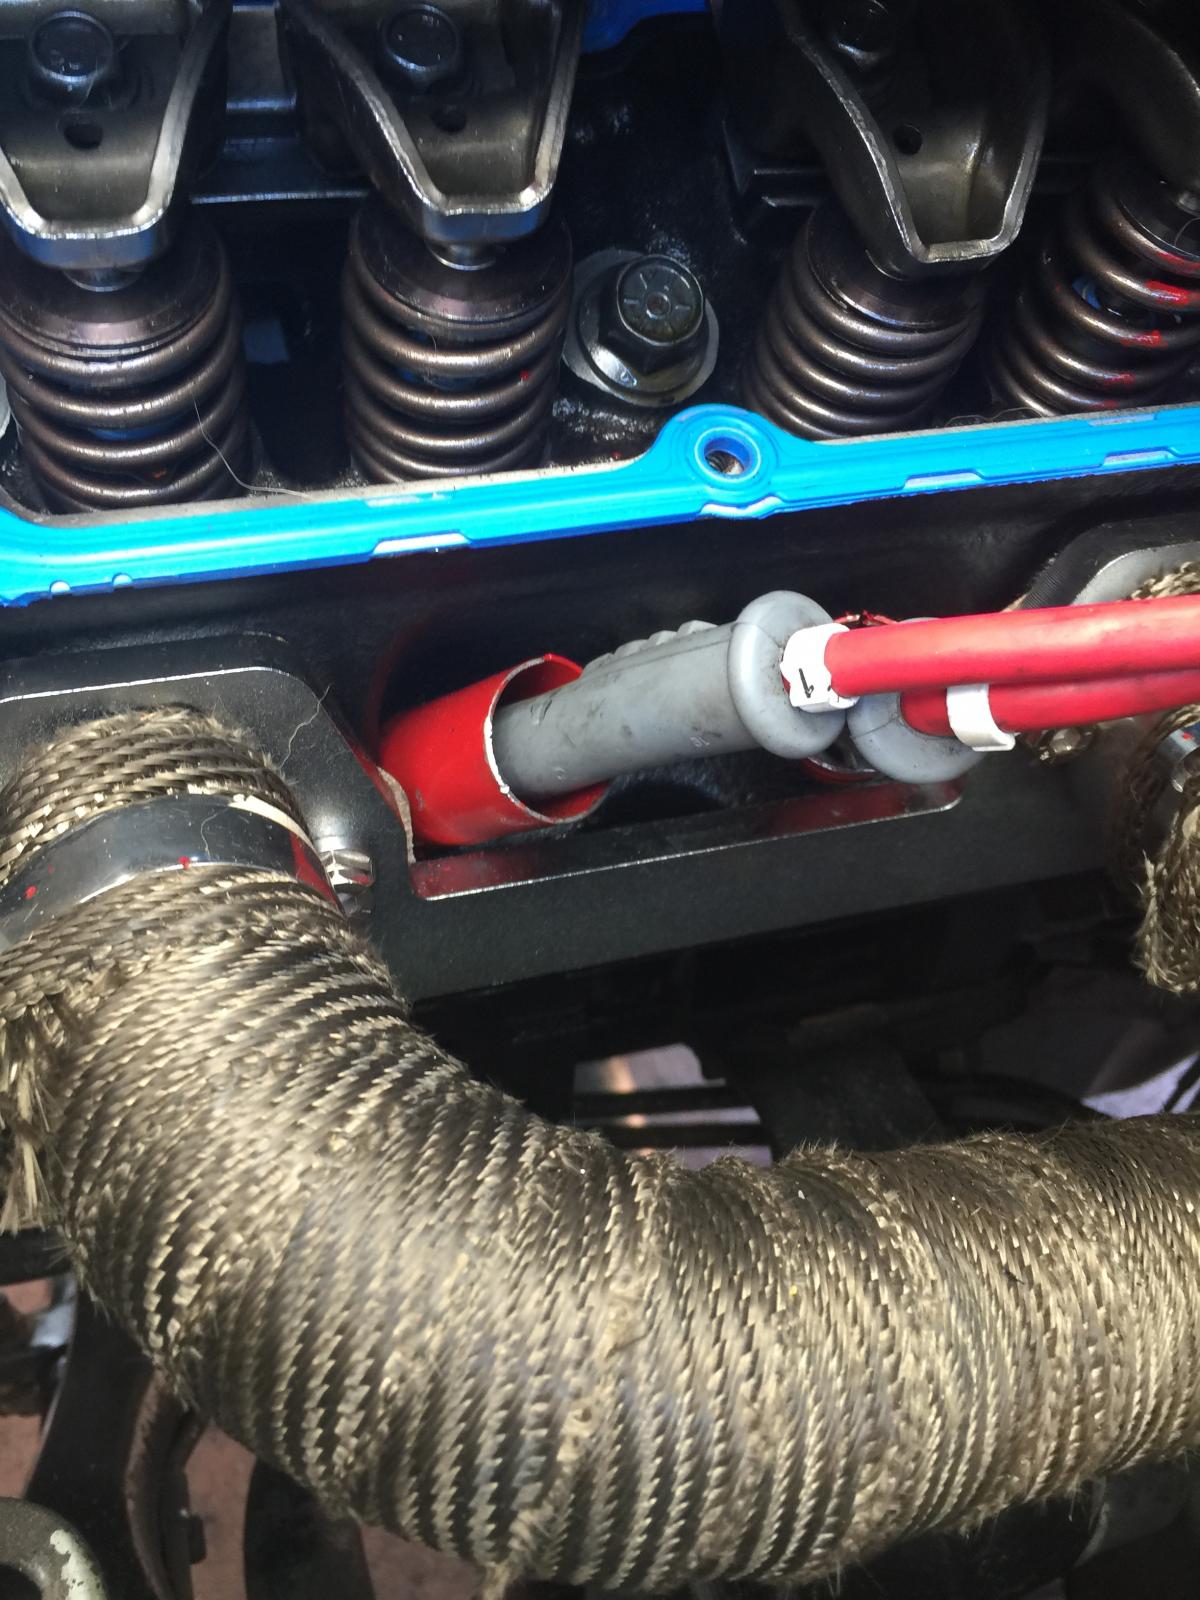
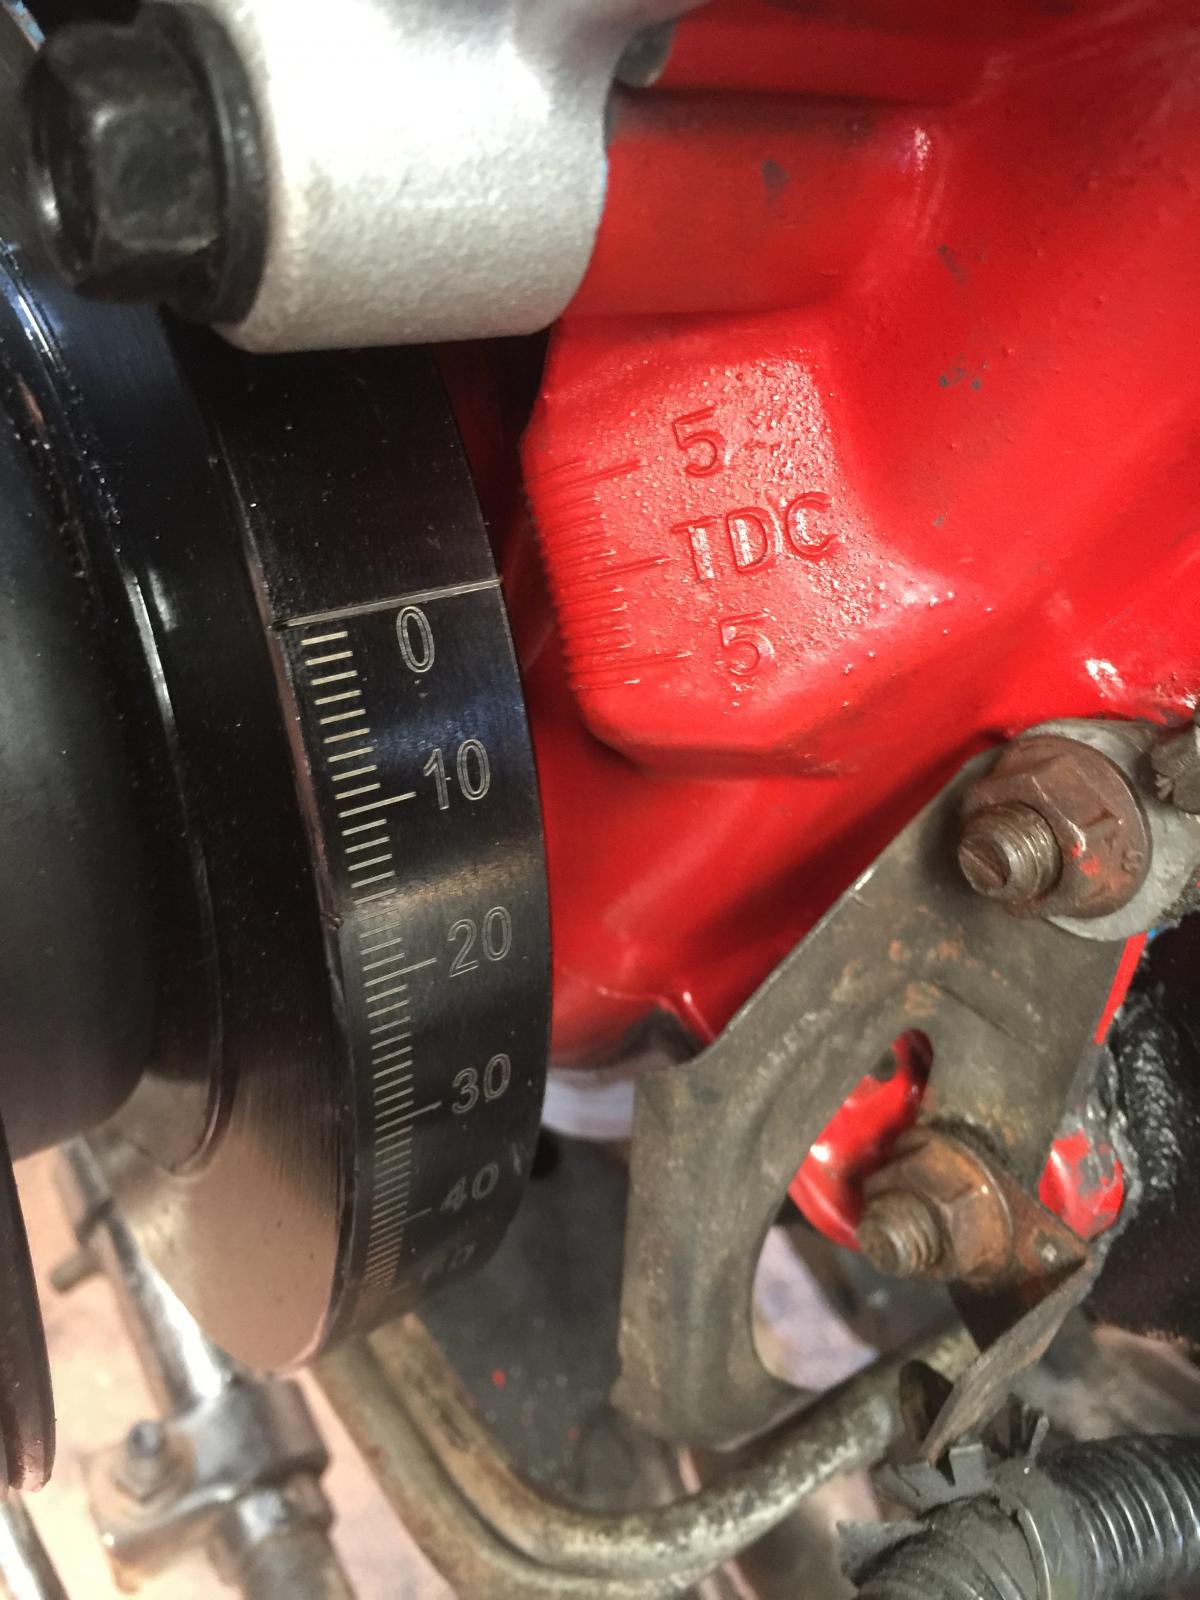
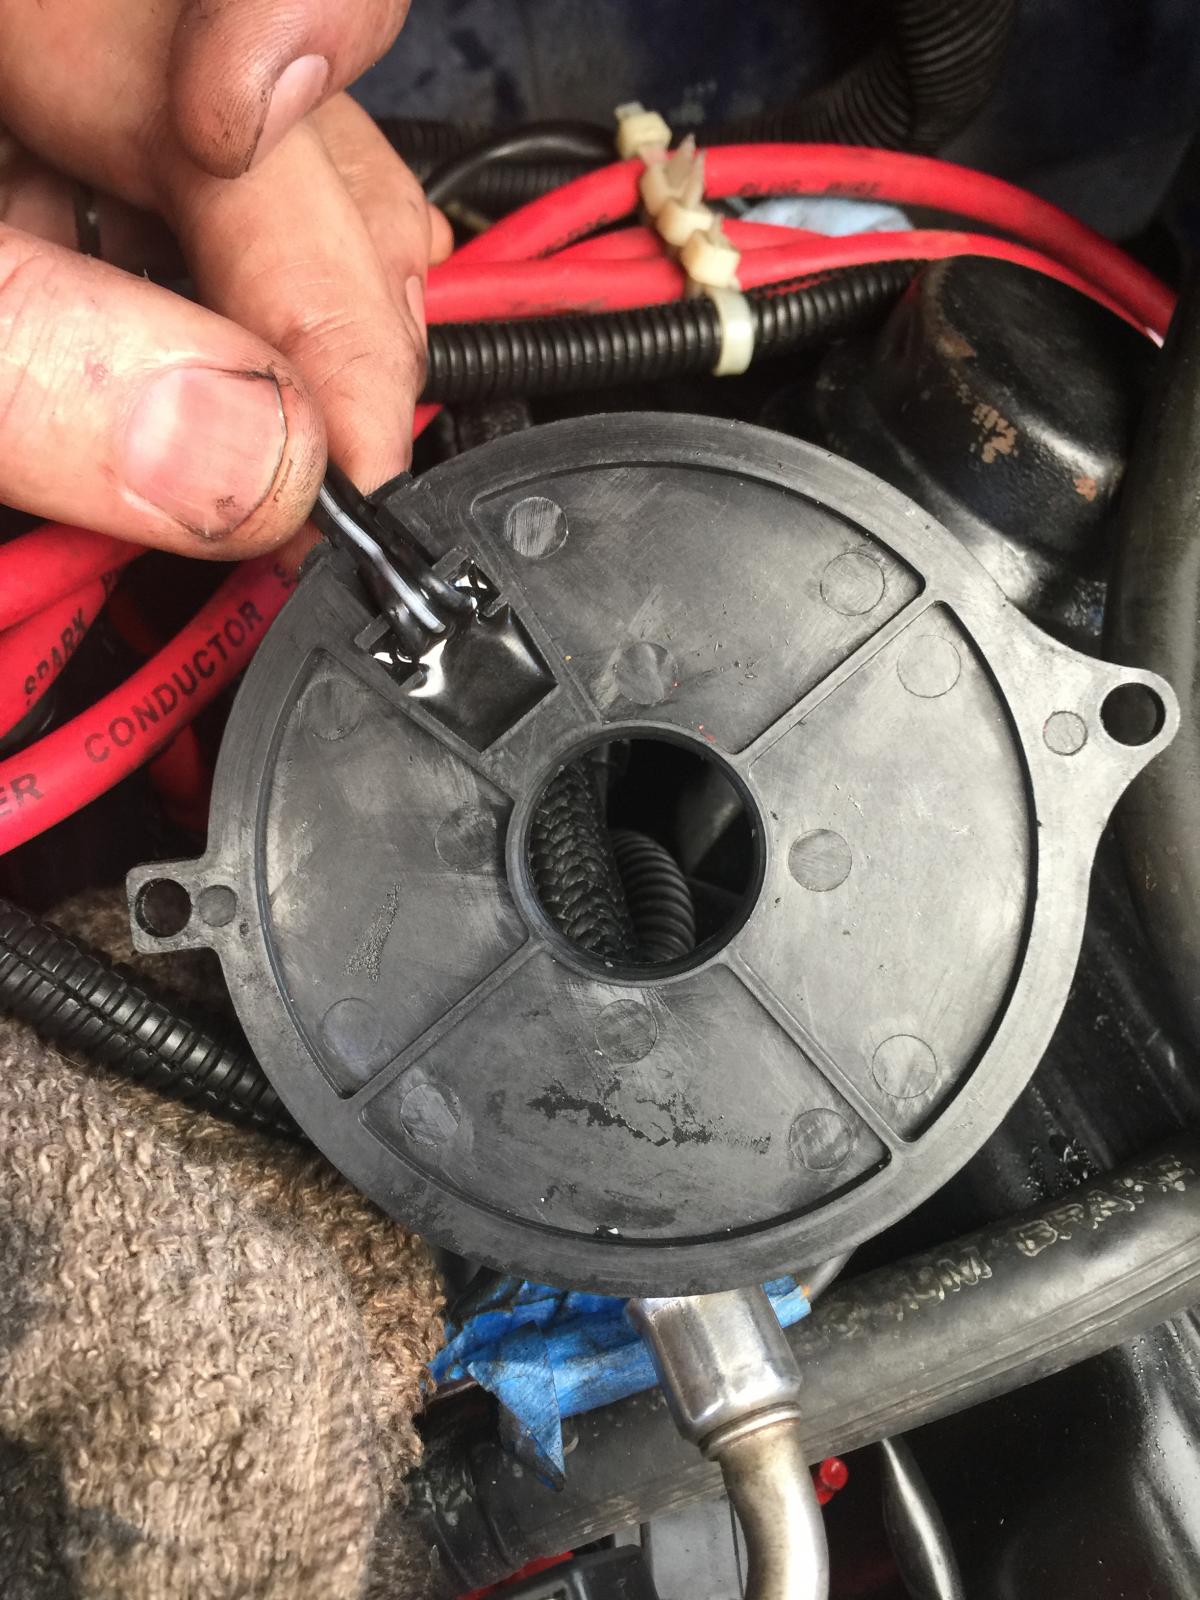
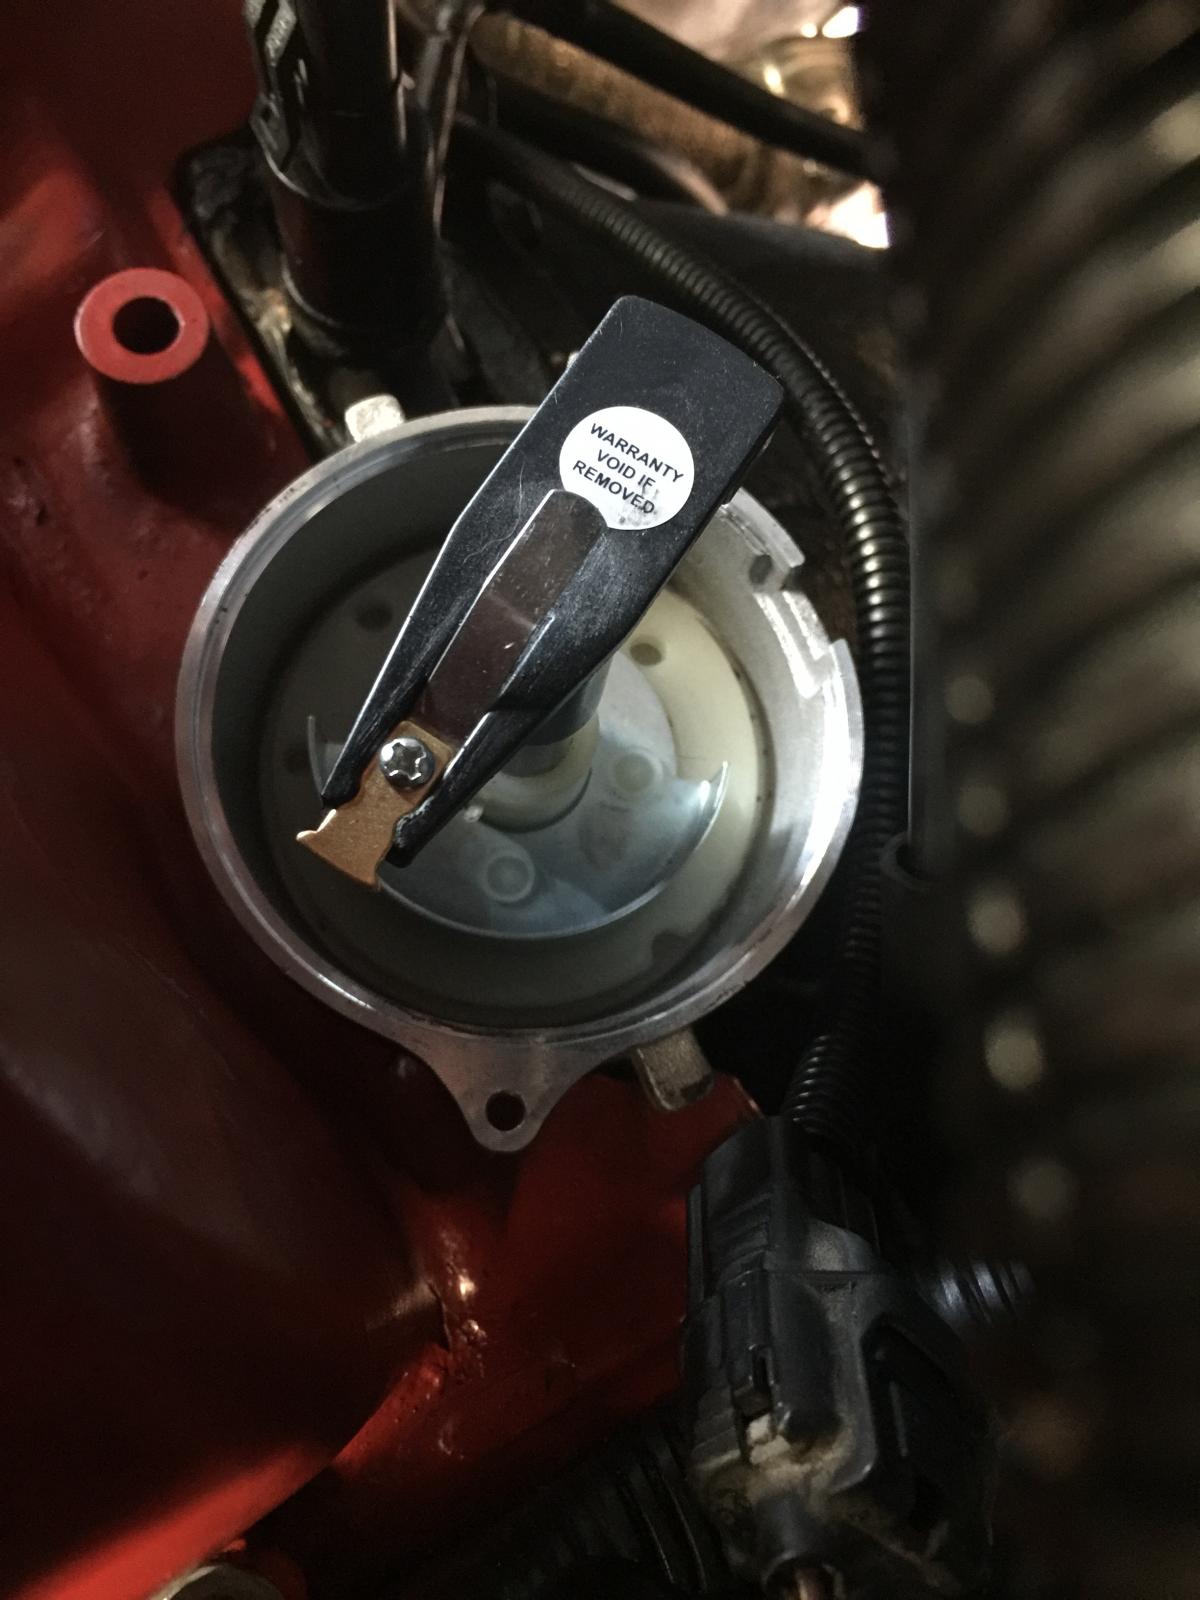
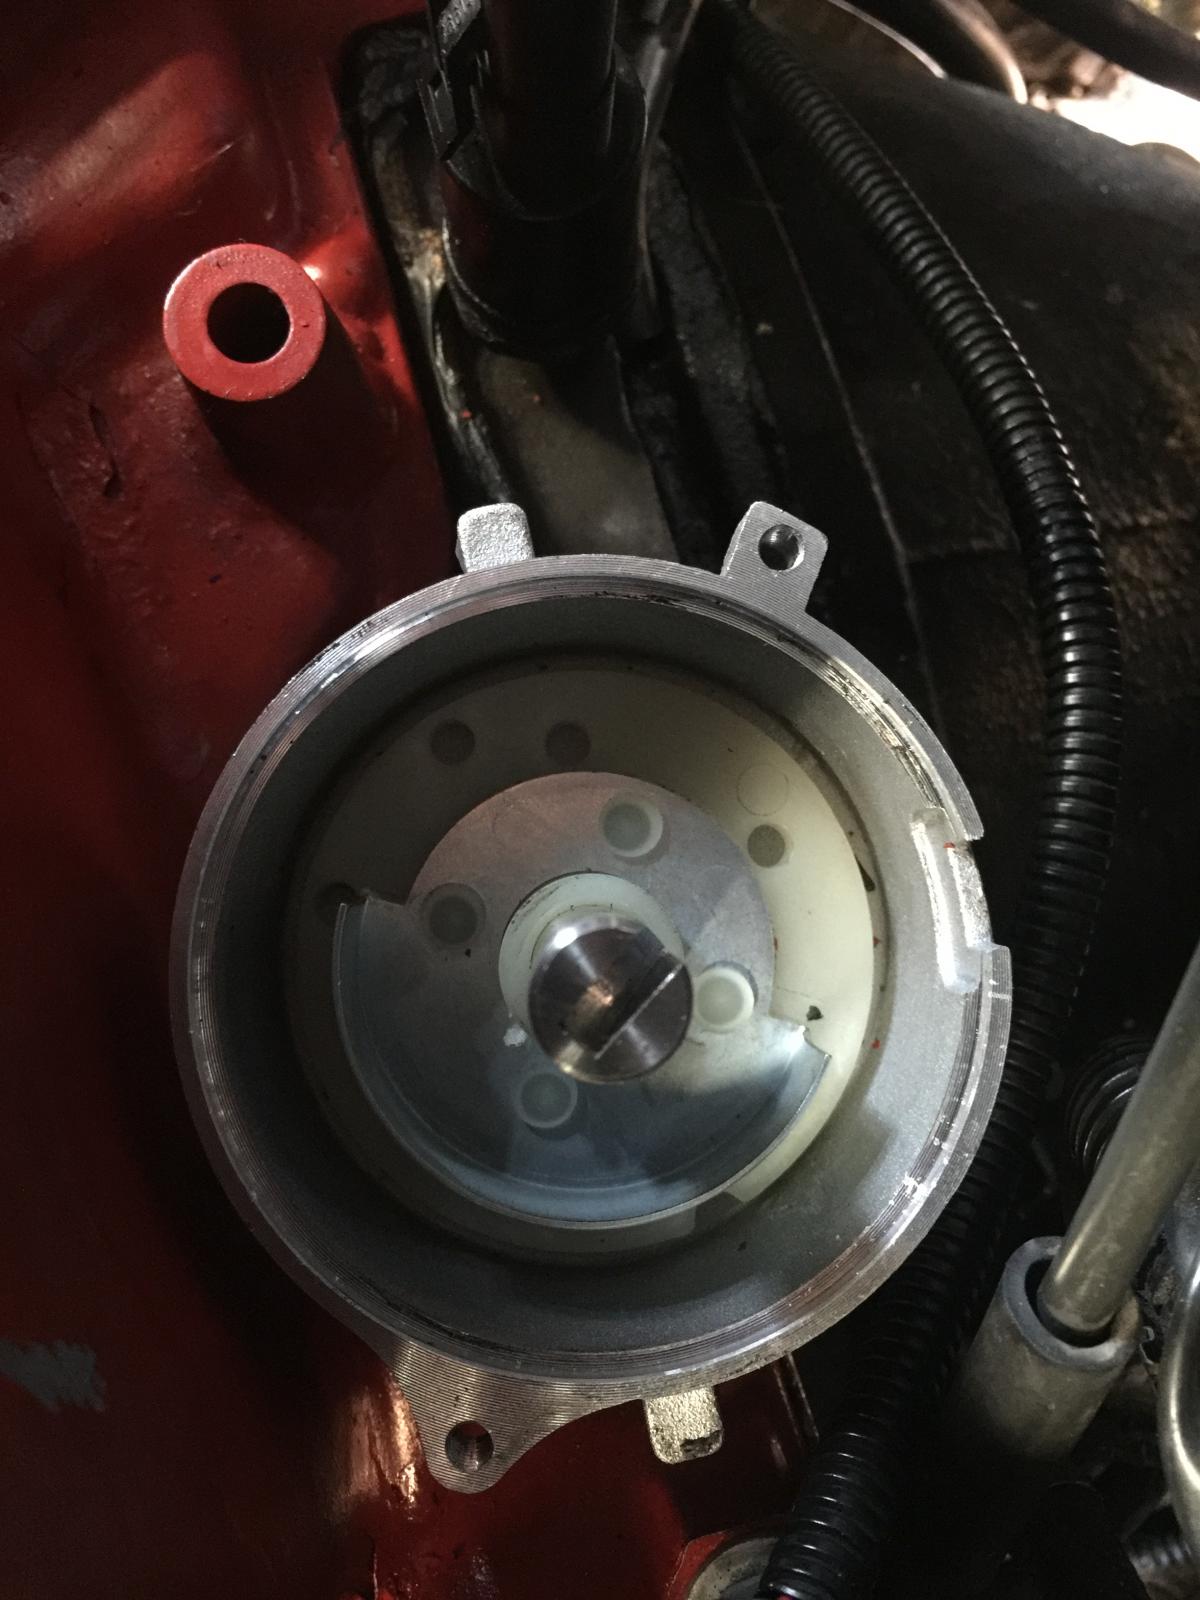
Picture 1: top left shows #1 TDC Picture 2: verified TDC Picture 3: #1 plug wire removed for clarity. Intake is red. Picture 4: This shows the pickup plate. Please notice - no timing mark or notch, etc. Picture 5: This shows the rotor pointing to #1 cylinder. Note pickup vane under the rotor. Picture 6: Another view of the vane but note the cutout in the housing for the sensor. Now with all all this info and #1 wire being on the left side [like most vehicles have it], how is #1 going to get fuel before the TDC. It’s going to be nowhere close to the #1 wire. So what’s my answer here? Pull the distributor and use some guesswork to place the rotor close to the #1 wire? I could pull the distributor out and rotate the housing (cap) so it kinda lines up, but then any self respecting maintenance person who looks and sees the #1 wire in the wrong location... My brain hurts. I’m close to getting out my AR-10 and putting a vent in my crate engine.

-
So the engine is still at #1 TDC and the rotor is pointing at the number one cylinder’s head bolt. Here’s my confusion. I’m running an electronic fuel injection with the electronic distributor. Which means the number one wire is now, on the distributor cap, pointing to the six hole. Coincidentally, the plug wires and cap orientation are in the exact position they were on the old distributor. There’s no spinning the distributor housing to have the number one wire align with the number one cylinder at TDC because the distributor housing has “ears” that prevent turning that far. It will bind on the back of the intake manifold. So what do I do from here? I don’t see how I’ll be able to sync the fuel to TDC. One person tells me I should pull the distributor *and gear* to move and align the rotor so it points at six. I’m so close but don’t want to destroy anything by turning the key while having the number one wire where it is. I’m very confused. The shop manual I have shows the rotor to number one as well but I wonder if there ever was anything like an addendum to re-aim the rotor somewhere else for sync. ...or do I just have the distributor housing 180° backwards? Pull the stem and flip it, keeping #1 TDC? Help me Obi Wan... Dave Rhodes Merritt Island, FL
-
SailingSanta changed their profile photo
-
Thanks to everyone here. The engine replacement project is drawing to a close. I’m hoping to make some noise tomorrow. Still working on the exhaust pipes. Long tube Headers and 3” pipes all the way back. Yes, noise.
-
I’ve gone to this supplier for my new hose and check valves. I really didn’t care about the visual aspect but more so with the overall performance. http://www.siliconeintakes.com/silicone-boost_vacuum-hose/ Also I have a vacuum/boost billet plenum due in a few days. This vacuum install is NOT going to be like the factory slapdash install.
-
Transfer vent. Anything attached to the fitting or just bare metal? Thank you for the diagram. Armed with this info, since the intake is still off, I can get my hands in to replace the vacuum line. It’s brittle - except for the section I squashed. That turned into mush. I’m using silicone vacuum hose. Significantly more durable.
-
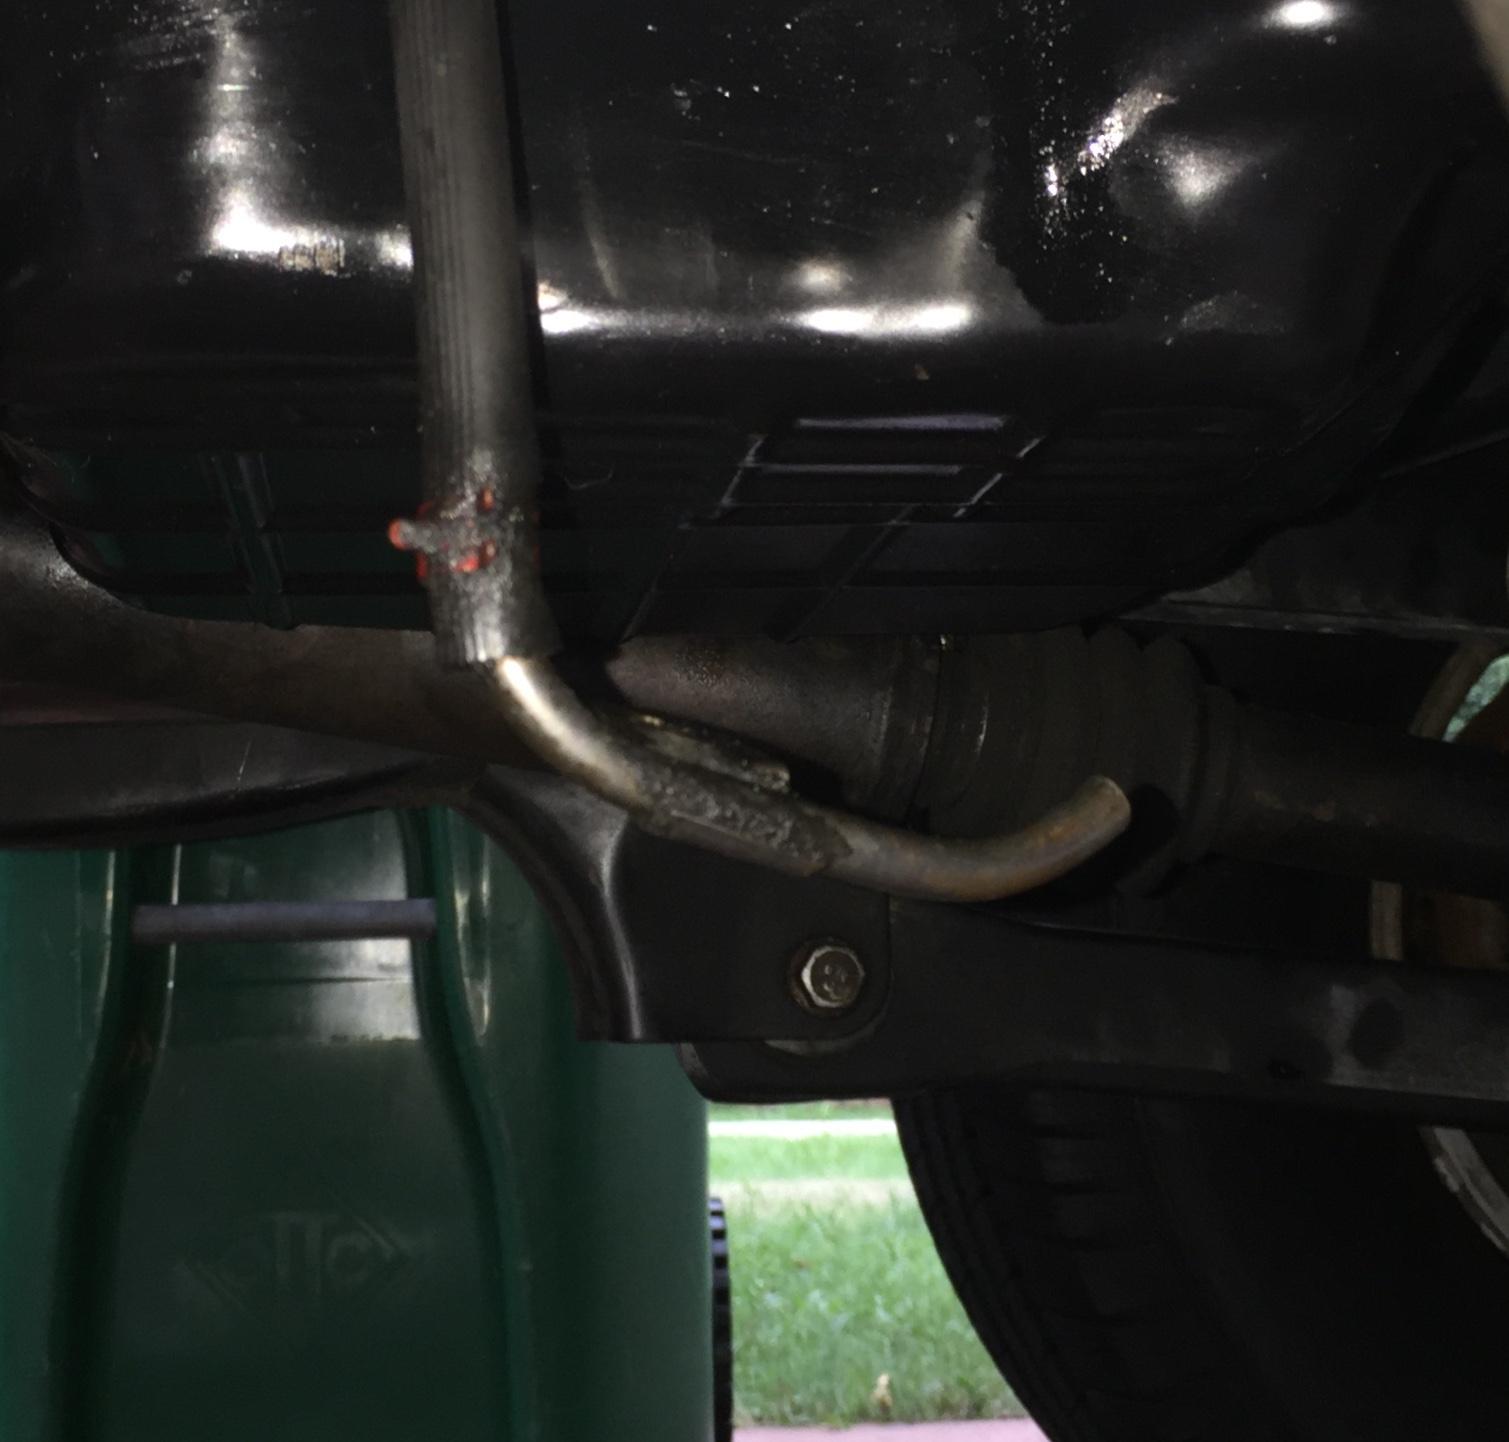
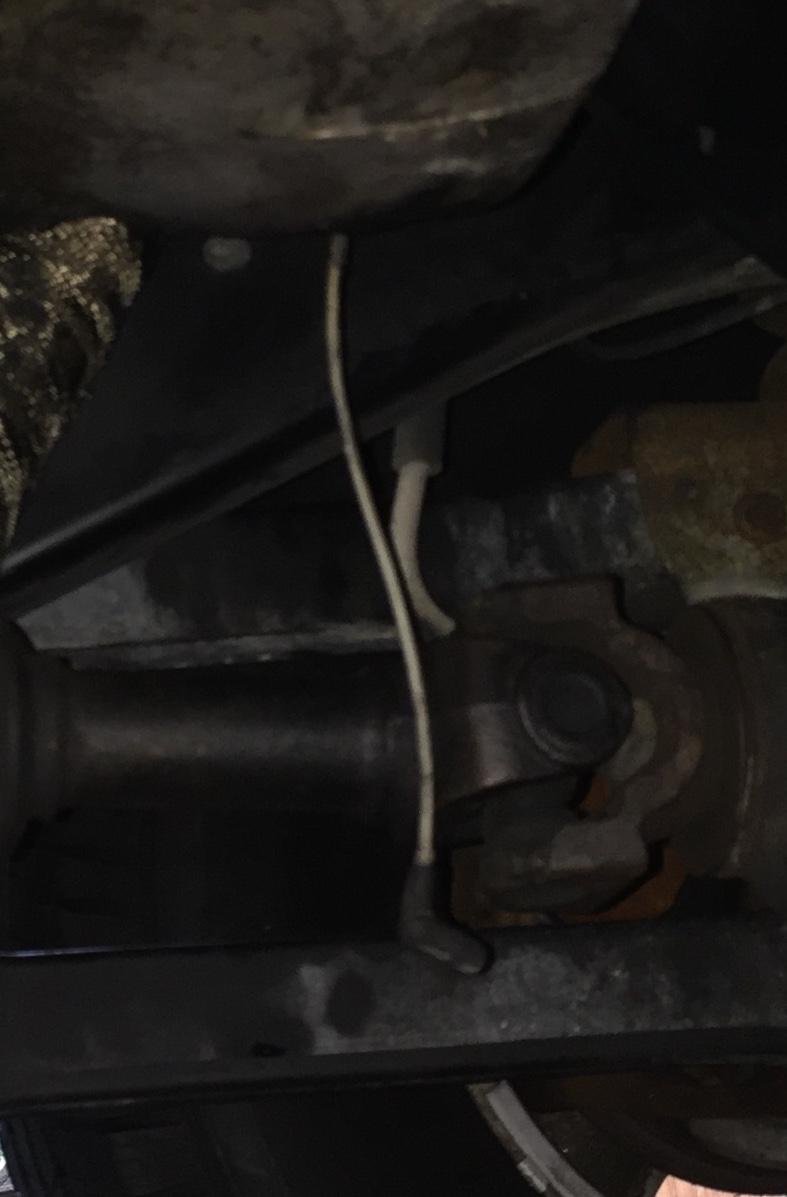
Long story short I had to replace the engine in my otherwise reliable old truck at 298000. That part with the exception of busted knuckles and not having done it before, went off mostly okay though I’m still not completely finished, due to the challenges described below. While wrestling the new engine into place at the bell housing and torque converter I inadvertently squashed a white vacuum line. I managed to get it removed from between the two sections. Now when trying to trace it back I find there is a second (unsquished) white line. What are these and where are they supposed to be terminated? Also, when the exhaust came out I now have a black rubber hose with a small metal curved pipe and bracket. (See pic). Where did THIS one appear from? Any and all assistance is appreciated and I thank you in advance. Please don’t cut my throat, I’ve never tackled anything like this before.