
Replacing injectors on a CR engine isn't much different that changing injectors on a 24V. There is a few differences but the process is the same.
First you need to make sure the fuel rail area is clean. Best to take a power washer and blow all the crud and dirt off the fuel rail side of the head.
Remove the intake horn and grid heater. Pack a few rags in the intake to prevent anything from falling in by chance.
Now you need to remove the fuel rail and all the connecting lines to the head. It will come out in one piece with the rail and the lines attached. Be aware the overflow valve has a banjo and sealing washers on top and bottom.
There is a few wires to remove. The two injectors control plugs on the driver side of the head. There are two sensors there on the intake.
Now remove the valve cover. You should be looking at the injectors and the wiring for them. Take a 8mm socket and remove all the connections. Then lift the wiring gasket up and out.
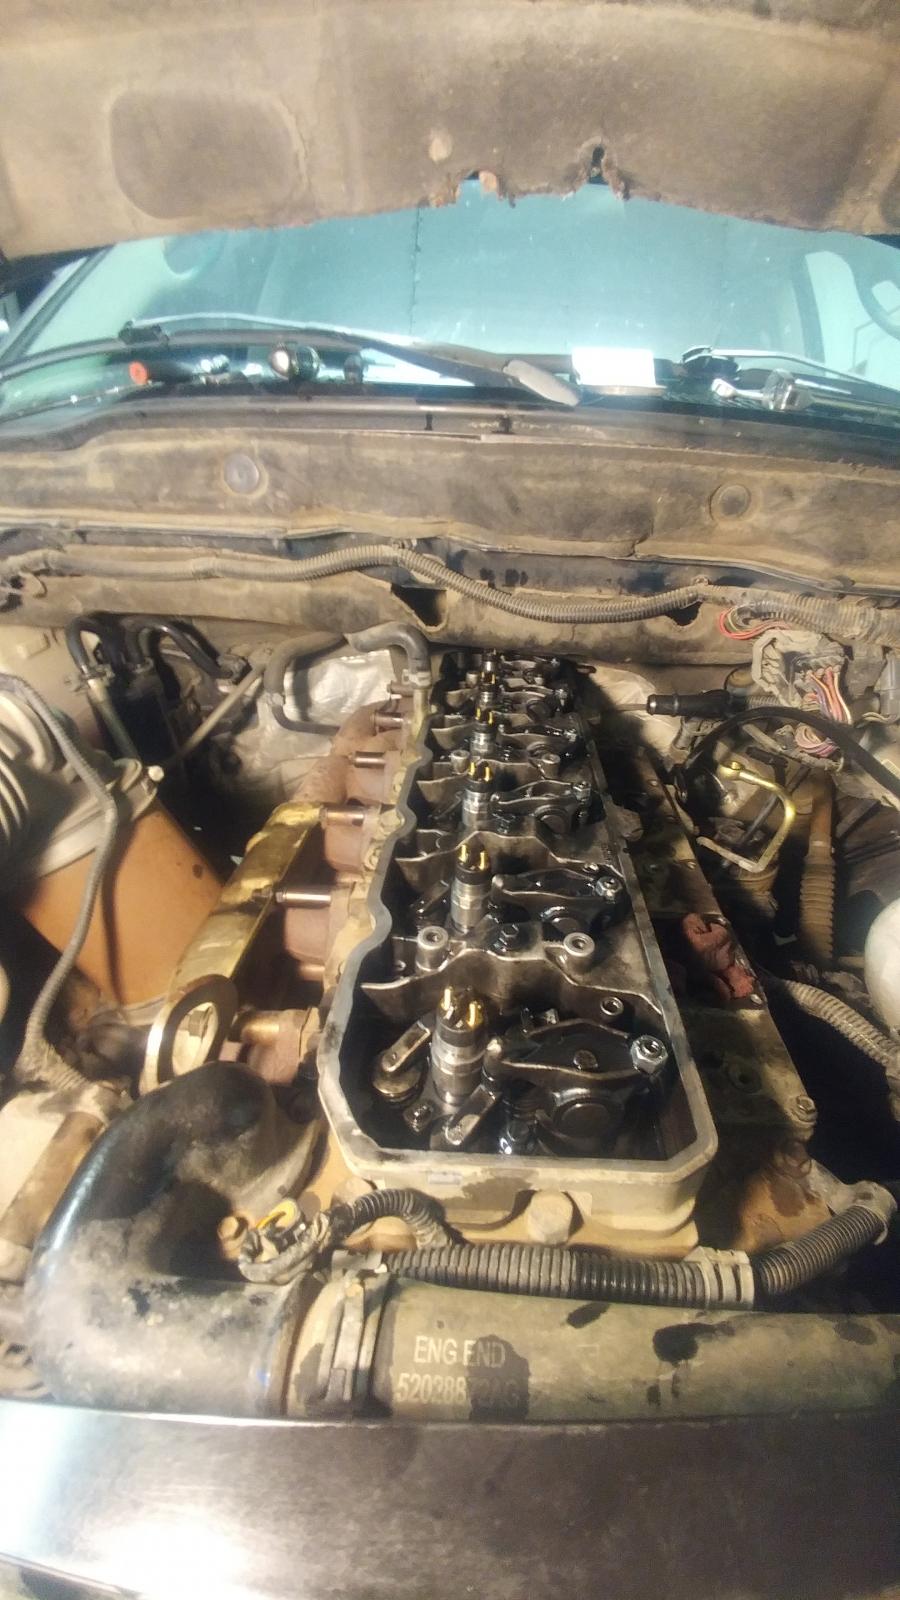
10mm socket and remove all the exhaust rockers. I suggest laying a rag out and laying them all out in the order removed. This way you can put back without adjusting the valve lash all over again. Suggested to do a valve lash after removing the rockers.
You'll need a 24mm wrench for removing the crossover tube nuts. Socket will work but the back might be a bit too limited. Now using a small flat blade screwdriver you can lightly pry the connector tubes out. Suggested to replace the crossover tubes.
Now with a 8mm socket you can remove the two bolts holding each injector down. Using a flat blade screwdriver hook the solenoid collar and carefully pry upwards out of the head. When it does come up make sure to check for the copper washer on the tip and no left in the head.
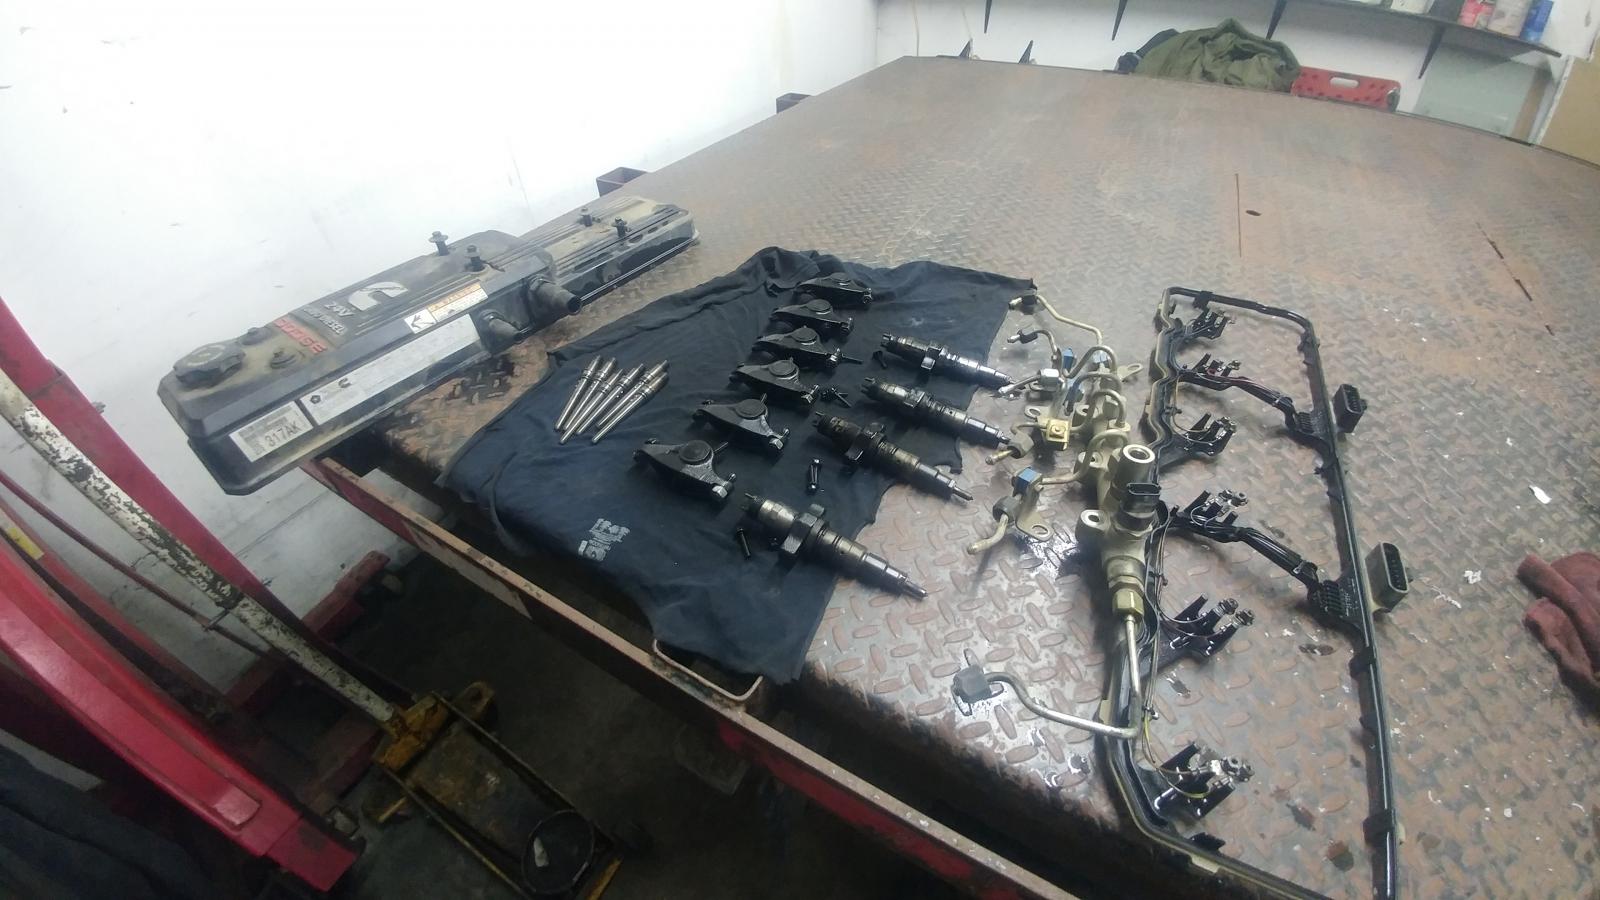
Assembly is fairly straight forward as well.
Now when installing the injectors you can place each injector in its hole make sure to locate the crossover hole towards the driver side. Another way to see it is the hold down collar is square toward the front and rounded towards the rear at least for the 2006 I have here.
Now you need to seat the injector in its hole tighten the injector hold down to about 44 inch/pounds. This is only to push the injector into the head. I used a nut driver and 8mm socket and tighten till the injector is fully seated and backed off the bolts till loose again.
Now you can push each crossover tube into place. Do note the position of the locating balls on the shank they face upwards might twist just a little bit to find the notch. Now twist in the crossover tube nuts. Torque them to 11 foot/pounds.
Now you can torque the injector hold downs to 89 inch/pounds.
Now you switch back and do a final torque of the crossover tubes to 37 foot/pounds.
Lay the the integrated gasket / wiring down and lightly torque the nuts to 11 inch/pounds. Just much easier having the 8mm nut driver and lightly tighten the nuts. Be aware over tighten will damage the injector and this is a very expensive mistake not to make!
Now you can install the rocker arms. This is why I lay them out in order then you can get them back in place without having to do a valve lash adjustment. The bolt is torqued to 27 foot/pounds. It is suggested to do a valve lash adjustment but you can quickly check after installing the rockers if that is needed or not with a feeler gauge.
You can now install the fuel rail and connect all the lines again. Make sure to get both sealing washer on the overflow valve. Don't forget the supply tube from the CP3.
Slip in the valve cover and tighten down.
Install the grid heater and the intake horn.
Priming is simple. Loosen only #1 injector line. Crank for about 5 seconds you should have fuel dribbling out. Now tighten and crank again it should start right up in about 5 seconds of cranking.