


Thanks to Loki223 over on Cumminsforum for this one.
Step one, remove the door panel. Carefully pry off the upper sail panel, and remove the fasteners holding the door panel on
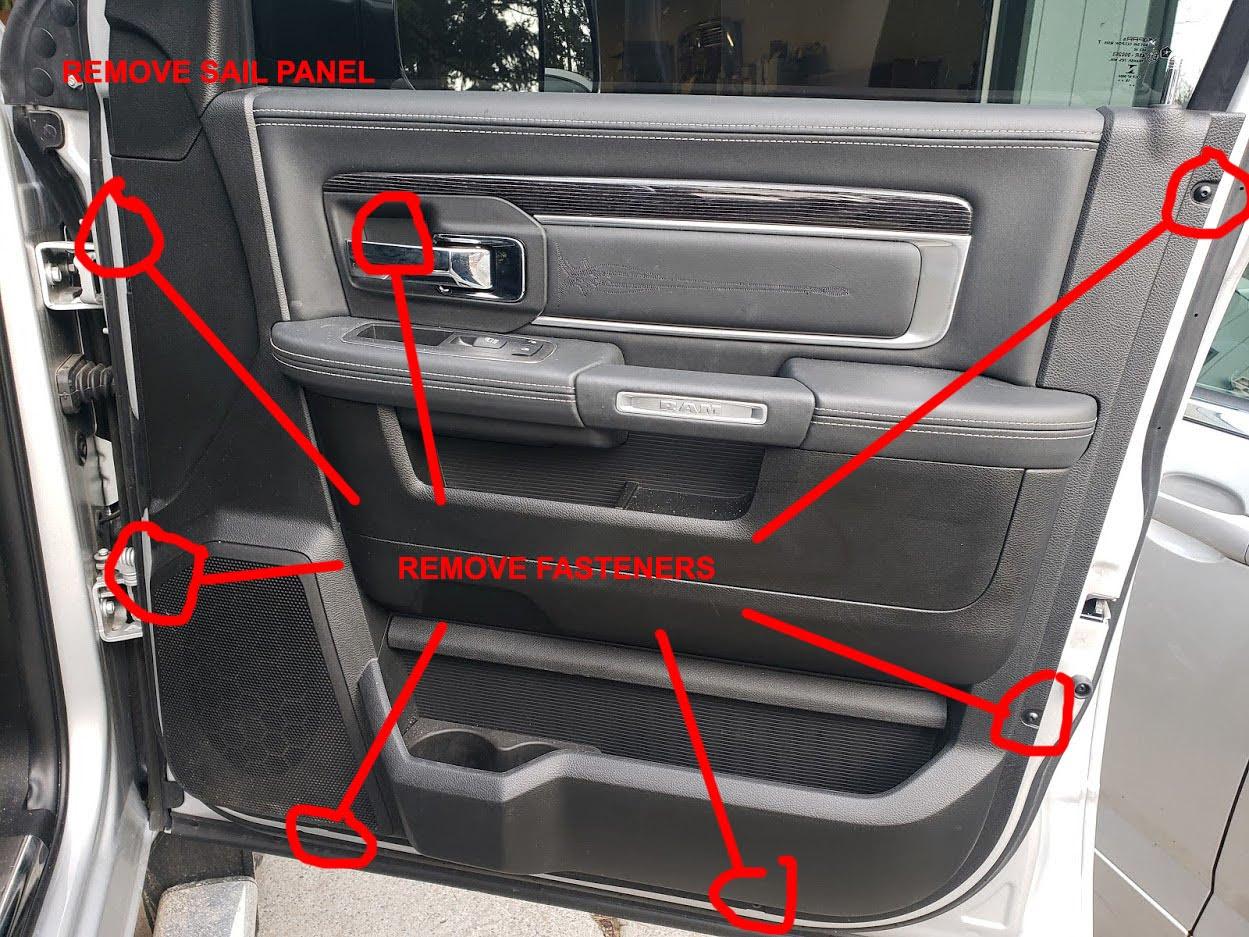
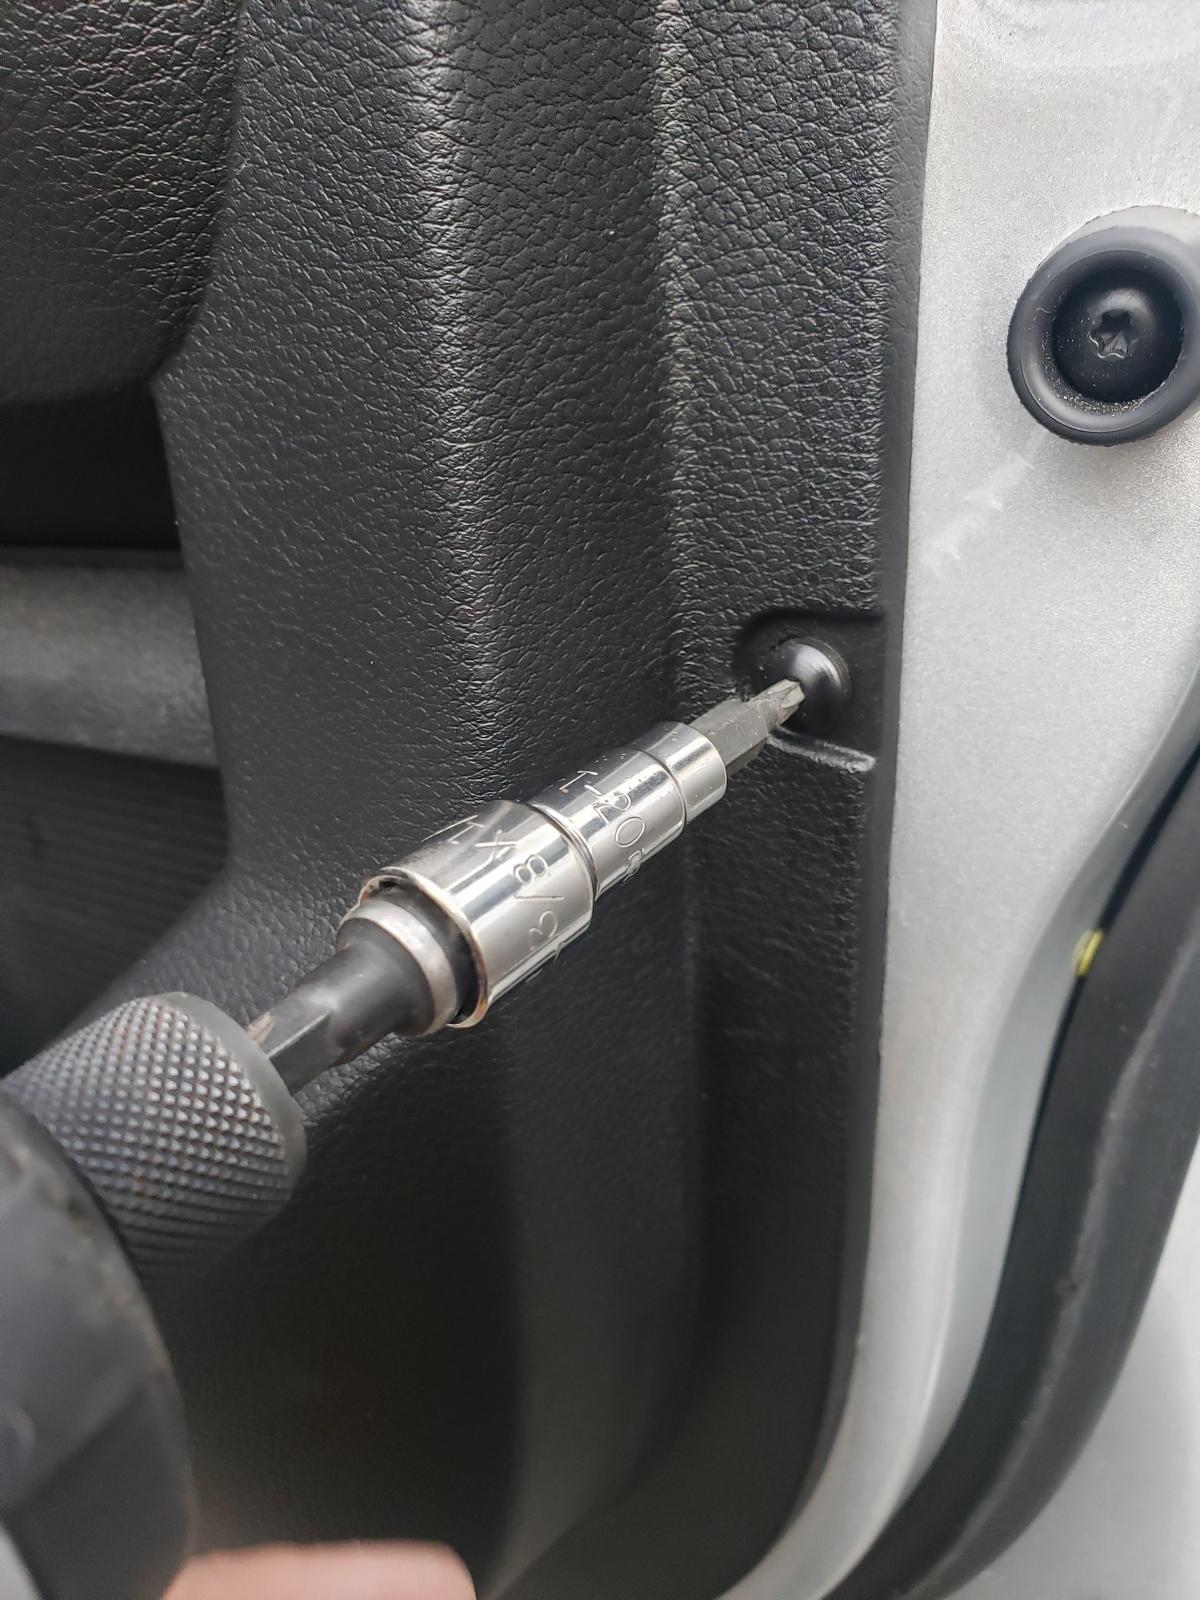
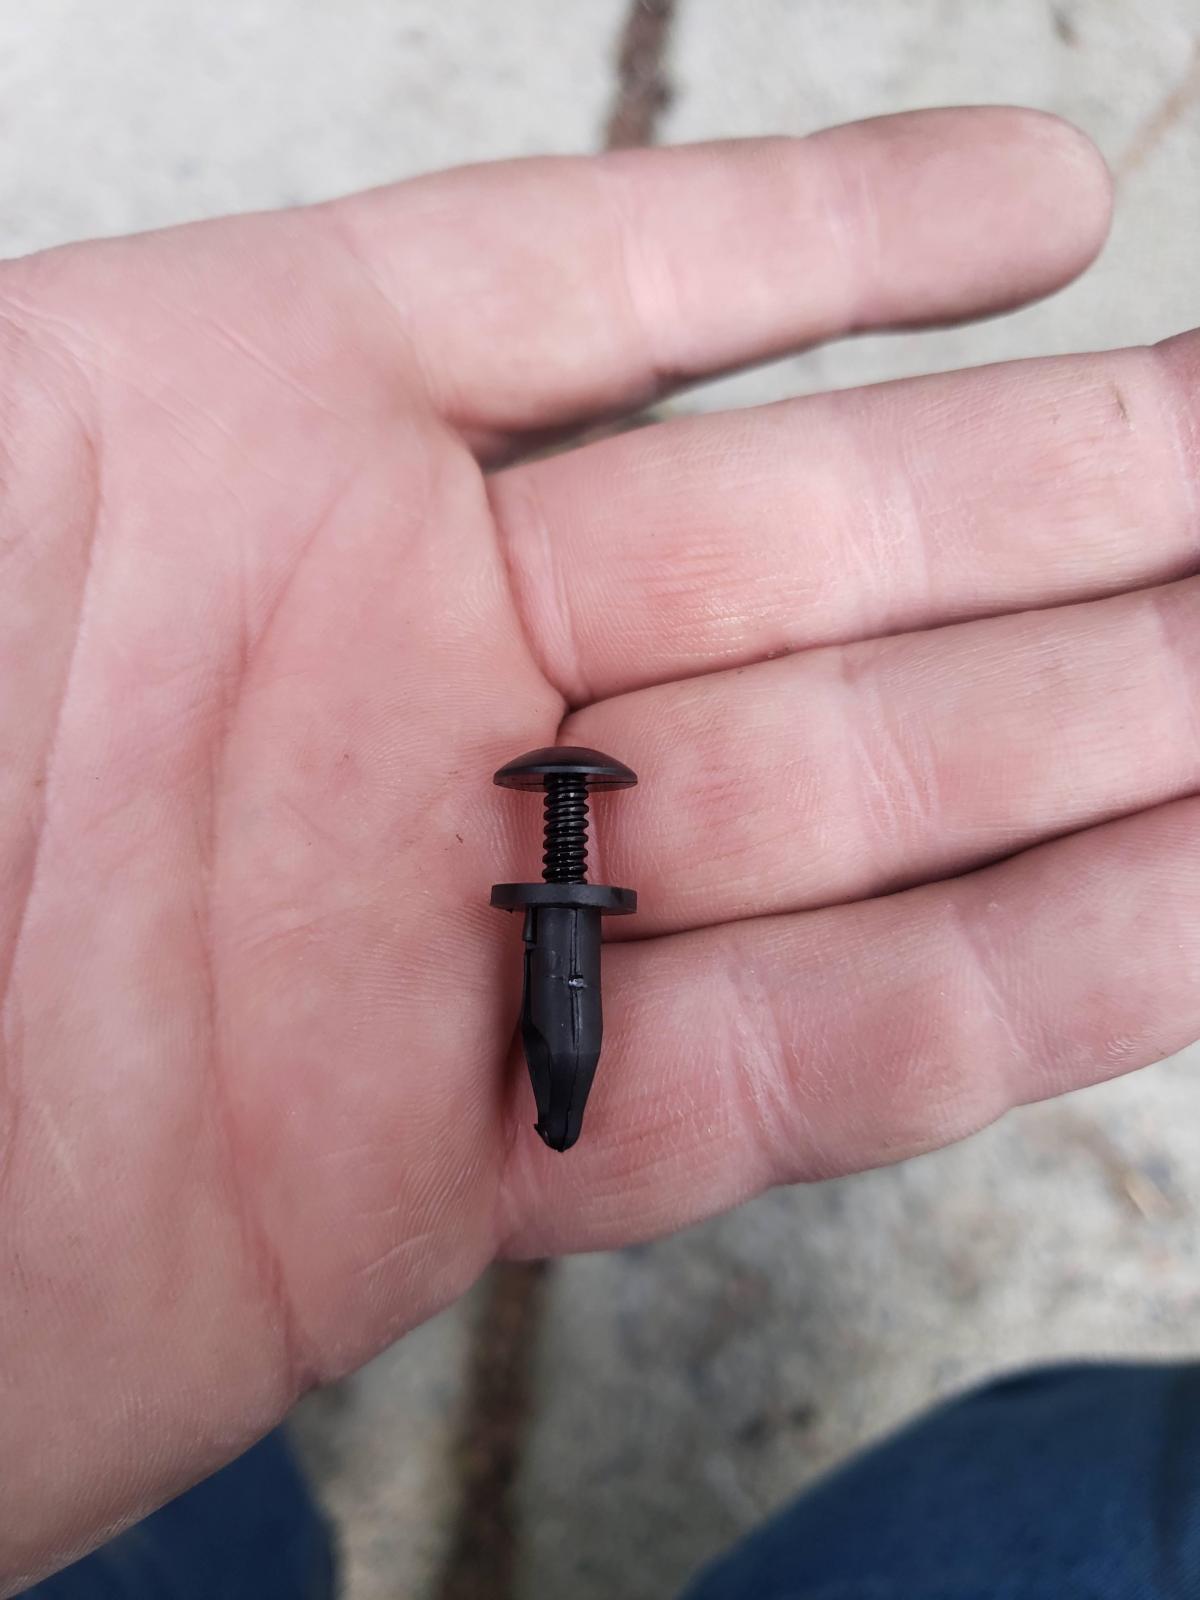
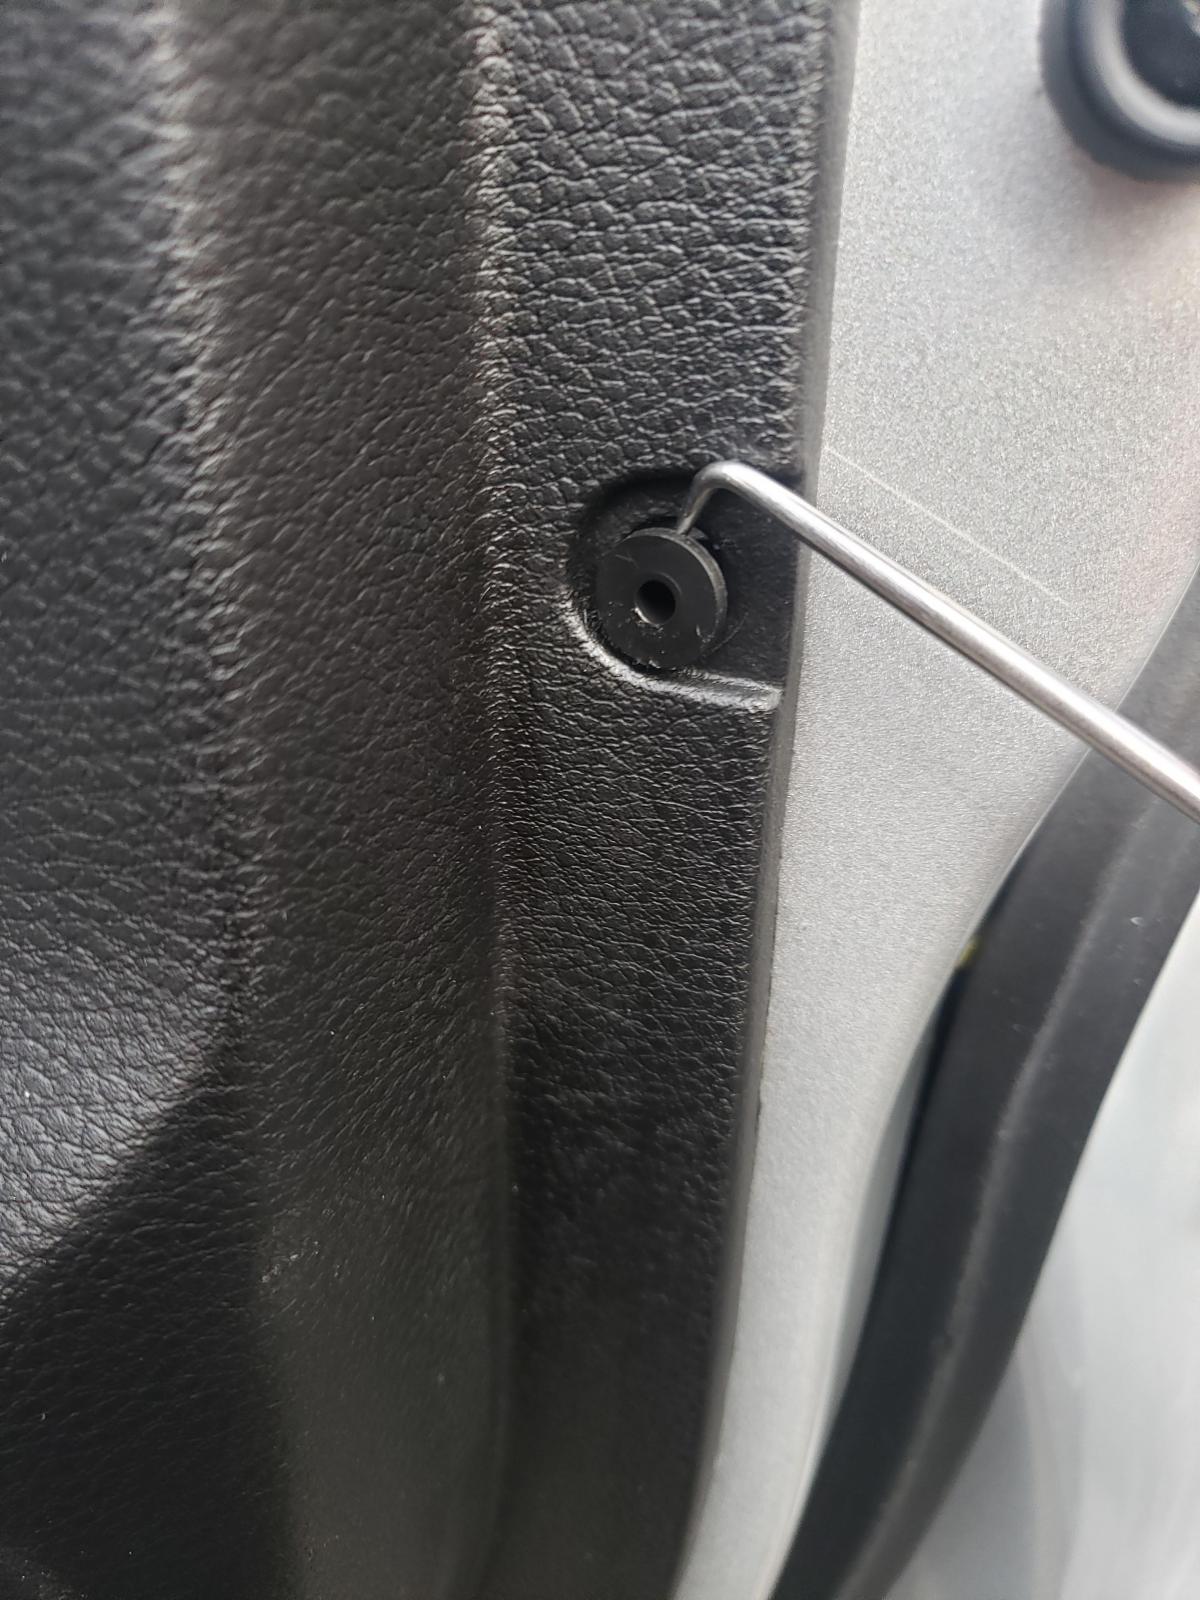
The edge fasteners are a T-20 Torx Bit head, sometimes you might need to use a pick to apply pressure to the screw to get it to come out. Once the screw is removed, remove the push in fastener, and push the screw slightly into it for reassembly. These are really fast to put back in, place the plastic piece back into the hole, and then simply push in the screw for reassembly.
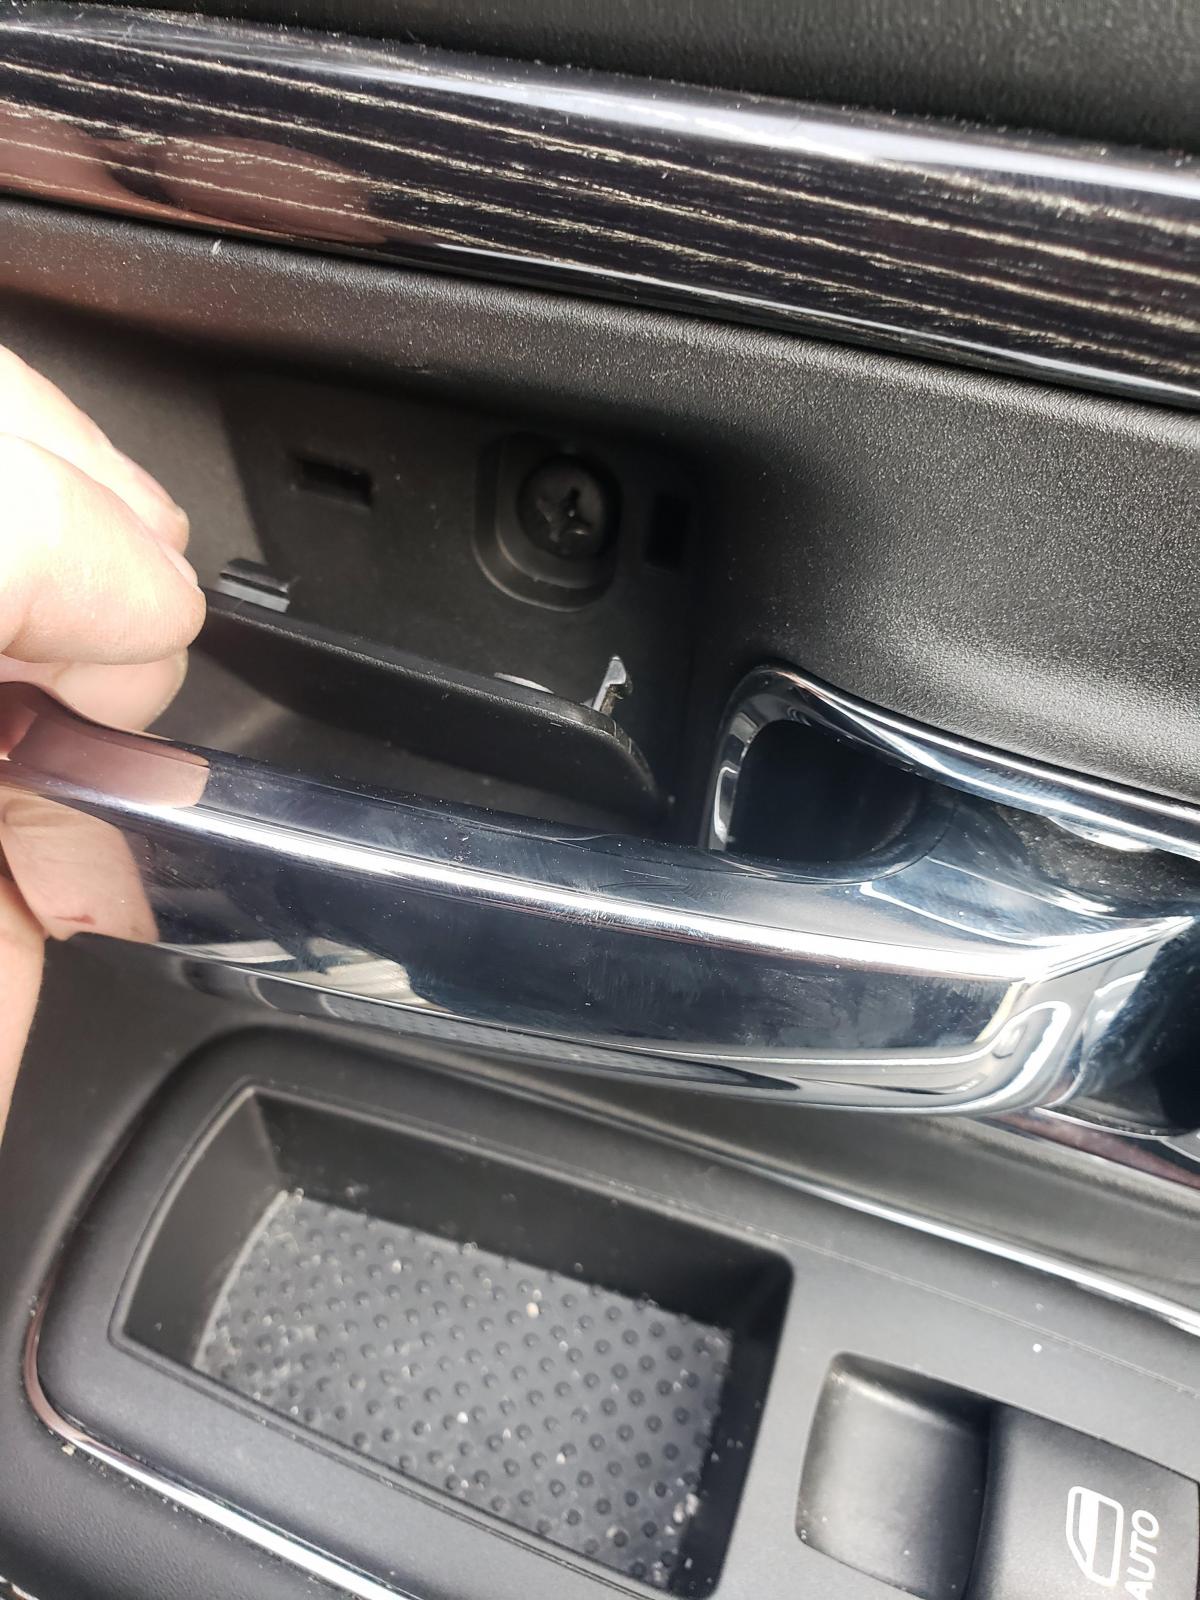
For removing the plastic insert, i used my 90 degree pick, it slips in easily and can grab the insert to remove it.
Now remove this plastic piece from behind the door handle, this picture is from one of the other doors as i was doing other things in the doors at this point in time, and snapped photos as i remembered i was supposed to take a photo of that. Behind this panel is a phillips head screw, remove this aswell.
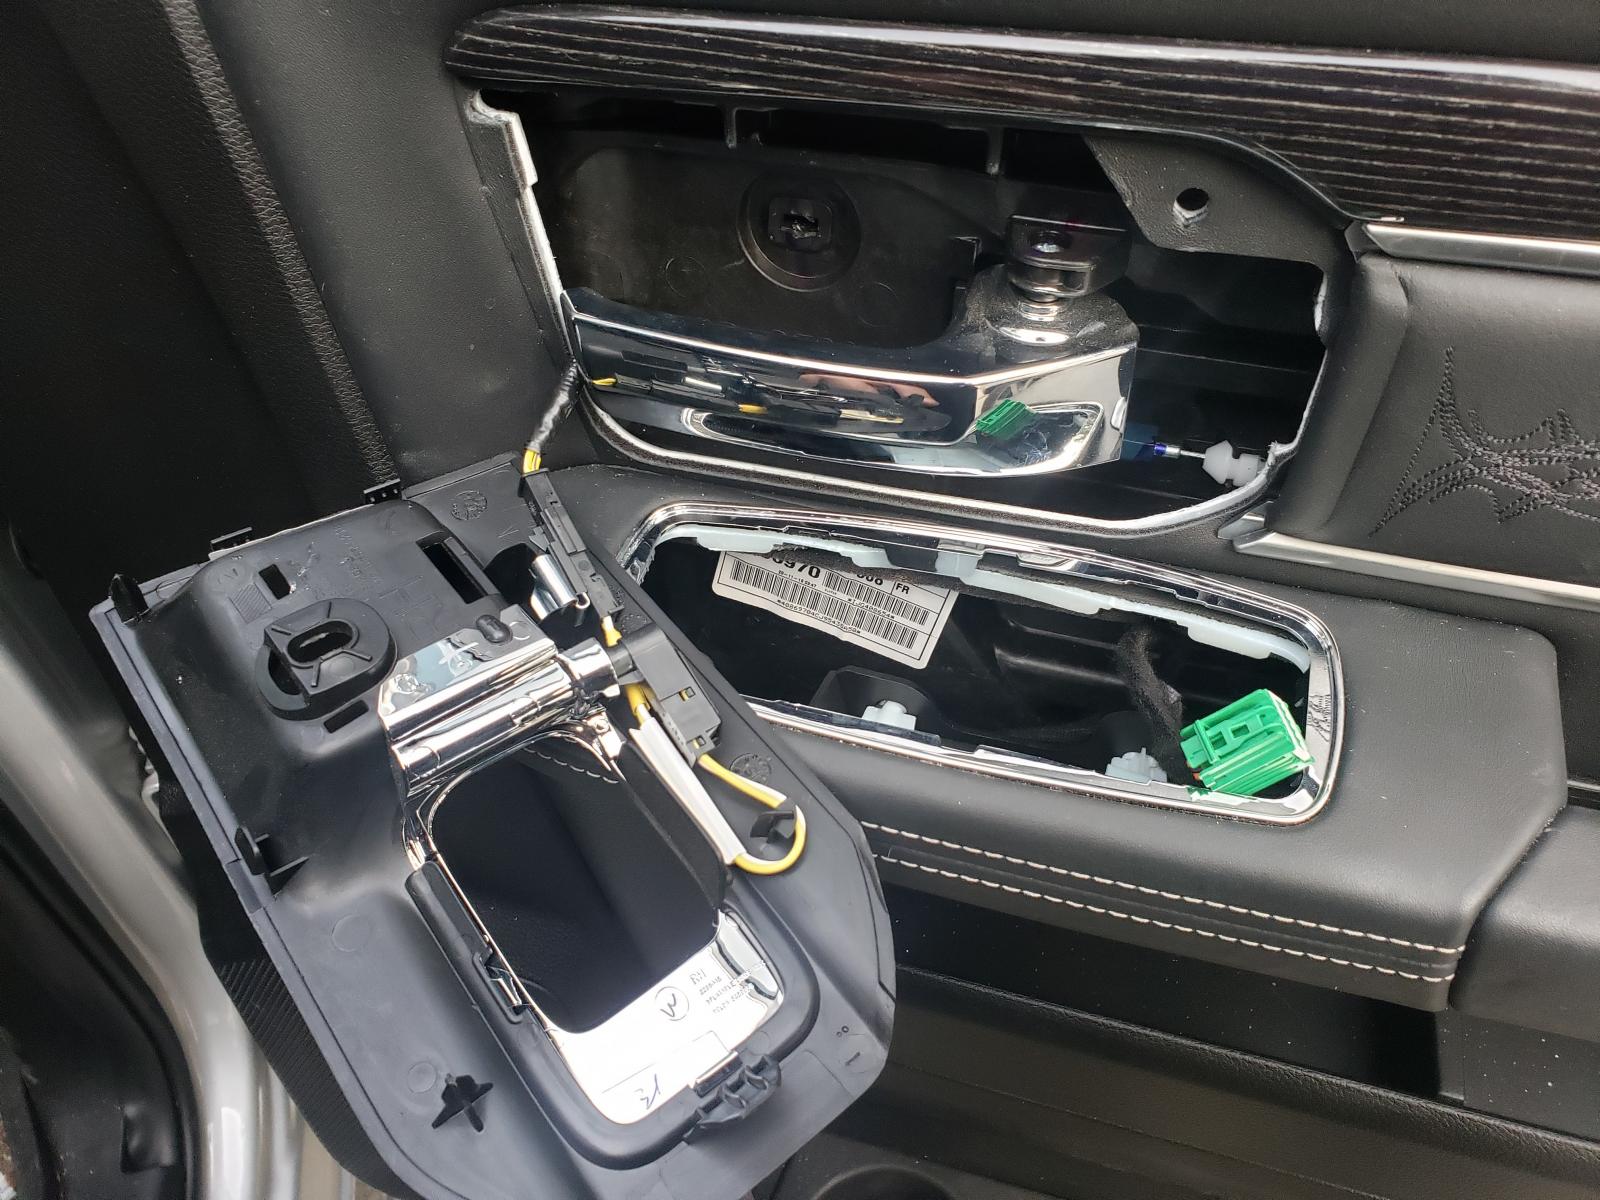
Now all the fasteners are out of the door, but you aren't done yet. Remove the trim panel that goes behind the door handle. I use my pick and insert it into one of the slots, to pull it forward and out. It comes out pretty easily, then slide it out and around your door handle. You also need to remove your window switch panel, this pries upward nice and easily. Unhook the connector, and set the window switches aside. You do not need to fully remove the door handle trim piece. For vehicles with the LED interior lighting group, there will be a wire running up to it, this can be left attached, and you can slide the trim piece through the opening in the door panel once removed.
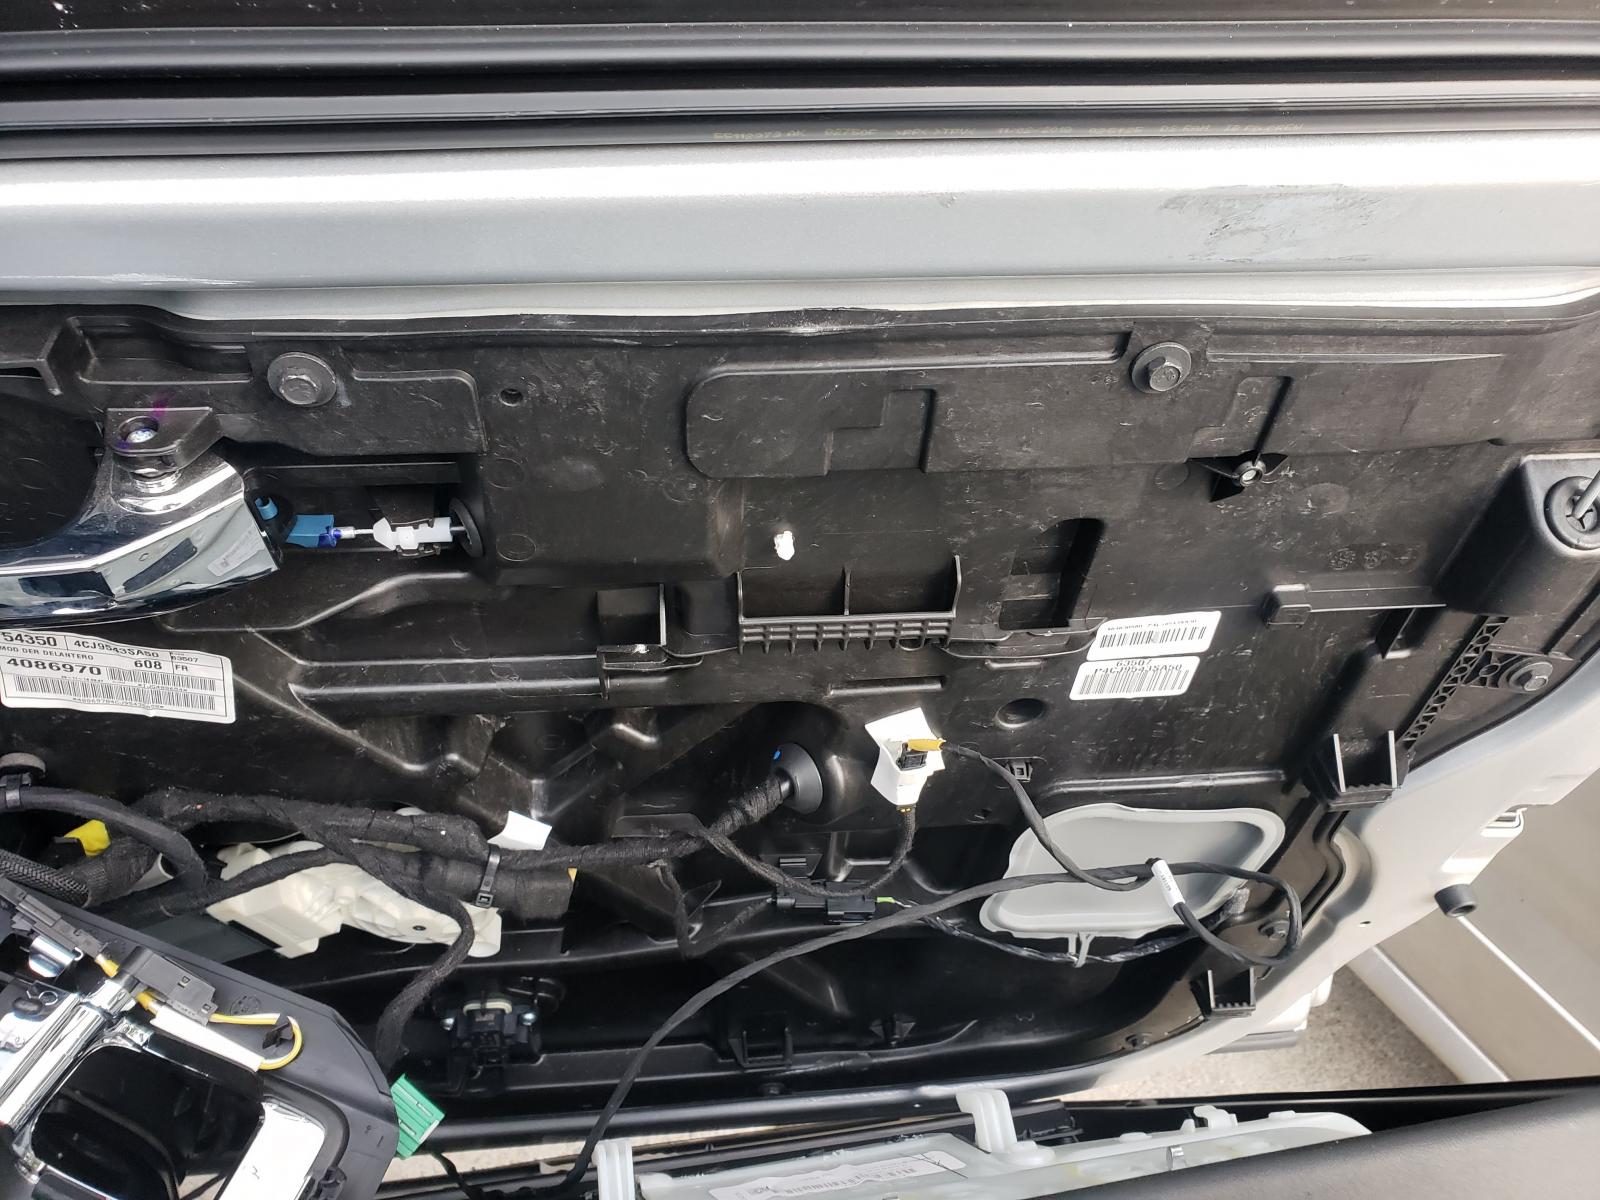
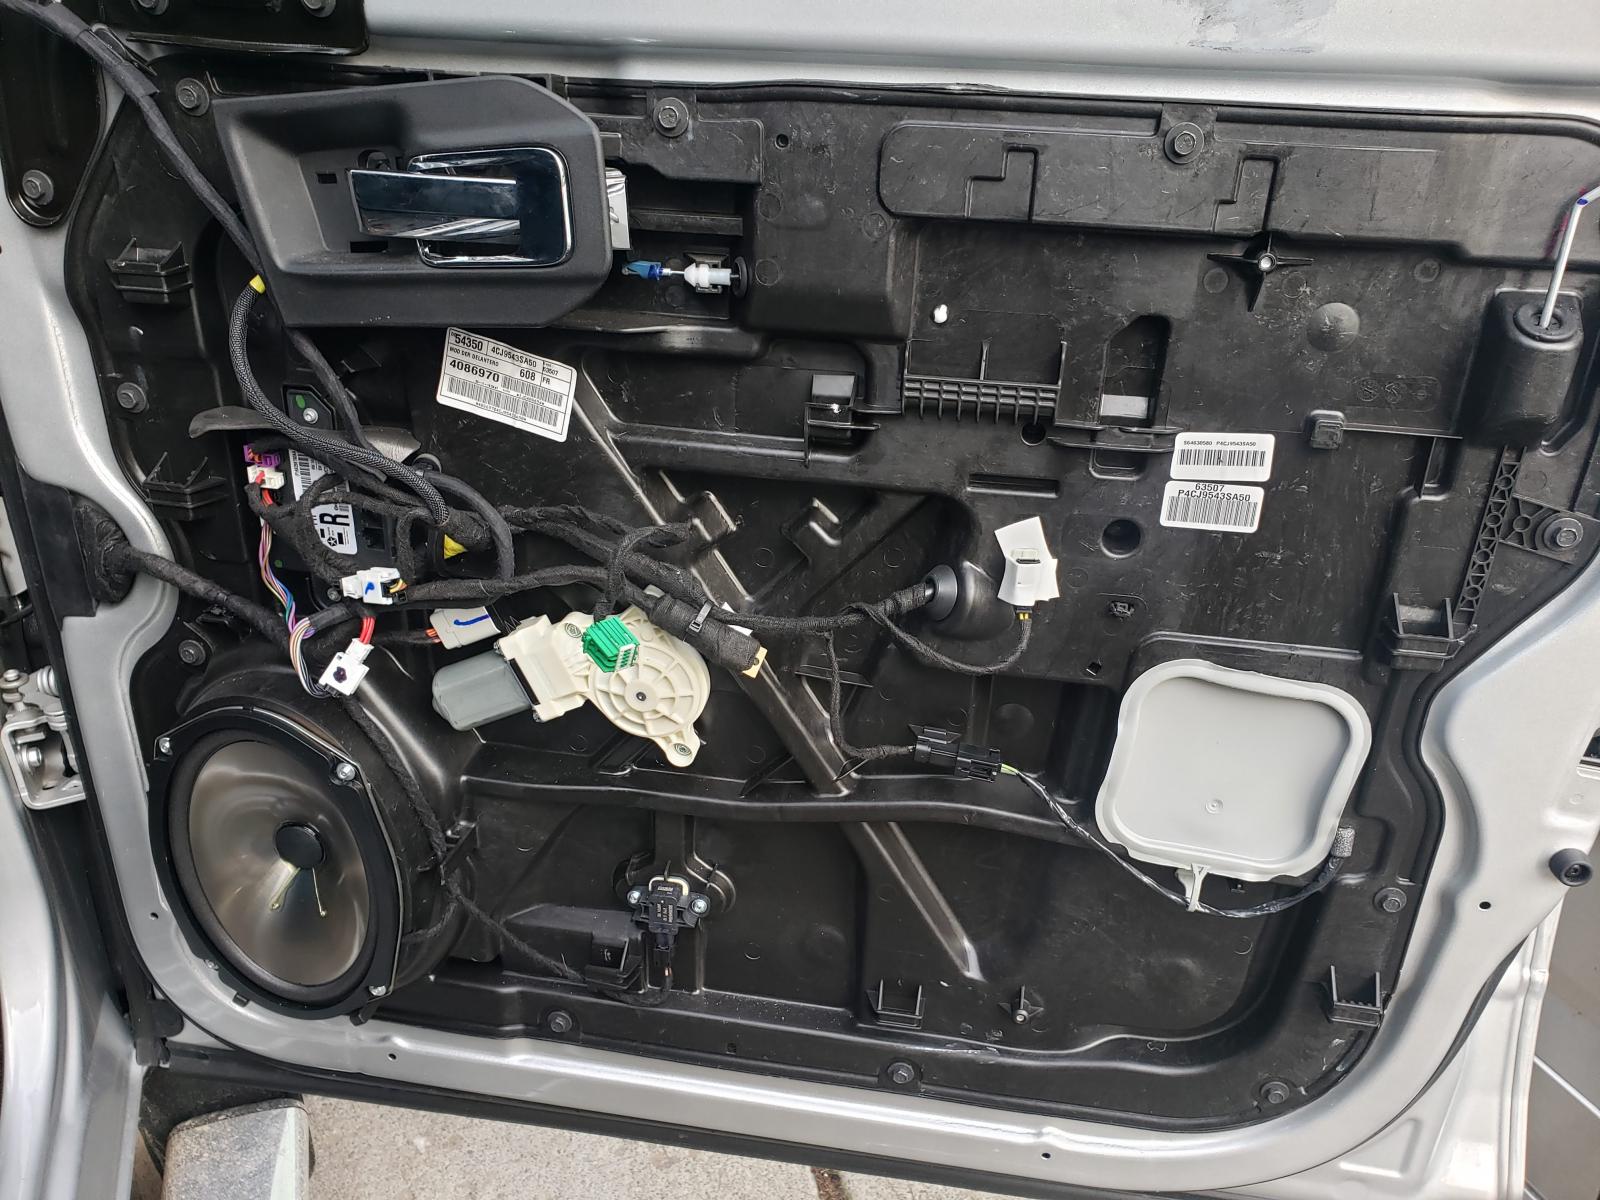
Now pull the entire door panel up, and the panel will come free. There are no plastic Christmas trees to break and replace and cuss at because that one in the center won't pop off and you have to find some way of popped it out without breaking anything...the entire panel just slides up out of place, or down into place. All around, a great panel design. Once removed, you panel will look like this. At this point, slide the door handle trim piece around the door handle to keep it out of the way, and you are already done with the hard part of this job. Note, if you have the interior LEDs, there is one more harness to disconnect once you pull the door panel off. there is plenty of wire there, so you don't have to worry about snagging anything. Towards the rear of the door is the connector, facing up. It easily disconnects to separate the harness. Make sure to plug this back in during reassembly

There are no reviews to display.