


KDP Repair/Timing Cover Leaks
This will go over fixing the killer dowel pin and/or fixing the oil leaks that the timing cover is renowned for.
I know I have things still on it in the video and did things backwards and stuff but do it the way I list and it will be a lot easier, I just took everything off that I needed to come off but doing it the way I list will save you from having to deal with a few things I ran into or it will keep you from getting close to messing something up
- Take the windshield washer fluid and overflow tank off of the radiator shroud and set them aside. They come off by pulling in the middle and pushing up. There are connections on the bottom of the washer fluid tank.
- Take the Fan and radiator shroud off. Fan nut is 1-7/16” and left hand thread (if you are standing in front of the truck, turn the fan clockwise to loosen). The shroud has four 10mm bolts on the sides. The bottom of the shroud has tabs that go into slots on the radiator, so it has to come straight up to pull it out of the slots. The fan and shroud come off together, it is hard to get the fan off by itself.
- Loosen the six 10mm fan pulley bolts, but do not remove, just loosen them.
- Take off the serpentine belt.
- Now you can take the fan pulley bolts all the way out and set the pulley aside.
- Take the fan pulley bracket off, four 10mm bolts.
- Take the RPM sensor off by taking the bolts out. There will be the sensor, a spacer, and a wire retainer thing. The sensor has a magnet in it so it will attract to the damper. Just set the sensor off to the side, no need to disconnect any wires. When reinstalling, get a feeler gauge and just let the RPM sensor lay on top of the thickest feeler. 0.030” is I what I used. Try to keep it level with the damper (yes, the damper goes on before you put the RPM sensor back on).
- Take the damper off, four 15mm bolts. If you have a manual you can put it in 5th and that will stop the engine. You will have to twist the damper and jiggle it around but try to pull it off as straight as you can. Look at the lines on damper, they should line up, if they are off, you know it is worn out. When reinstalling, use locktite and tighten to 92 ft.lbs.
- Take the bolt that holds the oil fill tube off, the one that goes into the intake manifold. You should be able to leave everything else on.
- Take all the timing cover bolts out, there are a million of them and some are long and some are short, all should be 10mm. When reinstalling, put all the long ones in first since there aren’t as many. The long ones also have a smooth hole since they have no threads for the first inch. Tighten the bolts to 18 ft. lbs. Make sure you put the cover back on going straight so you don’t mess up the crank seal.
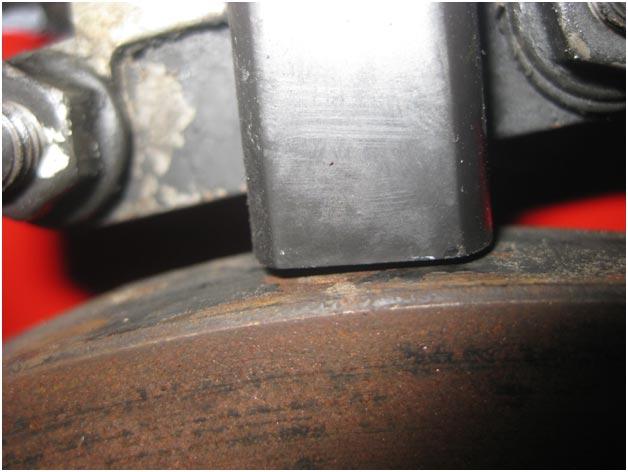
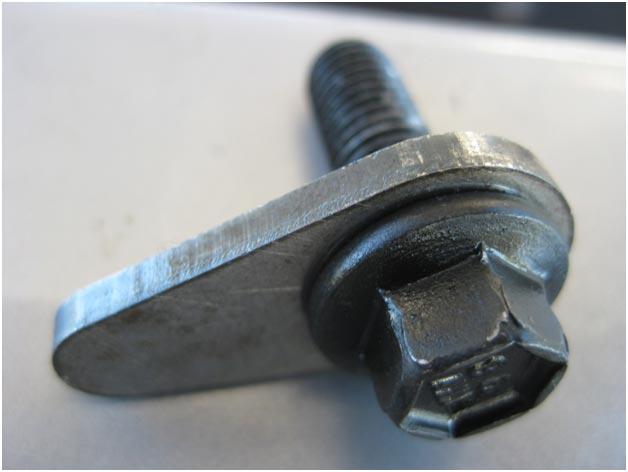
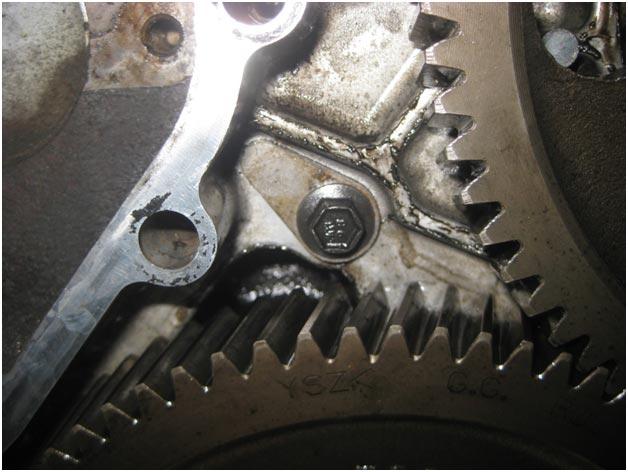
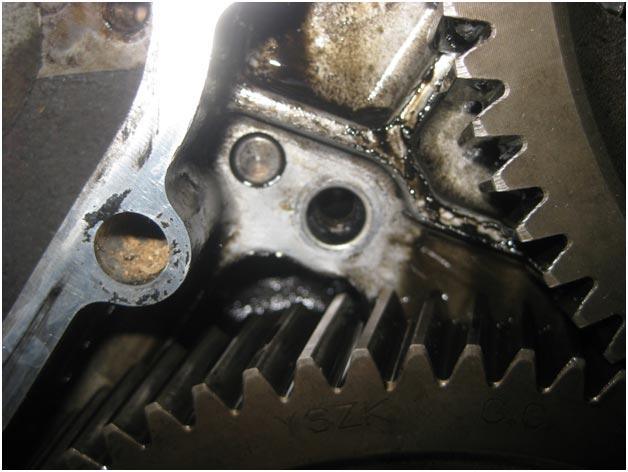
- Fix KDP, tab it. Clean off the bolt and put locktite on it. Try to dry the hole that bolt goes in.
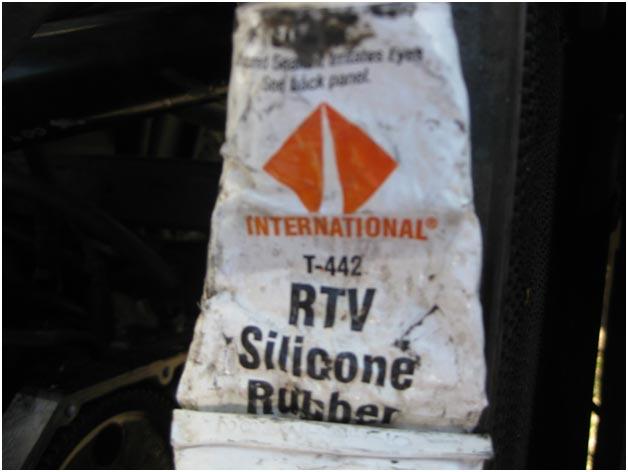
Scrape off old gasket/silicone and put new one on. I used this international T442 that supposedly will keep it from ever leaking again, so far so good. If you use it you have to get it on quick (within 5 min) and put the cover back on the truck and tighten all the bolts finger tight (should ooze out a tiny bit, you can just use a deep well socket by itself to help get it finger tight). After another 5 min, torque to spec (18 ft. lbs.).
- Optional: I tapped all the bolt holes to try and dig the old lock tite out. If you want to do this it is an M8-1.25 tap. Make sure to use oil on the tap and blow the holes out and blow the chips off the tap after each hole.
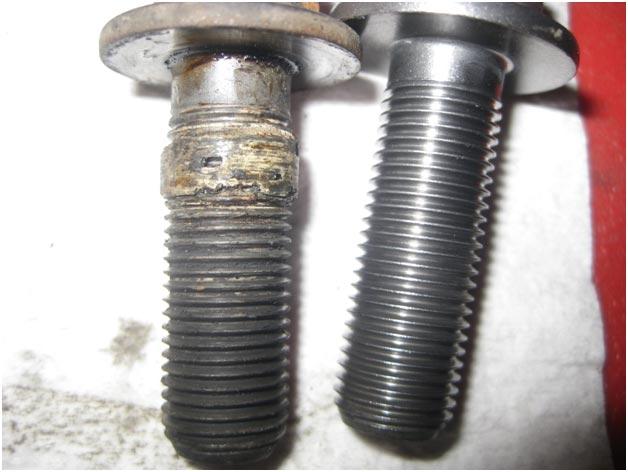
- Optional: I also wire brushed every single bolt. That way I don’t have all this old lock tite that won’t do me any good and sure won’t help the new lock tite out.


There are no reviews to display.