


After replacing some front end parts, I found that my previously aligned truck was steering horribly and needing a re alignment. I decided to try doing it myself rather than paying a local dude to do it for me.
There are three measurements and specifications for an alignment. Caster, camber, and toe. You can google those terms for information, but this article will outline a procedure to adjust toe. Our trucks have a caster angle set which should be appropriate and as long as the control arm bushings are in good repair the angle should not change. Some like adding additional caster using the cams present in the rear mounts of the control arms. Camber is not adjustable on our trucks without special offset ball joints, and also should not need changed unless something is very out of whack or you are customizing your truck for a specific and rare application.
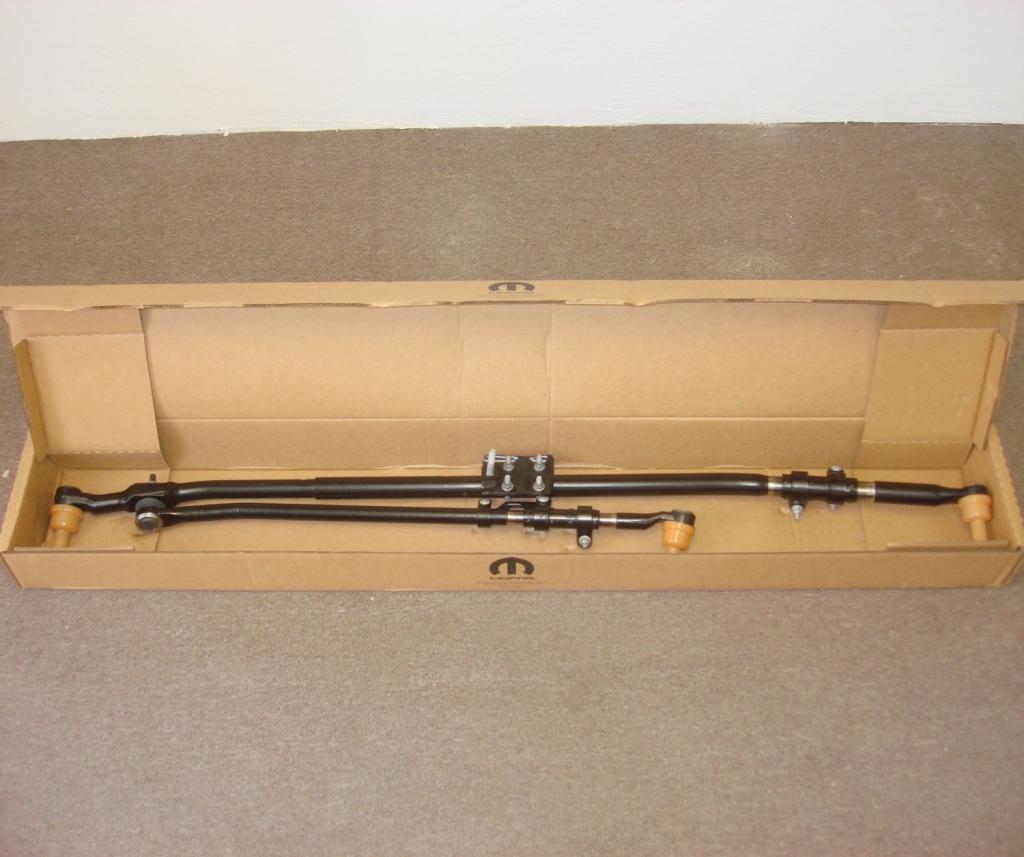
Positive toe, with the wheels fronts pointing slightly inward, creates some stability in the steering and is generally desired. Negative toe, is generally bad and can create some touchy or downright dangerous handling. However, there are some guys who like a small amount of negative toe when towing heavy loads where the truck will squat. The reason for this is on early 3rd gen and older trucks, the steering linkage used a Y type link system (see figure 1) that will change the toe as a function of ride height. The newer trucks, or ones like mine that have an HD steering upgrade kit (see figure 2 & 3) the toe will not change as a function of ride height. If you haven't upgraded the steering to an HD type, I highly recommend it.
Traditionally, many automotive manuals specified a toe angle in fractions of an inch with the intention for the mechanic to measure the toe at a specific point like on the front and rear of the tires. However, now they use degrees and give a specified angle. For our 2nd Gen Trucks, the OEM spec for steering toe is 0.10 degrees of total toe. Total toe is defined as the total angle of toe. Seems simple, right? So if the spec is 0.10 degrees of total toe, the right and left tire would be toed in at half that angle, at 0.05 degrees of toe (0.50 + 0.50 = 0.10). This is an important definition, so as to not put double or half the toe required.
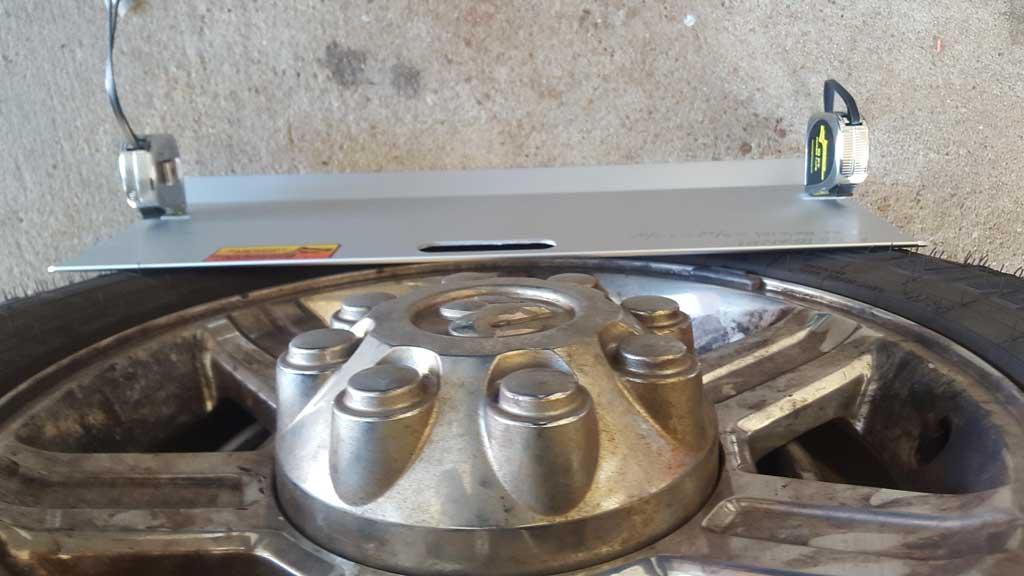
Professional shops use a light & laser system to measure the angles quickly and accurately. I used a Longacre wheel alignment kit, though you can make a similar kit with metal plates. For $60 delivered to my door, the Longacre plates were too easy to pass up. The system is essentially a plate and two tape measures. If you make your own, use two tape measures of the exact same brand and type. It will save you a lot of hassle. Also, if you can get tapes that have fine (1/16th or better) measurements up to 10 ft it will be helpful. The Longacre tapes have the fine measurements necessary to their full 10 ft length.
Figure 1 Light Duty Steering Linkage
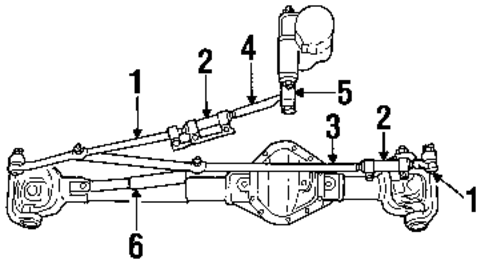
Figure 2 Heavy Duty Steering Linkage
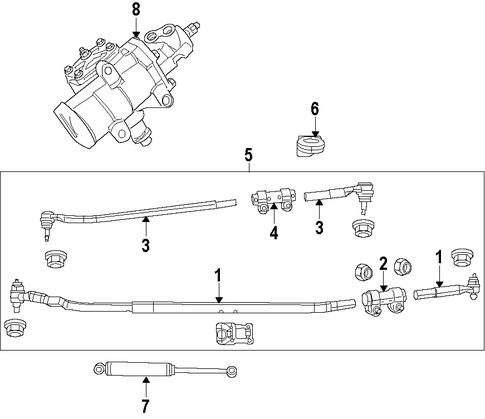
Figure 3 Heavy Duty Steering Linkage
Alignment Procedure
-
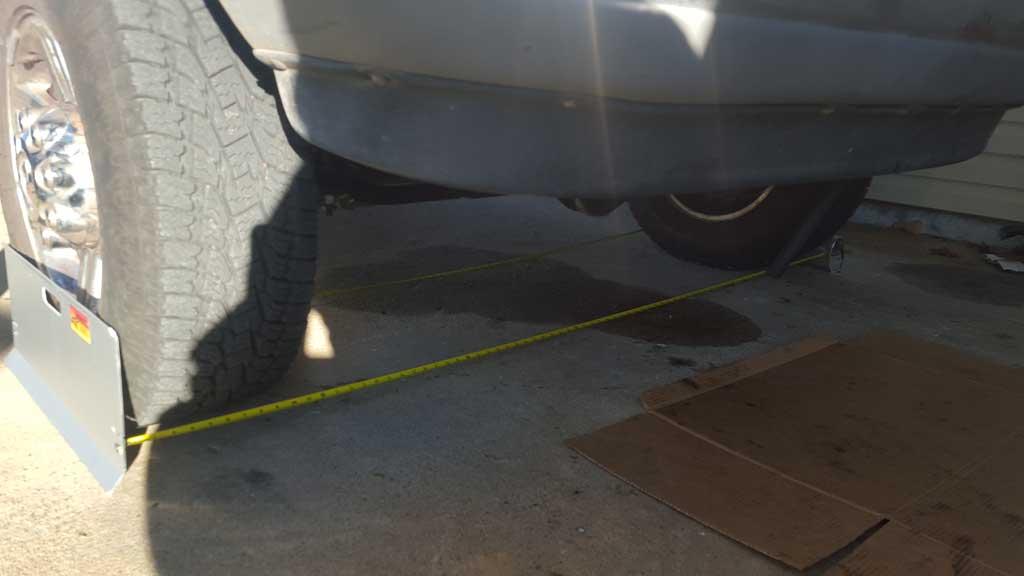
Pull the truck straight ahead into the work area on a level hard surface. Don't use dirt. Don't turn the wheel. You want the tires to be straight and not twisted.
- Note: if it is WAY out of whack, turn the wheel until the passenger side tire is straight and then straighten the steering wheel with the upper sleeve (see part 4 on figure 2). Then jack up the passenger tire and get the drivers side tire eyeball close by adjusting the tie rod adjustment sleeve (see part 2 on above figure 2).
- Set the plates against the tires so that they are even and not uneven due to lettering or the usual bulge at the base of the tire. You may need to air the tire up some or play with the angle of the plates to make the bulge at the base of the tire minimal.
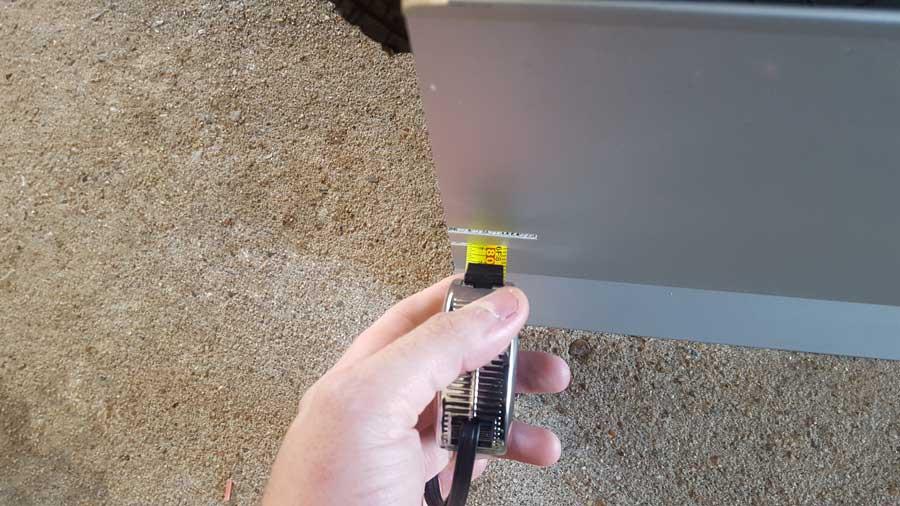
- Set up your tape measures and calculate the difference between the front and rear tape. I was very careful to keep the same amount of tension on each tape (two handed ordeal) and read off the measurements (see figure 4 & 5)
- Subtract the back from the front and compare to the attached tables
- Adjust the tie rod adjustment sleeve in or out towards your target measurement.
- Pull the truck ahead several feet to unload the twist in the tires (if you have big adjustments you can lift up the drivers side with a jack and dial in a big adjustment before returning to do fine adjustment)
- Keep measuring, adjusting, and pulling the truck ahead until it is aligned and the numbers are within spec.
- Lastly, recheck the steering wheel center, and fine adjust if necessary and tighten it all up.
Figure 4
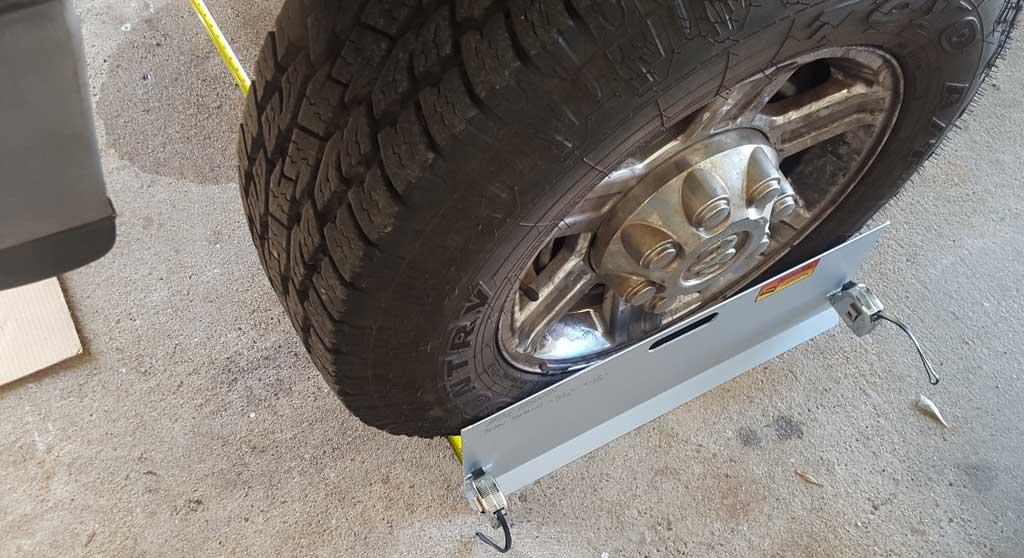
Figure 5
How to setup your plates
Longacre plates, home made plates, or whatever, you need to know the distance between the two tape measures. Measure it and use the table attached to find the correct r value. Then measure with the tape measures between the plates. It is that simple.

Notes:
- Your tie rod adjustment sleeve may be stiff. I replaced my entire linkage with the HD kit, but you may need to do a lot of fiddling with the sleeve with some penetrating oil and working it back and forth to get it free. Several techniques I didn't try were to use a bolt slightly larger than the gap on the tie rod to separate it, then remove and clean it then reassemble, get an expensive set of tie rod sleeve adjustment tools, or to use a lot of BIG wrenches and pipe wrenches.
- There is a key way/slot inside the sleeve between the two ends of the tie rod to keep them aligned and straight.
- See the HD steering article for more HD details.
Tables are attached.
-
 2
2
There are no reviews to display.