
jamman
Unpaid Member
-
Joined
-
Last visited
Everything posted by jamman
-
Thanks for the welcome back. I've had my head down in books for school for the last 2-3 years. I just graduated last month and have a job lined up. So I will finally have the money to do the needed work to my truck. And there is a list I love my truck, but sometimes wonder if I should be doing this. But If I'm going to keep it, I want it dependable. While I'm in here, I'm getting used to the new site design. How is the best way to search the site? Or is there an organization style that I'm not seeing? Btw, I have a '99 and it is stock other than the BHAF. Off to look up FASS pumps...
-
I haven't been on the boards for a long time. What are the best options for the lift pump? I've never done it on my truck and I know that I need to soon.
-
Thanks so much for the kind words, dripley. I can't tell you how much I appreciate the help of good guys like you and the others when you get in this sort of situation.Now there you go ruining my plan for getting done quickly!!!! ;) Ok, you're probably right. That means I pull the assemblies back out and see what I get. HEY! If I were to go and stick the hose up in that shaft while it was all put together, do you think it would SAFELY wash out those shaft tubes??? If I pull the assembly, how should I clean/polish/smooth that axle area where the seals have marked it up??I could not find the spacers. I also didn't try real hard. The parts store told me that would be a part you have to get from the OEM. I know what that means! Cha-CHING! So I'll have to use the pieces, er, spacers that I do have.I am seriously considering searching the junkyards for a front axle and the other attachments to replace mine as I've had soooo much corrosion. I know that if I max this thing out(and I work construction for myself) that I will likely break something at some point.Any and all suggestions or insights on any of this is still appreciated.
-
On the Rustoleum. I used the WalMart brand. But the instructions on it said that if the corrosion was severe, use primer. I used one can of primer, so no great loss. Actually, priming it helped me see some loose areas. I probably wasted my time, but I feel a little better.I was disturbed by the ring on the shaft. I tried using brake cleaner on one and it didn't come off readily nor scratch off with basic fingernail action. I decided to leave it until someone chimed in. I suppose I can still pull them out and clean them up. I thought about using some emery cloth on them, but again wasn't certain. I also was getting in a hurry with the clock ticking on me.I think I will leave off the shields until I have to break into this stuff again. I'm going to plan on washing out this area a little more often after seeing how it is put together. I've wondered about pointing the house at those axles to gently flood them once in a while after it is all together to try and get the particulate out.You wouldn't think it would take that much more money to actually coat these parts, grease them like they ought to and design it correctly. I really like the powerplant. The truck leaves a lot to be desired due to corporate greed keeping things from being put together like they ought to be. But I'm going to work with it and run the legs off this beast.Thanks for the help. Think I'll just tackle it again in daylight. I know I'm going nuts on the photos, but thought if there are any other newbies behind me it might help them out to not make the same mistakes and to weigh their options.Oh, btw, I was at Lowe's this evening picking up 1/4" Vinyl tubing for bleeding the brakes and blue loctite. It was blue or red, and I remembered red is more permanent.
-
I had limited time to work on this today. Here is the picture of my stopping point as of last night and starting point today. First, shoot some paint on the primed knuckles and other parts. I then attacked the axle shafts. After looking them over, I decided not to replace the joints in them. I've got to get done and they looked pretty good and felt tight. They aren't brand new, but good enough for now. I took the brass wheel to them and got them cleaned up pretty good. Then I shot them with the black rust paint. Use your imagination. ;) I decided to reassemble everything and put it in as an assembly, the hub/rotor/axle shaft. First order of business, reattach the hub to the rotors. I started to, but was using the brass pin and realized I was getting no where fast. Not having done this and not wanting to ruin parts and have to go spend several hundred over again, I elected to go to a local shop and have him drive in the studs. Won't do that again! He pulled out his kit, with spacers and such, then took his impact with a chisel point(as none of his bits were long enough) and drove them in like that. If I do it again, an old hub or rotor will be my spacer off the floor. Then I can use the electric rotary hammer with a dull bit or an impact and drive them home. Hey, $30 lesson and no ruined parts. Here they are, hub and rotor together. Interestingly, the hub that was left that I'm using had a rubber seal on it. The new hub doesn't. Oh, I forgot to mention that I brass wire wheeled all the pertinent parts of the old hub, all the contacting bearing surfaces and anything that would try and seize up. Here is the before and after of some of that. Let me break this into another post. --- Update to the previous post... So most everything is clean and ready. But I don't like the junk in the driver side axle shaft. It was extra dirty. There was dirt/grime around the seal area. Don't know if you can see it. I want some of that out so I don't catch it on the axle grease on the shaft end. How? Here's my solution. I keep redoing those and wipe out the shaft and I took a clean one and used my light and gently went in and cleaned right at the mouth of the seal, but not putting it way up in there. It looked a little better. So, put the assemblies together. Driverside first. Prep the parts: Lock them together with the castle axle nut and here is the assembly lubed up and ready to go! Prep the knuckle area. Finished product. Now, who was paying attention and realized what I did wrong? I just realized it a little while ago. Dust shields. Do I need to take this apart and put in that shield and the spacer? I don't want to, but if I need to, I will. I have not torqued anything up yet, just tightened. Now, when I was working on the passenger side and got it done I saw this: I'm not exactly certain what part of the front end assemblage this is, but the broken rubber makes me wonder if I need to knock that apart and fix it. Thoughts? Either tonight or tomorrow if I don't have to take it apart and put on the shields, I will torque the nuts, then put on the calipers, bleed the brakes, top the diff fluid, can't forget to put on the tires, and then test her out. Got to look up the torque specs for those 4 bolts that hold the hub. I know the axle nut is 175#. Caliper bolts are what torque? And where am I supposed to put loctite and which one? I've got the anti-seize for the caliper assembly and need to make sure I put it on all necessary surfaces. What am I missing guys?
-
I'm in for the night. Here is what little more I got done: I went and beat on the metal some more to knock stuff loose. Then I took the flapper wheel(great idea) and went after things. I used a brass wire wheel on the inner area of the hub hole. And you'll notice that in fooling with things I went ahead and pulled the axle shaft out. After all of that I went ahead and hit areas with the primer. I will then hit that with the rust stopper paint. Then I'll hit the bearing surfaces with the flapper and brass wheel again prior to reloading this thing. I had to pick up other supplies and a new 1/2" drive socket as the chinese cheapie that I bought some years ago just was slipping time after time after time. I dropped $400 at the parts store(including expensive ball joint press if I had to replace the joints) and another almost $100 between Wally world for fluids/paint/towels and Lowe's for sandpaper/wheel/emery cloth/ratchet. I'm wondering what this would have cost to have someone do? Anyone hired it out? The other day the quote was at least $300-$400 per side due to all the labor. I know they wouldn't have done all this for that price. Thanks guys
-
Ok, I went and did what I could to edit that post to make the images display. Some of the links aren't coming up blue and I have no idea why, I even redid them getting the link location and putting it back in. Some of them you may have to manually cut and paste. I only bought one hub. The 3yr warranty part was $170 at O'reilly's, and the driver side was obviously replaced not all that long ago. I am just going to have to let it slide at the moment, if I have to break into it later, I know how to do it and it won't be so badly stuck.Russ, as far as I know, there isn't much else to do here. The only upgrade I know of is to take a 3rd gen axle and swap things out. I don't have 1) the axle 2) the money 3) the time 4) the know how. If I've missed something and am missing a cheap but better upgrade, someone PLEASE let me know. I think I may watch for a 3rd gen just so I can put a new axle and knuckle and the brackets on and get rid of all these parts that have had so much corrosion in the undercarriage.Interestingly, we noticed at the parts store when I was looking over the old rotors to see if they were worth turning and salvaging, the "good" one was noted to have a big crack in the hood that extended around 2 or so lugs. NOT safe and very glad I found that.Eating dinner then back out to brush and clean then spray a coat of primer on stuff that I can. It won't be as good as it could be, but I'd like to slow the rust down some.I'll keep you posted!
-
Hello Everyone, time for an update. Here is a picture of the assembly as it was at the end of the day and when I was starting on it this morning. http://i1237.photobucket.com/albums/ff477/jammandiesel/IMAG2734.jpg http://i1237.photobucket.com/albums/ff477/jammandiesel/IMAG2732.jpg http://i1237.photobucket.com/albums/ff477/jammandiesel/IMAG2733.jpg I then took off the axle nut and washer and it pulled apart very easily. When I did, it became obvious this has been gotten into before as this must be copper based anti-seize all over it. Also, those axle nuts were NOT torqued like all the nightmares you hear. http://i1237.photobucket.com/albums/ff477/jammandiesel/IMAG2735.jpg http://i1237.photobucket.com/albums/ff477/jammandiesel/IMAG2736.jpg Here are the new rotor and the old one with the hub in it side by side. http://i1237.photobucket.com/albums/ff477/jammandiesel/IMAG2738.jpg http://i1237.photobucket.com/albums/ff477/jammandiesel/IMAG2739.jpg Then I took a side shot of the old rotor assembly. http://i1237.photobucket.com/albums/ff477/jammandiesel/IMAG2740.jpg I could see no way to pull this thing apart as simply as it was sounding. So I decided to take the new bronze hammer and start knocking out the lug studs past the 4 bolt plate of the back of the hub. I supported it on 2 pieces of 2x4. That has gone quite easily http://i1237.photobucket.com/albums/ff477/jammandiesel/IMAG2742.jpg Once that was done, I could break them apart http://i1237.photobucket.com/albums/ff477/jammandiesel/IMAG2743.jpg http://i1237.photobucket.com/albums/ff477/jammandiesel/IMAG2744.jpg http://i1237.photobucket.com/albums/ff477/jammandiesel/IMAG2745.jpg Ok, back to what I have. Here is the passenger side axle. I took a shot down it. I think I see a little crud on the seal, but no idea how to clean it up for reassembly. I took a paper towel and wiped some of that large stuff out of the end then wadded up some and shoved in there to keep out more crud. http://i1237.photobucket.com/albums/ff477/jammandiesel/IMAG2747.jpg Here is the shaft and head. The U-joints seem to be in fair condition and tight. Still think I should replace them? http://i1237.photobucket.com/albums/ff477/jammandiesel/IMAG2748.jpg http://i1237.photobucket.com/albums/ff477/jammandiesel/IMAG2749.jpg Ok, after all this, I decided to change my approach a little for the driver side. I took some wire and tied the U-Joint to the axle end. I then loosened the 4 bolts that hold the hub(after taking off wheel and caliper) and used the power steering to push on the bolts. I alternated between them to try and push it out more evenly. I also put the shorter extension I have between the bolt head and the back side of the knuckle and not back on a bracket closer to the frame. After it loosened up a good bit, and since I'm putting on new rotors, I then used the bronze hammer to tap on the back of the rotor and finish this up. Here is what I got. http://i1237.photobucket.com/albums/ff477/jammandiesel/IMAG2753.jpg Does anyone know if I can and if I should get new ones of plates/shields? I think the large one is serviceable, but there is a smaller one that is badly corroded and on the passenger side is nearly gone. http://i1237.photobucket.com/albums/ff477/jammandiesel/IMAG2754.jpg I protected the spline end of the shaft to keep my cleaning work of it to a minimum and then proceeded to beat the living daily lights out of the knuckle and such, used the screwdriver and a little bit of a wire brush. I'm going to be using a flap wheel and maybe a powered wire wheel on this stuff later tonight. http://i1237.photobucket.com/albums/ff477/jammandiesel/IMAG2755.jpg http://i1237.photobucket.com/albums/ff477/jammandiesel/IMAG2756.jpg http://i1237.photobucket.com/albums/ff477/jammandiesel/IMAG2757.jpg Now, here is a new wrinkle. I knew the passenger hub wasn't great, but when I got the driver side hub off, I knew I had problems. I'm headed to the part store to see what I can do. The passenger hub doesn't turn as easily as the driver side, the seal is obviously messed up(read: gone) and it's all rusted. Not good. http://i1237.photobucket.com/albums/ff477/jammandiesel/IMAG2758.jpg Now, this is not a super easily just pull it off and go operation. Maybe I'm missing something, but it seems sort of straightforward and sort of convoluted in its hub connection. It seems you've got to take it off that axle stub at minimum just to get a new rotor on. Maybe that's the beauty of it all, it all is connected this way to hold it on the axle and make it trustworthy. I dunno. Anyway, uploading this and going to see about a hub, shield spacer, wire wheel, paint, diff fluid and brake fluid. I can't think what else. Maybe emory paper. If anyone has a suggestion, post and I should get a notification while I'm out. Thanks again!
-
Hi hex,I really appreciate the help. I had searched and found those videos late last night. They helped some. But I hope I don't get over agressive and have to redo some of the parts like those two fellows on the two tone truck. They liked what they are doing, but this isn't a hobby for me!I did watch some things about the seal. Interesting. Now it makes me more comfortable reinserting the shaft and seeing what happens.You would think there would be more year specific videos for all these problems with as many of us dealing with these things.Thanks to all
-
No, don't do that due to my stupidity! I read about those nuts and took the pins out and used the wrench and loosened them up. Then, I guess I may have confused the instruction getting all loose with the 4 bolts on back or something. I thought you were suppose to leave that on to hold the hub together. Here, take a look at this explanation I had found that I was trying to follow: Removing Brake Rotor Many times the rotor will come right off by hitting on it with a soft hammer from behind while rotating it. If it doesn't... Break the big nut lose with the tires on the ground but leave it tight. Jack the side you are working on high to keep differential fluid from running out. Remove wheel and brake caliper. Caliper takes a 3/8" allan head. Remove three of the four bolts that hold the unit bearing on from the back side, they take a 12 point socket. Leave the last bolt most of the way screwed out, wedge a socket with extension in-between the bolt and differential housing, start the engine and turn the steering wheel to pop the bearing off. You will hear it very clearly when it pops. Leaving the big nut tight prevents the bearing form busting apart. During this process keep the axle in it's normal position by stuffing rags under the u-joint. This keeps the axle seal from deforming and possibly leaking. When you have the rotor off pound the studs out with a copper or brass headed hammer or press. Pound the studs into the new rotor using a drift then make sure they are pulled in tight by tightening down a lug nut with a pile of washers under it. Coat the axle stub with anti-seize before putting the bearing/rotor back on so it comes off easy next time. So, maybe it makes some sense why I had that nut on there. I've been afraid of that hub assembly becoming dis-assembled. I think it makes more sense to have that off now, but I try to follow directions as best I can when I'm in unfamiliar waters. I should have thought about going to youtube sooner to get guys videos of these repairs they had done! One more question...since I pulled out this axle, if I look in there and the seals are a little iffy, how do I pull them out to replace them? Wire to reach in there? I'll grab the flashlight and take a look tomorrow. I REALLY appreciate all the help on this.
-
I didn't take them off. I was following the instructions and loosened them but didn't take it off. I thought I had to leave that there to keep the guts all in place.Am I supposed to take the axle castle nut and washer off and then try to release this?
-
Well, it ain't just slipping off anything thus far!Maybe I need more pictures of it to help show the details. I just don't know how the hub and it are put together and where to exert the pressure to break it apart. It is actually hard to see that it's a separate part.It sure seems to me that someone has got to have a '99 they have torn into that is identical to this. We'll see what it looks like tomorrow as I attack it.I'll look at the new rotors closer tomorrow and they should give me more of a clue how this thing is put together.
-
Ok, I'll soak it with PB Blaster or whatever that is called that I have. I don't have a torch. I'll get the puller. I have the Haynes Manual and I have the 2001 or 2 FSM downloaded. But that part of the assembly just doesn't seem clear to me. Maybe once I have it apart it will clear up.
-
hex, Ok, thanks for the encouragement. I am replacing the rotors...ate up the passenger side. Decided to change out the calipers while I had it down(less than $30 each, I believe in good brakes!). This truck lived the earlier part of it's life in the MN/WI area if I remember correctly. Yep, it has some baaaaad rust. Sadly, you saw this after I beat off a LOT of the junk. I got a flap wheel to sand the important stuff. Need to get a wire wheel. Wanted to go ahead and paint this stuff up while I had it disassembled. Any recommendations on the paint? Btw, I bought the large container of anti-sieze. I don't want this headache again. The Castle nut and cotter pin are loose. NO problem there. I tried beating that rotor off when I had it on the wheel and the four bolts that come in from the back side where there. So, let me see if I am following your suggestion. Take the rotor/hub/spindle with part of axle shaft hanging off and re-mount that in the bracket(Knuckle). Maybe put it so the axle shaft is to the side? Then maybe take a block of wood, hold in front of the hub/axle end and whack it with the sledge to start to break the rust seizure? Or am I misunderstanding? I added the block of wood as I am paranoid about hitting the end of that hub where the castle nut is. Thank you, thank you and thank you to all for the help. --- Update to the previous post... Yep, I unbolted the caliper. There were two bolts there that looked like they had anti-seize compound on them, but they were the ones that took the allen head bolts. It got my hopes up that someone had taken this thing apart before and coated other critical items with anti-seize. Oh well. On the gear-puller, I'll go get one. I just want to have an idea are we talking a 4", 6", 36" what? I never had to use them before. Is something like this sufficient? http://www.harborfreight.com/automotive-motorcycle/pullers/8-inch-three-jaw-puller-40970.html And if so, why don't we try that from the get-go? Does anyone have an exploded diagram of this assembly? I haven't seen one that made a lot of sense. I feel like if I could see a good detailed diagram I'd know what I was dealing with and how to attack it. As it is, I'm treading lightly in areas I should be using my maul on, in my opinion. I'm really trying to not have that hub come apart and I have to tear into it and start rebuilding it. Thanks again!
-
Ok, I pulled the caliper. I used the 3/8" allen to back that out. Am I needing to pull the frame the caliper sits on, slides on? I thought it was part of the knuckle setup. I don't know how to get that rotor off the hub. I tried, but I'm just not seeing it. Is it too simple that I'm not seeing it?
-
So, how tough is it doing the U-joints? If I need to do it, now is the time. Mr. Credit Card will get more of a work out.Oh, what size gear puller will that take? And will I have to put that hub back together? I was trying not to take it apart and have to rebuild it. At this point, I just want it to go back together and go back correctly and stay that way a good long time.Thanks for the fast reply.
-
Here is the story: Front brakes grinding. I know I'm goingto find metal to metal. I open it up and....metal on metal. . I did reading in my manual and postedon a site and found out that with the 4x4 hub and such that thisisn't just as simple as a 2wd set up. I find the trick to use asocket and extension to help ease off the rotor and hub assembly. I got the axle nut off or rather, loosened(they were easy.I don't know if someone didn't tighten them back up after servicingbefore or what). But I've got big issues now. I loosened all the nuts and put thesocket and extension on the top one on the front side. I had the wifeturn the wheel and we did that and kept trying. I loosened it somemore. While pressure is on it I beat on the back side of it. I thinkmaybe it's ready. I have her back off the steering and turn off thetruck. I take out the 4 bolts on the back side as I think I'm aboutto pull the rotor and hub off.... I start to pull and notice, “Hey,that U-joint is coming with this!” So I stop and this is where Iam. How up a creek am I? I still haven'tfixed the originial problem(get the rotor off and replace with a newone and a new caliper). What the world do I do about this axle shaft?I jacked up that side to try and keep the diff fluid in, but have Ijacked up seals? Am I now going to have to break into my transfercase? I am a 4x4 neophyte. I've never workedon the actual 4x4 parts before. And of course I'm doing this workwhile broke so I'm trying not to spend anything I don't have to orwouldn't be prudent to go ahead and replace while I'm in there. So, where am I guys? How do I proceed? jamman
-
Hi Mike,I plan on attacking it soon. I have the new caliper brake pads sitting in the cab of the truck, but I've been literally working around the clock. I did most of the actual mechanical work the other day after running after parts all day from about 3 or 4 pm to after 4am then back up and working at 7am and go back to work.I will be studying the ball joint threads and front end threads. I don't know if I need tie rods, shocks, etc, etc, but with as much corrosion and the fact that we are dealing with a 13yr old truck with 140,000 miles on it and run up north how much more wear and tear it had on the front end. I hear a little bumping and such up there and I don't know how to describe it, but it isn't right.Sadly, I still love this truck. I'm ruined to a cummins diesel that I can work on myself. As everyone says, it's about like drugs...addictive. I just hope I can still say that after attacking ball joints.
-
Here's the update on the brake situation. I started dis-assembly of the brake system. I finally found a Napa store that could custom create the brake hose I needed and had one to go into the brake mounted on the truck rail. That had a 10mm x 1.00 thread flare fitting. (FYI, that stupid fitting that goes in the top of the proportioning valve is a m 12x1.25 and is rarer that frog hair) I then had the end of the hose come down to a more standard 3/8” x 24tpi which is the same as the fittings to the brake drums themselves. But as usual for me, things don't go as planned! I found a Tee fitting and made it work. It needs to be more robust, but it is all I could find right now. I plumbed that in and have finally re-plumbed all the rear brake lines. But in trying to get to the bleeder screws, I finally got one out but the other rounded off and broke. Not a single parts store could help me get correct bleeder screws. Finally found one Napa and they said they had it, but it was not the correct size. The one on there were on the small side. Well, I realized I don't have parts and no good option then I call a friend. I have no real experience with brakes, not more than putting new brake pads on the front calipers of a car. In our discussion, I realize something that hadn't hit me before....the bleeders are in the wheel cylinders. It was so rusty and a mess, it looked all part of the drum. I had new wheel cylinders I purchased a while back to do the 1 ton wheel cylinder upgrade. So, I knocked those out and replaced the cylinders. In the process, I realize that I have cracked brake shoes. Let's say that I NOW have much more knowledge about Dodge rear drums! I tore it all down, replaced the shoes and reassembled it. So, we basically have all new brake lines all the way from the front to the rear drums, a bypassed height valve, new rear brake job and new 1 ton GM wheel cylinders. Also rotated the tires in the process. I have not touched the front end other than shoot some grease in a few joints. I drove it a little on the farm, hit the brakes, threw it in reverse, slammed on brakes, rinse and repeat. Brakes are working great, I don't seem to have any leaks(finally!!!) and.....the brake light and ABS light went off! I thought they would have to be reset somewhere else. I'm tickled pink about that one. That is a very condensed version. This took hours upon hours of finding parts and work, over 16 hours on Tuesday alone. I have been to no less that 6 different parts stores messing with this. Do NOT trust them to look up what should be standard items on these trucks. I knew that, but man did I learn it again. Take the part with you. Thanks for the support. I'll try and tell you more as I use the truck in different situations, but it seems great. Even had the trailer hooked up and is working good. I was going to write this up, but I've been so busy. Doesn't seem like it happens that much, either. I found 1 other thread about it. So, let's hope it stays rare.
-
The saga continues... I've tried to include some photos for everyone to visualize this better. I got under there and it's obvious that I had a line fail on the top of what I understand to be the height adjusting brake proportioner. I just planned on buying all new and replacing it. But none of the part stores had it and I called Dodge. $530! Bull!!!! No way I'm going to do that. The two salvage yards were no help, especially the one that said that if it were a diesel they didn't have the part. As I know it, they brake are the same on the gas and diesel 2500, but I could be wrong. I went to the part store to get a short brake line to replace the one that goes into a fitting on the frame and curls over into the proportioning valve. I got out the line and the tube nuts and took them to the store. It APPEARS that Dodge decided to use metric for this. One end is 10mm x 1.0 and the other end appears to be 12mm x 1.0 as well. The store had parts to make the 10mm end adapt to the fitting mounting there on the frame, but nothing to run into the valve. My idea was to just bypass this proportioning valve and run on down as I'm running into nothing but headaches and the line running from the valve on looks in terrible shape. I don't think it will be that big of a deal on this setup. The brake line running from the valve down to the junction in/at the axle presents the next hurdle. This runs to a block mounted on the axle. The brake line runs into the side of the block, not with a threaded fitting, but an integral hydraulic fitting as I don't know how to better describe it. Metal wrapped metal brake lines come out of the right and left side of the block, from threaded holes in it, and run to each drum. Out of the top there is a hex fitting, though it looks like it's not actually able to be turned, like it's part of the block or welded to it. On the top of the hex fitting fitting is a nipple that has a hose that looks to be the differential vent. I don't know what I'm going to run into here as all the other stuff seems to have been metric and one thing after another. I think I need to run all new lines from the point on the frame. I think I can cut that piece off and thread on a new nut or connect to some sort of block and then run a flexible hose from there to the axle. But I don't know what to do about that block setting on the axle. I am open to ideas, experience, proposals, anything. I'm going to be searching salvage yards and seeing if I can cannabalize the parts off a 2500 in a junkyard. Thanks for the help so far. I've just made an album for the pictures of the brake parts. Go take a look at it here: http://s1237.photobucket.com/albums/ff477/jammandiesel/99%20Dodge%20brakes/
-
I moved forward in the interim. Let me tell you what I've found.I filled the reservoir and then pumped the brakes. Nothing. Then powered up and did that. I found quite a puddle under the rear axle. Long story short, since I'm working alone I never saw it actually spewing, but what I think it is is a severely rusted line coming from a unit above the driver side rear drum. I would describe the unit as looking like a miniature master cylinder without the reservoir. I think the steel line from it running to a connection that then runs along the frame. It's a short line. So I'm now dead in the water until I can get to a parts store while it's open.Oh, also... There is a rod running up from the axle to a bracket coming off of that mini master cylinder, or at least it should. It wasn't, but I can connect it and disconnect it at will. What is this rod/bracket/cylinder???I have a couple questions. What nut do you crack on the drum when bleeding the line? I see a large nut at the top of the drum, two identical nuts under it to each side of what I think is the bleeder valve. Then under that valve, there is the steel brake line that is wrapped in a thin wire. Then at the bottom of the drum is a rubber line coming out. The two identical nuts were mounting bolts, or so I thought.The second question I have now, there is a rubber hose that I don't know what it's for. It is running from one of the junctions on top of the rear axle up near the frame. It seems to have a plastic plug in the end of it. It isn't tied to anything. I don't know if it should be connected or tie off somewhere.Thanks!
-
Wow, color me the idjit!!!!Bought the master cylinder, pads, 3 quarts brake fluid, ordered seal kitsto rebuild calipers, getting shocks. Came home, pullef truck into work area. Go to actually check fluid level as I can "see" the level on outside from the darker color level just below full....IT'S EMPTY!!!I'm such a moron, and quite happy to be alive. I don't know how i've had any brakes. Go ahead and call me any name you like, I pulled a basic, stupid stunt here. I can't believe it. First step is always, "check fluid", not "assume like moron." Wow, hopeeveryone gets a free reminder from my mess up. Front of master is empty, looks like rear almost is, maybe a hint of fluid.So, I have a leak somewhere. Do I just add fluid and bleed and see what happens or did I do damage somewhere else?Sincerely,The Village Idiot
-
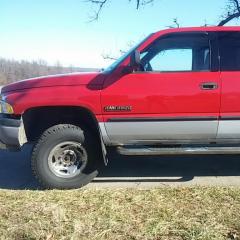
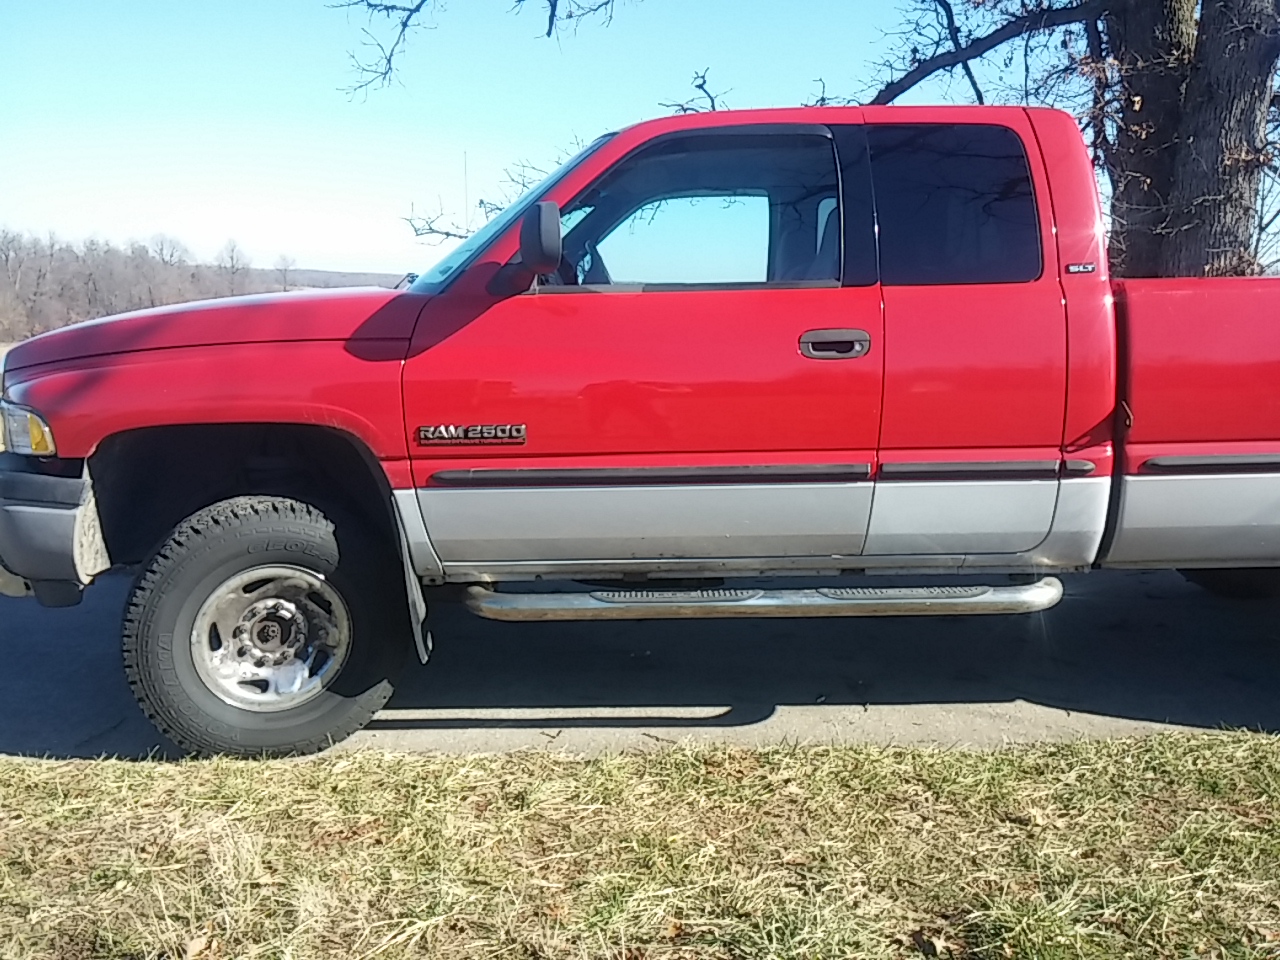
Tires are Bridgestone Dueller A/T LT265/75 R16. They were what were on the truck when I got it.I'm no mechanic and haven't done most of this stuff, so I'm a bit slow. Trying to do the research and read the manual, as I can't tear into this and leave myself stranded. When I move forward, I have to get it done. So, off to do more reading on rebuilding calipers(but thought about finding some from a 3500 like I've read others doing) and replacing ball joints, tie rods, tie rod ends, drag links, shocks.I really appreciate the help!
-
Yes, everything is OE, I've done nothing to the front end.No, I'm overdue for a rotation, which is on the todo list for tomorrow's auto work.So, if I have time and money(how much time for these?), upper and lower ball joints on each side, shocks both sides, what else?Oh, I'm in construction. Will be hauling trailers with supplies/forms/skidsteer. What shocks for just dependable workhorse? I'm not going to the dragstrip.Thanks,jamman
-
Hello everyone, I haven't been in here much lately, too much stuff. But now I have several things happening with the truck. Problem 1 I backed it up into the barn the other day during a downpour, so had to engage 4wd to not spin on the slope. I forgot to disengage as I moved and slid it out without enough time for it to fully do so. I parked it and left it for a few days. I start it up and bring it out and slide it out of 4x but I notice that my brake warning light never turned off, nor did my ABS dummy light. Now, my brakes were working, but the pedal travels a fair amount before I really find resistance. I'm not certain they are working at 100%. I've had a lot of brake dust on the front passenger side tire, just as extra info. It does seem to pull to the right. Problem 2 Seemingly unrelated, my front tires are really wearing funny. They are a more aggressive tread than pure road tires. I can't seem to find the words to describe the way they are waring, but it's not flat or even, it's different heights all over the tire. I should have taken a picture. There are pointed treads, like triangles pointed at the direction of travel. The points are higher, but further back is worn lower into the tire. Meanwhile, the rear tires are worn evenly across the width of the tire, very differently than the fronts. My thoughts: Problem 1-Seems like maybe my master cylinder may have up and died. So replace the master, do the front brake pads and look at my rotors. Problem 2 – Shocks shot? Replace the shocks. Should I also be doing ball joints at the same time? Never done either, but not afraid to tackle it. Just wondered if while I have it down I should be doing all of it. Seems like I had another thing but it's late and not remembering well. Thanks for any help or thoughts guys. Or, tell me what else I need to tell you to figure this out. jamman