Huge Shout Out to 14Cummins over on CF for this great writeup.
Ok everyone recently I completed a projector retrofit for my old man's 2011.5. I could not find a very good detailed writeup on how to do it so i figured I would make one. This is for Quad headlamps and you will still retain stock high beams.
To complete this retrofit I bought some used housings in the classifieds. That way the truck could remain operational and also I wasn't as nervous about screwing up a housing. Keep in mind this wasn't my truck. I had to repair where the previous owner cracked the mount, but I will tell you how to remove the housings so that won't happen.
Materials I suggest buying everything from "the retrofit source" they have excellent customer service and everything in their kit is all top quality Morimoto parts. Projectors- Mini H1 Stage III projectors Harness-H11 wiring harness Shrouds- I used mini gatlings, they are good for a 'stock' look Bulbs- I suggest getting 4500K bulbs because 4300K is the Kelvin rating with the most usable light Sealant- Add black retro rubber sealant and get a big tube of black silicon sealant. Heat Gun-With temp control knob if you plan to use it for an oven Dremel sanding wheel Solder Gun, Solder, Heat shrink, electrical tape, etc
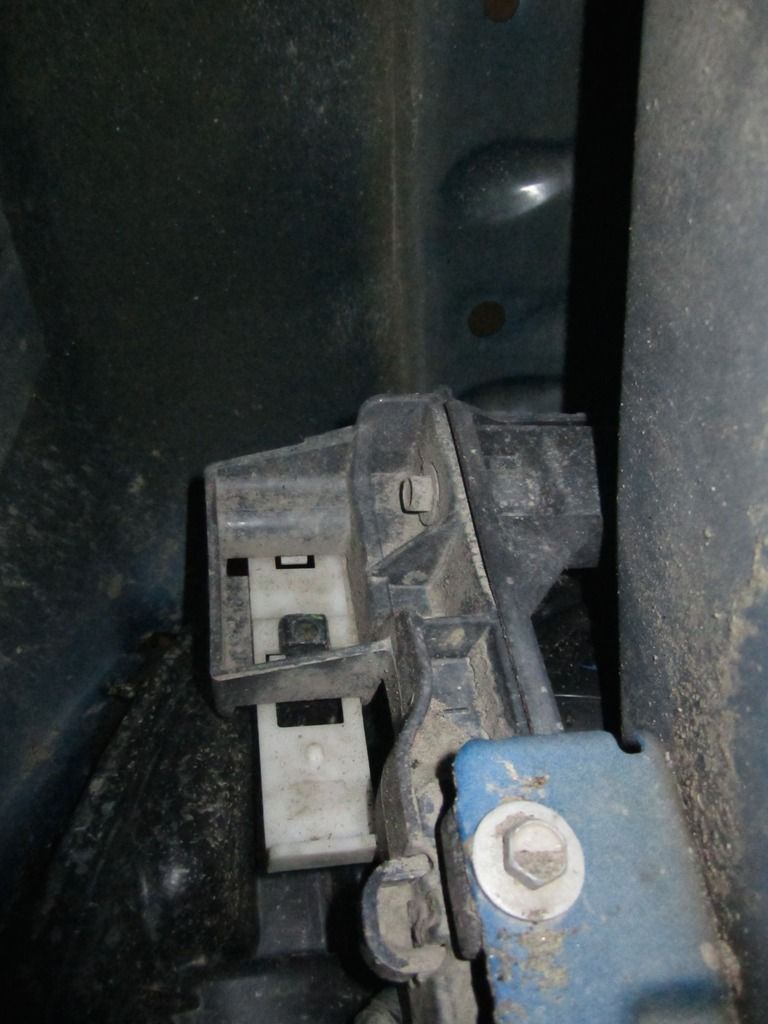
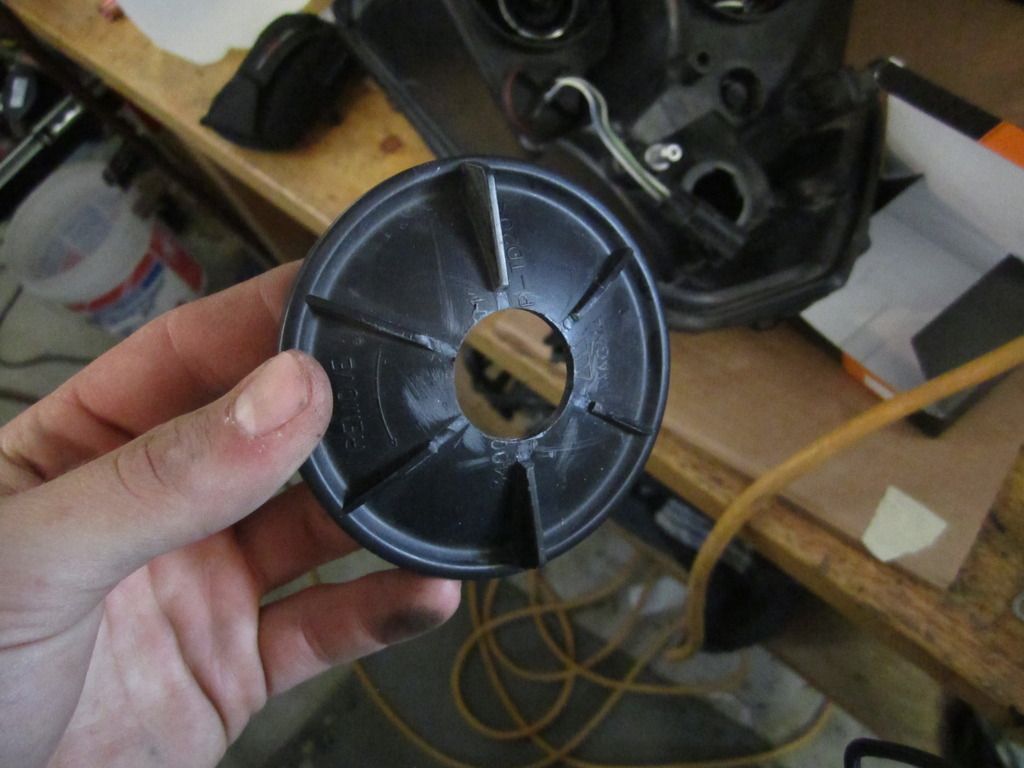
Headlight Removal You may need to remove the headlights to help route wiring so here is how to do it. First remove the two screws from each light, both are near the grill. Open the access hole in the plastic wheel well. Lift the bar show to release the top of the light. Now reach your hand throughout the access hole and push straight out to pop the mount out of the socket. Don't twist the light that will break the mount.
Truck Wiring- I will start with truck wiring first because you will need the truck wired to test the lights/wiring before you seal them up.Once again this is why the retrofit source is nice because they send you a nice wiring harness to help wire the ballasts.
All of my wiring is stripped, soldered, covered with heat shrink and electrical tape.
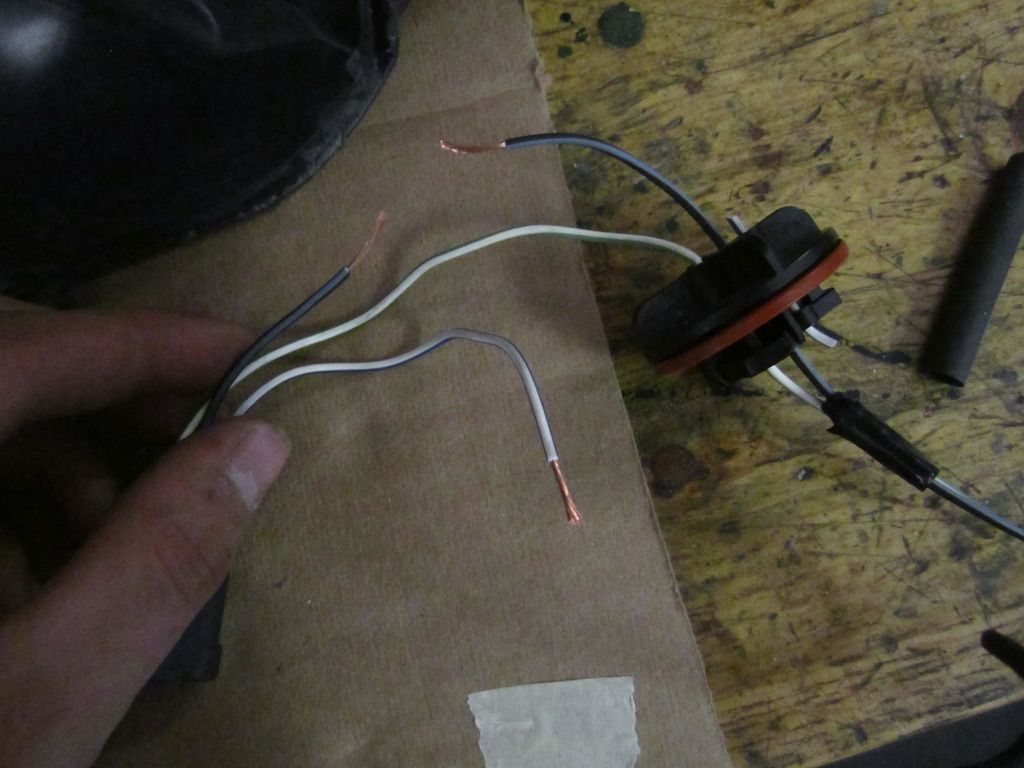
First you will need to adapt a harness for the OEM input. To do this remove one of the stock input wires for the headlight. This is the three wired plug. Trace the power wire that feeds the low beam. Cut both that and the common ground. Splice in the one short adapter that fits the OEM input portion of the harness. You will need to cut off the female end of the plug. I just soldered it right on instead of using a plug. You can remove the power wire from the OEM screw in seal plug, just dab some black silicon in the hole to seal it up.
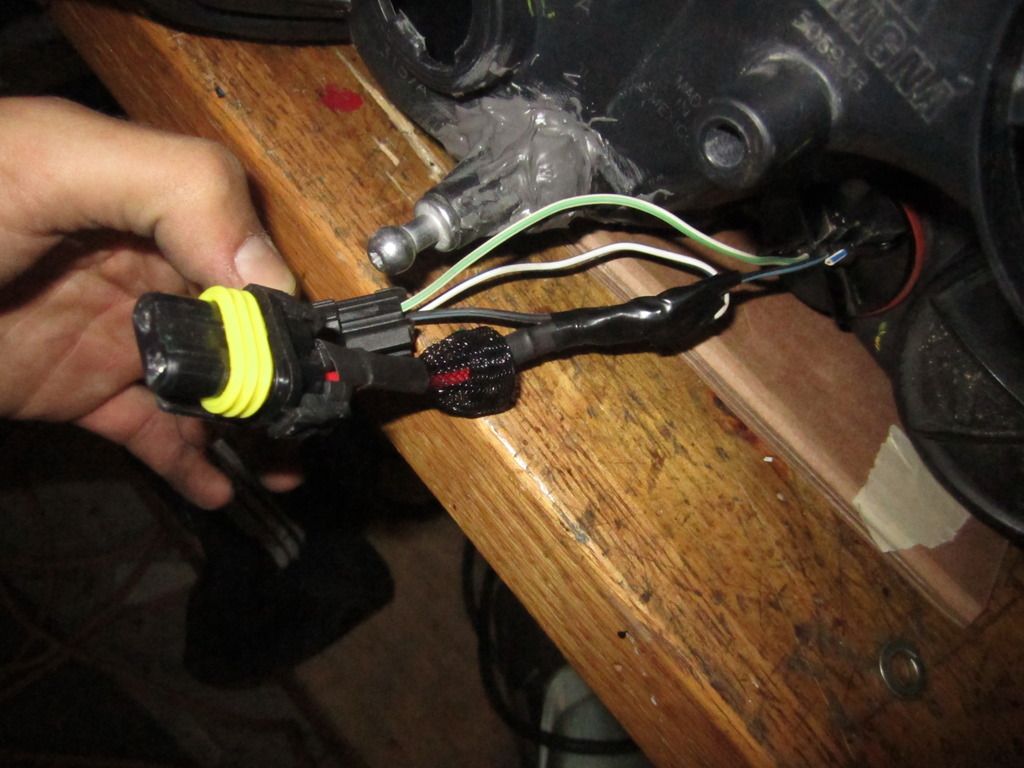
Next you need to install the harness in the truck. You will need to extend one of the ballast power wires. Cut and splice in about 2' of equal gauge wire into the longer ballast power wire. This is just so the wire can reach the other side of the truck from the relay mounting point. I spliced it in after installing in the truck to get the length right.
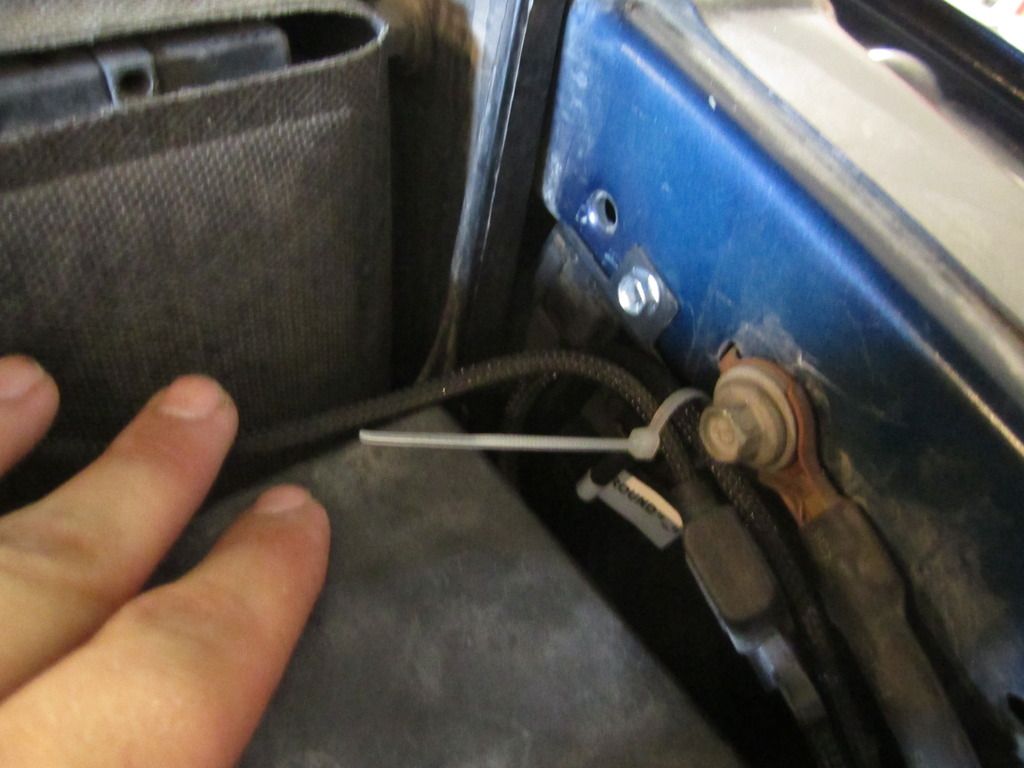
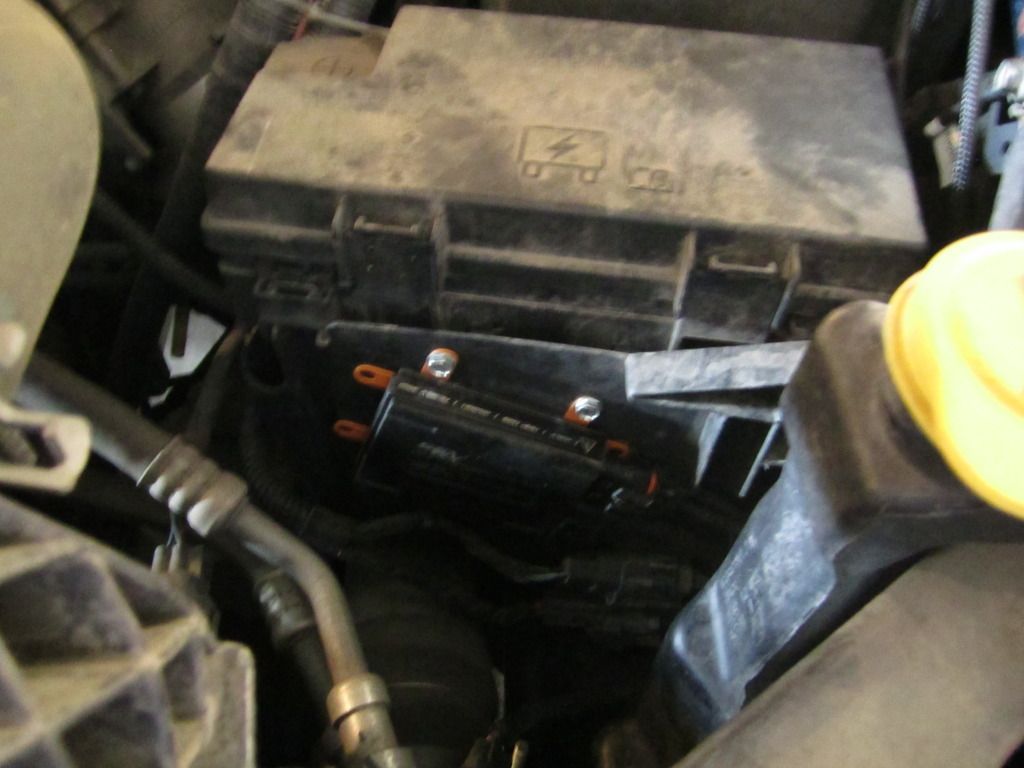
I mounted the relays with a self tapping screw just forward of the driver side battery.
Mount the first ballast on the shroud of the fuse box as see below.
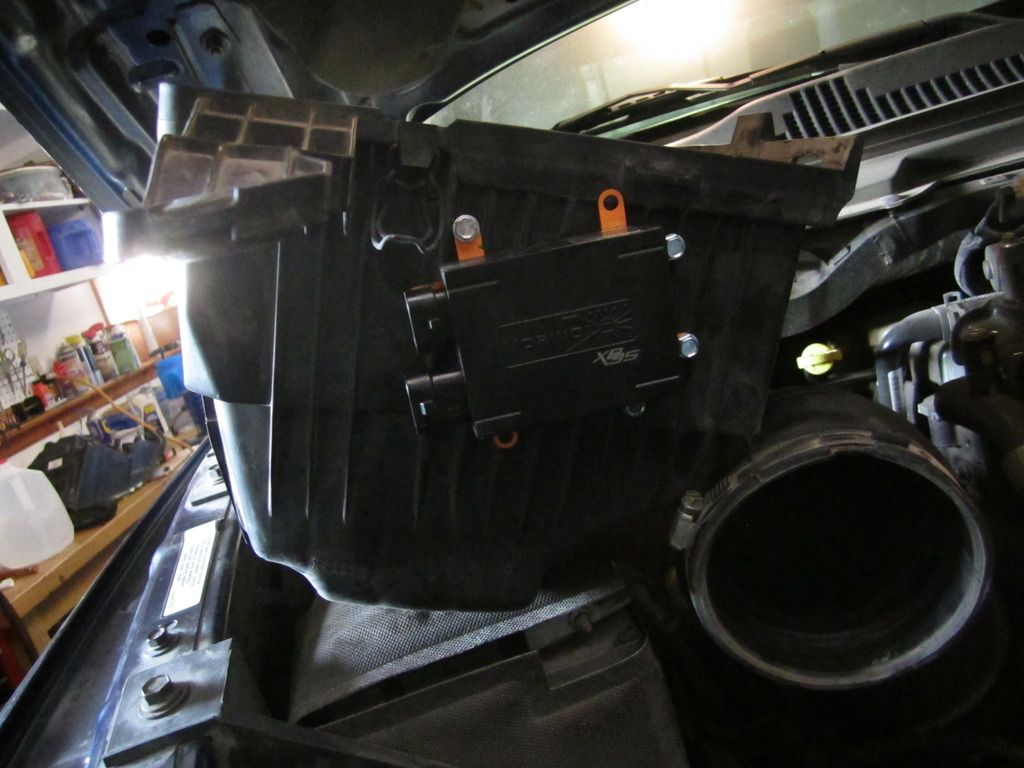
I mounted the other ballast on the air box. I removed it for easier attachment.
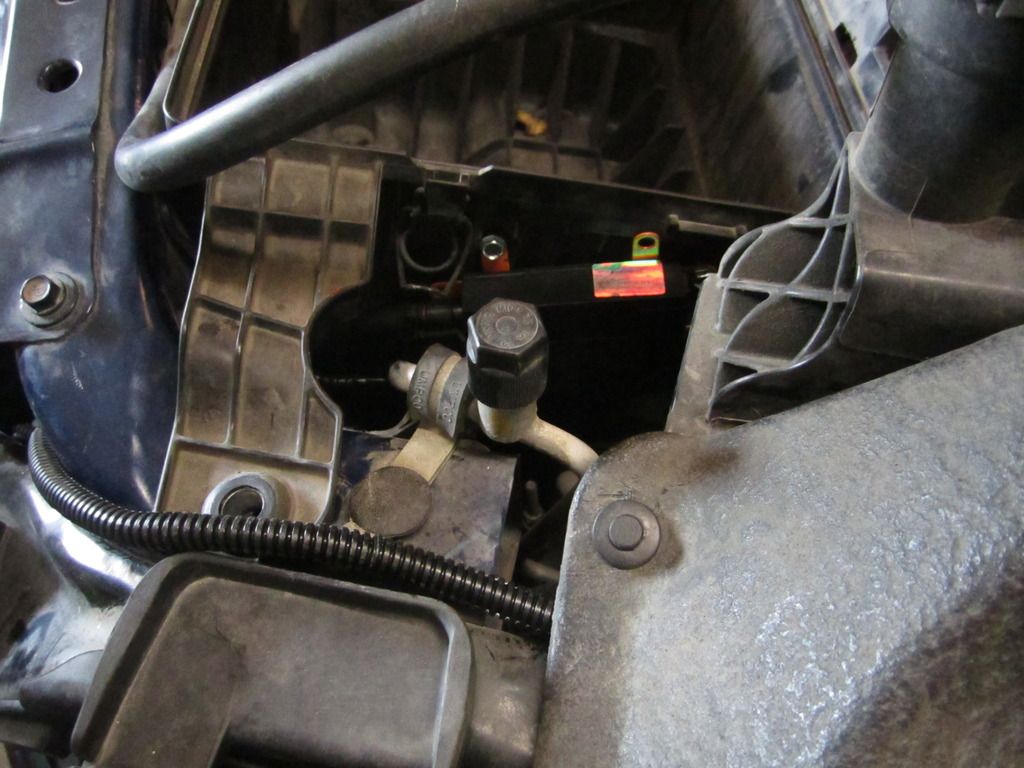
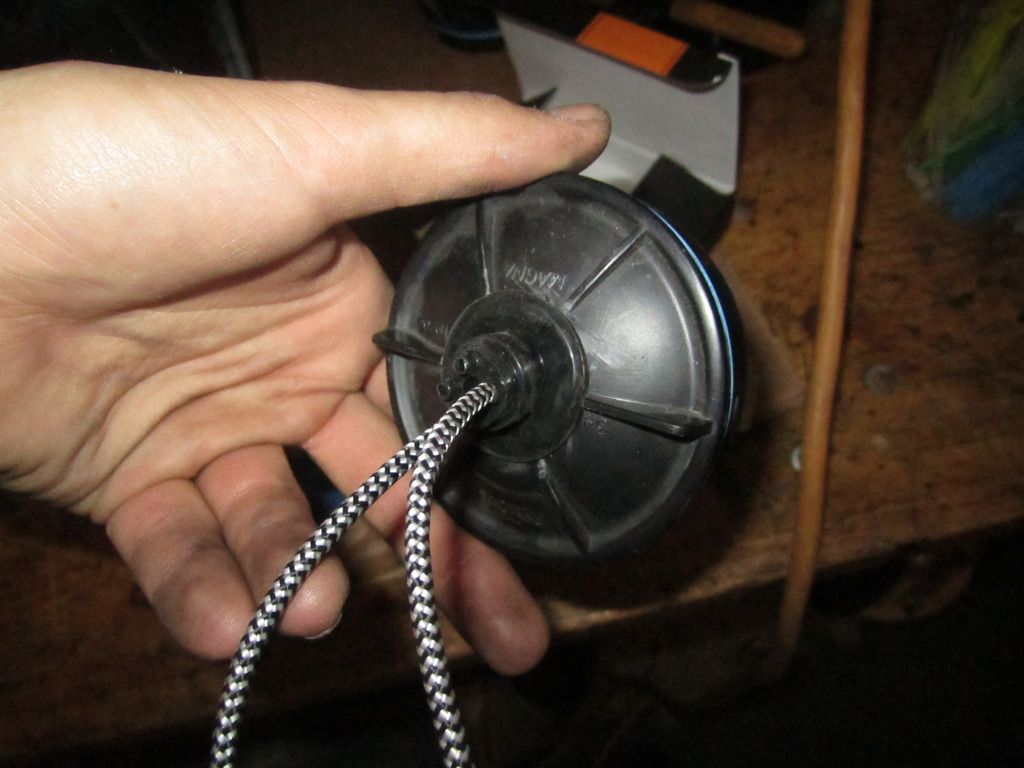
Run the driver ballast power wire for the passenger side under the fan/radiator shroud. The other portion of the harness plugs into the ballasts and then feeds the wires that come out of the grommet in the cap. This can get tucked behind the lights when you install them.
Next you job is to prepare the caps for the HID wires and grommet. The pictured one looks crappy but the second one I did this way and it turned out better. Use a forstner bit the size of the outer part of the grommet, just to shave away the ribs. Then use a smaller one in the center to cut out the hole, think its 1” but measure first.
I dabbed some silicon around the grommet and in the two unused holes to seal it up good.
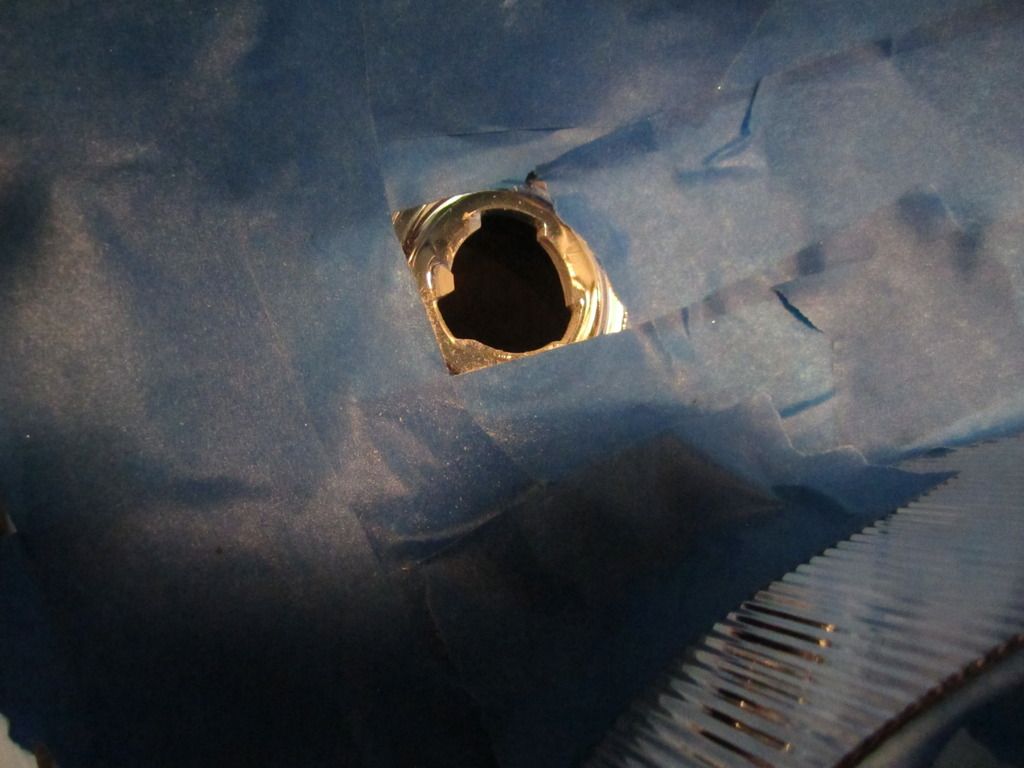
Unsealing the Lights I put tape on the lenses to avoid scratching them while working. This is the most frustrating and time consuming portion of the project. It involves lots of baking, heat, prying and cursing. To start it off you will need an oven to bake the light housings. If you feel comfortable using your kitchen oven go ahead. I have a brand new oven so that was not the ideal option for me so i made one. It used my heat gun, has a divider to avoid direct heat and a thermometer to monitor temp. To unseal the lights, heat is your best friend. If it is being really stubborn chances are you need more heat. I first started off by working my way around the light with the heat gun slowly just trying to pry the housing back just very slightly. This will make progress after the first bake much better. Then bake the housing for about 15min at about 260 degrees. If it doesn't seem to do much raise the temp just slightly. Once the light comes out of the oven pry away. You will bend and maul the crap out of the housings, it is impossible to keep them nice trust me. Then pry and heat in cycles it may take 5 rounds in the oven to get them apart so be patient. I learned that constant pressure prying on the housing will help to release the glue. You should be able to watch it pull away from the lens. Good luck with the separation, once you are finished you are half way there.
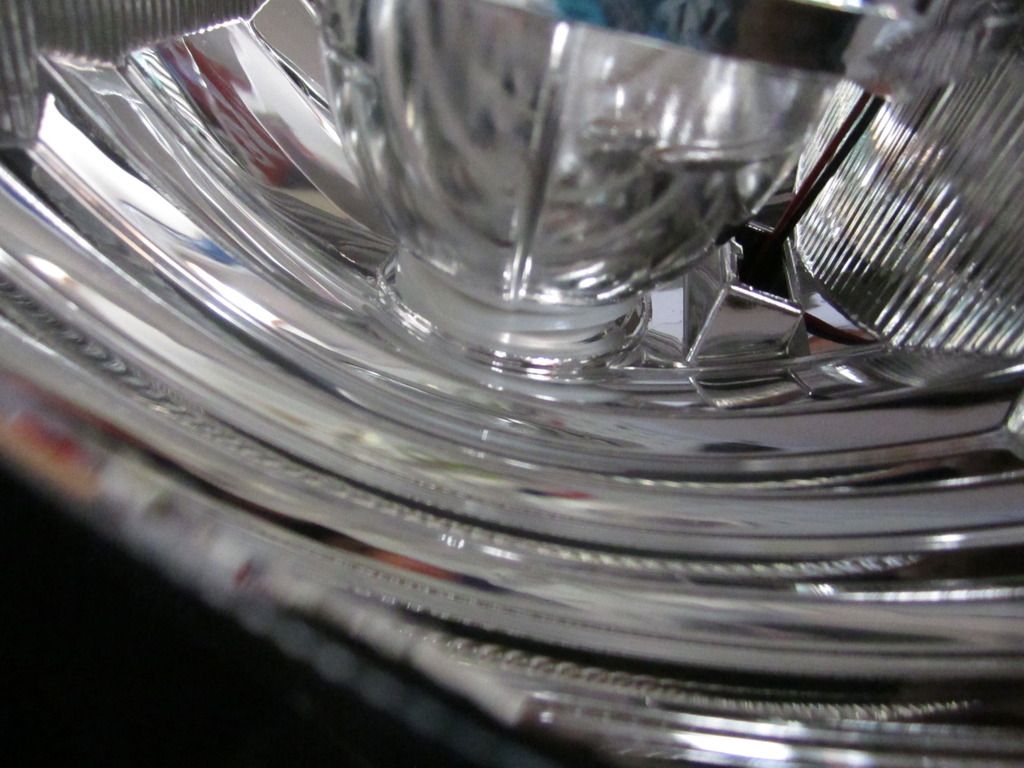
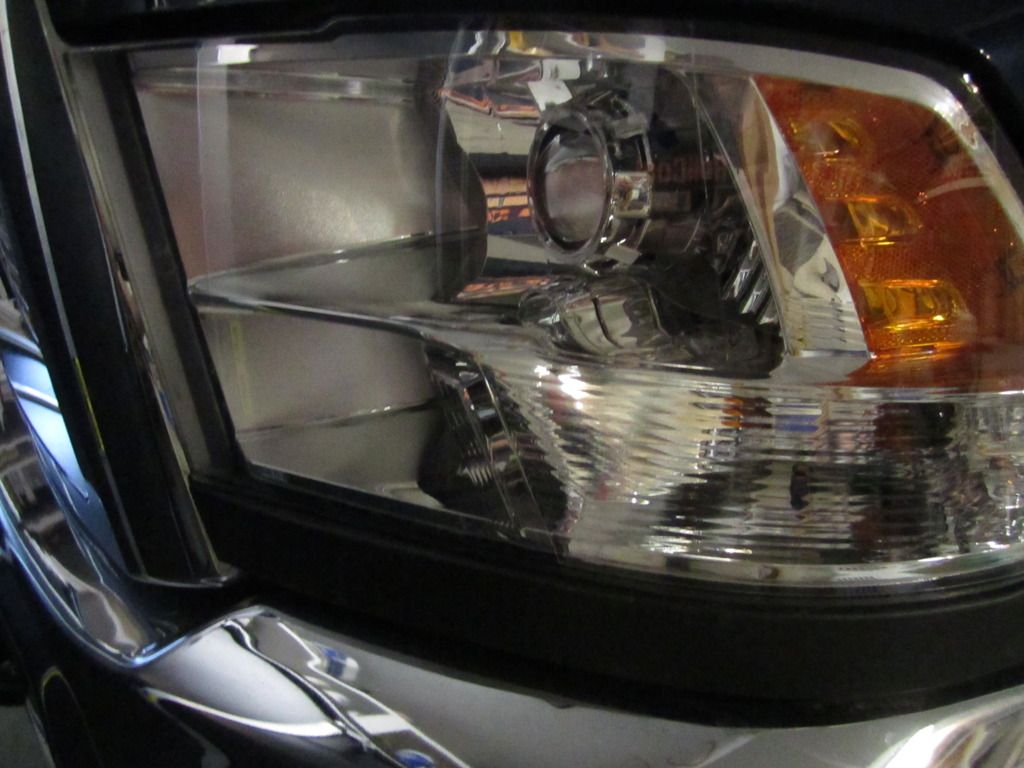
Projector Fitment and Installation First use a 9v battery to test the solenoid in the projector to be sure it works. Now that you have your lenses off its time to fit the projector. First remove the reflector that covers the bulb. First you will need to sand off the tab that sticks out in the lens with the dremel sanding wheel.
Next slightly round out the hole just enough for the threads on the projector to slide through. Screw your shroud onto the projector. Place the thinner rubber washer on the projector. Put the solenoid wires through the hole from the reflector. Put the projector into the lens. Be sure to read the label and place the projector right side up.
Use the three tabs washer and nut as shown to tighten the projector. Be sure that the nut is below the three recessed groves.I applied some RTV to the solenoid wires to seal the lenses. The black silicon will work fine i was just using up an old tube. Try to be sure the projector is as straight as possible so less adjustment will be needed later with the cutoff. Screw down the bulb clamp holder with the 3 tiny screws provided.
Now you will need to wire the solenoid. Use one of the provided splitters shipped with the kit. The splitter should plug into the high beam power plug. One side will power the high beams. Clip the plug off the other side. Then solder the solenoid wires to it.
Resealing Now plug each light in to be sure it works. Test the high beams to be sure the solenoid flips. If both work it is time to seal up the lights. First do your best to clean off the projector lens and reflector distilled water works pretty good. Regular water will leave spots. Now that they are all cleaned up its time to seal the lights.
Get out the retro rubber that you ordered. Make sure the grove in the housing is nice and clean. Now start laying the rubber in the channel. Stretch the rubber so it as wide as the channel then press it down to the bottom.
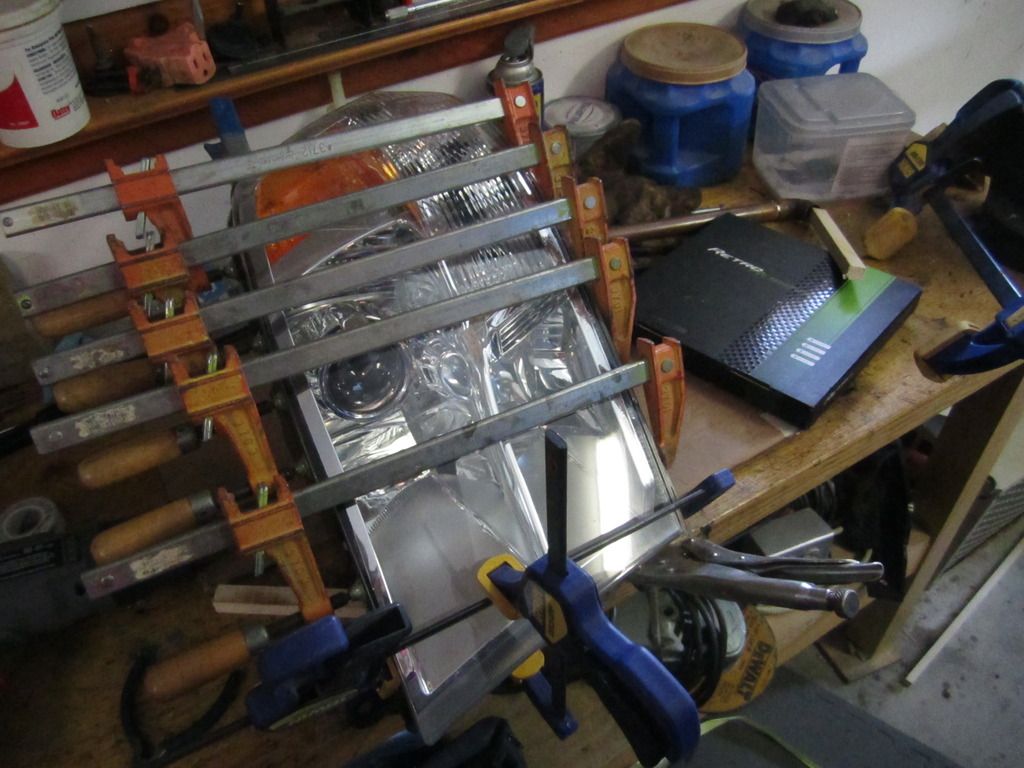
Roughly fit the trim piece and the lens back onto the housing. Put the housing in the oven at 260-265 for about 15-20 min. Once it comes out of the oven press the tim piece and lens into place. You may need to rebake or heat areas with the heat gun to get it clamped together good.
Once its all dried I ran a bead of the black silicon around the outside to make sure it is sealed up good. I don't think it is necessary but it can't hurt. Now you can put the lights back in the truck. You may need to slightly rotate the projectors from the outside to get the cutoffs to line up nice. You can also use the factory housing adjustments. Hopefully you are happy with the outcome of the project. This is how mine came out.
My Dad hasn't driven the truck in the dark yet but I believe they will be a large improvement all the reviews of the projectors rave about how bright they are. I was also thinking of adding LED high beam bulbs to make it brighter and also so the color of the lights are closer. HID bulbs will change color over time and become slightly more white. Hopefully this will help someone one with their project. If anyone has any questions feel free to ask, I have done a lot of research on this and will anwser best I can.


Huge Shout Out to 14Cummins over on CF for this great writeup.
Ok everyone recently I completed a projector retrofit for my old man's 2011.5. I could not find a very good detailed writeup on how to do it so i figured I would make one. This is for Quad headlamps and you will still retain stock high beams.


To complete this retrofit I bought some used housings in the classifieds. That way the truck could remain operational and also I wasn't as nervous about screwing up a housing. Keep in mind this wasn't my truck. I had to repair where the previous owner cracked the mount, but I will tell you how to remove the housings so that won't happen.
Materials
I suggest buying everything from "the retrofit source" they have excellent customer service and everything in their kit is all top quality Morimoto parts.
Projectors- Mini H1 Stage III projectors
Harness-H11 wiring harness
Shrouds- I used mini gatlings, they are good for a 'stock' look
Bulbs- I suggest getting 4500K bulbs because 4300K is the Kelvin rating with the most usable light
Sealant- Add black retro rubber sealant and get a big tube of black silicon sealant.
Heat Gun-With temp control knob if you plan to use it for an oven
Dremel sanding wheel
Solder Gun, Solder, Heat shrink, electrical tape, etc
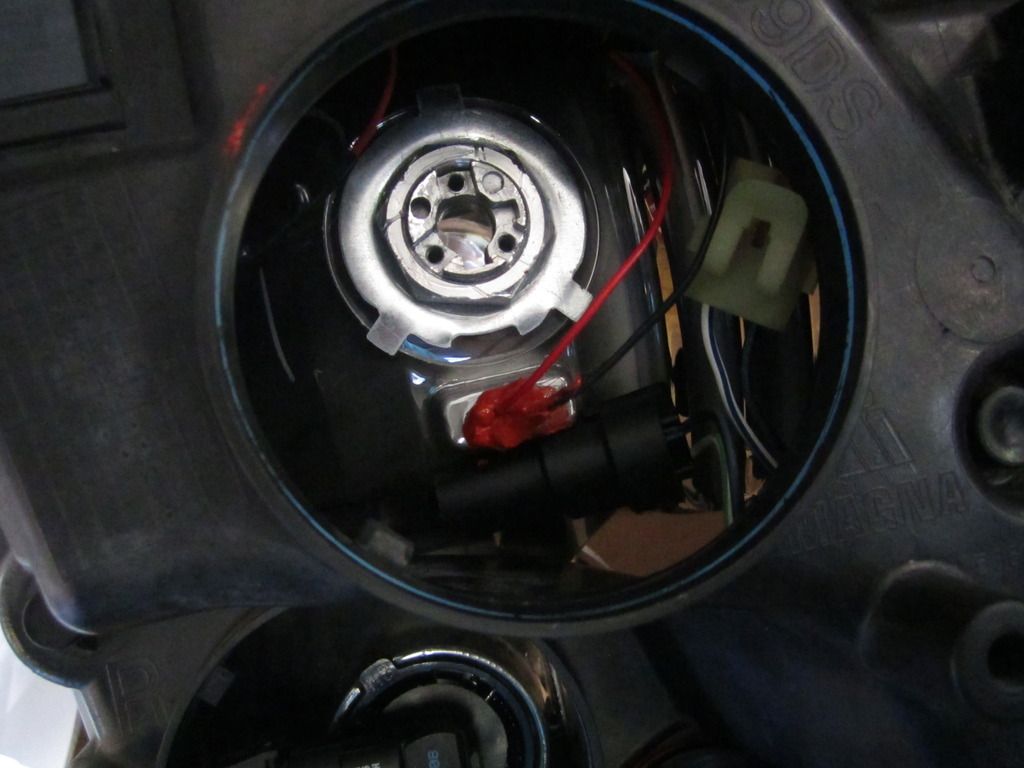
Headlight Removal
You may need to remove the headlights to help route wiring so here is how to do it.
First remove the two screws from each light, both are near the grill.
Open the access hole in the plastic wheel well. Lift the bar show to release the top of the light.
Now reach your hand throughout the access hole and push straight out to pop the mount out of the socket. Don't twist the light that will break the mount.
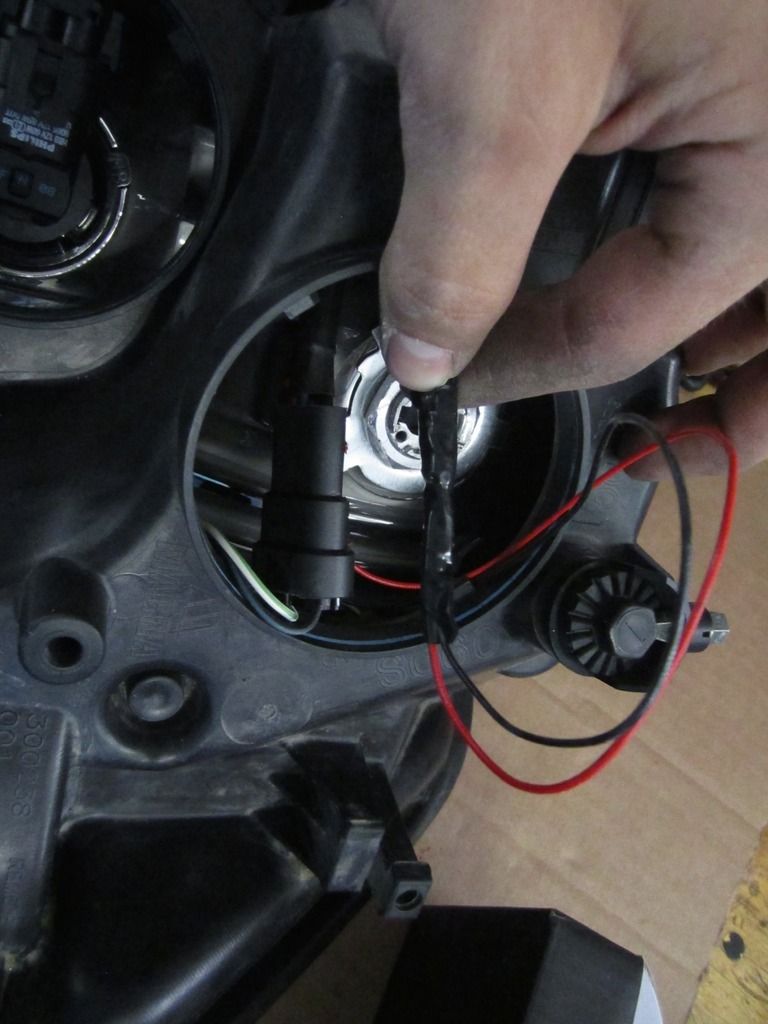
Truck Wiring- I will start with truck wiring first because you will need the truck wired to test the lights/wiring before you seal them up.Once again this is why the retrofit source is nice because they send you a nice wiring harness to help wire the ballasts.
All of my wiring is stripped, soldered, covered with heat shrink and electrical tape.
First you will need to adapt a harness for the OEM input. To do this remove one of the stock input wires for the headlight. This is the three wired plug. Trace the power wire that feeds the low beam. Cut both that and the common ground. Splice in the one short adapter that fits the OEM input portion of the harness. You will need to cut off the female end of the plug. I just soldered it right on instead of using a plug. You can remove the power wire from the OEM screw in seal plug, just dab some black silicon in the hole to seal it up.
Next you need to install the harness in the truck. You will need to extend one of the ballast power wires. Cut and splice in about 2' of equal gauge wire into the longer ballast power wire. This is just so the wire can reach the other side of the truck from the relay mounting point. I spliced it in after installing in the truck to get the length right.
I mounted the relays with a self tapping screw just forward of the driver side battery.
Mount the first ballast on the shroud of the fuse box as see below.
I mounted the other ballast on the air box. I removed it for easier attachment.
Run the driver ballast power wire for the passenger side under the fan/radiator shroud.
The other portion of the harness plugs into the ballasts and then feeds the wires that come out of the grommet in the cap. This can get tucked behind the lights when you install them.
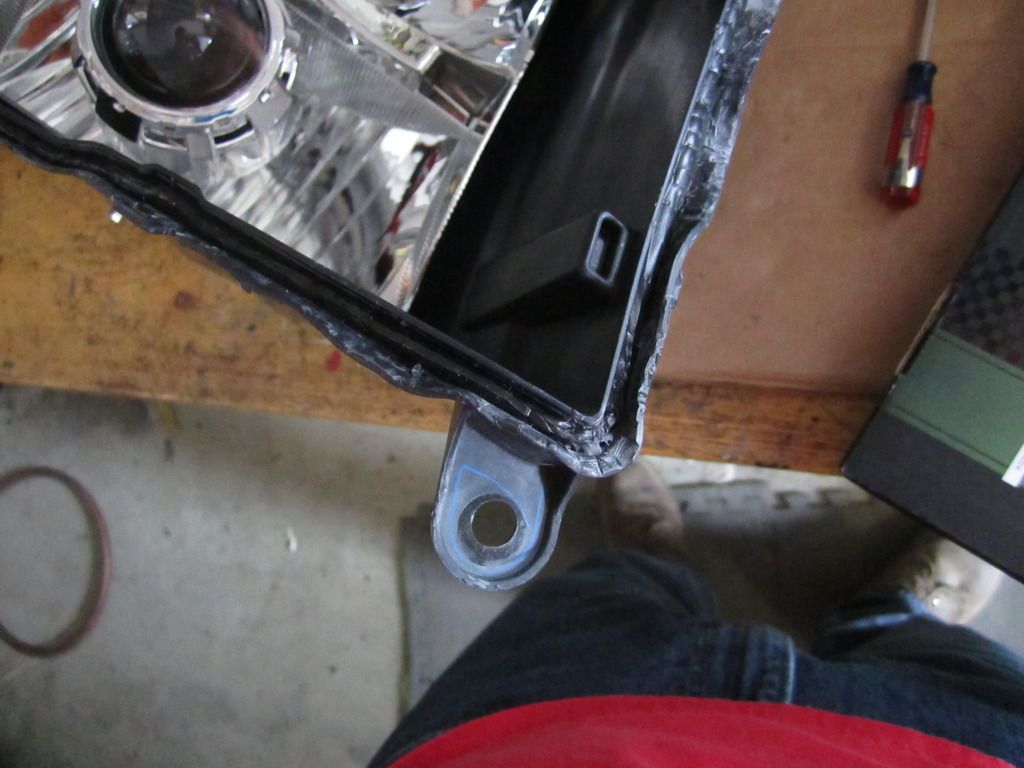
Next you job is to prepare the caps for the HID wires and grommet. The pictured one looks crappy but the second one I did this way and it turned out better.
Use a forstner bit the size of the outer part of the grommet, just to shave away the ribs. Then use a smaller one in the center to cut out the hole, think its 1” but measure first.
I dabbed some silicon around the grommet and in the two unused holes to seal it up good.
Unsealing the Lights
I put tape on the lenses to avoid scratching them while working.
This is the most frustrating and time consuming portion of the project. It involves lots of baking, heat, prying and cursing.
To start it off you will need an oven to bake the light housings. If you feel comfortable using your kitchen oven go ahead. I have a brand new oven so that was not the ideal option for me so i made one. It used my heat gun, has a divider to avoid direct heat and a thermometer to monitor temp.
To unseal the lights, heat is your best friend. If it is being really stubborn chances are you need more heat. I first started off by working my way around the light with the heat gun slowly just trying to pry the housing back just very slightly. This will make progress after the first bake much better. Then bake the housing for about 15min at about 260 degrees. If it doesn't seem to do much raise the temp just slightly. Once the light comes out of the oven pry away. You will bend and maul the crap out of the housings, it is impossible to keep them nice trust me. Then pry and heat in cycles it may take 5 rounds in the oven to get them apart so be patient.
I learned that constant pressure prying on the housing will help to release the glue. You should be able to watch it pull away from the lens. Good luck with the separation, once you are finished you are half way there.
Projector Fitment and Installation
First use a 9v battery to test the solenoid in the projector to be sure it works.
Now that you have your lenses off its time to fit the projector.
First remove the reflector that covers the bulb.
First you will need to sand off the tab that sticks out in the lens with the dremel sanding wheel.
Next slightly round out the hole just enough for the threads on the projector to slide through. Screw your shroud onto the projector. Place the thinner rubber washer on the projector. Put the solenoid wires through the hole from the reflector. Put the projector into the lens. Be sure to read the label and place the projector right side up.
Use the three tabs washer and nut as shown to tighten the projector. Be sure that the nut is below the three recessed groves.I applied some RTV to the solenoid wires to seal the lenses. The black silicon will work fine i was just using up an old tube. Try to be sure the projector is as straight as possible so less adjustment will be needed later with the cutoff.
Screw down the bulb clamp holder with the 3 tiny screws provided.
Now you will need to wire the solenoid. Use one of the provided splitters shipped with the kit. The splitter should plug into the high beam power plug. One side will power the high beams. Clip the plug off the other side. Then solder the solenoid wires to it.
Resealing
Now plug each light in to be sure it works. Test the high beams to be sure the solenoid flips. If both work it is time to seal up the lights.
First do your best to clean off the projector lens and reflector distilled water works pretty good. Regular water will leave spots. Now that they are all cleaned up its time to seal the lights.
Get out the retro rubber that you ordered. Make sure the grove in the housing is nice and clean. Now start laying the rubber in the channel. Stretch the rubber so it as wide as the channel then press it down to the bottom.
Roughly fit the trim piece and the lens back onto the housing. Put the housing in the oven at 260-265 for about 15-20 min. Once it comes out of the oven press the tim piece and lens into place. You may need to rebake or heat areas with the heat gun to get it clamped together good.
Once its all dried I ran a bead of the black silicon around the outside to make sure it is sealed up good. I don't think it is necessary but it can't hurt.
Now you can put the lights back in the truck. You may need to slightly rotate the projectors from the outside to get the cutoffs to line up nice. You can also use the factory housing adjustments. Hopefully you are happy with the outcome of the project. This is how mine came out.
My Dad hasn't driven the truck in the dark yet but I believe they will be a large improvement all the reviews of the projectors rave about how bright they are. I was also thinking of adding LED high beam bulbs to make it brighter and also so the color of the lights are closer. HID bulbs will change color over time and become slightly more white.
Hopefully this will help someone one with their project. If anyone has any questions feel free to ask, I have done a lot of research on this and will anwser best I can.
View full Cummins article