Huge Thanks to Loki223 over on CumminsForum for this one. You will need The wiring harness from Dudes Diesel Performance $95 but worth it to not hack up your trucks harness.
Alright, so i know many of you have seen the tow mirror running lights done before, and this solution is specific to the 13-18 trucks. On the old way of doing this, you must run some wires inside the cab and through the doors which is a royal PITA to get into the doors. And this must be done in both doors, plus there is cutting and splicing factory wires, which some people don't care about, others do. Being that i just spent a boat load of money for the truck, i didn't want to be splicing wires where i can avoid it. That is where this wire harness comes in. It is completely plug and play, with no cutting or splicing required. It is easily removed, and easily blends into the factory harness. My harness is a pre-production set, when these are readily available, i will post a link on where to get them. (I have no affiliation with the manufacturer or seller, so i will update this with a link when i get notified that they are up for sale.) Now, lets get into the this
Here is the harness as supplied. The black connectors that are separate in the picture will need to be placed onto the factory harness, while the factory connectors will be placed on the opposite side of this harness to make things fully plug and play. This process takes about an entire second, and will be shown in this thread
Next Remove the Door Panel by following the directions in this article.
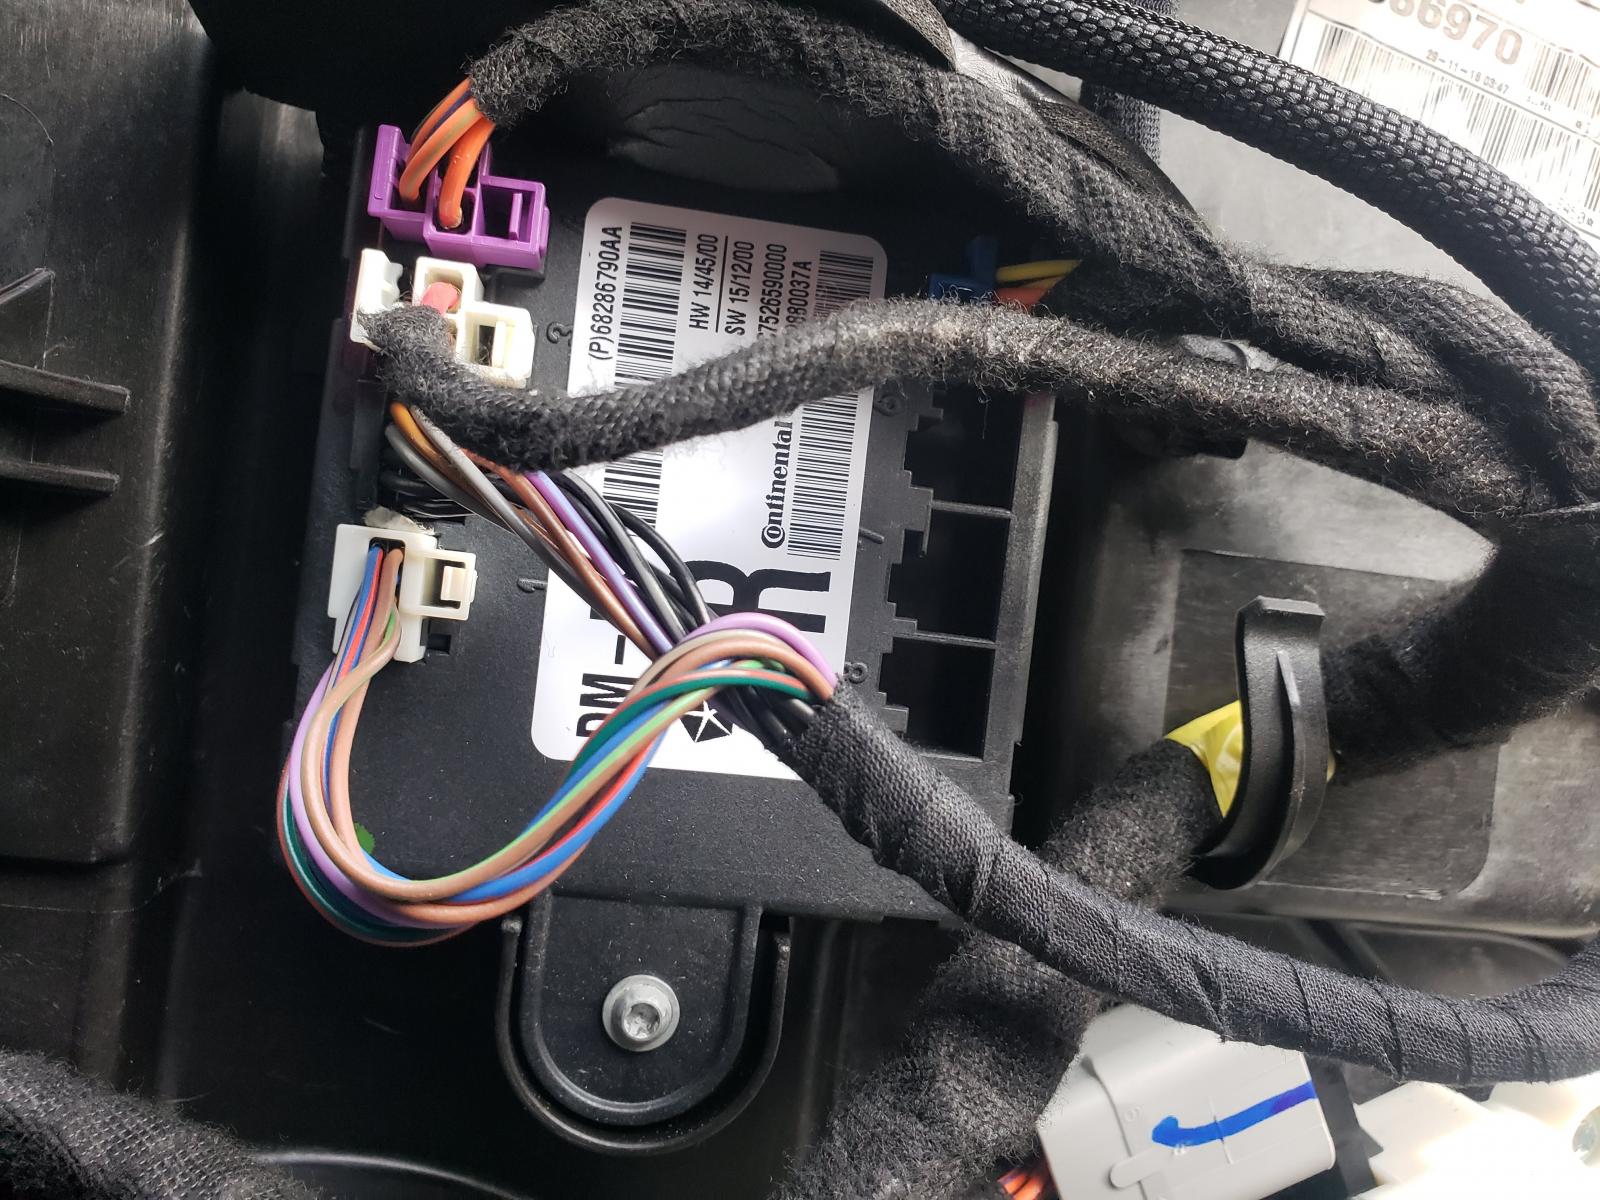
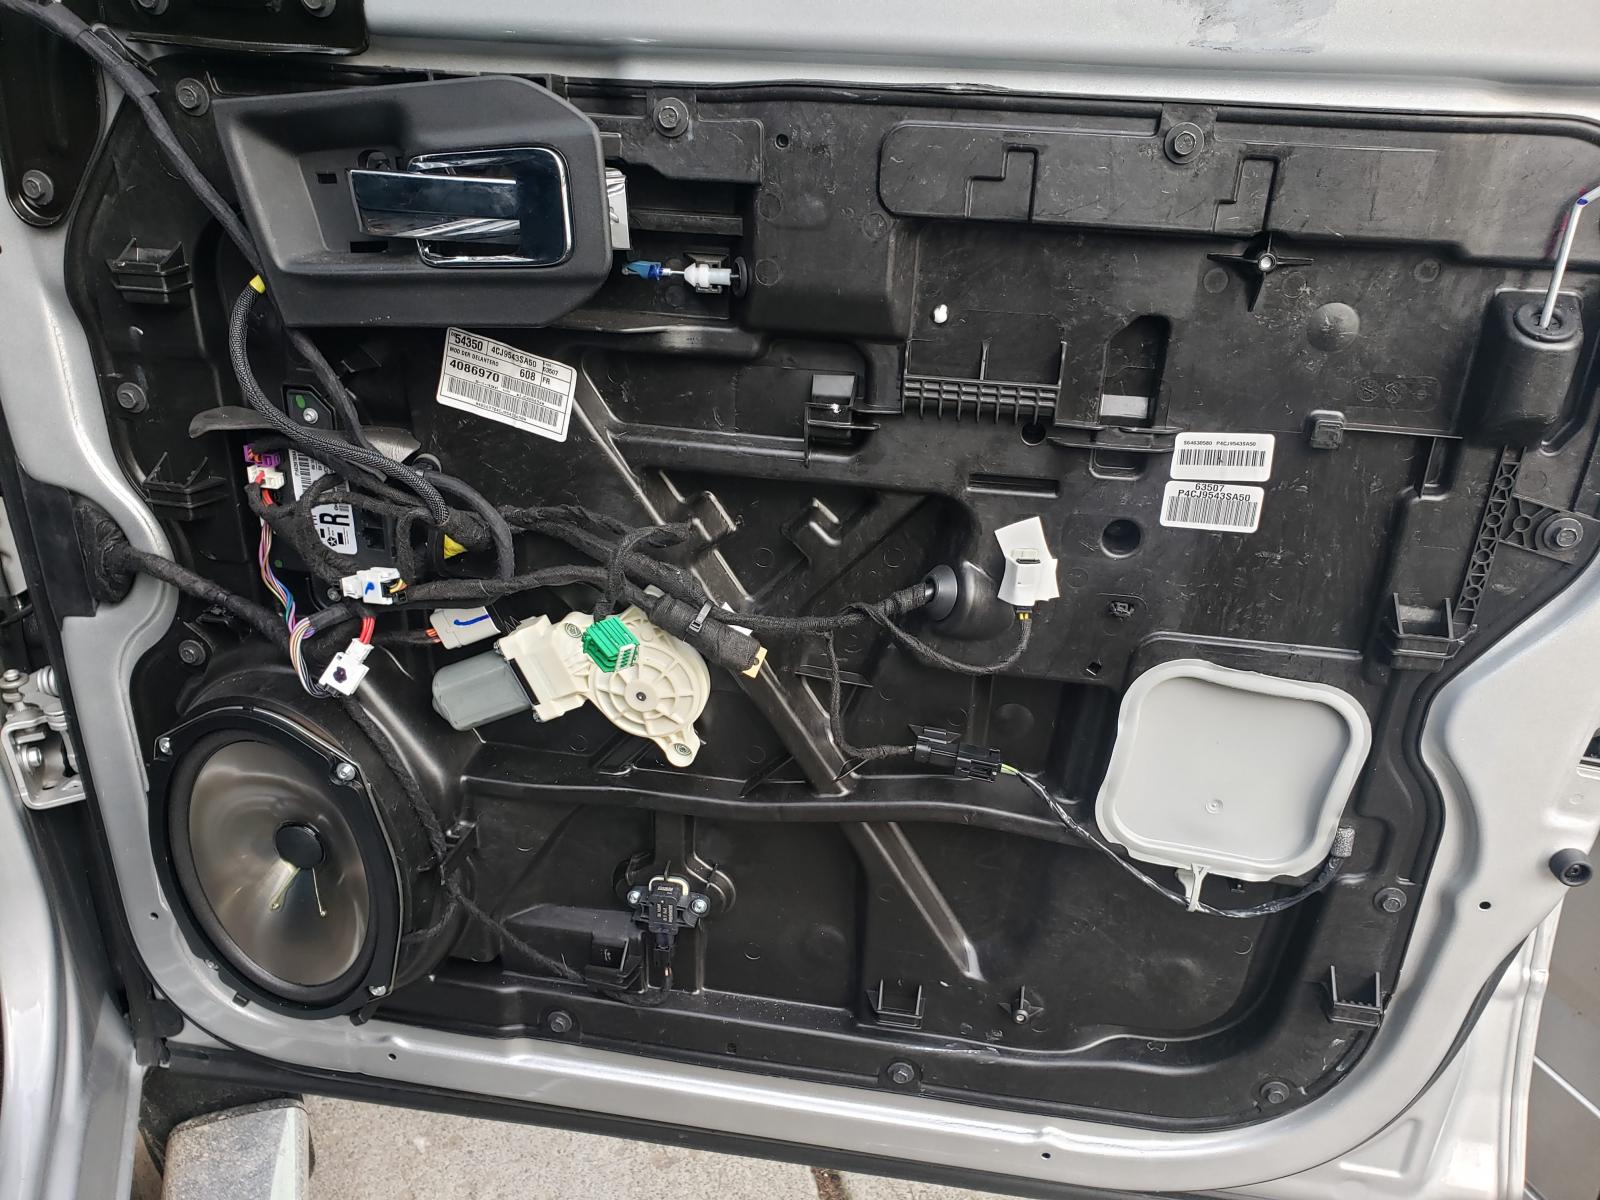
Now we are looking at this guy, the door module, which is located towards the front of the door, the handle trim piece is actually blocking view of this in the previous photo. The 2 connectors we need are the Blue and Black one. Do this one at a time, so as not to mix anything up
Let's start with the black connector. Insert a pick into one side of it, and use a screw driver on the other side in the access hole to slide it out. When inspecting the connector, you will notice that there is a retainer piece that must be relieved to allow the inner connector to slide out of the outer connector. I found the best way to do this was with the pick, as shown here
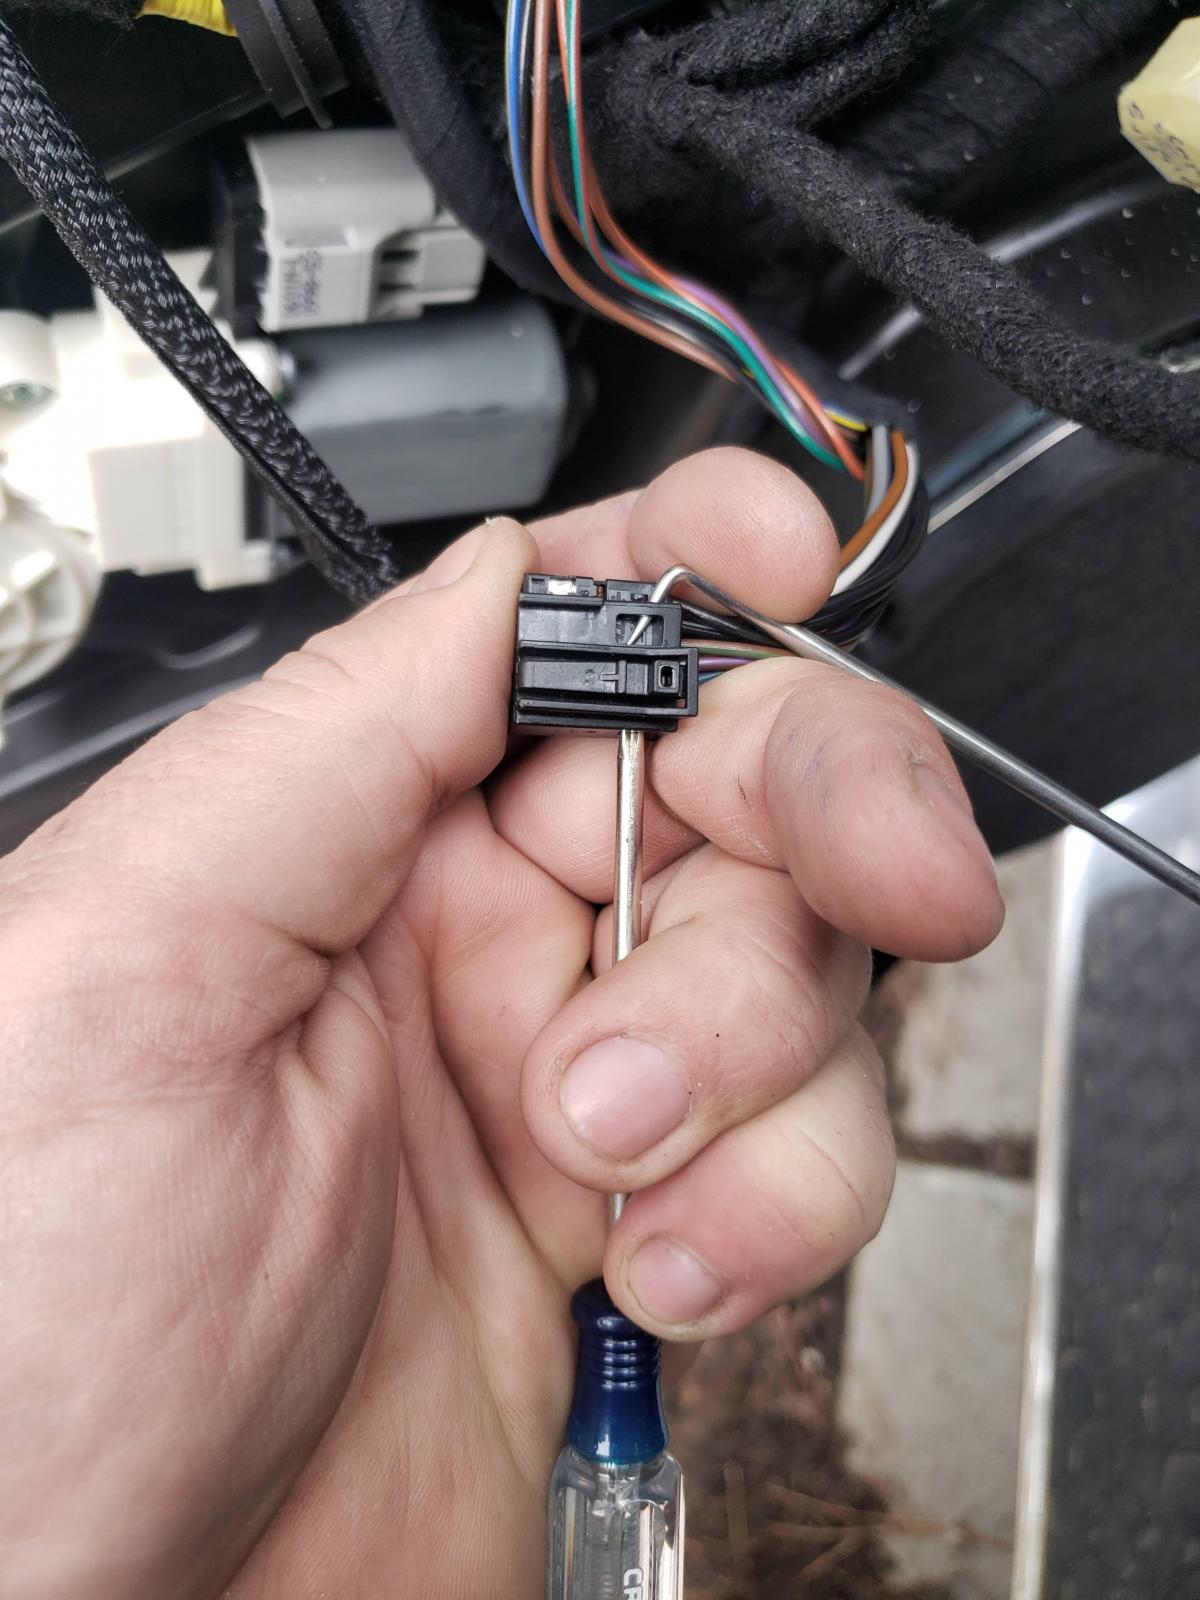
Now, on the opposite side use a small screw driver (or other small skinny object) to press out the inner connector
Once removed, slide on the provided black connector to this connection. Then place the removed connector onto the other side of the harness. Once the connectors are fully assembled, plug the harness connector into the door module, and the door harness into the new harness. Repeat on the blue connection, and now all the hard work is done. Check function to verify nothing is messed up while you have the door open. Now that everything is connected properly, secure the wiring with some zip ties, and trim the zip ties, because we are tidy folk here. Once that is done, everything looks pretty again, and we want our trucks to look pretty (even on the inside where nobody else will see them)
Now take a step back, and look at it. You can hardly tell anything aftermarket is going on there. Now question yourself as to why you didn't pre-order the Kicker speaker upgrade kit to do at the same time. Because look at that speaker, it looks so much better suddenly. And if you wanted to upgrade the speakers, this gives you the perfect excuse (it's only 4 more screws per door)
Now reassemble the door panel, in the reserve order that you took it apart. Then, you are done! No running wires, and messing with the door harness connector under the hinge that will make you cuss and grab a beer while you think about your decisions. Nice and easily done, with basic tools. Enjoy your work! (and probably tell me to go wash my truck, which will happen later today)
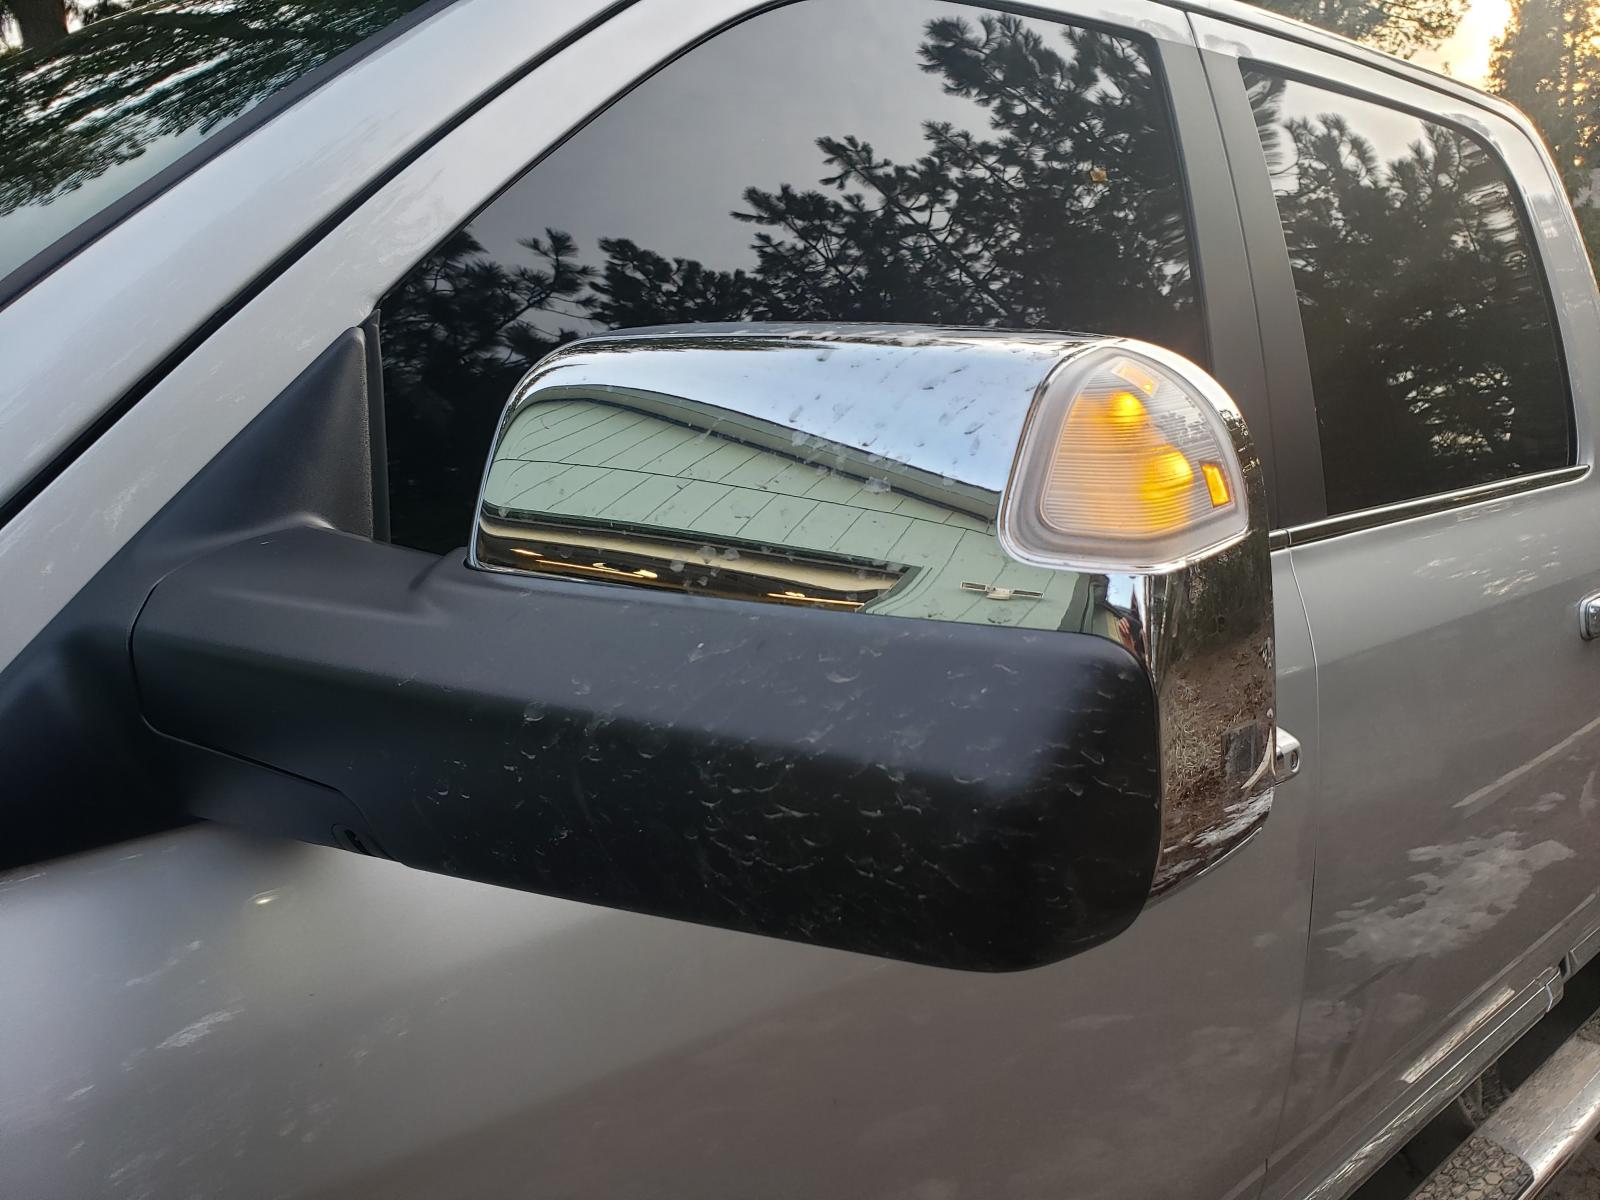
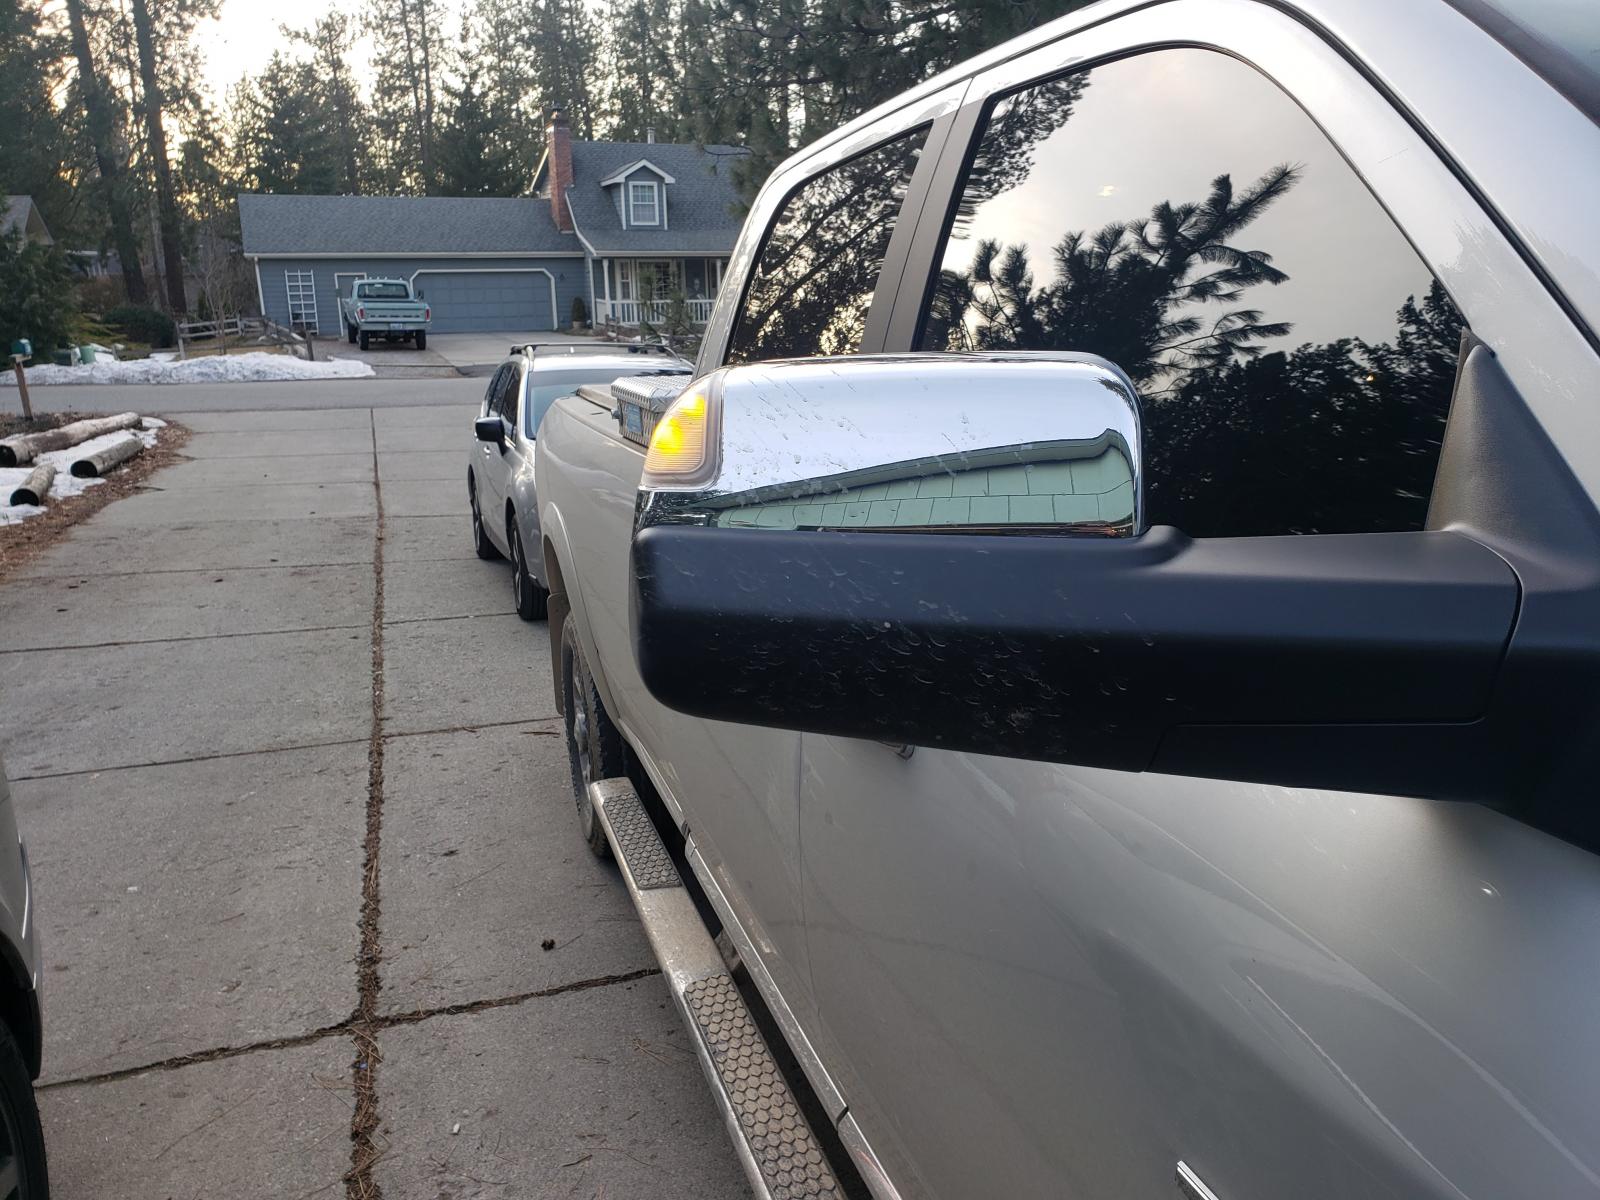
Here is a video showing the function. The lights are at full brightness during running light mode (which i like over partial brightness of some of the other ways of doing this) The lights are being powered through the interior lights circuit, not the running lights. So they will turn on when you open the door, and not when you remote start the truck. They also fade off with the rest of the interior lights, and stay on for a couple seconds after exiting the vehicle.
For vehicles without interior LED lights in the door panel, this mod will cost you a little more, but it will be worth it. You must purchase Alpha OBD and turn on the feature in your door module. it will only take a minute or two, and is really easy. Plus there is a lot more you can do with Alpha OBD, so you should just go ahead and get it anyways. If you need help with Alpha @Jimmy07knows a lot about the program, and can help you get done what you need done. If you are on the fence about getting the program, check out this thread to see what a lot of people have been doing with it
As always, enjoy, and let me know if you would like to know more. I will update with purchase location once i have that information. This is one of my favorite things to do on these trucks, and now it is super easy to do. Cheers everyone!
Huge Thanks to Loki223 over on CumminsForum for this one. You will need The wiring harness from Dudes Diesel Performance $95 but worth it to not hack up your trucks harness.
https://dudesdieselperformance.com/i-30533376-dudes-diesel-performance-tow-mirror-light-harness-13-18-ram-1500-2500-3500.html
Alright, so i know many of you have seen the tow mirror running lights done before, and this solution is specific to the 13-18 trucks. On the old way of doing this, you must run some wires inside the cab and through the doors which is a royal PITA to get into the doors. And this must be done in both doors, plus there is cutting and splicing factory wires, which some people don't care about, others do. Being that i just spent a boat load of money for the truck, i didn't want to be splicing wires where i can avoid it. That is where this wire harness comes in. It is completely plug and play, with no cutting or splicing required. It is easily removed, and easily blends into the factory harness. My harness is a pre-production set, when these are readily available, i will post a link on where to get them. (I have no affiliation with the manufacturer or seller, so i will update this with a link when i get notified that they are up for sale.) Now, lets get into the this
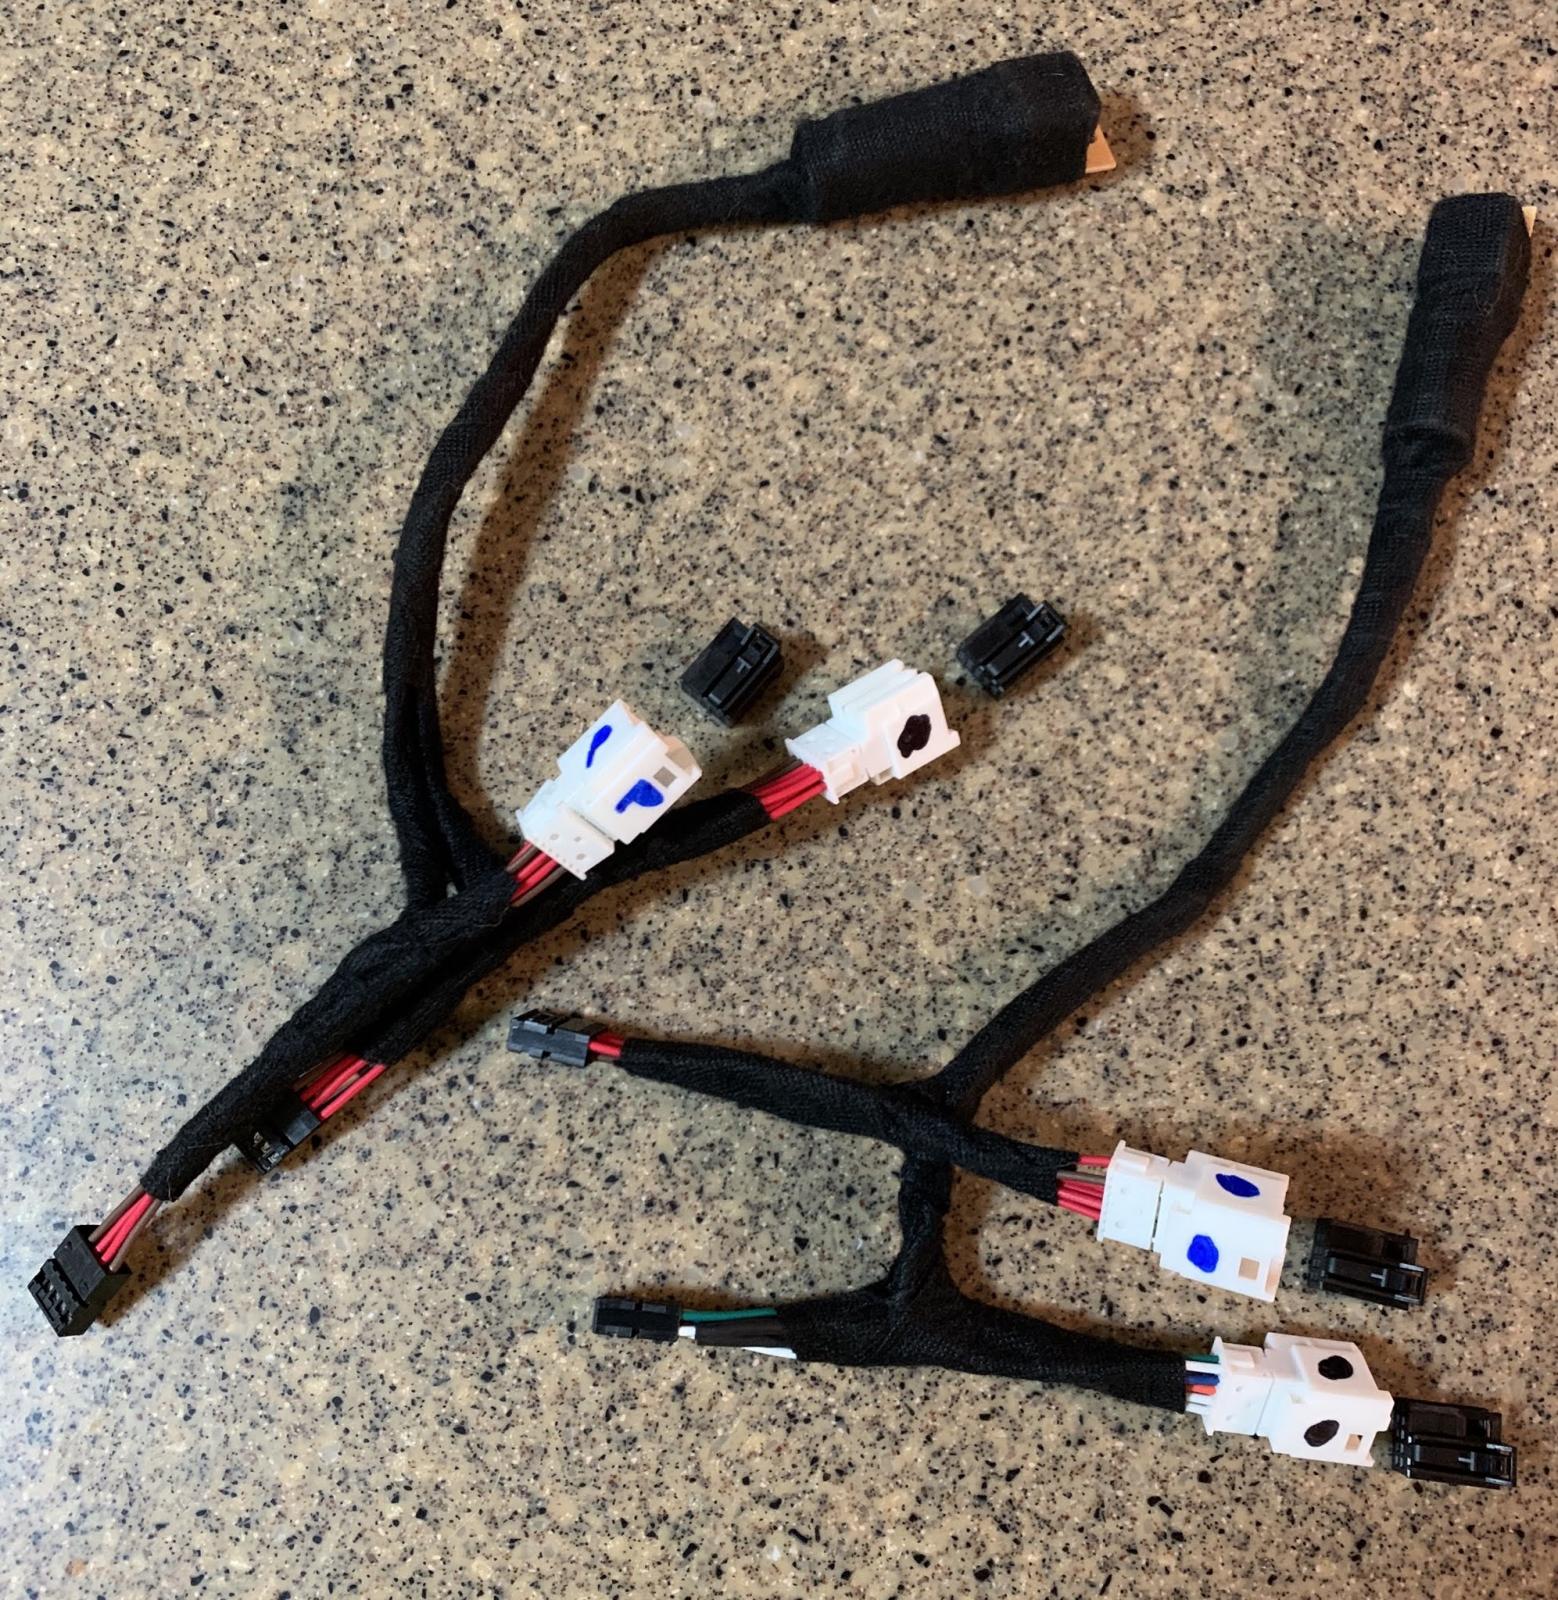
Here is the harness as supplied. The black connectors that are separate in the picture will need to be placed onto the factory harness, while the factory connectors will be placed on the opposite side of this harness to make things fully plug and play. This process takes about an entire second, and will be shown in this thread
Next Remove the Door Panel by following the directions in this article.
Now we are looking at this guy, the door module, which is located towards the front of the door, the handle trim piece is actually blocking view of this in the previous photo. The 2 connectors we need are the Blue and Black one. Do this one at a time, so as not to mix anything up
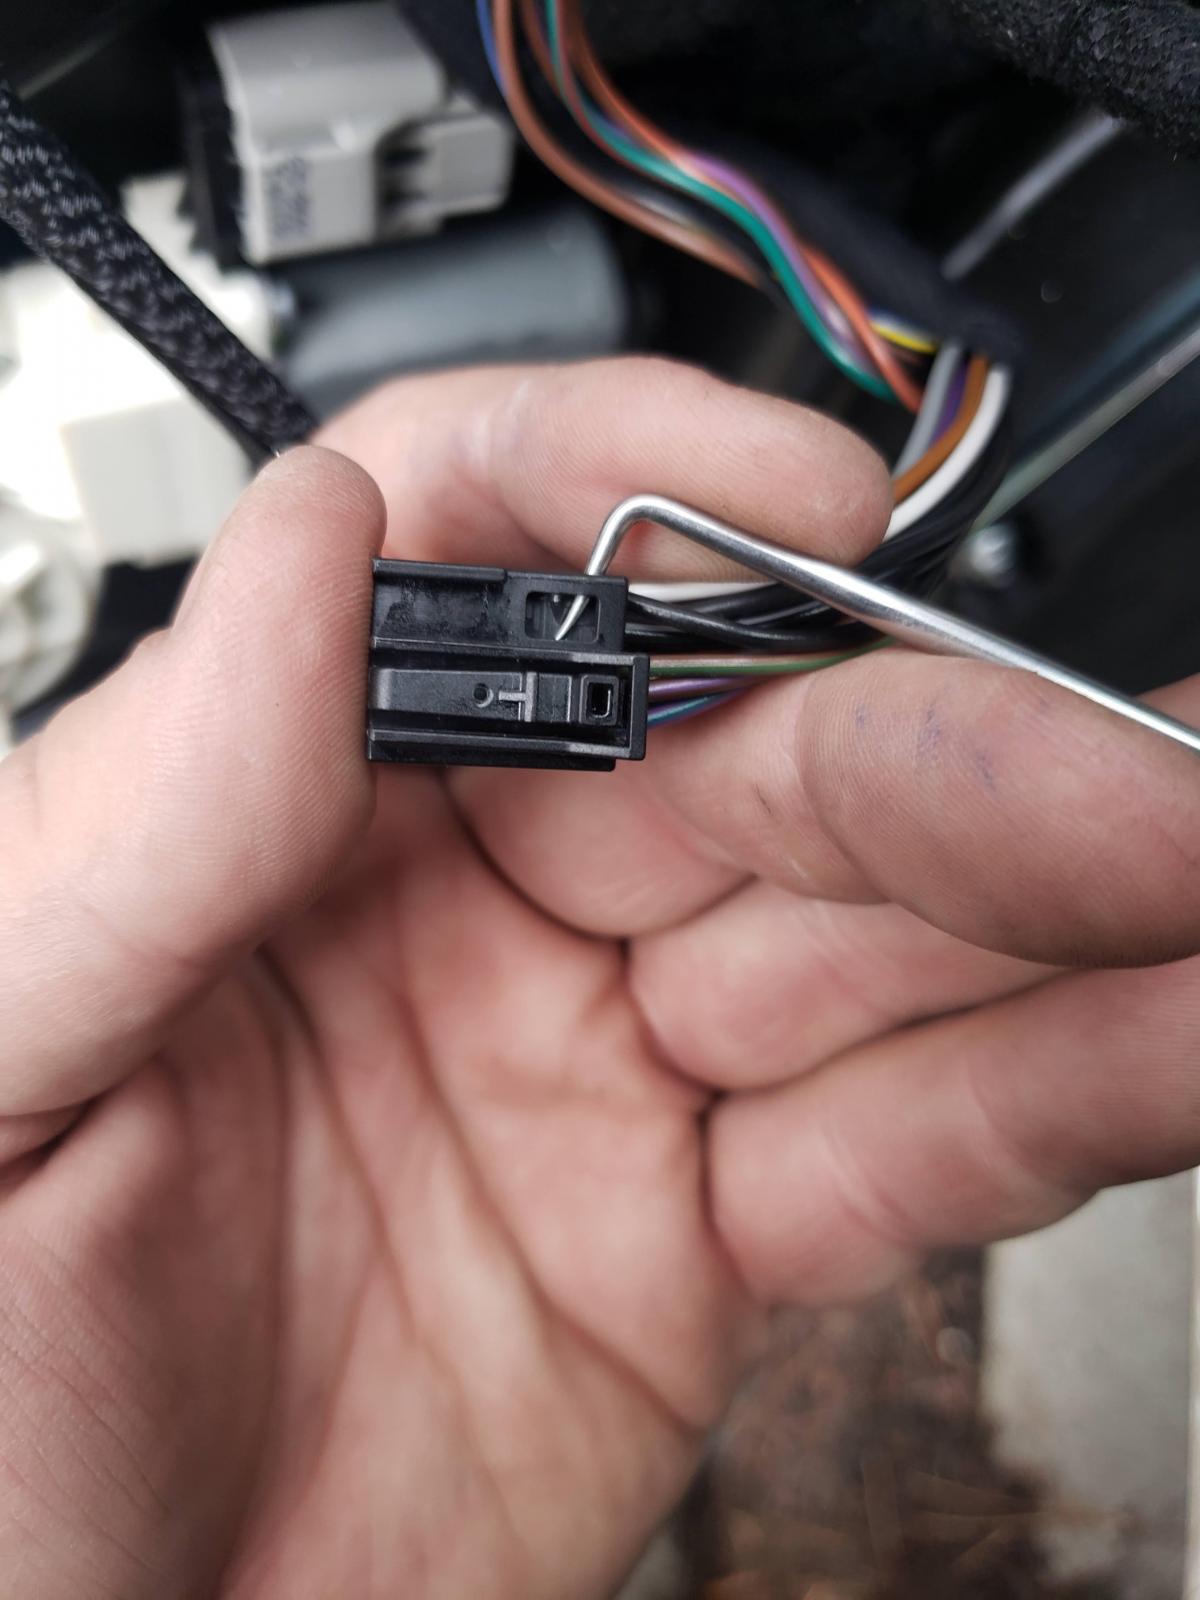
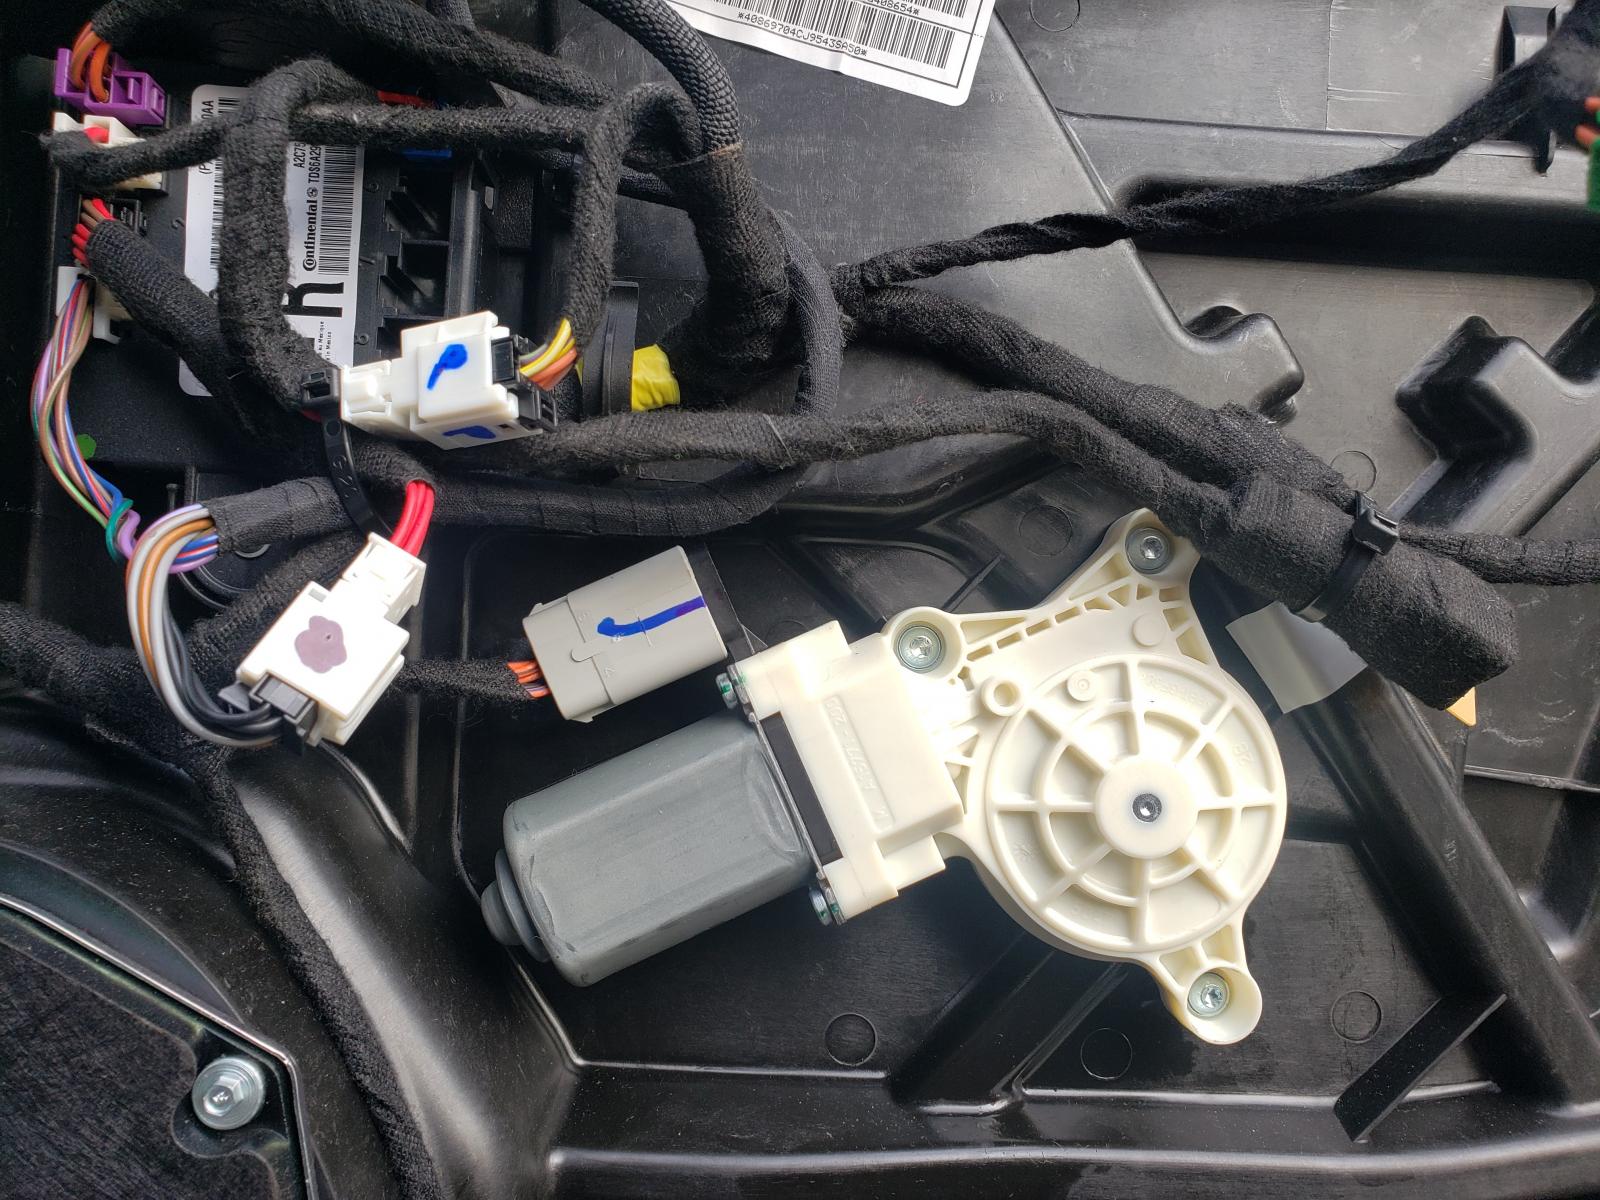
Let's start with the black connector. Insert a pick into one side of it, and use a screw driver on the other side in the access hole to slide it out. When inspecting the connector, you will notice that there is a retainer piece that must be relieved to allow the inner connector to slide out of the outer connector. I found the best way to do this was with the pick, as shown here
Now, on the opposite side use a small screw driver (or other small skinny object) to press out the inner connector
Once removed, slide on the provided black connector to this connection. Then place the removed connector onto the other side of the harness. Once the connectors are fully assembled, plug the harness connector into the door module, and the door harness into the new harness. Repeat on the blue connection, and now all the hard work is done. Check function to verify nothing is messed up while you have the door open. Now that everything is connected properly, secure the wiring with some zip ties, and trim the zip ties, because we are tidy folk here. Once that is done, everything looks pretty again, and we want our trucks to look pretty (even on the inside where nobody else will see them)
Now take a step back, and look at it. You can hardly tell anything aftermarket is going on there. Now question yourself as to why you didn't pre-order the Kicker speaker upgrade kit to do at the same time. Because look at that speaker, it looks so much better suddenly. And if you wanted to upgrade the speakers, this gives you the perfect excuse (it's only 4 more screws per door)
Now reassemble the door panel, in the reserve order that you took it apart. Then, you are done! No running wires, and messing with the door harness connector under the hinge that will make you cuss and grab a beer while you think about your decisions. Nice and easily done, with basic tools. Enjoy your work! (and probably tell me to go wash my truck, which will happen later today)
Here is a video showing the function. The lights are at full brightness during running light mode (which i like over partial brightness of some of the other ways of doing this) The lights are being powered through the interior lights circuit, not the running lights. So they will turn on when you open the door, and not when you remote start the truck. They also fade off with the rest of the interior lights, and stay on for a couple seconds after exiting the vehicle.
For vehicles without interior LED lights in the door panel, this mod will cost you a little more, but it will be worth it. You must purchase Alpha OBD and turn on the feature in your door module. it will only take a minute or two, and is really easy. Plus there is a lot more you can do with Alpha OBD, so you should just go ahead and get it anyways. If you need help with Alpha @Jimmy07 knows a lot about the program, and can help you get done what you need done. If you are on the fence about getting the program, check out this thread to see what a lot of people have been doing with it
https://www.cumminsforum.com/forum/2...justments.html
As always, enjoy, and let me know if you would like to know more. I will update with purchase location once i have that information. This is one of my favorite things to do on these trucks, and now it is super easy to do. Cheers everyone!
View full Cummins article