Jump to content
Mopar1973Man.Com LLC
  • Crankcase Vent Modification for 24V Dodge Cummins Trucks

    People been asking for me to redo this article so here it is.

    Supplies you'll need...

    • 1 stick of 1/2" PVC pipe (minimum of 57" long)
    • 3 - 1/2" PVC elbows slip to slip
    • 1 - 1/2" PVC elbow slip to NPT (male or female)
    • 1 - 1/2" PVC straight connector slip to NPT (male or female)
    • 3" piece of 3/4" heater hose
    • 2 hose clamps
    • 1 Small can of PVC glue
    • Hacksaw
    • Sharpie black marker
    • Tape measure
    • Can of spray paint
    • 1 Zip tie 6" long

    Cut measurements

    • 3" Heater hose
    • 4 1/2" front down pipe
    • 2 1/4" front cross pipe
    • 24" long pipe
    • 5" rear cross pipe
    • 20 1/2" rear down pipe

    NOTE: These measure are my final cut measurements. I suggest cutting a tad long and adjusting as you see fit for your truck.

    So at this point you should have all your materials to assemble. You should assembly your cut pipe and fittings dry without glue and test fit everything. While test fitting be sure to remove all plastic cuttings from the ends of the pipes. Also when test fitting be sure to bottom out all pipes into the fittings. In the supply list I list PVC elbow and a straight connector (male or female) this is totally up to you. You can do either way as long as you have a male and female connection in the end.
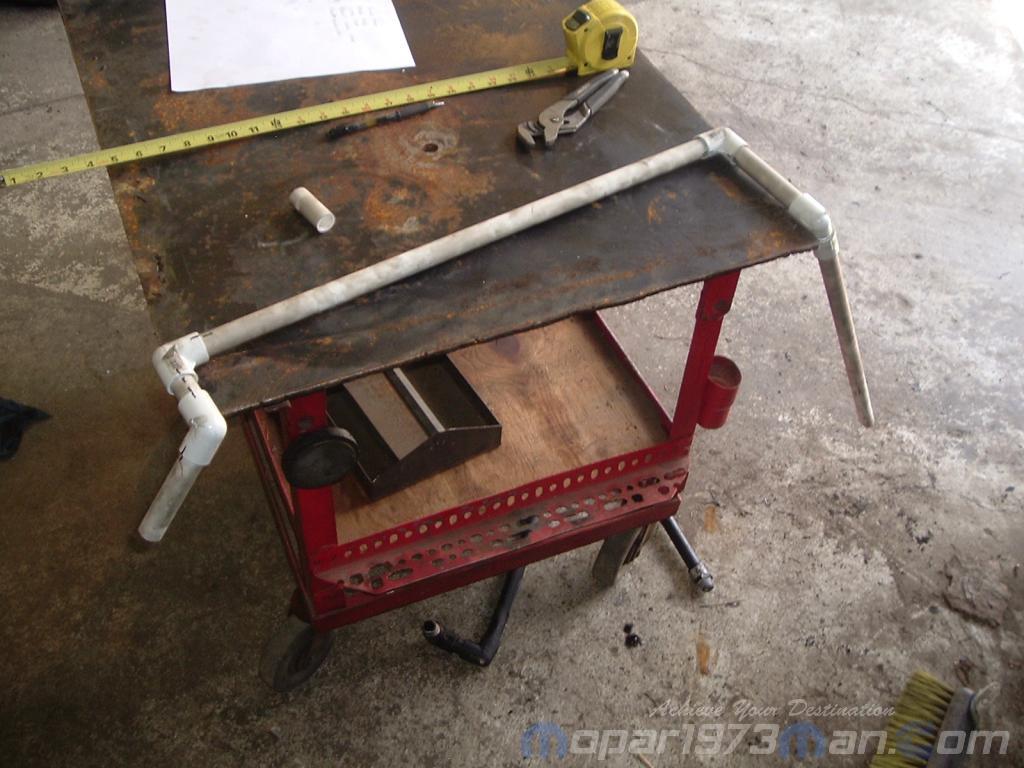
    crankcase vent

    Now during my test fitting I was very careful to get the front section of pie back far enough so its not in contact with the upper radiator hose.
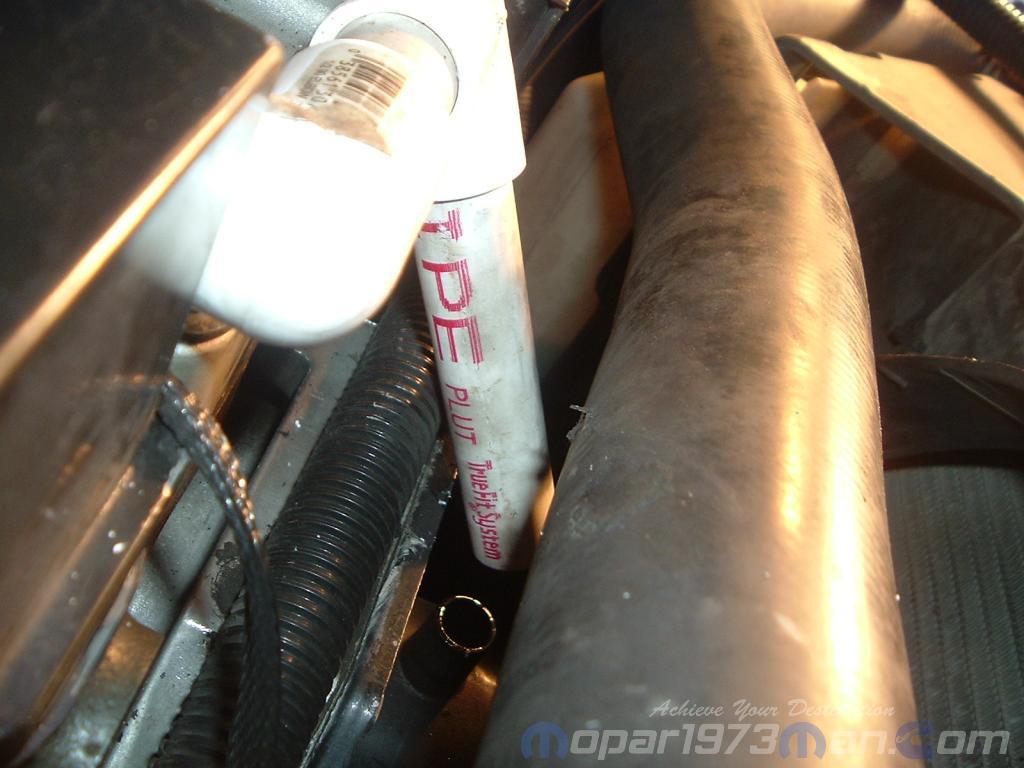
    crankcase vent clearance to the radiator hose

    On the rear section you have to be careful of the angle of your down pipe. I've got mine resting on the very tip of the bellhousing. Now that you fairly happy with your fit. Take a Sharpie marker and mark all the elbow positions with a fine line from the elbow to the pipe to note position. This way you can glue the pieces back together in the proper angles. When gluing all the pieces together be sure once again to bottom out all your pipes into the fittings.
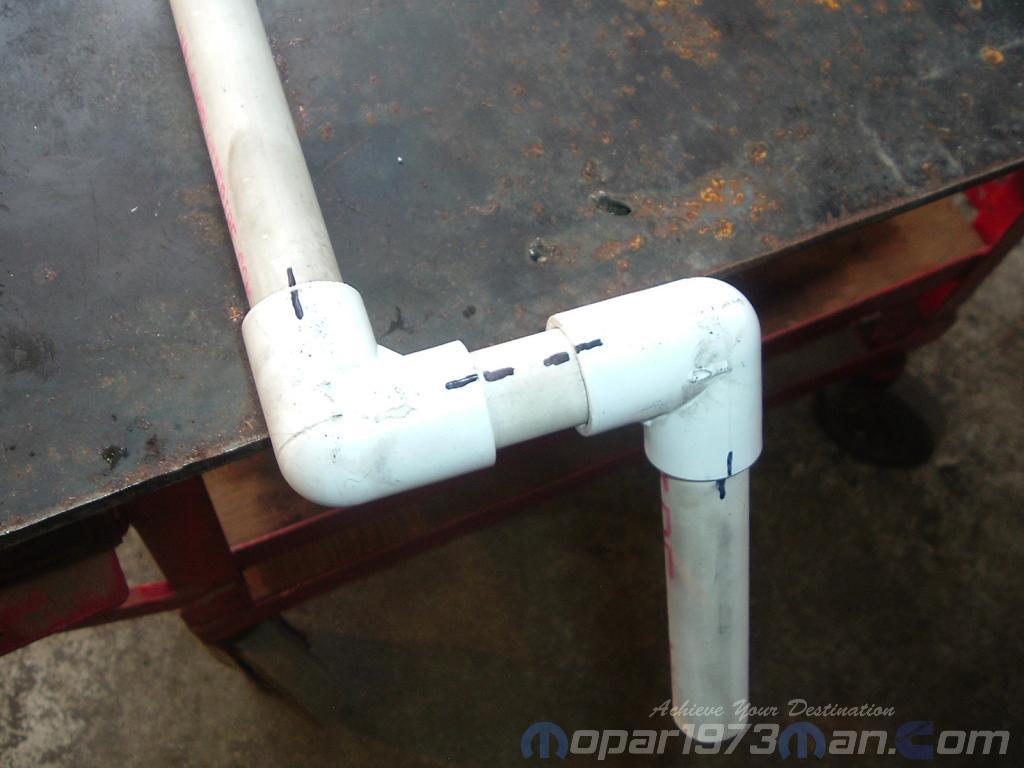
    marking the crankcase vent to remember positions

    At this point you will want to stuff your 3" piece of heater hose on the front pipe. Need at least 1" of heater hose on the PVC pipe for clamping.
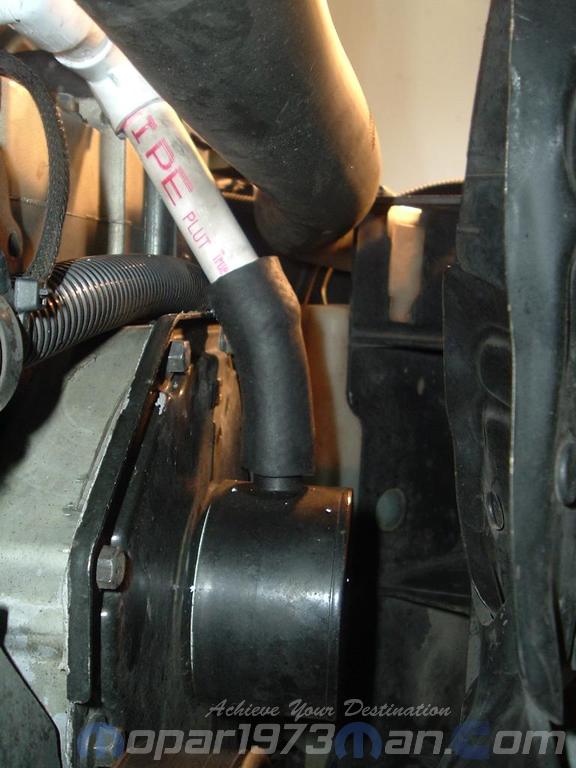
    crankcase vent clearance

    Now take a rag and a bit of paint thinner or lacquer thinner and wipe all the oil and grime off the pipe assembly. Now take a can of spray paint of the wanted color. It's best to get a spray paint that is chemically correct for plastics. 
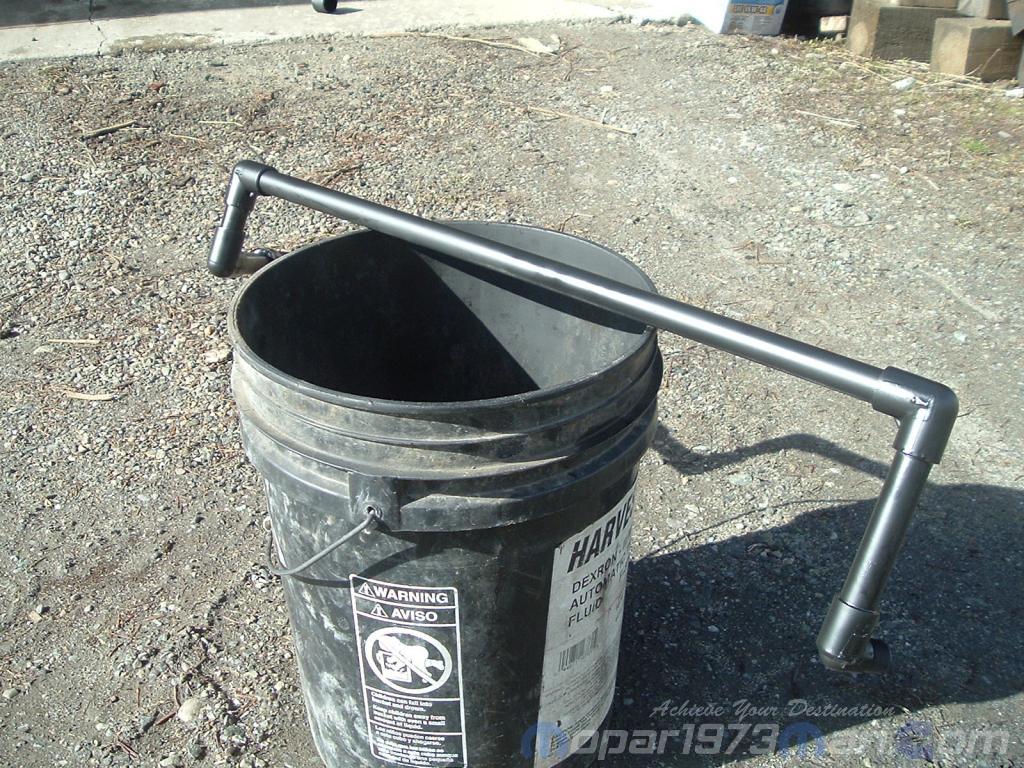
    crankcase vent painted

    So you should have a completed Crankcase vent pipe for your truck now. All you have to do is lay it back up on top. Make sure you have your 2 hose clamps on before installing. Slip the heater hose over the crankcase vent nipple. Using the one zip tie tie the rear cross pipe to the top of the hoist ring. Carefully slide the down pipe down and screw on to the rear fitting. 
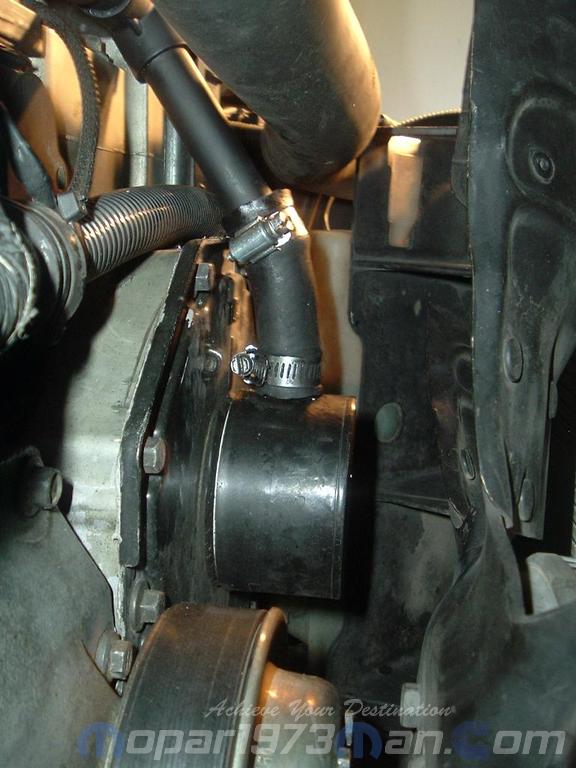
    crankcase vent with hose clamps

    Opps. the Paint was completely cured. 
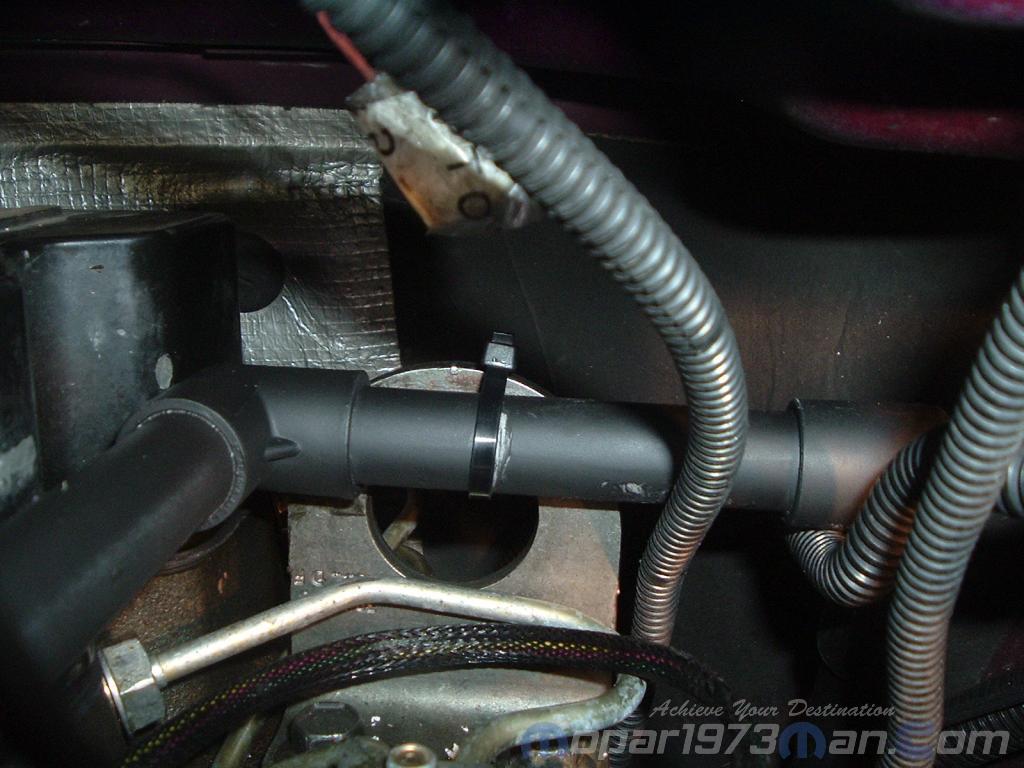
    crankcase vent zip tied to the hoist ring


    • Like 7

    User Feedback

    Recommended Comments

    abner99

    Posted

    Did you bevel the long pipe? So it won't clog?

    • Owner
    Mopar1973Man

    Posted

    Actually to prevent dripping or venting moisture doesn't freeze the end of the vent shut.

    notlimah

    Posted

    So the front pipe on mine that goes down to the top of the vent is a lot closer to the intercooler pipe. I can't get it any further back no matter what I do to the PVC. Is it ok if it's really close or even occasionally touching?

    • Owner
    Mopar1973Man

    Posted

    32 minutes ago, notlimah said:

    So the front pipe on mine that goes down to the top of the vent is a lot closer to the intercooler pipe. I can't get it any further back no matter what I do to the PVC. Is it ok if it's really close or even occasionally touching?


    That doesn't even make any sense. Intercooler pipe is way off to the right the front pipe goes down in the gear case face to the cover where the VP44 nut is. The final vent should be all the way back behind the bell housing of the transmission. I would have to see a picture of your set up.

    notlimah

    Posted

    I'll snag a pic later today, but if you look at the second pic you posted in this thread, mine looks exactly the same as yours except it looks like my intercooler pipe is a lot farther back then yours. The PVC pipe is literally touching the engine and with me holding it back, I can have it about a 1/2in away from the intercooler pipe

    Me78569

    Posted

    I assume you mean radiator pipe not intercooler?

    notlimah

    Posted

    Yes sorry, radiator pipe, not inetercooler.

    abner99

    Posted (edited)

    Mine is right down by the starter in fact it's laying pretty much on it.  I beveled it just so it won't freeze or clog I figure with the heat from the engine and blow by air shouldn't have any problem. 

    Edited by abner99
    • Owner
    Mopar1973Man

    Posted

    I've added just a bit of rearward angle so the tip of the down pipe is rest on the back side of the bell housing. This way the oil if any drip doesn't drip on the starter.

    abner99

    Posted

    Ohh it's about 3 inches past the starter 

    LorenS

    Posted

    Where do the NPT fittings go in this assembly?

    • Like 1
    • Owner
    Mopar1973Man

    Posted

    1 minute ago, LorenS said:

    Where do the NPT fittings go in this assembly?


    That is for the rear drop pipe. It has to be threaded to install and remove.

    • Like 1
    • Thanks 1
    LorenS

    Posted

    That's what I figured, but wanted to be sure. Thanks!


×
×
  • Create New...