

Hello Guys, Pepsi here with another thorough article. I have grabbed this information from over a dozen threads and posts across about 6 websites. I'm going to write this up, and surmised it where applicable to try and make sense of this. Hopefully you guys will learn something from this. And as usual if you guys have something to add fell free to tell me so I can add it in.
|
PEPSI'S NOTES: This can apply loosely to the 46re/rh series, and the early 48re series that are not actuator controlled. if you have an APPS sensor and a TV cable on your 48re then you can use this to follow loosely. However 48re line pressures are generally higher on the acceptable scale. |
So first things first. We need to do some testing on your current transmission set up.
You should set up a table like this:
|
Condition |
Stock(Unmodified) |
Modified (1st adjustment) |
Final |
|
|
50% Throttle shift |
@RPM |
|
|
|
|
WOT Shift |
@RPM |
|
|
|
|
Line Pressure @ Idle |
PSI |
|
|
|
|
Line Pressure @ 1,800 |
PSI (Get both 3rd and 4th gear) |
PSI (Add in turns of the screw) |
|
|
|
Line pressure @ 2,700 |
|
|
|
NOTE:
All 12V engines should have WOT shifting around 2,400 to 2,500 rpm
All 24V engines should have WOT shifting around 2,800 to 3,000 rpm
When filling out this chart I chose 2,700rpm because you want to see where your line pressure is when your just before the shift.
Line pressures should be measured in DRIVE. You will want to measure them at both idle in Drive, and driving down the road, weather you use 3rd or 4th gear you should measure your line pressure across the rpm range from 1,600rpm to 2,400rpm.
OEM should be between 55-65 psi at idle.
A built auto should be in the 70-80 psi at idle.
When testing the truck you want to have the truck in D and around 1800 rpm.
OEM is between 65-75 psi. 47/48re's are between 90-95. Built autos I will expand on this below.
So what do we gather from this information you ask? Several things. The health of the transmission and the line pressures at which your working with. Hopefully if you spend $5,000 for a built transmission your not seeing stock line pressures. As for your line pressures they are dictated by a few things. The number of clutches, the types of fluid used, and holding power are all dictated slightly differently.
So as stated earlier OEM max line pressure as measured in the middle test port is around 90-96 psi. Regardless of weather your in 3rd or in 4th you need to monitor your line pressures. Why do you ask? The overdrive units are weak, and because the 3rd gear clutch pack is a common failure point. See the 3rd gear is a shifting clutch so it takes the abuse on the 2-3 shift, Not to mention the fact that your usually turning over 1800 rpm's under full boost. When driving around its best to try and let the transmission to select the right gear. it's better to be in the right gear then run around in the wrong one.
Approxx Holding power for 3rd and 4th is below.
At 90 psi of line pressure your clutches will star to slip at about 250 HP/500 lbs of torque
Bumping this to 135psi gives you about 375 HP/750 lbs of torque.
Bumping to 150 psi gets you well into the 450HP range.
Bumping 165-185 psi is good for 500HP applications.
SOMETHING TO NOTE: Now lets assume that were still at 135psi, but the clutch count was also upgraded to (6) total friction disks which itself equates to an increase of 150%. Combined with the increased pressure we now have a total capacity increase of 230% for an ultimate slip rating of roughly 575 HP or 1,150 ft lbs. Long term reliable usage, that equates to 460 HP 920 ft/lbs of torque.
So take from this that if your adjusting your line pressures you should know whats inside your transmission, as there's no need to be pushing that kind of pressure with upgraded clutch counts.
FLUIDS--------------------------
Now fluids also play a role in this. Transmission fluid is another easy upgrade but it is difficult to quantify how much torque capacity is increased with the various fluids on the market. However, synthetic fluids such as ATF+4 perform the worst when it comes to preventing slippage in the transmission, Dexron 3 is slightly better than ATF+4, then comes the Ford Type F. This is about the best red fluid you can run for high friction/low slippage. Hydraulic fluid seems to be the best fluid at reducing slippage although it is generally high viscosity so not friendly at 100% hydraulic fluid for cold climates or daily drivers trying to maintain peak fuel economy.
RAISING LINE PRESSURES--------------------------
Now comes the fun part. Raising line pressure can increase longevity, and not to mention better shifting. However understand that there are risks associated with this. If you do raise your line pressures make sure you have a aftermarket 2nd gear strut. As it tends to bend when you get close to its limits which are about 120 psi. For most of us its well worth it to invest in one as well.
WARNING ! : If you don't know if you have an upgraded strut remember to keep your pressure below 120psi. Or you need to drop the valve body and verify.
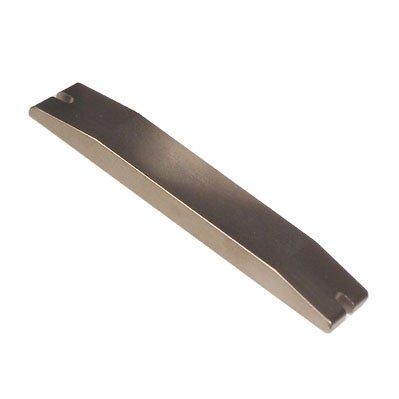
Stock Band strut looks like this(and yes its bent)
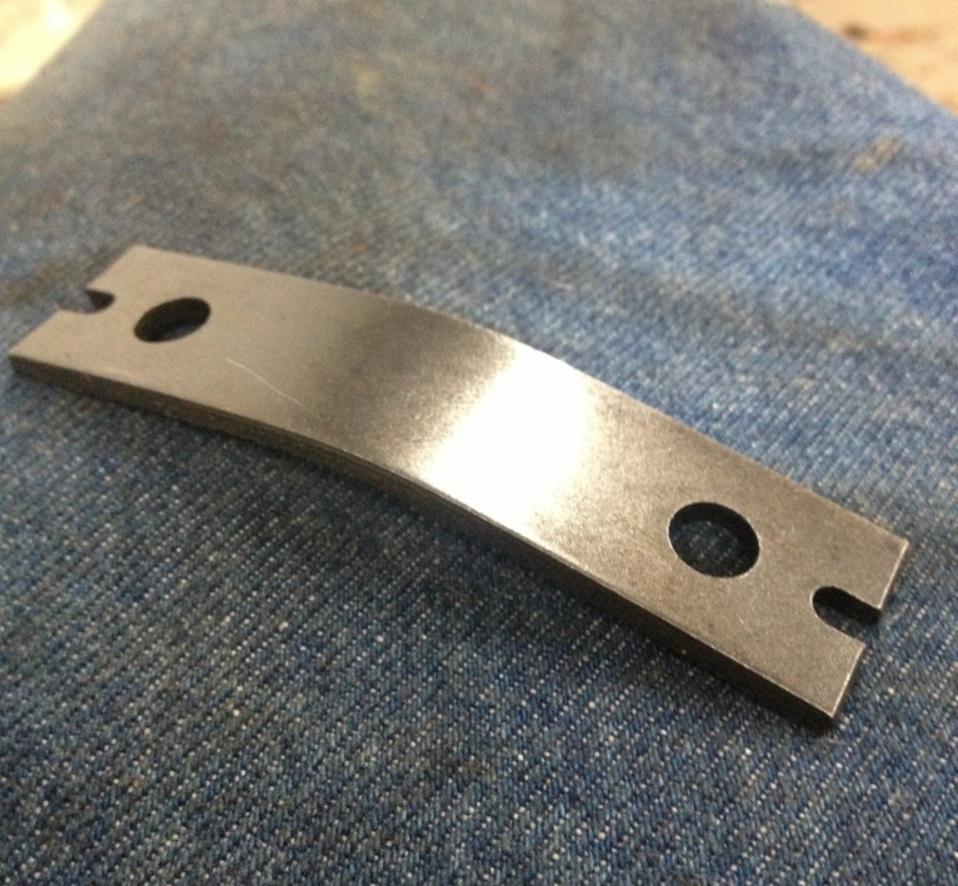
Below Is what an upgraded 2nd gear band looks like.
OK So how does one raise line pressure? Well technically there are two different adjustments you can make inside the valve body as it is. Lets look at this photo first.
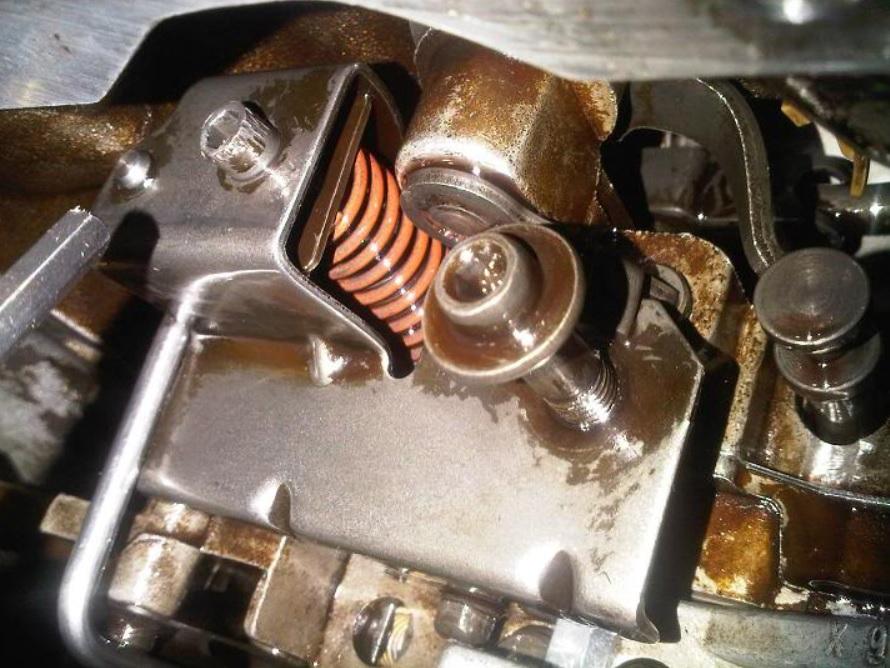
In this photo we are under the Drivers side of the truck, and looking at the valve body. There are two set screws here.
WARNING ! : I advise you turn these screws slowly and make small adjustments. Its much better to make small adjustments and drop your pan a dozen times then turn it a few larger turns and then find you blow out a seal. The 3rd gear drum seal can and will blow out under high pressure. And If your unsure where you stand then you risk doing more damage then good here.
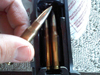
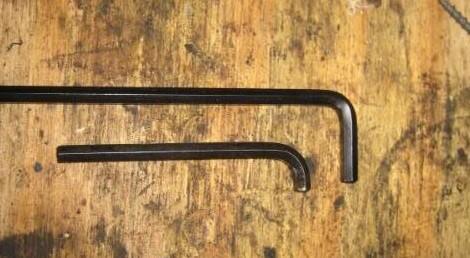
SO First you need to find yourself a 3/16ths Allen key and cut it up like this. Top is the key, the bottom is the modified key.
OK----NOW its time to start screwing.
The LEFT set screw that has the pressure plate and orange spring(in the photo) controls your line pressure. This you turn counter clockwise to raise pressure, and clockwise to lower it. Generally in a stock transmission you should see about 3-4 PSI per 1 revolution of the set screw.(ie 360 degrees) Now with a modified valve body you should be very careful about adjusting this. Some built auto's and shift kits can actually raise it closer to 8-10 psi per revolution.
NOTE ! : When raising this line pressure, you should also turn the TV set screw about ½ turn as well.
The RIGHT set screw controls downshifting, and passing gear. If your truck doesn't downshift early enough when you coast to a stop, you should turn this screw in about 1 turn. This screw is a slack-stop for the TV lever. The farther you turn-in this screw, the higher minimum TV lever position or throttle valve pressure regardless of external TV cable slack. When adjusting this screw you will notice downshifting sooner when you put your foot back to idle.
WARNING ! : Its advised that you not turn this more then 2 Full turns clockwise! For those who are technically inclined that is .800" of an inch.
When adjusting your TV cable you want to make sure it is adjusted so your WOT shifts are within your engine specs laid out at the beginning of this article. If you are running a programmer make sure that you go through and make your adjustments again especially if it is a smarty for example, and you know it will change the shift points.
<<What this accomplishes is that it allows you to still have full range of motion of your TV cable for passing power, but it raises your minim line pressure, which will control your low rpm and low throttle shifting. it will also delay your shifts out a bit. A few years ago there was a spring mod that accomplishes the same thing, but unlike that mod this sets the preload on the TV Valve >>
Testing and Adjustment---------------------------------
Now that you have made some adjustments, its time to hook up a line pressure gauge and get driving.
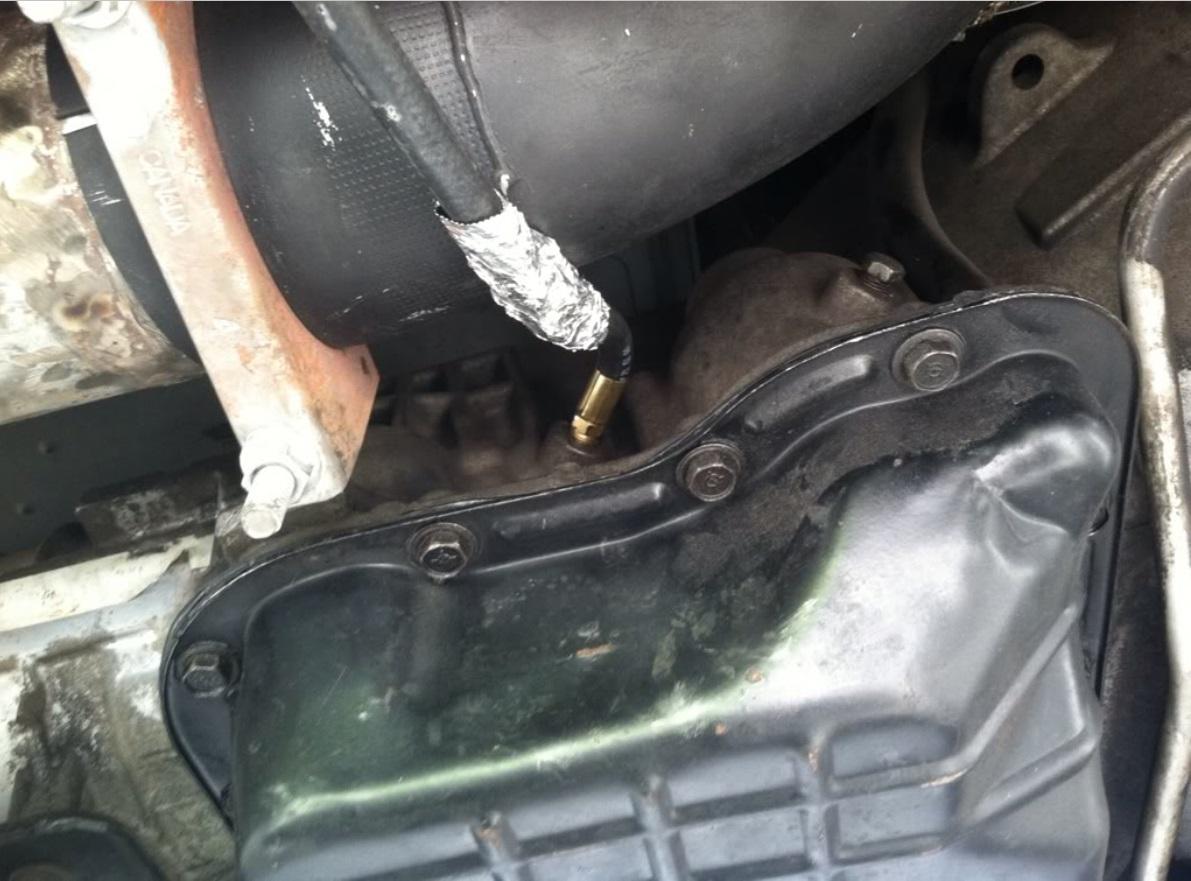
What you see here is the middle test port. This is the accumulator port and has line pressure in it in all 4 forward gears. What you need is a 1/8npt grease gun hose and run it to a 1/8 tubing to get a 0-300 psi gauge. I used a 0-300 psi gauge from Home Depot, and ran it up the outside and through the passenger side of the window. I watched for my line pressures and that it stayed above the 150 psi mark when I was about 1,500 rpm or above. When I did my pressures for Bill at DTT he specified 3rd gear O/D off and that the line pressures were above 150psi at 1,700rpm.
So what are we looking for?
Idle in Drive should be between 75-90 psi. This idle PSI isn't as important as its the speed. Driving down the road you want to see between 120 and 160psi generally. But it depends on what your HP goals are. Also if your running a OEM stock 2nd gear band strut. If you are then you MUST stay below 120spi.
REMEMBER ! : Its important to remember the number of turns that the two screws in the valve body take. When you fill out your first Modified chart, remember the number of turns on the two screws, and divide them by the increase. So for example Assume your at 3 psi per turn, So if your at 150psi at 1,800 rpm. Turning the line pressure up to 170 would be as follows. Follow the math here. Now to calculate your actual PSI increase per turn you need to take your modified (1st pass) results from your stock results. You can see the Warning below as that is how I calculated it.
170psi-150psi=20psi increase. the divide that by 3.5psi and you get 6 turns.
WARNING ! : Aftermarket Valve bodies have been reported to be closer to 8psi at the turn of the screw. One poster turned his screw 6 turns and went from 150 to slightly over 200psi! Now sometimes this is due to additional clutches inside the packs, sometimes its the springs themselves as well. Either way its better to adjust slowly.
200psi-150psi=50psi increase. so 50psi divided by 6 turns = 8.3psi per turn.
WARNING ! : Its advised to keep your max line pressures in the 170psi or less. Anything much over 175 there is a significant increase in blowing out seals on the 3rd gear drum.
Table for about where you want to be for line pressures at 1,800 rpm
|
Line Pressure |
HP MAX |
TQ MAX |
|
90 psi |
250 HP |
500 lbs |
|
135 psi |
375 HP |
750 lbs |
|
150 psi |
450 HP |
900 lbs |
|
165 psi |
500 HP |
1,000 lbs |
|
180 psi |
600 HP |
1,200 lbs |
|
200 psi |
TRACK OR STREET ONLY |
|
CONCLUSION-----------------------
Now your mileage may vary. Transmission longevity maybe extended, shift points fine tuned. But my advice is to stick around these line pressures and you may yourself see some changes in your trucks performance. Hopefully for the long run.
-
 3
3

There are no reviews to display.