leathermaneod
Yearly Subscription
-
Joined
-
Last visited
Everything posted by leathermaneod
-
Sounds like a plan! That's kinda what I was thinking after feeling it out, but I wanted a second opinion. Thanks!
-
You are correct, it is supposed to be torque set, that can be found in the FSM. However, I don't have a torque wrench adapter for a spanner wrench. Plus the plug has way to much resistance to be torqued accurately.
-
Anymore input on this guys?
-
I replaced it, but it is a stock one from rock auto. I know what you mean about the play though, this new one has it already. Very disappointed with it.
-
Hey guys, Most of you know that I recently did A LOT of work on my power steering system, including attempting to rebuild the gear box, which failed forcing me to replace it with a reman. Anyway my trucks steering has never been what I would call very bad, but it's always had the usual 10-2 dead spot. The new box and shaft and even Rock Solid Ram Steering Fix bushing did nothing to help that, though the bushing did get rid of the clunking. I am also guilty of sanding the bushing a little too much to prevent binding in cold weather and so I still have a little movement in the shaft. Anyway I got tired of the dead spot and read up on the "over center adjustment". I tightened the screw about 1/8-1/4 turn max. It helped some but I still had a dead spot. After some more research I found quite a bit of emphasis on performing the bearing preload adjustment BEFORE the over center adjustment. Anyway I ordered a spanner wrench and finally performed the bearing preload adjustment after returning the over center to the way it was. Now I was able to turn the nut about 1/4 turn max before it got tight. So I backed it off about 1/8 turn to halve the total movement. It definitely reduced the dead zone and the steering still feels fine. My question is, do I tighten up on the preload more even though there's only about 1/8 turn left? Or do I now adjust the over center?
-
Hey guys, job is done and, fingers crossed, no leaks yet. First off, as for pre bent steel, the dealer told me they could get it for $50. How it would be shipped, I'm not sure because it's probably about 12' long. As for this copper nickel alloy, it seems pretty nice. Very easy to bend, seems pretty easy to double flare after a little practice. No issues with kinking. Only downside I noticed was that it has a tendency to want to twist as you tighten your fitting if it's not held well and perfectly straight. Not a huge issue since it's so soft, but I did my best to keep it from twisting because I'm sure it begins to weaken it, but I couldn't totally prevent it. You can also make it less likely to twist by trying to clean up any burs from the flaring. I was getting a good one on the outside of each flare due to the seam on the flaring tool. Just had to try and clean them off with a file then lube things up with brake fluid. Now fitting sizes. The two ends of the long run are the same standard thread 3/8-24 inverted not bubble 3/16 line. Where it gets weird is on the rear axle. At the end of the hose that goes from hard line to middle of the axle there is a block. The lines that go to each side come out of it. Those fittings are M11x1.5 thread 3/16 line. My local stores did not have a fitting like that except for a bubble flare so I had to reuse the old ones. Next weird thing, I could not get the hard line seperate from the hose at the caliper so I had to get new hoses too. Autozone told me they could get the passenger side, only the driver, well they are the same. I compared my old ones off the truck and they are identical. The fittings on the end of those hoses are metric M10x1.0 inverted flare. One more thing, I cover the new line with split loom in places where I thought it likely to rub. My buddy who was helping said I was crazy lol but it made me feel better. Behind the tank it is all clipped in the holders along the frame though so I didn't need any loom there. Mostly just where it crosses over the frame up front and along the rear axle.
-
I'm not sure if it is most economical or not, it was $50 for a 25' roll at autozone. I saw it online for about $30 though. I haven't worked with it too much yet, but I practiced making a few flares. It took some practice but seems pretty easy. Seems very easy to bend this stuff by hand. I'll give you a better idea once the job is done. So far the worst part is the fact that all the fittings are different. It's one size one each end of the long run that goes from front to back. Then it's a different size on the lines where they go into the block on the axle. Then another size at the hoses. It's really been frustrating! I'll try to list all the sizes when the job is done
-
I'm using the copper nickel alloy stuff
-
Well just figured I'd update this with my progress. After looking at just how much line is behind the tank there was no question in my kind that it had to be dropped, so we got right on it. So far the tank drop was the easiest part of this job, even though it's about half full lol. We just put a jack under each end. Hardest part was getting the darn return line quick connect fitting to release. I'm hoping it's not damaged enough to keep it from sealing up! Anyway got the tank down and the old lime out with no problem. Then decided the hose that goes to the axle needed replaced too. Should be no big deal right? Well the brake lines that come out of the block at the end of the hose and go to each wheel would not come off without a fight. They were original lines but looked in perfect shape. But the nuts wouldn't turn on the lines and so ruined the lines. Then I figured no big deal I'll replace them too. Well the hard line would not seperate from the hose that goes to the caliper. So I had to call up autozone and get new caliper hoses too. Well autzones telling me that they can only get the driver side hose! Wth?! Well fortunately my buddy was sitting right there and said "I'm pretty sure both sides are the same...." autozone says no they are different lengths and the end at the caliper is different. I go to the truck and check, they are 100% exactly the same. So now I'm waiting for hoses to get everything put back together. Another "simple" project that got blow way out of proportion smh
-
Since we are talking about antifreeze I figured this would be a good place to ask this question. A diesel mechanic friend of mine said he has a great way to flush antifreeze. Something he used to do on the HMMV's all the time. You get the engine up to temp, then carefully open the drain on the radiator, then carefully take the cap of the radiator and it will flush it self rapidly out the drain. He offered to do it for me next weekend but I'm just a little concerned....Anyone ever try/hear of this? Will it hurt my engine to rapidly remove the coolant when it is up to temp?
-
Thank you! I will look into that. What would a slight upgrade like that get me? Quicker spool or mpgs? Only thing I miss going from smarty to edge comp is that now my truck has a little lag compared to the smarty. Also, I see they have various numbers of blades with the different size comp wheels. Do I want 6,7 or 8 blades?
-
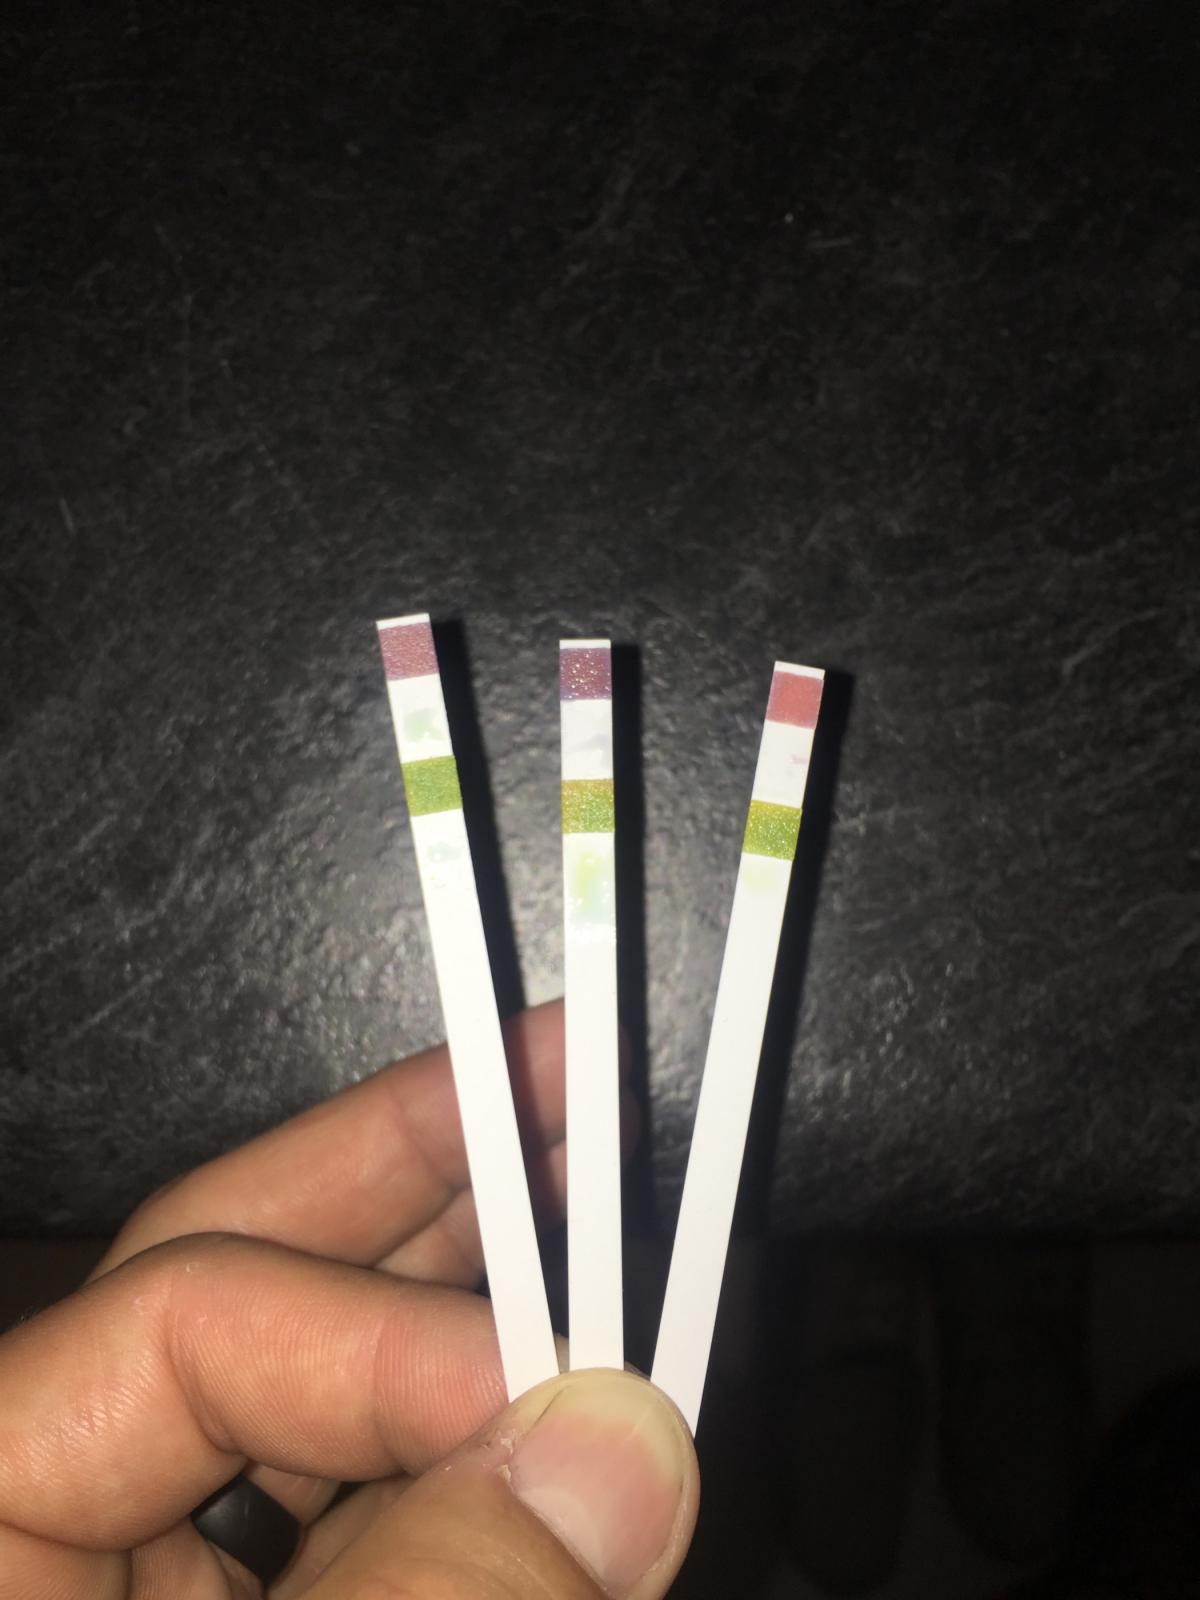
Well I have some interesting results to share. Below are (from left to right) tests from my 04 Honda Civic 202K, 06 Honda CRV 150K, and 01 Cummins 258K. The Civic we have owned since 150K and it has never had a coolant flush other than what came out when I replaced the radiator 2 years ago. The CRV we have owned since 117K and it was flushed at the dealer when we bought it. My truck I have owned since 248K and the only change it had was when the radiator was out at the shop that did the front main seal. I do know that the PO did a thorough flush when he did the headgasket and changed coolant from red to green. He said he had heard that red eats headgaskets and didnt wanna risk it. Now obviously my truck needs changed because the freeze point is way to high, but the PH on all three is right around 7.5 - 8.....
-
Lol thank you. I believe it is also possible to figure out the size based on the model number on the tag. I'm still a little concerned about the quality...I wish I could get a genuine Holset wheel....
-
I believe stock size is 54mm x 78mm, but I could be wrong. If they have one in the correct size, would you buy from them? like this...http://baeturbosystems.com/compressorwheelformitsubishitd04hl4350mminducer-5600mmexducer-3-3-1-1-1-4-2-2-1-3-1-1.aspx
-
Anyone know a good source for an OEM HX35 compressor wheel? Ive been looking online and there are some cheap ones on ebay, but I cant seem to find any that are OEM Holset, and if I'm going through all the trouble of rebuilding and balancing this thing, I dont want to throw a crap wheel on it. I don't want a Wicked Wheel either, just a stock HX35 wheel would be perfect. Just hoping it doesnt cost an arm and leg.
-
What should the PH be at with those strips? got some today...
-
I had a local shop put new ends on my cables so I could switch to the ordnance style terminals when one of mine cracked. They told me they crimped and soldered the ends, and they also used adhesive lined heat shrink over them. I'm not sure what they used to crimp the ends, but I've seen a large crimping tool online that is made for at least up to 2/0. I debated about getting one but they are around $100. That one is a long handled one made by greenlee I believe. Then there are also the smaller hydraulic ones that come with different size dies. I got one from harbor freight and tried it but wasn't impressed. The dies were labeled for metric wire sizes and didn't go big enough for 2/0. It did make a good crimp on smaller stuff though. I assume if you got a better one you could get one with awg wire size dies. My cables had plenty of slack to cut the ends off, but I have been told you can melt the factory ends off to save length.
-
So your saying to take total capacity of the cooling system and divide by 2. Add that amount of concentrated coolant and fill the remainder with distilled water? Just want to make sure I understand....
-
Thanks for the tips guys. My dad always taught me to just start with adding the antifreeze then water a gallon of each at a time. That way you always end up with a higher concentration of antifreeze. How do you test the PH?
-
This is what concerns me with doing a flush myself. What happens if I am unable to drain all the tap water out? Could you blow it out with compressed air?
-
Was it a good difference? How did it affect the sound? How much did you need? About 3 gallons?
-
Very interesting to hear that the tip made the sound deeper. I would like mine to be deeper, maybe a 4-6" would do the trick... btw what color is the Zerex and where did you get it?
-
Yes why?
-
Thanks for the info. I know it's definitely possible because my rear axle is and has been overfull as well. I'm just not totally convinced that it will be possible to stop it from leaking while it's overful since that seems to be what quite a few folks have found to be the case and it's what the fsm says. Plus before I topped mine off it wasn't as wet as it is now. Like I said, not trying to debate or anything by any means, just want to get to the bottom of this before I go back to the guys that did it again and complain about their work....
-
Well I guess you guys are getting me talked into it. If I am moving the tank at least partly out of the way, should I get a new stock preformed line from the dealer? Or make it myself? Also should I replace it all the way from the front fender well where it originates? Or just make a union after the tank? Btw does anyone the the fitting/thread size?