Jump to content
  • Welcome To Mopar1973Man.Com LLC

    We are a privately owned support forum for the Dodge Ram Cummins Diesels. All information is free to read for everyone. To interact or ask questions you must have a subscription plan to enable all other features beyond reading. Please go over to the Subscription Page and pick out a plan that fits you best. At any time you wish to cancel the subscription please go back over to the Subscription Page and hit the Cancel button and your subscription will be stopped. All subscriptions are auto-renewing. 

need help quick on parking brake for a 1998 dually....and new raptor


Recommended Posts

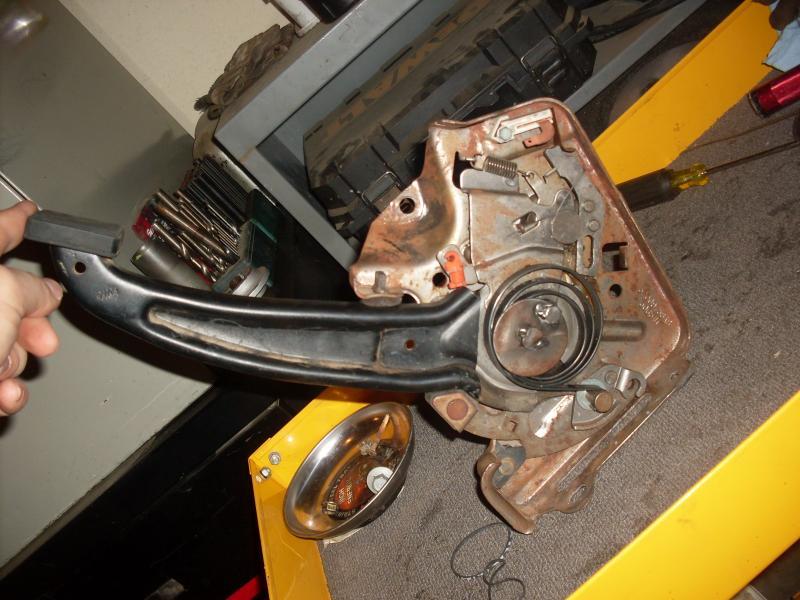
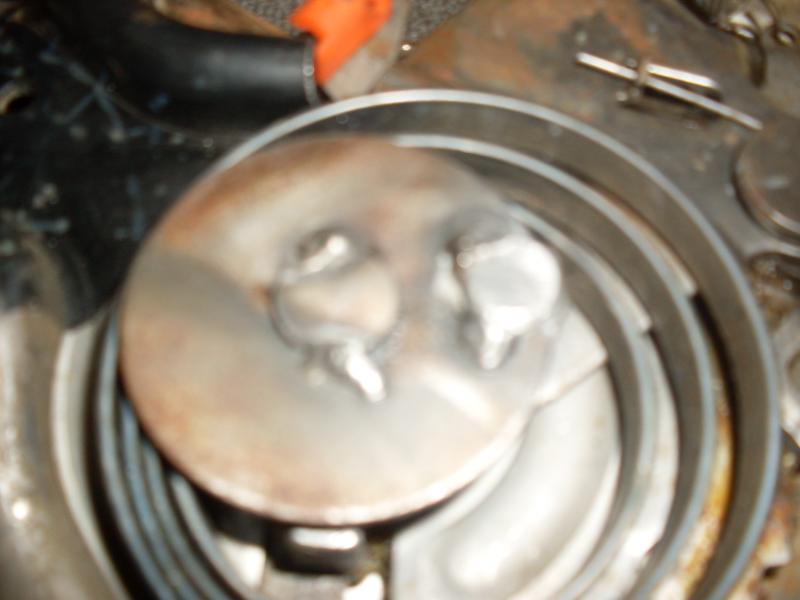
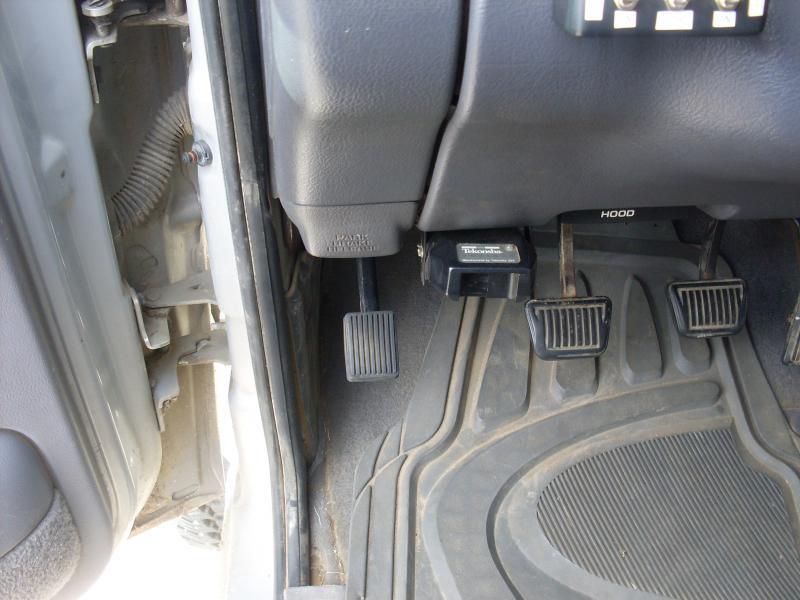
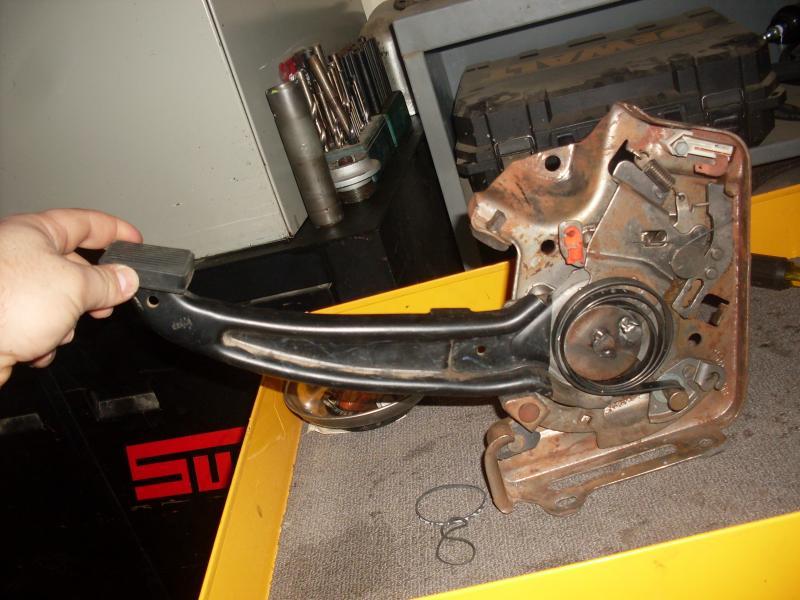
Help ......ok heres whats going on need to fix my parking brake and fast have a vehicle safety inspection comeing up on next thursday ......gotta have a working parking brake .....i remember reading somewhere ..sometime that the stock parking brake was very weak at best on these trucks ....there was a way to make them stronger had something to do with turning the big spring in an opposite direction and welding a bolt in somewhere ..or something like that .....any one have any info on this? .....also any one have any helpful hints on installing a new raptor lift pump i just got mine in the mail today with the new 1/2 inch lines with quick connect fittings....thanks in advance folks.

Link to comment
Share on other sites

lol I must b getting senile or just inhaleing to much smoke from house fires after searching many times on here i found that i had asked this question once before ...(shortley after becoming a memeber )...several ppl started talking about micro or macro locks .......dang sorry folks ...if anyone is a member of turbo diesel registry would yall mind asking about the modification over there and letting me know please

--- Update to the previous post...

found the post on turbo diesel registry titled tough truck ..dated about 9-04-09....i cant read the whole post due to not being a member can anyone help please

Link to comment
Share on other sites

terry thanks for the web link looks like something i may have to try in the near future. At one time i was a member of the cummins turbo diesel registry forum and i posted a thread about brake failure over there and several ppl replied with a modification to the regular parking / emergency brake ..where you unbolt the pedal assembly from the fire wall then do something with the big circular spring and add a bolt somewhere then weld another piece and reinstall ..this supposedly made the holding power on the pedal and cable stronger due to the fact that these brakes have a tendency to "pop" off ......problem is i dont remember what all needed to b don for the modification and i can no longer read the entire thread due to the fact I am no longer a member there....cant see paying the money for the web site evry year when i get better service here .....thanks again maybe someone will see these posts and have a connection to the other site or have more info ...but i believe in the end (after christmass) when i have more cash ....i will have to do the micro lock ....thank you very much

Link to comment
Share on other sites

I signed up for a trial membership at TDR after I found their site last month and its good for 60 days so heres a copy of the post that I believe your talking about.

Originally posted by SRath over on TDR.

This post is for owners of early 2nd gen trucks like my '96 that have the annoying at best, and dangerously ineffective at worst, parking brake pedal that won't stay down when set and/or won't stay set at all (like mine was).

It is intended only to share my personal solution for the problem with members who need it or are just sincerely interested in improvements to our trucks. If your parking brake makes you happy the way it is, or you have a newer truck that does not have a problem, or if you simply don't believe in using parking brakes, this post is probably not for you.

It is what it is. Nothing more.

But it works well. And it costs virtually nothing. The R&R of the pedal assembly is the hardest part and is 99% of the work. So if you can do that, you can do this fix.

It does require one spot weld. If you don't have access to a welder, or if the instructions leave you confused, I'll be happy to do the entire mod for you for free if you send me your parking brake pedal assembly and pay for return shipping.

Please understand that this solution does not fix your rear brakes if they are the problem. It fixes the parking brake pedal on models with the same miserable design my '96 had. Dodge later changed that design (I don't know exactly when), and that alone should tell you something about how it (didn't) work.

My solution is very simple to do and makes the pedal stay where you set it. It will hold better, no longer pop off, and will no longer return to the top position when set; leaving you unsure of whether it is set or not, driving with your brakes on, or parking with them off.

Your shoes and drums and their mechanisms and adjustment must be right for any parking brake to work. Adjusting your parking brake cable slack is part of the process after reinstalling the pedal. The entire modification is easily reversed to stock if you don't agree it is better.

My parking brake was as bad it could get and would not stay set reliably, yet my rear brakes were fine. My engine compression alone would not hold the truck in all situations. Putting it in gear and shutting off the motor to exit the truck for even a brief moment was a pita, as was having to use wheel chocks all the time. I had to find a solution; and I did. The parking brake is great now. Better than new.

The parking brake pedal stays where I put it. Happily, so does the truck now... Posted Image

[i have included some suggested R&R instructions for the pedal assembly. Some guys won't need that. Others might find parts of it useful. Please bear in mind that I did this fix many months ago and did not write notes on the R&R part and removing and reinstalling my pedal assembly may have been a little different since I already had much of my interior removed for other reasons. Improved instructions, feedback, and suggestions from those who do this mod are most welcome. "Thank you!" to Joe G. who did this mod very recently and suggested some changes to the R&R instructions and encouraged me to repost it.]

Parking Brake Pedal Removal (suggested tips):

1> Under the driver's side of your truck is the parking brake cable adjuster. Loosen it completely and get all the slack you can for the front cable.

> It helps to use plenty of penetrating oil on the threaded shaft.

> If you can, use a dremel-type rotary tool with a wire wheel brush on it to clean the threads as much as possible first.

> You will need a pair of vicegrips and a 13mm wrench. The threaded shaft is too long for a normal deepwell socket, so a ratcheting boxend wrench really helps!

> Use the vicegrips to hold the adjuster yoke from turning.

> Use antisieze when you reassemble. You will be adjusting your parking brake here when finished.

2> Remove the parking brake pedal assembly.

> You will need a 13mm socket (preferably a flex socket) and some various extensions. A really long one helps.

> Make a note or take a photo of how the wiring bundles around the parking brake pedal assembly are routed. You want them the same way later.

>There are two nuts on the firewall and a bolt in the kickpanel. The top nut is hard to get to and I removed my knee panel from the dash to help.

>There is also a tiny clip that holds the release handle cable to the pedal frame. Remove it and the release cable ball end. Remove the brake light wire.

>The parking brake cable housing itself is held in the hole in the pedal frame with spring-type fingers. Squeeze those fingers down and remove the cable housing. (Get the pedal assembly unbolted and down on the floor first, where you can work on it.)

>Remove the lead-ball end of the cable from the parking brake mechanism. Leave the cable in the truck.

> As an alternative, you can leave the cable with the pedal assembly if you think it will be easier. But you will need to completely disconnect the adjuster end and pull your carpet back to get to the screw holding the cable to the floor where it passes through.

> Play with the stock assembly enough to understand how it works. Push the pedal down and operate the release. Watch how the center section operates and how the pedal "freewheels" independently. Note how little tension is placed on the ratchet holding/release mechanism. It is an ineffective and ridiculously overcomplicated design and you're going to change those things.

Actual Modification:

Look at the photos, particularly the one showing both the stock assembly (on the right) and the modified assembly (on the left).

Focus on the center section and spring and compare them to each other.

The stock configuration has the big spring winding clockwise out from the center.

It is anchored on the inside to a bent metal tab.

The modified version has the spring flipped over and winding the opposite direction.

It is anchored on the inside to the new "anchor" bolt you are going to install in the center plate.

Both have the outer end hooked on the same stock pin, only in different directions.

(and those few simple changes are the entire modification in a nutshell!)

The other photos give some different angles and closeups. The extra empty hole drilled in the center plate of the modified assembly was just an experimental hole as I was figuring out how much tension to put on the spring. Ignore that empty hole. More is better.

Step by step:

> Remove the spring by hand. It has low tension and comes off easily.

> In the close-up photo, note where I drilled a 1/4 inch hole in the top center plate. Do the same now. It does not need to go through the bottom plate nor does it need to be in exactly the same spot, but try to get it close.

> Cut a 1/4 inch bolt to length so it just reaches through the hole to the bottom plate, as seen in the close-up photo.

> Put it through your hole nice and straight and spotweld the head to hold it in place.

> Put the spring back on flipped over so it winds the opposite direction (counterclockwise from center) from stock and so the hooked inner end hooks over the bolt you just installed. Hook the outer end over the same pin it was on originally.

> The original bent-tab inner anchor, seen in the photos, does not seem to get in the way, but you can flatten it down if you want to.

> Play with the pedal assembly a few times; pushing the pedal down and then releasing it.

Note the changes in the function of the center section and pedal. It will now stay down when set and snap back when released. Also note how the tension of the spring now provides a firmer positive engagement of the ratchet holding/release mechanism. Much better!

(That's it. You're done with the modification! Now you can just reinstall.)

Reinstall and Adjust:

1> Reverse the removal procedure to reinstall the parking brake pedal assembly. Be careful of wiring that runs through your kickpanel to the door and any other wires in close proximity.

2> The final step is to adjust your cable slack under the truck. I like mine so the pedal goes 2/3 to 3/4 of the way down when fully set hard. Make sure the brakes release fully, too. If you run out of adjuster threads, you probably need to adjust your brake shoes using the star wheel inside the drum. Or you may need new shoes and/or drums. That is a different job and is just a straighforward normal brake job.

3> Your parking brake pedal will now stay "set" in whatever position you put it in until you release it.

The spring will put tension on the ratchet assembly to help hold the engagement; something important it did not do before.

The pedal will pop back to the top only when released, and will do so visually and firmly.

I hope this works for everyone else as well as it is working for me. If you have any questions, problems, suggestions, or criticisms (now that you have tried it), please let me know. If you don't have a welder or other equipment, I will be happy to do the modification for you if you can send me your parking brake assembly.

post-10366-138698173411_thumb.jpgPosted Image

post-10366-138698173327_thumb.jpg

post-10366-13869817334_thumb.jpg

post-10366-138698173348_thumb.jpg

  • Like 2
Link to comment
Share on other sites

  • 5 weeks later...

well i have completed this mod just today and so far i like it very much now when the pedal is set it stays in a down and locked position and you can actually tell that the ratchet is engaged. it seems to hold much much better. here are a few pics of my go round enjoy.

post-10316-13869817455_thumb.jpg

post-10316-138698174556_thumb.jpg

post-10316-138698174564_thumb.jpg

post-10316-138698174571_thumb.jpg

post-10316-138698174577_thumb.jpg

post-10316-138698174596_thumb.jpg

post-10316-138698174608_thumb.jpg

post-10316-138698174614_thumb.jpg

post-10316-138698174621_thumb.jpg

post-10316-138698174629_thumb.jpg

post-10316-138698174635_thumb.jpg

  • Like 1
Link to comment
Share on other sites

×
×
  • Create New...