

Injector Disassembly, Cleaning & Inspection
Cleanliness is very important, any dirt or debris that get inside the injector will wear on the tight tolerance parts.
Injector Diagram:
.jpg.24cecc3aa85c4898c65ef402f3803d1f.jpg)
Torque Specs
- 15mm Nozzle Retaining Nut - 22 ftlb's
- 10mm Injector Bleed-off bolt - 6 ftlb's
- 24mm Injector Retaining Nut - 44 ftlb's
Things we'll need.
- 19MM Open end wrench (For Pop Tester).
- 15MM Open end/box end wrench (For Injector Disassembly and Pop Tester).
- Torque Wrench with 15mm Deep Socket.
- Vice, Preferably Smooth Jaw.
- Lubrication Oil (I use 50% Diesel, 50% engine oil).
- Pen Magnet for Shim Removal.
- Small pick (I like a 5/64 hex key, it fits tight into the shim for easy removal).
- Adjustment Shims (For Adjusting Pop Pressure).
- Caliper (For measuring Shim packs for easier pressure adjustment).
- Pop Tester (For checking Pop Pressure)
- Fluid for Pop Tester (I use 95% Diesel, 5% 2-Stroke Oil)
Clean the injectors thoroughly before disassembly.
I Highly recommend you only work on one injector at a time to prevent mixing parts between them.
Clamp Injector in the Vice. Do not Clamp onto the Injector Return Outlet Port. Use 15MM Wrench to loosen Nozzle Clamping Nut until Hand Tight.
.JPG.c8b6fb74fd67b7ccc5b971ae826fbef6.JPG)
Remove the injector from the vise, put the injector close to your work bench before finish removal of the Nozzle Retaining Nut. This will prevent small parts from falling and disappearing.
.JPG.3493dff126e437801214068f87b18378.JPG)
Disassemble the injector further, note the orientation of everything, it should come apart like this.
.JPG.7070528248b1abc3ef534c36b60eea17.JPG)
.JPG.0a2752cc45f5bb2cc8218b481c6bd074.JPG)
Clean All Parts Thoroughly. Use Brake Cleaner/Carb Cleaner and Compressed Air to blow backwards through the Feed Passage in the Injector Body to clean the Edge Filter.
.jpg.62cd069507adfc210400d91b0551481c.jpg)
Carefully remove the Needle from the Nozzle, if necessary use some pliers and carefully pull the needle out, make sure not to scratch the nozzle mating surface. If the needle still won't come out (very unlikely for a used nozzle in good shape) then reassemble the injector and install it into the injector Pop tester and use it to pop the needle loose. And then once again disassemble the injector and continue cleaning.
Use Brake Cleaner/Carb Cleaner and Compressed air to clean out the nozzle, blowing into the needle hole, and the feed passage.
.jpg.d42ea304cd3230f1502dceb092681b6e.jpg)
Inspect the injector needle for wear or pitting at the tip.
Here is a video showing a good and bad needle. If the injector needle is damaged, both it and the nozzle must be replaced. If this is the case, it is highly recommended that you replace the whole set.
Once clean, use your lubricating oil and put a couple drops on the injector needle before inserting it into the nozzle. Make sure to lube both the needle tip, and the largest diameter portion of the needle. Well used nozzles aren't picky about the type of oil, you could even get away with straight engine oil. However new nozzle have much tighter clearances so are very picky about oil thickness, Use a maximum of 50% oil and 50% diesel. To thick will warrant inaccurate readings with the Pop Tester. If the injector isn't working correctly on the Pop Tester, Disassemble the injector, clean the nozzle thoroughly, and make sure you're using a thin enough lubricating oil.
.JPG.f508fdf84e46f00e2219200c7590e78c.JPG)
Once done, insert the Needle back into the Nozzle.
.JPG.630fcee70772da67625cc56dd2bcc697.JPG)
Back to the injector body.
Install all the shims back into the hole, if you are installing extra shims to raise the Pop Pressure, install them under the main thick shim. As a general rule, .01mm of shim will raise the pop pressure 1.5-2 Bar. Once the shims are in place, insert the spring, if the spring does not sit approximately flush with the injector body, the shims are not seated correctly. Carefully use the spring as a ram-rod to seat the springs.
Here is the shims and spring inserted correctly.
.JPG.0480d0978288d3ced89b736d77d89e47.JPG)
Then install the spring seat, note the orientation.
.JPG.0f070403ce1b8455e1218af141ba4679.JPG)
Now install the Valve Stop Plate. Once again, note the orientation, the conical side should face the injector body.
.jpg.3da18776c2a6414699cb0003a066b242.jpg)
When installing, make sure to line up the Feed passages.
.JPG.3d6e563593d6e67c2002eced1c2f24e4.JPG)
Once installed Dribble a little Lubricating Oil onto the Valve Stop Plate, This will lube many key things, most importantly the injector body threads. Also dribble some oil into the Injector Nozzle Nut, this will again lube the threads, as well as where it seats against the nozzle.
Once done, install the nozzle, again make sure to line up the Feed Passage.
.JPG.6c40fff395464cac61bd76e45467b388.JPG)
Install the nozzle, then the nut. Tighten the nut until you start to feel spring tension, then back it off a turn or two. Grab the nozzle tip with your fingers and pull up and down on it, there should be play, if not, loosen the Nozzle retaining nut further until there is some play. Then try and spin the nozzle tip, while pulling in and out. The nozzle should not spin. If it does then you do not have the aligning dowels in incorrectly. Disassemble and re-check your work. if the nozzle does not spin, everything is good to go and you can tighten the Nozzle retaining nut down to 22 ftlb's.
If you are changing the pop pressure, or installing new nozzles, it is highly recommended that you Pop test the injectors once down. This will let you know if you should shim the injectors, or if some nozzles aren't spraying correctly.
I highly recommend you do your pop testing outdoors, or in a very well ventilated area (Due to the fact that it was raining, I had to take these pictures indoors).
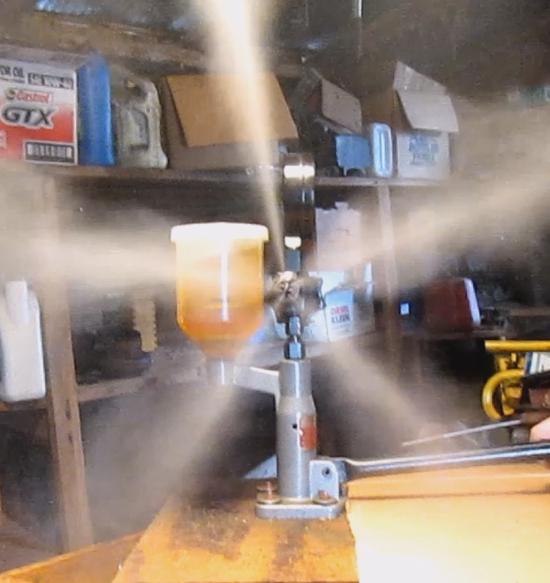
Good spray pattern:
5x.010 VCO @ 280 Bar
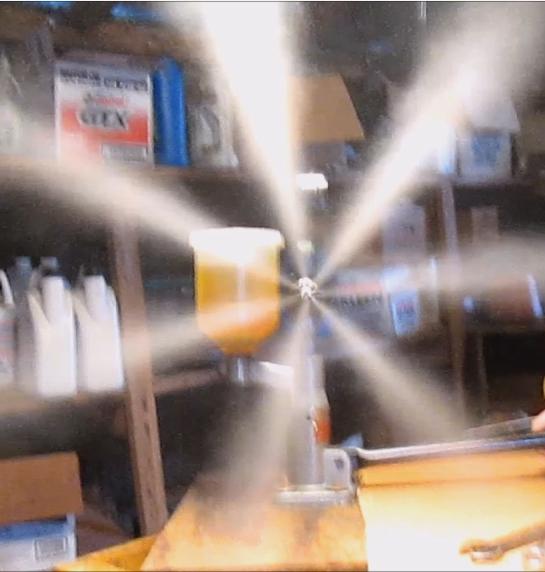
7x.0105 SAC @ 320 Bar
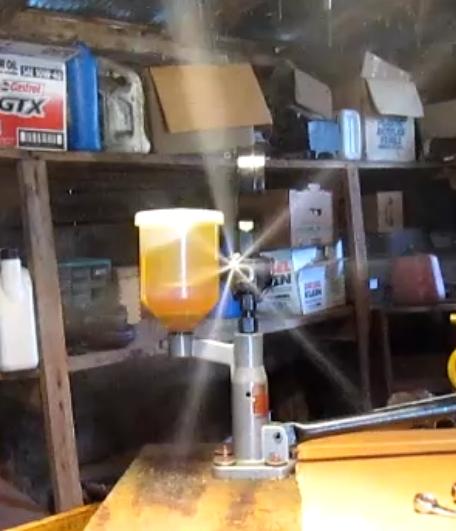
7x.0105 SAC @ 260 Bar
.png.ce7e187d6484f6e8c73b34c7c9991ee3.png)
5x.013 SAC @ 260 Bar
.png.c8a718eadaa06694831e764c1a028064.png)
7x.0105 SAC With Bad Spray pattern, it may look like it's just injecting less fuel, but it's actually the same amount.
-
 4
4
-
 1
1