Valve Lash Adjustment For Cummins

Valve lash adjustment is suggested to be done at 150K miles which I think is too far down the road. My valve lash were out of adjustment a bit at 92K miles. So this is how I did my valve lash adjustment on my truck. Valve lash adjustment is fairly simple to do and doesn't require much for tools.
Tools Needed:
1. Feeler gauge set (0.010 and 0.020)
2. 9/16" box wrench
3. 10mm short socket
4. 15/16" socket
5. both 3/8" and 1/2" ratchets
6. Allen wrench
7. mirror.
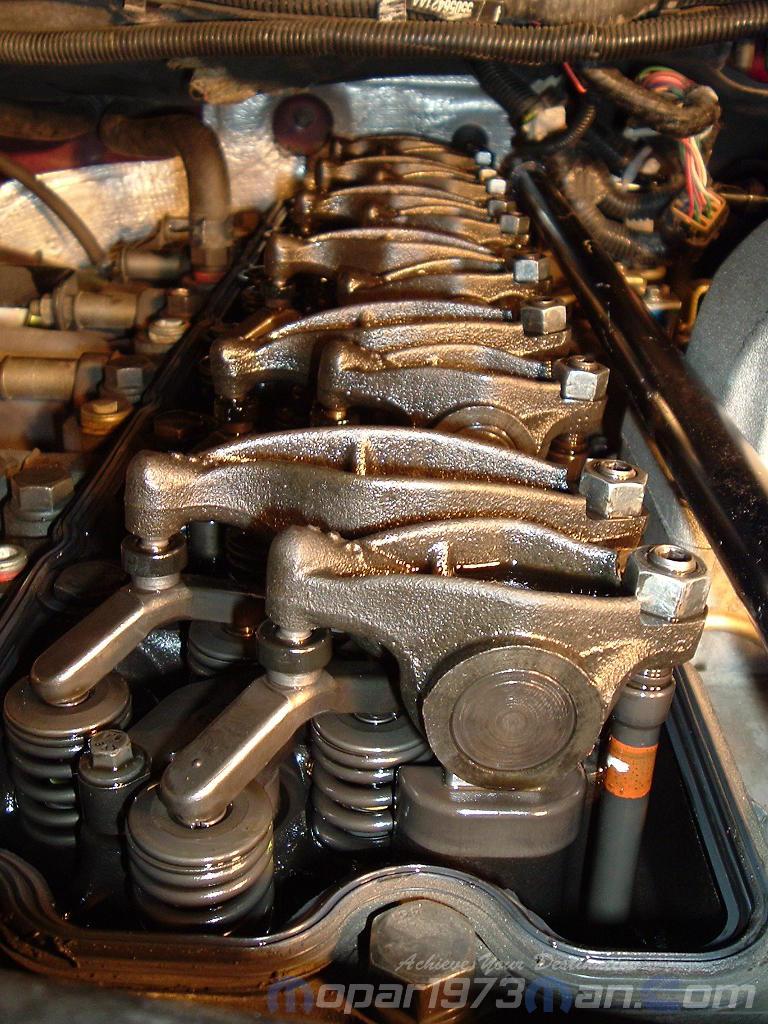
Valve lash adjustment should be done on a cold engine with a coolant temp below 140*F. The first thing you need to do is pull the valve cover off the engine. You'll need a 10mm short socket and a 3/8" ratchet. Loosen all the bolt till you can lift the bolt up. Don't bother removing the bolts from the valve cover. Once you got that the valve cover will come off on the passenger side. You got to slide it towards the turbo and work it over the top of the heater hose. Take your time is will go...


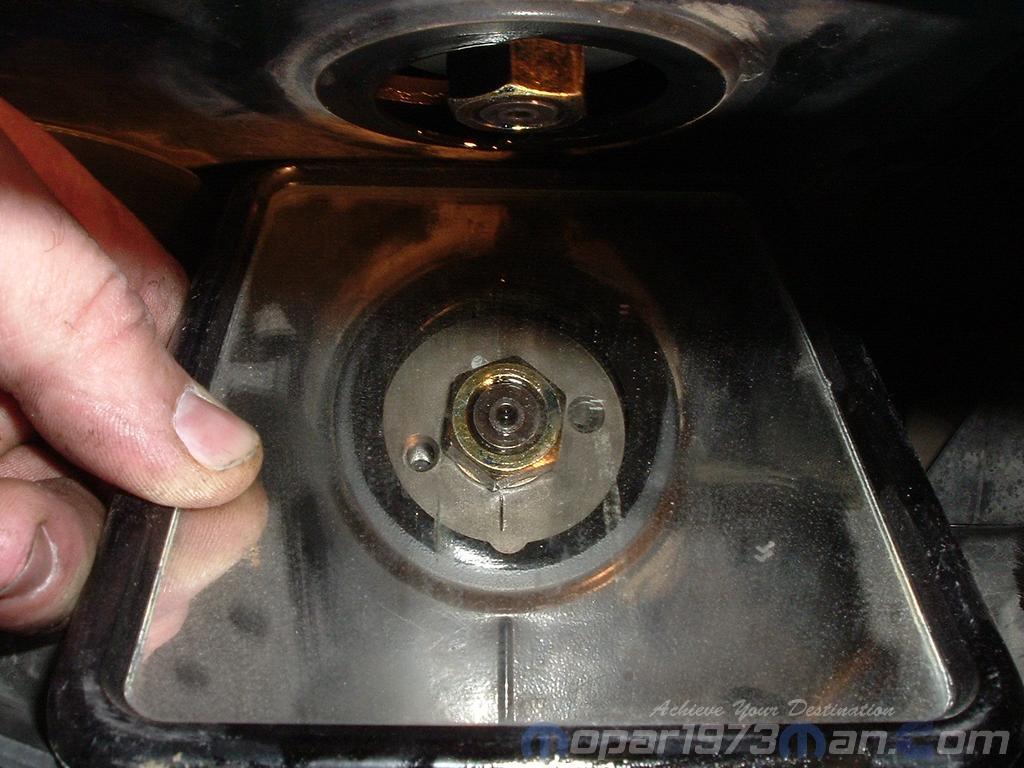
Now you need to use your 1/2" ratchet and the 15/16" socket to rotate the alternator. You want to turn it towards the passenger side (or towards coolant bottle). You want to get the gear to be in the TDC (Top Dead Center) like in the picture above.
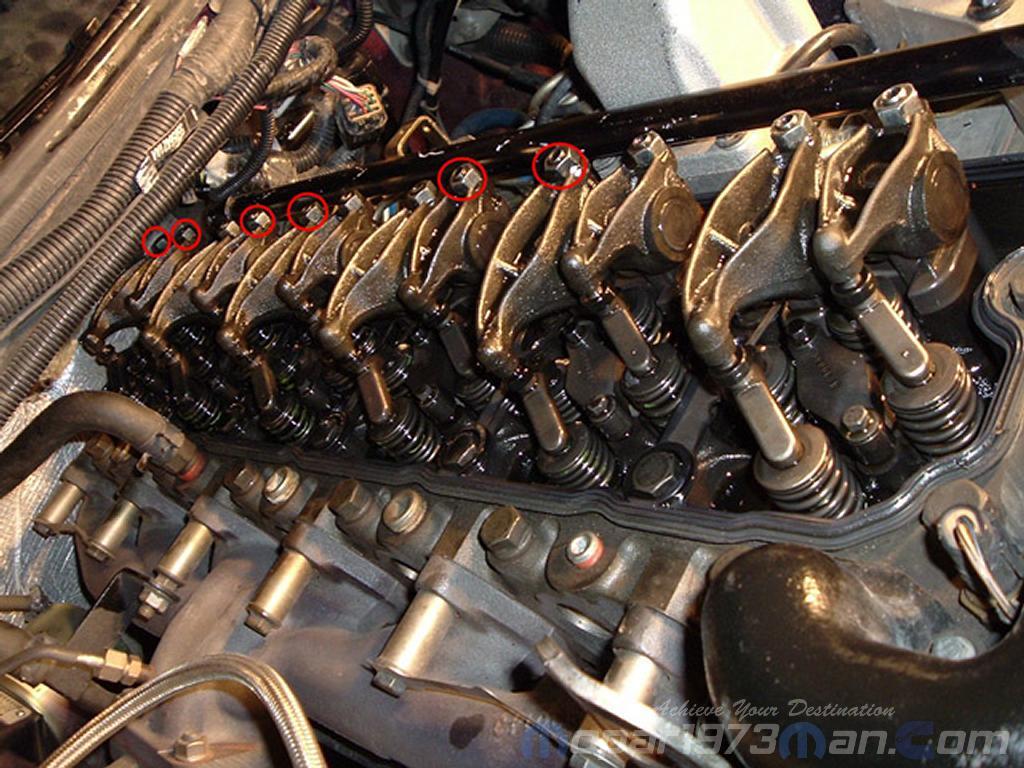
Now you'll start adjusting valve lash. Intake valves 1, 2, 4 and Exhaust valves 1, 3, 5 which I've circled for you. Just remember the long rockers are exhaust valves and the short rockers are intake valves.


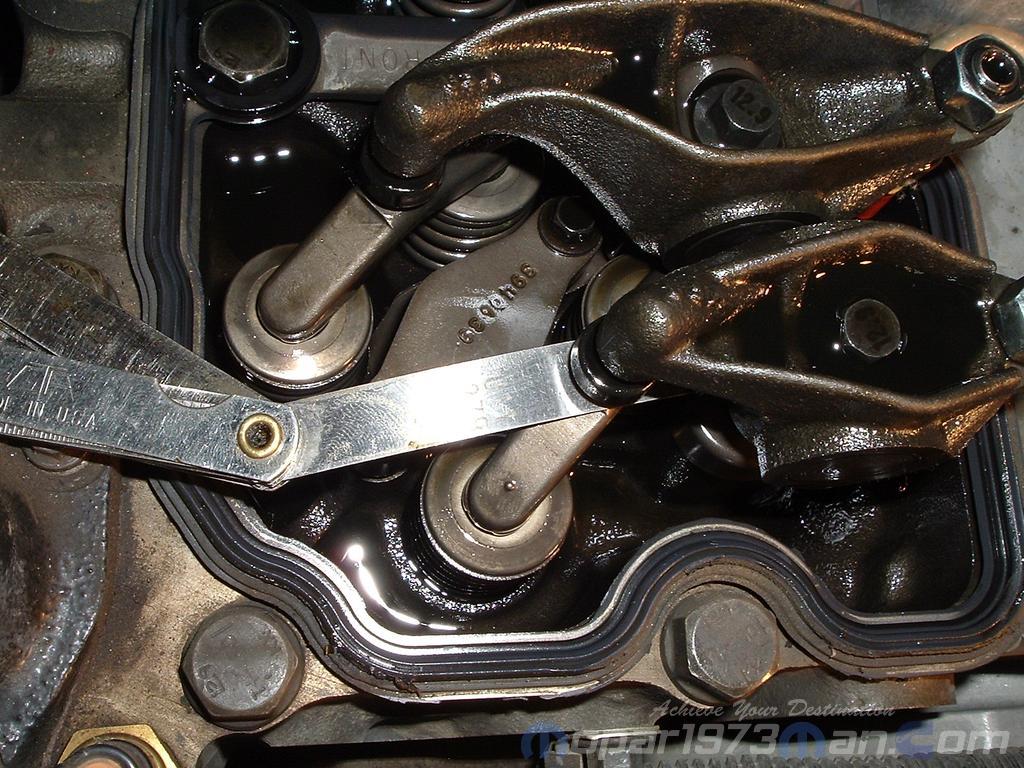
Using a feeler gauge you want to adjust all intake valve lash to 0.010" gap and all exhaust valve lash to 0.020" gap. You'll be inserting the feeler gauge like shown. This is the part you got to take your time on. As you'll notice as you tighten up your adjustment screw the feeler gauges seem to be pinched in-between but try to hold the feeler gauge flat you'll notice it get loose again. So take your time... Now when you get ready to tighten the lock nut or finger spin it tight. Then as you tighten the nut you go to hold the adjustment screw still. But if you notice your gap is loose twist both nut and screw tighten a little bit. Or twist the adjustment screw loosen as you tighten the nut. This will increase or decrease the gap a little but not much.

Now that you done this set now you go to do the other half of the valves. So now twist the alternator some more till you see (BDC -Bottom Dead Center) for the Bosch VP44 injection pump gear.
Now adjust the rest of the valve lash. Intakes 3, 5, 6 and Exhaust 2, 4, 6. They are marked in the picture below. Again remember the long rocker are exhaust valves and short rockers are intake valves.

Double check all the jam nuts that they are TIGHT!
Mopar's Notes: Also wouldn't hurt to throw in the torque specs for the lock nuts on the adjusters. 18ft-lbs for the adjuster nuts and 18 ft-lbs for the valve cover bolts starting in the center out.
inlinecumminspower
http://idahoturbodiesels.com/vb/showthread.php?t=7665
You now have completed a valve adjustment on you engine. Now you got to reassemble the valve cover. Replace the gasket if it damaged typically the gasket is serviceable for many years. Then remount the breather cover on the gear case and hook up the vent tube. You'll hear a slight difference when you start the truck up. It going to be a bit quieter. Let it idle a bit and double check your valve cover for leaks.


