leathermaneod
Yearly Subscription
-
Joined
-
Last visited
Everything posted by leathermaneod
-
Thank you! Good to know
-
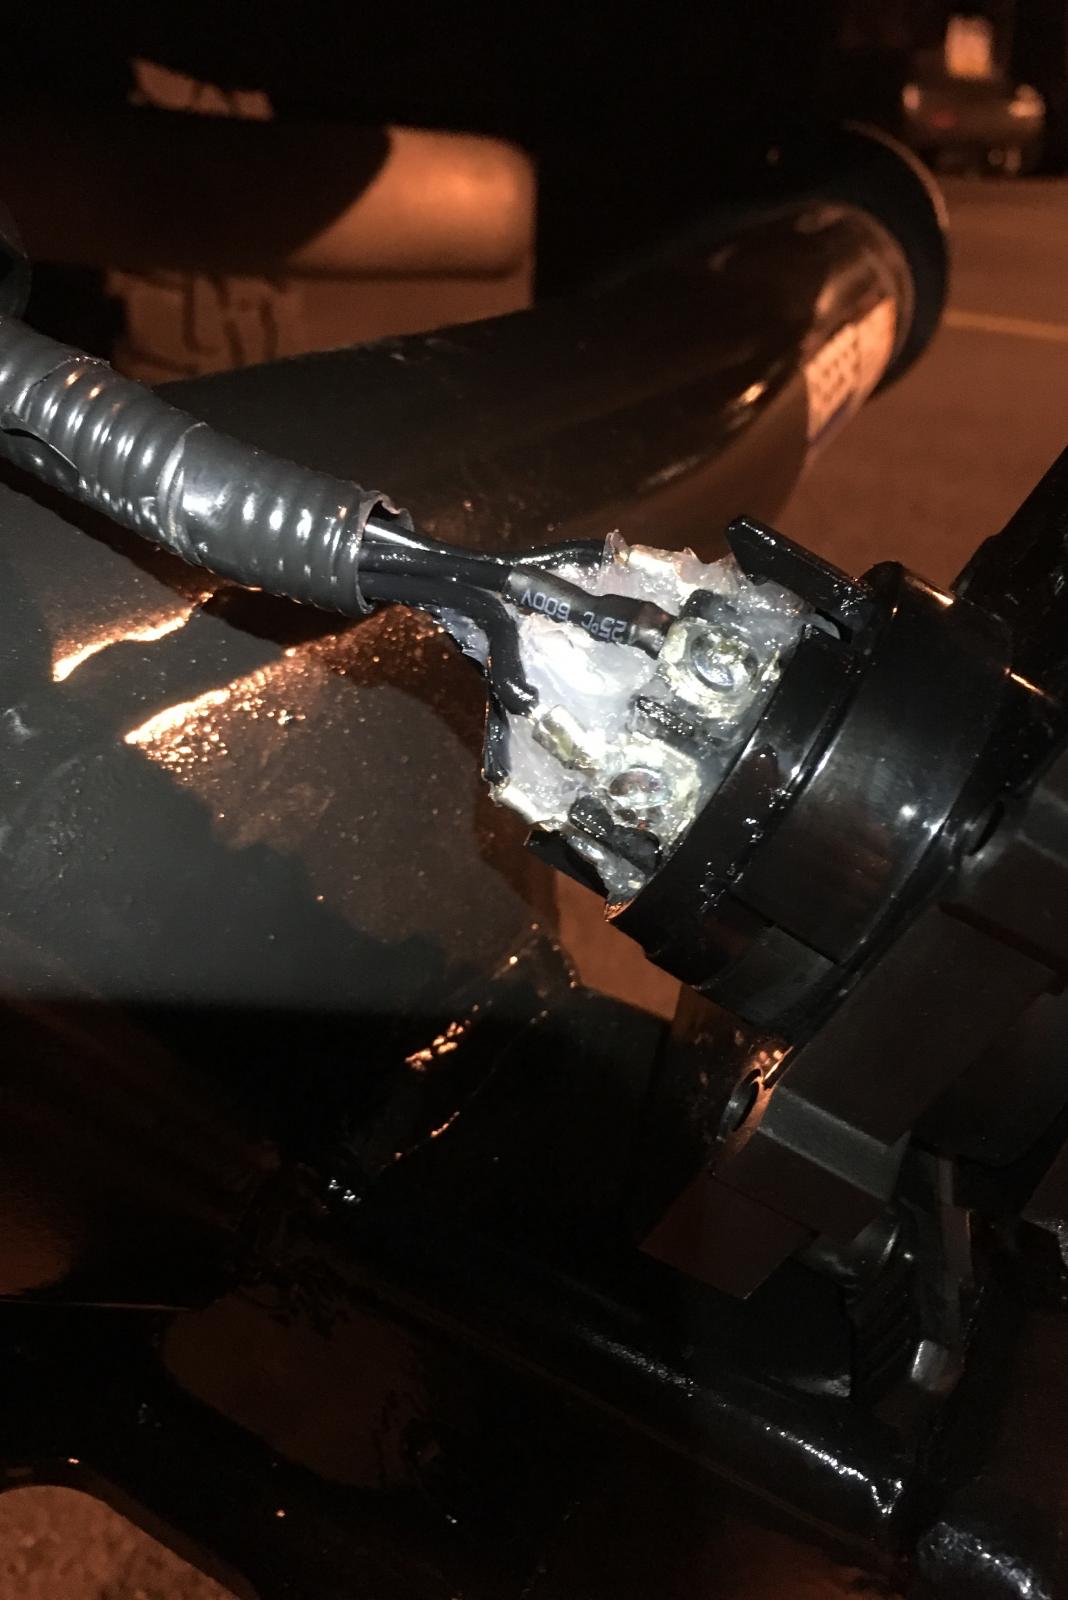
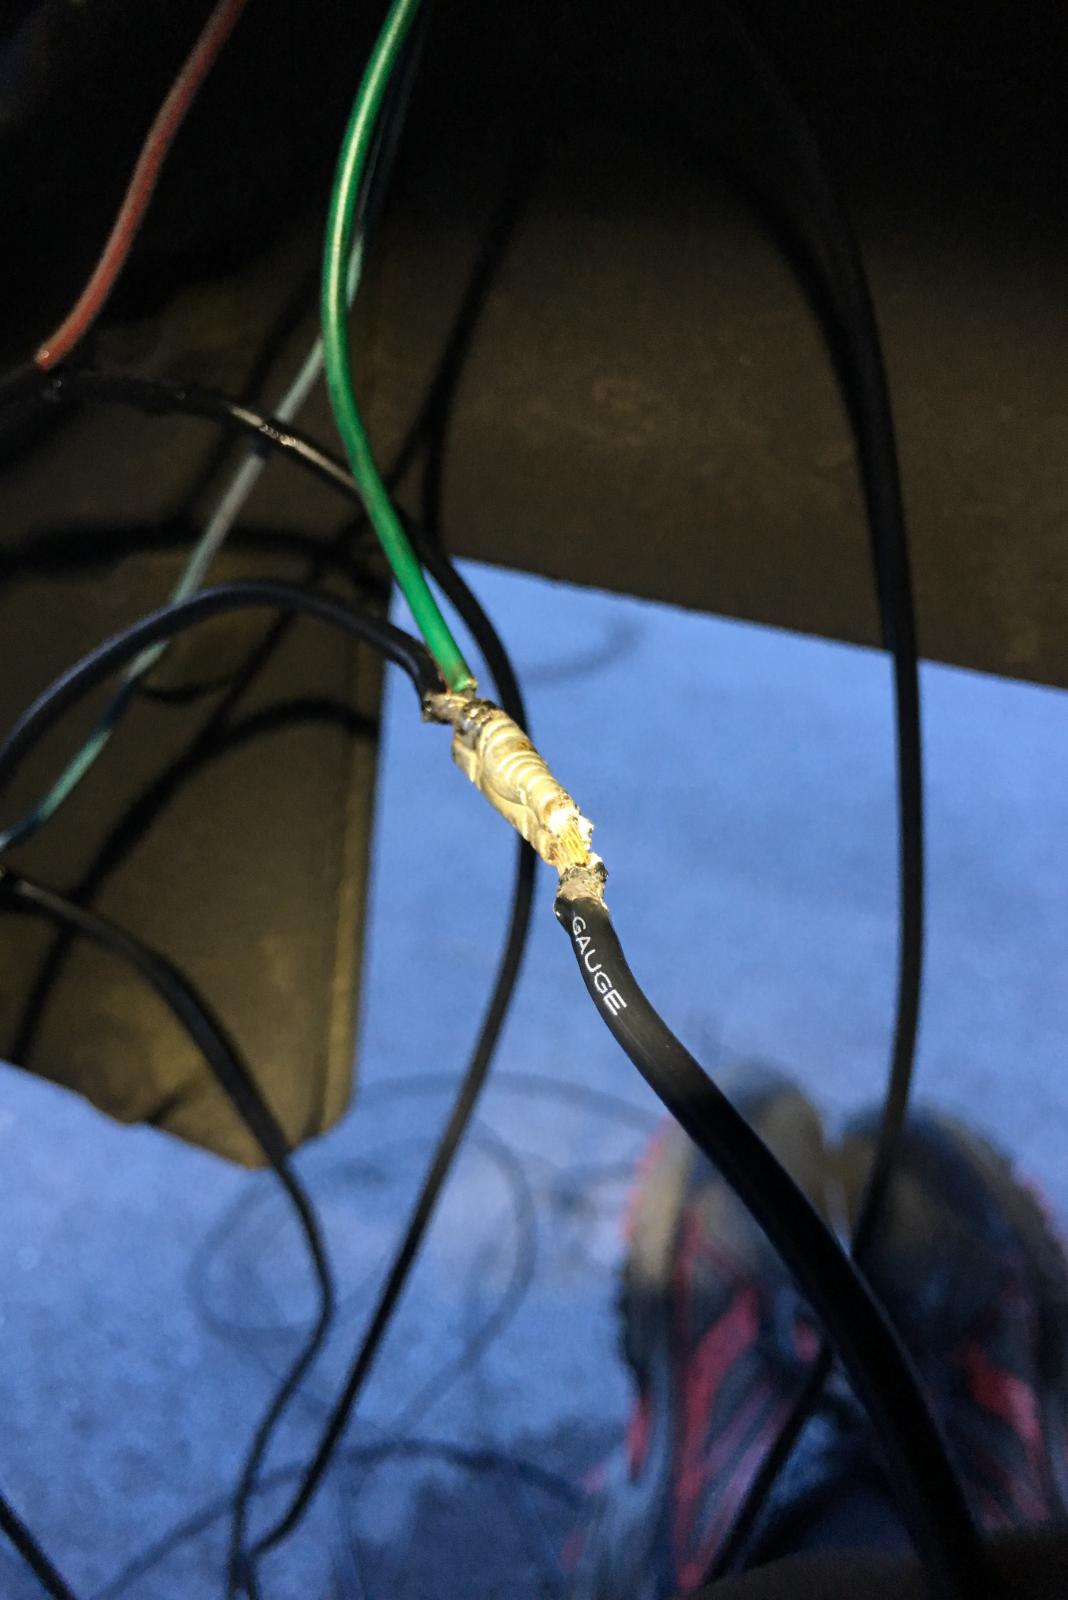
Well the more I though about it, the more I convinced myself that I needed to take that connector back apart and insulate those ends before During after

-
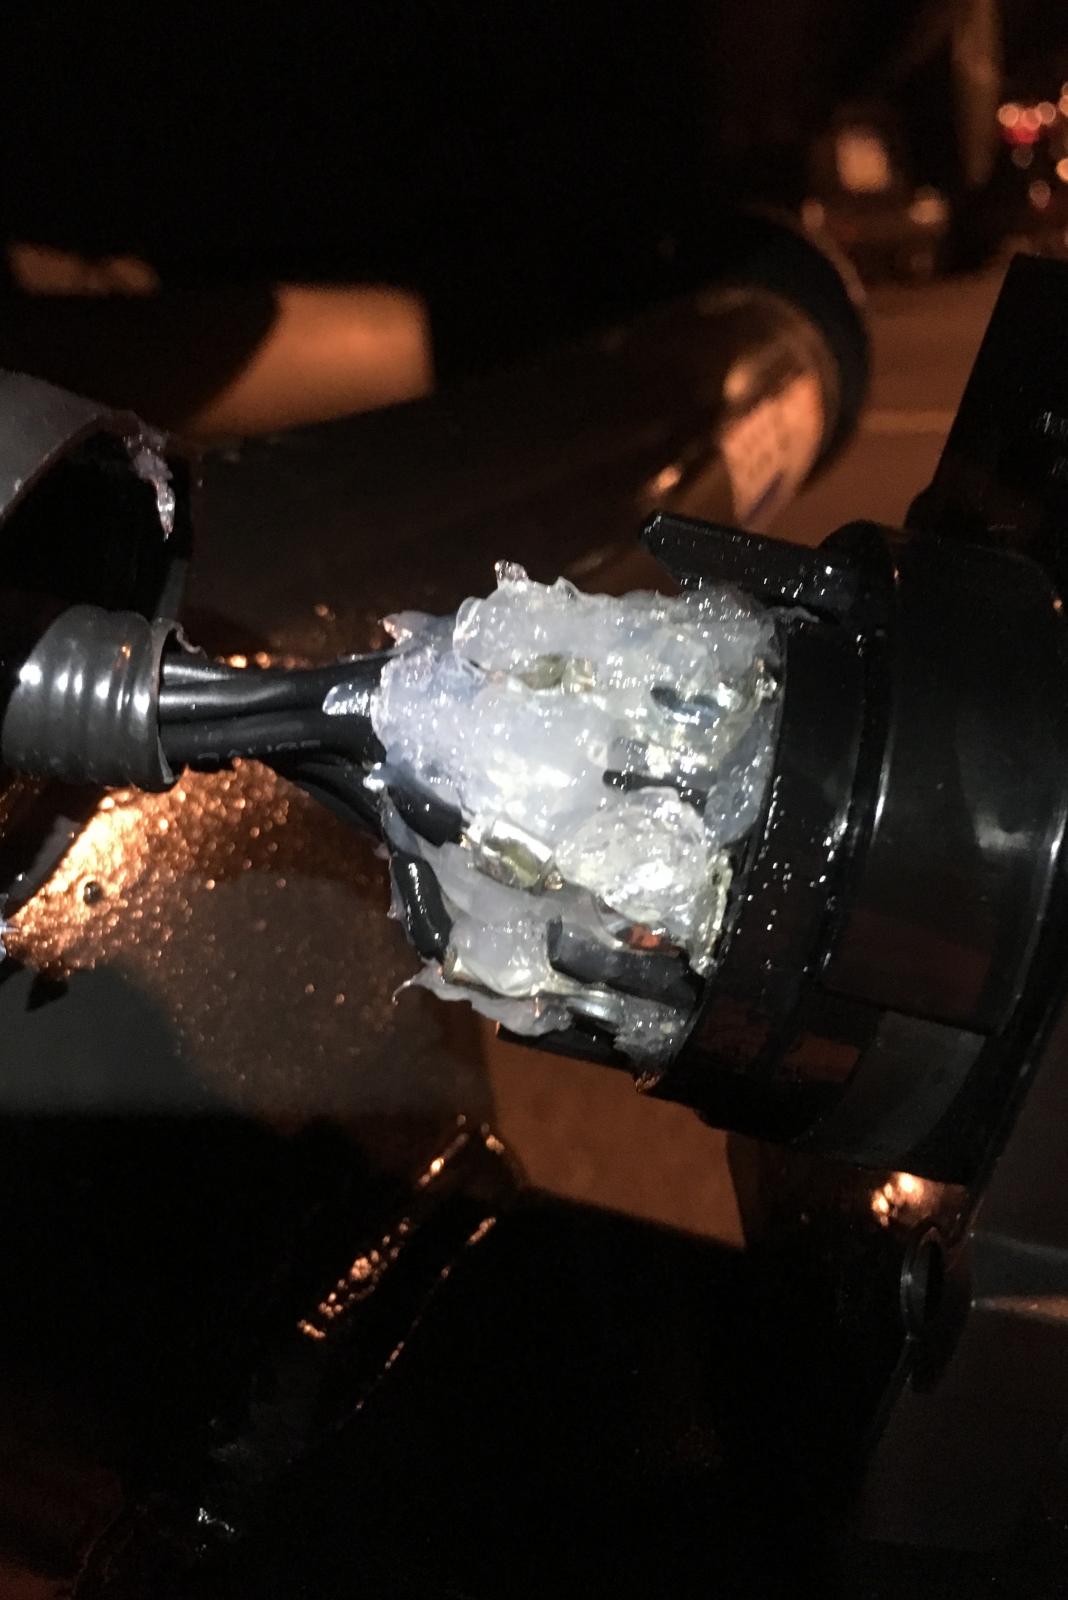
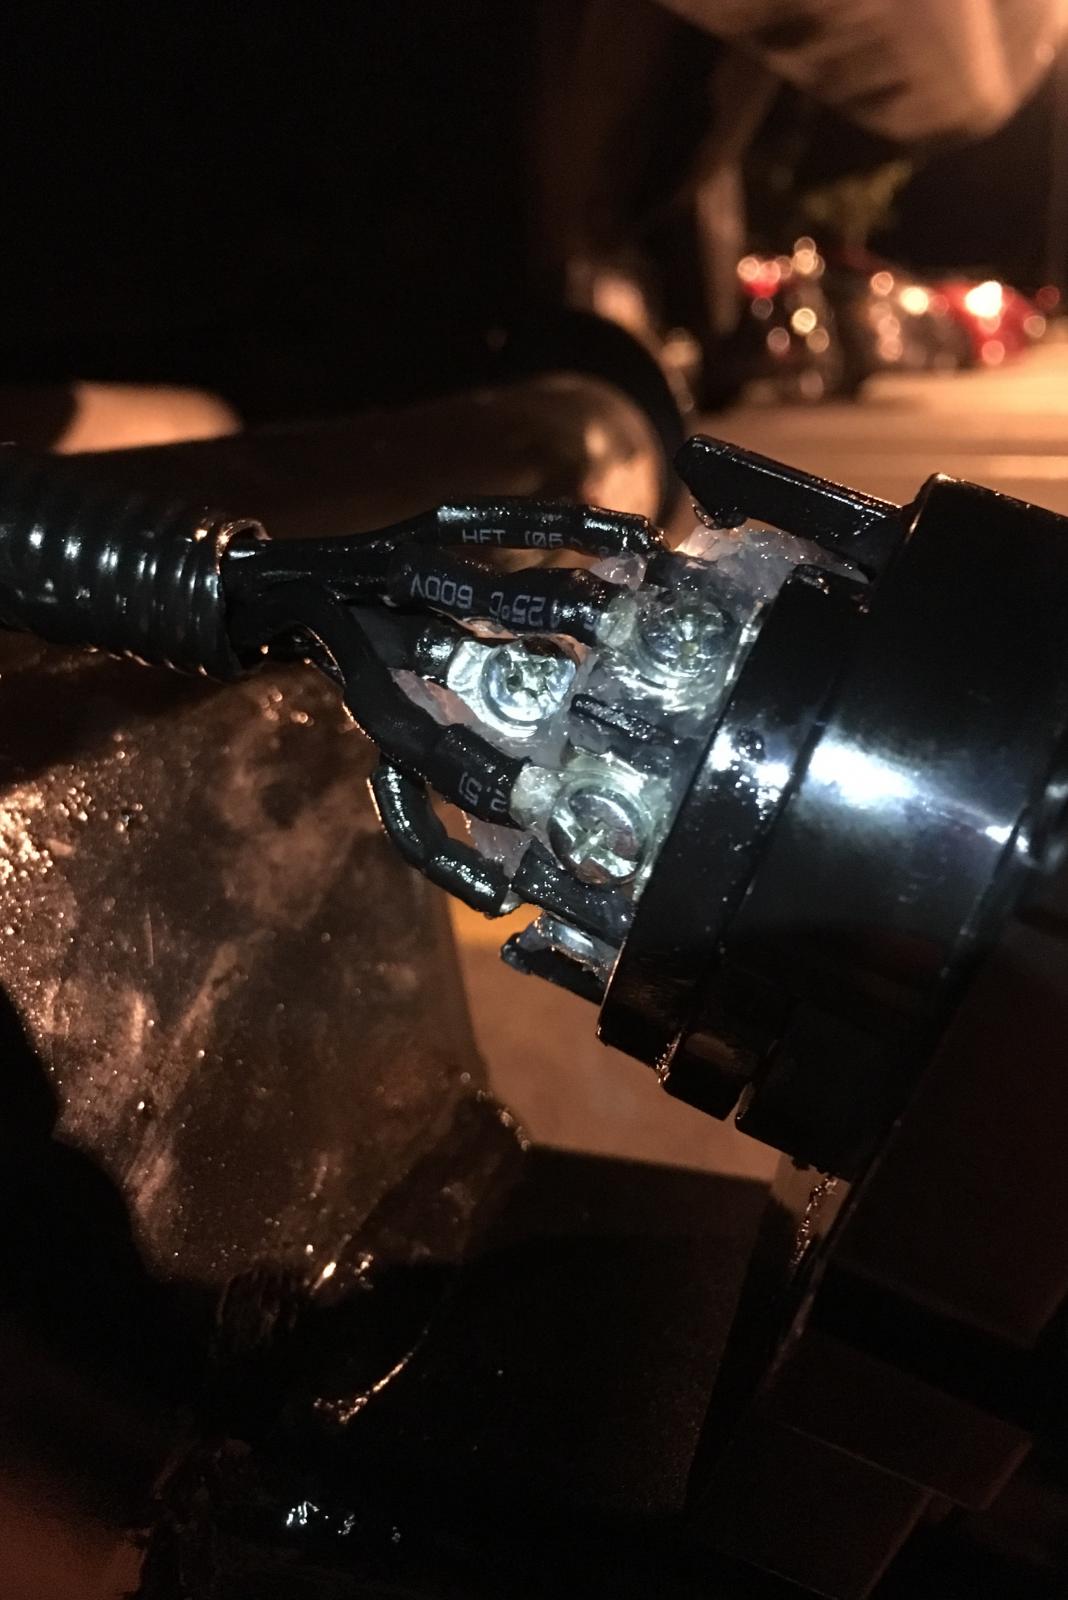
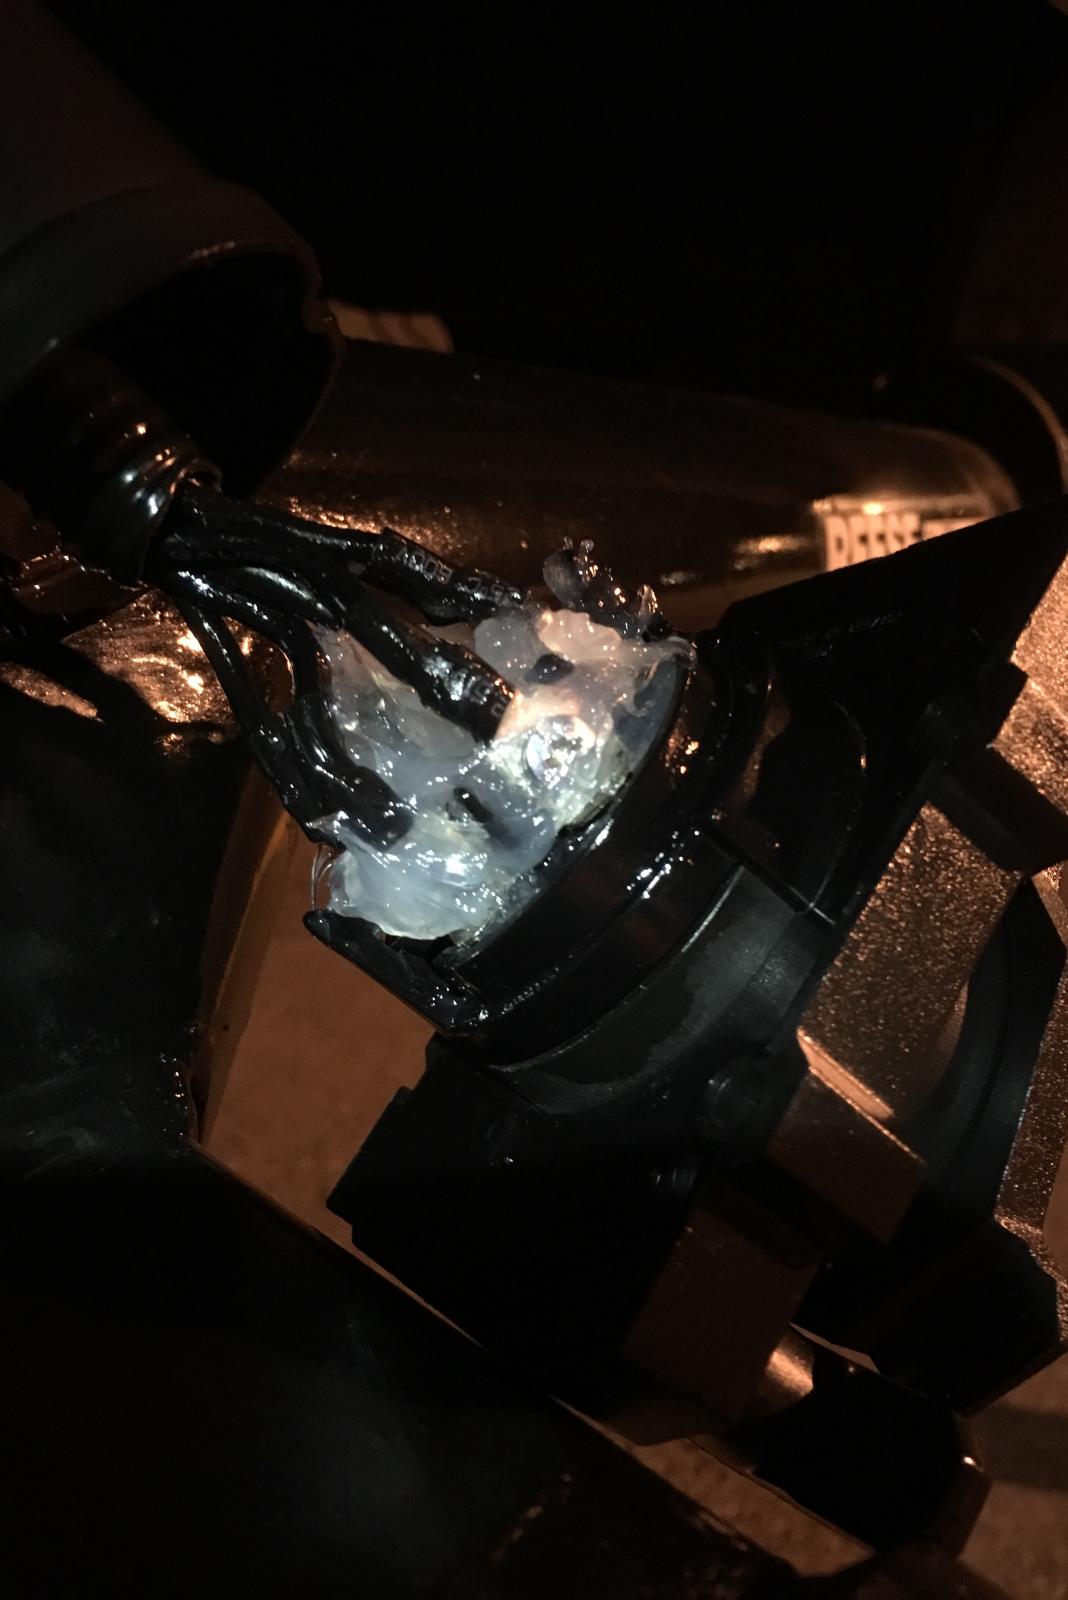
Haha yeah I guess that's what happens to crimp connectors after years of exposure to the elements, even though they are partly cover by the cap for that. I'm really wishing I had heat shrunk the ends of those so they would be insulated as much as the crimp connectors...oh well I guess there's no point messing with it unless i start having issues. If fuses start blowing I'll know what to check first lol i just left them like this rather than heat shrink that little bit using the old connector for illustration purposes here the only ones that seems even a little close were the ones by the center you can kinda tell there, but I just bent them a little so they weren't close. Then packed that entire thing with dielectric grease :-)


-
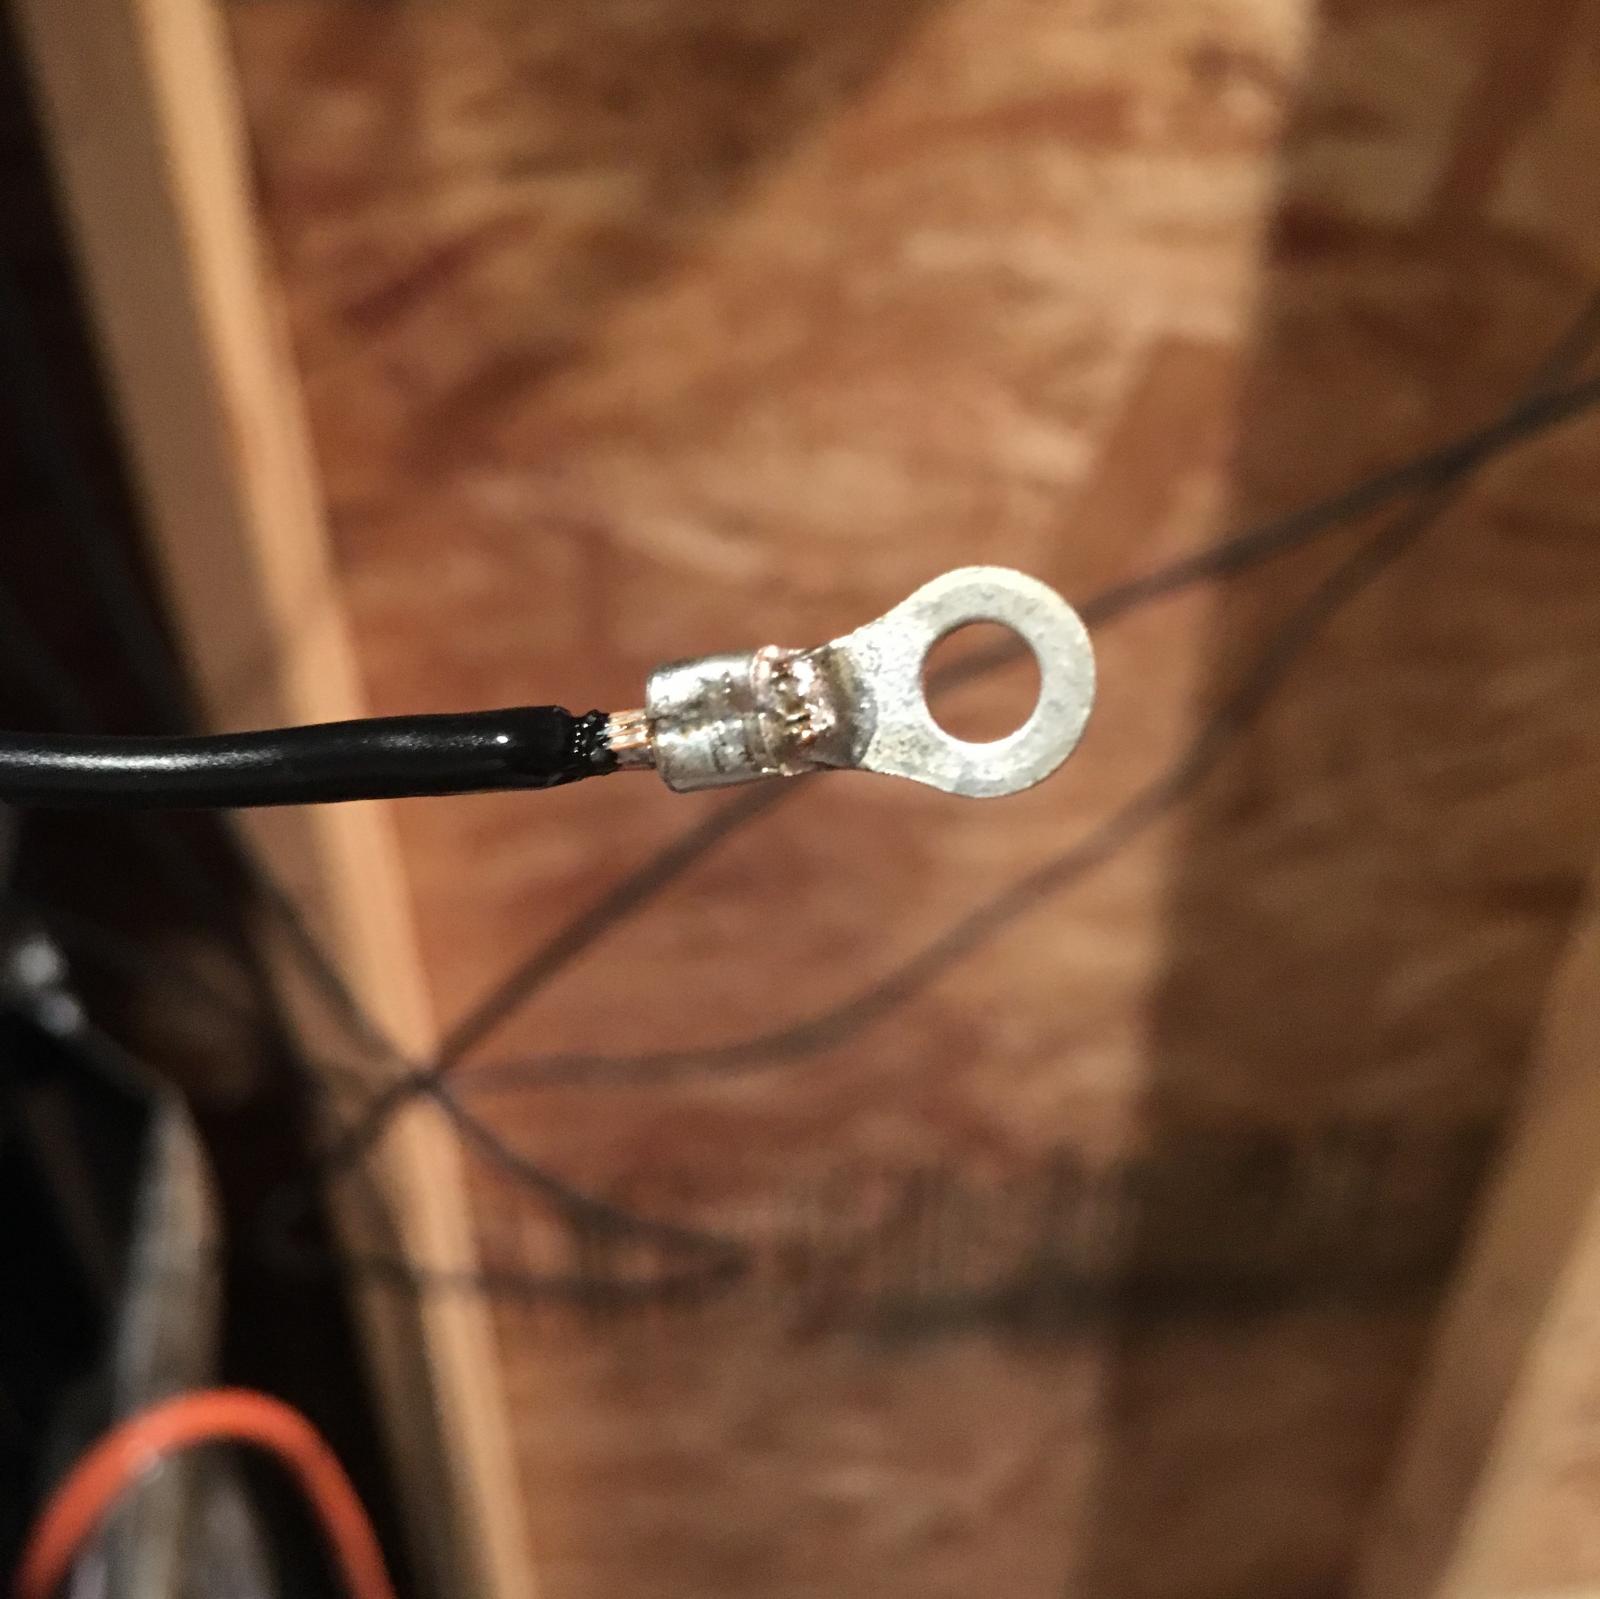
Hmmm well this is quite strange. Anyway something else I forgot to add about the install of my new plug. After seeing the condition of the old one I decided I wanted nothing like that. So, I again removed the plastic from the ring terminals I had and crimped and soldered them to the wire ends. I didn't bother heat shrinking because neither I or the friend who was helping thought it was necessary since the wires really shouldn't get pushed around inside the cup that goes over the back of that and the terminals are all really close to each other anyway. Looking back maybe I should have? Idk, I didn't have much exposed wire, just the length of the crimp area of a ring terminal. I put the wire in so the insulation was almost touching the terminal. Anyway, I also basically packed that area around all the terminals with dielectric grease to prevent any future corrosion. It will be a mess if I ever take it apart, but I hate rust lol. Sorry I should have grabbed some pics but I was in a rush to get done at that point lol just sharing my ideas incase it helps someone else.

-
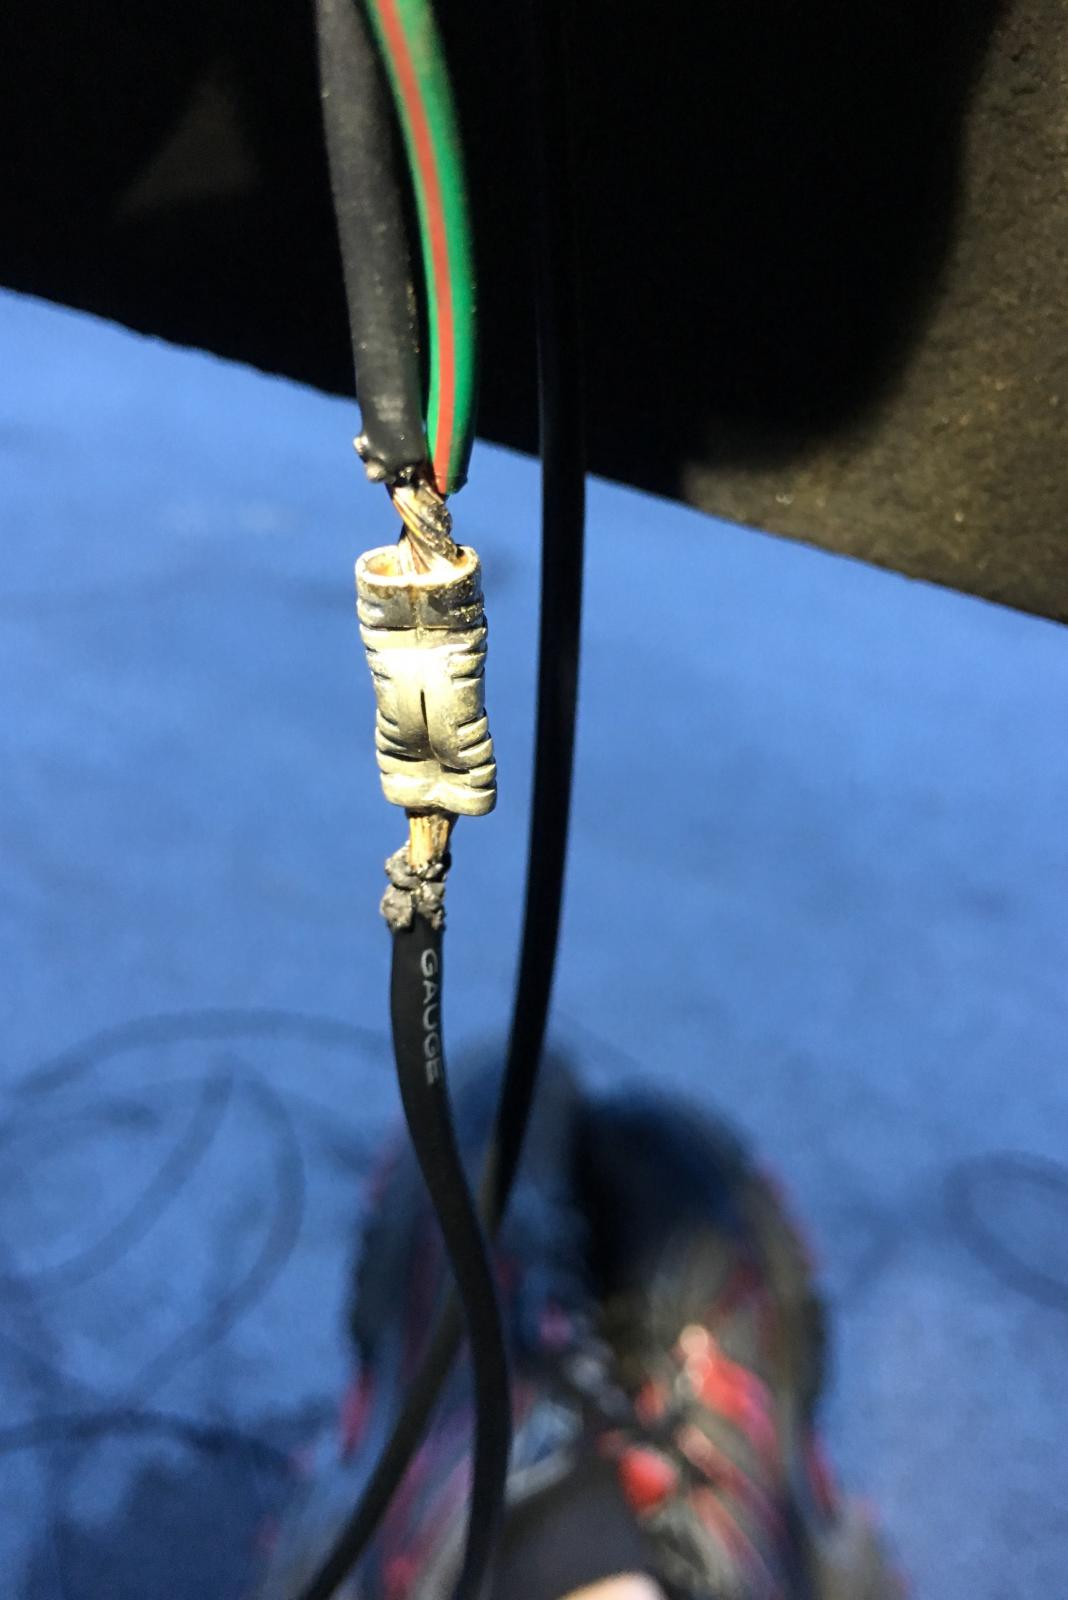
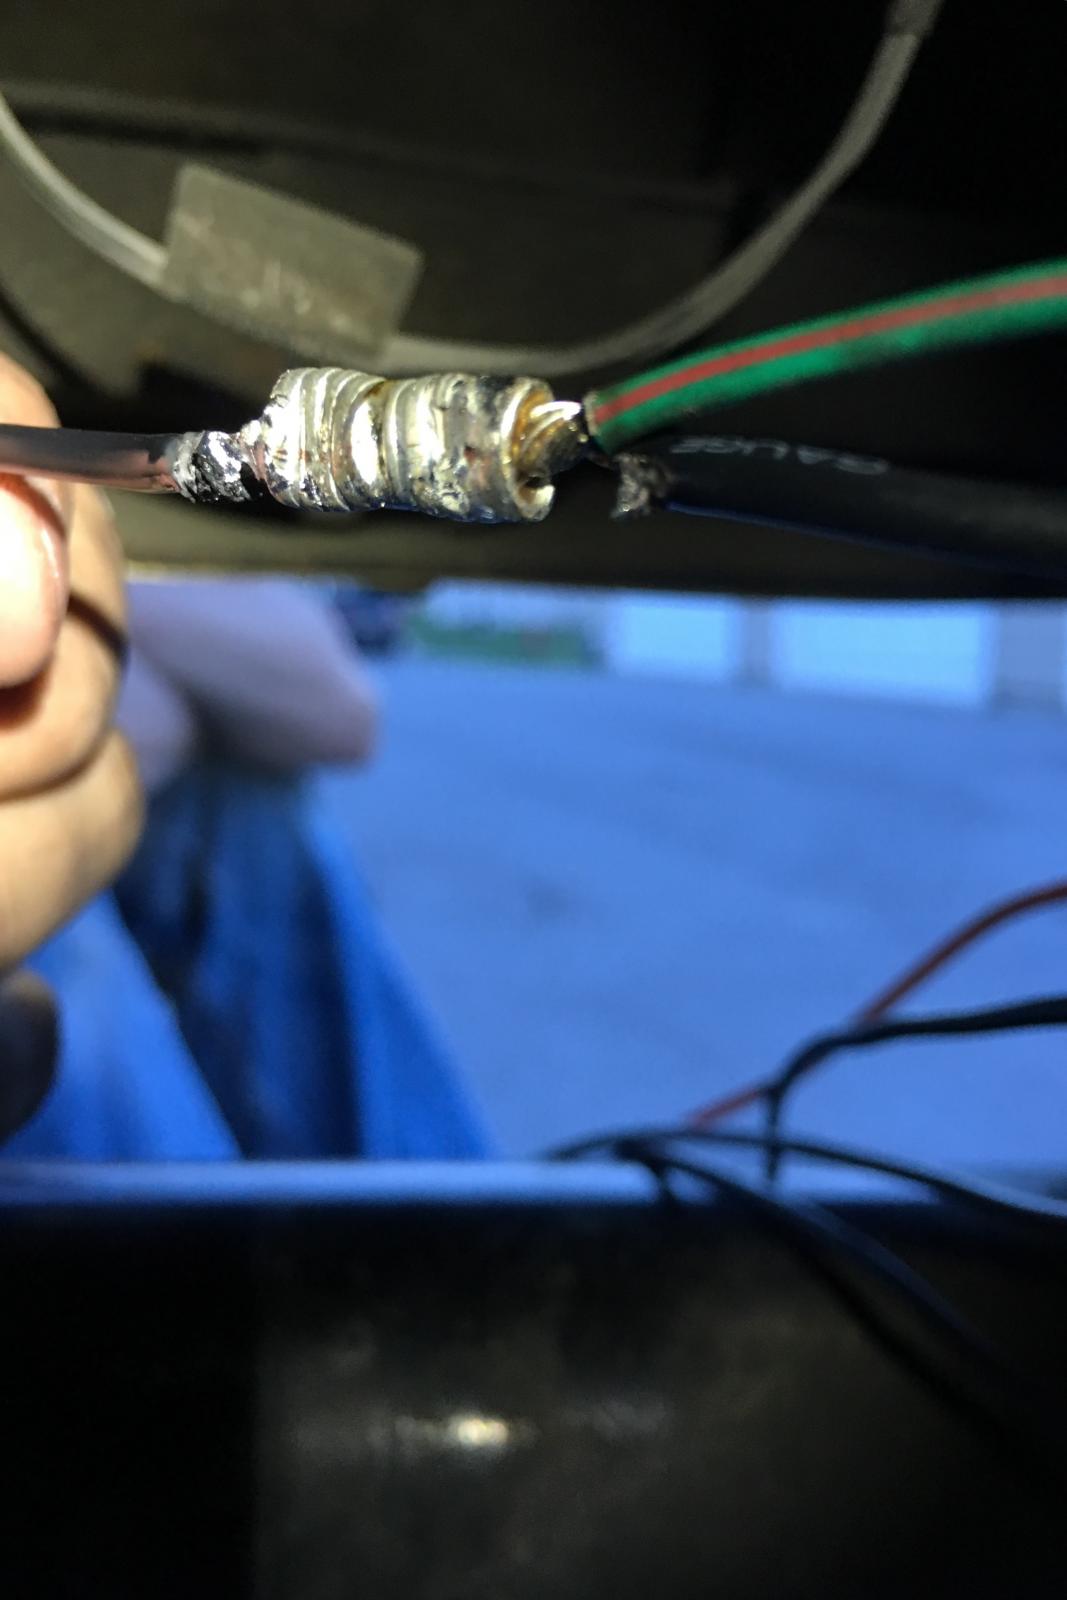
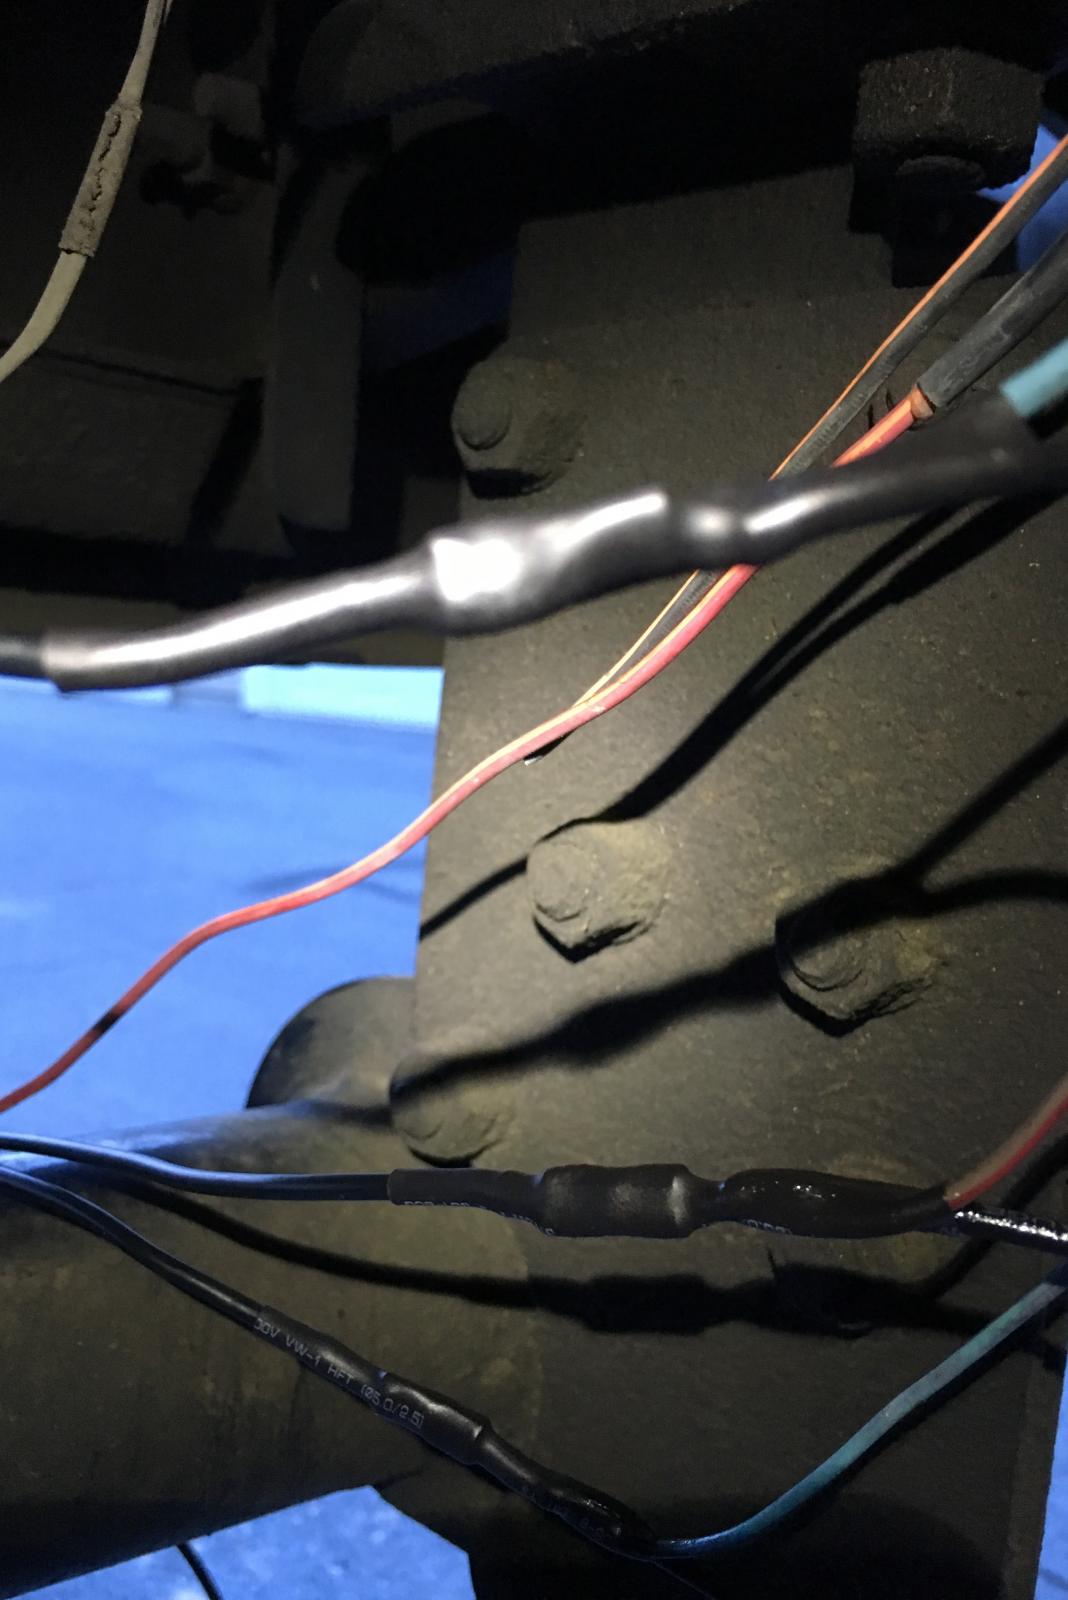
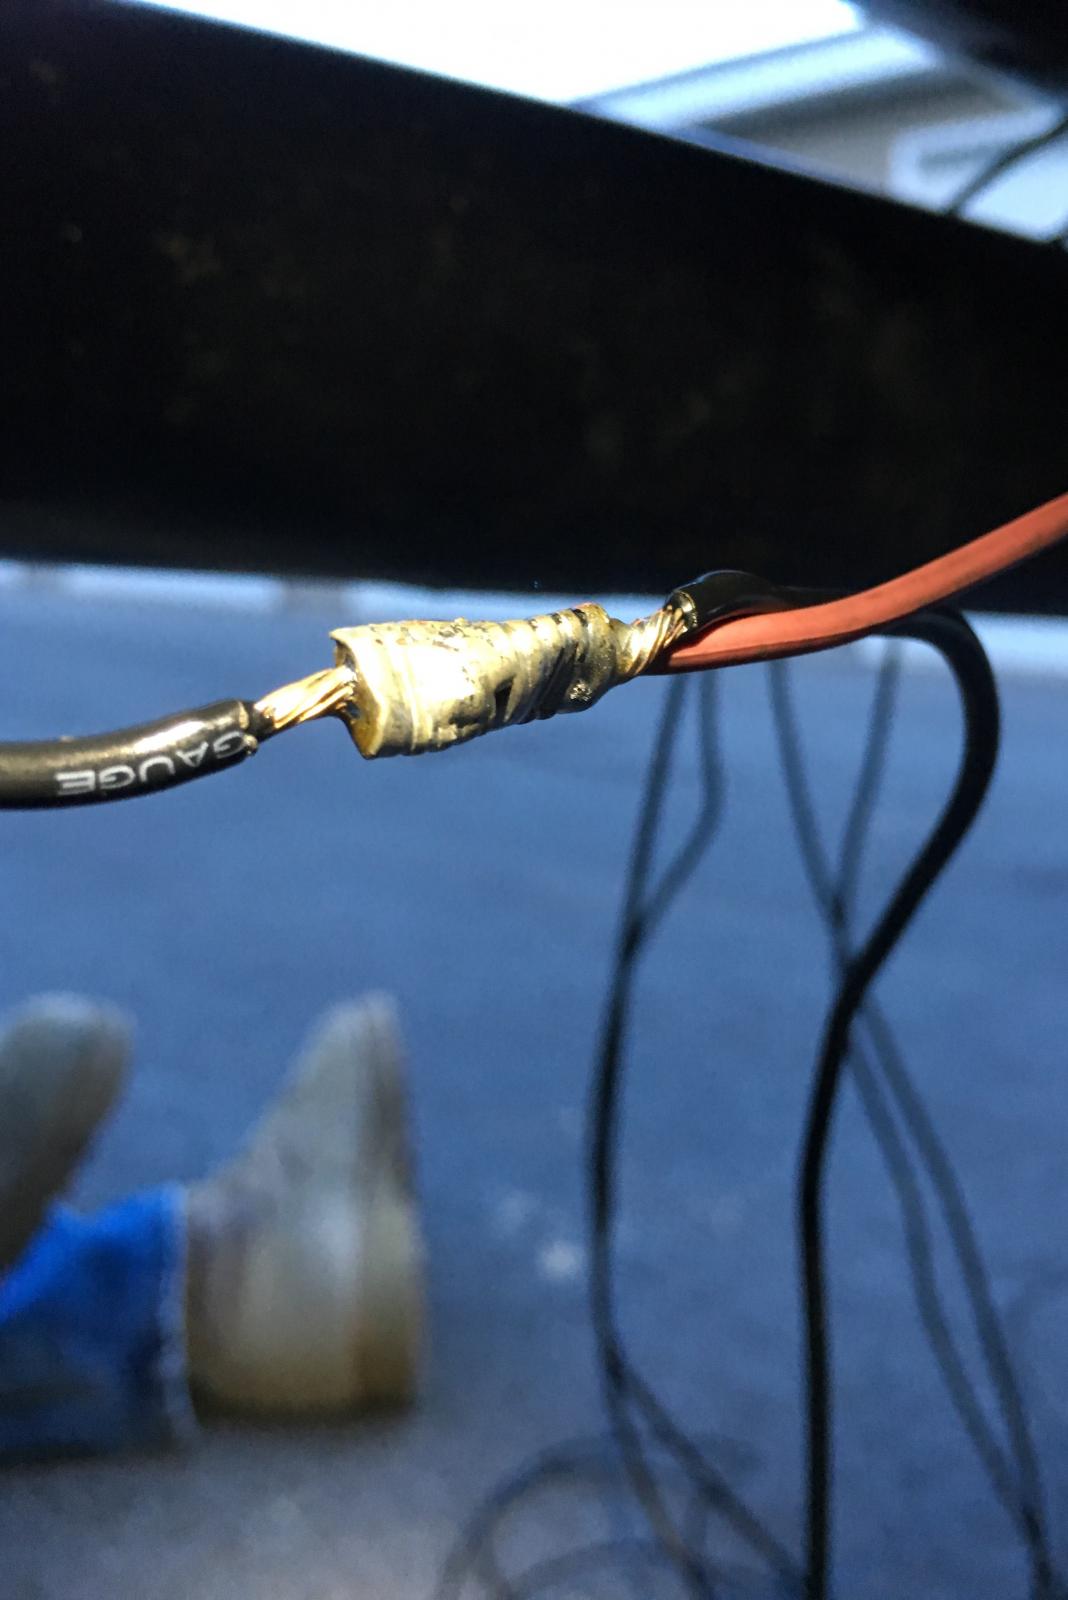
did your truck come with the trailer tow package or was it added after?you guys don't happen to know off the top of your head which fuses they are?Thank you both for the replies! @01cummins4ever, that is exactly what I thought, but apparently we are wrong! Thank you @Wild and Free for confirming this! I don't think I blew a fuse, but I tried to cut multiple wires to the same length and got a small spark! I was shocked because the key was off. Why is it designed this way?? Is there something built in to prevent batteries from being drained by a trailer?I forgot before but I wanted to ask you guys, should the 12v power to the trailer be energized all the time? Even with the key off? Because it is....lolThanks very much for the info guys! What exactly is the purpose of "flashing tunes" then? Is that just like if I wanted you to build me a tune, you send it to me and I upload it to the box without having to adjust parameters myself? Like a preset basically?Ok thanks Mike. I'm sure one or both of them will see this and reply. I wouldn't really want to have to need windows because having to buy a copy to run on my mac would just be another headache/expense. Hopefully if there isn't mac software yet, there will be by the time I'm ready to buy. So @Quadzilla Power, these are my requests, mac software for the non computer literate guys like me, and some sort of buy back/credit for guys who trade in there current tuner :-) btw I have an almost new edge comp for sale lolOk thanks. I was afraid of that lol. Do you know if I can use a mac with the quad? Or will I have to have windows?Hey guys I have a couple questions about the quad. First, can I use a mac for the tuning/downloading/updating stuff? Second, as I'm sure you'll remember me saying before, I've been wanting new injectors for a while now because I've always thought the BD 75hp ones I have are really smokey. Now I'm wondering if I should do injectors first, or switch to the quad and try to clean up the smoke with tuning? Thanks!Hey guys I got the job done alright :-) Thanks for all the tips! Interestingly enough, none of my wires seems to be as big as 12 awg. I was going to redo the 3 big ones with 12, but my friend and I carefully compared the trucks wiring to the 14 gauge I had bought and they were the same. Also compared the sizes with the wire stripper and the trucks wires were perfectly stripped with the 14 gauge hole as were the wires that I bought. I seemed to have 4 that were 14, 2 16, and 1 18. Maybe OEM wiring is just smaller even though they call it a certain gauge? Or maybe autozones wire is just big? Who knows, but we decided against redoing anything as it would not have been necessary. The 12 gauge I bought was very clearly much bigger than anything on the truck. Yes I know bigger is is not bad, but it wasn't worth all that extra work and wasting material to redo things. I didnt have a lot of time to waste on this project either. Some pics of my work incase you are wondering, I did splice in an extra set of wires to go up to a connector in the bed for my future gooseneck hauling. That's why there are two wires on the one side. I just cut off all the factory wiring at the scotch locks, and added my own from there. Since I didn't have easy access to the crimp/solder/hear shrink connectors that you guys showed me, I made my own version by removing the plastic from a regular crimp connector, crimping it, soldering it, coating it with dielectric grease because I didn't have adhesive lined heat shrink, and then heat shrinking. I think it worked out well and I now have a harness that looks factory. To save money i used all black wires and made labels with a label maker. Btw that white wire I was asking about, it's powered with the brake lights. I assume it would be for wiring in a third brake light so that it doesn't blink with the turn signals. The only thing I would do differently looking back is clean some of the wires on the truck before soldering. The smaller gauge ones had kind of a black oxidation on them when the insulation was stripped. I tried to clean it off with brake cleaner but it didn't work so I just crimped, then soldered the best I could. The heat and flux seemed to help remove it and I'm sure I got a good enough connection, but if I had thought of it at the time, I would have used some steel wool or scotch brite to clean them a bit. I can try to get a pick of the finished product tomorrow if anyone wants. Btw I pulled a trailer today and it all works lol
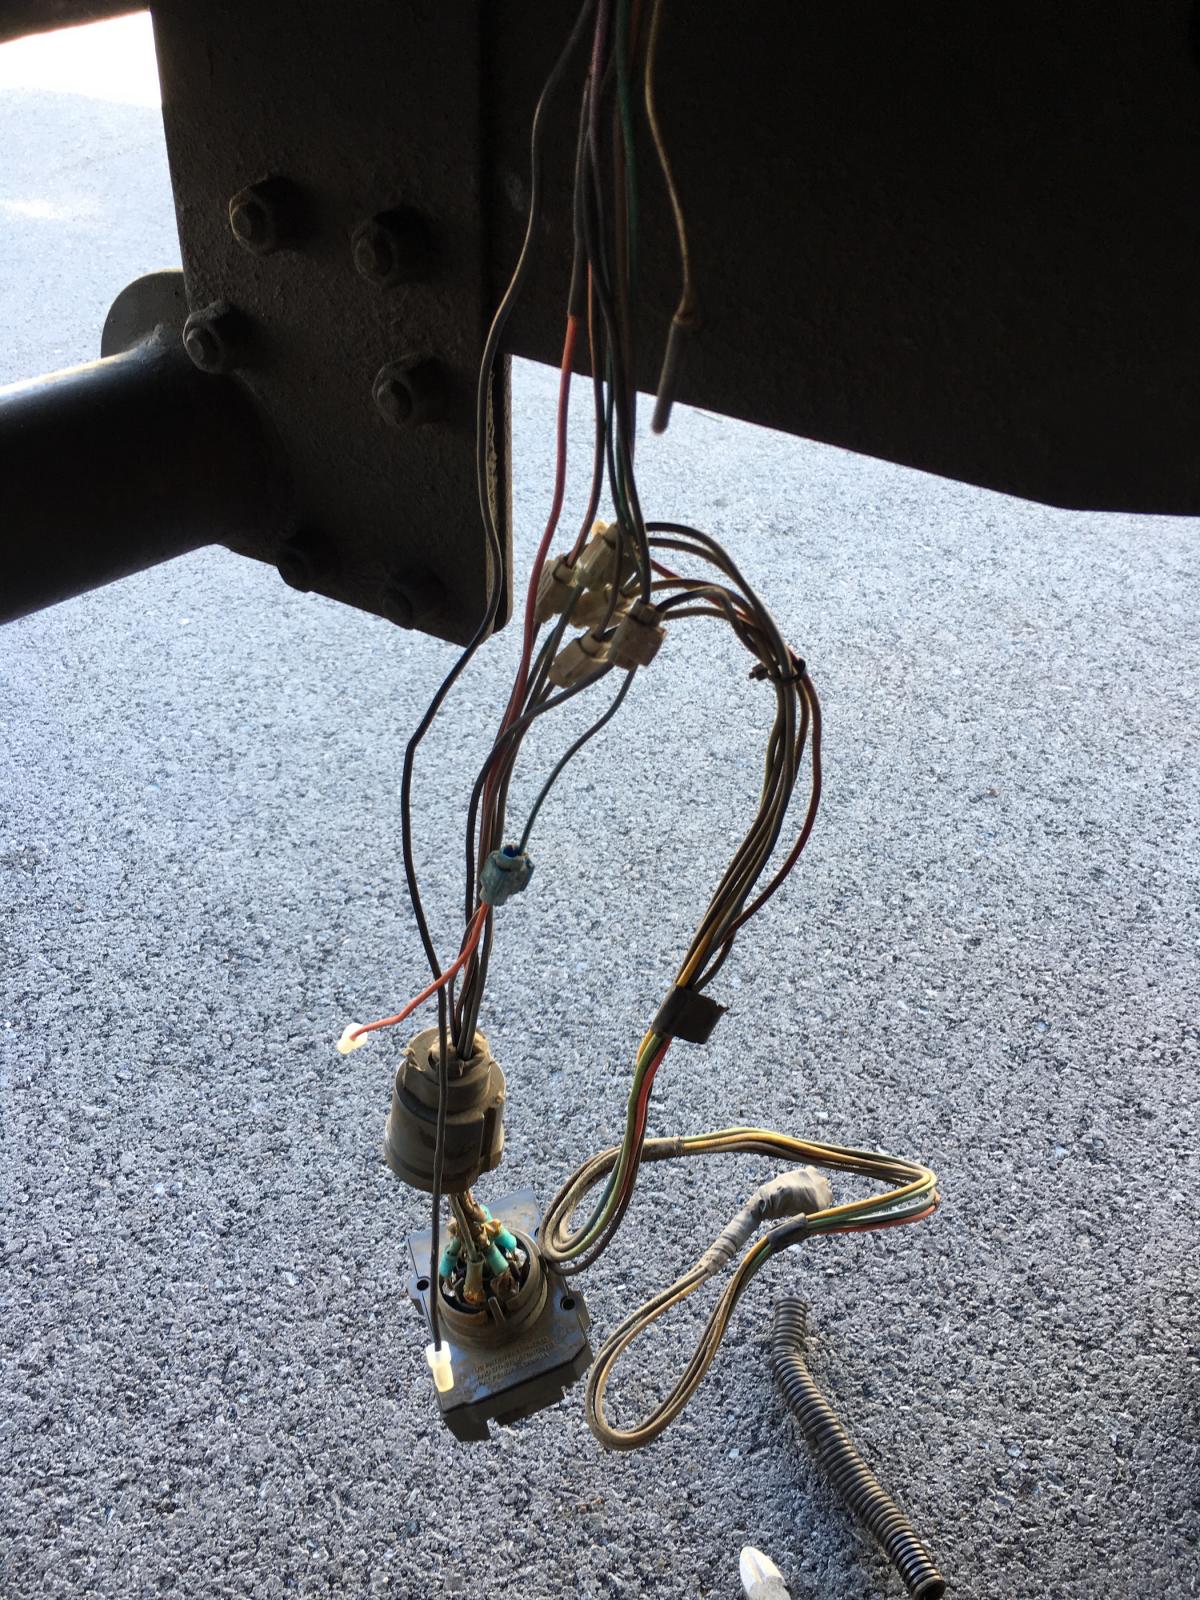
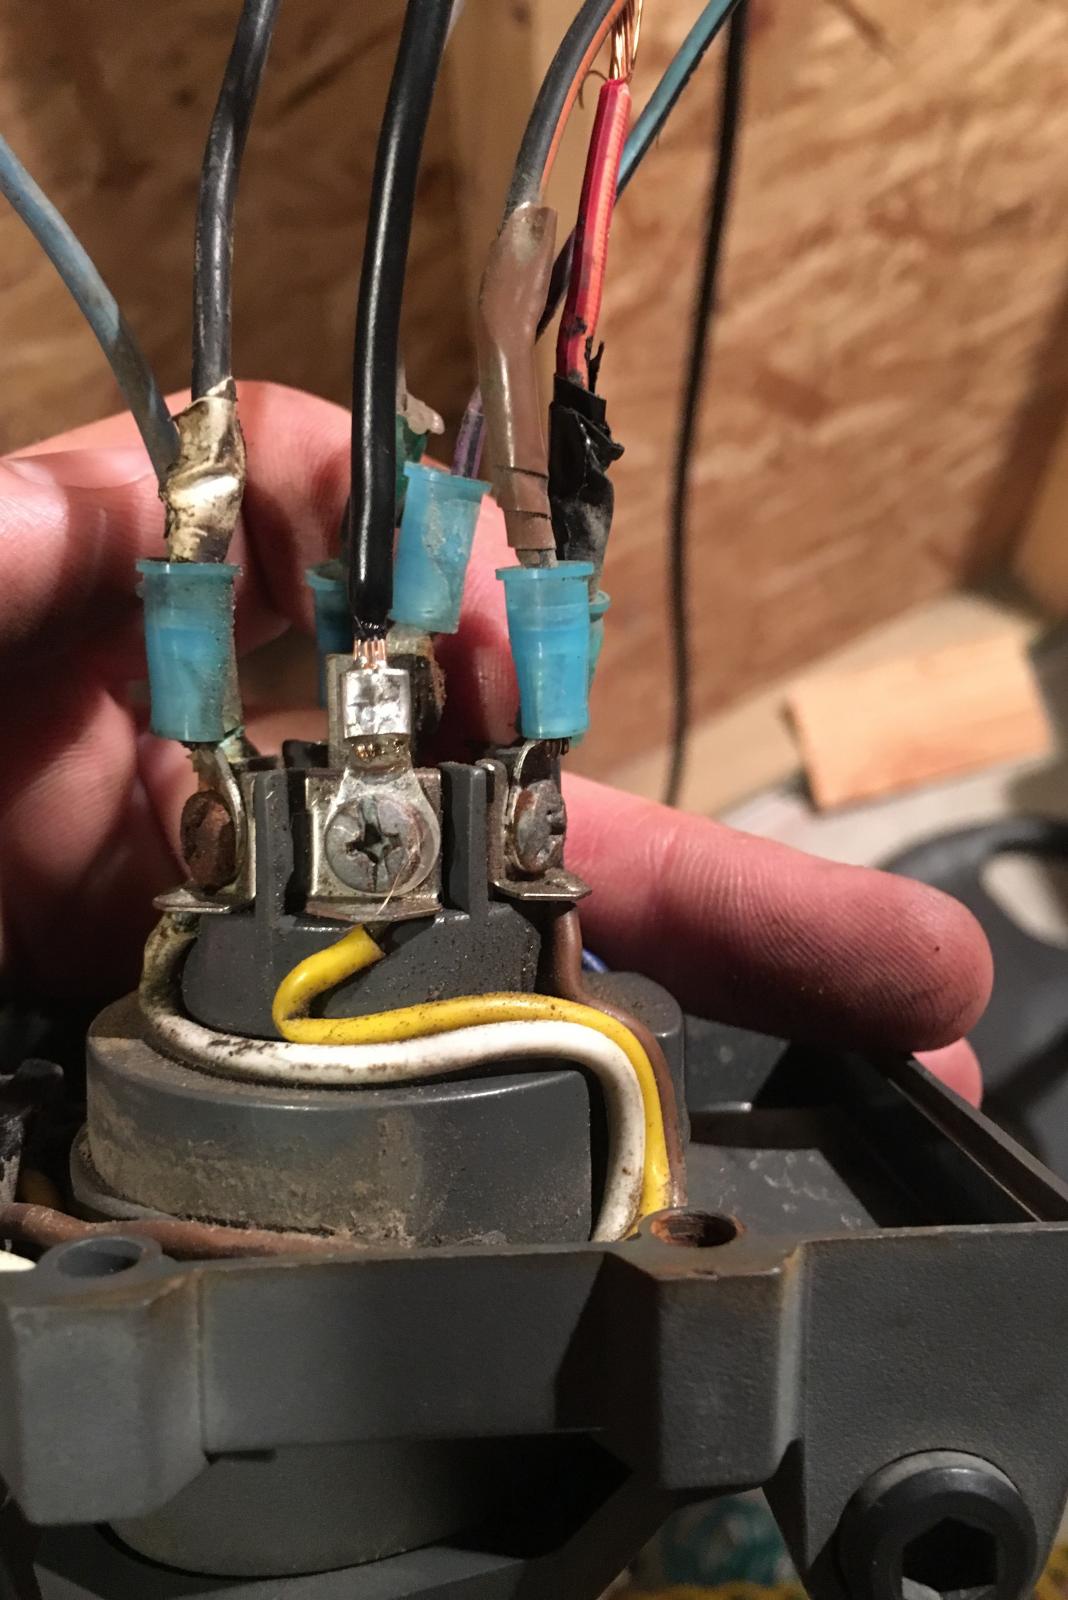
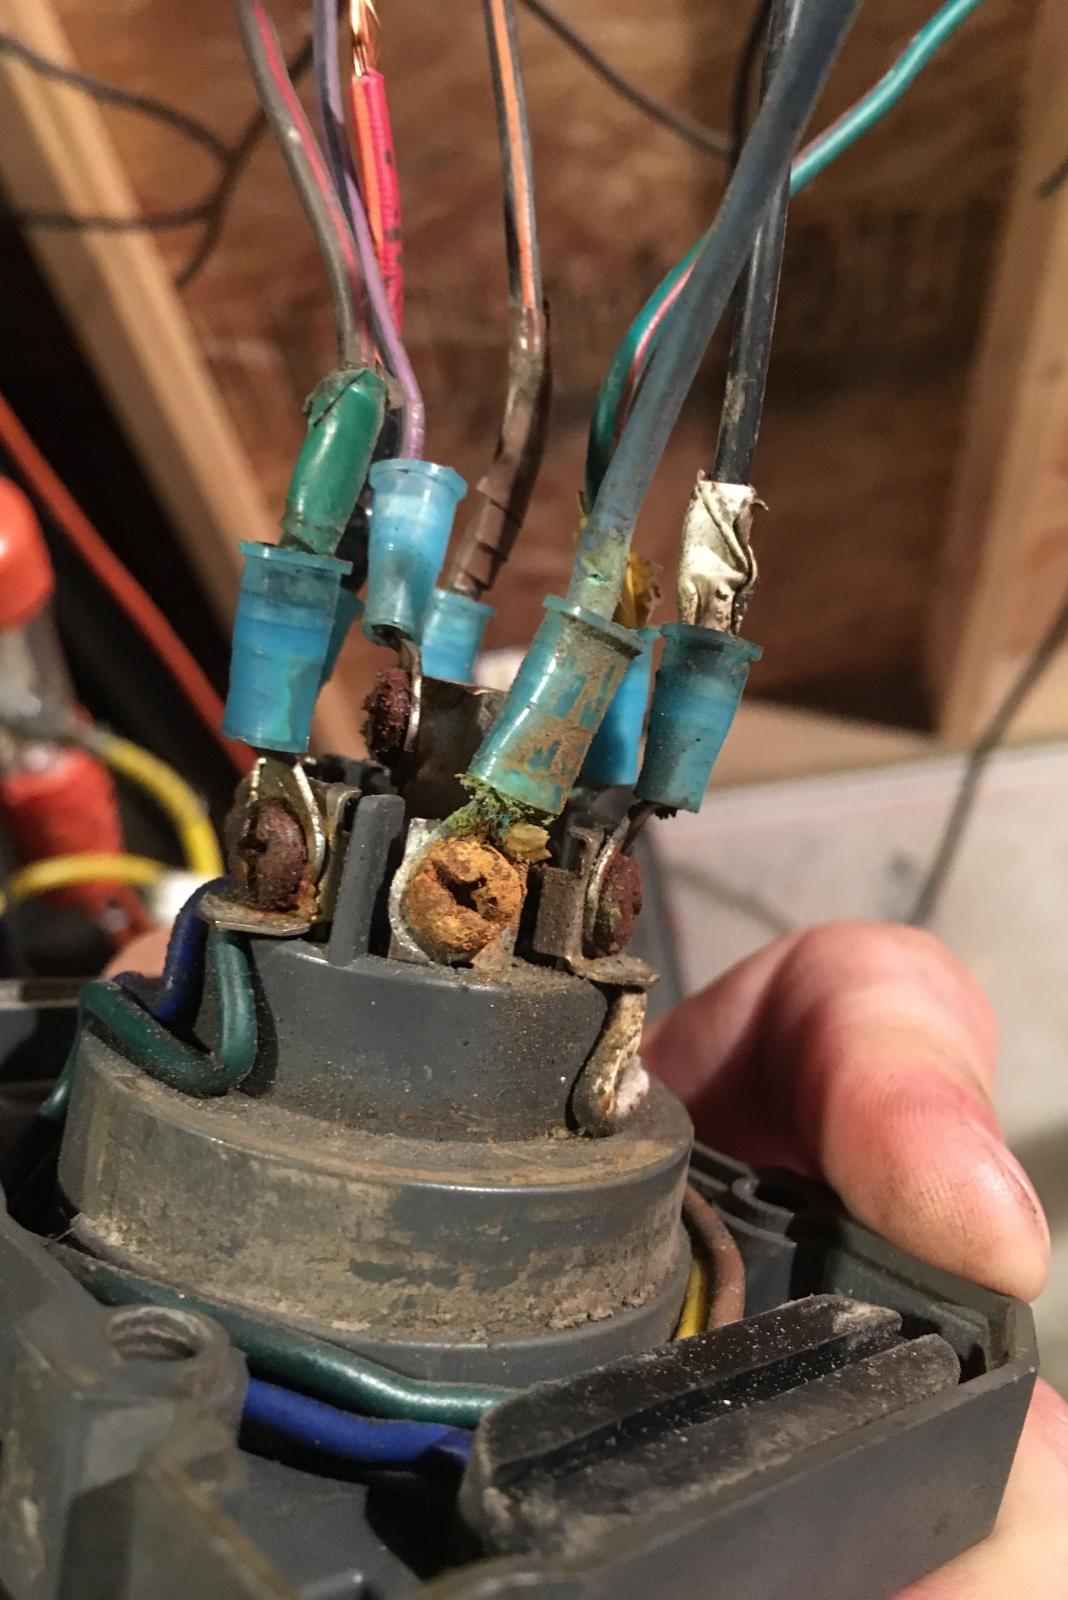
 I just want to throw in here that some guys will keep the 2ng gens for many more years to come just because they like them for one. Also, even though they are getting expensive to maintain(this is mostly because they are at that age, once you fix everything they'll be good for a while again), I think it's still cheaper for someone who does their own work, than it is to buy a new truck. On top of that, idk about you all, but I HATE dealing with car dealers, especially for warranty issues. I'd rather buy a new car for less money and have no warranty, but a 2nd gen style vehicle that I can fix myself. Obviously that's not possible, so I'll stick with the older stuff for as long as I possibly can. Plus I don't need or want any of this electronic bs that comes on a car these days. More stuff to break. Like backup camera and backup sensors an all this. Sure if you want it it's fine, but you should be able to get a vehicle without it. If I were to buy a new truck, I would want to keep it for 15-20 years. I don't think that would be possible with today's vehicles, so I'll stick to my 2nd gen as long as I physically can. And I am very interested in getting the best mpgs that I can. I want a good tuner anyway why not have the cleanest thing available? Maybe we can help reduce all the emissions bs by showing that the 2nd gens can be clean if tuned properly. Unlikely I know but why not? Anyway just my $.02Thanks for that. Really kinda sucks though because I just got done doing it all with 14 awg it didn't seem like there was anything bigger than that. Guess I need to go get some 12 awg and redo the ones that are 12. Can't win.Yes that's what I figured too. I just don't know what size it is on the truck and thought maybe someone here would lol it's not all the same size either. I'm out and about now so I can't go check.16awg should be heavy enough for all those right? I was debating between that and 14 but I decided on 16. Thinknim safenor should I do 14?Oh I totally agree. I just think there may be a cheaper way of accomplishing the same thing. I'll post my idea with pics if it worksFollowing this with great interest! I've been reading the other articles on the tuning from @Me78569 and @TFaoro and thinking that I should really have got the quad instead of the comp. Especially since I'm after mostly mpgs and clean power. Just really sucks that I just left the smarty for the comp a few months ago. Now what quad really needs is some sort of program where they give guys credit towards the purchase of the quad when they trade in their comp or other current boxHoly $$$$! Does your local place charge $1 a piece too??Those are awesome!! Unfortunately I don't have a clue where I could find them around here :-( I've searched high and low for various wiring connectors before and never seen anything like that. I've used the ones that heatshrink, but I don't think they have solder in them....I was planning to just make the connections the old fashioned way on this, hold the wires together, solder then, heat shrink them. I guess I could but I don't really know how and I don't have the lights. Maybe I could just hook up and coil up a few feet of wire so it's "plug and play" if I ever want to add them? Would they need a seperate fuse though? Or just power from the reverse lights in that harness?Thanks for the input guys :-) sounds like I have lots of testing ahead. The weird thing is that everything worked when I towed the tractor last weekend. So I don't get what the white or black wires could be unless the black is a ground and maybe the white is nothing for my truck. How would I ohm test the white wire for ground? Sorry I am not too god with a multimeter yet. I do have a brake controller so that won't be an issue. I also have a friend coming over tomorrow who is way more experienced with this stuff than me. Just trying to get some questions answered a while. If the black or white are grounds, should I do anything with them?Sounds good. I need my main plug mounted back at my hitch receiver. Is there any reason not to solder splice in those other wires to go up to the bed in future? I don't want to be redoing all this in a few years lol Also, any ideas what that white wire could be? Also how do I differentiate between the trailer brake power and the regular brakes?Hi all, So I want to replace my trailer connector plug and clean up this wiring. Now just throwing on a new plug would be no big deal, but I want to figure all this out and clean it up. I know that whole bunch of wires thats hanging on the right was installed to run up to the bed for a gooseneck connector. Im planning to leave that as is because I may pull a gooseneck in the future, unless someone can suggest a better way of wiring that? What I don't know is, what is that short white wire up at the top thats capped off, and what should I do with it? What is the long black wire thats capped off? What is the lighter gauge wire with the red one attached and capped off in the center of the picture? And why would someone have put that red one on there? I believe the main wire is blue with a black tracer. My truck does have a trailer tow package from the factory. Also, would you guys use crimp on eyelets like that? or just strip the wires and put them in between the two little plates and crush them with the screw as designed? I spent a little time looking at the fsm, but I'm not real good at interpreting schematics like that and it didn't make much sense... Thank in advance all! EDIT: Well this fsm is making a little more sense now, still haven't found the answers to any of my questions though. I also think I will remove those huge crimp on connectors for the gooseneck wiring, and solder and heatshrink them in. Question on that though, shouldn't the wiring for the gooseneck have 7 wires? It only has 6 now so I'm thinking one is missing. Maybe thats originally where the red one went thats on the blue wire? EDIT 2: So it sounds like the black wire is probably a second ground, but I still can't find anything on that short white wire. The only white one I see in the FSM is further up with the brakes, but it doesn't seem like that could be the one here...