
Rogan
Retired Staff
-
Joined
-
Last visited
Everything posted by Rogan
-
I run the Diamond Eye (aluminized steel) 4" DP, 5" back, 6" SS tip with SS muffler.~$380, iirc. I love it, to be honest.
-
Pics


-
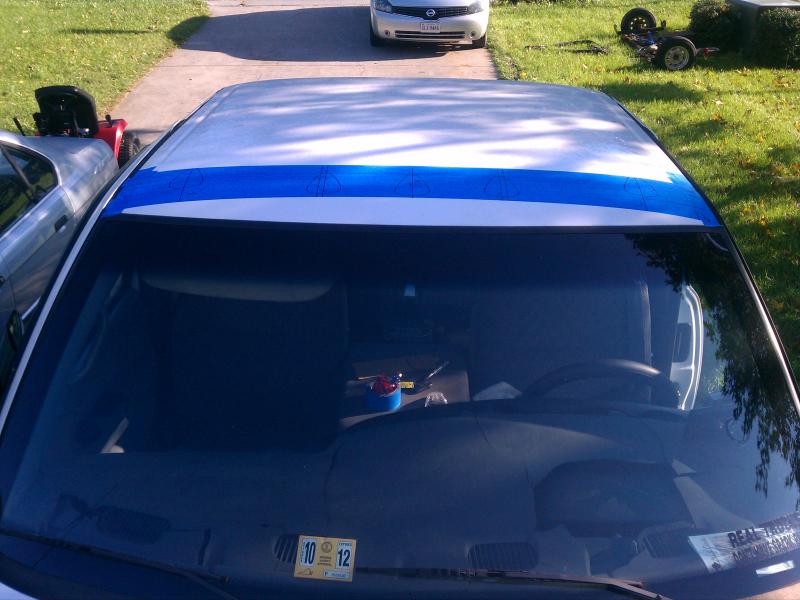
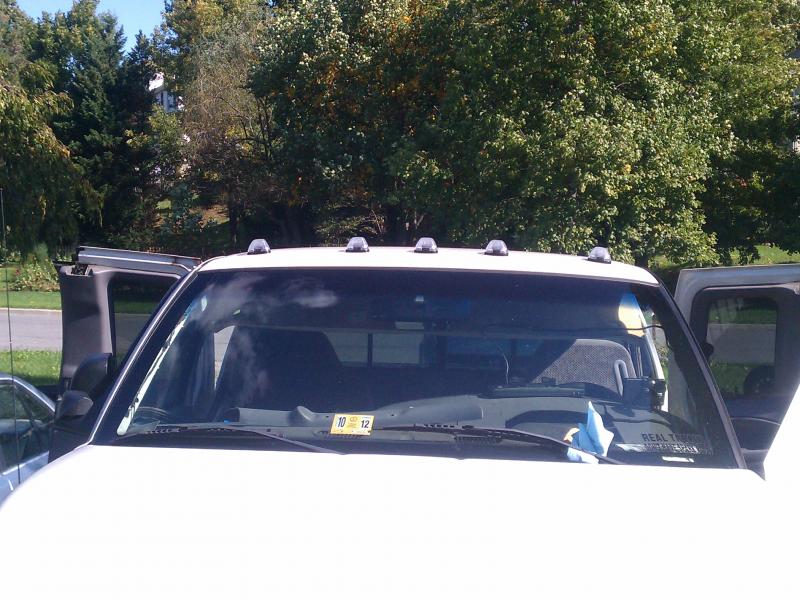
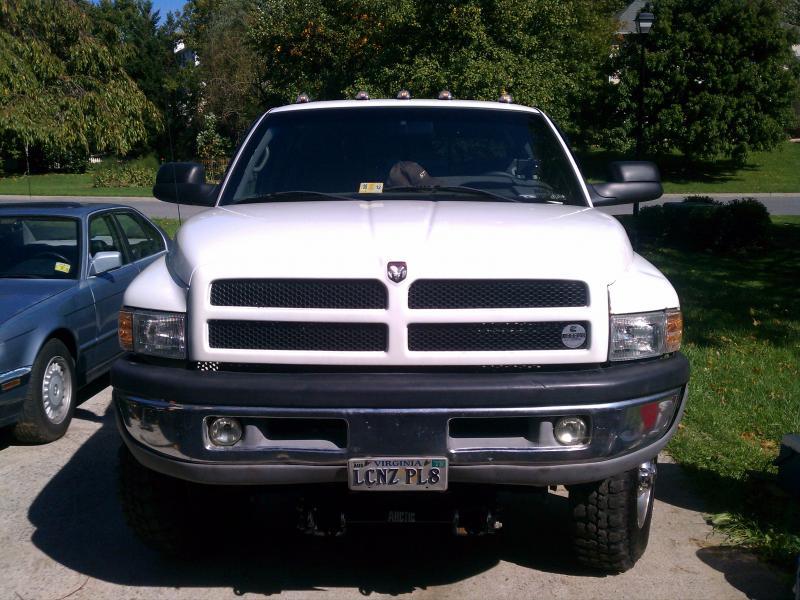
I 'thought' I had started a thread on Cab Lights before, but the search turned up nada.. At any rate, I installed clear lens/amber LED cab lights this past weekend. My truck did not have them from the factory, so I bought some EuroLite 9-LED ones for a Ford, from eBay for $70 delivered. I liked the Ford-style ones better, so that's what I went with. They arrived in a box, no instructions, no packaging, only an invoice, lights, and packing peanuts... Since my truck didn't have cab lights, I had to drill.. In a nutshell: [*]Drop headliner (phillips screws hold visors, pinch clips for overhead console, T20 for pass. side grab-handle, T20 for QC latch trim covers, snaps for a-pillar trim [*]Tape a straight line from top corners of windshield. [*]Measured 6" up on each side, and taped another straight line across. [*]Found Center line, marked it on the tape [*]From center line, outward, measure 8.5", mark it [*]From the center line, outward, measure 21". mark it [*]Once you have these lines marked, measure 5.75" from top edge of windshield, back. This mark will be the forward-most point of the cab light. (this will put the wiring of the Ford-style lights right about over the inner cab-wall hole. [*]Using the base of one light, make a cardboard template of the light base, and drill holes where wiring and screw holes will be. [*]Mark center line on template. This will aid you in lining/centering/straightening up the lights and marking the drill locations. [*]Align center line of template onto each parallel line for the light locations, taking into account the front of the light base on the 5.75" back-set mark. [*]Drill the three holes required by the lights (2 mounting screws, one wiring hole) [*]I used an 1/8" (.125) bit for making the #8 screw pilot holes. Also a pilot hole for the wiring, to be drilled out to 3/8", or .375 [*]Apply a dab of clear silicon on each mounting screw hole on the cab, and a blob around the wiring at the light base [*]Place the light base onto the cab, carefully ensuring that it's aligned properly. [*]Mount the light bases using (purchased separately) #8 x .75 SS sheet metal screws, and snug them down evenly [*]Once all are mounted, move inside the truck and wire lights in series. [*]I grounded them within headliner, and ran 'hot wire' down driver's a-pillar, to headlight switch (remove bezel, 3 phillips screws and slide headlight switch out. Wire is black/yellow. [*]Check for proper operation. [*]Reinstall everything if all is good to go! Pictures to follow.. I didn't take many, but I've got a couple I could add.
-
Yeah, I think I'll go ahead and order the Skyjackers and HOPE they stay in.
-
I plan to do that, as well.. Just won't happen this year..
-
That's the one. You can order it in red or black. I got mine in red, because I didn't state which, so that's what they sent me. It is a direct bolt-on w/o a plow. My bearing assembly was pressed in crooked, so I had to realign the bearing within the housing (no big deal.) WELL WORTH the money. Drivability (a week, now) seems really unaffected. It actually feels a little smoother in ride quality. However, I haven't pulled the trailer yet. I will this weekend, and update you all on the drivability. I ran my Jeep Cherokee with 35s and 10" lift with removed sway bars, with no ill effects. that, it is But I stay busy with two jobs, anyway. I'll be glad when it slows down a bit.
-
Yeah, I just have a hard time 200$ for bump stops.I replaced my shocks last night. I do believe they were OEM originals from 2001. 175k miles on them.I had some Rough Country 9000-series shocks in the garage that were hardly used. I'd originally bought them for my Cherokee rock crawler, but with 10" of lift, they were too short. I had to take them off after about 2 days usage and replaced them with remote reservoir Pro-Comp gas-charged.Anyhoo, these RC9000s were exact length as OE rear ones, and fronts were ~2" longer than OEs, which is fine, as I've got the leveling kit.The concern I have is, the OE eyelets had rubber with a steel bushing that the bolt went through. The steel bushing was a little too big to fit in the RC shock insulators, so I went without; only using the urethane bushings over the bolt, which is a little baggy. I'm sure they'll (bushings) be wore out in short order, but I needed shocks badly, and this way, I'm not out much.On topic, I may order the Skyjacker pieces and try them.
-
I had one in my '96 5spd. I kept smashing my finger on that one, but it worked great.
-
The ones, above, are longer than OE. I'm looking into these as a alternate to the timbrens for the front of the truck..These are 6" long, snow plow usage
-
Anyone used these? [TABLE=width: 100%, align: center] [TR] [TD=width: 100, bgcolor: #BBBBBB] Part Name[/TD] [TD=bgcolor: #EAEAEA]Dodge Ram 3500 Bump Stop - Front Or Rear[/TD] [TD=bgcolor: #EAEAEA, colspan: 4, align: center] Part #S97BP60 [/TD] [/TR] [TR] [TD=bgcolor: #BBBBBB] Brand[/TD] [TD=bgcolor: #EAEAEA, colspan: 1]Skyjacker[/TD] [/TR] [TR] [TD=bgcolor: #BBBBBB] Fits[/TD] [TD=bgcolor: #EAEAEA, colspan: 1]1994-2001 Dodge Ram 3500[/TD] [/TR] [TR] [TD=bgcolor: #BBBBBB] Features[/TD] [TD=bgcolor: #EAEAEA, colspan: 1] [*]Location: Front Or Rear [*]Material: Polyurethane [*]Type: Direct OE Replacement [*]Quantity sold: Sold as Pair [/TD] [/TR] [TR] [TD=bgcolor: #BBBBBB] Year[/TD] [TD=bgcolor: #EAEAEA, colspan: 1]1994-2001[/TD] [/TR] [TR] [TD=bgcolor: #BBBBBB] Description[/TD] [TD=bgcolor: #EAEAEA, colspan: 1] [/TD] [/TR] [TR] [TD=bgcolor: #BBBBBB] Your Price[/TD] [TD=bgcolor: #EAEAEA, colspan: 1]$63.38[/TD] [/TR] [/TABLE]
-
Ok, update. I got the thing installed Sunday. I had to trim a little off of the snow plow brackets, but I don't feel it will be structurally degrading for the plow assembly. I also had to shim the spindle nut (pitman arm retainer nut) ~ 1/4" out, to compensate for the plow mount thickness. This was done by using the OE lock-washer in addition to the new washer. This still leaves plenty of thread for the locator nut on the steering box output shaft (pictures will follow, soon.)I also removed the swaybar in the front, as the end links were gassed and needed replacing.First Impressions: Holy ____! The truck steers and rides 10 times better. It actually steers sooo much better than before. Bear in mind the output shaft on my steering box would move laterally a little, and required a tad more steering input than normally needed. It's all gone, now. I have to say that this is the 2nd biggest improvement, behind the Edge Juice w/Attitude, that I've done to the truck.The brace, coupled with the sway bar removal and new L/F ball joints, has made it so much more enjoyable to drive.
-
Thank you for being a www.RockAuto.com customer! To show our appreciation, we have a special discount for you. Your discount code is: 72070485976244 [h=4]Using Your Discount Code[/h] Enter the code above in the "How did you hear about us" line of the shopping cart. If you are using our traditional HTML catalog, please click the "Apply" button to the right of the field. Your discount will automatically appear, subtracted from your order total. Please note: We sometimes get calls from people who put the word "discount" in front of their code and do not get the discount. Please enter ONLY the discount code, no other words or numbers. The discount takes 5% off our already-low prices. There's no limit on order size or the number of orders. Use the code for your next order, and share the code with friends, neighbors, relatives, the guy at the corner garage--anyone you know who works on cars or trucks. This discount code expires on December 11, 2011; so don't wait!
-
Ok, me and my buddy, Jeremy Denson (Disturbed Diesel Performance) knocked the left side out this past Saturday. Only took us 7 hrs LOL!But, we got it done, didn't destroy the hub bearing, and never used a hot wrench :)I do NOT look forward to doing the passenger side; thank goodness they're in good shape so far.
-
that's the one I'll PM you. Thanks!
-
Hellzyeah! Lol. If its for free, then its for me! Sent from my rooted EVO's tiny keyboard with my opposable thumbs...
-
It's "basically" the same as what you did with a socket and extension. The TRE didn't get in the way, it just bent like hell because my dumb ___ tried turning the wheel too far.
-
My $200 OE pressure sender is crap. My truck reads 2/3 full sweep of oil pressure, even with the engine off... :doh:Unhook the sender, and the gauge goes to zero, so I know it's a failed/stuck sender.
-
I'm not far from selling the damned thing, to be honest.
-
Blue, you did, and Mike quoted that you did..
-
OMFG I wanna move back home (TX) for more reasons than rust.
-
I went and got my REJECTION inspection yesterday.. Guy says "Uhm, sir? YOur lower ball joint and wheel bearing are shot. I can't pass it. You need to get that fixed or else your wheel could fall off."No ____? LOL Never mentioned the 2" deflection in the top ball joint.. :cookoo:I said "I broke over $1000 in MATCO and SNAP-On tools, trying to fix it last weekend. Got any suggestions?"He said "It should just pop right out."I replied.. "Ever worked on one?""No.""Well, they don't 'just pop right out', unfortunately. Otherwise, it'd be replaced already.""Oh."
-
LOL nice! I need that sign.
-
So Friday night, we attempted to replace my ball joints. All week, I've been soaking the hub assembly and associated hardware with rust penetrate.Bottom line:Broke $1400 in Snap-On and Matco tools, and NEVER got the axle nut off, nor did we get the hub out. Afterward, we tried using the hub press tool thingy from Snap-On, where you use the hub bolts (backed out some) and use the power steering to press the hub out.. Yeah... DESTROYED the right-inner TRE; turned it into a horseshoe.. it's as if the spindle and hub are now one-piece, thanks to rust...So, I had to replace that. Never did get the hub out. I suppose next weekend, I'll just cut the ball joints , slide the spindle/hub/axle out as one unit, and annihilate the $400 hub bearing on a 20T press.
-
yeah, you can use a NC solenoid, and it'll be fine, as well, if you cannot find a NO one. It'll handle the duty cycle 100%, as it's only a relay of sorts. If you cannot find a NO one, you can get an NC one off of any 90s Mitsubishi. They're 99% located on the drivers side firewall. Make sure you clip off the harness pigtail, too.. --- Update to the previous post... As for NO solenoid, late 80s/very early 90s Honda. Also, check VW EGR solenoids. The NO units are quite common, if you look. I like to take my own piece ov vac. line (about 1' rolled up) in my pocket, pop the vac. lines off the solenoid, and use my piece of vac. hose to test the NO/NC..
-
So I ordered a steering box brace from Spohn Performance. It arrived a couple days later, and I will say, seems to be a pretty class A piece.Well, it won't fit. sorta. It's the right part, and is made properly. HOWEVER, I also run a plow in the winter. The truck-side bracketry (spreader bar, torque arms, etc.) are all kinds of interfering with the installation of the new bracket... I'll investigate more this evening, and see if I can slightly 'mod' something to gain the clearance I need..Otherwise, the new steering brace will be up for sale...