

My OBA system install (including exhaust brake & air horns)
- Replies 6
- Views 4.5k
- Created
- Last Reply
Top Posters In This Topic
-
AH64ID 2 posts
-
War Eagle 1 post
-
diesel4life 1 post
-
ABennin 1 post

I have been contemplating the installation of an OnBoard Air system (on my '05 CTD) for quite some time. I wanted to install a PacBrake (which needs air to operate), also I wanted to have a couple of quick connect couplers mounted on my truck so I can air up tires etc. when needed. I also have an air horn that is just begging to be installed on my truck.
Doing some research I found there are dozens of different compressor systems. You can easily spend way north of a couple 'G' notes on some systems but my wants were simple enough that I didn't think I needed to get too fancy.
I didn't want to install the system in the bed of the truck because I sometimes carry a camper. I didn't want to displace my spare tire or install it inside the cab of the truck. Also I didn't want to try and cram something into the engine compartment. So I decided to look for something that I could install on the outside of the truck frame rails between the frame and the body overhang.
I decided on an constant duty cycle Viair 480c which is rated for a maximum working pressure of 200psi. I opted to go with a 2.5 gallon storage tank. It was the recommendation on this forum to not install too much storage because you can end up impacting your tire air -up time if the compressor is having to fill larger storage capacity along with filling your tire. The PacBrake doesn't take much air volume to operate and I don't plan on laying on the horn alot and airing up tires is not a regular occurrence so I am thinking the 2.5 gallon tank will work just fine.
I installed a 110-150psi pressure switch because my 19.5" tires are rated to 110 psi and I didn't see a need to make the compressor operate at the 200 psi level.
PacBrake recommended 100psi maximum so that meant I would need to install a pressure regulator to control the pressure it will see.
I wanted to mount the compressor and tank in a solid manner so I didn't have vibration or equipment breakage problems somewhere down the road. I decided to make a 'U' shaped cradle to set the tank in and used "Stanley" L shaped brackets to make the cradle out of (got those at Lowe's). They are very heavy duty brackets and are galvanized. I opted to use 3/8" self threading bolts to mount the brackets to the frame rails. Again I wanted something that would take the punishment of hanging under the truck and the bouncing from the road. I used self tapping bolts because I was working in a bit of a tight location for trying to use a tap to thread the holes.
I found a compressor mounting bracket that is made for the Viair compressors and decided to use it for mounting the compressor. It is also very heavy duty and I could tuck it in close to the air tank to make the connection to the tank fairly simple. This bracket also could be mounted to the truck frame rails and provide me with easy access to run the compressor inlet filter up in the engine compartment rather than having it placed somewhere under the truck where I thought the dust and moisture would be much less desirable.
As I worked to get the tank and compressor located I tried to take into consideration the route I would run the air lines. My plan was to install a quick connect coupler somewhere near the front of the truck and one near the rear of the truck. My thinking was that this would give me added flexibility when it came time to string out an line to air up any of the truck tires (or help some other rig). So as I looked over the real estate I decided to mount one inside the engine compartment and connect it to the pressure regulator that I would install to regulate the air supply for the PacBrake. So a few brass fittings allowed me to come up with a fairly compact solution. There was a very convenient location that would allow access to the coupler while standing on the ground next to the truck and the location would be a straight shot for the supply air line to come from the compressor (under the truck) up through the wheel well area to the pressure regulator.
The rear quick connect coupler is mounted on a bracket that is connected to my hitch and I have it covered with a rubber sock to keep mud, water and junk out of the coupler when not in use. All of the air supply lines are cased in a plastic wire wrap for abrasion protection.
Here is a picture of the wheel well with the splash guard removed and you can see the compressor inlet line (and the less visible pressure line) zip tied to the wheel well and the splash guard will cover it all up. Again this provides a straight shot (simplified routing) from the compressor and tank up into the engine compartment. Compressor inlet line is 3/8" and air pressure supply lines to regulator and quick connects are 1/4". The air supply line to the air horn is 3/8".
Here is a picture of the compressor set on the mounting bracket and you can see the high pressure SS braided outlet line that feeds the storage tank.
The electrical hook up is fairly simple in that the pressure switch I installed comes setup with a built in relay to start the compressor. So I needed to run a trigger wire from the ignition switch on circuit (so that the compressor can't run unless the key is on) to the relay on the pressure switch. Then there is a 12ga power wire that runs from the battery to the relay for the main compressor power (pulls 20amps under full load), and then another 12ga wire going from the relay up to the compressor motor.
I opted to install an on/off switch and a pressure gauge in the cab of the truck. I didn't want another gauge on the dash or column so I decided to install it in the kick panel below the ash tray and power outlet. It was very simple to get the 1/4" airline into the cab from the regulator (actually I installed a 'T' just prior to the regulator). I then could bring the line from the 'T' to this gauge just through the firewall under the heater) and along the bottom of the dash over to the kick panel and the back of the gauge. I also installed the switch right next to the gauge in the kick panel. It sits low and close to the floor so you are not able to read the numbers but you can clearly see the gauge needle and it's location on the face of the gauge. The primary purpose of the gauge is to tell me if the system is working. I can see it from the drivers position since you can't hear the compressor running while driving.
When I finished the install I zip tied everything down so it doesn't flop around when driving and I sprayed all the brackets, bolts etc. with undercoating. While the compressor and electrical connections are not water proof or water tight they are water resistant. I plan to make some splash guards that will provide some additional protection for the pump and the electrical connections on the tank. When I get those installed I will add some pictures of my approach.
When I installed the pressure regulator I installed a 'T' so I could connect the quick connect coupler and placed a plug in the other opening. This plug will remain there until I install thePacBrake. Once I have the PacBrake installed, the plug comes out and that port will be the connection that will be used for the PacBrake. This whole assembly sets just above the location where the brake will be installed and again it is a short and direct run for the airline.
Air Horn Install
I was hoping to install the air horns up front or maybe even in the engine compartment. But in the end I just could not find a satisfactory place to install the horn. This was primarily due to their size. I ended up installing the air horns under the truck on the driver's side. I mounted them to the frame rail with another Stanley 'L' bracket. Those things are super strong and it seems to hold the horns very solid. The trumpet portion of the horns is facing toward the rear of the truck. My thinking was that this would prevent water,dirt and other stuff from being rammed down the horn while driving. This thing is water resistant but I also plan to make a splash guard and mount it around the assembly to help keep it as dry as possible. Pictures will come later after I get the splash guard built and installed.
PacBrake Install
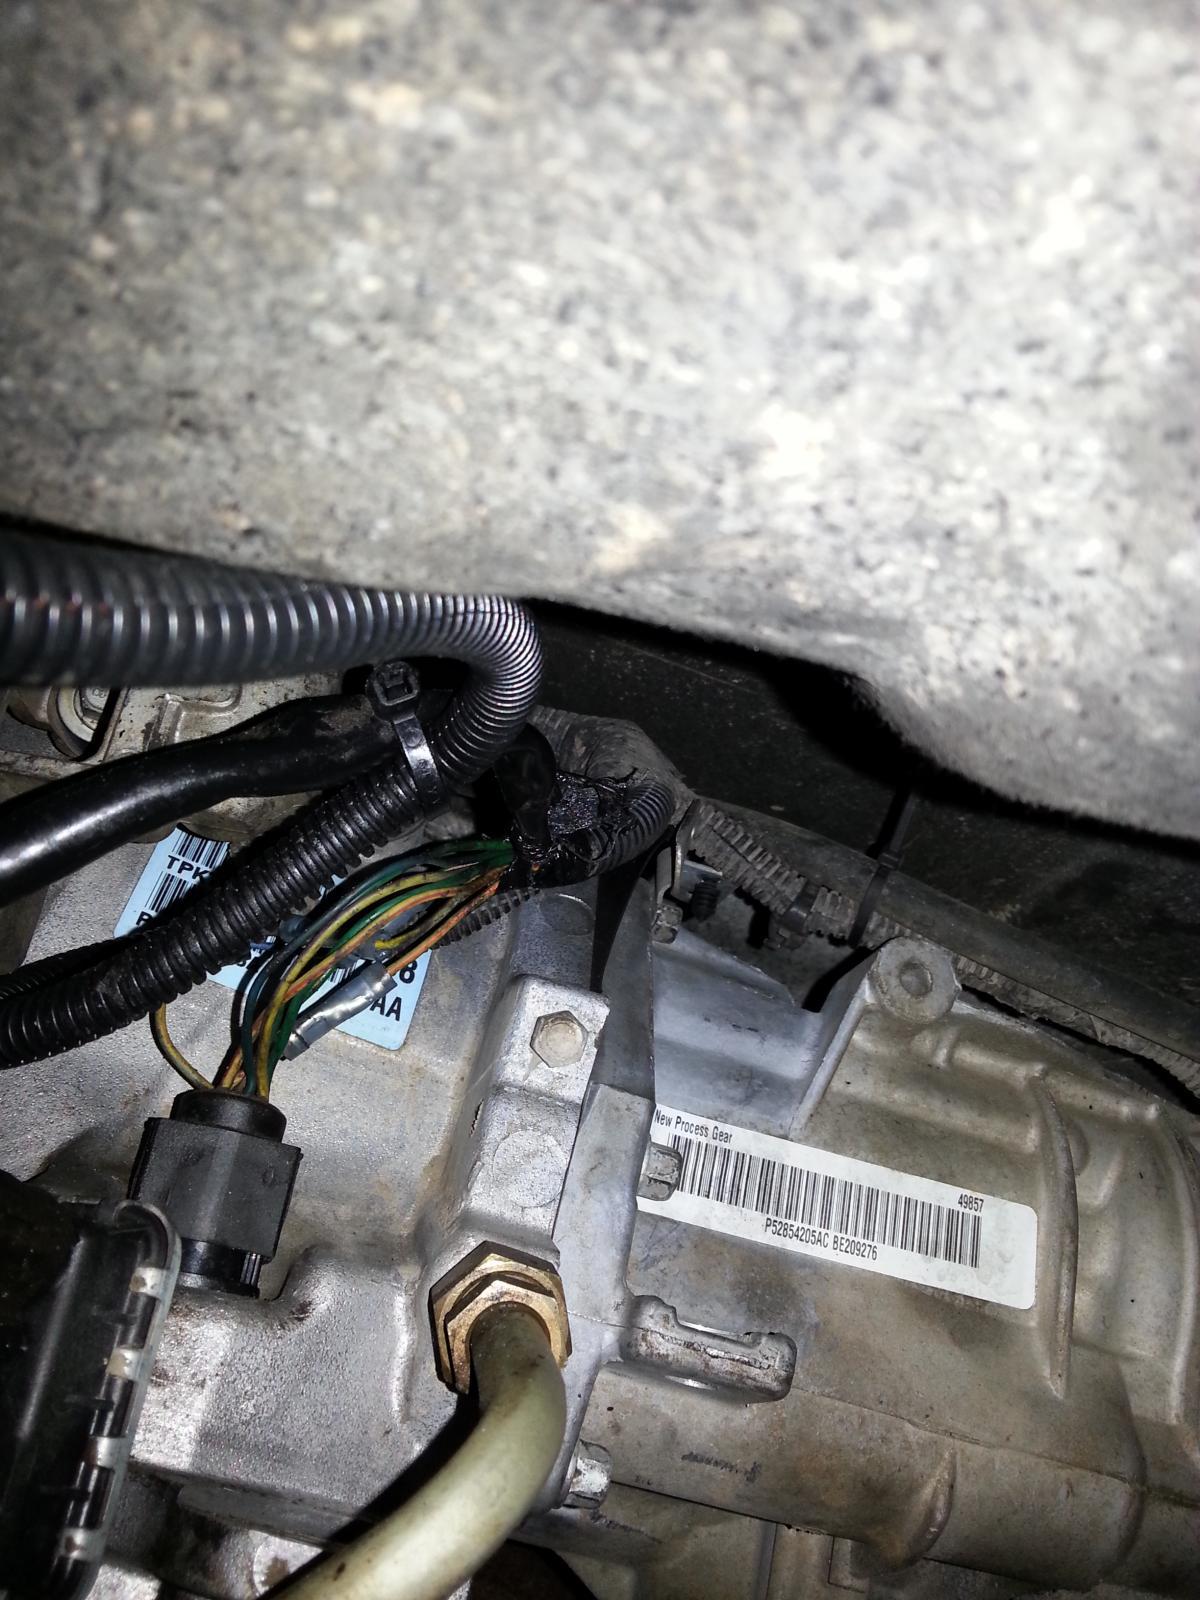
So I was finally able to move on to the PacBrake install. With the wheel well splash guard removed you have better access to the exhaust elbow that needs to be removed to install the PacBrake.
Work to remove the elbow and install the exhaust brake assembly is kind of tight so it actually takes a little more time than expected. I was actually surprised at how compact the PacBrake unit was. I guess I was thinking the air cylinder and its mounting plate would take up much more space than it does and even make space around the turbo area more congested. As you can see from this picture it doesn't really take up much additional space.
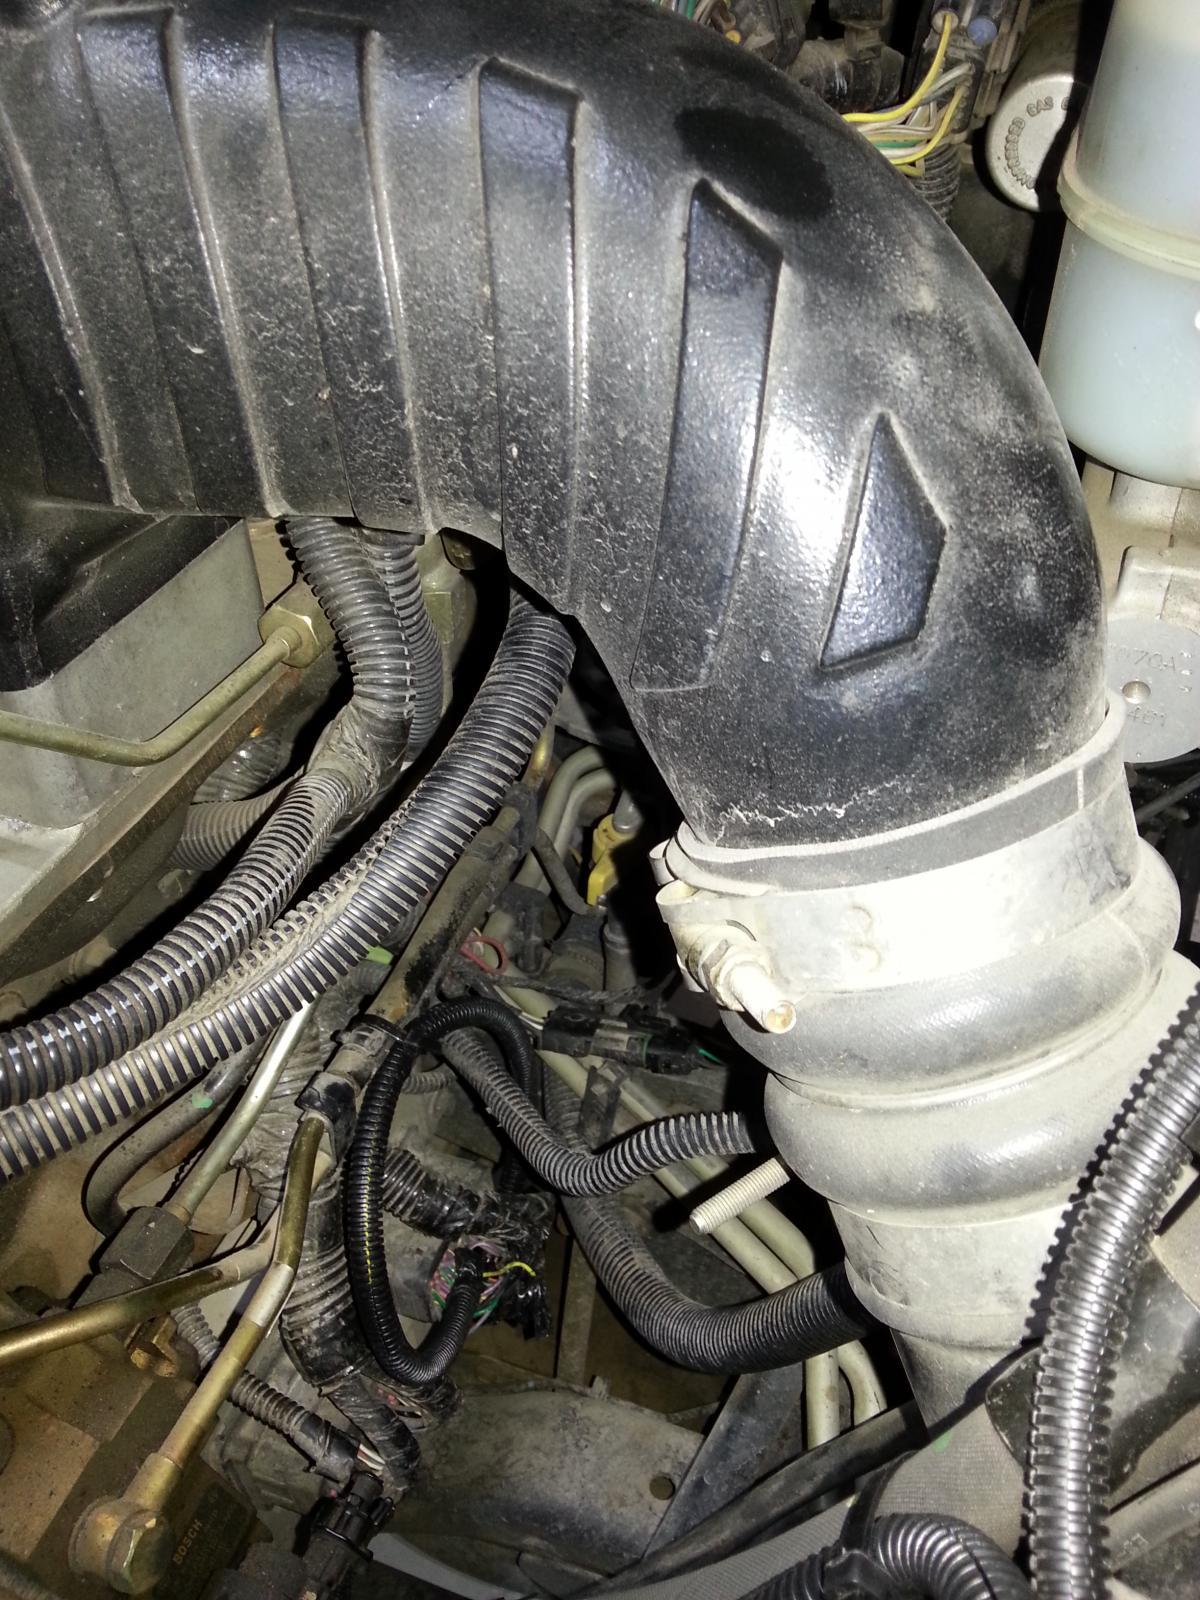
The cylinder actuator airline you see in this picture comes from the solenoid that operates the brake. As planned, I just connected into a 'T' fitting I installed on the output side of the air pressure regulator I had previously installed. This picture shows the location I placed the solenoid and the air line connection to it.
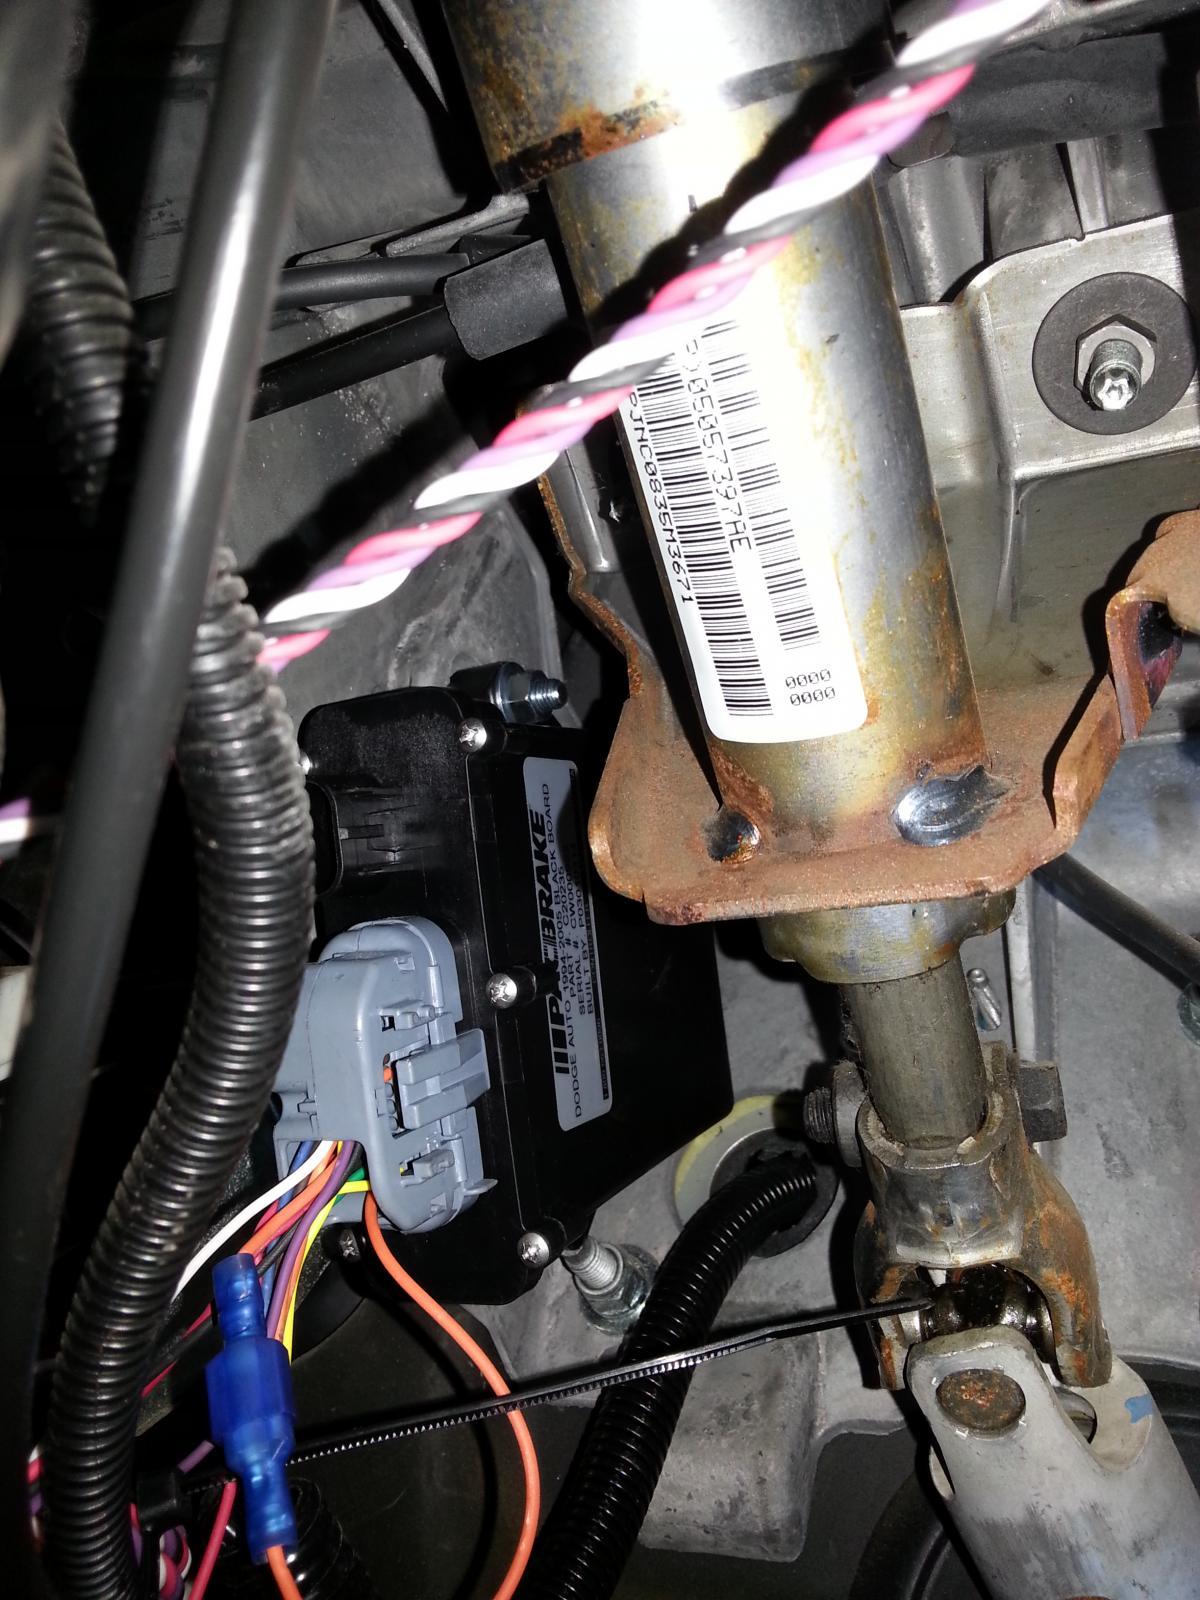
Since my truck is an '05 with auto (Dodge made the '05 48RE with a somewhat unique control methodology which is different from later versions of the 48RE) there is a 'brain box' (transmission controller) that has to be installed that controls the TQ lockup. The air solenoid is electrically controlled through the interface of the transmission controller, the connection to the ECM and to the transmission.
This picture shows the mounting of the transmission controller box up under the dash near the left side of the steering column.
This picture kind of shows the connection made to the ECM.
This picture kind of shows the connection into the transmission but it was pretty tight to get a picture of all the detail connections.
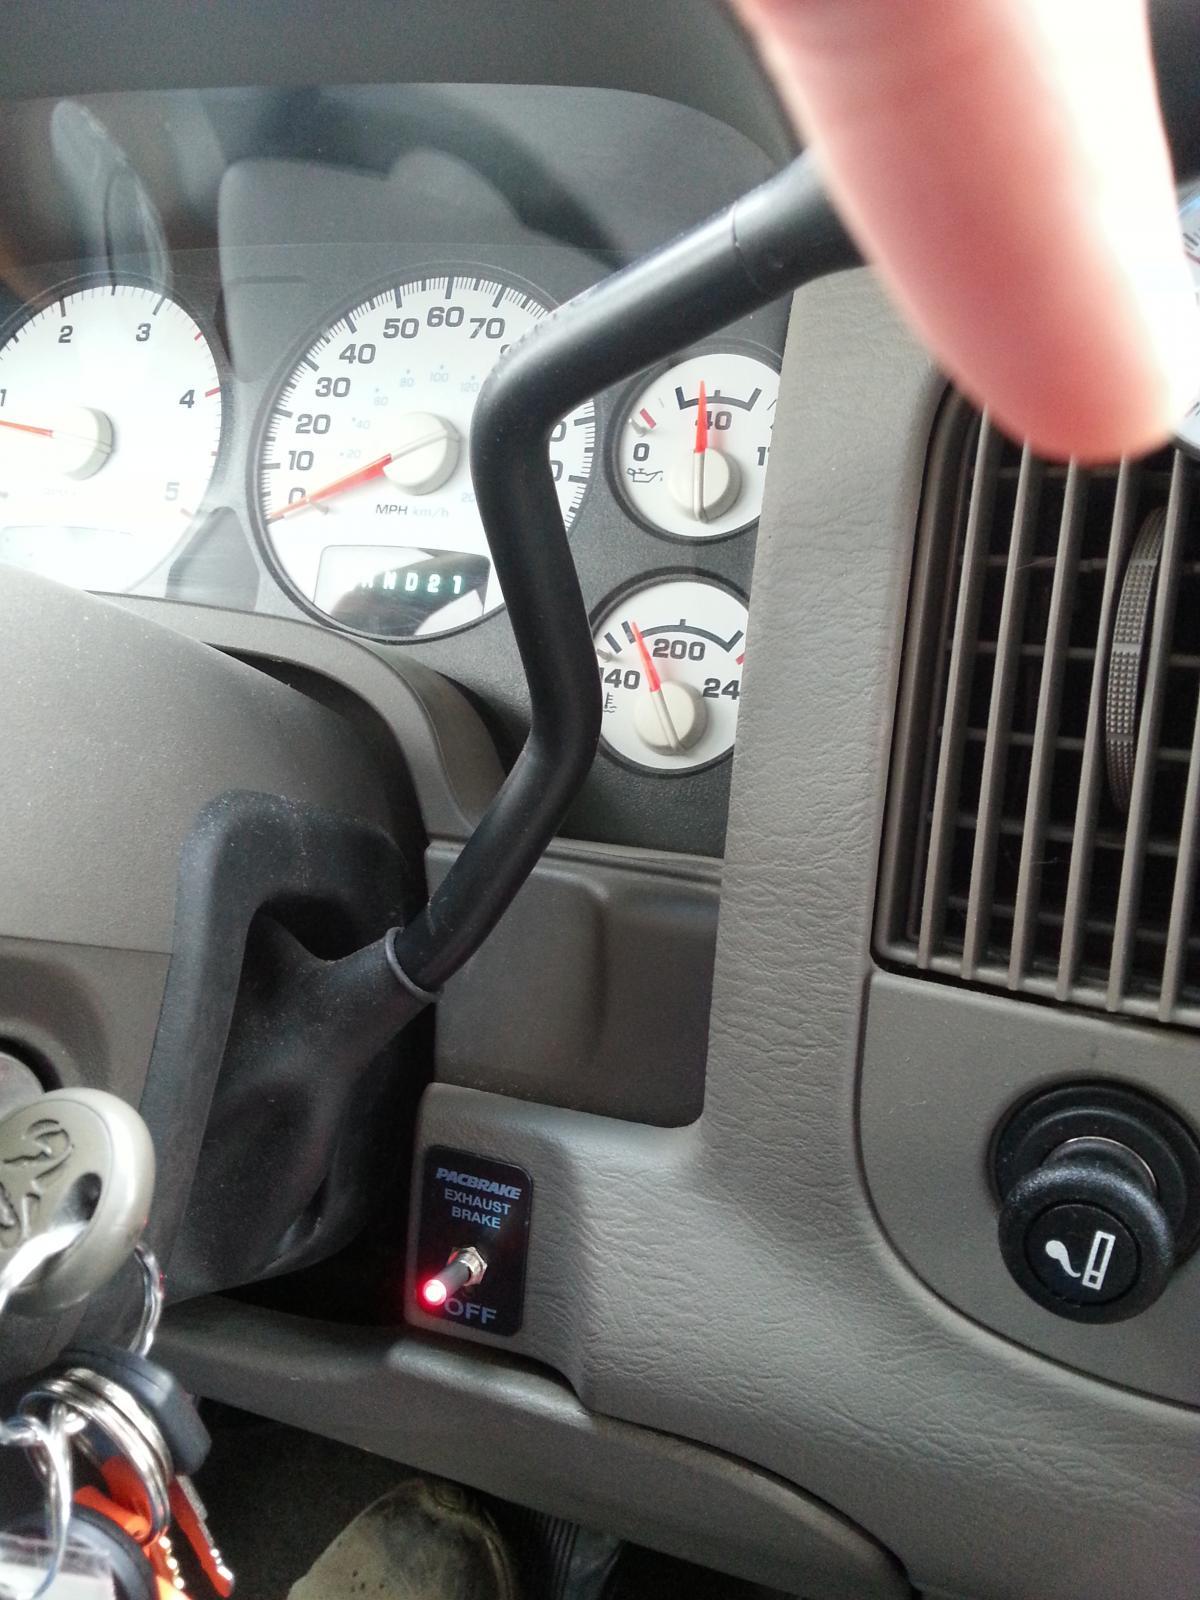
I installed the in cab PacBrake actuator switch on the transmission shift lever side of the dash.
Now I need to learn how to effectively use the exhaust brake. I have never driven a truck with an exhaust brake, so I am sure there will be much to learn.