TFaoro
Unpaid Member
-
Joined
-
Last visited
Everything posted by TFaoro
-
Someone please correct me if I'm wrong, but I think the only difference between the (98.5-2000) & (2001-2002) was one had the cam sensor and the other had the crank sensor. I don't know if those are interchangeable or not
-
Didn't know about that link. Thank you. So going by the spreadsheet in the article mopartechnician quoted, adding almost any anti-gel formula is not going to give the VP adequate lubing?
-
So what additive is best to keep the vp44 lubed AND prevent gelling?
-
Is the Xylene supposed to lube everything? I will run this tank down low to get the diesel911 out. After that should I mix Howes and 2 stroke, or just use the howes?
-
Over 3/4. It was right between full and 3/4. The only part that gelled was the filter.
-
What exactly should I look for in the msds sheet? I have heard good things about Howes but I don't know what I'm looking for. http://www.howeslube.com/dieseltreat.php - the msds sheet is on the page http://www.powerservice.com/msds/ - Diesel 911 is what I used I figured mixing wasn't good, but I thought under 10psi of fuel pressure was even worse.
-
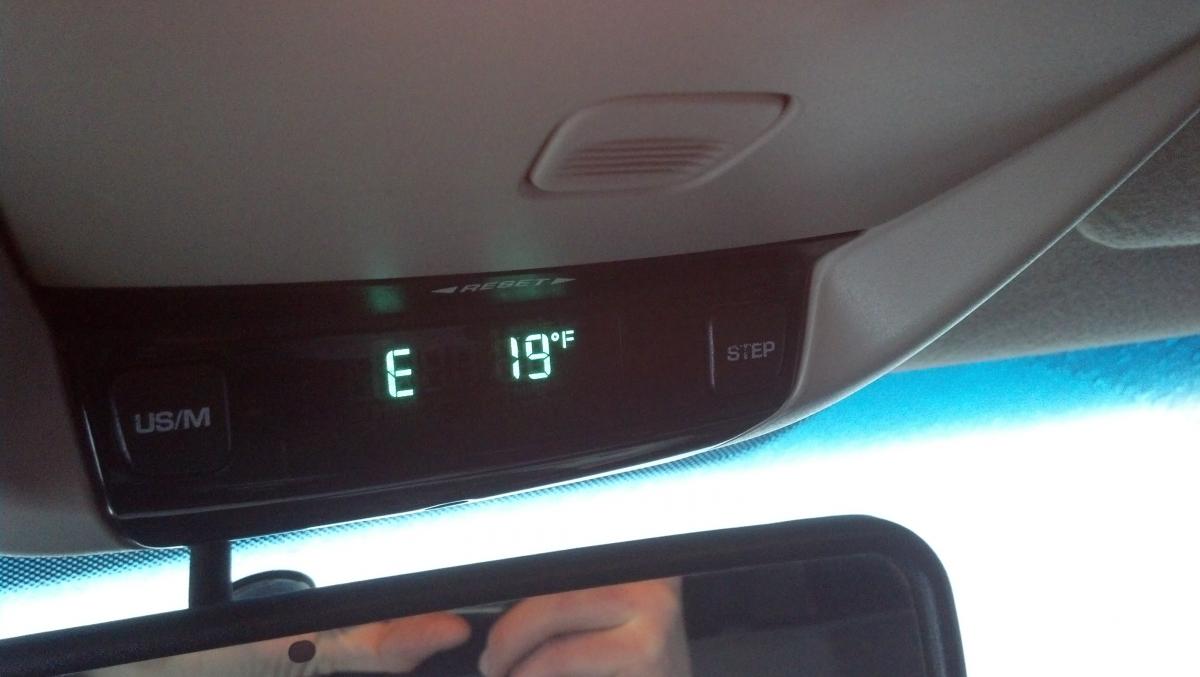
This morning it was -9deg Fahrenheit and I believe it got down below -16 last night. I don't have any fuel additive in my truck as I only run 2 stroke oil. I was able to get the fuel inside the filter warm enough to get me to school with 10 psi of fuel pressure . After some classes I went and bought some diesel 911, and poured a little more than the suggested amount into the tank. The fuel pressure returned to normal as expected. Will having the 2 stroke and diesel 911 in the tank together hurt anything?? Is there a different additive I should use during the winter instead of 2 stroke? Or should combine 2 stroke with something else during the winter? I know plugging it in would be best, but living on the 3rd floor of an apartment makes that option impossible. Thanks in advance!
-
What do ya know they did make one http://www.genosgarage.com/DODGE-RAM-WINTER-GRILLE-COVER-94-02/productinfo/WINTER_FR_9402/#.UvGevRCIDlw
-
Great looking cover!! But I don't think it'll fit on a gen 2. Where did you buy it though? My brother is interested in one
-
Mopar, I cut a square hole out directly in front of the fan. It isn't very big, but it allows air to flow to the fan in case it does get hot. Right now I am going to school and it is only a 6 mile drive between my apartment and the school. I have almost everything blocked off just to get it up to temperature before I get to school. I know it isn't good for the motor, but it's my only vehicle! Also, egt's are always below 1,000 with the smarty, so the increased IAT might be good for it???? Correct me if I'm wrong! It does get air, but very little. With the cardboard right behind the intercooler there is no place for the air to go if it does travel through the intercooler fins.
-
I found a box in the trash..... shoved the cardboard between my radiator and intercooler! Price: Free!
-
The drum inside is only used for the emergency brake. As for the uneven pad wear you need to check and make sure the caliper is able to slide in and out on the pins. This can be done by removing the pads, pushing the piston all the way in, installing the caliper and trying to slide it in and out. If it won't move you found the problem! I'm sure others will chime in with some advice too
-
http://www.dieseltruckresource.com/dev/replace-your-camshaft-lifters-n-stuff-t255129.html This thread shows what has to be done to remove the cam without flipping the engine over. It is possible, but it's easier with the block upside down!
-
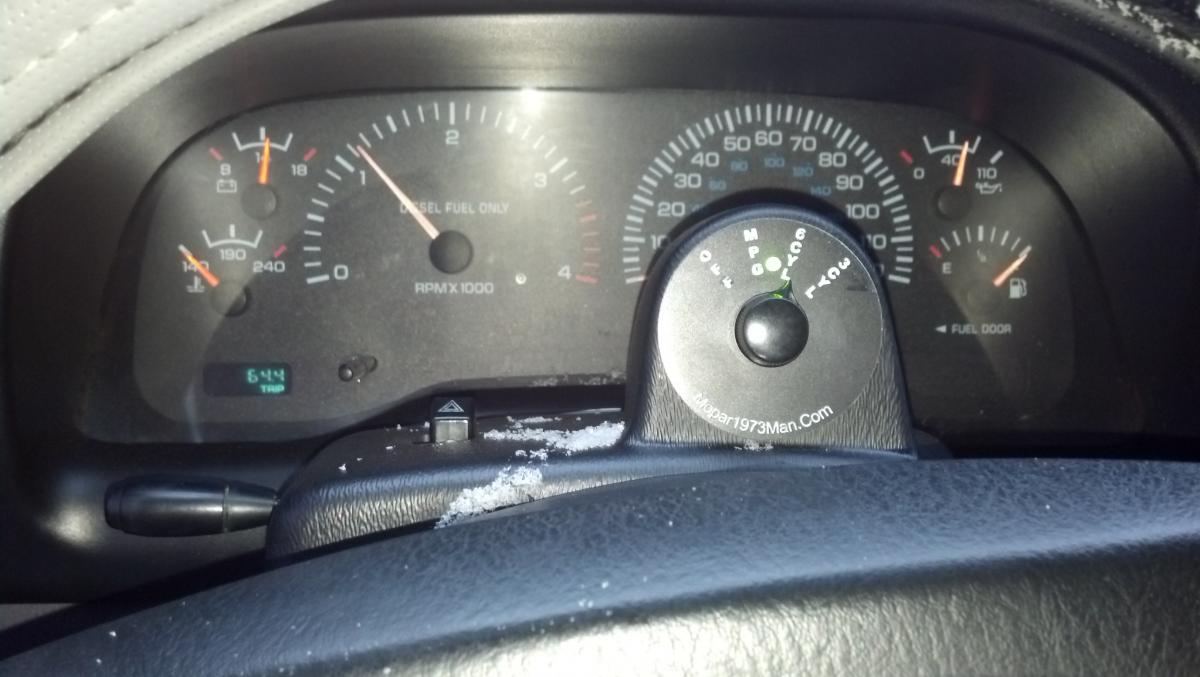
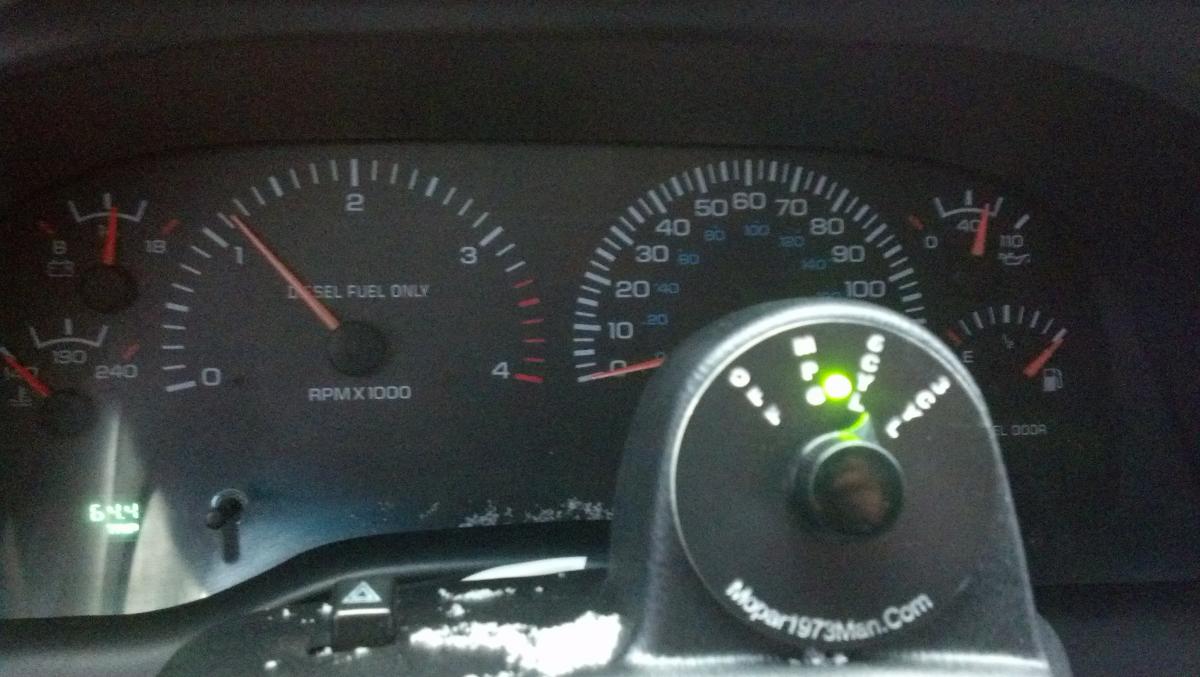
The 2nd gens have dummy gauges. If you have the high idle mod from ed and turn it to 6cyl while the engine is hot the oil pressure climbs as the temperature gauge drops. At least that is the way it is on my 02
-
I'm not sure. I haven't changed my fluid since I put the luke's link on. You could call the company and ask though.
-
I believe it says you might have to, but mine and my dad's fit just fine without "deforming" the pumpkin cover. 3rd gen track bars wear out too. My brother's 05 had to have new bushings put in it. As with anything you have to keep up on maintenance. I just check it and grease it at every oil change!
-
Could we say it's a COOL Secret Squirrel?
-
If it is the track bar there is a way to rebuild the joint. It's called a Luke's Link and is a lifetime fix. You can adjust it as it wears. http://shop.lukeslink.com/ http://www.lukeslink.com/
-
The carrot.... It was pretty delicious!
-
I spoke with ED today about this problem and we believe we have narrowed it down to debris in the system or another bad pump. The fluid does have a burnt smell to it, but ED instructed me that all atf 4+ has this smell even after a short amount of use. When I get home from college I will pull the pump, and all of the lines to ensure all screens and lines are clear. I will update when this is done.
-
Larry B's is a very reputable place. We have 3 trucks with this guy's parts. http://www.fostertruck.com/dodge/starters.html
-
Definitely sounds like the starter. They are pretty easy to tear apart and look for obvious problems. Maybe contacts getting bad?
-
Not a problem. What is the next product!?
-
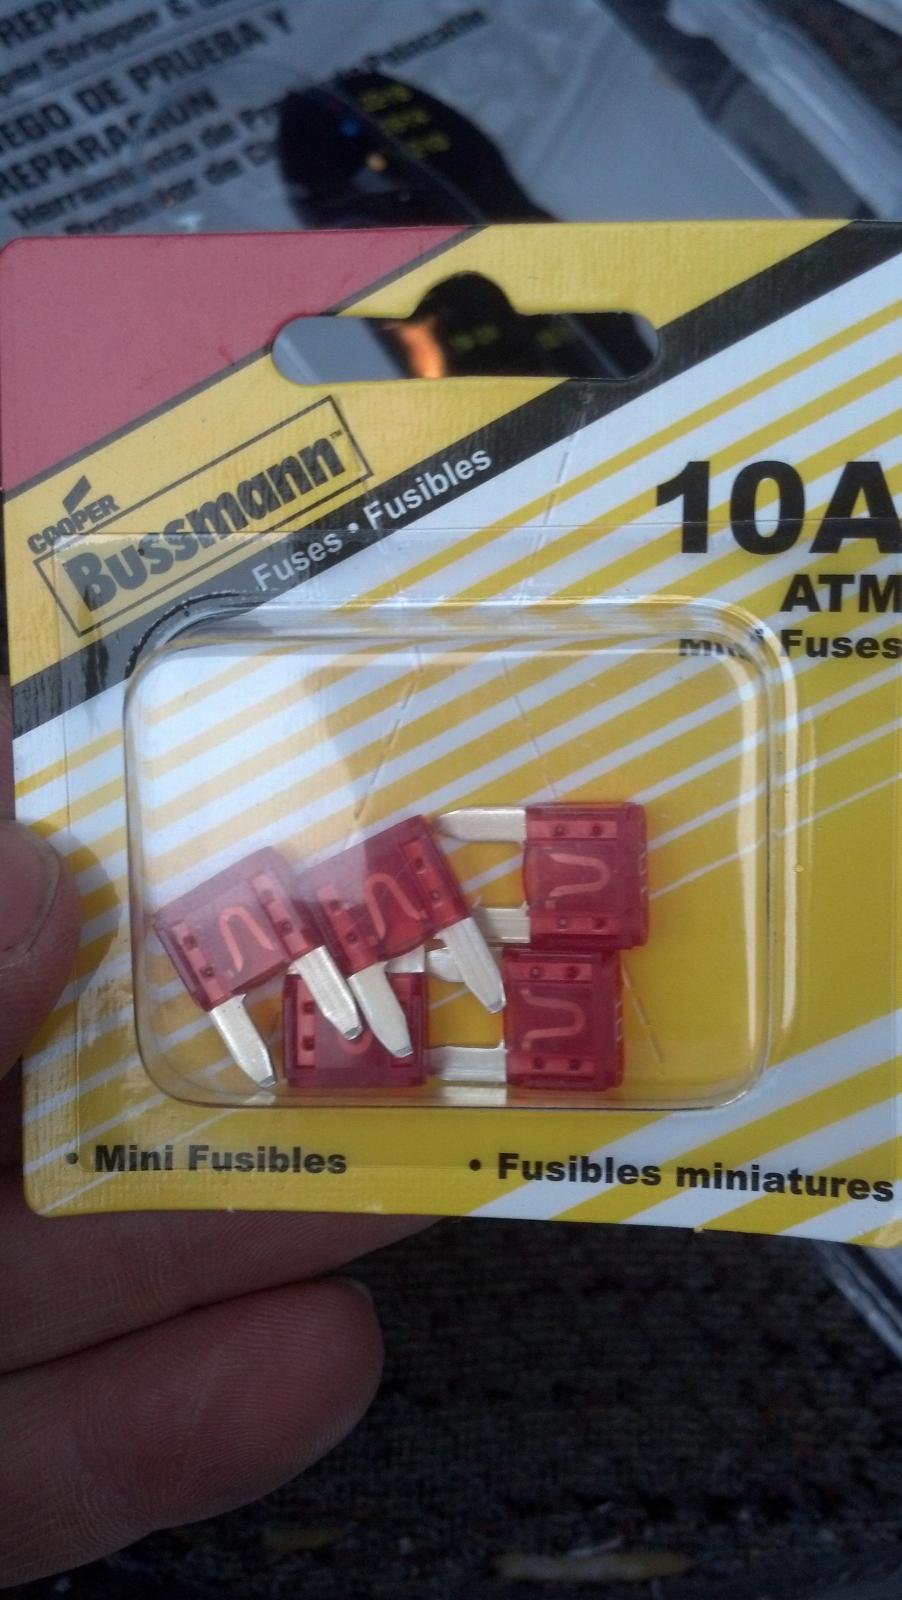
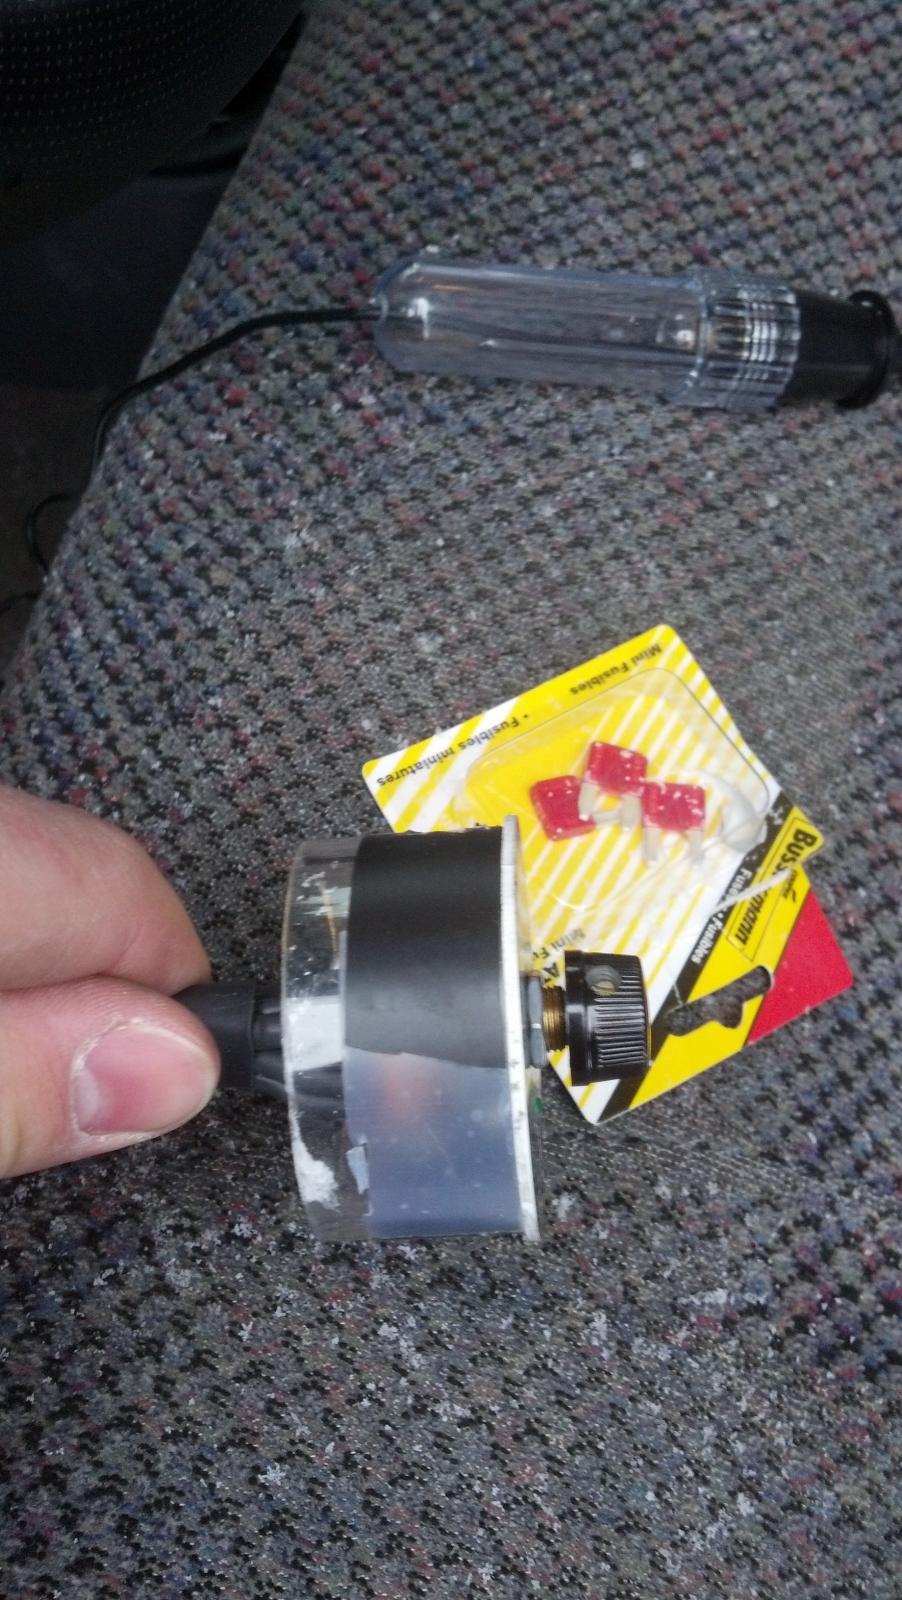
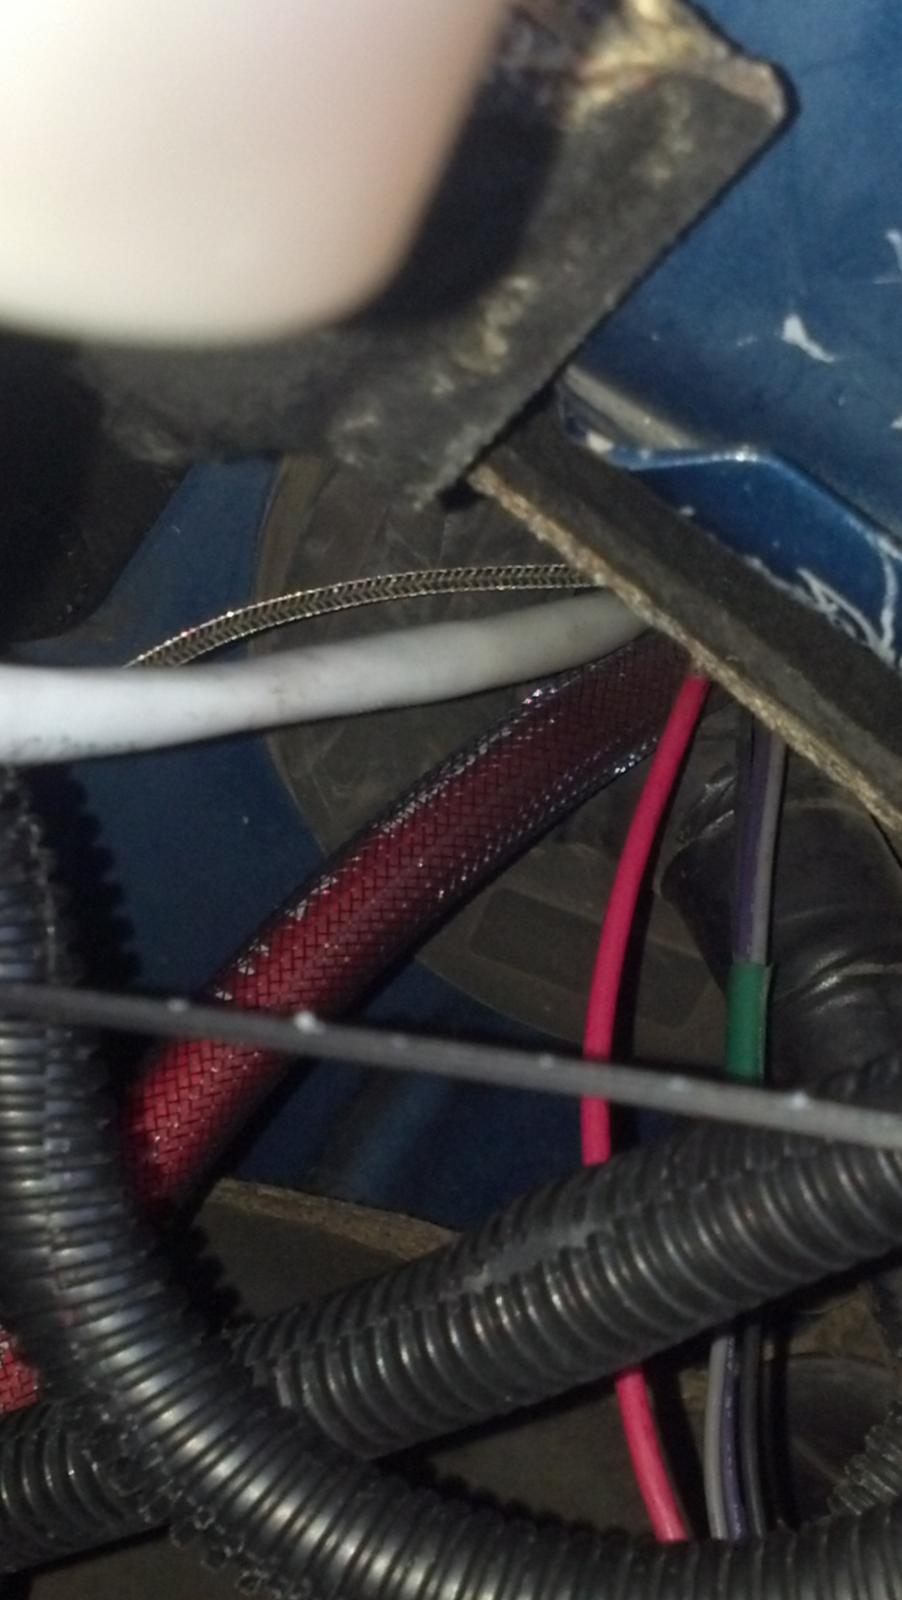
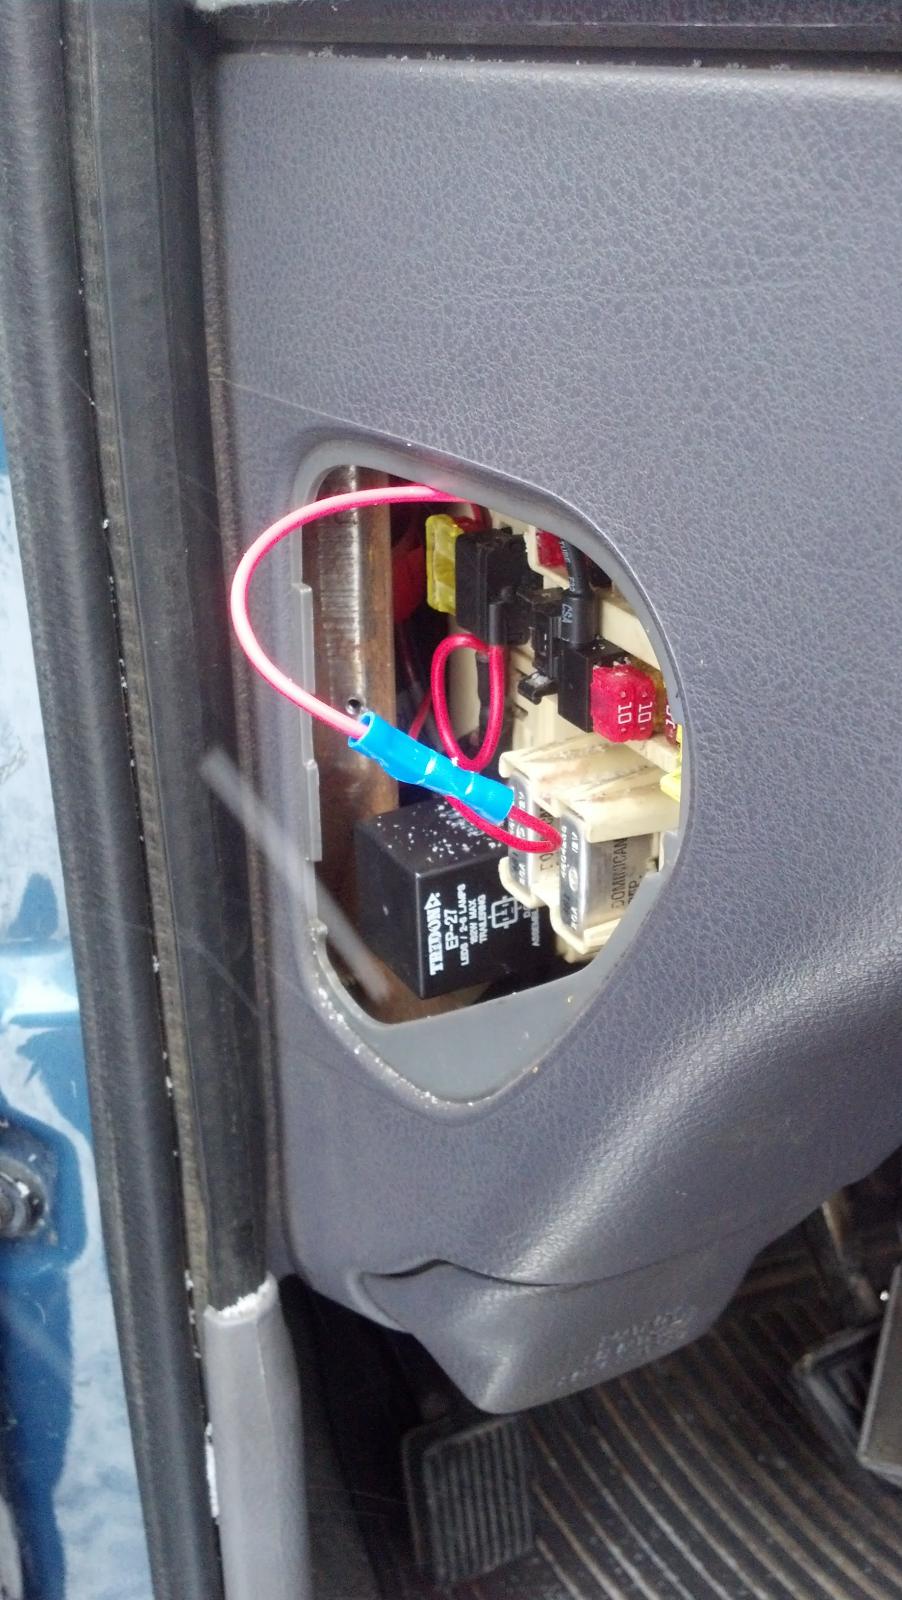
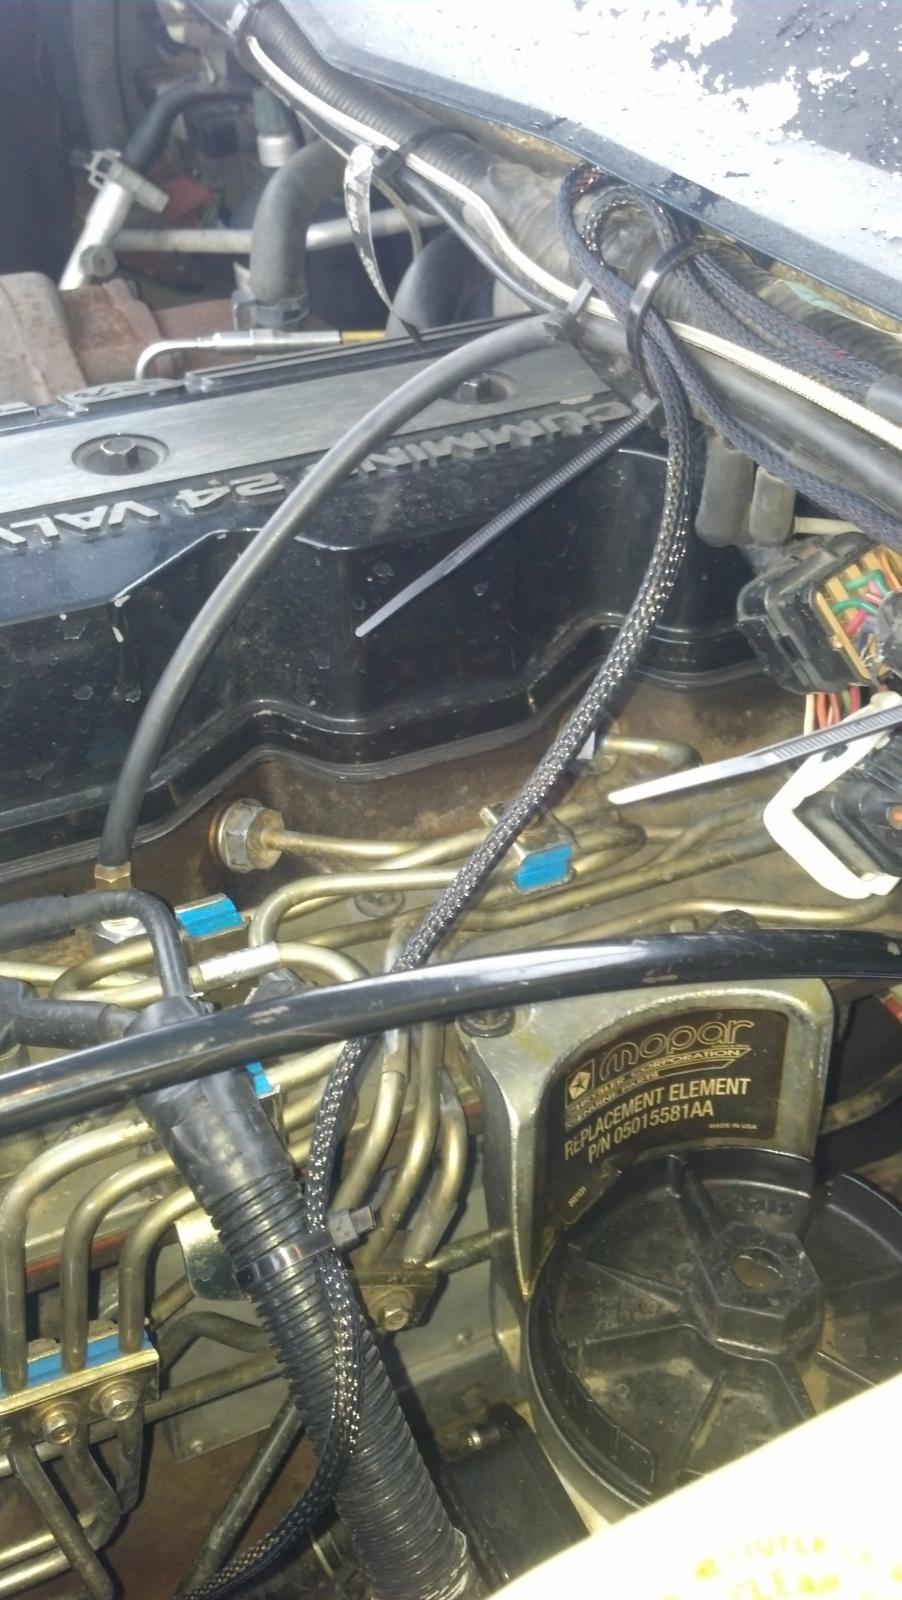
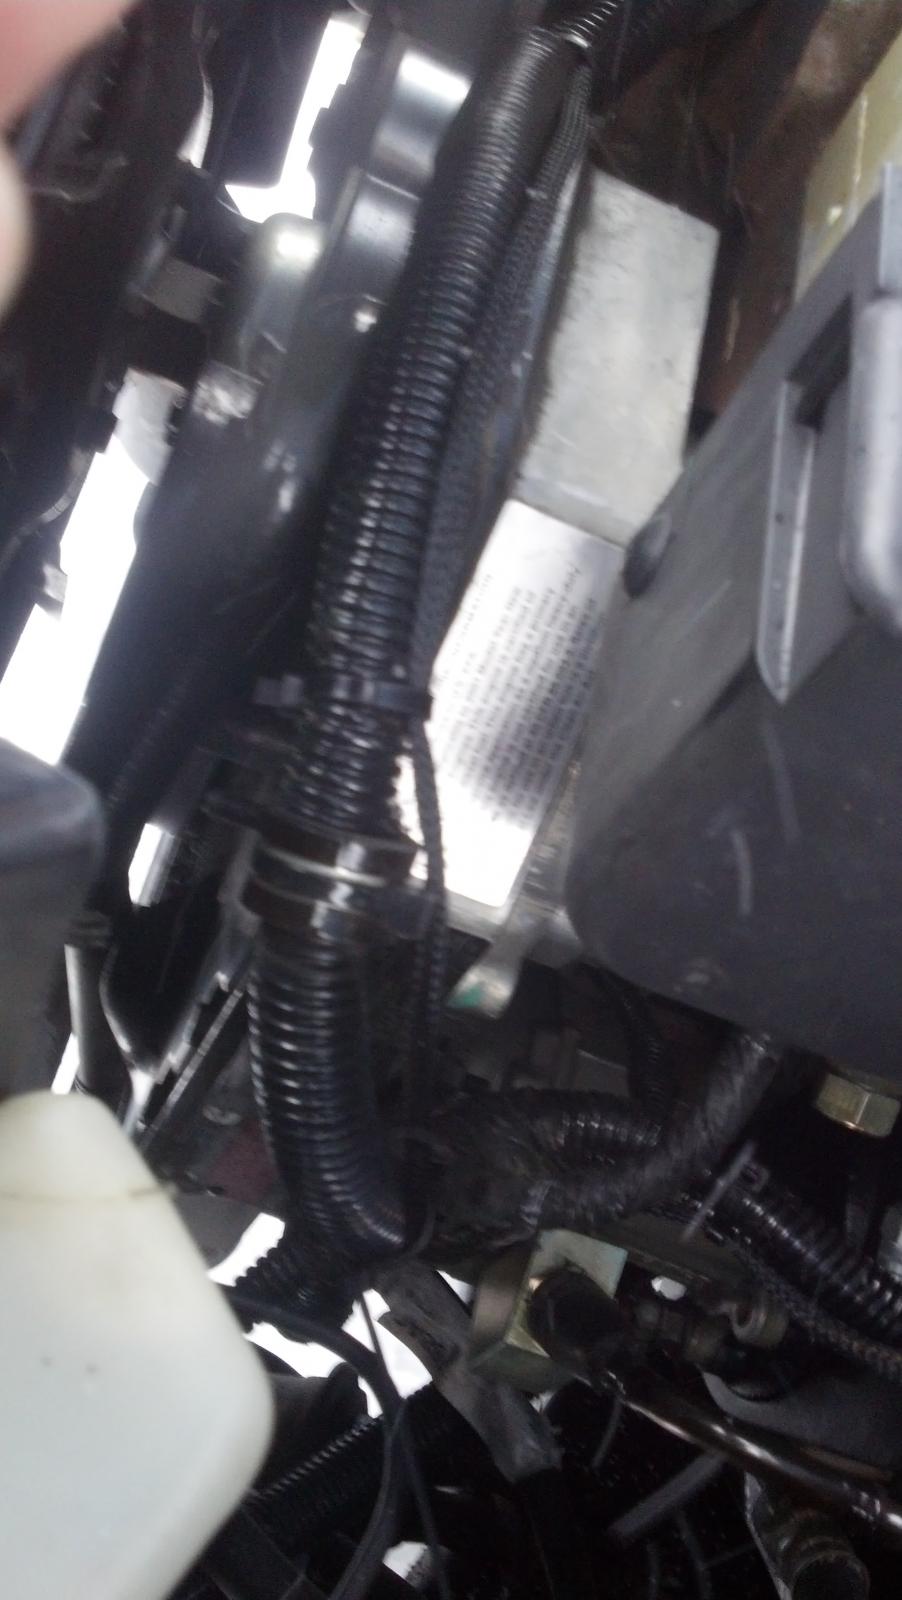
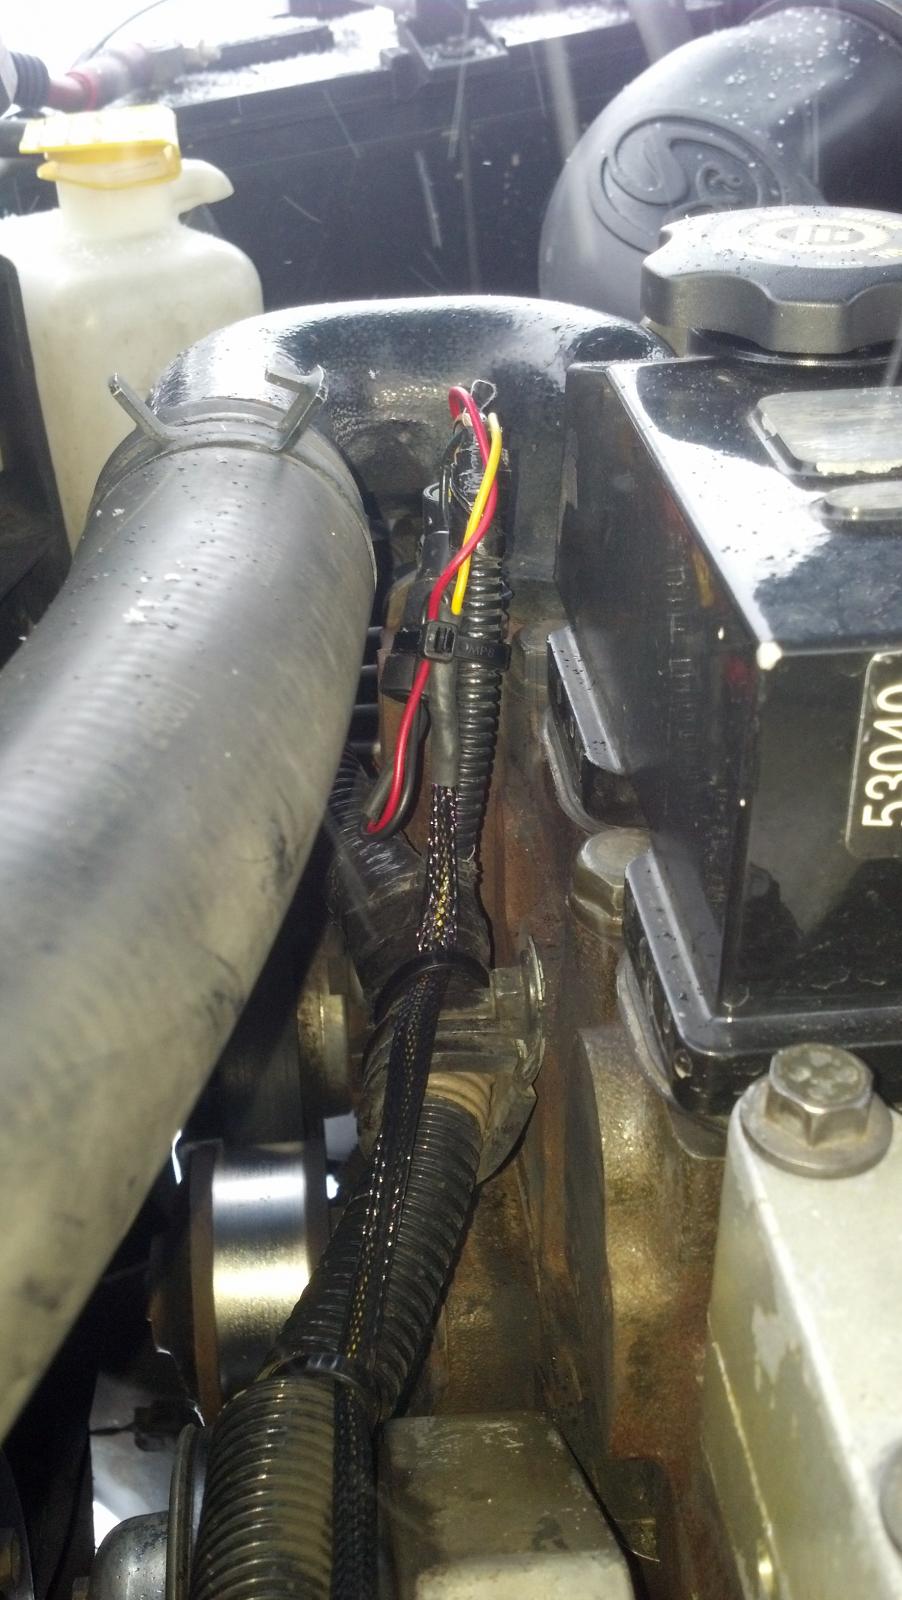
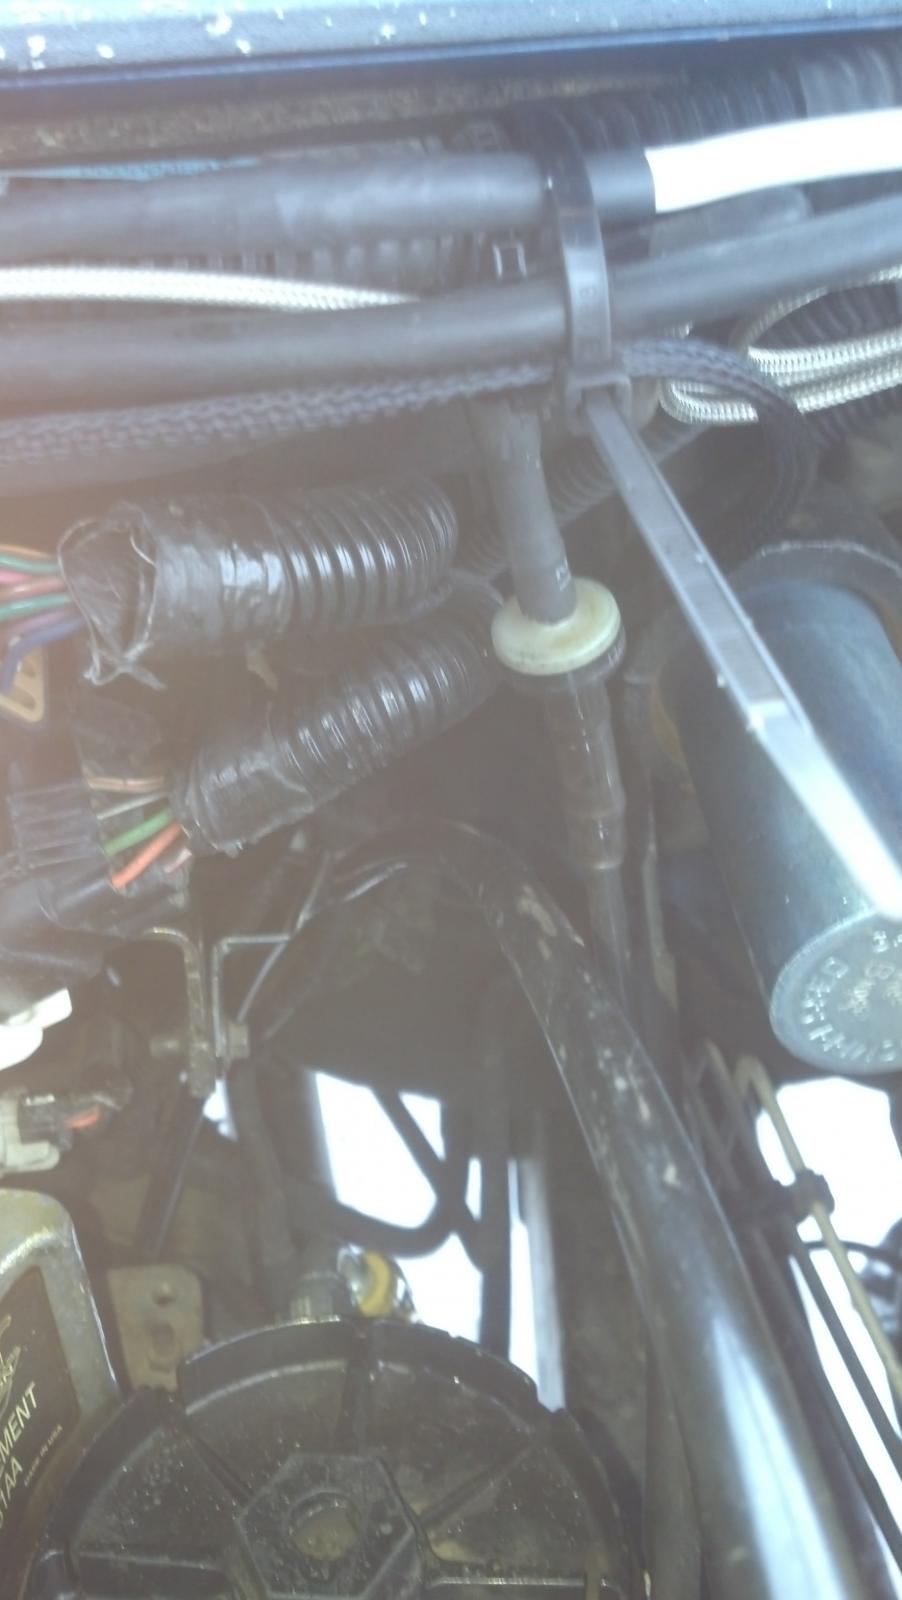
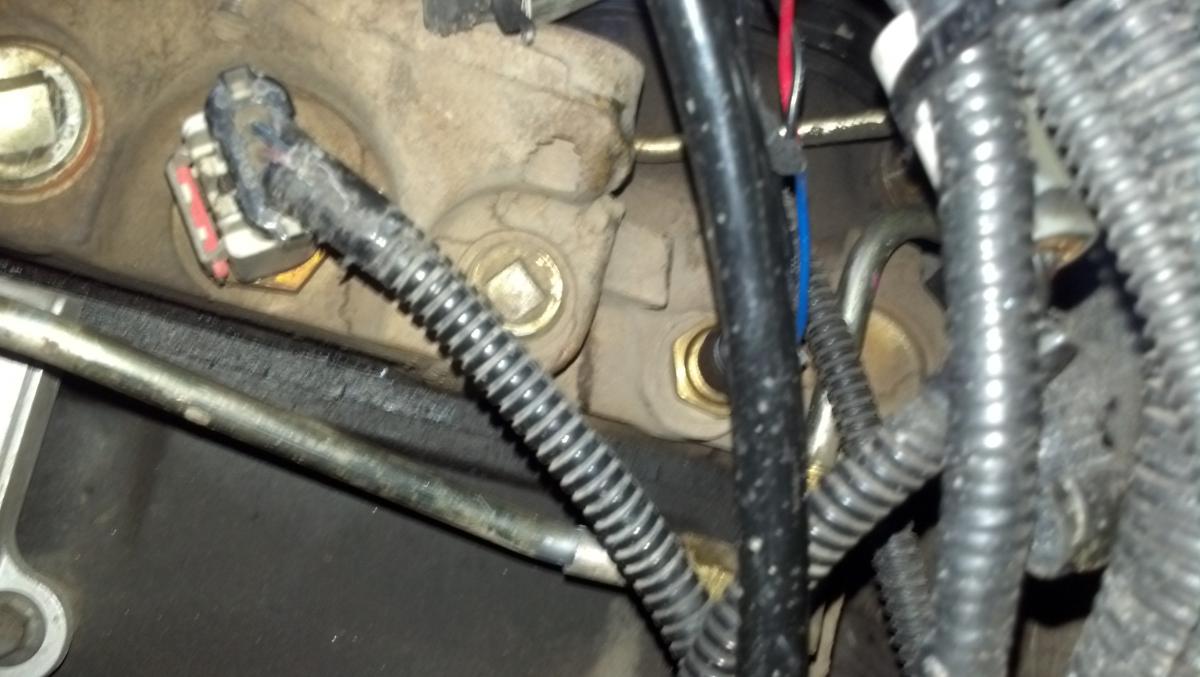
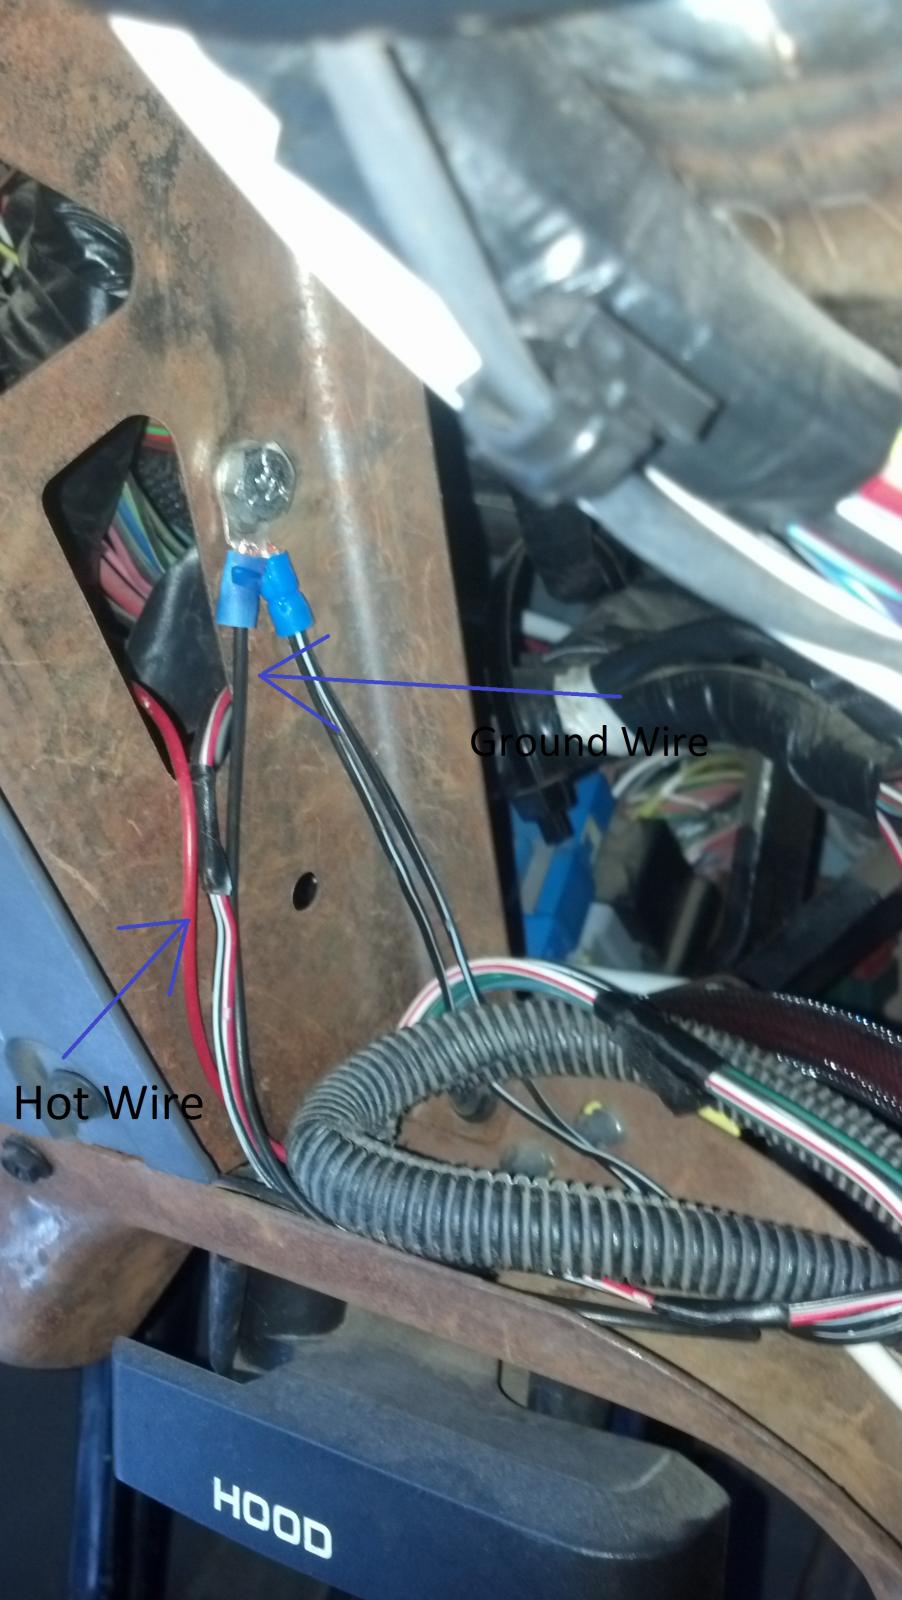
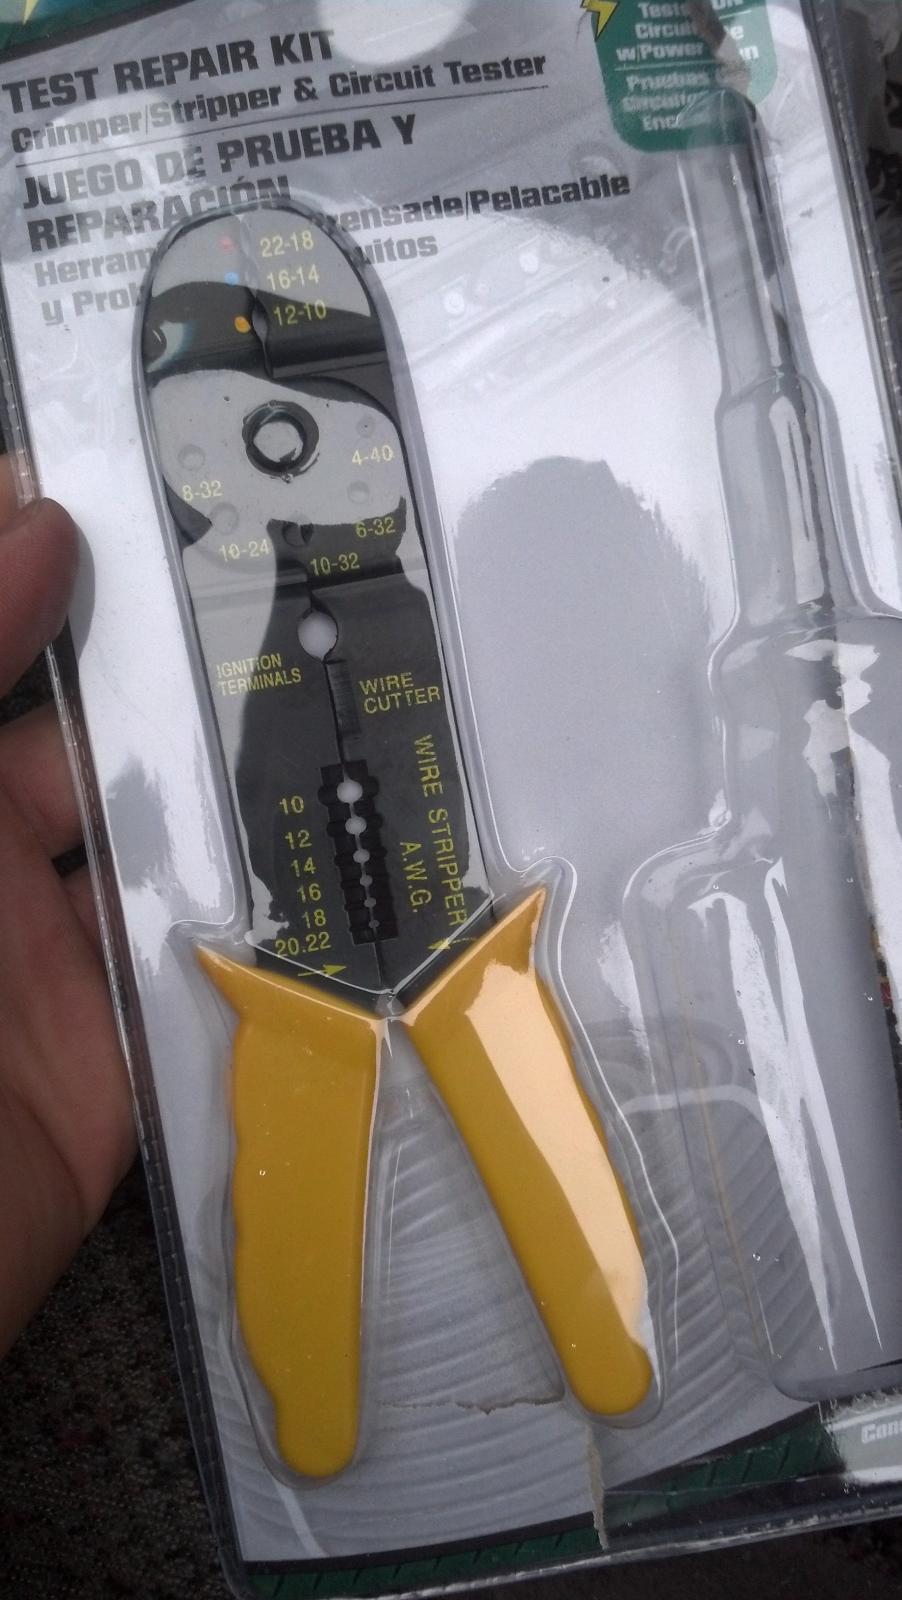
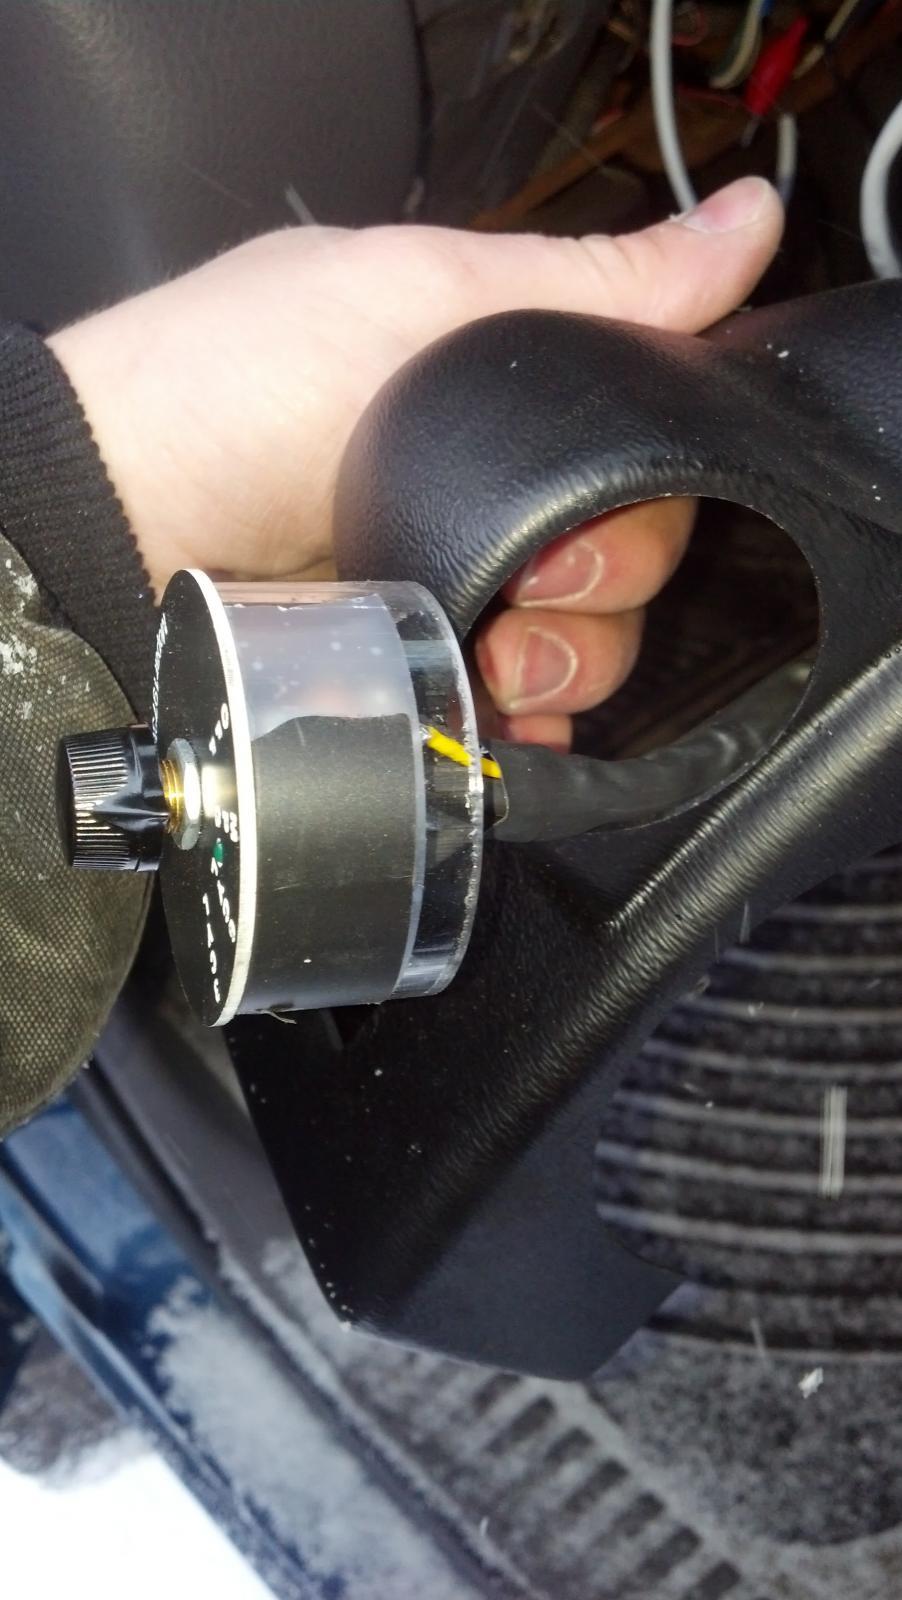
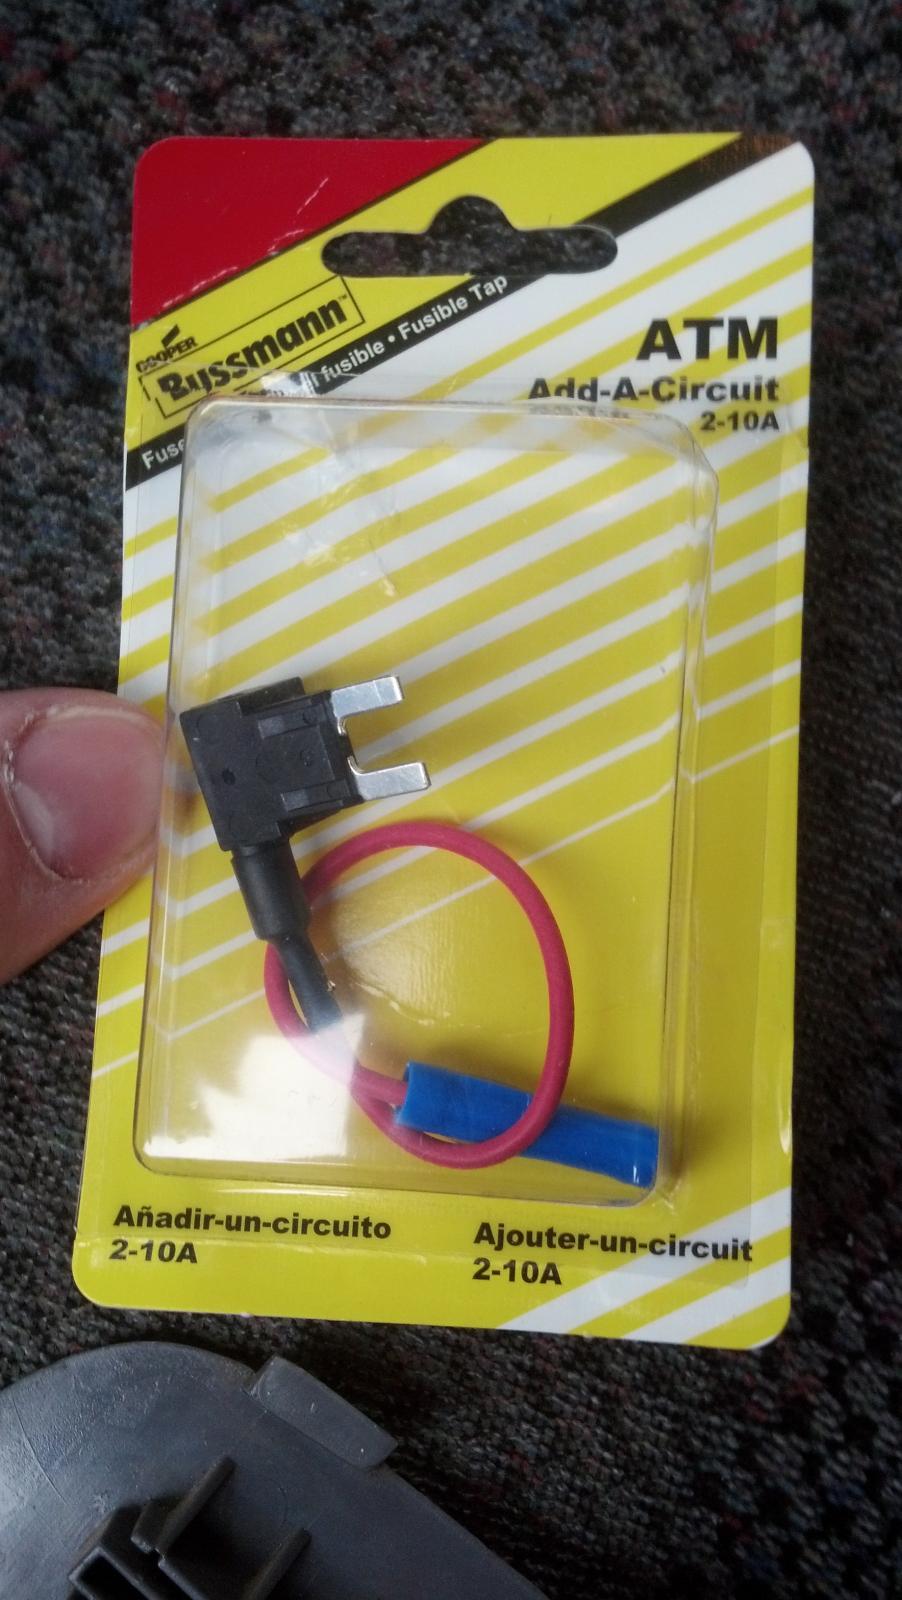
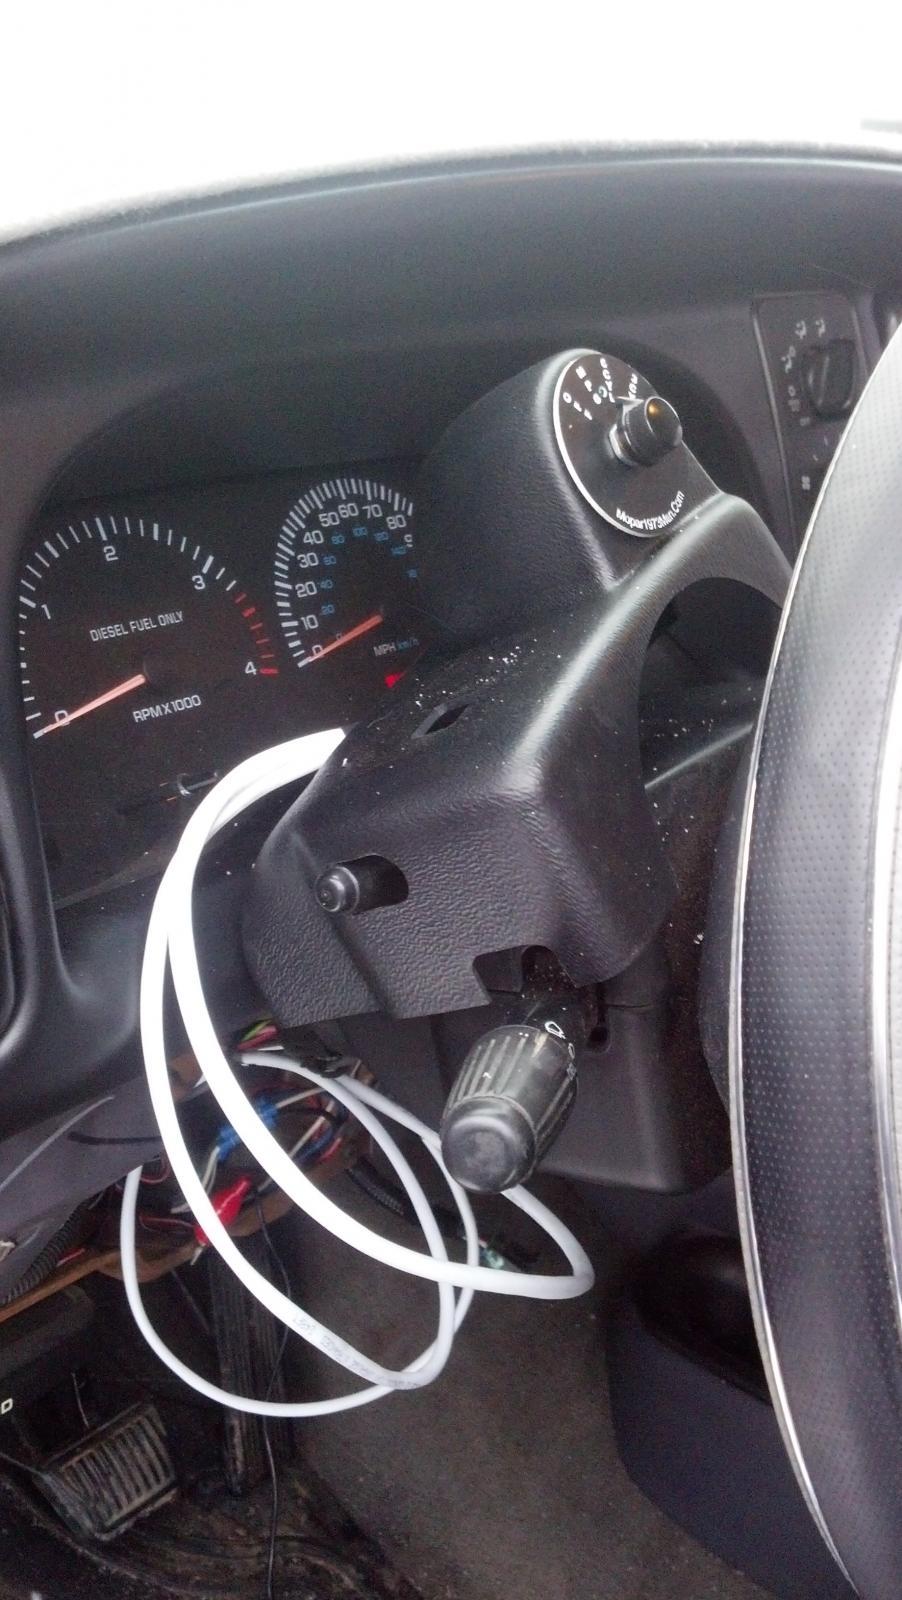
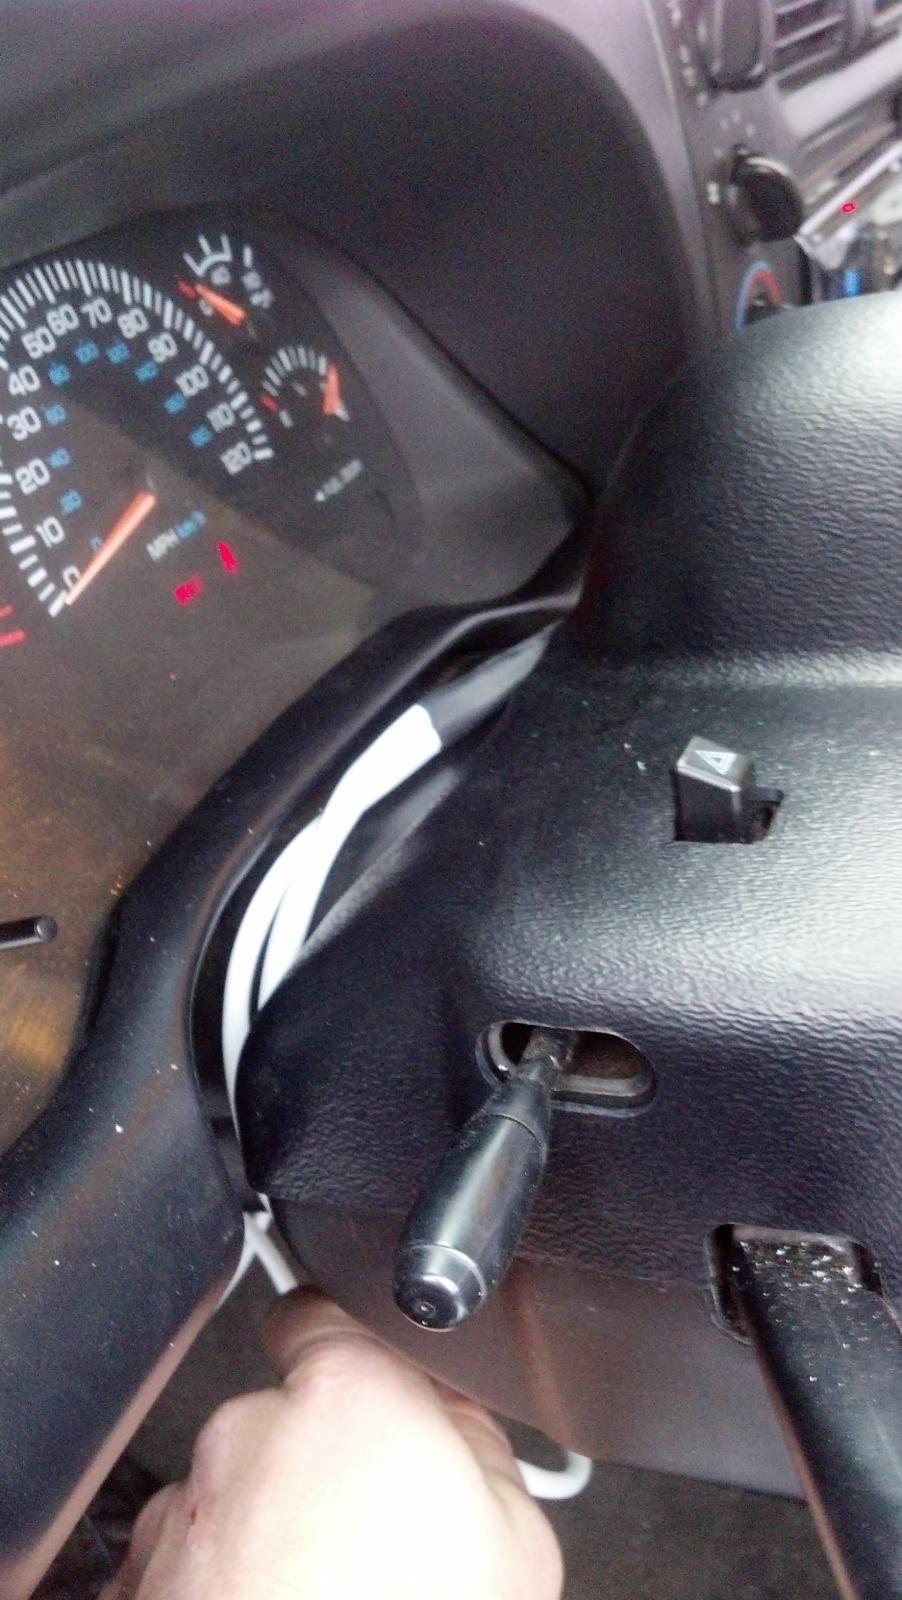
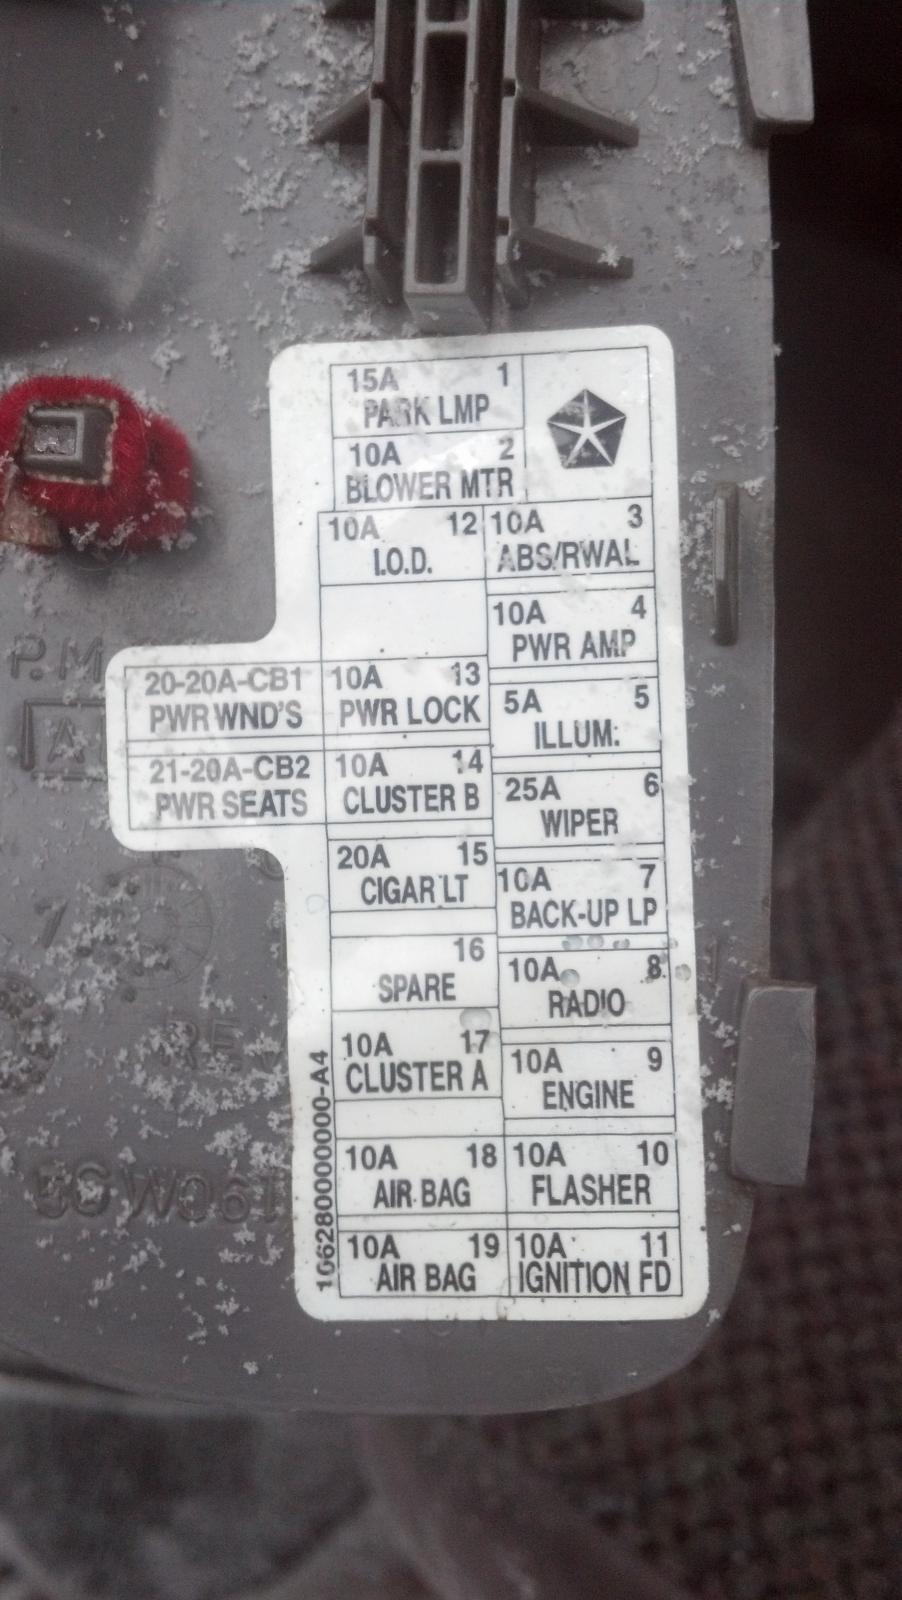
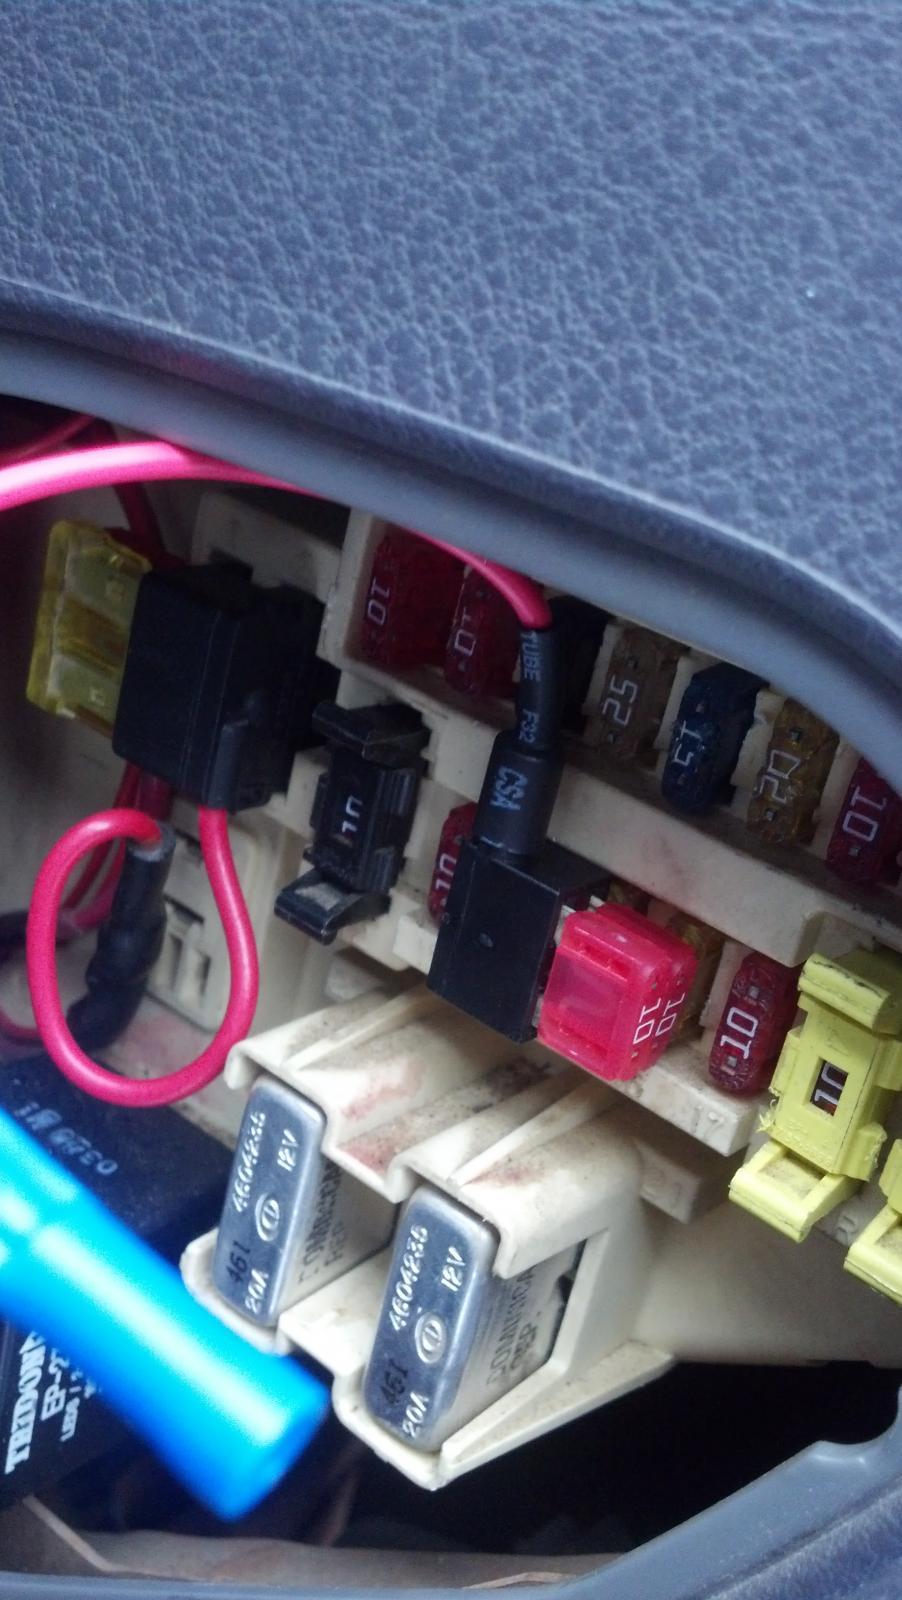
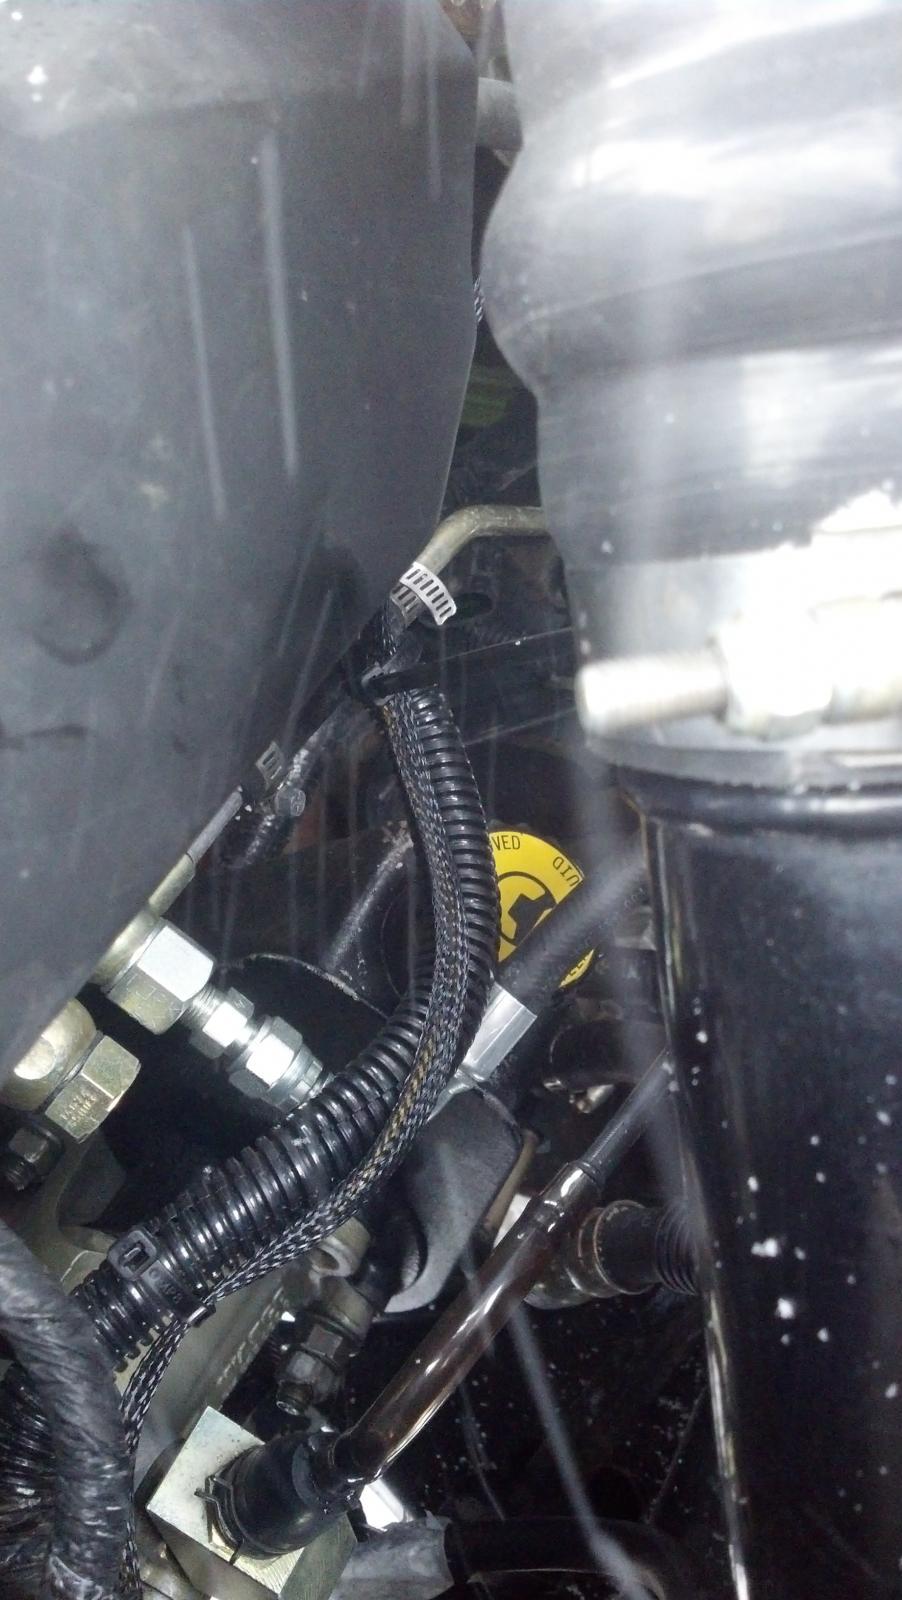
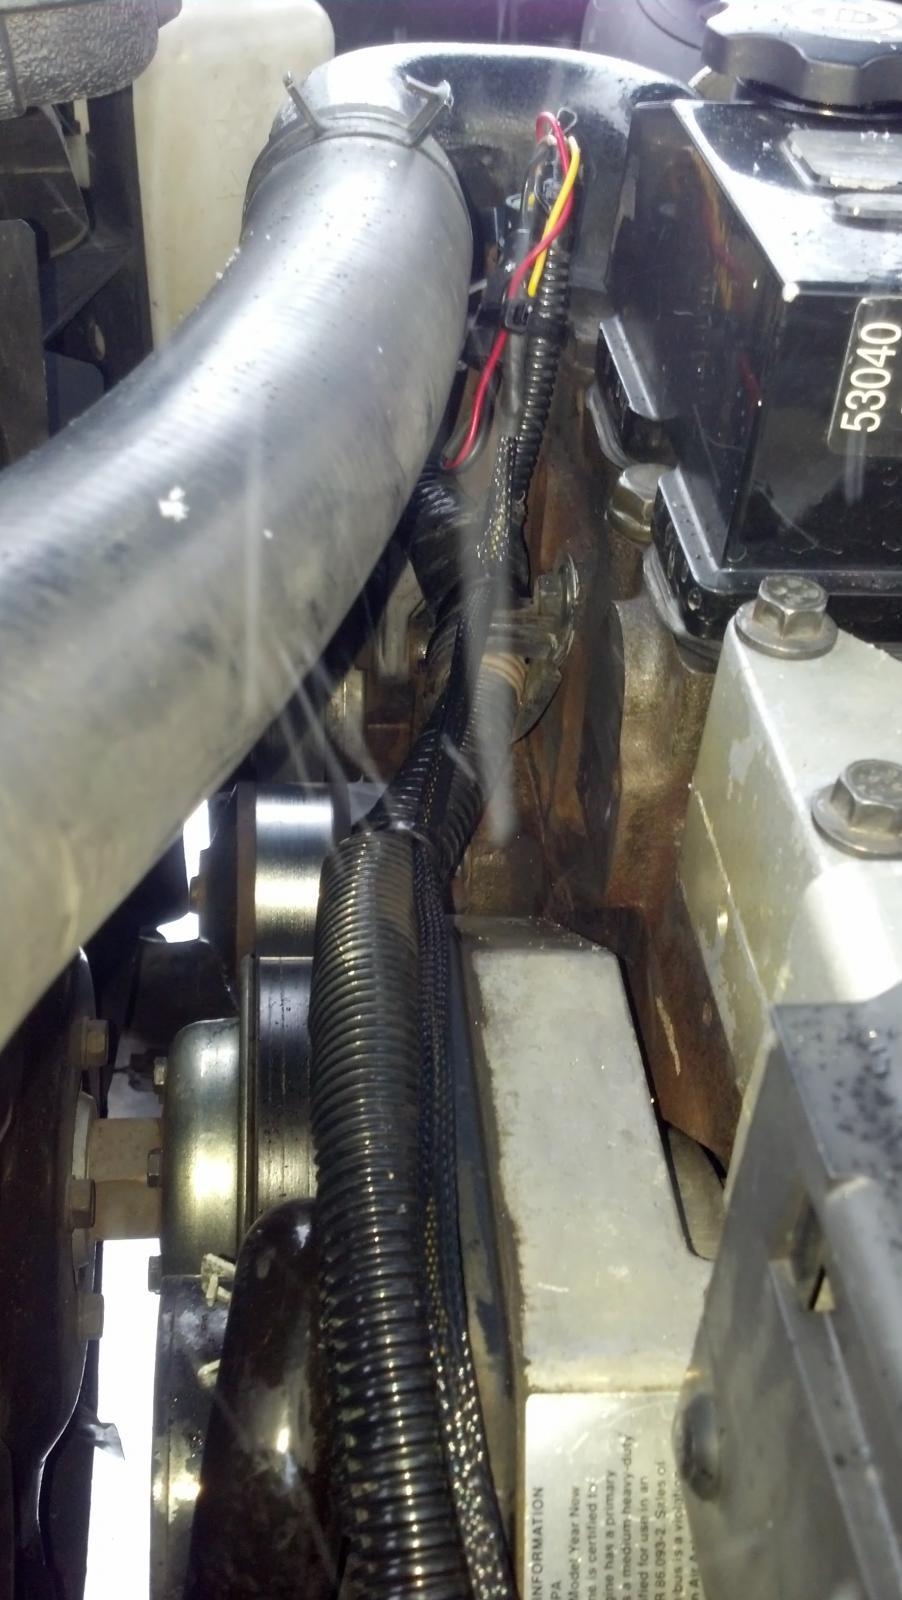
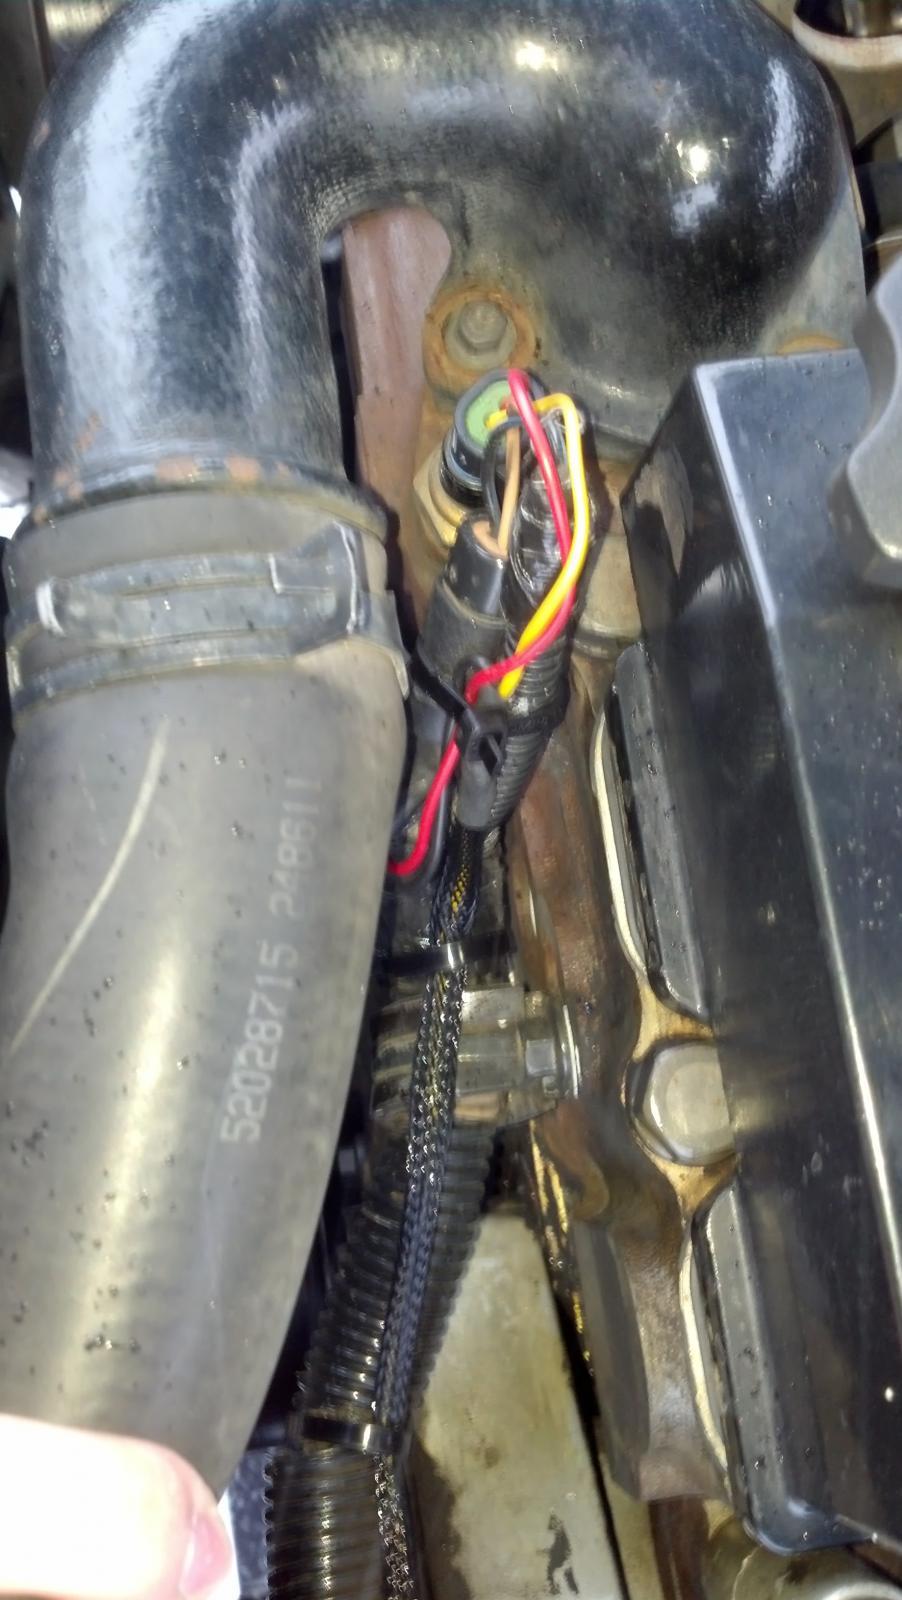
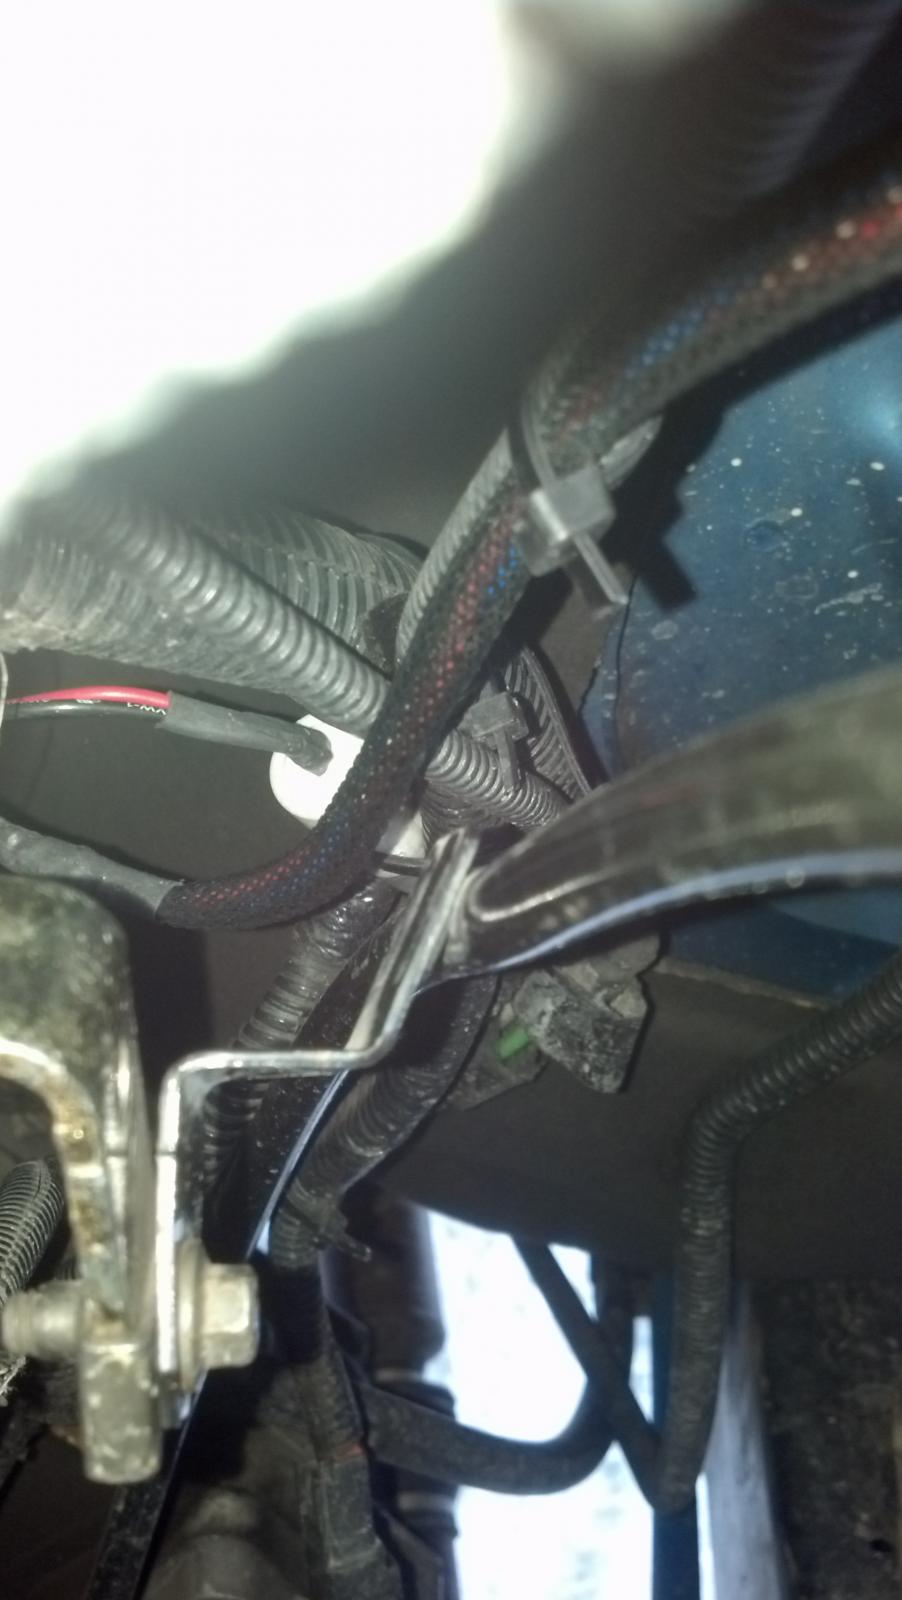
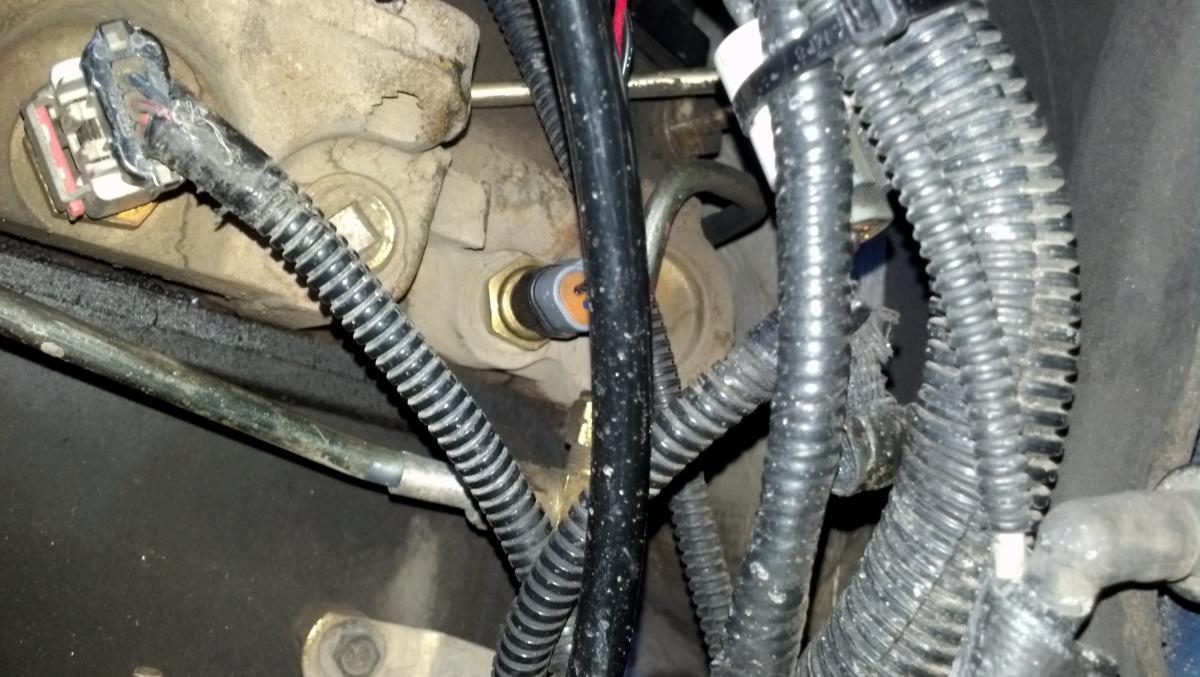
To start with make sure you have the supplies to complete the install: 1. Wire crimpers and strippers 2. Wire connectors 3. Gauge pod for the steering wheel 4. electrical tape 5. Add-a-circuit fusible tap 6. Tons of zip ties 7. Wire connectors with a round end for a screw or bolt 8. Two sided tape (Usually comes with gauge mount) 9. Fuses 10. Sockets, screwdrivers, dikes, razor blade Next the install! 1. Take the front knee board off and set it to the side without losing the screws 2. Run the wires for the fooler through the gauge pod 3. At this step you can either use the supplied glue to hold the fooler tight against the mount, or you can do as I did and add a bit of tape around the edge so that it fits tight and stays in place well. 4. Attach some two sided tape to the sides or the top of the mount. I recommend the sides because the top will lift the mount and make it look goofy. 5. Tilt the steering wheel all the way down and carefully slip the mount over the top of the adjuster. As you pull it down make sure you pull the edges out so the two sided tape doesn't get caught and ripped off. 6. Pull the wires around the back side so that they fit comfortably. 7. At this point route the wires that go to the air intake temp sensor and engine temperature sensor out through rubber with the wiring harness. Zip tie the wires to the steering column wires. 8. Cut away some of the white sheath to the hot and ground wires. Run the hot wire around the back and up to the fuse panel on the side of the dash. Attach this wire to the add-a-circuit fusible tap. I inserted the fusible tap into the #14 slot which is the 10Amp Cluster B. This has power full time. Really any of the links can be used, but I wanted my light to be on full time so that I wouldn't forget to shut it off. 9. Now attach the Wire connectors with a round end to the ground. I bolted this to the metal frame under the dash. It can be screwed anywhere it will ground effectively. 10. Now to the outside. Run the wires across the top with the existing wiring loom and zip tie them into place 11. Run the wire that goes to the engine temperature sensor (The longer wire) down to the grid heater wire, to the injection pump wires, around the front of the engine and plug it into the sensor. 12. Now run the wires back to the intake air temperature sensor. This is near the back of the intake plenum AFTER the MAP sensor. I zip tied the original connector to the existing loom to keep it from moving. 13. Cut all of the zip ties and inspect to make sure there won't be any rub spots. 14. Put the knee board back on and test it out. ** Let me know if I left anything out so I can edit it in!


-
I just finished re-installing my high idle/mpg fooler about an hour ago. I took me about an hour and a half with the given conditions.