Tractorman
Yearly Subscription
-
Joined
-
Last visited
Everything posted by Tractorman
-
Thanks for reporting your fixes and glad to hear that you are back on the road. John
-
It sounds like you found a good shop to do the diagnosis and fix. Your issue could have turned out so much worse. I am sure that you have a new found respect for a "water in fuel" warning. Good job following the right path for repair and thank you for posting the solution. John
-
The in-tank lift pump draws from the lowest point in the fuel tank, and since water is heavier than diesel fuel, the pump will draw up the water along with other contaminants. Your siphon was likely not reaching the bottom of the tank. There is a slim chance that you can salvage the high pressure part of the fuel system, but you would need to act now. Every day the truck sets with water in the high pressure lines, the CP3 pump, the fuel injectors and other components; corrosion will be happening to each component. By the time a mechanic looks at the truck, more damage will be done and likely the damaged components will have to be replaced - very expensive. If this were my truck, I would get a hold of a lift pump now (I would purchase one, if necessary) and temporarily rig the lift pump to pump out of a 5 gallon bucket of clean diesel fuel. I would install a new fuel filter and plumb the temporary lift pump to pump fresh fuel through the filter. I would then disconnect the fuel line right at the CP3 pump and purge the filter and fuel line with the fresh fuel. Then I would reconnect the fuel line at the CP3 pump and plug the fuel line coming from the in-tank pump (or disable the pump electrically). At this point I would try starting the engine with the temporary lift pump running. Should the engine decide to run, the fresh fuel will purge out the contaminated fuel in the CP3 pump, fuel lines and injectors. This would be a good thing. There are six injector tubes inside the head that supply fuel to each injector. Each tube has an edge filter installed inside. The purpose of the edge filter is to break up any fine particles that have gotten by the fuel filter. These edge filters may save your injectors, IF you act soon. Also, in the fuel system's current status, the engine cylinder walls and piston rings / pistons are water contaminated and can begin to rust and / or corrode. John
-
In the photo - is that water setting on the surface of the fuel rail pressure sensor? Is the lift pump an in-tank pump? Is the fuel filtration system still OEM? If it was my truck, I would be looking at removing the fuel tank and thoroughly cleaning it. Or, if you have the ability to remove the bed of the truck, that would give you good access to removing the fuel canister, which in turn will give you access to pumping out the fuel and cleaning the tank. Remove the fuel line from the fuel filter to the CP3 high pressure fuel pump and flush thoroughly. After the tank is cleaned and filled with fresh fuel (new filter installed, you could use the lift pump to purge the fuel lines up to the CP3 pump (leave the CP3 disconnected). The not-so-good news is that you will not know how much damage has been done to the high pressure fuel system (including injectors) until you perform all of the above-mentioned work. John
-
Also, I forgot to respond to the above. The bearing likely seized and resulted in a broken bracket. My brother-in-law's 2003 truck had a loose / noisy fan hub bearing, which was caught on an inspection. If gone unnoticed, the same result could have occurred. I periodically remove the serpentine belt and inspect all pulley bearings. They will fail - the inspection just stops it from being a catastrophic failure. John
-
I am just following down your post in order of events. Thanks for providing good detail, but I still have a couple of questions. Did you replace the fuel filter. Have you replaced the fuel filter since this event? Just for clarification - "turning over" means the starter is cranking the engine, but the engine is not running. Can you give more detail to your particular "no start" situation? Has the fuel filter been replaced after the "water-in-fuel" incident? I think that the 16 mpg hauling a heavy load is unrealistic. The 12-13 mpg sounds more reasonable - even with the lighter loads. Unless loads are weighed and fuel tank fill-ups and driving conditions are documented over a long period of time and trips, the reported fuel economy is very subjective and usually inaccurate. The common rail fuel system (beginning in 2003 for Dodge Cummins engines) runs at much higher fuel pressures than the '99 VP44 engine that you have become familiar with. Consequently, the common rail engine fuel system (including the high pressure pump, FCA, and injectors) cannot tolerate any foreign material in the fuel system. Introducing water means that other foreign matter (dirt) is being introduced as well. More than likely there is much more foreign matter remaining in the fuel tank from the original source of contamination. Also, since the common rail fuel systems is completely computer controlled, good electrical continuity is extremely important. Batteries in poor condition can intermittently set diagnostic trouble codes. For example, the FCA operation is controlled by the ECM and related wiring and wiring connections. Improper voltage in any part of this circuit could lead to a performance issue with the FCA. The FCA mechanical valve portion could have foreign matter lodged in it, which could result in the valve sticking. This could happened even with a new Bosch FCA if contamination is still present. In almost all diesel engine applications (even before the common rail fuel system), any time water was introduced into the fuel system, the fuel filter needed to replaced multiple times until the contamination was cleared. Sometimes the fuel tank needed to be removed and cleaned. You do need a mechanic with good diagnostic skills and knowledge of the Cummins common rail fuel system. I have been turning wrenches professionally over half of my life and am skilled in many areas, but I cannot skillfully diagnose a common rail fuel system symptom. John
-
I am leaving for two weeks (camping and fishing with a friend) to the Grand Mesa in Colorado. I will consider putting together an article when I return. All of the area on the map below is right at 10,000 feet elevation. John

-
You have done some incredible troubleshooting! And such a simple, inexpensive solution! You came here asking for help, buy you ended up providing the help. Thank you for posting the details of your solution. Your thread will be an inspiration for others to be diligent and methodical when diagnosing difficult symptoms. @Mopar1973Man , could you save this thread in a place for easy access for anyone to read? It is an excellent read for anyone to illustrate the importance of methodical troubleshooting. It could be titled something like, "Why Methodical Symptom Diagnoses is so Important" - followed by an introduction from you. John
-
I tend to agree with you here. Have you closely inspected the wiring connector to the VP44 for any damaged, corroded, or pushed back pins? I think you have a wiring problem - either with grounds or a poor connection with a pinched wire, pushed back pins, corrosion, etc. John
-
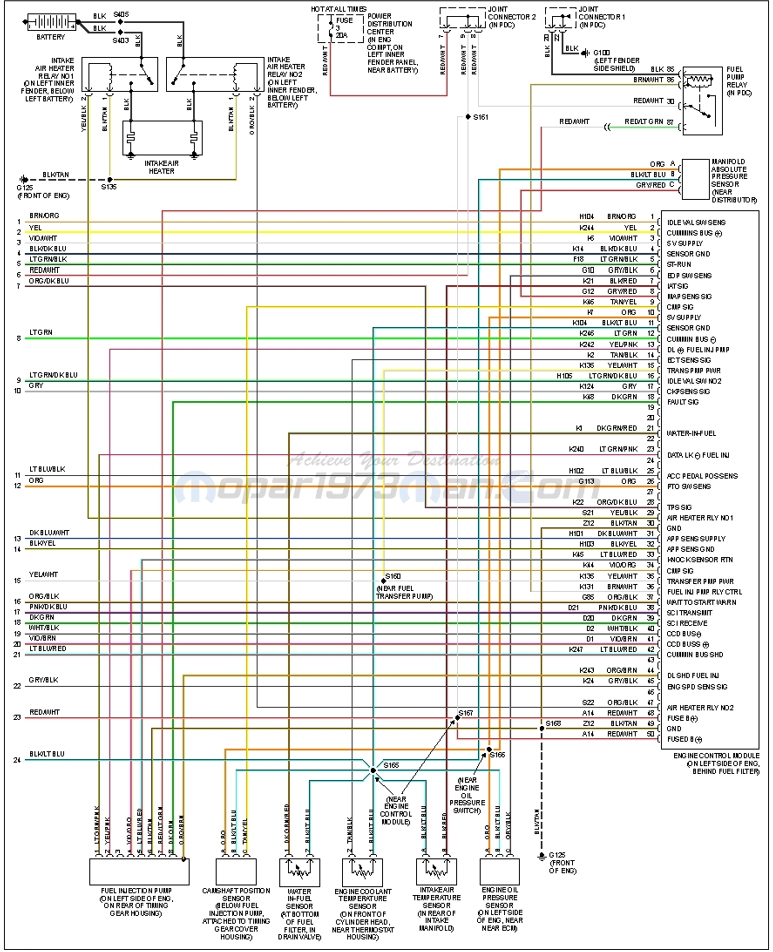
A long post with lots of detail is much better than a short post with little detail. Many sensors (as well as the VP44) ground through the ECM - you can see this in the wiring diagram photo below (terminal #11 and #49 on the ECM). Note that Splice #168 (difficult to read, near terminal #49) is also a ground. When the engine has the rough idle, can you tell if all cylinders are affected, or just one cylinder? Have you checked the mechanical idle stop condition - loose, out of adjustment, etc? I would expect a code, but not necessarily. The APPS is a closed loop system with the ECM and there is an idle validation switch inside the APPS. It is possible that if the APPS adjustment is marginal, the ECM may not see the idle validation switch signal (the ECM controls idle). I wouldn't rule out wiring issues or ground issues at this point. Multi-pin connectors with poor connections can be difficult to find. Performing "wiggle tests" while checking continuity or voltage can help diagnose. It usually works best with two people performing the tests - one doing the wiggle test and the other holding the multi-meter connections steady. John
-
Agree. John
-
I think this is what your are looking for. Removal (9) Remove the eight flywheel housing to block bolts and remove housing and starter motor as an assembly. Installation (9) Install the flywheel housing and bolts. Tighten the bolts to 60 N·m (44 ft. lbs.) torque. John
-
Of course you can. You asked, "should I flush the system and add back the CORRECT power steering fluid OR should I buy a new hydroboost module?" and you also asked, "so should I flush the system and prepare for replacing gaskets or should I flush the system in preparation of replacing the hydroboost?" I gave you my personal recommendation. I based my new hydroboost replacement decision on the fact that my OEM hydroboost gave flawless service for 24 years and 393,000 miles. I didn't want to put a seal kit in this unit because, even though it would fix the leak, all of the internal components still had 24 years and 393,000 miles of operation on them. There is sophisticated valving inside the unit and an accumulator that has an unknown state of pre-charge after all the years gone by. I hold high regard for safety in braking components, such as the booster and the master cylinder, so I prefer to buy new - not rebuild or reseal. John
-
The 2002 FSM states: CAUTION: Use MOPAR Power Steering Fluid or equivalent. Do not use automatic transmission fluid and do not overfill. Even though you used ATF, it probably didn't cause your leak - after all, you have gotten a lot of miles out of the unit. My personal recommendation is to replace the hydroboost with a NEW unit. They can be purchased at Parts Geek or Rock Auto for a reasonable price. Flush the power steering system and use a quality power steering fluid of your choice. I replaced my hydroboost a year and a half ago at 393,000 miles (it started to drip fluid). I purchased the Parts Geek unit (new) and it has performed well for the last 10,000 miles. Whichever way you go, make sure the push rod length (hydro to master cylinder) is correct - very important and the manufacturers don't seem to pay much attention to that detail. I had to cut mine shorter to ensure the free play measurement was correct. John
-
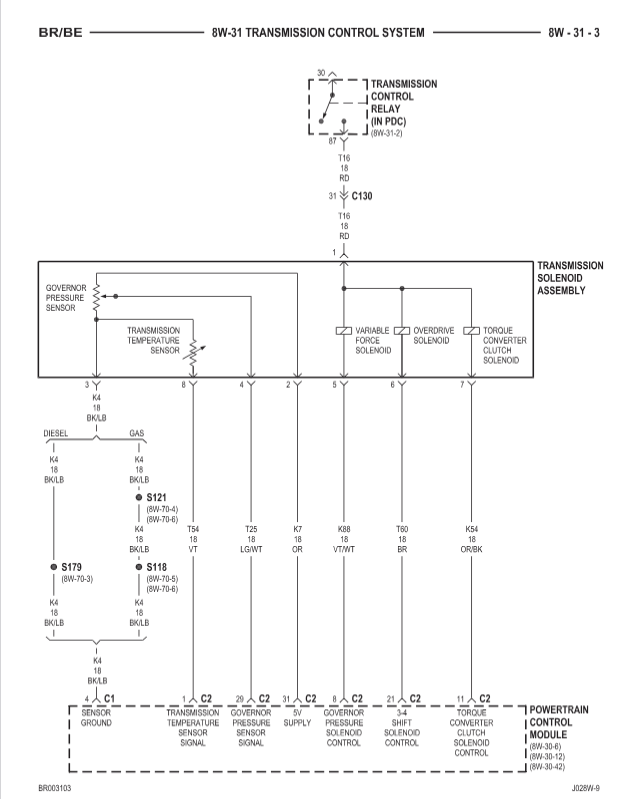
What about temporarily testing with a Voltmeter? Connect one lead to the OR/BK wire from terminal #11 at Connector #2 PCM connector and the other lead to ground and go for a test drive. When TCC is unlocked - 12 volts should be present. With the TCC locked - 0 volts should be present. You might get some useful information with this test and it doesn't cost anything to perform. John
-
I used a Standard Motor Products VCP112 electric vacuum pump for my application. It was less than $100 from Parts Geek. This vacuum pump regulates pressure from 13" HG to 15" HG and there is no flow rating listed. It is suitable for my application because it only supplies vacuum to the HVAC and the 4WD CAD unit. My cruise control is operated by the ECM, so no vacuum servo is used. If you are going to use a vacuum servo, then air flow volume could be a concern for you. My previous exhaust brake was vacuum controlled. The reduced volume of the SMP VCP112 made the exhaust brake slow to actuate and to release, which was not acceptable for me. That didn't matter at the time because I replaced the vacuum operated Jacobs exhaust brake with a PacBrake PRXB and air compressor at the time of the vacuum pump / power steering pump conversion. @Mace, who provided the information for this conversion, uses a similar vacuum pump as mine. He noted the delay of his exhaust brake operation as well, but it was acceptable for him. Parts needed for Vacuum Pump Conversion and Power Steering Pump Conversion by @Mace . Vacuum Pump Conversion CON166 - pump connector (Rockauto) VCP112 - vacuum pump (Rockauto) Vacuum hose Mini fuse tap connector 4 pin relay & base connector Power Steering Pump Conversion 4002056 plug - Cummins RES0161 reservoir - Rockauto 4988390 pump kit - Cummins performance.com M20x1.5 to 6 jic fitting The description for these mods is in the following thread. John
-
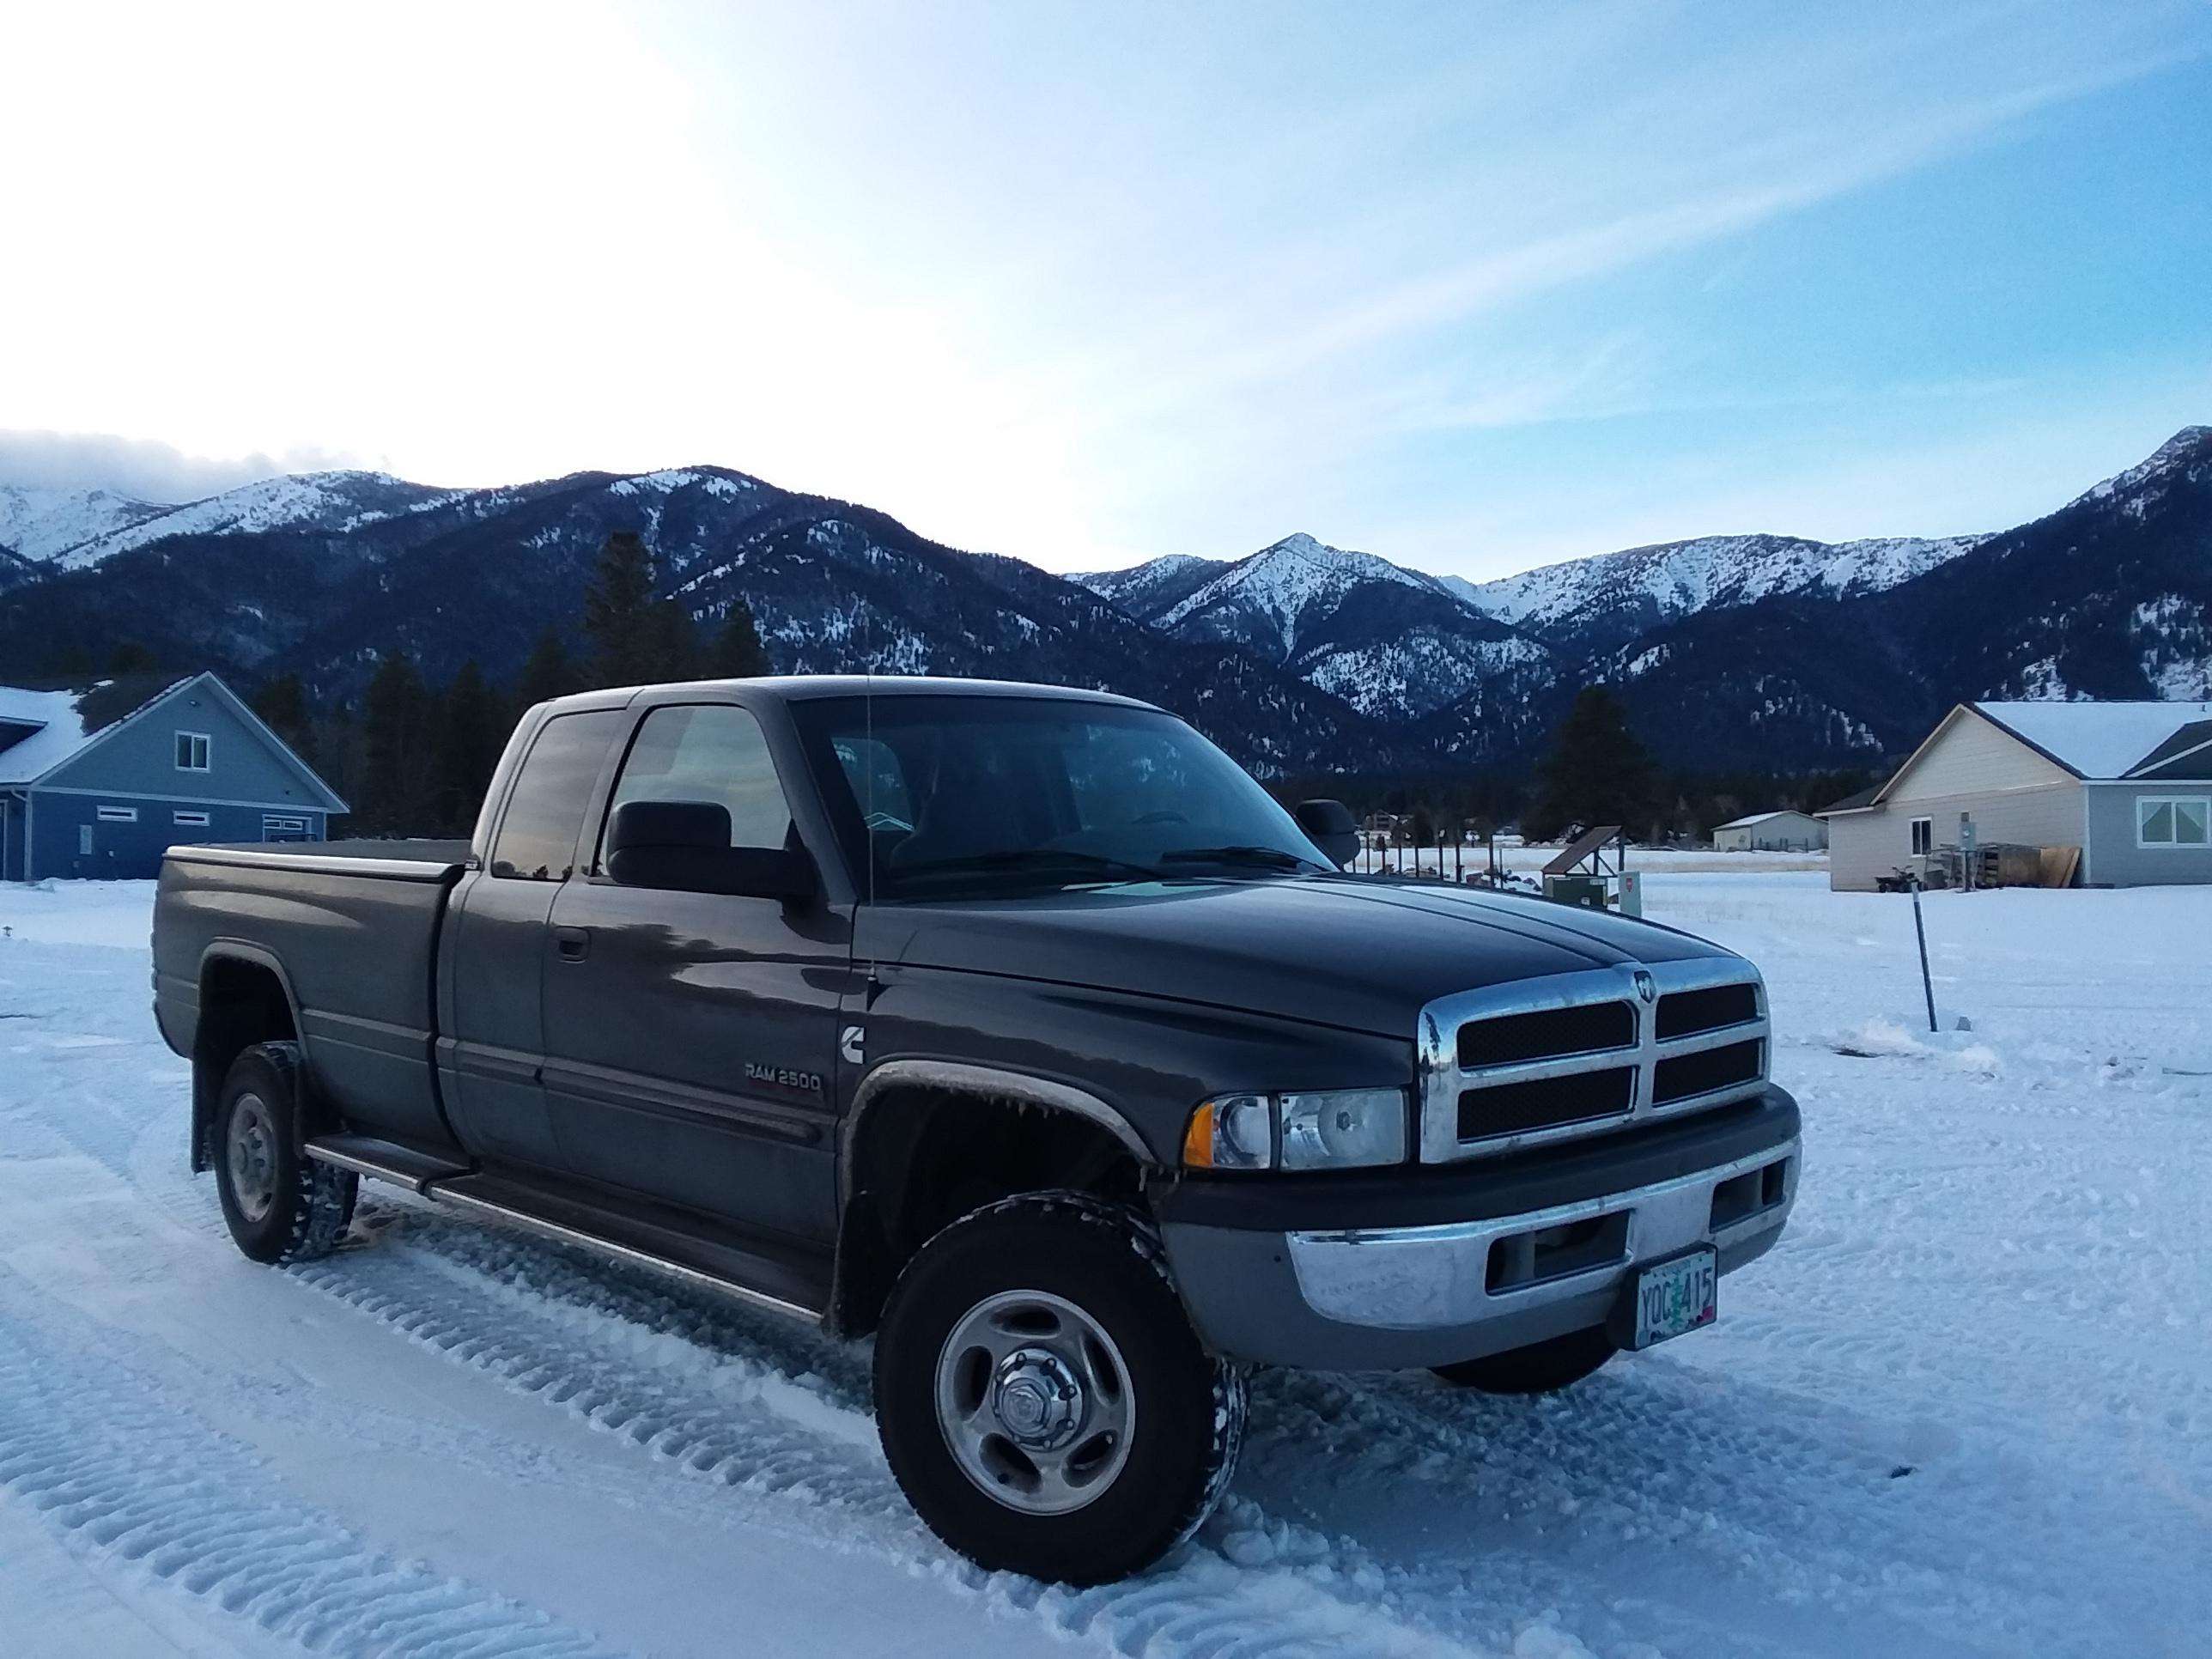
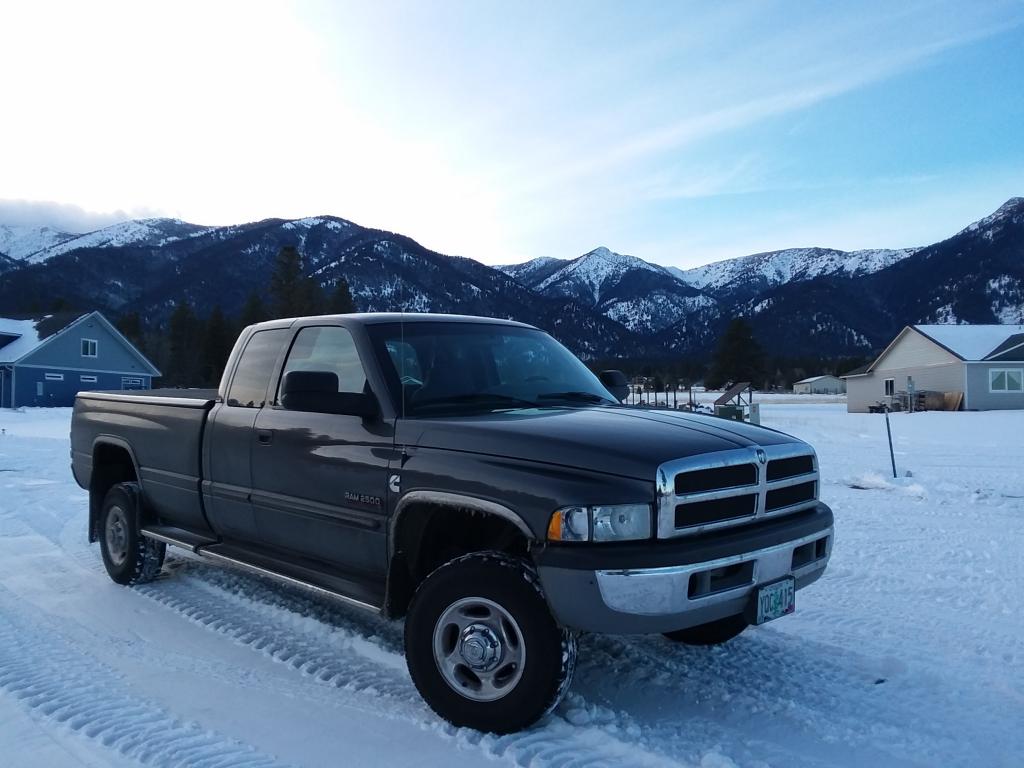
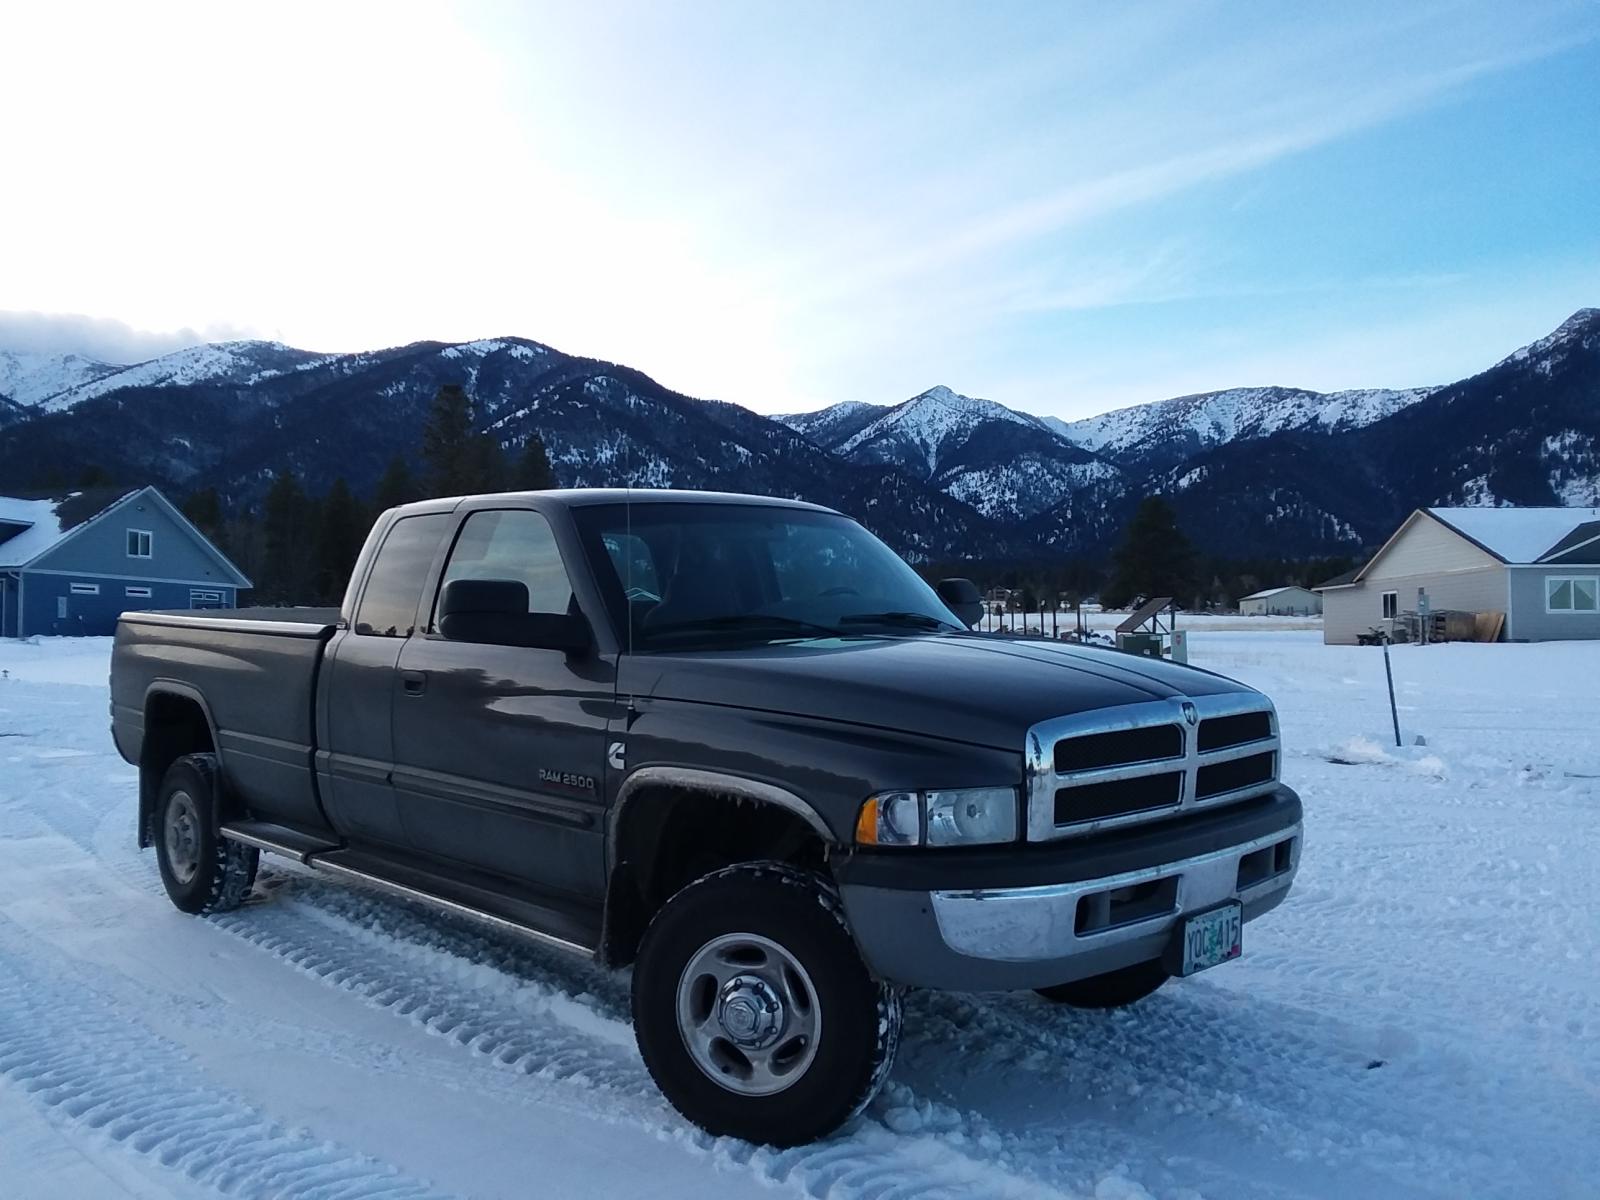
Good lookin' truck ya got there. 406,000 on my 2002, 4WD 6 spd (bought it new in October, 2001) John
-
Congratulations!!! Are you feeling euphoric? I have been waiting for you post. Now that your truck has thoroughly tested you and you won, the truck should behave itself for the rest of its life under your ownership. John
-
Good to have another source for ECM repairs. Also, glad to hear that your truck is running well. Just for clarification, the ECM does run the lift pump for about 1/4 second when the ignition switch is turned on. If the starter is bumped and then the key is released, the lift pump will run for approx 25 seconds. From the FSM (2002): The transfer pump is self-priming: When the key is first turned on (without cranking engine), the pump will operate for approximately 1/4 second and then shut off. The pump will also operate for up to 25 seconds after the starter is engaged, and then disengaged and the engine is not running. The pump shuts off immediately if the key is on and the engine stops running. John
-
I think you have found the issue. I also strongly think that the noise that you have been hearing is mechanical. I think the noise faded away when you disabled one cylinder and when you ran the engine with the ECM out of the loop because you changed the cadence or resonance of the engine in motion, thus changing the movement behavior of the loose tone ring piece. This would also explain why no code was set for the crankshaft sensor and why the engine performed as it should - not a timing issue. I think your perseverance has paid off. Great job on your part! Post a photo the tone ring. John
-
Good to hear back from you. I am hoping that you are on the right path and that you have finally found a solution to your forever lasting symptoms. Of course, you know that when this is fixed, you will constantly be hearing random phantom ticking noises for at least six months - then you can finally relax. John
-
I mounted mine on the lower part of the factory air filter housing right next to the battery. My guess is that you probably don't have a factory air filter housing. John
-
I won't be able to offer any help - I am responding because you haven't received a response yet and I didn't want you to think you were being ignored. From reading your post it seems that you have been very thorough in trying to get your issue resolved. You have checked everything that I can think of that needs to be checked. Maybe @Mopar1973Man will respond now that I have flagged him. He is knowledgeable in this area. John
-
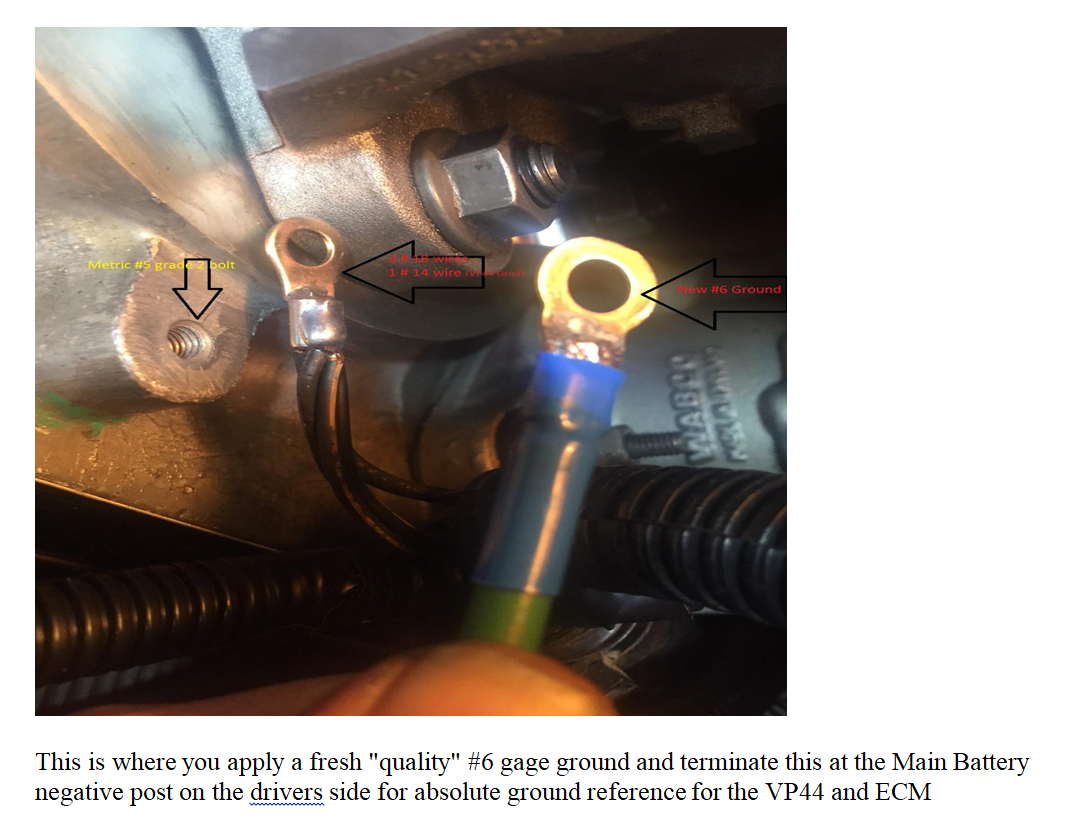
Correction - This moves ECM, VP and grid heater relay grounds from the right battery to the left battery. From W-T: John
-
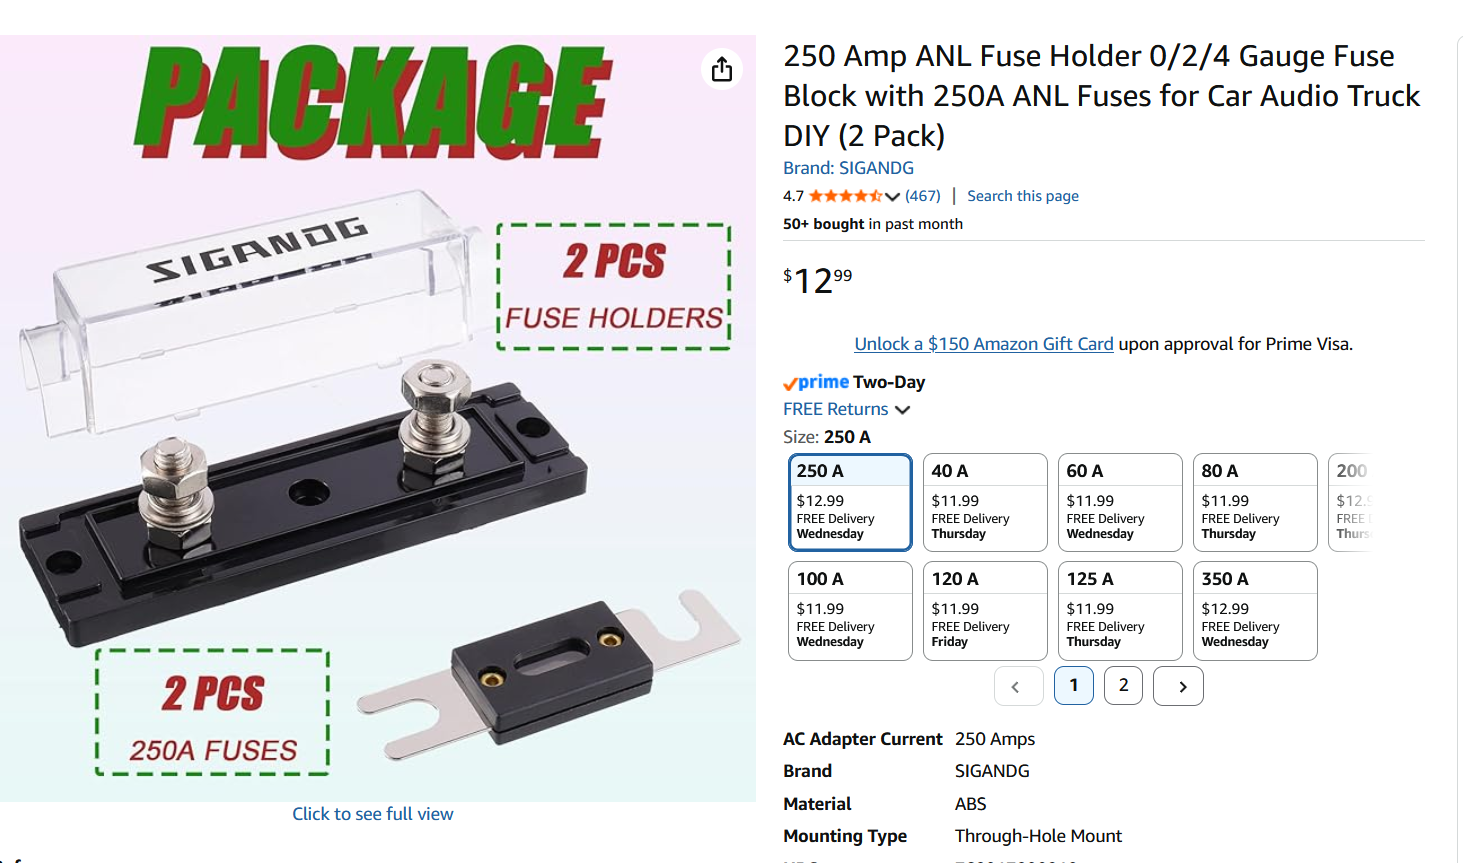
The photo below shows a 250 amp fuse and fuse holder similar to the style of fuse that I used. My fuse is 150 amp and has been reliable for over 3 years and over 30,000 miles. John