2000Ram2500
Monthly Subscription
-
Joined
-
Last visited
Everything posted by 2000Ram2500
-
You’re not the first to suggest another transmission I’ll say that. i haven’t drilled the check valve it was just recommended that I do drill it out to prevent clogging. i am aware that fluid does pass through bores within the shafts but haven’t yet come across any mention of issues with clogging inside those bores. previous failure wasn’t “catastrophic” I just lost my rear forward clutch pack and thus all momentum but also had water contamination which was a root cause so I replaced all the clutches. Fluid condition at the time of draining and initial rebuild wasn’t anything other than black and no pieces of metal were found at that time at all. Input shaft wasn’t a problem but was found cracked not broken and then replaced. All of this debris can be found inside the output housing and in my pan. I do suspect some pieces to be hiding above the valve body though. But I can’t see any way that any of that debris could have made it beyond the pan and filter from the back. This happened entirely inside the overdrive housing. im no pro by any means im just trying to fix this thing. Im working on my back at my apartment with hand tools and borrowing space in a friends garage if he’s able to let me. Im just doing the best I can with the little income and facilities that I have.
-
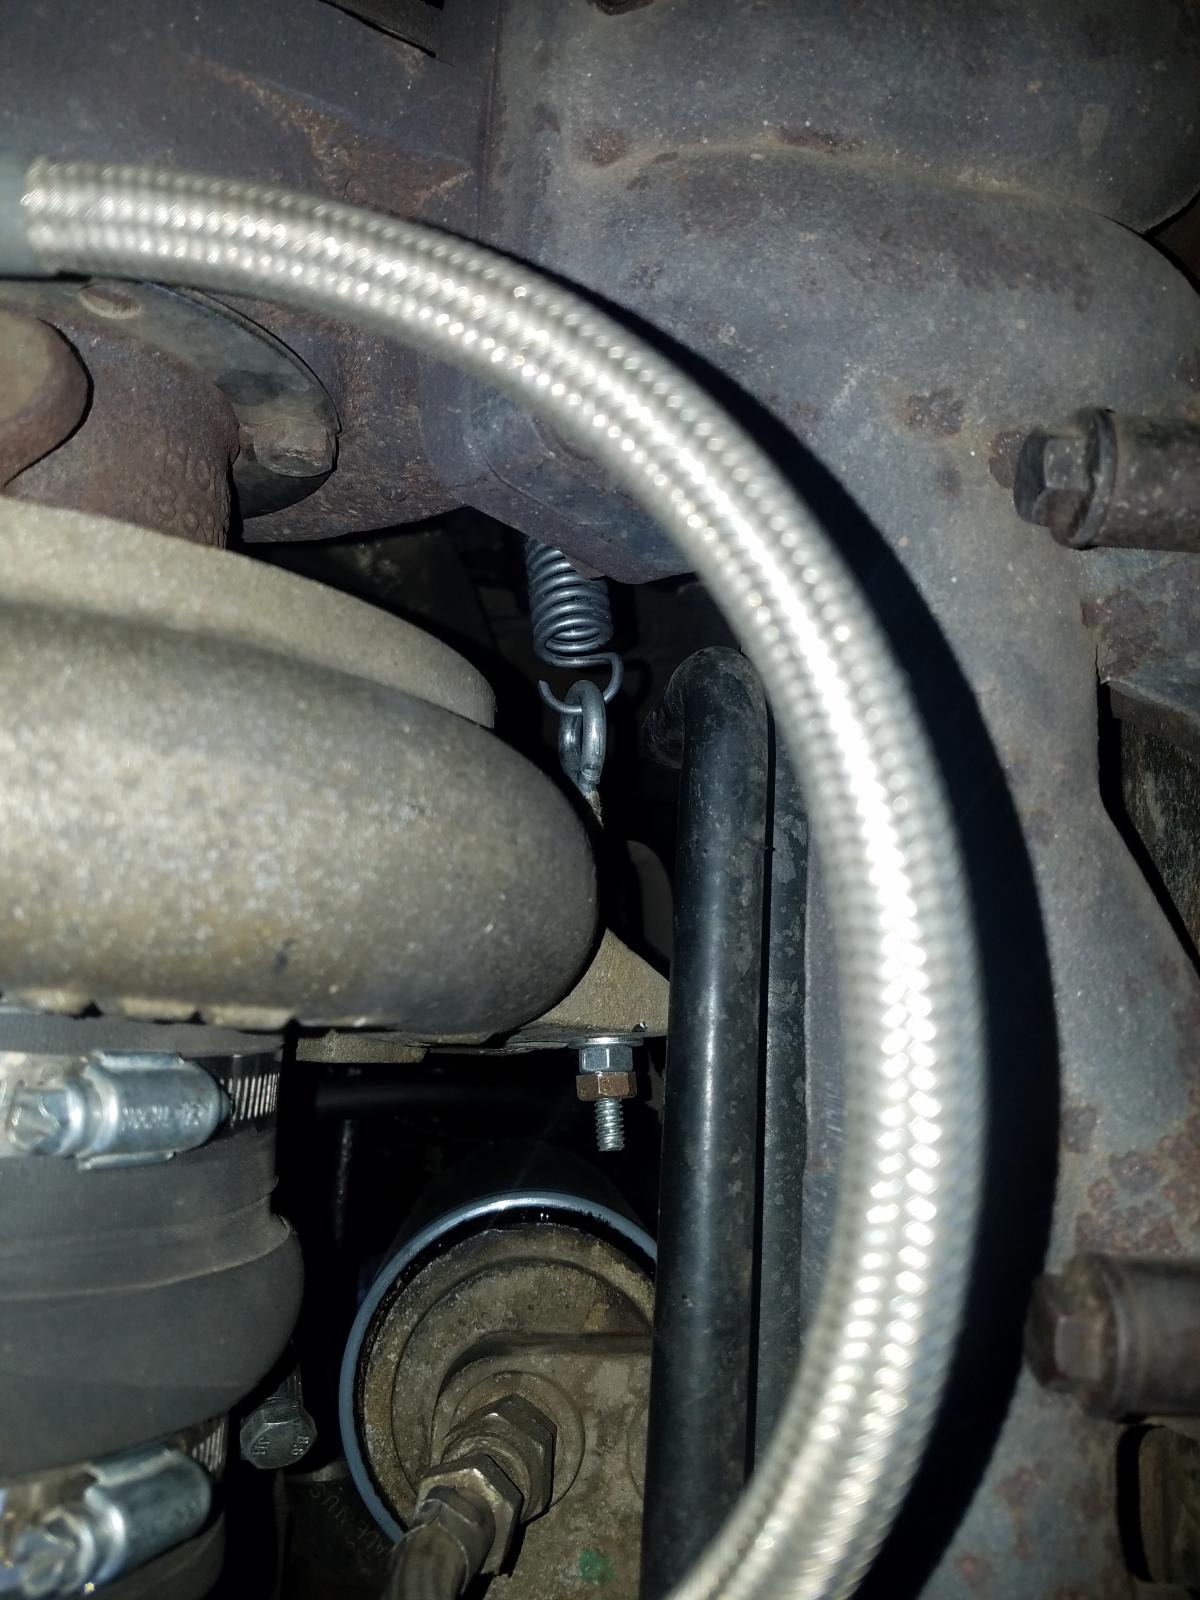
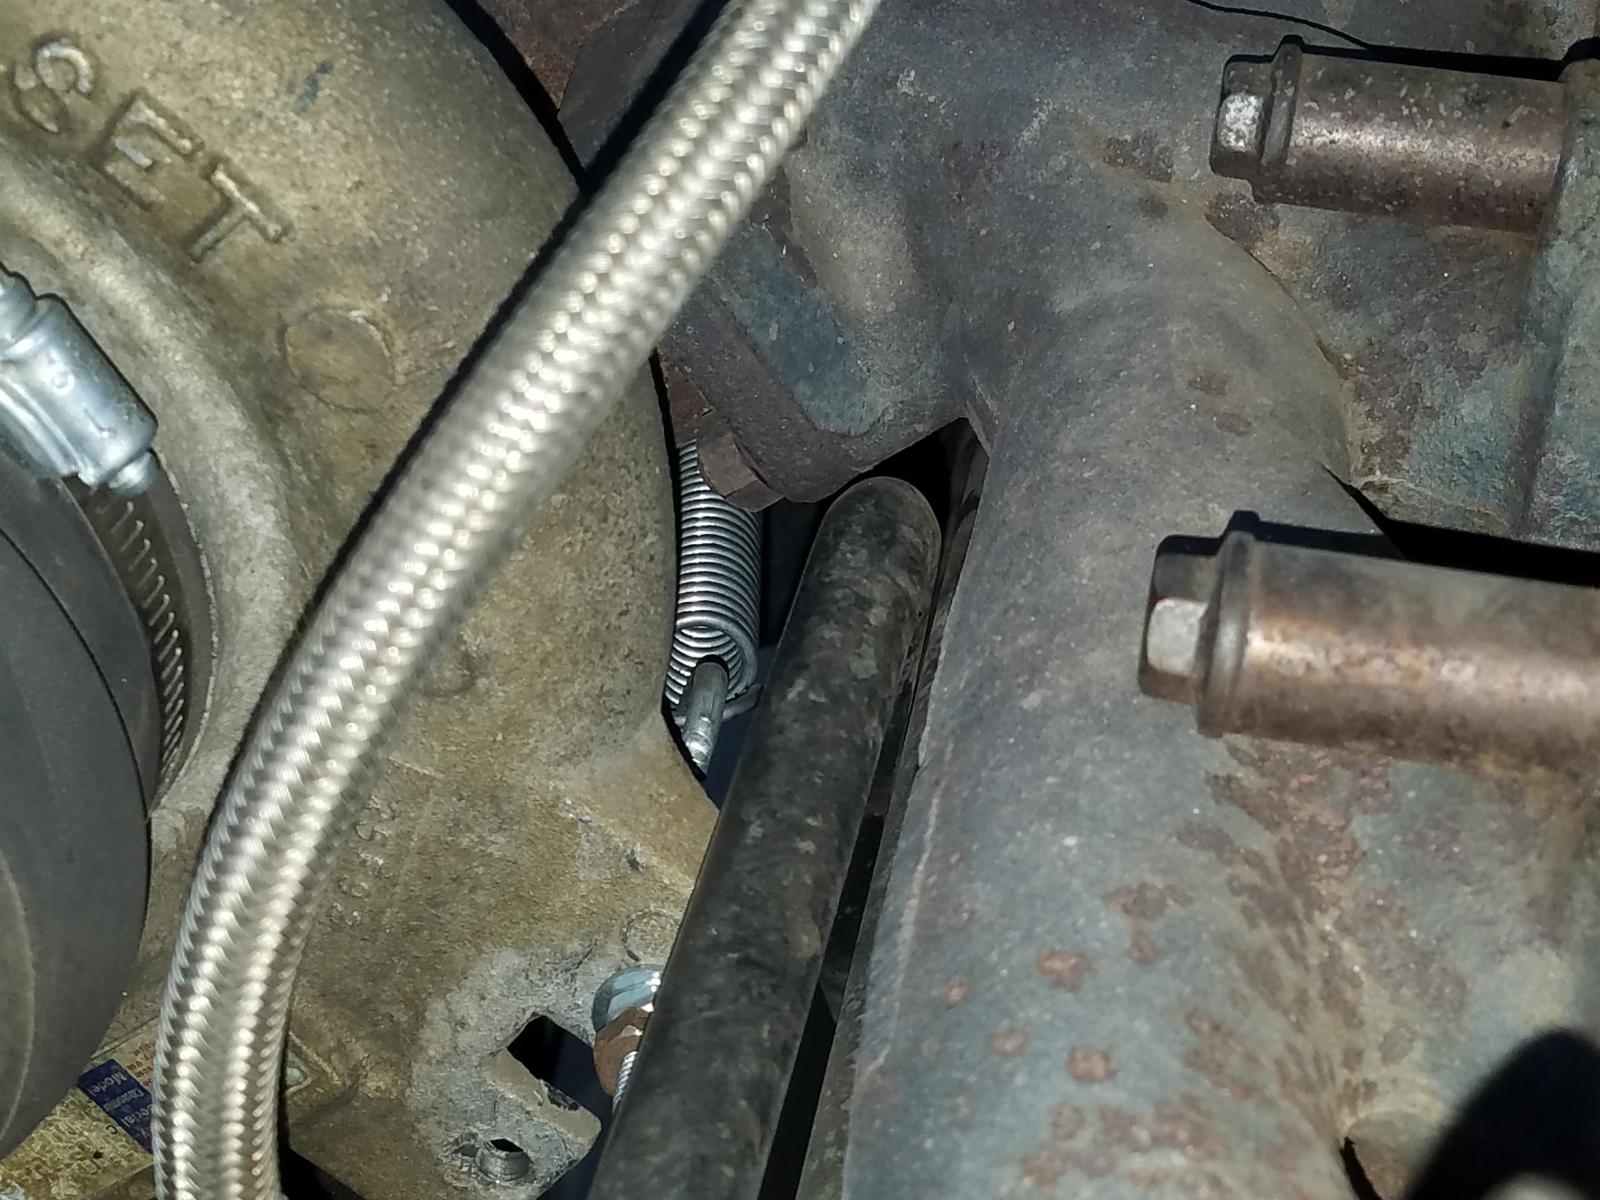
Alright so I’m not sure where I went wrong but I’ll never know. Bearing was the overdrive piston thrust bearing. Overdrive brake clutch was cooked. And when I put the unit in the press and removed the snap rings (yes both of them) it would not come apart. I’m not brave enough to find out why so I got an assembly from eBay. Should arrive today or tomorrow and I’ll be inspecting it thoroughly before installing it. it was highly recommended that I drill out the check valve inside the cooler line but my check valve is inside the cooler itself because I do not have the factory cooler lines and still have a check valve preventing back flow. Has anyone drilled that check valve out before and maybe has some pointers?
-
got the OD unit off the back. Bearing chunks falling out with it. Cooked the OD clutches messed up the piston and pulled that small snap ring out of its groove. I'll be swinging into my local transtar tomorrow and getting some of this stuff on the way. It makes me wonder what caused this. I didnt replace any hard parts only clutches so in theory the clearance should have been fine. I wasnt able to tell for sure if the big bearing groove was worn out and the actual unit itself inside with the spring seems to be together correctly When i rebuilt this thing the input shaft and rear/forward clutches were wasted. input up was cracked all the way through and the shaft had spun inside the hub. Im wondering if that had covered up an issue in the OD that i didnt notice when i had it apart
-
Ive actually been curious as to how one would delete the heat exchanger altogether Im not recommending this to anyone simply saying that i really messed up my cooler lines a while back and found barb fittings and half inch hose went right to the cooler and back and sawed the exchanger lines short and out of the way. I eventually added a cooler in front of the condenser because i then understood how hot coolant can help regulate fluid temperatures. But it looks like all you would need to do is find a big pipe plug for one of the block offs and then there was one other piece that looks like it wouldnt be difficult to change in order to just remove that thing all around. You'd definitely need to add in a substantial cooler because the heat exchanger is a really powerful part of keeping the fluid temp down when it wants to climb
-
Finally have an update to this thread As it turns out I managed to clog the filter with leftover debris in the cooler and torque converter. Flushed about 7 gallons of fluid through it so far. Changed filter added fluid and drove it.. TPS/APPS was sticking and cutting out and almost made it undriveable but i pressed on. Went easy on it for about a mile to the nearby park where i stopped on mostly level ground checked fluid levels and for leaks. Headed then to the main road a little 2 mile cruise did exactly 1 pull from low 3rd lockup to OD it all was going great. So i got a new APPS the next day (yesterday) and swapped that out. Decided i should drop the pan again and give it another filter based on the quality of previous fluid. Im now skimming through tiny shards of metal and actually found 3 rollers that are no longer within their cage and now in my waste oil bucket. So i filled her with fluid and test drove it again and realized my ABS sensor must be bad because the speedo isnt working below 30mph. Yes i drove it last night after finding the bearing pieces. Went pretty good i just needed to make sure the APPS wasn't gonna stick so i didnt go far. But I also drove it to work and back today. It all went pretty good but I did keep it out of overdrive on my way home for fear of damaging my OD piston as thats the thrust bearing that im suspecting came apart. So now its parked and cooling down. I got a new ABS sensor that i'll install at some point this weekend. I am borrowing the alignment tool from work and pulling the OD unit off the back because its about as much as i can do without pulling the whole transmission and im pretty sure i messed up that tolerance anyways or possibly my case is worn in the back and i need to get a shim or a new one. Finding the rollers was a little unsettling and i hate that i cant take it apart right now but i should have more to post at a later time Its been several months now but thinking back and researching the proper way to measure for that piston spacer im really beginning to doubt that i measured that correctly. Im staying positive though.. I'll either pull the OD and see my problem immediately or I wont see it and I'll know what i have to do next. Im even tossing around the idea of ordering one of those preassembled overdrive cases from ebay at this point and just putting my guts or clutches in it and i'll even get my own alignment tool to keep. But this we wont know until i get under the truck and get it apart again. I skipped alot of the deductive reasoning but it seems most likely to be the OD piston thrust bearing. But those rollers were skinny and short and the only thing that even uses rollers is those thrust bearings. My 47re only has 3 and 2 of them are in the OD unit. I have seen plenty of pictures of the carnage that happens to the thrust bearing under the sun shell in the main case but I really dont think these pieces of metal could have escaped that shell. However, I am noticing that OD engages in a really inconsistent and poor manner. There also happens to be a large hole in the casting where a piece of metal the size of the one i saw could have fit through by the park rod. Im not hearing any noises. Im not noticing any other issues with the transmission or how it drives other than a single instance where it felt like it was hunting for 3rd but i think its related to the ABS sensor because it started to hunt for 3rd immediately after the speedo came on and read about 33 and climbing then grabbed 3rd and lockup. And it does feel like 2nd comes on way too early at like 8mph but i cant tell with no speedometer until 30. More to come edit- atf+4 is expensive and tough to find but i cant sell myself on buying the ever plentiful 5 gallon hydraulic fluid. but at the rate im using this stuff its looking more and more appealing. its hard enough to find more than 6 quarts of atf+4 around here but every store will have like 3 or more 5 gallon pails of tractor hydraulic fluids in several different grades. 15w40 t4 is also super easy to find in 5 gallons around here thankfully
-
never air tested any transmissions before so that’ll be a learning experience. and yes I did do the clutches under the big spring they were a nightmare and a little sketchy to say the least. I bought a press from northern tool and used about a 10 inch piece of 3” PVC cut down with a window to get the snap rings in and out. Literally the only lip seals I didn’t change was behind the forward clutches in the front drum. I did the rear forward piston and got the gap set with the correct size snap ring and definitely changed those seals. Just the ones under the little springs I didn’t change but I never even took the springs out to inspect it so there’s that. The one-way roller clutches were easy. I just set them in a safe place until assembly and they went in the same way they came out. I verified direction with the book but I never moved them and definitely had 5 days of solid problem free smooth driving out of it so I’m sure they are fine. i followed the factory diag flowchart (I work at a dodge dealer) and Chrysler says to look at the regulator valve inside the valve body. At this point it seems I’m looking at a line pressure issue with a leak I can’t pinpoint until I get this thing out and I can’t get it pulled until my buddy clears me a spot in his garage. So when I get a chance I’ll be draining fluid and pulling the valve body and inspecting as much as I possibly can without actually pulling it and proceed from there. I’ll also update with any codes since I keep forgetting to pull them
-
i replaced all the clutches including the set under the 800lb spring. Billet input shaft. Front drum was in great condition. the only thing I didn’t mess with is the lip seals under the 9 springs that are inside the front drum. I didn’t have a reason to remove the springs so I left the seals alone. I’m kinda kicking myself now though because it’s kind of leading me in that direction it seems When you say bearing damage are you talking about the bushings/guides where the input goes through the pump? im glad some of the guys from over the years are still active on here a coworker here recommended that I air pressure test a couple of the ports and identify the problem that way. It’ll be another project for the weekend when I have some time to do so and get into it a little further
-
I agree i thought front seal too but its not leaking at this time. Im not able to take it out of the truck at this time or i would just do that and try to find the problem Its been a couple months by now that ive had it parked since it let me down and broke my heart again. But im still confident the TC was spinning freely before i put bolts in. And I did go on a whole weeks work of commute 25 minutes each way and some other driving outside of that. Maybe im mistaken but i dont think i would get that much time out of it if the TC wasnt lined up or jammed in there somewhere My head is actually leaning more towards the lip seals on the forward clutches pistons im wondering if i pinched one and it let go of all of its fluid and it made its way out the vent
-
Ive been off the site for a while due to so many circumstances over the last 3 years as im sure so many of us have. Im hoping some of the older knowledge is still floating around because i may need some help or if nothing else i can document the story a little bit here Back in 2017 i had the transmission rebuilt for the first time by a good friend at a reputable shop with plenty of experience. He did a great job. What was done then- (cause of failure was TC welding itself together and subsequently toasting the rest of the unit while i trying to get it home) billet triple disc, shift kit, GM sensor and governor, replaced one drum (with a good used one, still good) and both bands due to wear and scoring that drum from a rivet in the band. Transtar parts were used. Now in the spring of 2021 i unfortunately sank the truck in a mud hole and flooded the rear axle and transmission. The transmission lasted another 6 months before finally giving up on me which i knew was only a matter of time due to the water. I got the ATSG book and another kit from my now local transtar (moved from AZ to FL) and tore the transmission apart knowing full well the clutches are done. Discovered my input hub (between the shaft and clutch bucket where the forward piston goes) was completely cracked end to end except for the outer edge on one side so i ordered the light duty billet replacement from goerend. Mic'd the gaps and end play and ordered the appropriate sized snap ring when i discovered that i needed it. I did not inspect the pump (shame on me i know), i made sure all the old fluid was drained from the valve body and cleaned the burnt clutch material off of it and reinstalled and assembled the whole thing. Installed in the truck just fine, TC lined up on both sets of splines and bolted to the flex plate just fine. Filled with fluid and it worked great on the first drive. Barely any bleeding any air out of the valve body was necessary it was just ready to go. I drove the truck for exactly 5 days. Got it running on a sunday and it stopped working that friday. I hop in for my commute and within 5 minutes of startup im at a red light. As i approached that light the truck attempted OD but it shook the whole truck and dropped out of gear and then i had to hit the breaks due to red light. About a mile down the road its attempting OD again and same results only this time i start to lose pressure so i immediately pull over and get out. I saw fluid pouring out from the bellhousing and by that time i had basically no forward or reverse. I had it flat towed home by a coworker and I parked it. After work that day I tested it out and I have absolutely no reverse but drive will engage after about 5 seconds and of course its a really weak engagement. I feel like the safe bet is a pump but having just rebuilt it there's no telling if i missed a crucial point (yes i know the pump). A seasoned technician at my work has told me several times to not buy a pump and to take the DRB scanner from work while i pressure test it and write down everything. I may end up borrowing the DRB but did not do that yet. At this time i dont have any more diagnosis info but as soon as i submit this post im going to crawl under there and pressure test it. And likely drain and drop the pan after that. I'll post my findings. If anyone has any input or experience with this or similar it would definitely be appreciated UPDATE after pressure test on accumulator port. ATSG book says 54-60psi. Cold start and i read 80 right off the bat. I tried it again and got 70, again and got 40 with a bouncy needle, last try got me 10-15 with a needle all over the place. haven't drained fluid or tested rear servo for reverse pressure yet. We can eliminate the pump as the issue as i am building pressure UPDATE 2 i inspected everything and studied the fluid paths a little bit in the book. Oddly enough there is fluid everywhere around the cooler line fittings and mainly the most soaked is the shift lever but it clearly made its way all over the frame rail as well. The only thing immediately in common between drive and reverse is the OD/Direct Clutch which is the giant spring loaded assembly so no fluid required there. Im leaning towards an issue with a lip seal on the forward pistons I think this is probably enough information maybe someone can go off of that
-
You guys are awesome. One of these days I’ll be able to buy a membership and give back at least a little bit. I wanted to months ago and then I lost my driveshaft and had to repair my axle block under the leaf spring because it somehow slipped out of place. Then COVID hit.. my life has been a whirlwind
-
I did perform the WT mod. I have an extra ground from the timing case to the drivers battery and the alternator charges the passenger battery. I also replaced the diode about 2 years ago. I noticed huge improvements with the WT mod it was like a new truck. i need to update my passenger side connection where the big cable crosses to the driver side it’s a little sloppy right now. I am using dual post optima batteries which made the WT mod pretty easy to do and for a while I got a good connection it’s just not holding up anymore. So in my case I just need to get a new side post terminal and I’ll be alright with the battery connections. do APPS sensors get worn or dead spots after a while? I’m also kinda thinking it’s Timbo time.. thank you
-
Still dealing with my hesitation. It actually went away for a good while. I’ve been chasing it again. My zip tie BUS connector fell off somewhere between Arizona and Florida. but I have some new specific information I believe. 95% of the time it happens under specific conditions. speed: 55 to 65 trans: 4Lock (locks at 51mph) apps% 20 to 30 conditions: under slight load or slight hill. At speed or under slight acceleration between the specified speeds, also considered a load in my book but someone else may make use of that detail. maybe 4% of the time it will hesitate/jolt for a split second only one time has it acted up in any other gears i have some other details to add. My battery connections could be improved upon. Voltage used to be 14 pretty consistently but I’m hanging out around 13.6 to 13.8 mostly now. i had to bleed my injection lines about the same time this started happening. hope someone has some experience with this. If I had to guess I’m leaning towards apps or BUS connector again or I accidentally overtightened my injector tube nuts and messed one up. Or possibly a leak elsewhere is another thought I’m having but wasn’t sure if this was consistent with what usually happens with fuel/air leaks
-
EDIT completely deleted text i had before this because i just realized the OP had a DLD and i completely missed that before....
-
recently cracked my rear extension housing. it is a DHD verified with the tag on the case GM dealer in town gave me part numbers 15665311 (seal extension) and 15547441 (bearing retainer) and ive been able to find a C-16258 housing The "PROS" say they wont interchange due to the bushing inside the housing being a different size and different output shaft and different output seal Found an ebay listing for the pair of GM housings just wanna verify before i order. the dodge one is available but expensive
-
Been a while... axle locator pin decided to push through the factory axle lift block.. axle was very crooked so that was a fun 200 mile drive home 1 week later... u joint blew apart with little to no warning and wiped out my driveshaft and even wadded up the center bearing brackets so one piece shaft it is... back to the task at hand for the others- BUS connector on my truck is iffy so i snugged it up with a ziptie for now but also swapped to my spare APPS sensor. Problem seems to be fixed for now. I did notice that when i swapped apps sensors that my truck shifts noticeably different. It really hangs onto first. First used to shift consistently almost regardless of throttle position at 19 mph. This apps makes first last until 24-26 mph and i have to feather the throttle to get it to shift into second and when it does it GRABS it man.. anyways hope the input helps. BUS connection is kinda crucial it completes the loop so if your connection isnt really good you lose your tuner momentarily depending on circumstance. Doesnt apply to you if you dont have a tuner running through your BUS connection.
-
when i get down to a single sensor and dont have my spare i will replace it with a timbo but right now its a new OE assembly in the bracket and all that already calibrated. The plan is that when i do need to buy a sensor i will just buy a timbo and put it into my spare bracket and i'll have another new assembly ready to go. i did happen to notice yesterday on my way home that as far as the mystery hesitation were experiencing goes, mine doesnt have to be at highway speeds. i got it to happen consistently at 1800-2000 rpm in all 4 gears at different points throughout my commute home. still no codes i was wondering though... so i had to bleed my high pressure side last week and i didnt notice this hesitation before i did that. is it possible i over tightened one of the connector tubes? ive never had to bleed this truck before and thats a whole nother story in itself but i figure you just get them nice and snug and obviously not tighten them to oblivion which i didnt i just got them snug. if your wondering why i bled it... i took a tight corner with little to no fuel in the tank and made it about 100 yards from there before it just shut off because it sucked air the voltage is supposed to change as you press the pedal just so you know... if i remember right theres 2 sensor circuits and 2 ground circuits and the voltage between the 2 sensor circuits is the opposite of eachother. Meaning that on the 2 circuits that will show a positive voltage value on a volt meter will move in opposite directions. 1 starts at full voltage and goes down and 2 starts at low or 0 and goes up. i may be wrong about that though. if theres just one positive voltage sensor circuits then you'll just worry about that one. but what you wanna look for is a fluctuation in the voltage that is inconsistent with how your moving the pedal. so if say your just slowly pushing the pedal down and you see the voltage suddenly jump or drop that would be an indicator that theres something going on with that sensor. but regardless of how many circuits give the PCM a positive signal throttle position circuits all operate on the idea that as your pedal moves the voltage changes and the PCM will always know that for example 2.0 volts might be 50% throttle and 3.0 volts might be 75%. you want these to be consistently the same voltages at the same position every time but the voltage itself will change based on throttle position i hope that makes sense i have a hard time explaining things sometimes as it is and im pretty wiped out today im gonna disconnect my edge for the ride home from work today and see if anything changes. if taking the edge off makes the problem go away im gonna look at my BUS connector again followed by MAP sensor connector. if taking the edge off doesnt do anything im gonna swap APPS because it seems to me like it happens around the same throttle position. i just dont know why that wouldnt throw a code for it now when its been giving me codes for months off and on with very minor symptoms that ive chosen to ignore
-
Im having this problem now too... again. Not stealing the thread just wanna contribute what ive seen in the past on my truck. My issue isnt while under a towing load its just under a load in general. Up an incline, 1800-2000 rpm, 65 to 70 mph, very intermittent. So far its only done it 3 times but its obvious to me that its happening especially when the hesitation causes a power loss that messes up my freeway pass... I replaced the MAP sensor AND connector mine was corroded about 8 months ago or maybe more now. That was a similar hesitation also with no codes I have a spare OE APPS to swap out as a tester. Keep forgetting to swap it to test... but its a great idea to have a spare if possible in the whole assembly so you can just swap them real quick and not have to worry about all the calibration steps necessarily or tapping wires and all that fun. No codes currently, however about once every 2 or 3 weeks it will give me a TPS circuit code although symptom wise that would just be the normal dead pedal then it would come back. However what im dealing with now is more of a hesitation as opposed to a loss of throttle which is very obvious. I have noticed this and maybe its because mines an automatic but if you completely take your foot off the pedal (0%) the press the pedal again (sometimes you have to do it a few times) the throttle comes back. Whereas my dads 02 HO 6sp you would have to shut the truck off (we did it while driving occasionally even) and restart and cross your fingers that it came back. Also if it helps anyone i had to replace/repair my BUS connectors too in the past. Its a long story but i had to adapt from the triangle plug to the weatherpak plug and it wasnt good so i had to fix it. But for some reason that BUS connector was definitely the cause of my issues once before and it was very intermittent with no codes what so ever. (EDIT this is referring to the Edge where it connects to the BUS) I thought the WT mod was intended to remedy the torque converter going nuts but i understand how it could apply here too. Ive done that already and that honestly turned the truck around entirely. Electrically everything improved even my stereo quality noticeably improved. If anyone hasnt done it, do it NOW. Its a must for these trucks.
-
I havent tried to adjust it but given its a 40 lb spring i think im at my limit with 27 psi since im now working with drive pressure and not boost pressure as my regulating force.
-
Always a ton of different ways to do anything. Pictures look great @mopar1973man and it definitely looks like you wont have any problems with fueling there. With limited resources i could only do so much.. i only had half of my tools and if we werent living in an apartment at the time this would be a different story i would have pulled the tank out and brought it inside but trying to do it outside in 20 to 30 degree weather with snow and ice on the ground while im trying to work in gravel on a hill i think i did pretty good. And i had to get my truck running again so the wife and i could stop carpooling which for us added an extra hour and a half onto our day in just commuting time.
-
Oh yea im not gonna say my way or the highway just that this is what worked for me. It is a really nice feeling to know that im getting fuel to my injection pump and i dont have to worry about it.
-
Back in january i got an airdog 150 with half inch fuel lines. I used the included draw straw from airdog. I remember seeing several people with complaints so being as i have yet to have an issue i thought i would offer up what i did and how well it has worked for me so far. So in the instructions it says to cut the end of it at an angle. I cannot remember how much of an angle i used but i would say roughly a 45 is what i ended up doing (actually i think now that i did about a 35 degree cut with some side cutters). Face and cut it so the opening of this angled bottom is facing away from the bottom corner of the tank to avoid having it get stuck to the bottom. Length wise i dont have a true measurement but i trimmed it until it was just barely off the bottom and again keep the opening away from flat areas that could suction closed your fuel system. Keep in mind that you also have to factor in the direction that your new fuel lines will be coming in from and how you are routing them. For location i used the flat spot in the top of the tank that is inboard (driveshaft side) and slightly rearward from the original fuel pump and put it right in near the middle of that. Far enough from the side that you can get the straw down to the very bottom. This keeps the straw near enough to the original low point that you should be able to avoid issues with fuel slushing front to back. Do this with a full or mostly full tank. My lift pump failed with about 7/8 of a tank. I originally had hoped to lift the bed up on one side but all of those bolts were rusted in place and the only way i got my fuel tank to come out was with a piece of pipe as a breaker bar and it was still a nightmare. I used a 2x4 to actually build a support to put between my floor jack and the fuel tank and i made 2 little short pieces to sit right next to the fuel tank straps so i could still get them on and off. Doing it this way also doubled as a way to make sure that when trimming the straw down to the right length that the tank still had its low points and i didnt lose any fueling ability when getting down near that E mark. Use a heat gun to get the hoses to fit snug and at the time it was also about 20 to 30 degrees out around here so it was a necessity really. These are probably just common sense things but i hope they help. Ive ran this thing down to fumes several times now and have yet to lose fuel pressure or even get a noticeable amount of air in the system. Not that i would hear the pump while driving but literally no issues with my install. Another tip from experience. Dont let your lift pump fail in winter when all you have to work on is a gravel driveway on the side of a hill and a harbor freight floor jack that wont go up high enough and all the bolts are seized and theres snow on the ground.
-
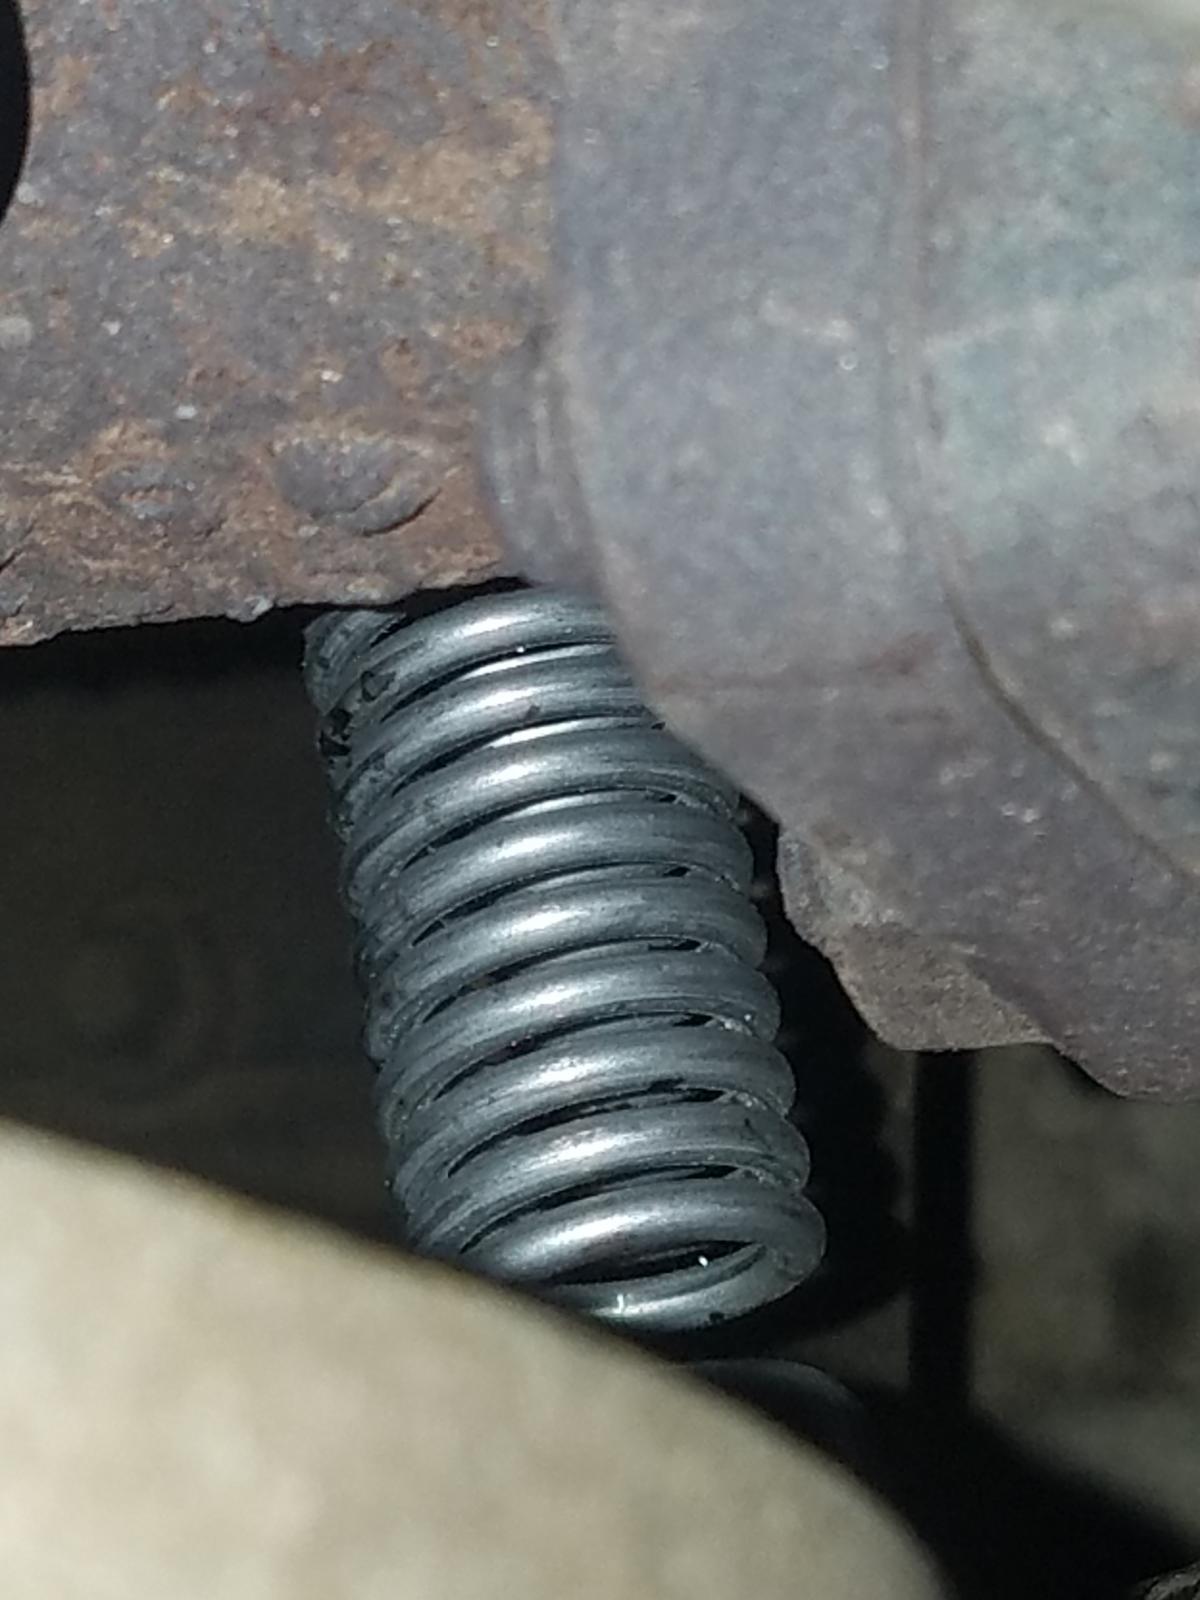
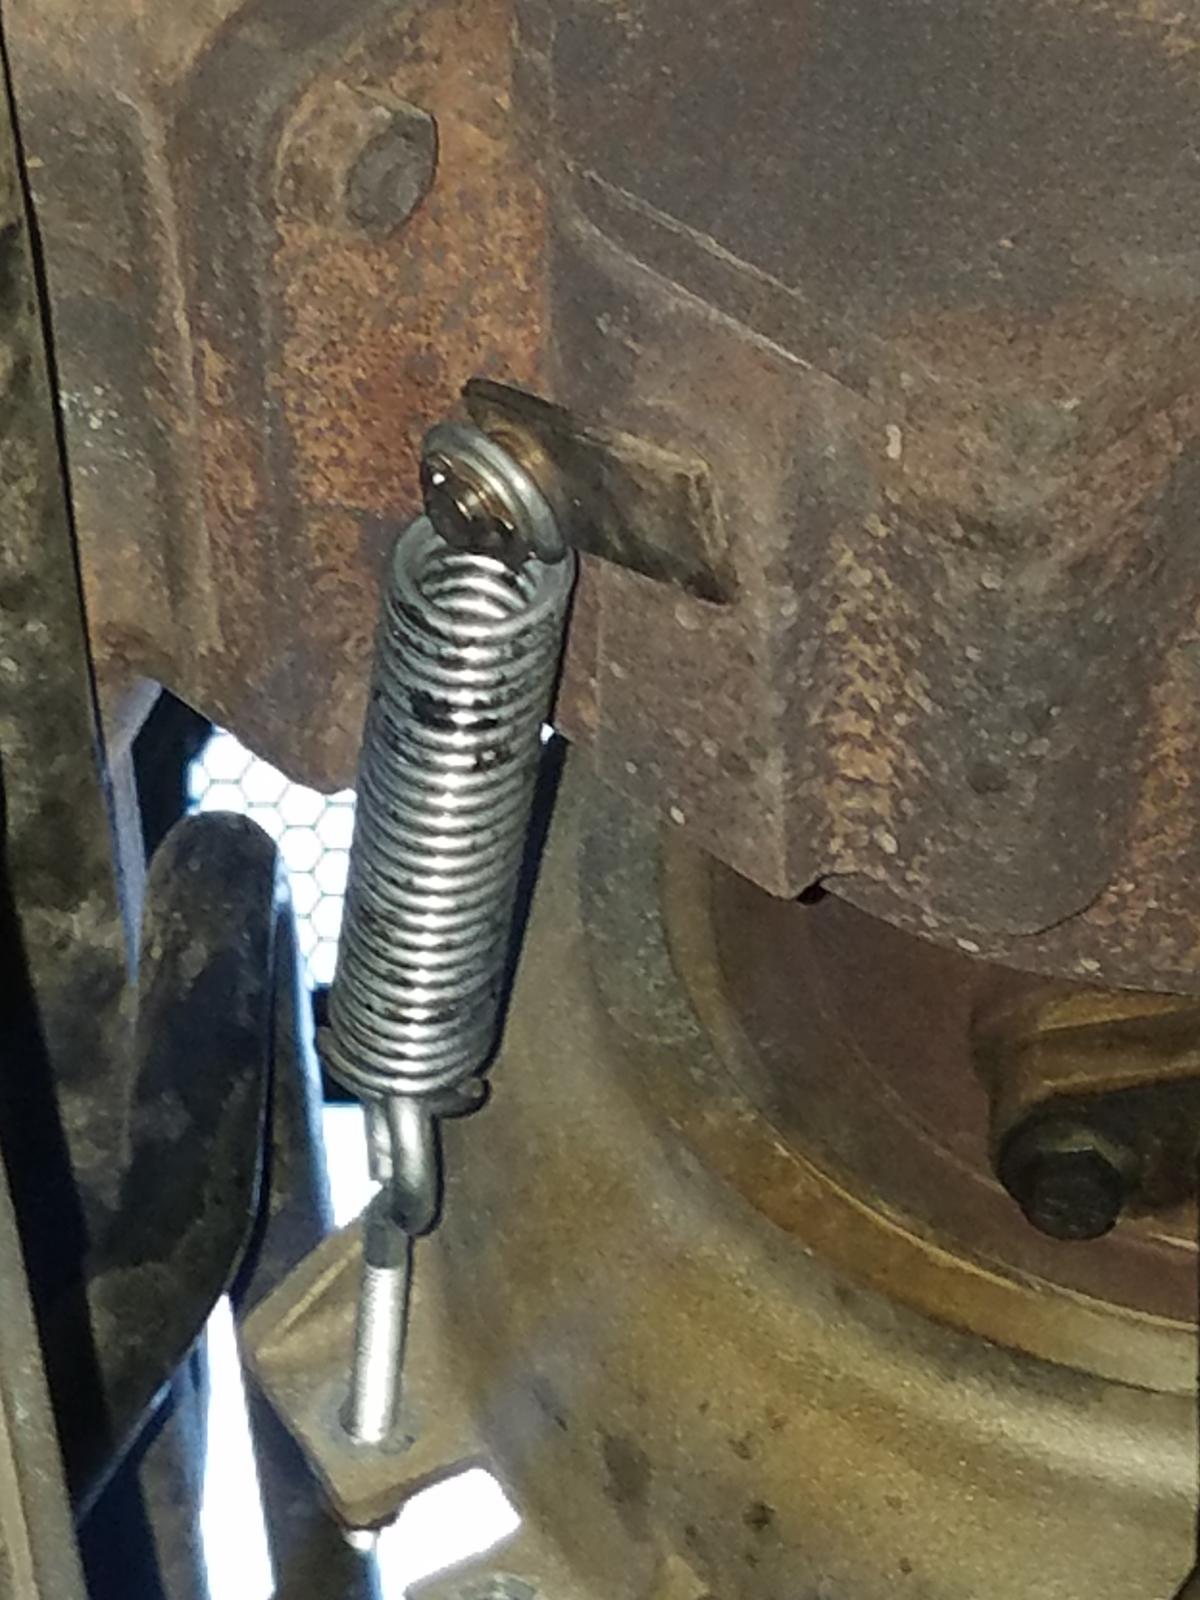
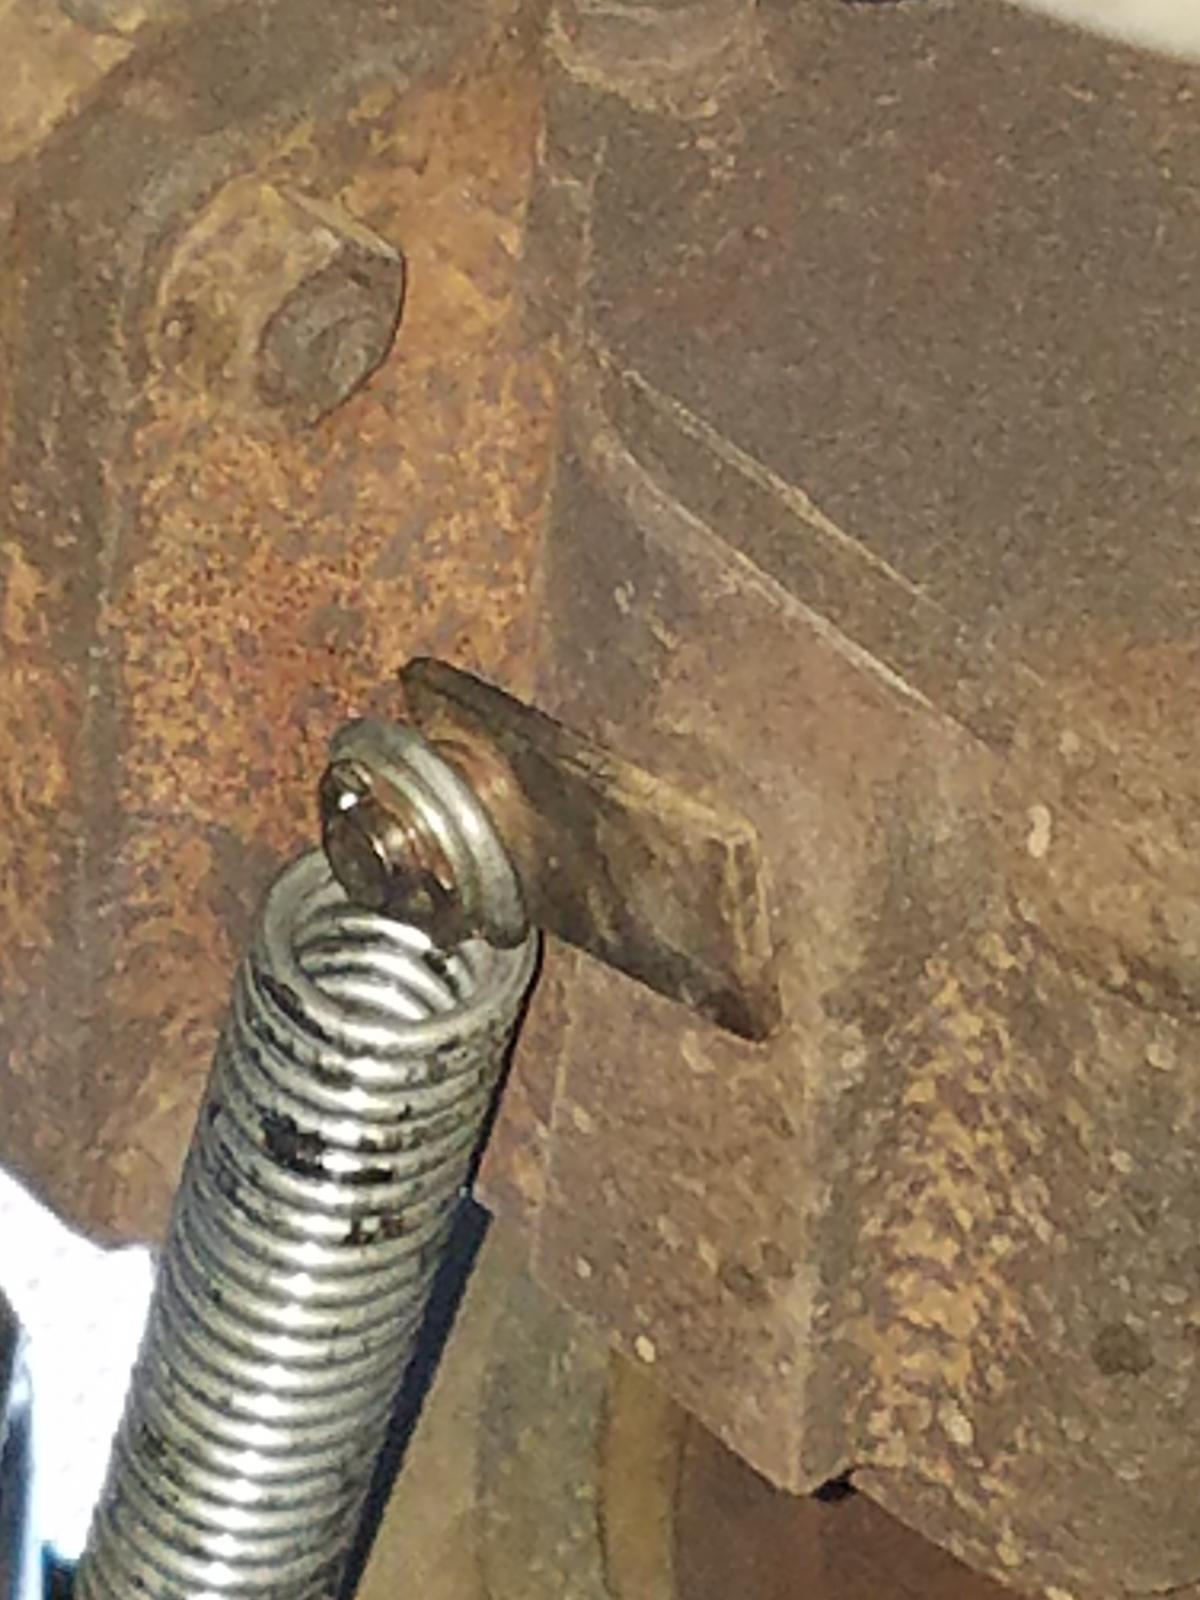
Alright so i had a single picture and it wasnt worth anything so i took new ones. Pretty straight forward. And there is a washer between the spring and the circlip. I dont know what size i found it in my literal bucket of spare hardware but there is a washer there to keep the spring from finding a way past the circlip. I remember using the old wastegate linkage for comparison now that i think about it. Anyways heres pics Zoomed in on spring for spacing Front view Top view Ghetto hose plug Underneath zoomed in. Hard to tell but there is a washer on there Underneath zoomed out You can see my super ghetto boost plug... its worked for now because the top of that fitting is so stripped its not even funny.. Not the prettiest as i said but its functional. I tried to get a good picture of how far the spring is stretched and its not much but it is way easier to tighten the nuts if you have a pry bar to help stretch it. Then you can quickly spin the nuts on and not have to fight the spring. This is my take on a budget "performance" upgrade. Hope it helps someone out.

-
Pictures will come later as they are buried in my phone but its really simple. As a disclaimer, use common sense, see what other things i've got done to my truck and take that into consideration before you do this. I am not responsible or liable for anything that happens. For what its worth i am working with a stock truck. No "real" mods or upgrades.. You will need- 1- Eye bolt (with 2 nuts and 1 washer) (i think 1/4 inch is what fits through the old wastegate holes) home depot for less than 5 bucks 1- extension spring from napa part# 7704099 (balkamp) about 2 or 3 dollars 1- 1/8 pipe plug to plug hole in turbo compressor housing left over from factory wastegate air line - oreillys has them but they are pricey at about 5 bucks So i was able to this fairly easily. I learned the hard way that you cannot remove the wastegate with the circlip attaching it to the wastegate lever. First get that stupid circlip off. I used a flat screwdriver with about a 1/4 inch blade and from underneath the truck i pushed up carefully and was actually able to keep that clip on the blade of the screwdriver and not have it go flying down the driveway. You have to reach way up there to get to it. Next take the wastegate off by removing the 2 nuts and its air line. I found this to be rather difficult. My air line was really stuck to the wastegate and fought it for a while. With all the old wastegate parts out of the way you should now plug your old air line port with the 1/8 pipe plug (i actually stripped the fitting and still cannot remove it from my turbo so i have been running with a bolt in the hose with a hose clamp squeezing it in place, verified good up to about 28 psi) This is where i had a really hard time, getting the spring to stay hooked onto the wastegate lever. I tried combinations with washers and ultimately i dont remember what i ended up using as a final solution but when i go to get a finished picture and update the post i guess we will know. But i had a very difficult time with that bit there. The final step is to apply tension to your brand new wastegate. I did not get scientific by any means at all. I havent the faintest idea how much tension is on that spring. All i can say is really well snugged up and stretched out. I did double nut the eye bolt to prevent it from loosening over time with your typical road scenarios ie: vibration/heat. But i took into consideration that it was about a 40lb spring when i did this. Now i will say i have not adjusted mine at all. I put this together back in May and havent really touched it since. I took it for a test run on a freeway onramp near my house and saw my gauge read 29 psi and at that exact moment i lost an intercooler boot. Fortunately i just had about 20 years of oily residue built up and every last one of my boot clamps was LOOSE. Since May I have maintained about 27 psi as a peak at the current spring setting which hasnt changed since i put this together. Reliability seems excellent. Have had zero issues with it aside from the intercooler boot popping off. This includes several trips to Phoenix from the az mountains as well as 2 trips to california. I have yet to really tow with it but i have moved my enclosed across town a few times since then and it hasnt affected it at all. I thought heat would soften it up and lower my boost but no changes even after several hours in the heat (driving across the 10 down to hwy 8 gets hot even at night in august its 100). The wastegate flutters pretty good with a spring on it vs the boost pressure style and your working with drive pressure solely and not boost pressure which changes things. Overall i would say for those in my position (broke, bought a second hand edge that did not come with any of the boost mod parts, needed more air) it is definitely a worth while mod and its cheap and super easy all things considered. I was able to increase my combined average mileage from 12/13 mpg to 17 based on the trucks computer and my commute/driving style (half highway,half city. 5200 ft to 5800 ft elevation). The trucks computer its about 1 mpg over what im actually getting when i do the real math. If you spend more than a day doing this project than your getting distracted or something is wrong. Actual time working was about an hour or two if im being honest. Fit and finish is far below what i would consider professional, clean, bad, etc. Its ugly but functional. Hope this helps (i will tag those who were asking about this)
-
Just wanted to update this post before its left for dead in the depths of the forum. Not that its really of any importance but were about 2 weeks in and I've yet to see any issues with it finally. Lift pump seems to have done the trick. I was worried about the draw straw that AirDog provides and installing it wrong and I've gotten down to just a hair above the E mark and no hesitation due to air being sucked up or anything even with uphills downhills turns traffic its doing great so far. Thanks to everyone for there input and help along the way
-
So from the sounds of it i probably dont already have the ability to lock 2nd. I will have to ask a friend of mine who built it then. As far as i know i've got all Transtar internals with a transtar billet triple disc converter and a transgo shift kit (not sure if theres even any other brands of 47re shift kits) Im sure i could ask him and see if he remembers exactly but there a busy shop. He's gonna stab me if i tell him i want to do another lockup switch. He swears thats what killed my transmission but i think its because i had to haul my other friends fully loaded f250 (powerstroke, giant camper, steel trailer, all of his things in his bed plus everything in else in my bed) back across Palomar mtn he was half way to Ocotillo wells when he lost a fuel line and my trans was still bone stock (absolutely no gauges at the time either but at least it was cold out). If memory serves me right, if i had a bone stock trans at the time but with a lockup switch and got cruising at around 20-22 mph (idk rpms) enough to actually shift into 2nd then hit the switch and had it react would that be a rough forced shift to 3rd and not 2-lock. I remember trying to do 2nd gear but its been over a year and a half ago now and i cant remember but i do remember a lower speed jerk into either lockup or the next gear and a check engine light because i did it the way where they say to remove the relay and hotwire the pins with a jumper wire and wire in a switch to ground for the torque converter lockup circuit.