DRW
Unpaid Member
-
Joined
-
Last visited
Everything posted by DRW
-
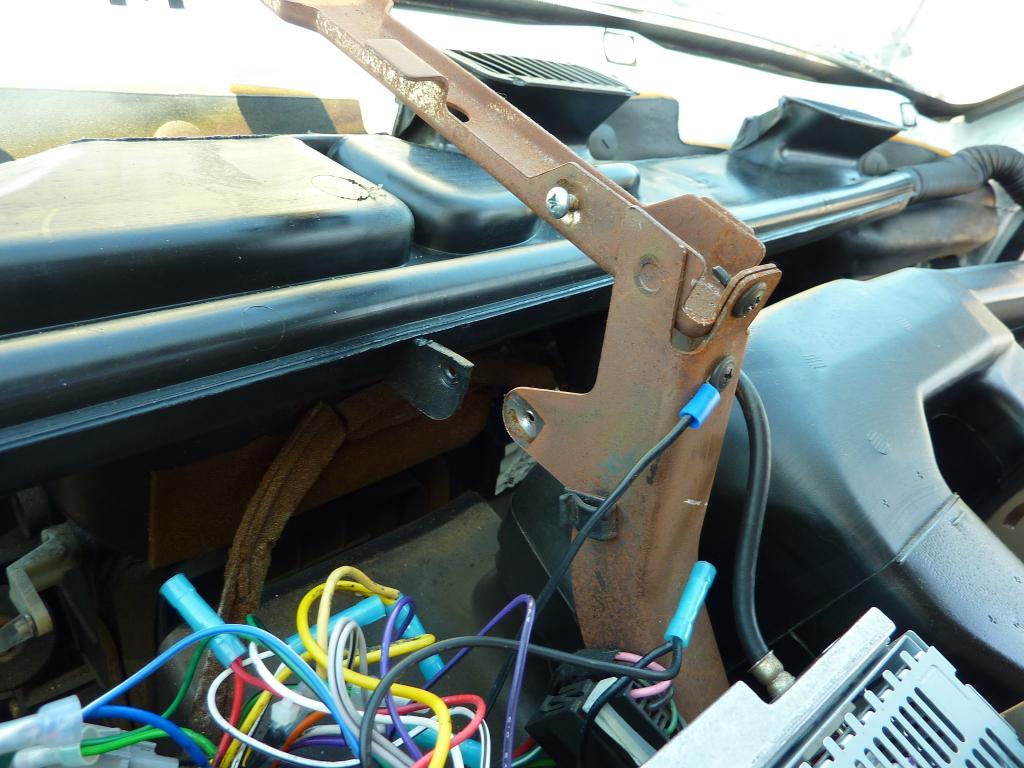
A new pitman arm is not required, I made the decision to replace mine based on two factors. I had read that sometimes removing the pitman arm was difficult to the point of breaking tools and second my existing pitman arm had 200k miles on it. For the relatively small cost of a new part I chose to avoid any problems or frustration in removal of the arm and replace an old part with new.
-
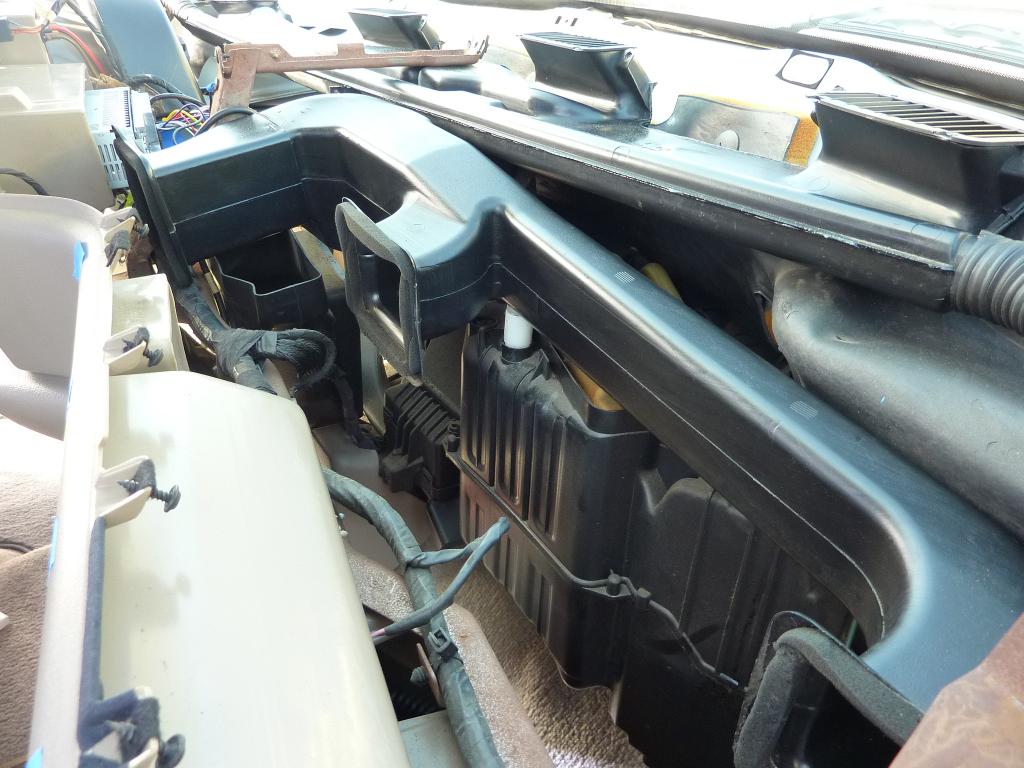
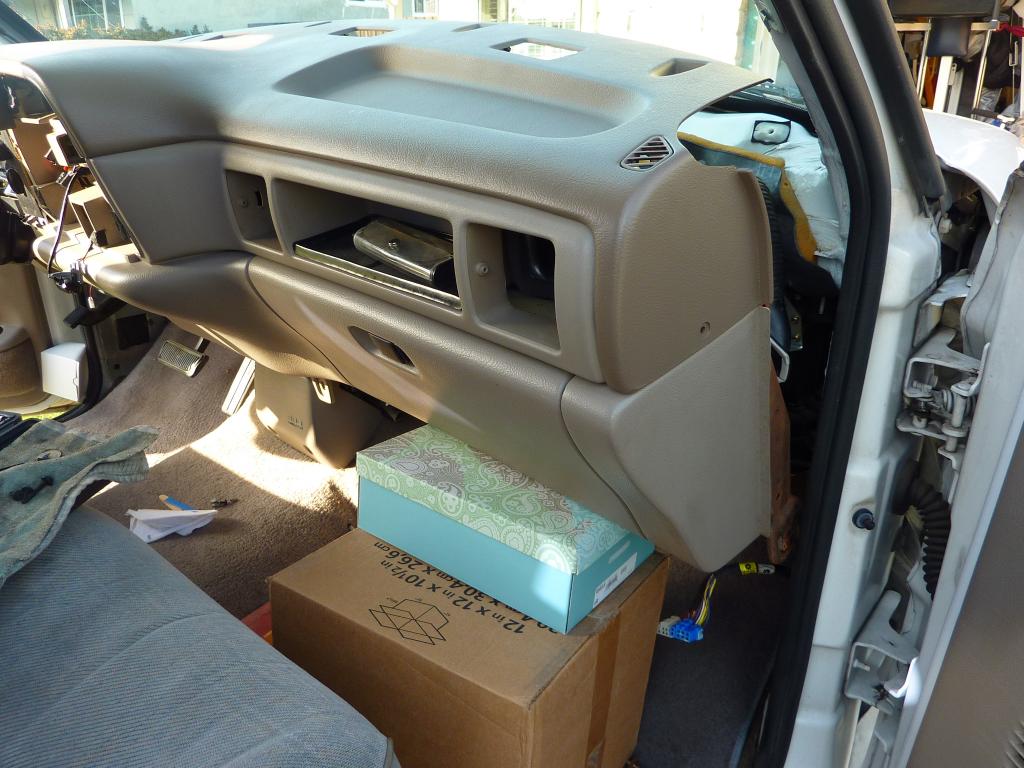
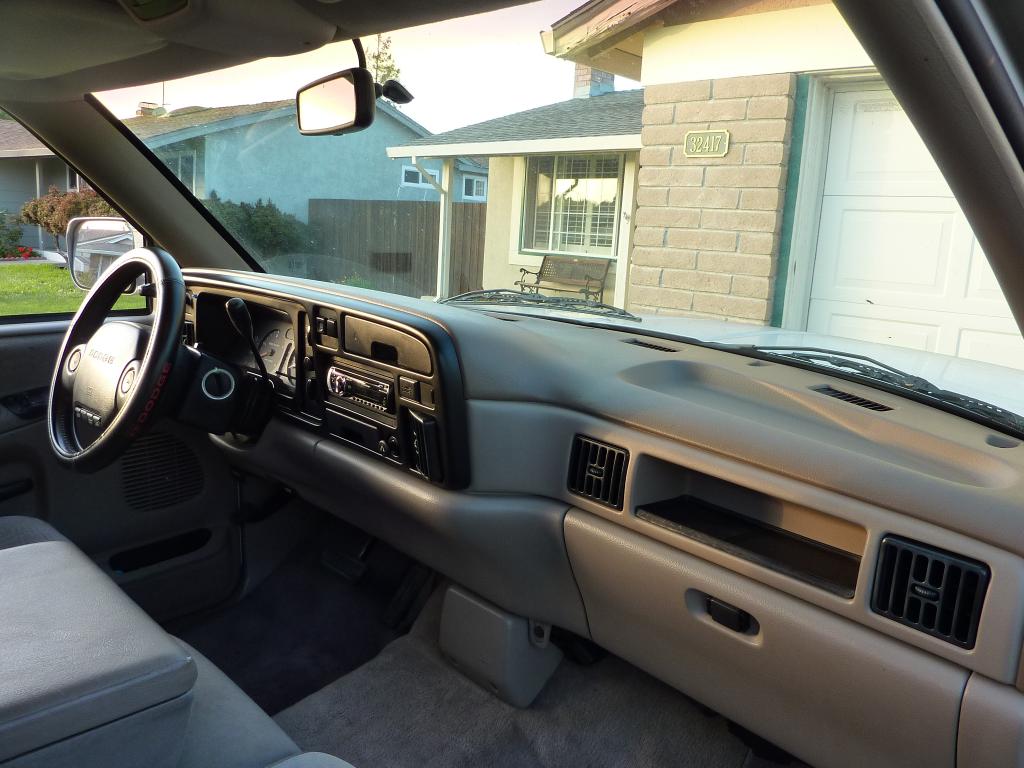
I think that the stock wheels on the 97 are 16 inch so I can only guess that the 16s off the 2001 will fit. My question and maybe yours is whether the 16 inch aluminum wheel will fit over the 2001 brakes. I know that the 17 inch wheels fit nicely.I dropped the tank recently to replace the fuel sender. Pretty straight forward as there are only a couple of straps, filler hose and supply/vent lines to remove. The tank was pretty empty and I used a couple of jacks to lower and re-lift the tank. Maybe it is just me but I found that re-installing was a bit of a bother as my 2wd truck does not have a lot of ground clearance and getting access to see and reconnect the fuel lines was a bother. I ended up jacking the truck so I could sit underneath which allowed me to use both hands to reconnect the fuel lines. The fuel line connection is shape keyed kind of oval and with only one hand it was near impossible to match the shape of the tank and connecting hose. With the truck lifted a bit to allow me to sit and then using two hands it was easy. I think that crawling underneath and using jacks to lower and lift the tank would have been difficult on a gravel surface.Pretty sure they will, I have a 96 and am running aluminium 17 inch wheels off a 2010.Brian, I do not have a box brace, however I plan to add one in the few weeks. I have driven a 96 like mine with stock steering gear and a box brace (DSS) and I could tell it was better than my stock setup before the Borgeson upgrade. I will also add that my front end had a lot of play and I suspect that ball joints and tie rods are also worn contributing to the play.I installed the Borgeson in my 96. Installation is easy but I also installed a steering shaft and new pitman arm, since it was all new the install was easy. The parts kind of pricy, but once installed the drivability is a lot better. Eliminated almost all play in the steering. The steering touch is lighter and quicker. 3.5 turns lock to lock vs. 4.5 with stock.The warranty is from Borgeson and it is 3 years.My OEM steering box was leaking and I chose to replace with the Borgeson. I thought about rebuilt or replacement OEM but was concerned about the long term durability. That and the borgeson makes the steering lighter, more responsive.Borgeson 800112 is ~$360 from Amazon, free shipping.I would call it a brace, however as sold it is called a "stabilizer". http://www.solidsteel.biz/dss.htm Are you familiar with the mod required for the brace?I have a Borgeson steering gear and have recently obtained a DSS steering stabilizer. I have read here that the DSS needs to be modified to work with the steering gear. Does anyone have the details of the modification?I have the d80 in the garage and getting ready to swap. Since I dont know when it was last serviced I plan to change the fluid before install. I cant seem to find a listing for the fluid capacity that is clear. Documentation indicates a differenent capacity for a D80 in a 4x4 vs a 4x2 application:Lube Capacity 4x2 6.8 pints ( 3.22 L ) 3.4 Quarts4x4 10.1 pints ( 4.79 L ) 5.05 QuartsAre the 4x2 and 4x4 axles actually have a different capacity, or is it a different "fill level" depending on the drive configuration?Thanks for all the info. I picked up the axle last weekend and just need to gather a couple parts and then find a few hours to swap in.Thanks, for the quick replies. The donor rear end is SRW and since it is from a 96 2500 no disc brakes.I am investigating a gearing change for my 96 12v automatic (2500) which has a dana 70 (4.10). I have an opportunity to pickup a dana 80 that has the 3.54 ratio I would like, so I does anyone know if that will bolt in as a replacement rear end or are there other issues that I would need to address?This is my experience as well. My 96 needs a little bump to the throttle and will start after a short grind. My buddy's 92 springs to life without throttle and without any delay. Like you I have been wondering why and recently, and with this thread, I am thinking it is a P-pump feature.Finished this job over the weekend; I took some pictures and will post those in a bit. maybe it is just me but jobs like this always seem more involved than they need to be. 1. If you wish to paint the replacement - SEM makes good paints for this application and if you want to have factory like colors, try to use an actual color chip chart in a store that stocks the paints. The representation of colors from the internet can get you close but in the end you will guess. 2. Remove Radio, adjustable AC vents, and instrument cluster, basically most of what bolts into the dash. (I did not need to remove the heater controls or the headlight switch. 3. Plan to drop the steering column (thanks awoods9520) and completely drop the dash, removing the two pivot bolts behind the kick panels. I also disconnected some wiring at the passenger end which allowed a few extra inches of access. (I used a cardboard box to support the dash on the passenger side while the steering column supports it on the driver side.) 4. Once the dash is dropped, remove defrost and passenger side AC plenums. The defrost plenum is held onto the dash cap by two screws on each vent and one screw on the center dash brace. The AC plenum is held on by three screws, one on each vent. (I found it necessary to remove the plenums to allow access to the screws that hold the dash cap to the passenger side of the dashboard.) 5. Repair any broken plastic on the dashboard frame; I used Superglue, epoxy and even shoegoo for a semi flexible repair. Friction tape over some of these points to add a bit more strength/flexibility in the future. 6. Use felt and friction tape on friction points. The old dash should show you where these are. Also, you can count on the foam around the air ducts to fall apart so you may want to plan to replace that too. Mine was a sticky mess and I was able to replace with foam tape from the hardware store. Installation: 1. The screws on the passenger side (I think there are five of them) all attach from the rear of the dash and will require that you reach in from the side and underneath the new dash cap. If the air plenums are out of the way this is not too difficult and for this I can only suggest to be patient, use a magnetic tip screwdriver and even use the tape the screw onto the screwdriver trick. The attachment screws on the driver’s side are easy to attach and all done from the front. (before I began this job I pre-screwed each of the connection points to cut the threads into the cap plastic. This just made the screwing in job a bit easier) 2. Once the passenger side dash screws are attached you need to reattach the plenums. (There are three dash support brackets on the top (ends and middle) that the dash cap needs to align with. There are tabs on the new cap that need to fit into a hole on each bracket. Alignment of the defrost plenum will be impossible if these brackets are not aligned.) I did the AC plenum first but in retrospect not sure if this is the best sequence. In fact I wonder if it would be possible to attach the defrost plenum to the dash cap before even putting the replacement into place. All of these screws are attached from behind the dash, driving back towards the interior of the cab. I used an assortment of screwdrivers, a mirror and patience. 3. When the plenums are reconnected you only need to reinstall the pivot bolts, reconnect any wires you disconnected, reattach the steering column and raise and pivot the entire dash back into place. Screw in the five bolts on the top of the dash and tighten the pivot bolts. Reconnect all of the parts you removed and clean up.


 Does anyone know if the wheels off a 2012 model Ram will fit on the 96 year truck. Wheels are 8 lug and seller says they are 17" chrome clad.Has anyone replaced the dash cap with a new one? On my 96, which should be the same for 94 - 97, How do you get to the screws on passenger side and the defrost vents? No problem removing the old dash because it was so broken I could just about reach in from the top. However to install the new dash there are screws on the passenger side and on the defrost vents that have to be screwed in from the windshield side of the dash. I understand that I need to unbolt and tilt the entire dash toward the seat but it still looks near impossible to reach these screws. Any experienced advice?
 I am getting ready to repace the cracked dash on my 96 and noticed he "Taking dash out" video. Sure would like to see what I am in for but when I try to play it says it is marked as private. I can play all all the other videos, so Is there a setting on the file that needs to be changed to make it public?Thanks.If you have not repaired the rubber boot on your shut off solenoid you can get one here: http://www.fostertruck.com/dodge/default.htmhi John, Check this group. RamRunners bay area. I get notifications of their meetings but have not been able to make the time to attend. You may be able to make some bay area connections through here: http://www.facebook.com/rrddtk?closeTheater=1