


Mopar1973Man
Owner
-
Joined
-
Last visited
Everything posted by Mopar1973Man
-
Your going to want to read the article about this. https://mopar1973man.com/cummins/articles.html/24-valve-2nd-generation_50/51_engine/swapping-vp44-cummins-engine-between-985-00-01-02-r429/?do=getLastComment&d=4&id=429 I know the text is dark. I'll try and fix it.
-
I'd be happier without the bags. Either way I get up every morning and do what I can do like yesterday got two other guys Einar and Mark to do the big work of getting my water fixed here for the yard. I did the pipe jointing. Today I'm going to be a bit lazy and rest and recharge it was a long day doing some basic work. PM sent.
-
I would say keep it and replace the damage heat exchanger for the transmission.
-
My adventure continues... I'm still doing makeup and enjoying life the best I can with my cancer and my two bags hanging off my back. Seems quite amazing to see how many people stop to give me comments and props for what I'm doing. I'm still working on my own style and look with what I've got. Like most say, "Fake it till you make it". I need to replace my choker collar being the strap is ready to break. Even when I'm hanging out with friends I get people stopping me and commenting on my looks. Donnelly Idaho (Stinker Station) - Erica was the one to shoot the photo here... Like here I was on my way to drop Erica off back at her place in Donnelly ID. We stopped at the local Stinker Station and these two women commented on my looks and since they said something I always asked if I could get a photo with them to add to my TikTok account. Lewiston Idaho (WinCo Foods) My monthly shopping trip I went alone and opted for my Black and Purple hair and like typical its a women favorite. I was standing in the soda pop alise and these two women spotted me and commented on how bright the purple color is my hair and asked if it was aa wig or my actual hair. I told them it was a wig and I'm fighting cancer. So the gal with the green hair shot the photo but it was aa fun time in WinCo. Clarkston, Washington (Walmart) This gal I felt sorry for. Look at the lower right corner you can see her cane. She was chasing me all around Walmart trying to catch up with me. I just left the automotive area grabbing two batteries for my Jayco trailer and thought I needed to get makeup wipes for cleaning makeup off my face. She cornered me in the makeup area and gave me a stellar comment. "You are F_cking Gorgeous! " She was impressed by my looks and will be looking for me next time I go shopping too.


.jpg.c373210f35563bc9cb56f53c7dd894e4.jpg)
-
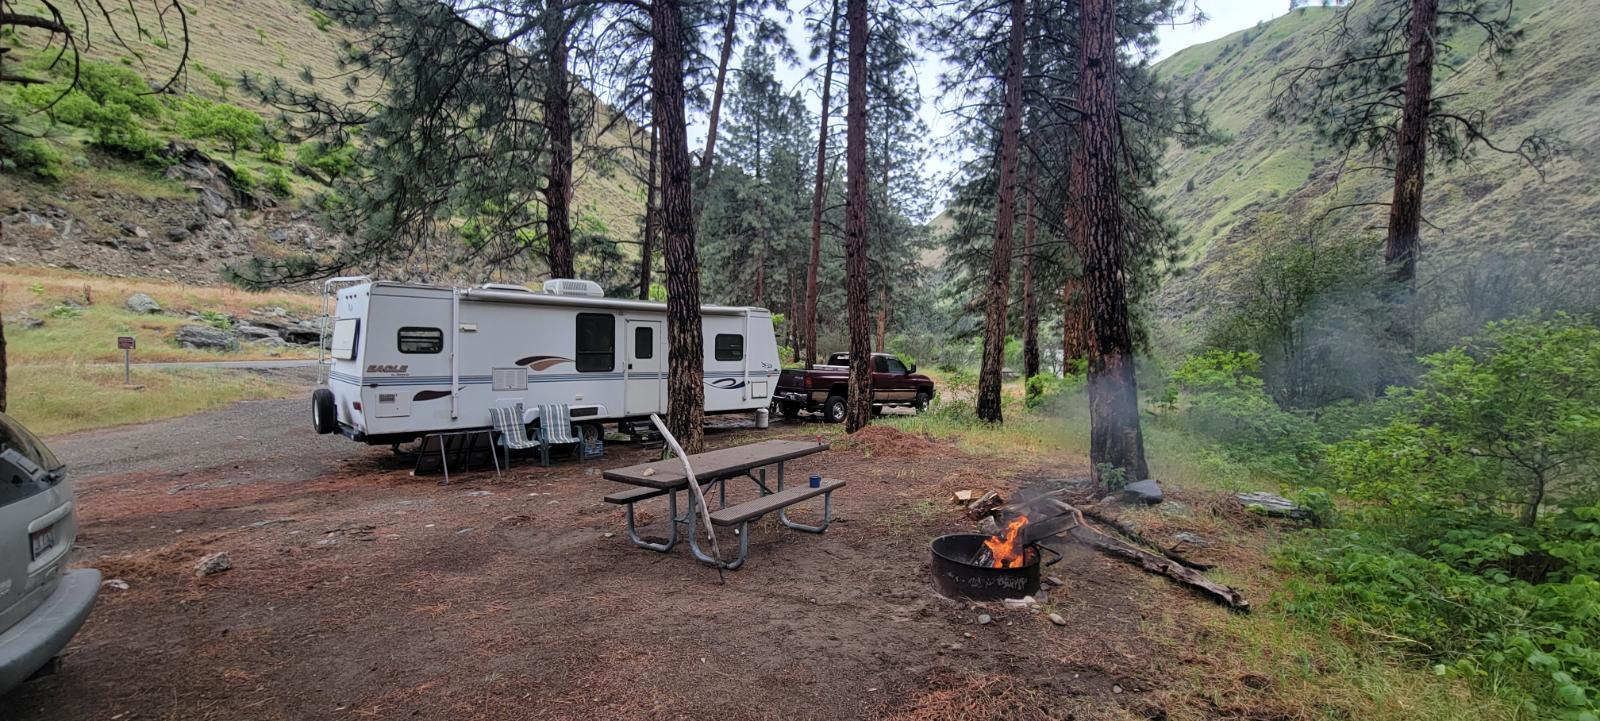
Yeah Mark and I stayed here along the Salmon River for 5 days. As for the Quadzilla tune, I will say my timing is the same but I zeroed out my cruise timing and disabled that knowing I rarely can reach the cruise state and I can't move the cruise state higher in engine load without possibly blowing the head gasket. Then for the retard settings you need to retard pretty much fully to get the spool you need for pulling grades and climbing with weight. I know I can hold WOT and have no issues with EGTs on level 3 as usual. Engine oil temperature remain in the 170's and coolant was still normal. EGT's I have been under control. As for me and my cancer, I spent those 5 days just relaxing, eating, and enjoying some quiet time without my cellphone and internet. I will do this as much as I can as I heal from my coming surgery and even before if I can squeeze one more trip in. Now notice I'm running more retarded timing and my EGT's are still in check. I know you can't see boost here but I'm still below my 15 PSI break point for adding fuel. Even now I'm only using the 150 HP injectors but no added fuel by the Quadzilla. No smoke issues and temperatures across the board are still under control. Cooant, Engine Oil, EGT's, etc. All stable and not ramping up even scaled out at 17,500 pounds with the RV fully loaded with water, food and supplies for 5 days.
-
First thing. Replace both batteries with new batteries. Then might be a good idea to do the W-T ground wire mod. Also have your alternator tested for AC noise. Weak batteries can cause all kinds of issues.
-
Update... I produced a towing tune and took off for a 5 day camp trip down near Fiddle Creek which is just south of Lucile ID. I can say I hit proper timing in the first try and oil temperature where still 175 to 178°F and coolant ran like usual around 204 to 208°F no problem. I was seeing 12 to 14 MPG flat ground travel. No issues to report even towing. I'll post up my towing tune here shortly. I'm still running around haven't been home much more than few hours and left again.
-
Look up dual tank control valves. You should be able to get either a manual or electromechanical valve for controlling fuel on a stock set up. Now AirDog / FASS is tougher with 1/2 inch lines. Just consider gravity setups it's possible to over fill if you forget to shut the valve.
-
Could be a bad switch or the ground side of the bulb lead is shorting to ground.
-
Keep in mind that like the headlights you can blow a fuse and get back feed and still have a lit bulb.
-
Here it is...
-
No. It typically dries up before it hots the ground. Like mine did it only leaked and puddled on the floor with a coolant system tester. Normal driving it would have the smell but nothing on the ground.
-
Simple test. On a cold engine hook up a coolant tester pump it up to 16 to 18 PSI and wait. If it's leaking out a puddle should form on the floor as pressure drops. Be aware my first head gasket blew out in the rear of the head due to weak head bolts and head curl which is normal around 300k miles.
-
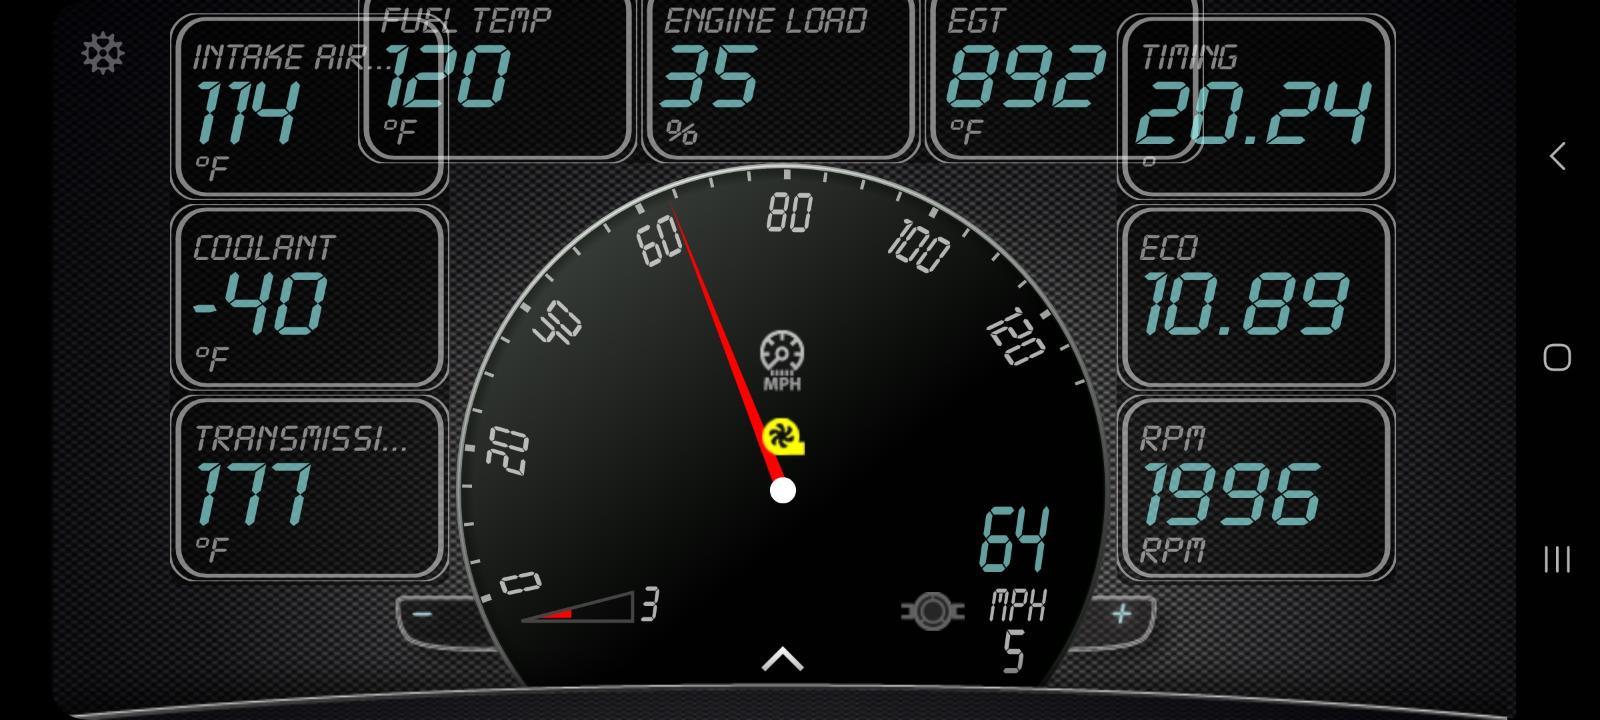
Cummins CanBus is limited because of the Cummins ECM software bug. Now Dodge CCD network over the OBDII port will show correct because the software does not have that bug. Yes any OBDII live data tool shows correct values but sadly Quadzilla never show any temperature above 204°F.
-
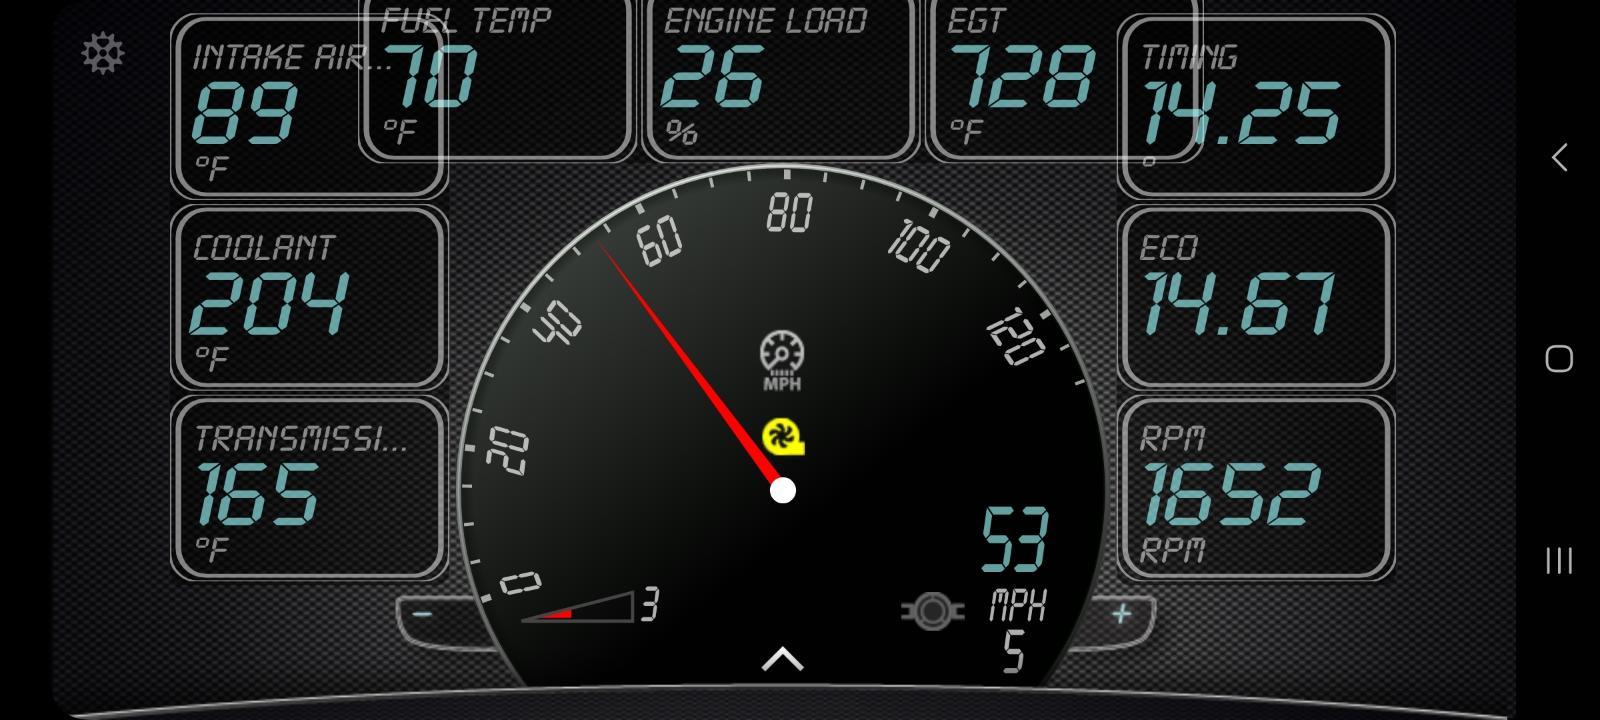
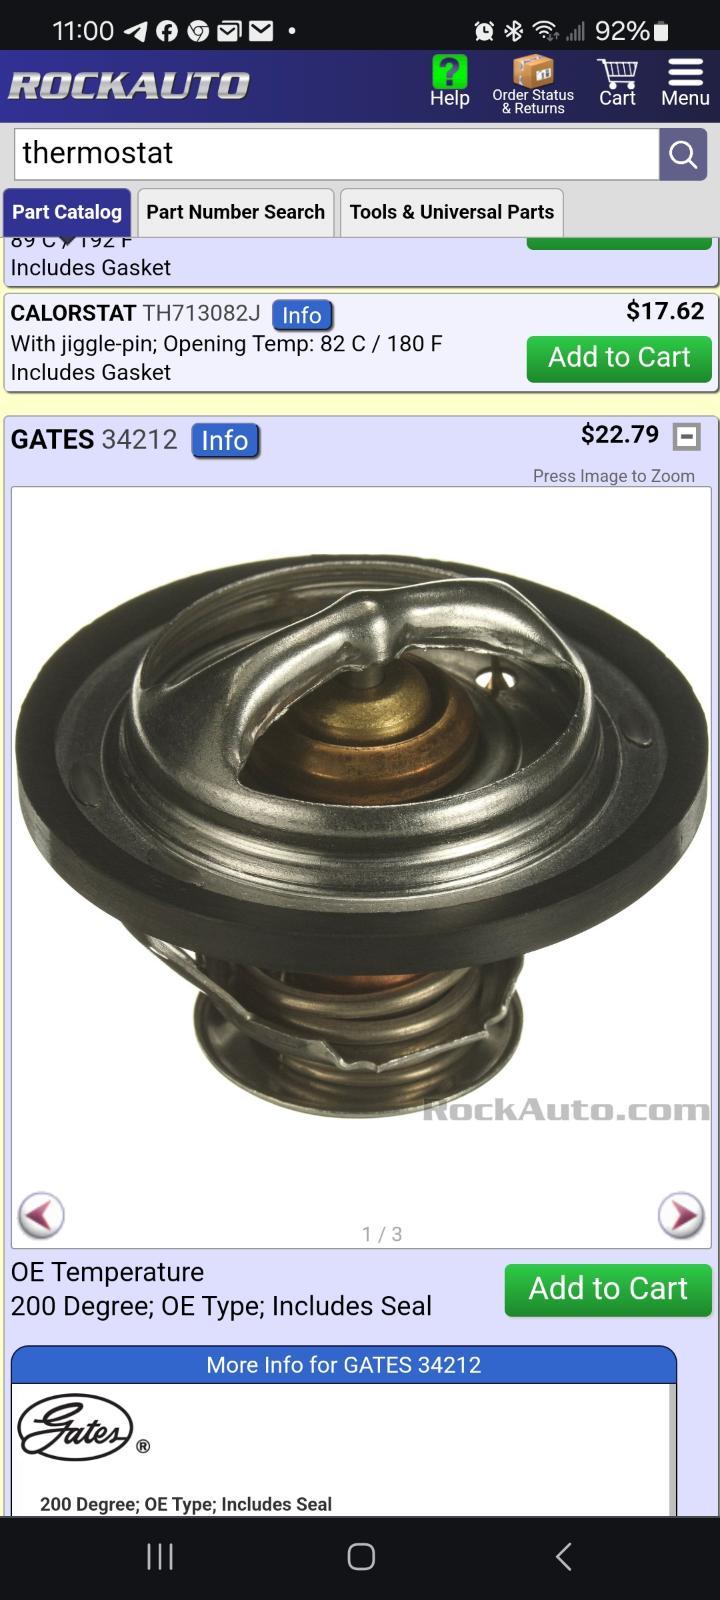
Starting back in the beginning of 2023 winter I opted to play with 200 degree Cummins thermostat from a 6.7L Cummins. Now as winter got to the coldest of minus 7 degrees I was happy to keep a warm cab and engine. I watched over the winter time and as I was able to keep temps above 80 degrees in the intake manifold (IAT) I noticed an improvement in MPGs because cold air does rob the engine of ignition quality and more heat energy is not wasted to the coolant jacket. Now fast forward to now. I made a trip to Lewiston ID for monthly supplies and food. Still running a 200 degree thermostat in 90 degree weather. This is a Gates Thermostat and seems to hold steady between 200 and 210 degrees of coolant. Even climbing 7% grades everything still running normal specs and no issues. I'm happy to say MPG wise I didn't quite use a 1/4 tank more like 3/16 of a tank in a one way pass from home to Lewiston ID. Level ground EGT's are still cool. Engine oil temperature barely touched 178 degrees even climbing long 7% grades. Boost was between 10 and 13 PSI. Flat ground cruise

-
I'll tip 210°F at 80 MPH. Typically at 65 MPH is floating at 205°F. No, there is no way to fix because it a Cummins software bug in the ECM. A live data tool will see full range of coolant temperature.
-
Food for thought. 150HP injectors and tow on a stock HX35W turbo. For sure need a Quadzilla to control timing and EGTs.
-
Thermostat is failing and sticking. Don't buy a Cummins which is not designed or built by Cummins. Hence I buy NAPA thermostats.
-
Well good morning to the gang out there... I'm still getting it together. Yesterday was a bit more normal feeling. I got started doing some basic tasks about cleaning and organizing my kitchen and pantry. Today I want to stop in town and grab a few basic things. Now its time to get working on my office area cleaning it up and getting the last of my cabling done for the cameras and WiFi heads. I've got a problem with my "Home" WiFi head showing up as a 10/100 Mbit which it should show up as a 1 GBit cable so I got a bad plug to fix at one end or the other. I've gotta stay busy and doing light duty things.
-
It's all about gaining strength now so I can handle a 6 hour surgery and 14 days in the hospital. I feel better not being nauseated and weak all the time. I wanna get back to normal things like even working on my trucks for light duty repairs. Mark did me the favor for installing my new Diamond Eye 4 inch exhaust and muffler. Wow it nice to have quiet exhaust again. If the weather warms up I'm going to start doing rust repairs. Yup the salt is taking the toll on Beast.
-
As of today I'm officially done with chemo. So all this time of doing my chemo I always dressed up and did my make up. Today I walk into the cancer clinic plain me. No wig, no make up, etc. Just my DAP shirt and jeans. Most of the staff did not know it was me. As for my health I'm starting to have flow to my bladder and peeing like a normal guy most of the time now. I've still got tubing into both kidneys and bags but that is to give the best chance of healing for my kidneys. I canceled the final chemo because of my weakness and nausea was getting out of control. Now I can start to heal up and build my endurance and strength again. Still gotta be careful because of my tubing and bags hooked to my kidneys. Yeah my hair is starting to grow back but we are still getting off and on snow and rain. It really makes me cold without one of my wigs. People are more used to seeing my wild hair and makeup than normal me. Yup that's how I went to McCall to go shopping for some food stuff and take care of meds and other things. Yes I'm doing pretty good but like I said I'm weak and can't walk a long ways without getting winded.


-
For all of you that use a Big Honkin' Air Filter like myself. While back I quit putting the air filter minder in the head of the filter, well I went a bit too long on this filter even though the restriction is minimal really didn't see any huge temp difference per se. Now changing to fresh BHAF supplied by @dieselautopower and got it installed. Very small changes in temperature did occur. Coolant is down about 3 degrees, engine oil temperature is down about 3 degrees as well. Now EGTs really didnt change a lot but cruise state seems a tad cooler hard telling. Now as for MPG just making the trip down for my chemo appt. I only used 1/8 of fuel for 125 mile trip. I did go toe to toe with a sport car running the canyons. Kind of fun to have quicker spool and just a bit more fuel/air mix keeping heavy throttle usage a bit lower in EGTs even on level 5.
-
First off, the best off would be to look for petroleum diesel. My only solution would be to dilute with 2-cycle oil which is a natural cetane reducer.
-
Ok. Now little trick look up MSDS for your favorite cetane products and look at the chemicals used to make said products. Now take a sample of said product and put small amount in a small open container and leave it exposed. Ex: Power Service will change to a tarry sticky product if exposed. Just remember leave any oil exposed it will still be oil. (Lubricity is poor). Now back to MSDS sheet look up the BTUs of said chemicals you find they are much lower than the diesel fuel. There is no way to add a low BTU chemical to diesel fuel and have it increase the BTUs which is impossible. Ex: Biodiesel is lower BTUs vs Petroleum Diesel (lower cetane). Now go out on YouTube there is a video of home test of a guy burning Power Service and it was very smokey and sooty and then he adds 2 Cycle Oil and it cleans up the mess of Power Service. No, I don't don't support the Climate Change nor do I believe EPA systems are cleaning up the air. If we cared we all have high efficiency Diesels up above 60 MPG which produces the least amount of emissions but here we are.
-
Sadly that is all a lie. As cetane goes up, lubricity gets worse because of the solvents to increase cetane. Then BTUs go down as seen in my previous post. Emissions go up being you have to burn more fuel to travel the same distance. Louder knock because cetane rose and sudden hammering effect of the rapid burn fuel which enhances wear.


