Dieselfuture
Yearly Subscription
-
Joined
-
Last visited
Everything posted by Dieselfuture
-
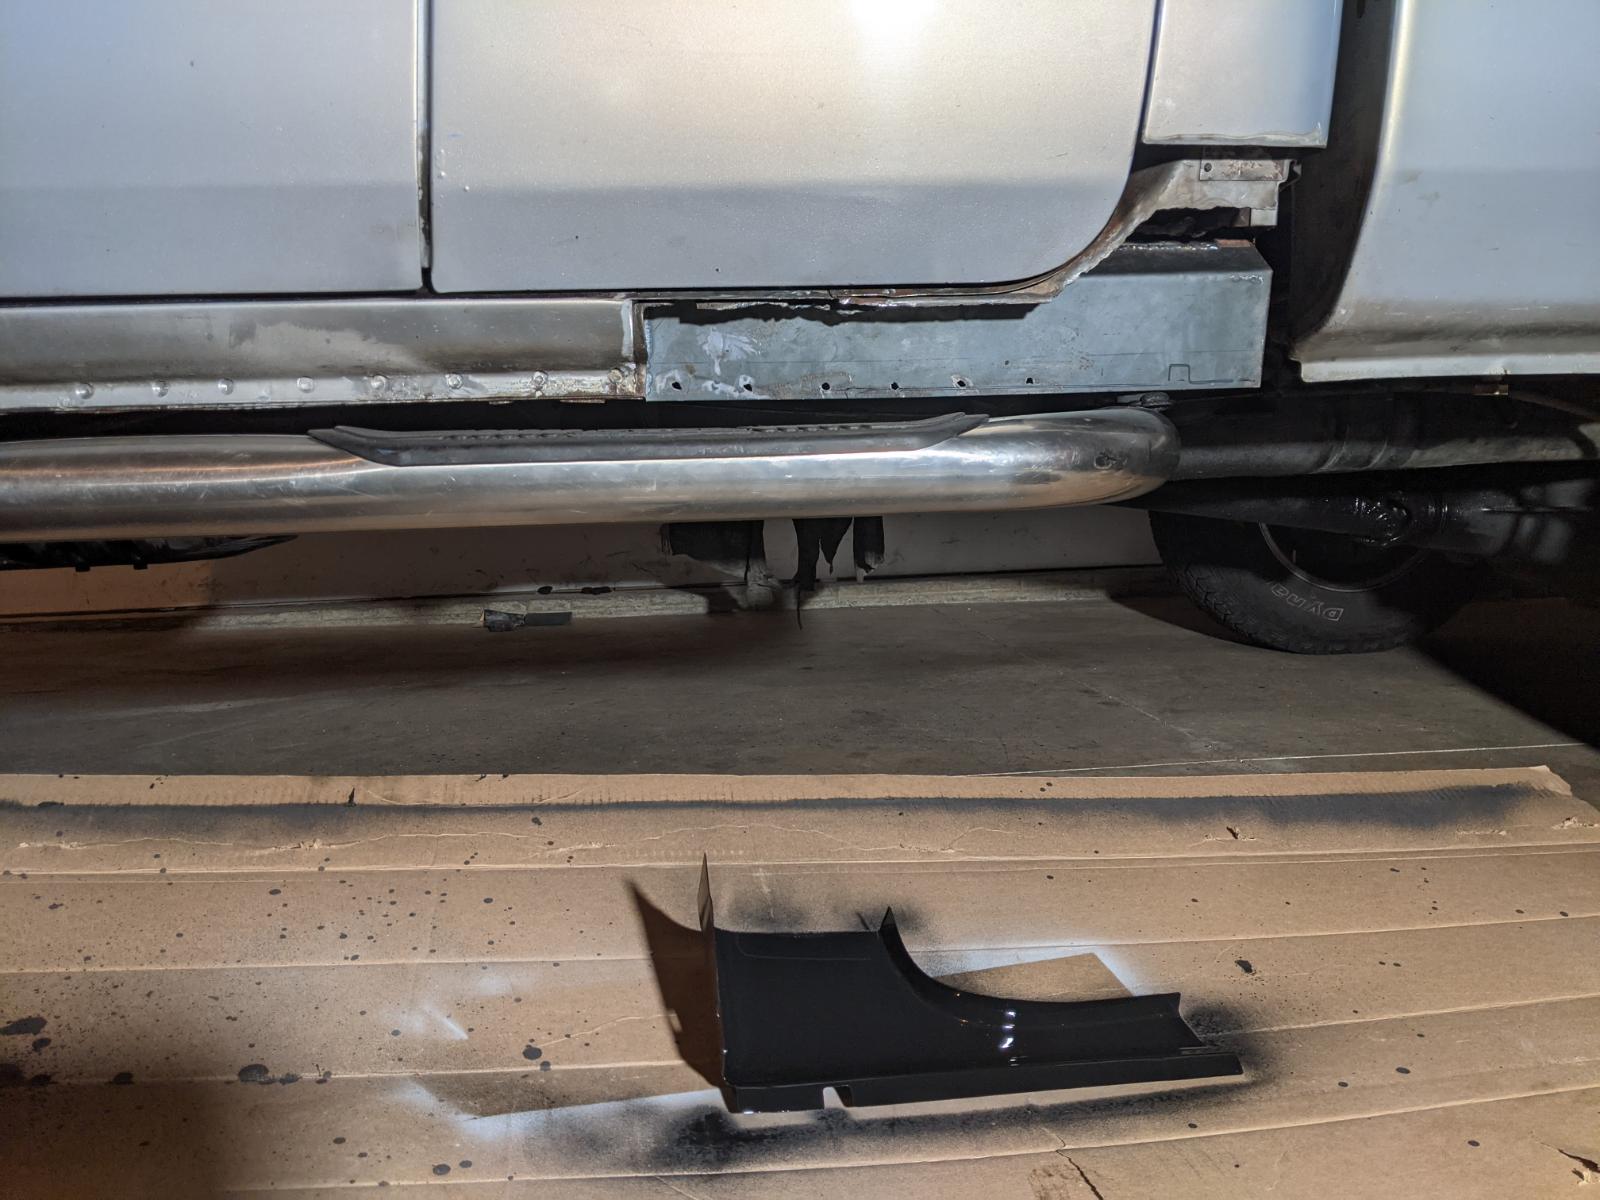
Ok I've seen enough of this truck for this week. Just needs a little more bed liner paint and I'm calling it good. This bed liner spray on first coat runs way too easy, started to look better on second coat, see on the box, and of course I ran out. Goodbye supporo cans, at least on the cab... black looks pretty good, matches my bumbers.
-
Hey someone had to eventually
-
Oh common, we all know moon is made of cheese and not something you can land on, plus it's only as far as your imagination. All kidding aside I was always fascinated with it and always wondered if it's so far why am I seeing it so clearly with such a detail and can my eyes really see 240000 miles away with such details. Idk, I know someone does. Don't mean to be a party pooper and ruin the moon drive
-
Mine is a slider I think it's more to do with po and not washing the truck. When I got it it had few inches deep of lime/roks that were packed inside the frame, he lived on gravel. And when I popped plugs out on rockers and looked inside there was already rust forming, that's when I decided to spray oil in there, I believe it helped although that one video in the link above proves that it's actually can make it worse. I'm thinking about trying to wash all that oil out with a hose and some degreaser maybe then spray some rust converter then fluid film, I ordered a case of that was much cheaper to get a case vs few cans you bet everything will be covered in it now I will check the rear light thought.
-
Leave and learn all though I've been around the corner a few times seen it done it a few times. But not disagreeing with you on your statement. I did this more to stay sain and yeah I believe if I waited another year or two there would be much more damage and I'd have to cut out even more. Not going to worry about fenders or bed, I'll get some rust free at some point. Main thing was the cab for me. I'll be spraying fluid film in the fall now, hopefully it'll keep this thing going for a while longer, wish I new about it 10 years ago. Both sides primed just need some pait/bed liner. Cab corners weren't exact match so there's a bit of discrepancy, it'll be fine if it's all black , like the song paint it black.

-
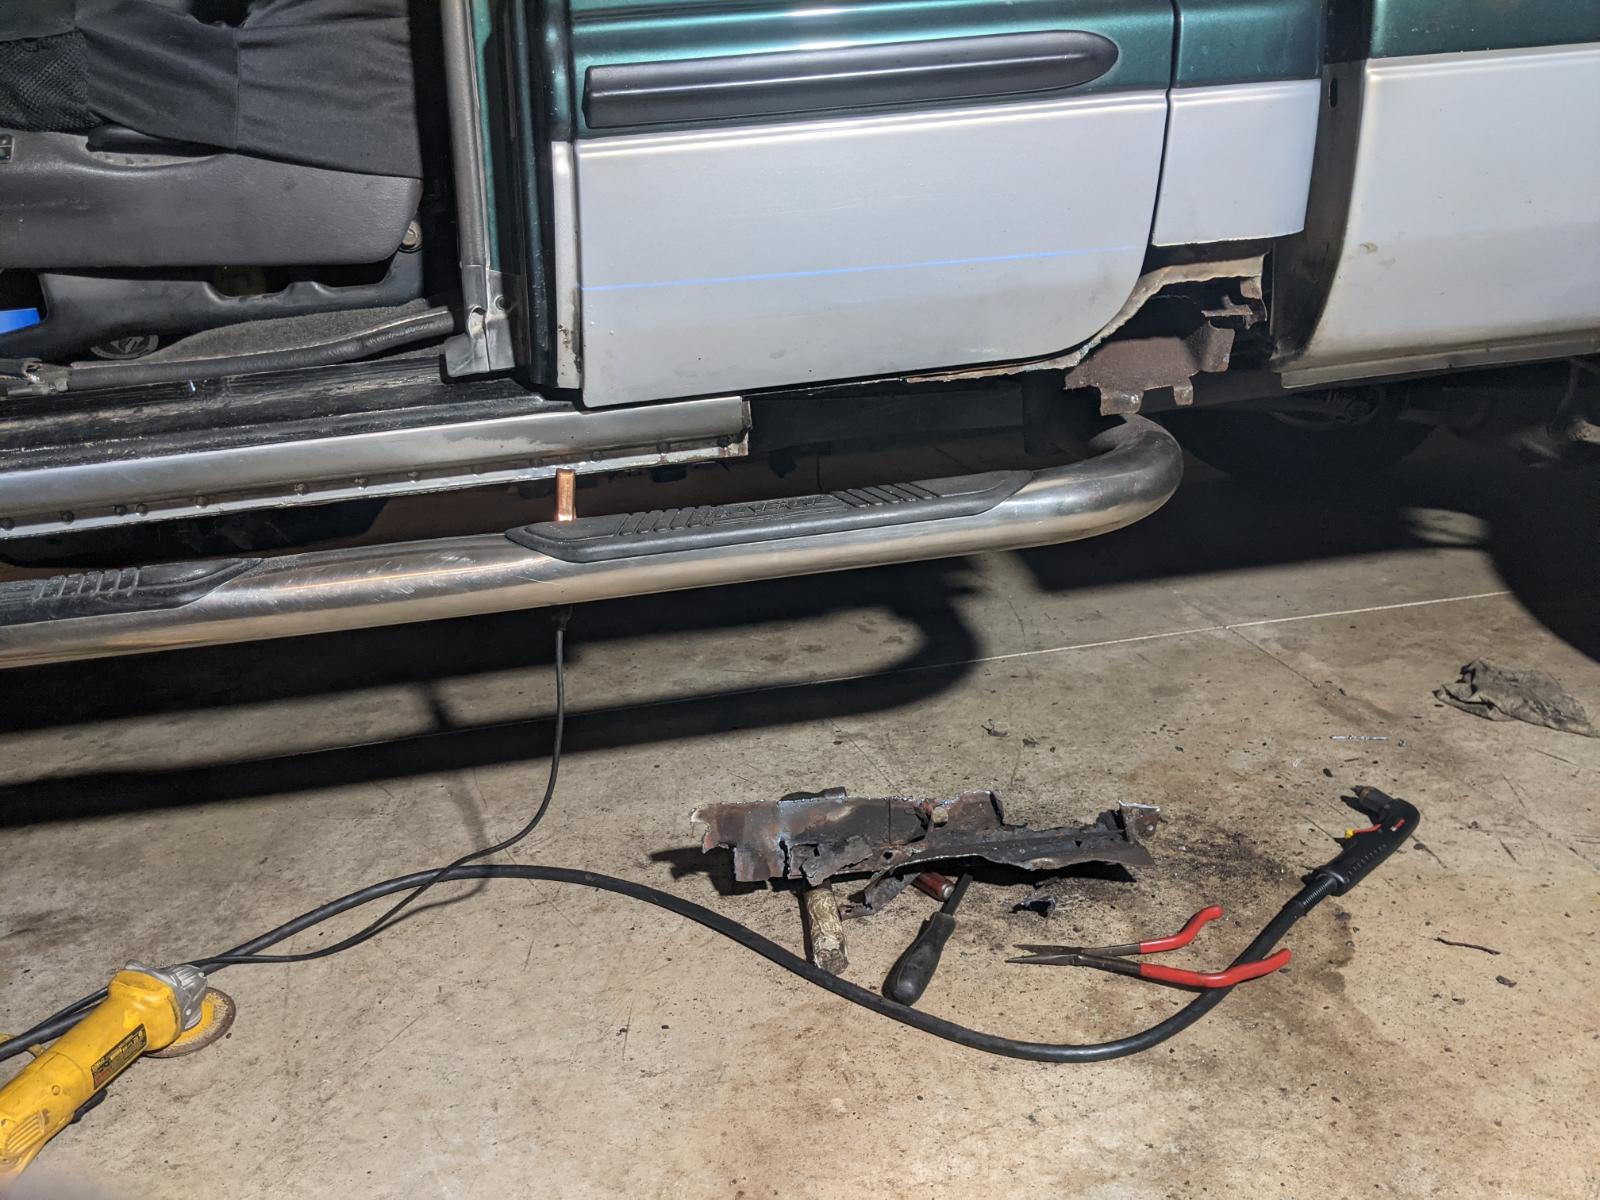
Plasma cutter helped, then some salzaw, grinder with cut off wheel, air tool with cutt off wheel, little bit of chisel and few beers. You can get to some of it from under the bed, eventually I'll take the bed off and finish it with final touches, for now will seal it off and paint. Probably going black on bottom now with some bed liner.
-
So time consuming, especially when you don't do this for a living
-
Well one down one to go, driver side didn't look bad until I cut in to it, glad I did need to make a back plate on this one.

-
Make sense, I still like the control like some older cars I had, all had bottoms for ac and fan. I really don't care for new cars how on most yore forced to like what they give you. Are you talking to me if you are make sure you read my post to the end, wire to cut and splice changed in my conversation with @IBMobile because it was all his thinking on that, I just asked a question on how to. I think you can see which wire to splice in the picture.
-
Yes it would, but not all the time. And in spring and fall I hardly ever turn ac on, no point wearing out ac system for no reason. I run it enough through the year to exercise it. Plus it gives me more selections without turning ac on Next I need a switch to shut blower off, no need for it on the hwy
-
You only drive like 45 mph
-
Make sense, the only problem is it still turns ac on. Now if you're like me and put a toggle switch on to shut off the ac compressor then it becomes a recirc.
-
I'm welding it, already have a welder and don't feel like spending anymore money on this project. Decided not to do rockers at this time as they are still in good shape, it's the inner inner that is looking bad. So if I'll be doing that at some point I'll do outers then too, for now one beer corner will do, driver side is ok yet. I really thought it be way worse then it is on outers, unfortunately to do this right I'll need all 3 panels and that's something I'm not ready for at this time. Fluid film better do the job till I'm ready.
-
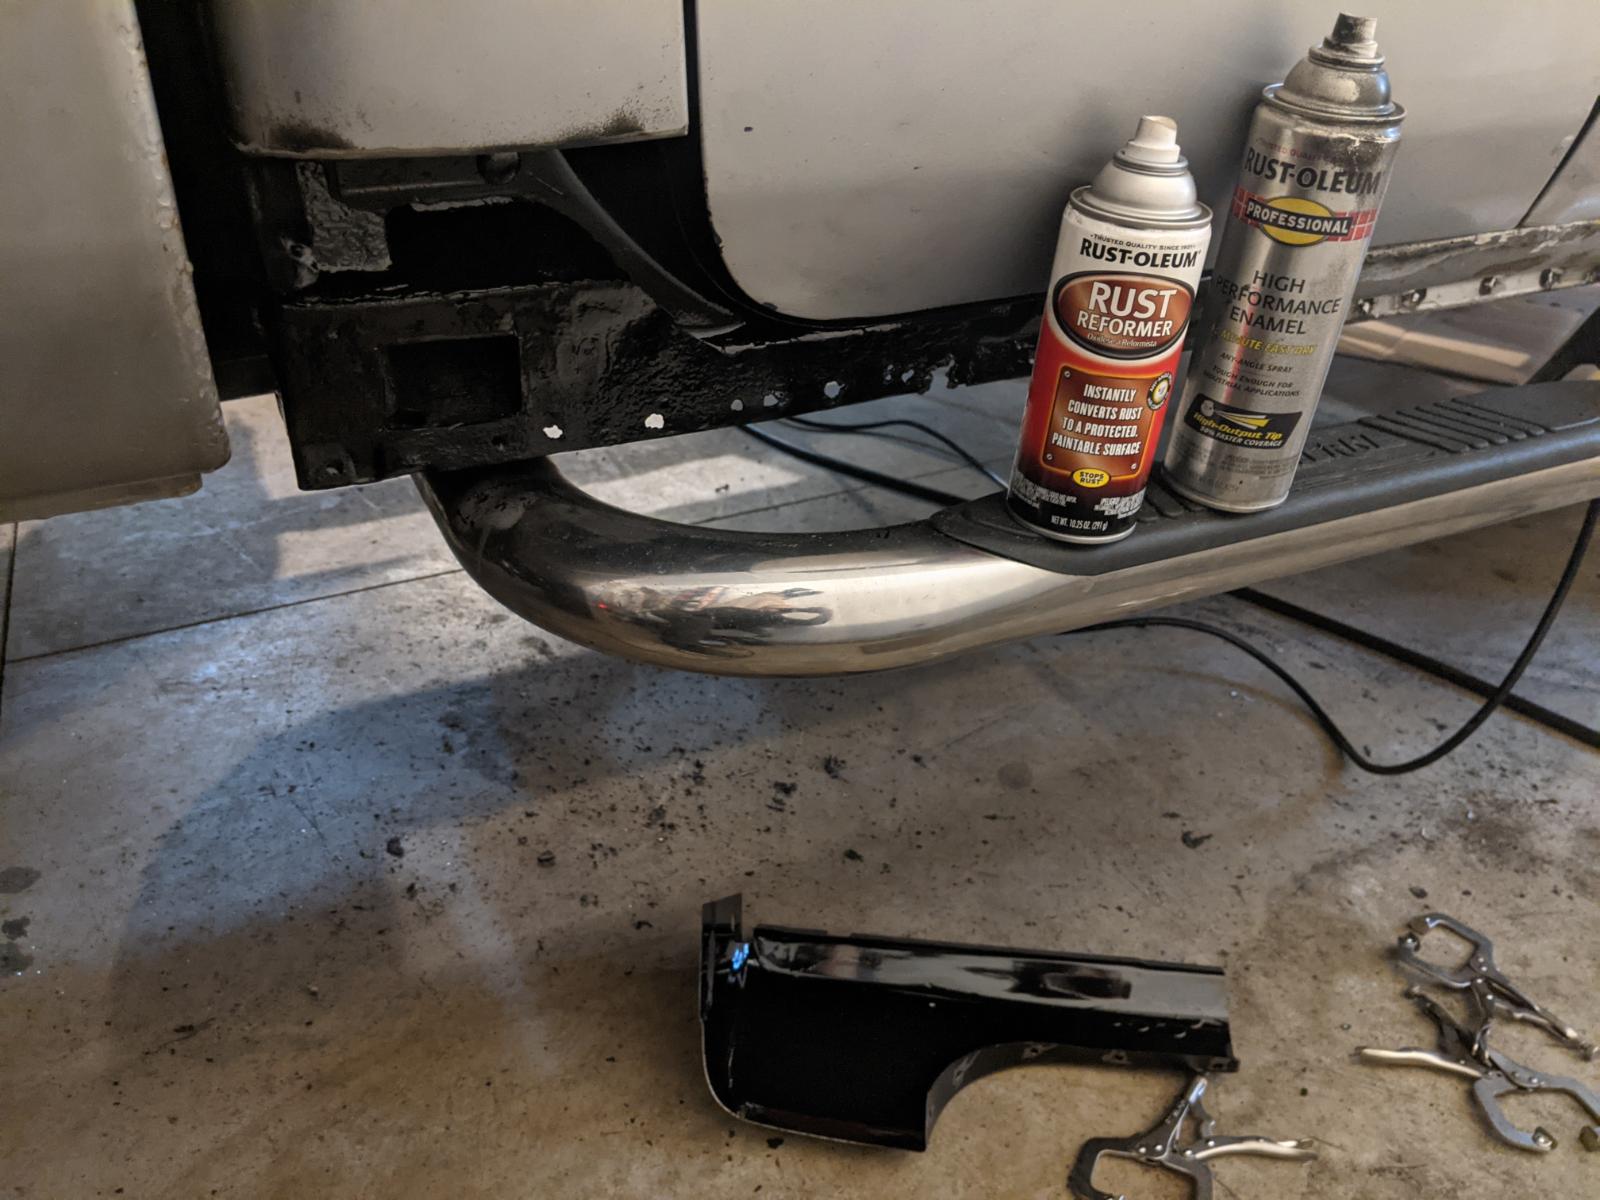
Well crap another dream down the pooper It can't be that easy I suppose. I got some rust-oleum converter I'll use, not sure if I want to put pair over it though, don't want to trap rust under paint. Maybe rust converter and fluid film will do the trick for a while.
-
And update to v2 tuning
-
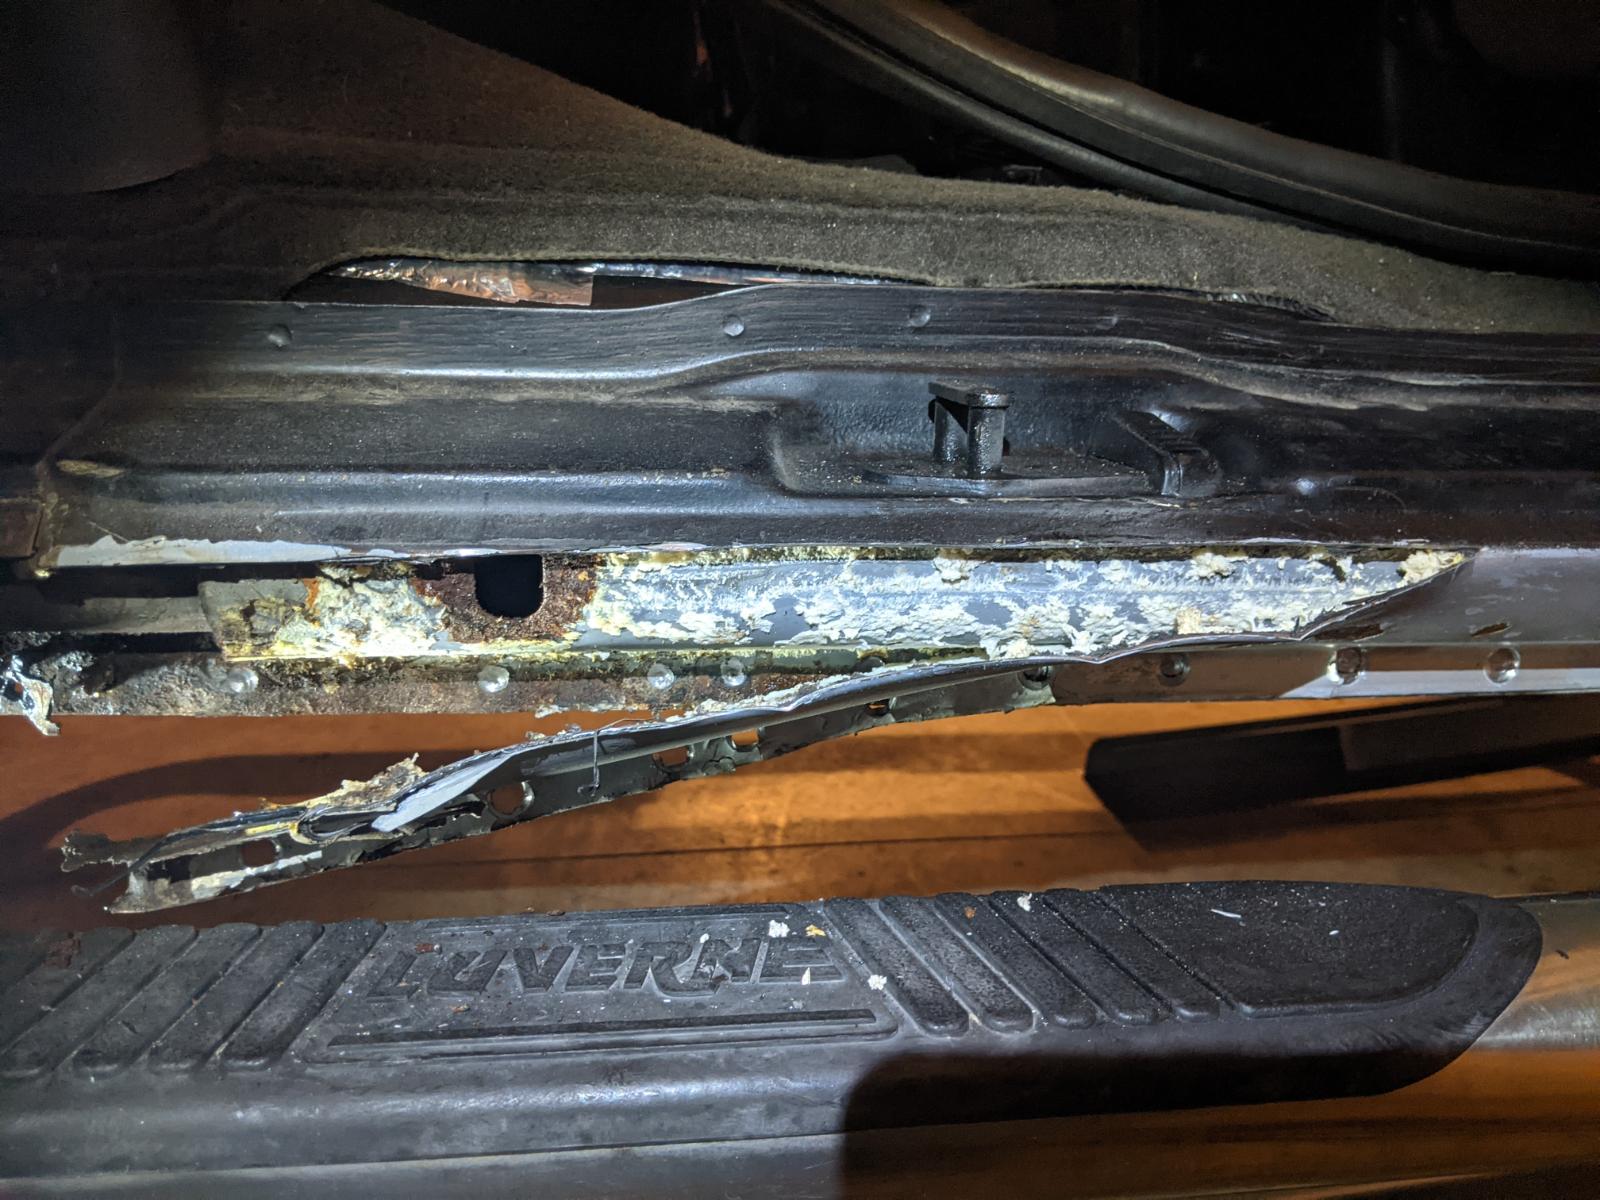
Well the in between outer and inner panels is looking pretty good and it has some kind of rubbery foam between. Now I'm thinking just corners and put it all back together for next 10 years, maybe forever since I got some fluid film coming. Problem I'm seeing now is floorpan that extends down and becomes a back piece is in the worsted shape from inside. So if I replaced outer shell then in not to distant future I'm sure that would be next thing to cut out. Think I'll leave it alone then do the entire thing at some point, or not, beer time.
-
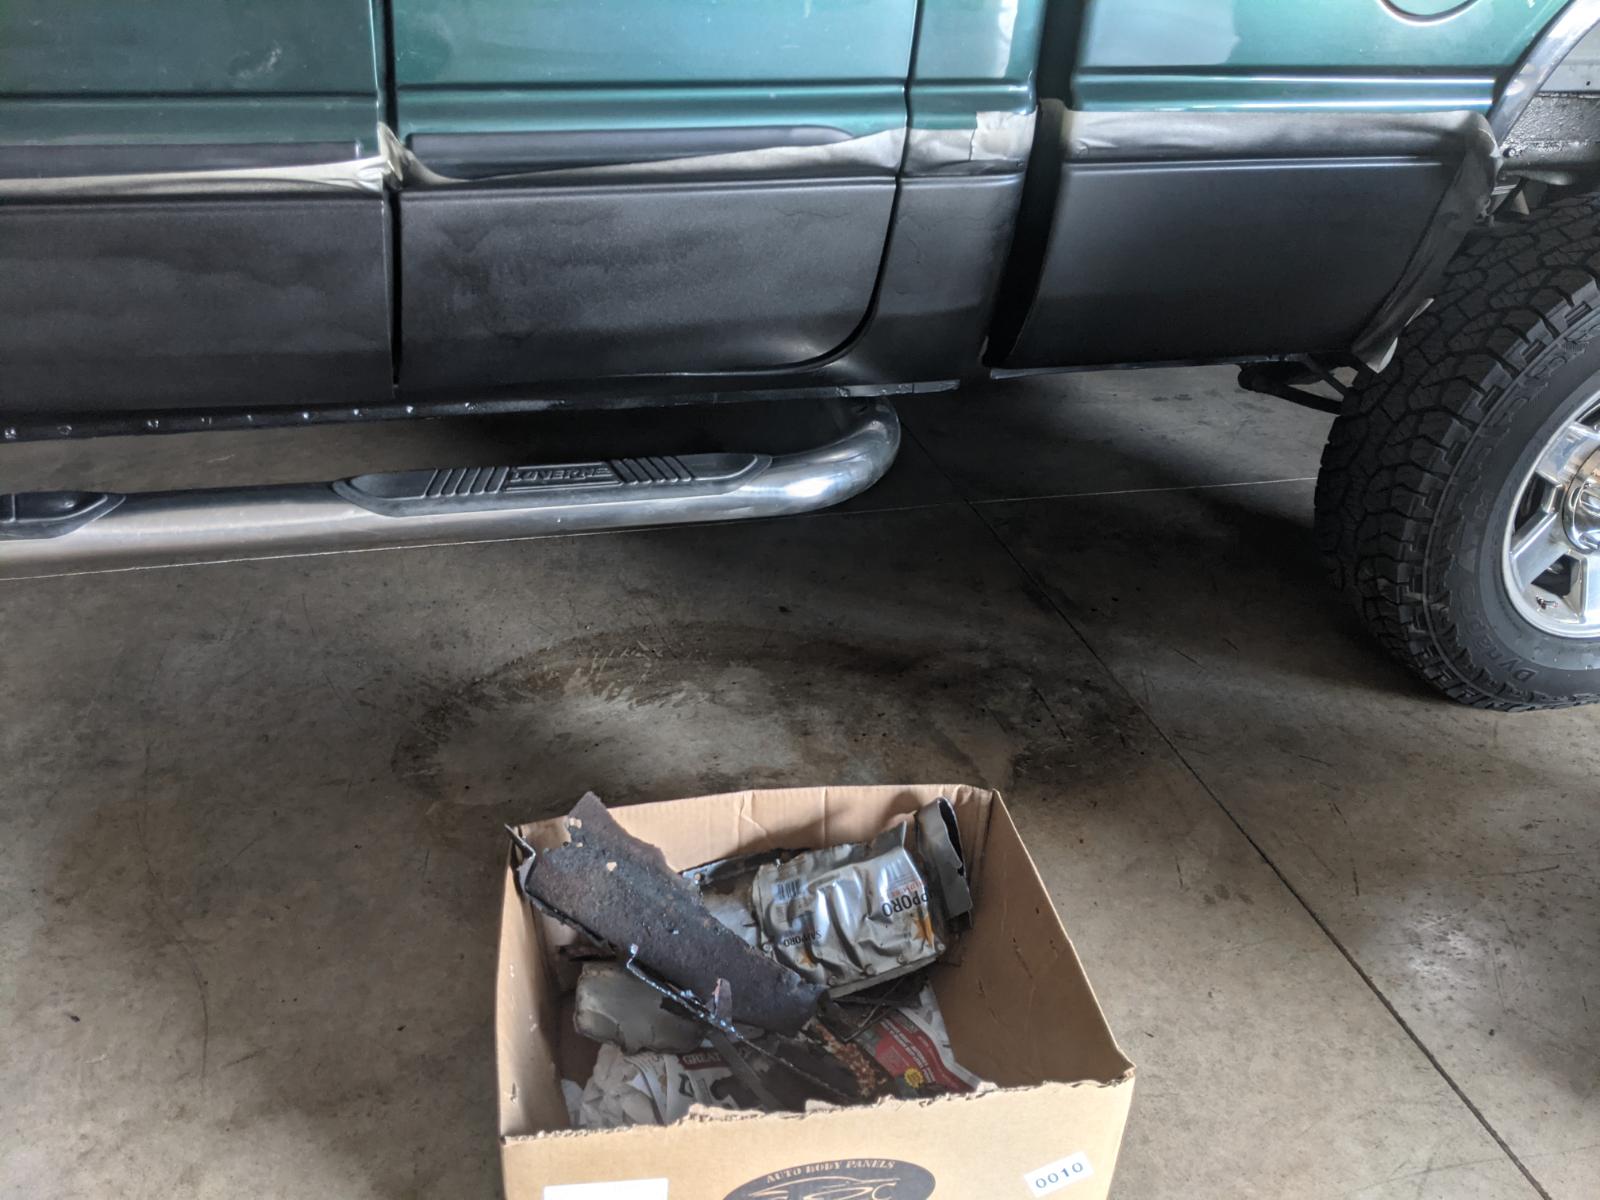
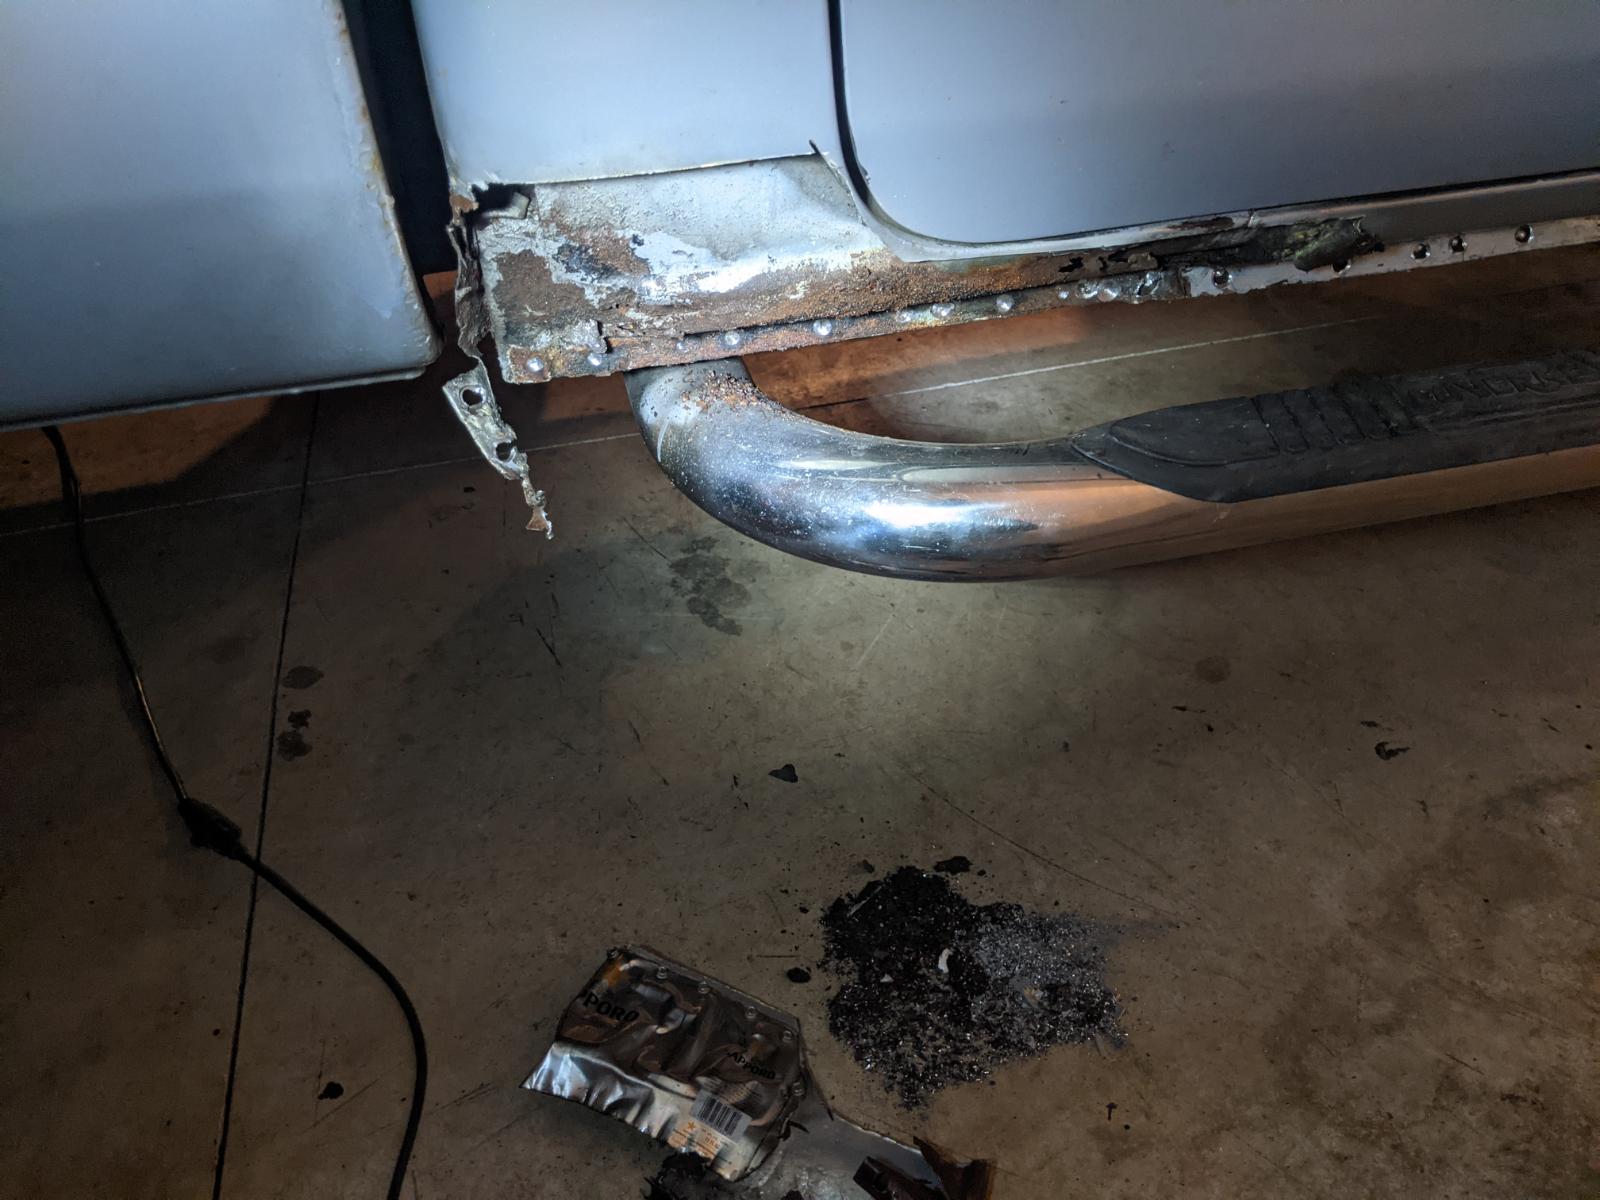
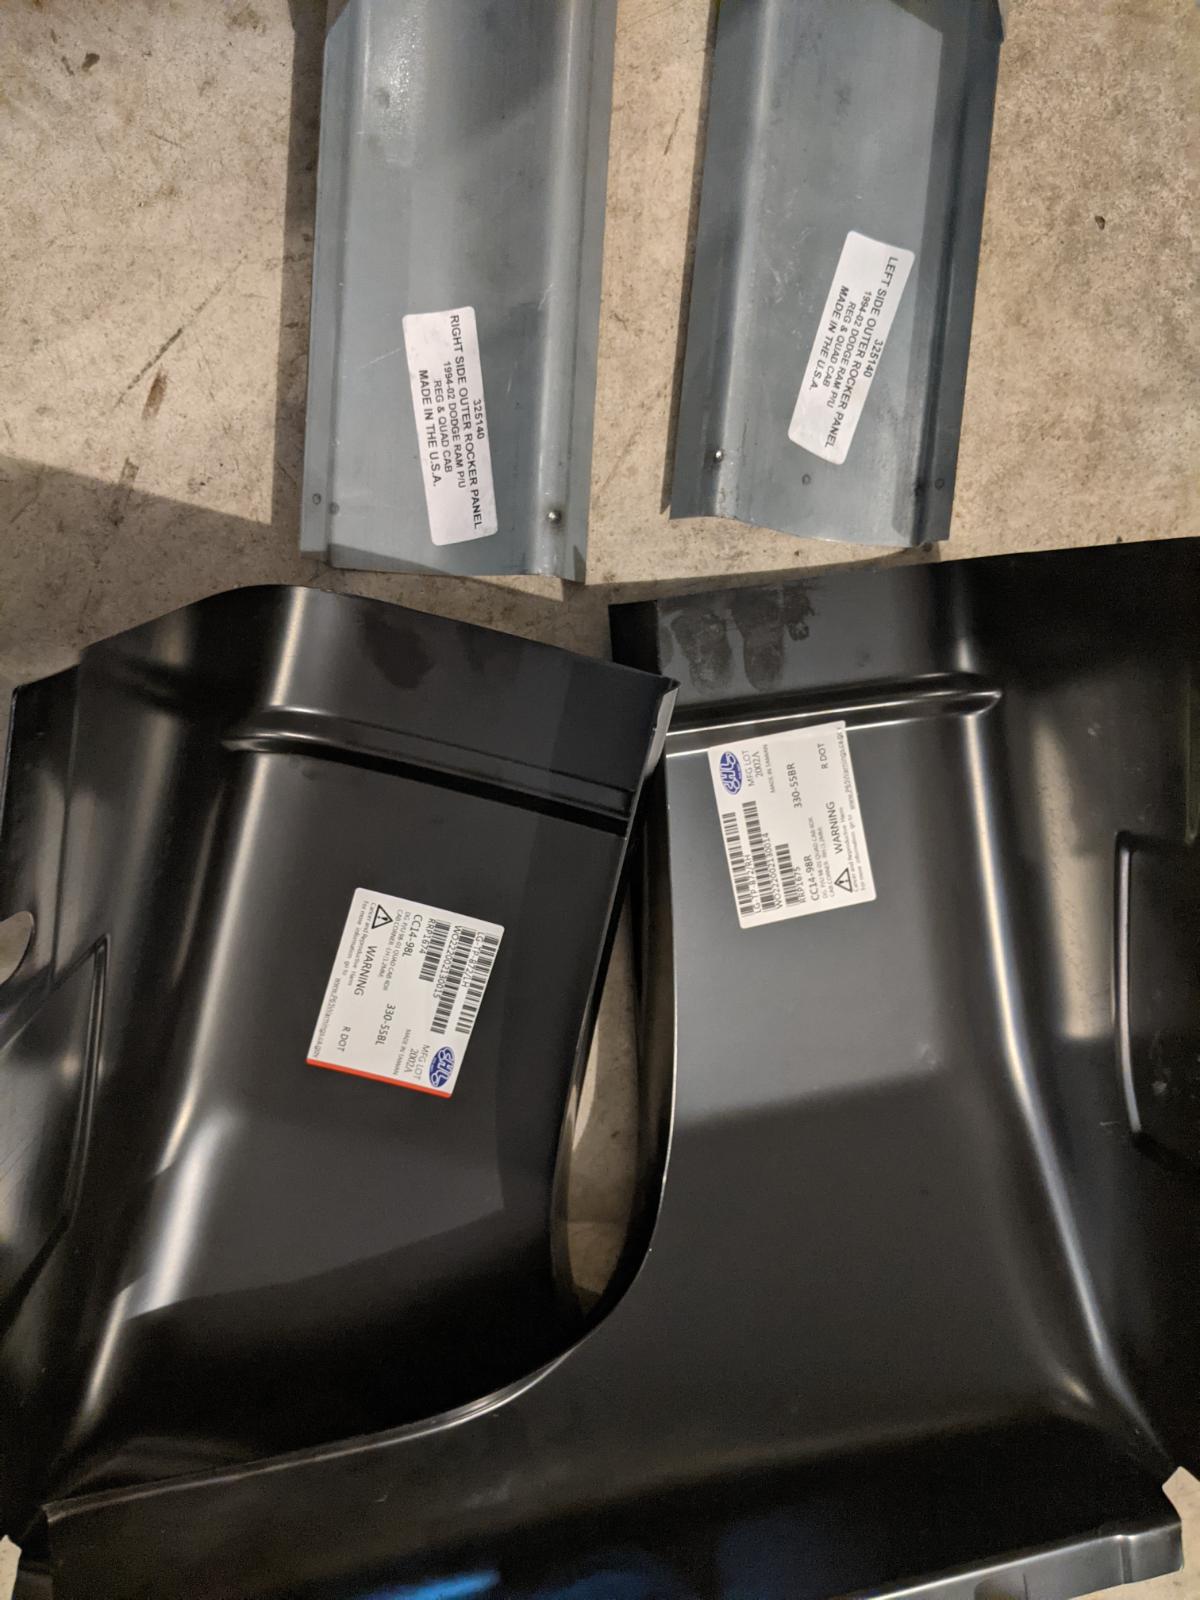
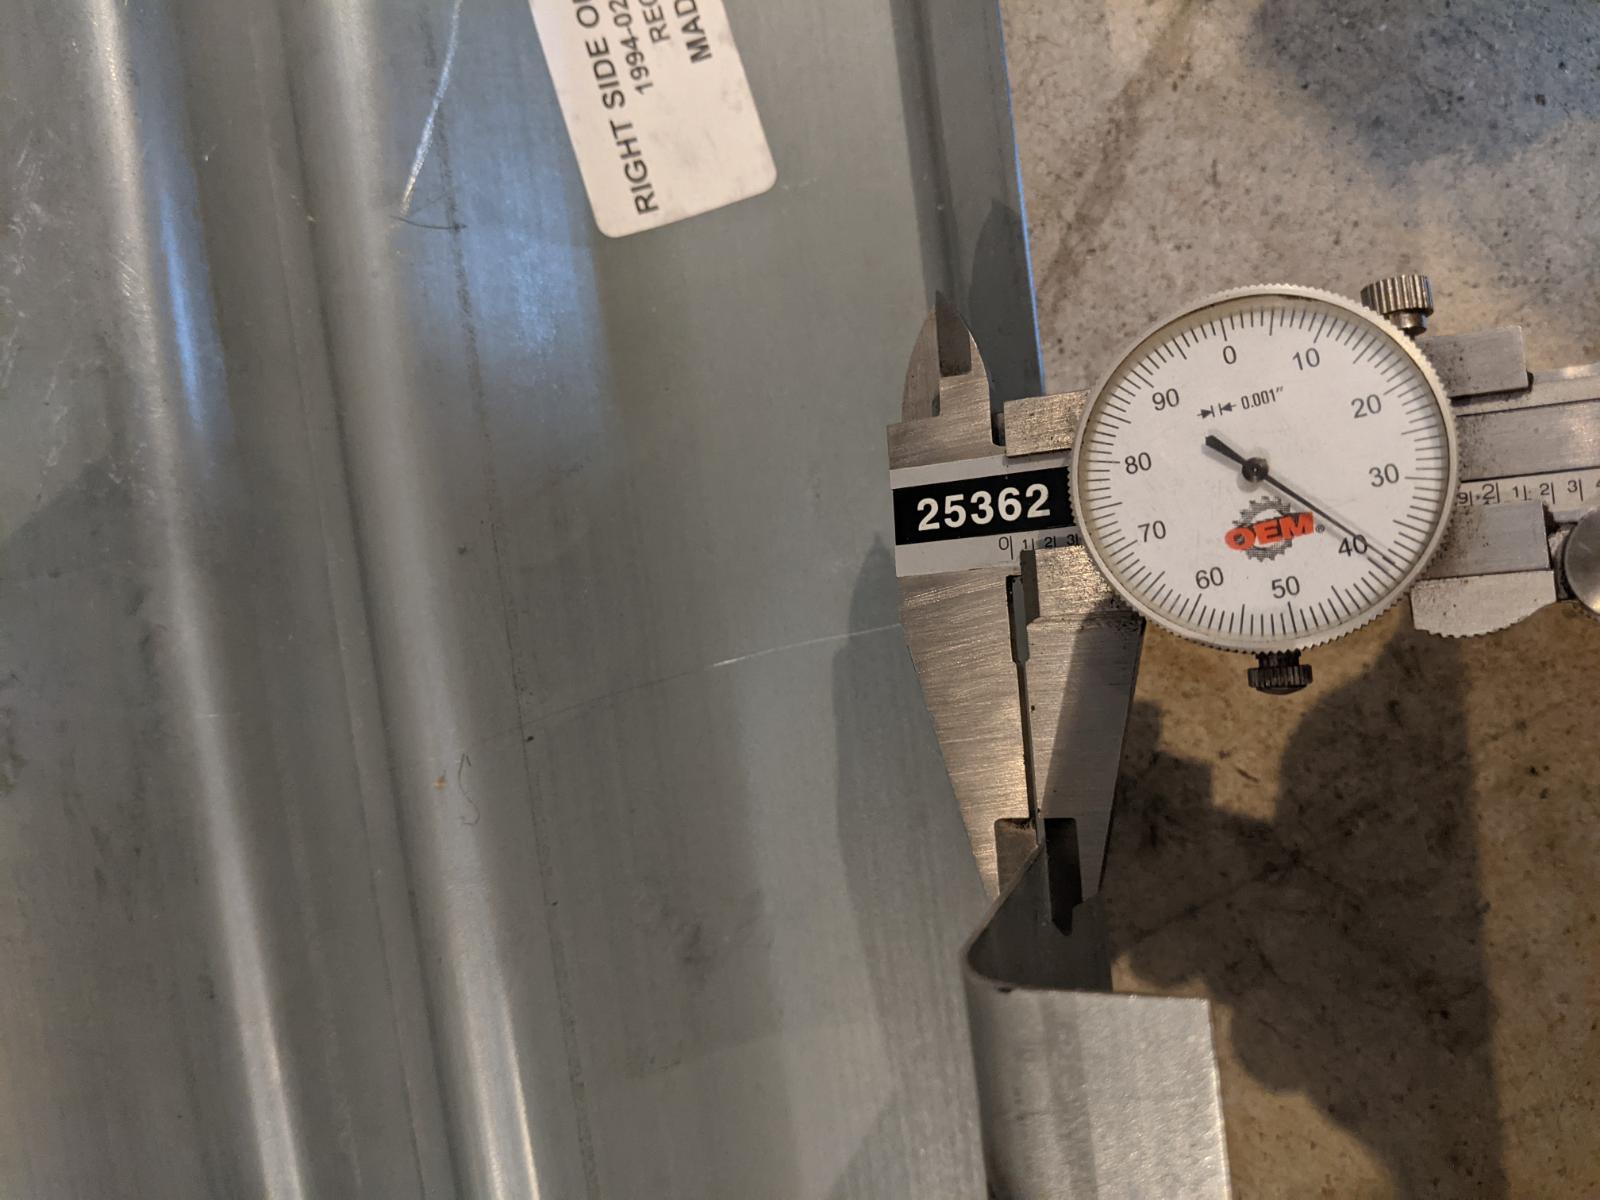
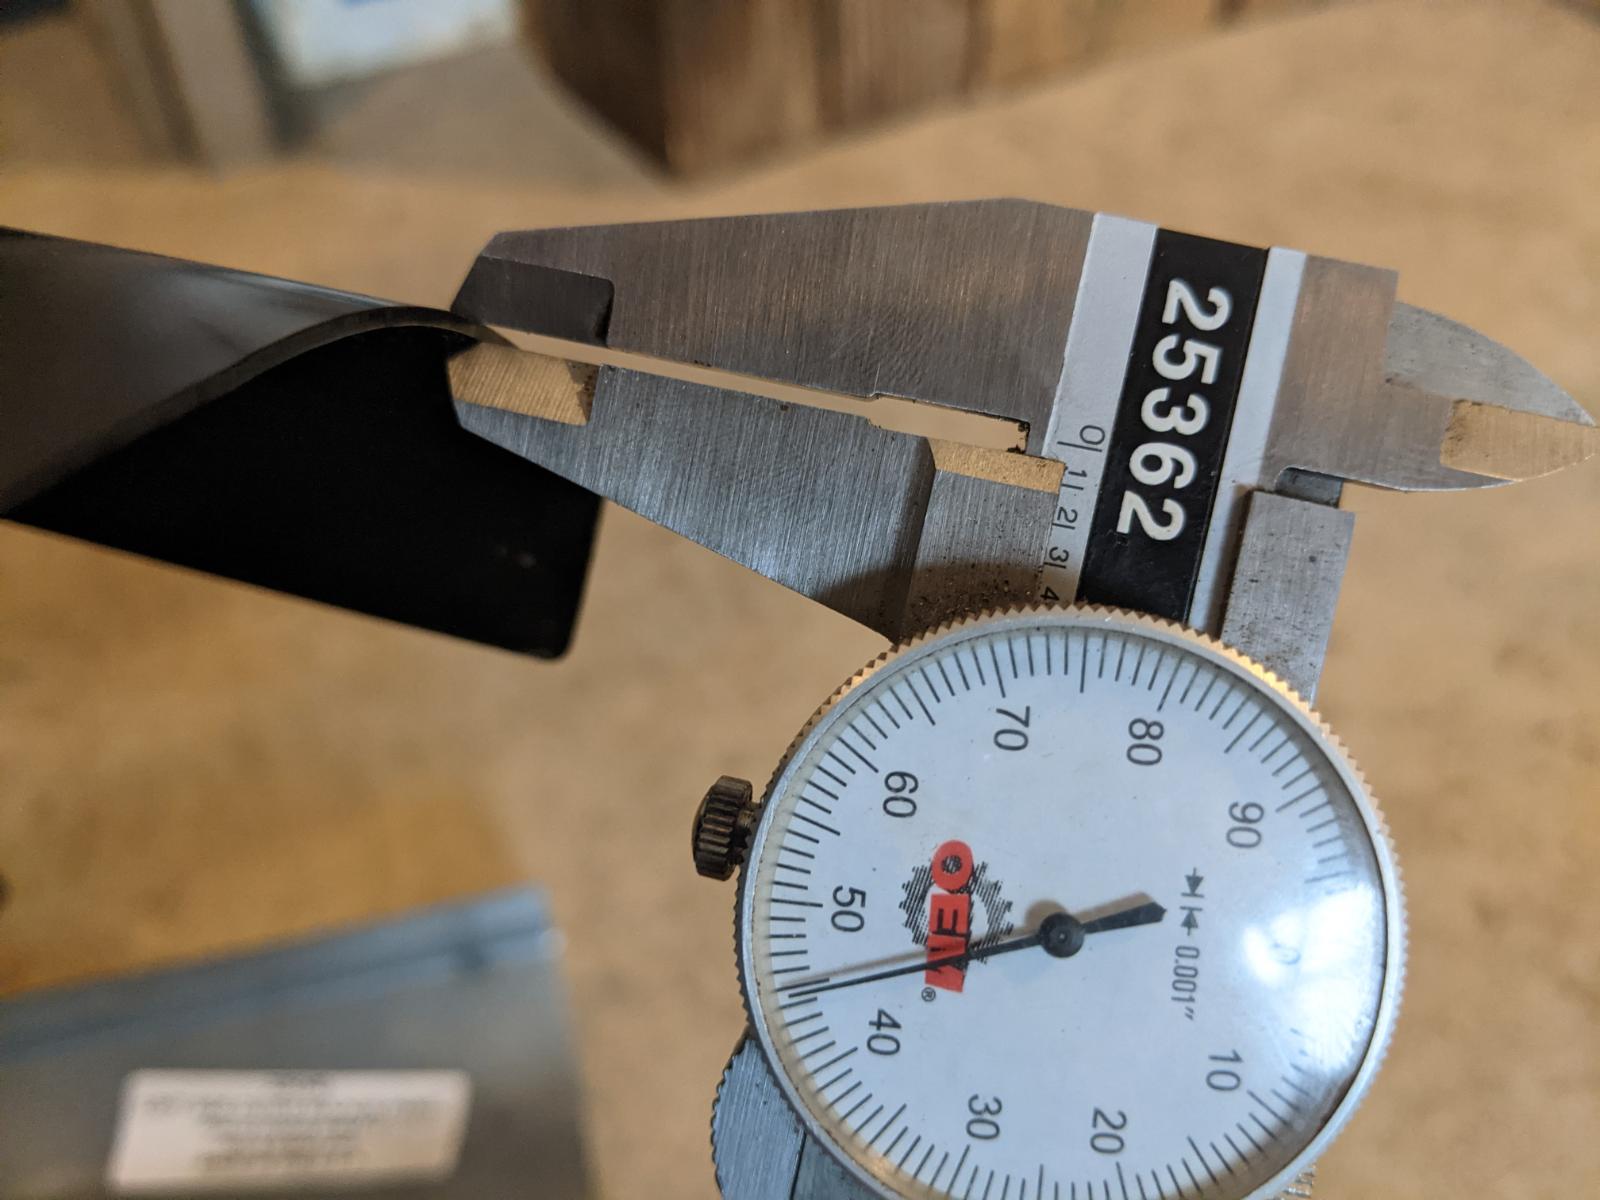
Oh man... There's no end in sight Inner rockers are gone too, at least towards corners, goodbye sapporo... what am I getting in to, now thinking taking box and doors off, or jus say who cares and put the beer cans back. Got my eBay rockers in, looks like corners are made by chl in Taiwan and rockers made by motor city in livonia, MI. Rockers are longer then the cab, need to be trimmed to fit, which I guess is ok depends on who needs what cut out. They don't look to be an exact fit and will need some work, hopefully I can get them to work. Taiwan is looking to be a bit thicker than usa, shouldn't be a huge deal, probably more important quality of steel and fitment more, then protective coating. Maybe they can bend me some out of SS, it looks like that's all they use is a break.
-
Or pee on it after I drink it
-
I'll let you all know in 10 years , if it works
-
Thanks, would never guess to search under wand lol, looks like a pack of 6 in that link, but reviews say only one guess it's not horrible for 6 but yeah a bit steep for some hose and tiny brass piece that some say comes off. I suppose it can't be too heavy or it'll be hard to get through cavities. I'll see if I can make something quick and test it with paint. I also got few cans of fluid film coming to try out, seems to be great for how easy it is to use.
-
Do you know where to get one by a chance, I'm thinking about making one but if I can buy one cheap I'll just do that.
-
Lol guess you make a good point. I have a vw jetta Diesel I got as a run around car. It does have an underbody coating for corrosion and even came with a 10year warranty for rust, if any shoes up any dealer fixes it free. Still I say nothing is designed to last as long as it used to be. I'll let you all know when my first rust spot forms on vw, it's a 2013 with a 2.0l and 6 speed. Wouldn't of gotten it otherwise. Seen over 50mpg in summer more than once if I drove nice, mid 40s in winter.
-
Proceed at you own risk, this is not something that is approved by anyone as a safe to use device. Parts that are used to make this are only that, parts and we're not designed for this kind of project. For those that don't want to spend thousands on expensive units and don't quite trust china special sold at many places, you can make your own out of bottle jack. I've also tossed the idea of buying hydraulic cylinder type pump made for body work. It already has a hose that would be easy to adapt to fittings or just adapt right at the pump as it's threaded. But since I had this 4ton jack for last 10 years not doing much I decided to use it. Keep in mind not all jacks are going to be put together same way or have same size internals. One thing you need to make sure is that it can be disassembled, most new seem to be welded now, probably cheaper to make that way. There are more than one way of making this work, some use a tap on the main cylinder where all the pressure is built and not even using the part that travels (piston?), then use a bushing to reduce to 1/4" pipe and go from there. To me it seemed that you would need to machine the top nut that holds jack together so your bushing can get through, you would also need a bigger tap, in my case it would of been a 1" they don't give good ones away. I had a 1/2x14 tap already and the inside of the piston that travels in my case was hollow and pretty close to tap size, a little on the lose side but it worked, later I decided to weld it to be sure. I suppose you can drill it so the fitting just fits inside and weld it in to begin with, so no tap required. Some actually thread the nut that holds it together on inside where oring is and reduce it from there to 1/4" npt so no inside piston needed at all. Like I said there are plenty ways of doing this. You may come up with one that works best for you. As you can see in picture above I cut off few inches of the piston, these parts aren't used just showing where a tap would fit. Here it is already tapped with 1/2-14 npt. I also drilled 2 holes on the sides of main cylinder and went in to piston a bit then filled it with weld make sure to have a good welder that penetrates and makes a good seal. The actual piston is an inch below the holes, it still has the rubber sealing ring on it. One thing I didn't mention, you have to drill a hole all the way through the piston so fluid can make its way in to top part where the threaded part is. Here is what it looks like after it's welded with the 1/2" x 1/4" npt male on both sides fitting. Then I ground off excess weld and tapered it some so the big nut can go right over. Now you got 1/4" mnpt sticking out that you can adapt a 1/4" npt T. One side of a T is a male that I put a 1/4" npt female to metric male 14x1.25 the other is for the guage. I used a Carbo guage form eBay, says carbousa but it's made in china. I believe it's a decent guage for the money, I may get a better one later that's also bigger for accuracy. The metric thread where you see oring needs to be slightly tapered inside so the injection line seals, oring is not used. I used a drill bit to put some angle inside, worked for me. I plugged the original oil fill hole and tapped another one down low with 1/8"x27 tap, then used some local hardware store fittings to go to a paint cup that I got from harbor freight, comes in a pack of 5 really cheap for what they are. They are threaded with female 3/8" npt, so you need a reducer to go to 1/4" then to 1/8" npt. I suppose you can tap a 1/4" npt in the housing and just use 1/4" all the way. I didn't use a filter like I planned to, maybe I will in future, for now I make sure fuel I put in is clean. I got a fuel line from a local CAT dealer, guy I know works at parts counter and he was able to get me a free line that is 14x1.25 metric. It was a used line that apparently they don't reuse on jobs just toss them and always put new ones on, at least that's what I was told, ether way it worked out for me. As for the adaptor for 24 valve vp44 injectors, I went with accuratediesel made in usa. I'm sure you can find others. https://www.accuratediesel.com/5-9l-dodge-cummins-vp44-24v-injector-pop-test-adapter-fixture.html Guess that's about it, like I've mentioned this can be done more than one way, maybe simplified too. One thing to remember is to clean everything very well before final assembly, this even goes for if you decide to buy one on line, I would highly recommend to disassemble it and go through it. It won't take much with that kind of pressure to ruin something. I also used teflon tape for sealant, make sure to stay back with it on threads so it doesn't get inside. Now that we're talking high pressure, it is very dangerous if you get injected with diesel fuel you can get seriously hurt. So make sure you are comfortable in your building skills and wear proper ppe when working around high pressures, a good respirator is not a bad idea. This project is not for everyone. Good luck if you chose to go this route. View full Cummins article
-
Proceed at you own risk, this is not something that is approved by anyone as a safe to use device. Parts that are used to make this are only that, parts and we're not designed for this kind of project. For those that don't want to spend thousands on expensive units and don't quite trust china special sold at many places, you can make your own out of bottle jack. I've also tossed the idea of buying hydraulic cylinder type pump made for body work. It already has a hose that would be easy to adapt to fittings or just adapt right at the pump as it's threaded. But since I had this 4ton jack for last 10 years not doing much I decided to use it. Keep in mind not all jacks are going to be put together same way or have same size internals. One thing you need to make sure is that it can be disassembled, most new seem to be welded now, probably cheaper to make that way. There are more than one way of making this work, some use a tap on the main cylinder where all the pressure is built and not even using the part that travels (piston?), then use a bushing to reduce to 1/4" pipe and go from there. To me it seemed that you would need to machine the top nut that holds jack together so your bushing can get through, you would also need a bigger tap, in my case it would of been a 1" they don't give good ones away. I had a 1/2x14 tap already and the inside of the piston that travels in my case was hollow and pretty close to tap size, a little on the lose side but it worked, later I decided to weld it to be sure. I suppose you can drill it so the fitting just fits inside and weld it in to begin with, so no tap required. Some actually thread the nut that holds it together on inside where oring is and reduce it from there to 1/4" npt so no inside piston needed at all. Like I said there are plenty ways of doing this. You may come up with one that works best for you. As you can see in picture above I cut off few inches of the piston, these parts aren't used just showing where a tap would fit. Here it is already tapped with 1/2-14 npt. I also drilled 2 holes on the sides of main cylinder and went in to piston a bit then filled it with weld make sure to have a good welder that penetrates and makes a good seal. The actual piston is an inch below the holes, it still has the rubber sealing ring on it. One thing I didn't mention, you have to drill a hole all the way through the piston so fluid can make its way in to top part where the threaded part is. Here is what it looks like after it's welded with the 1/2" x 1/4" npt male on both sides fitting. Then I ground off excess weld and tapered it some so the big nut can go right over. Now you got 1/4" mnpt sticking out that you can adapt a 1/4" npt T. One side of a T is a male that I put a 1/4" npt female to metric male 14x1.25 the other is for the guage. I used a Carbo guage form eBay, says carbousa but it's made in china. I believe it's a decent guage for the money, I may get a better one later that's also bigger for accuracy. The metric thread where you see oring needs to be slightly tapered inside so the injection line seals, oring is not used. I used a drill bit to put some angle inside, worked for me. I plugged the original oil fill hole and tapped another one down low with 1/8"x27 tap, then used some local hardware store fittings to go to a paint cup that I got from harbor freight, comes in a pack of 5 really cheap for what they are. They are threaded with female 3/8" npt, so you need a reducer to go to 1/4" then to 1/8" npt. I suppose you can tap a 1/4" npt in the housing and just use 1/4" all the way. I didn't use a filter like I planned to, maybe I will in future, for now I make sure fuel I put in is clean. I got a fuel line from a local CAT dealer, guy I know works at parts counter and he was able to get me a free line that is 14x1.25 metric. It was a used line that apparently they don't reuse on jobs just toss them and always put new ones on, at least that's what I was told, ether way it worked out for me. As for the adaptor for 24 valve vp44 injectors, I went with accuratediesel made in usa. I'm sure you can find others. https://www.accuratediesel.com/5-9l-dodge-cummins-vp44-24v-injector-pop-test-adapter-fixture.html Guess that's about it, like I've mentioned this can be done more than one way, maybe simplified too. One thing to remember is to clean everything very well before final assembly, this even goes for if you decide to buy one on line, I would highly recommend to disassemble it and go through it. It won't take much with that kind of pressure to ruin something. I also used teflon tape for sealant, make sure to stay back with it on threads so it doesn't get inside. Now that we're talking high pressure, it is very dangerous if you get injected with diesel fuel you can get seriously hurt. So make sure you are comfortable in your building skills and wear proper ppe when working around high pressures, a good respirator is not a bad idea. This project is not for everyone. Good luck if you chose to go this route.
- 1 review
-
-

- 2
-
-
Unfortunately for us it's not in big corporation agenda anylonger, most higher ups I've spoken on this subject, I've been told that everything is aimed at first owner or 10 years max, not like back in good ol days where things were meant to last. Doesn't even matter on what country we're talking about really. Seems to be world wide disease these days. Only few select companies are making good products still but of course not many can afford that.