TFaoro
Unpaid Member
-
Joined
-
Last visited
Everything posted by TFaoro
-
Looking for a 1 Piece? @CSM might know
-
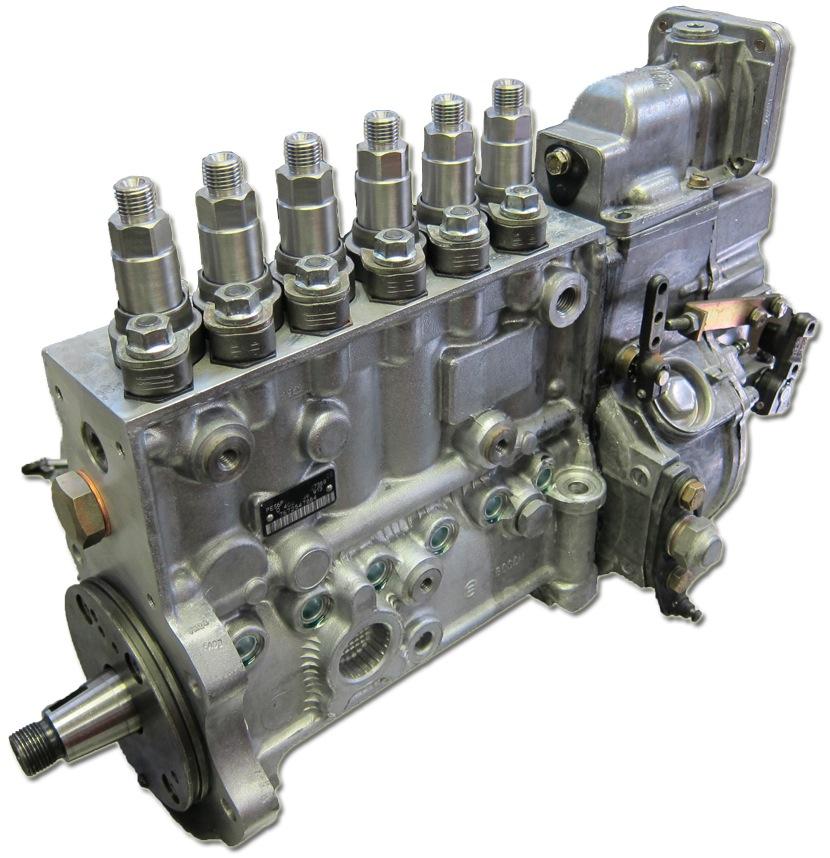
Alright I've got a parts list mocked up. Pump - Local Guy Linkages - Local Guy Mounting bracket and hardware - Local Guy Oil line and oil line T - Local Guy Case with studs and nuts - Local Guy Adjustable timing gear - Crazy Carl Billet front cover - Carl P24 Tunnel Ram Intake - Carl Cam Sensor Adapter - Carl Front case seal, front cover seal, and front main seal - Carl Oil Pan Gasket - Cummins Apps kit - Carl Injection lines - Where should I get these??? I'm thinking stock size or 84's I'm going to crank the pressure up on my fass and that should be fine for now. Still working on the supply line and return line.
-
He has to have the 12v style tappet cover vent. He's trying to remove it so he knows when the engine is at TDC and adjust the valves.
-
Cool. I messaged you on FB. May have found a pump that'll work well.
-
Thank you, I almost forgot about that. Will the pump fit with a tunnel ram and a grid heater together?
-
Ppumps are 100% mechanical. The only electrical thing on them is the fuel shutoff solenoid. They do however fuel based on a boost reference. It's the same concept being used in the quad V2, just much simpler and mechanical. I have a HPFP from fass, so your pump probably wouldn't work. I'm unsure of the minimum pressure you want to run them at, but I'm sure it could be researched.
-
This shouldn't change anything with the quad. I found that last bug, but I think @Me78569 is almost done. I'm still available if he needs to bounce ideas off me and he can now turn high rpms to test that. I should be able to up the pressure on my pump to run it for now. When I want to start pushing big power I'll have to get a bigger pump and supply more pressure. This is going to be expensive, but I'm hoping @jlbayes will help walk me through it. If I can find a pump I'm hoping this swap will be done in 3 weeks. I think somewhere around 25K. Fed with a fass its whole life.
-
If yours goes bad (hopefully not) then you'll need it to send in as a core. I'd like to have one off a pump that is no longer in service. I do appreciate the offer though!
-
Well I lost the VP yesterday afternoon. I tried cranking it with lines cracked, checked to see if the keyway was in, and hot wired it. Trevor and I got it pulled tonight and it destroyed itself on the inside. I'll attach a video showing how it won't move. If you've never turned one while it's out they turn smooth as butter! Not this one though. Here's the next chapter in this build: Video of dead VP @Mopar1973Man do you have a top cover for a VP you'd be willing to sell me? I'd like to sell the stealth cover, but the people who stole my truck also stole the stock cover for the vp.
-
No, Trevor helped drag it home. Nick and I have some guesses, but we won't know until I get a chance to tear things apart.
-
You gotta put bolts in it to keep it from leaking! I wish my DP gauge worked with the filter like you have. I had one, but it would always fill with moisture and clog the lines and filter. I did have a hickup tonight. Truck quit on the highway and refuses to restart. I'll do the hotwire test and pull some stuff apart tomorrow. Hopefully I'll have an update in the am.
-
Keep saying it's done and I'll keep finding things
-
I had a chrome one, but there was just too much chrome on that side of the engine. I do have the thermostat housing chromed that I might put on. We'll see! I drilled and tapped the manifold this weekend, so it's in. I did manage to leave that up there and drive it though Somehow it didn't melt the rubber or anything so I got lucky. I did some more testing on my drive home for the coolant bypass. Then I got home and realized I never tightened the radiator cap. It looks like the pressure is about 6-7psi higher than it was before. I've seen a max of 62psi at the back of the block. I'm waiting on @trreed to get me pressures for the back of the head! Then I can select a pressure relief valve and have it set.
-
So this idle thing you guys speak of. Seems like everyone's trucks idle a bit different. When I had my 300's in, it would idle at 800. It didn't matter if it was cold, hot, moving at 50mph, stationary, etc. Now that I stuffed these stockers in, it idles at 815 when cold and not moving, 805 when warm and not moving, and 870ish when moving in neutral. What is up with this???? I also need to fill up, but I've been running 2* on cruise timing and I think the mileage on this tank will be at least 20 with old crappy injectors. (No weird missing for me either)
-
All done
-
Was it new? The one they have pictured is clearly not new.
-
I wonder if they're actually for sale. Cummins quit making them a while ago. It was in the way. Had to put it in the trash!
-
Polishing is very difficult to do by hand with all of the raised parts. I'm considering taking my stocker, shaving everything smooth, and polishing it into a mirror. We'll see. That looks about right
-
This was horrible because of the raised parts. I spent probably 15 hours on it -__- On straight aluminum pieces that aren't painted it's much faster if you have the right tools. An air grinder with different grit pads can make the process pretty quick. You're special and got to see it early!
-
I think I've seen it on FB BTW @jlbayes I think they can be polished up pretty nicely! I haven't even had a chance to use the aluminum polish on the raised parts yet.
-
I THINK they are a M10x1.5. if not, they are probably a coarse thread M8. If you have an ace hardware or home depot anywhere near, take one of the nuts and head to the metric aisle. From there you should be able to figure out what it is.
-
That sounds HORRIBLE. Injector would be my guess. Maybe a valve
-
I spent 6 hours hand sanding mine tonight. Shines like a diamond though! Pictures look like crap, but once it's painted black around it it'll look good! All the letters and lines look like the U, M, 4, and V. And to answer any coming questions - Yes that's the dining room table, yes that's starting fluid, and yes that's the butter knife I used to spread the airplane stripper on You also thought you could take my little VW.... but we both know how that turned out If you're looking to sell em Selling those wasn't my brightest move
-
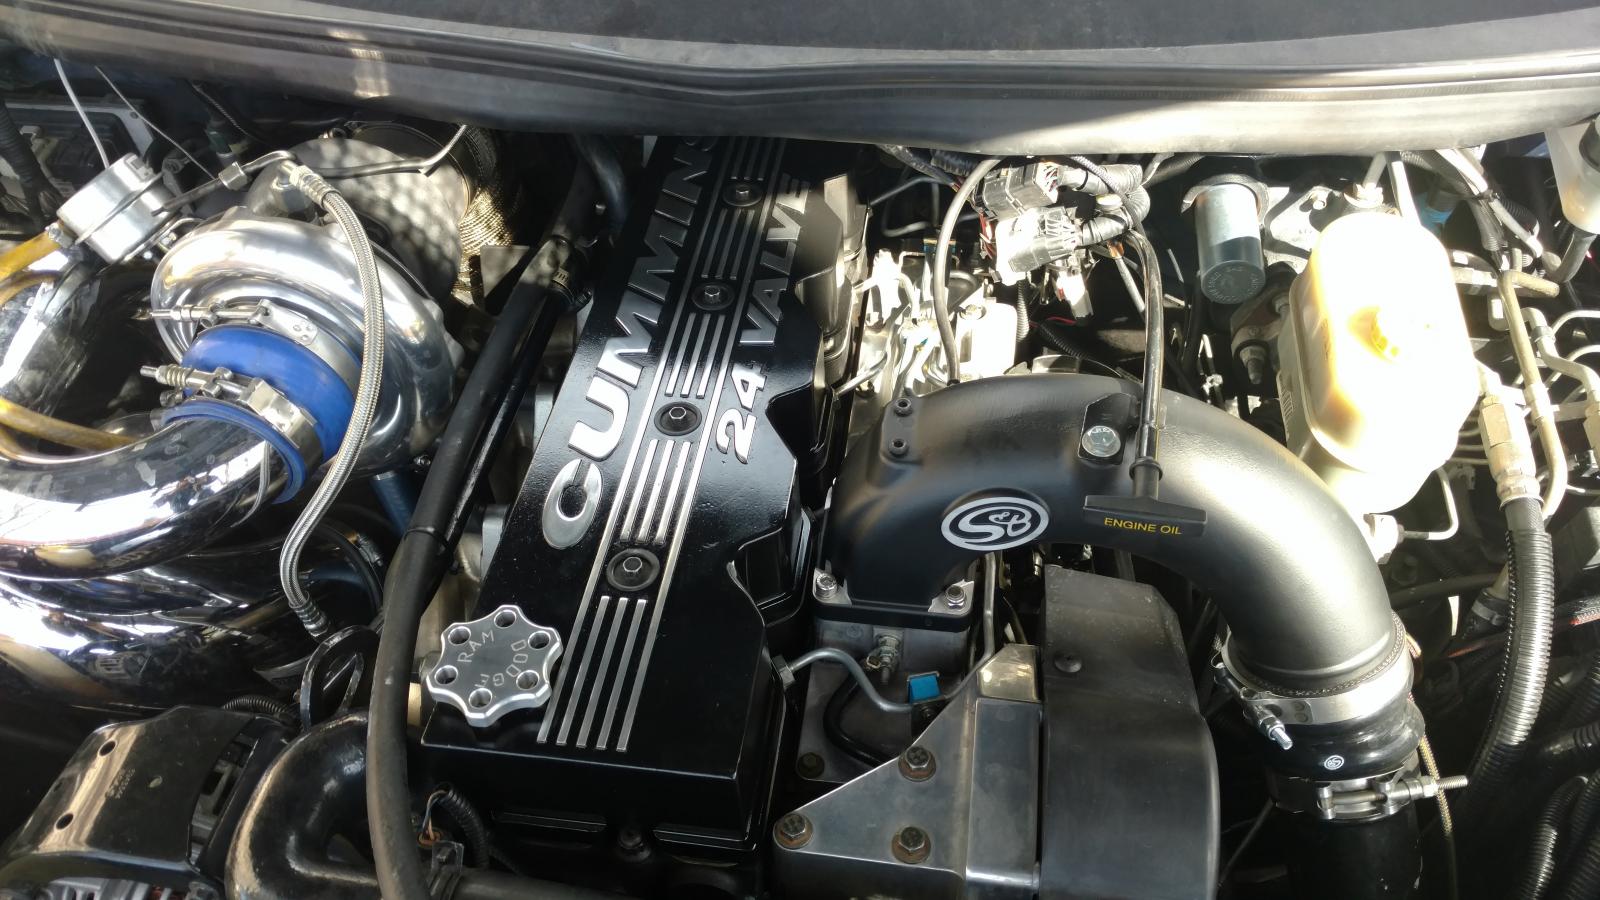
My plan right now is to polish the raised sections and paint the rest. (Self etching primer then gloss black) I am very lucky. Shout out to Nick for helping all of us with that. I managed to get the truck back together today and even stuffed in @trreed's old injectors. Whew hard to remember how slow they are stock! With the quad CRANKED I can still manage 50psi out of it though EGTs won't go above 1200 with a 2100us fuel stretch. Picture time. Started out by wrapping the hot pipe between the turbos with titanium wrap. I'm trying to keep it from melting my wiring looming more. I then mounted the manifold. Yes I know some of the stock bolts are in there. Thanks BD for sending 2 bolts and expecting us to use the stockers. I found 4 stainless bolts at Ace Hardware. Not sure where I'm going to find the rest but I'm working on it. The back half are stainless, so it'll be easy to replace the front half. I also bolted the primary mount to the turbo and hung it in the bay. The new mount fits perfect! The BD manifold came with two tapped ports which are on the bottom (because I flipped the manifold over) so I'll have to drill another hole in it to make the quad egt probe work. My autometer is plenty long, but quad's is pretty short (hint hint) Slid the secondary in and hooked up its pretty blue drain line. Finished buttoning up the twins and dropped the injectors in. You can also see where I have the bypass hose run. It's currently over on the driver side sending pressure data to the quad via the fuel pressure sensor. Here's the interesting part. I am not seeing readings anywhere close to what the videos in the CF thread had. At 2K rpm coolant pressure is at 16psi. At 3K rpm it's 30psi, and at 3500-3600 it's 50psi. I'm considering pulling one of the plugs in the head and seeing if the readings there are the same. The thread on CF had 20psi at idle, but he was tapped into the back of the head. BTW the thremostat being open or closed made zero difference in my pressure readings. (and yes I bled the line)
-
Bingo. They're strong and they don't crack! Price and geometry are the main reasons. I'd like a steed speed, but they don't come in stock 2nd gen geometry. I do think Stainless Diesel's stainless manifold is better, but I can't justify the cost for the nominal gains. So I got a lot of work done today! Drained the coolant, pulled the bolt in freeze plug and got the fittings installed. For anyone looking to do this, do NOT try to put the fittings in while the plug is in the truck. It doesn't work -__- Anyway, the only fittings I used were a 1/2in short male-male, a 1/2in 90 female-female, and a 1/2in pipe thread to1/2in to hose barb fitting. Then I picked up 6 ft of 1/2in heater hose and put it together. These front fittings are to hook the Quad's pressure gauge into. Once I have the pressure data, I'll purchase a pressure relief valve. s475 rebuild kit. It's kinda weird how they come with 3 front oil seals and 3 rear seals. The front on my turbo only uses one seal and the rear uses two seals. I hope you like pictures! I took enough to make an article. I'll get to it @Mopar1973Man. Take the front nut off and remove the compressor wheel. Screw the nut back on and tap the end of the shaft. They pop out pretty easy as the only thing holding it in is the rear seals. Pull the shaft out. Remove the big snap ring and pull this front piece out. (Not sure what it's called) Pop the seal out. Remove the oil diverter Remove the thrust bearing Remove the baby snap ring holding in the journal bearing. The bearing will slide out by turning the cartridge over. Remove the other baby snap ring on the back side. Here you can see where it looks like the bearings were spinning in the housing and got scored pretty bad. Thrust bearing scored on the rear. Thrust bearing scored on the front. Dual seals on the exhaust side. AFTER cleaning. All 3 new seals installed. New journal bearings installed. New thrust bearing installed. Thing that pushes against the thrust bearing installed. Oil diverter installed. New O ring on the front piece along with the new seal installed. Everything pushed back together. Getting it to go the last 1/2 in or so is a PITA. Gotta push hard! Large snap ring. Note it is tapered to hold everything tight, so it only fits one way. I should note before I put it all together I cleaned it with brake parts cleaner. I also oiled everything heavily! To finish the install, just push the turbine wheel / shaft back in, put the compressor wheel back on, and torque the nut. This is my oiling method. Cut a little hole in the corner of the bag and dump some oil in it. I was able to get a lot in before it came out the drain. The turbo is now very tight with slight side-side play and zero in-out play. I took some airplane stripper to the valve cover I mentioned before. I'm confident this crap will eat anything! Lastly I shined up the injection lines. Not sure why... no one notices them! Hopefully everything will be running tomorrow and I'll have some DATA!!