
Bcoan55
Yearly Subscription
-
Joined
-
Last visited
-
@Reaper22 did you ever figure out what the cause of your truck not starting was? I am experiencing the same problem. I crank the starter but all I hear is 1 click and nothing happens. Had the batteries tested and they test good. Currently waiting on a new plunger and contacts from Larry B.
-
I just bought the LEDs from the article and installed them. Couldn’t figure out why the tail lights were coming on with everything off. Turns out my brake light switch under the dash was bad. Not sure how long I was driving around without brake lights but I’m glad I changed the light bulbs and found the problem before I got a ticket.
-
@War Eagle by any chance would you still happen to have the photos for the install? Thanks in advance, Brandon
- 5 comments
- 1 review
-
Did you ever figure out what the cause was? My father just started noticing it in his truck after I installed a new AEM HD intake. He has an 01 Dodge Ram 2500 ext cab long bed automatic trans with a triple disk TC. Banks tuner, high ram intake, 4” turbo back exhaust and a banks wastegste mod.
-
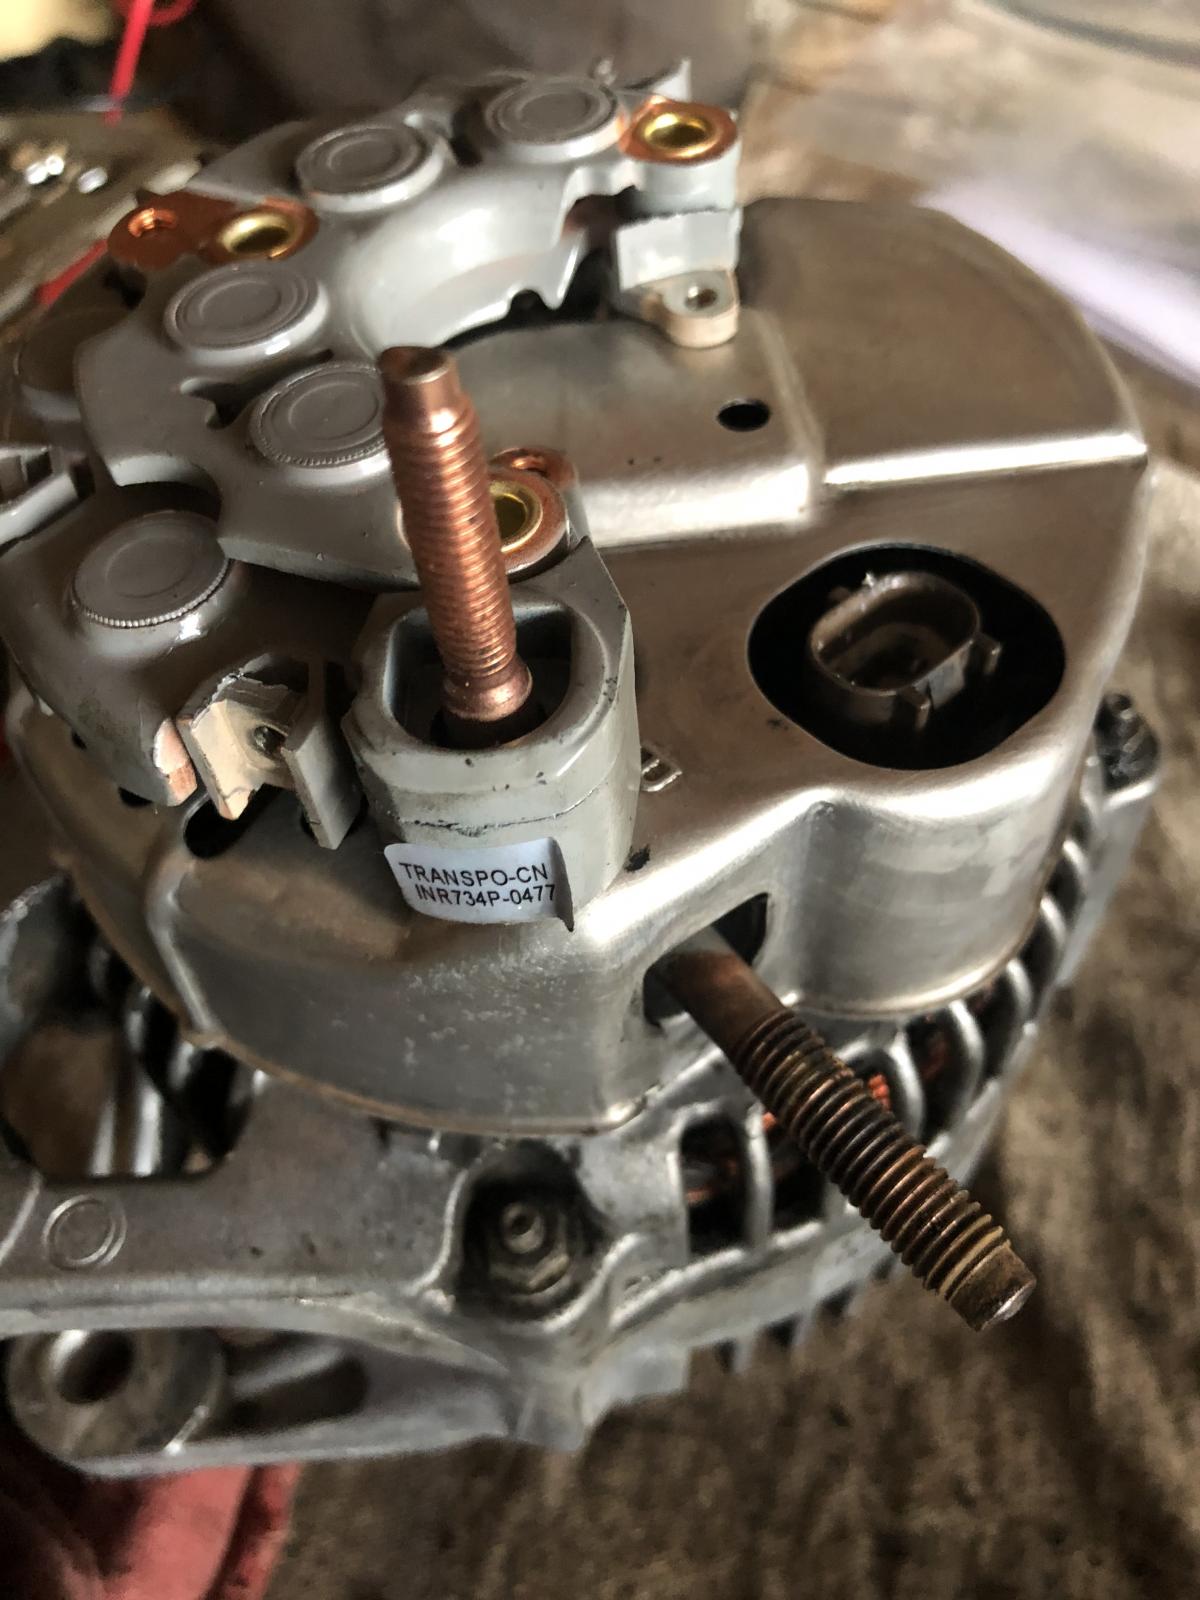
Thanks for the input everyone. Agree the shaft looks worn down but I'm just working with what I have at the moment. I modified my alternator to fit the new diode.
-
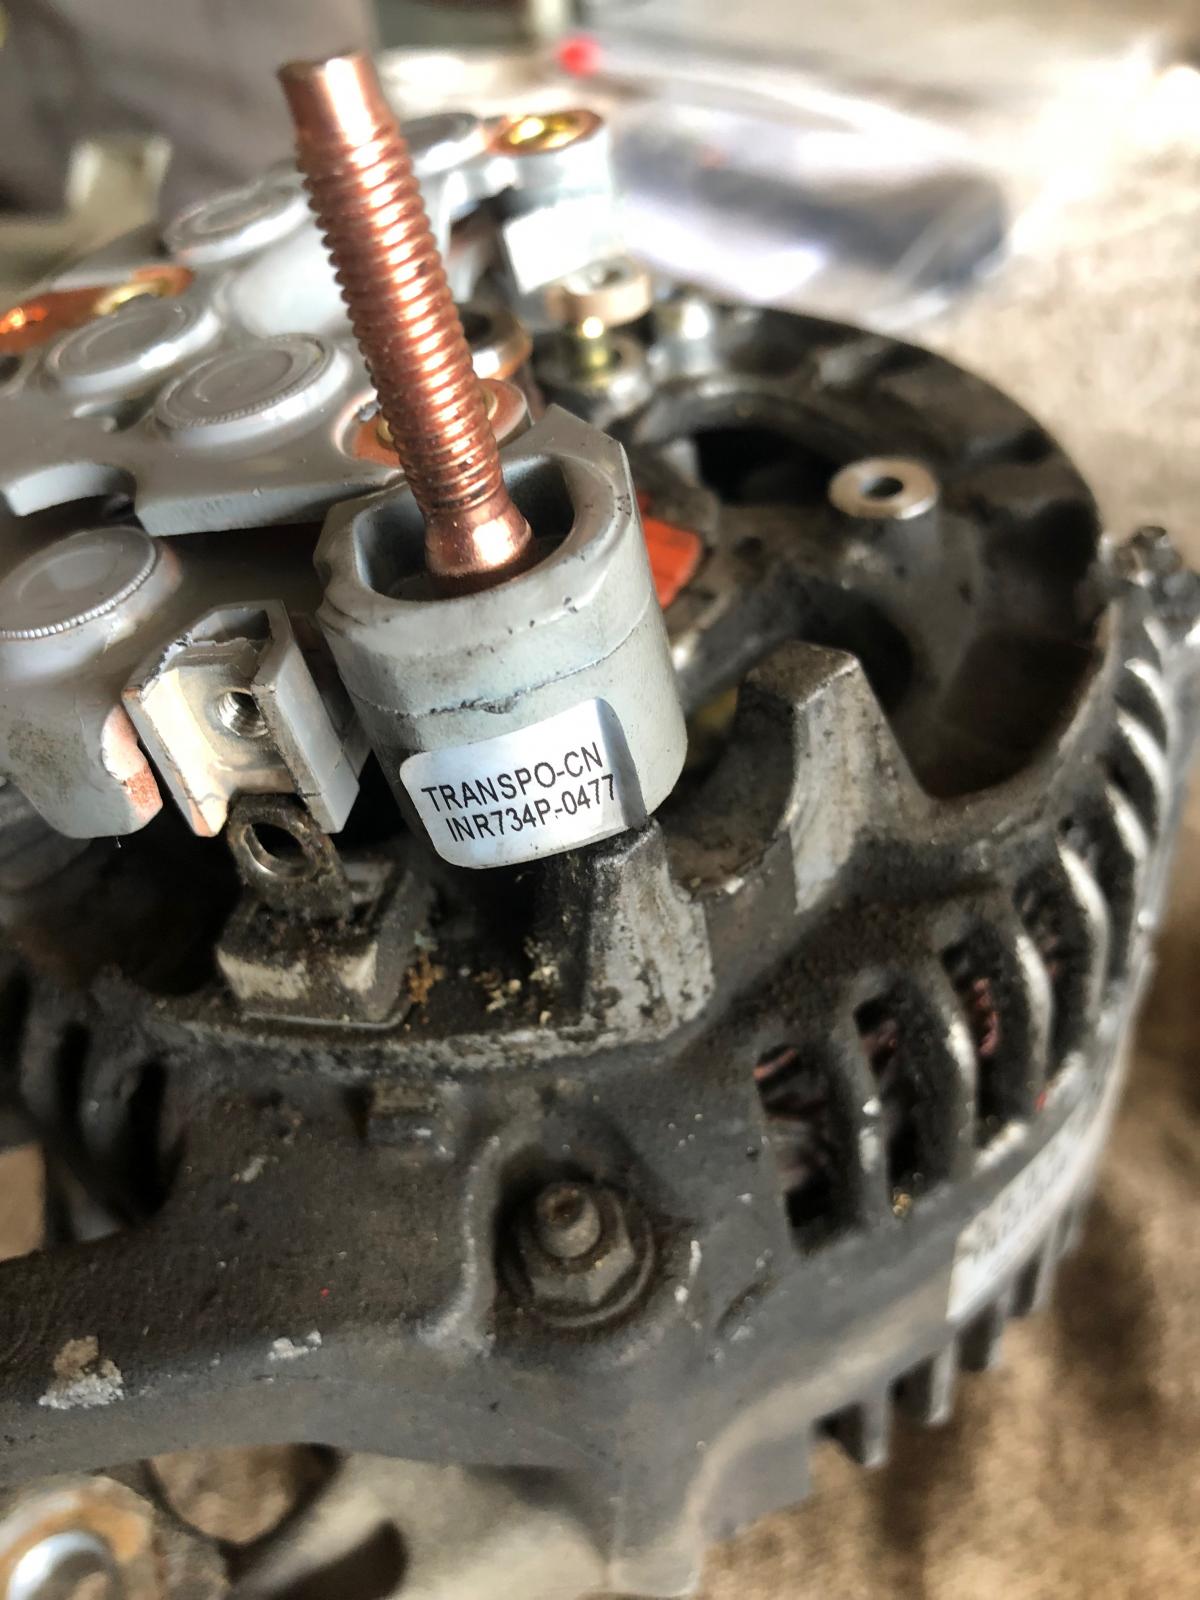
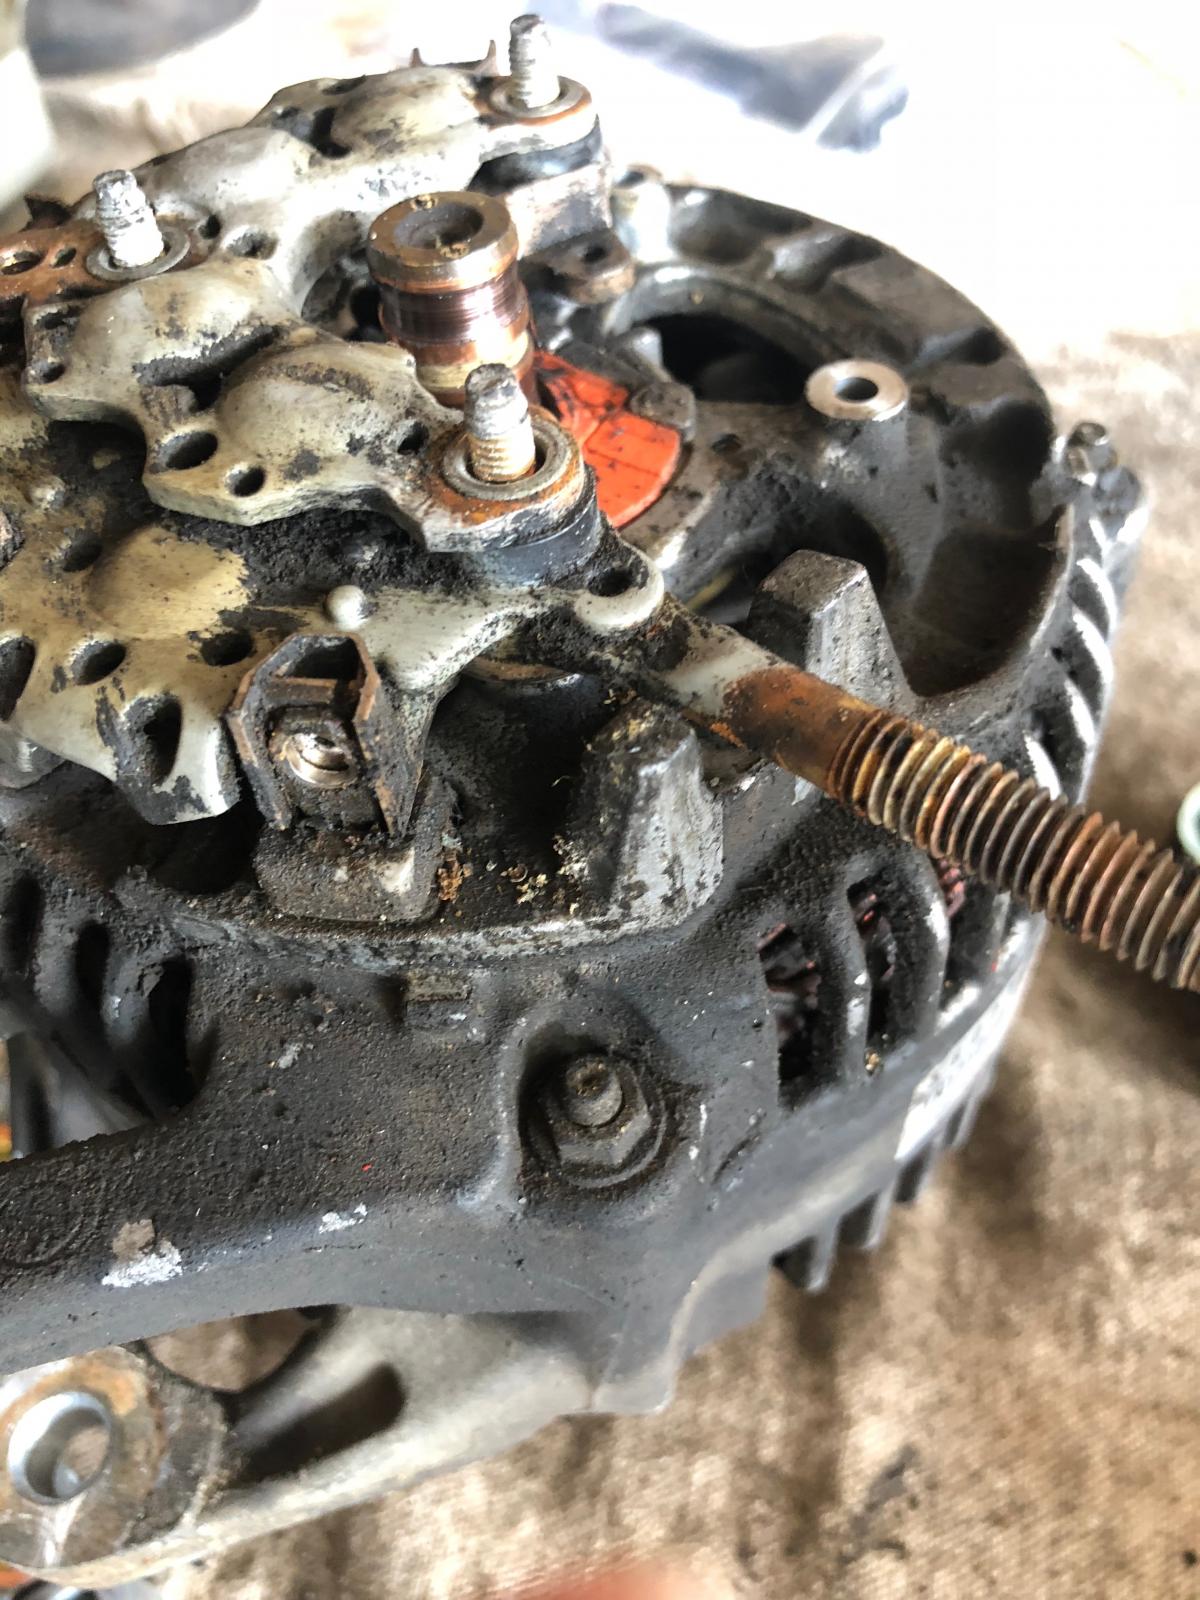
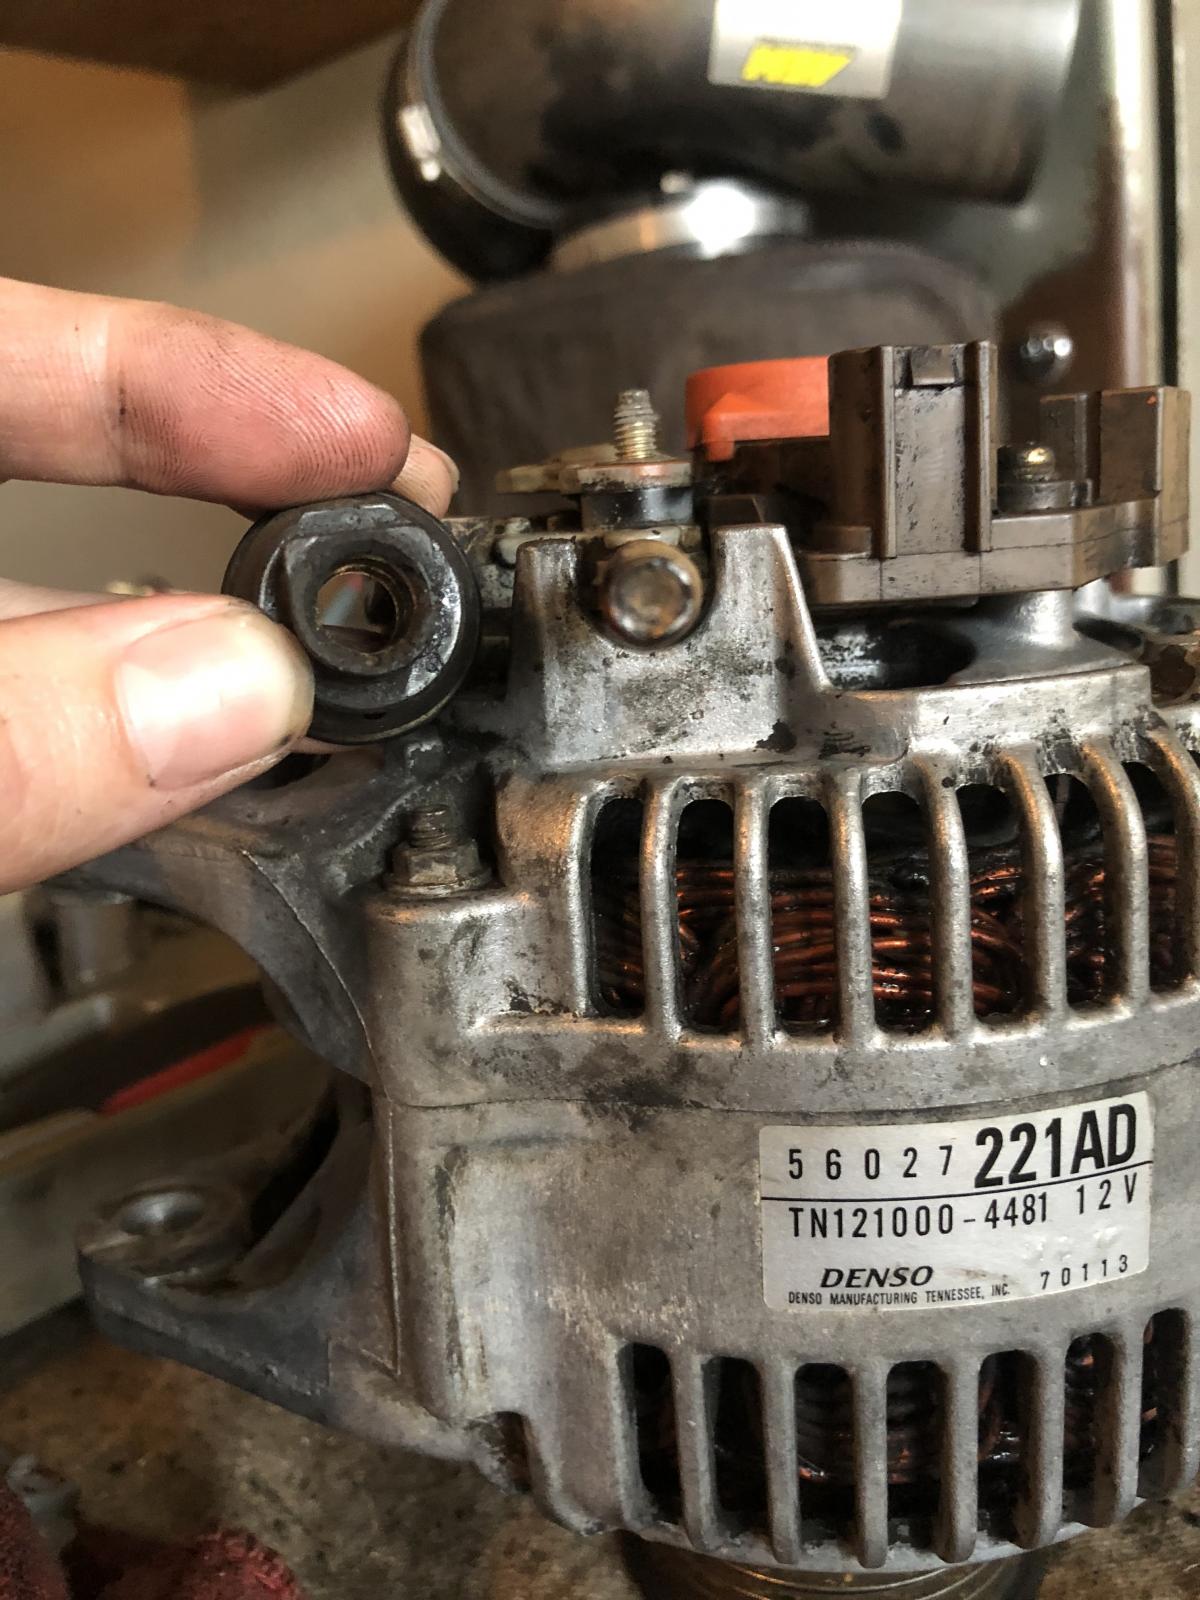
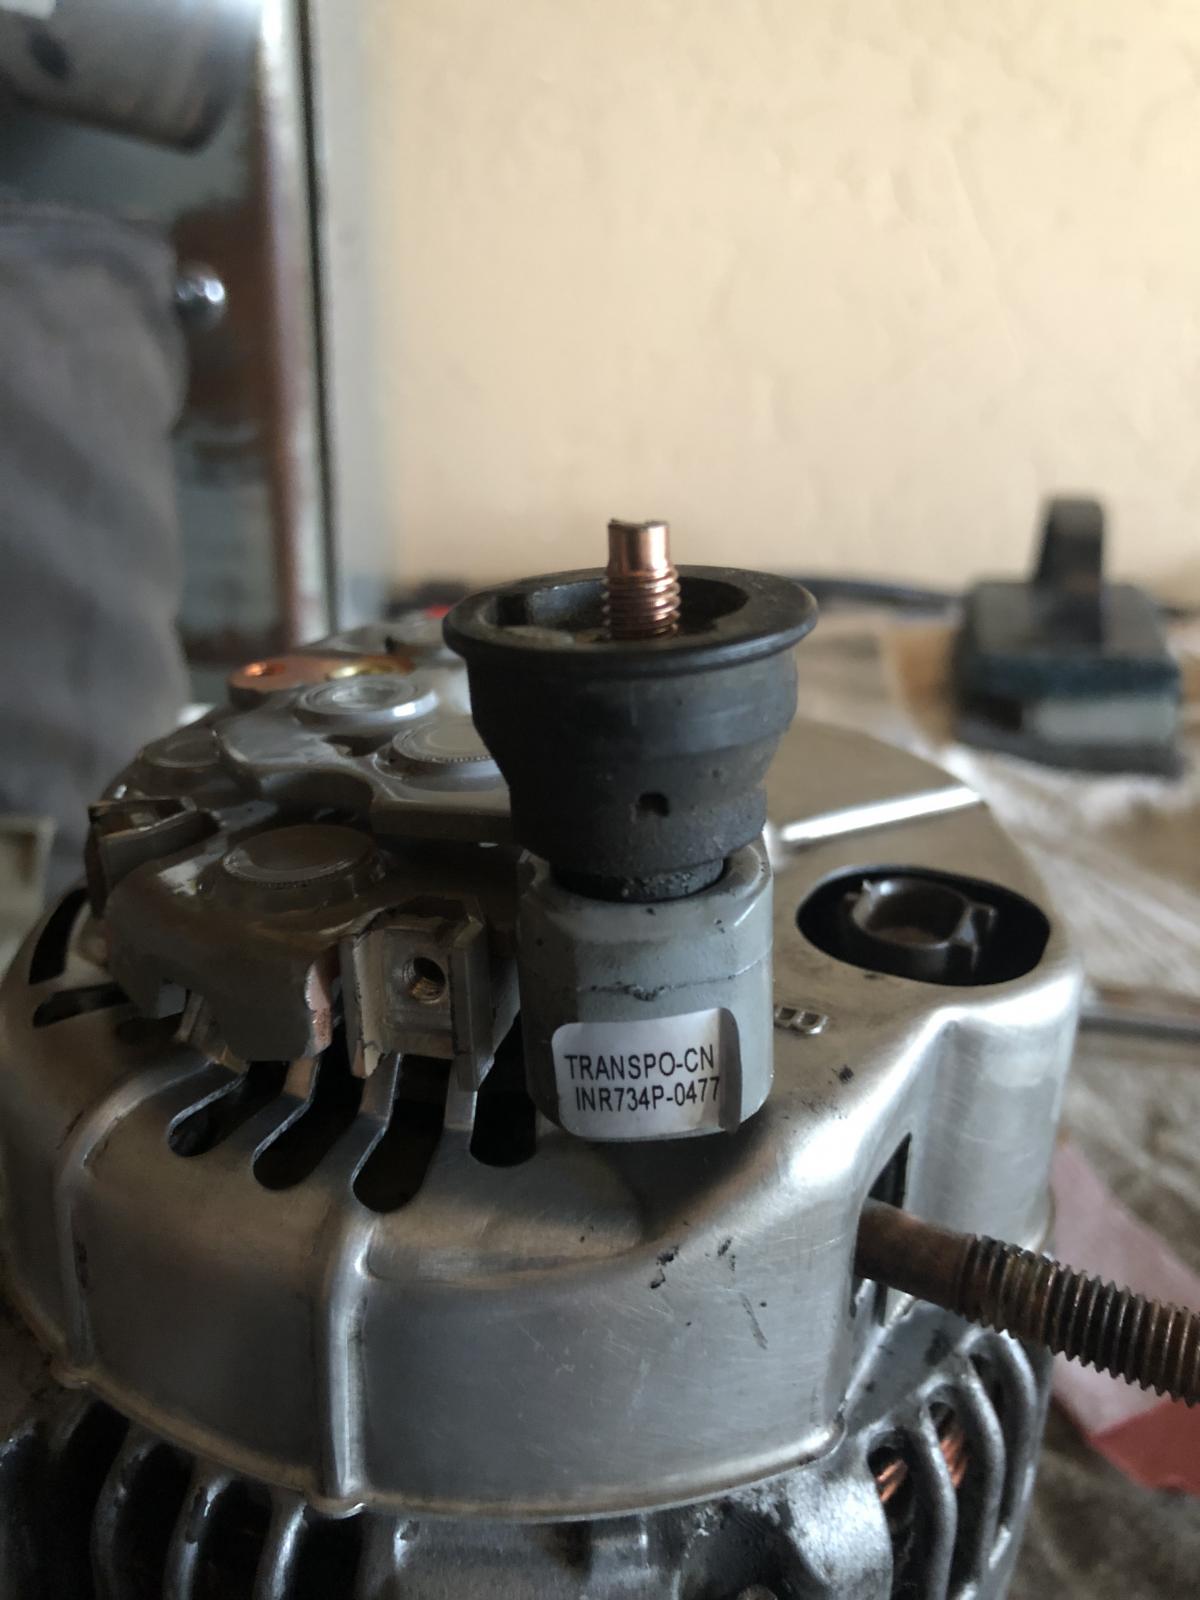
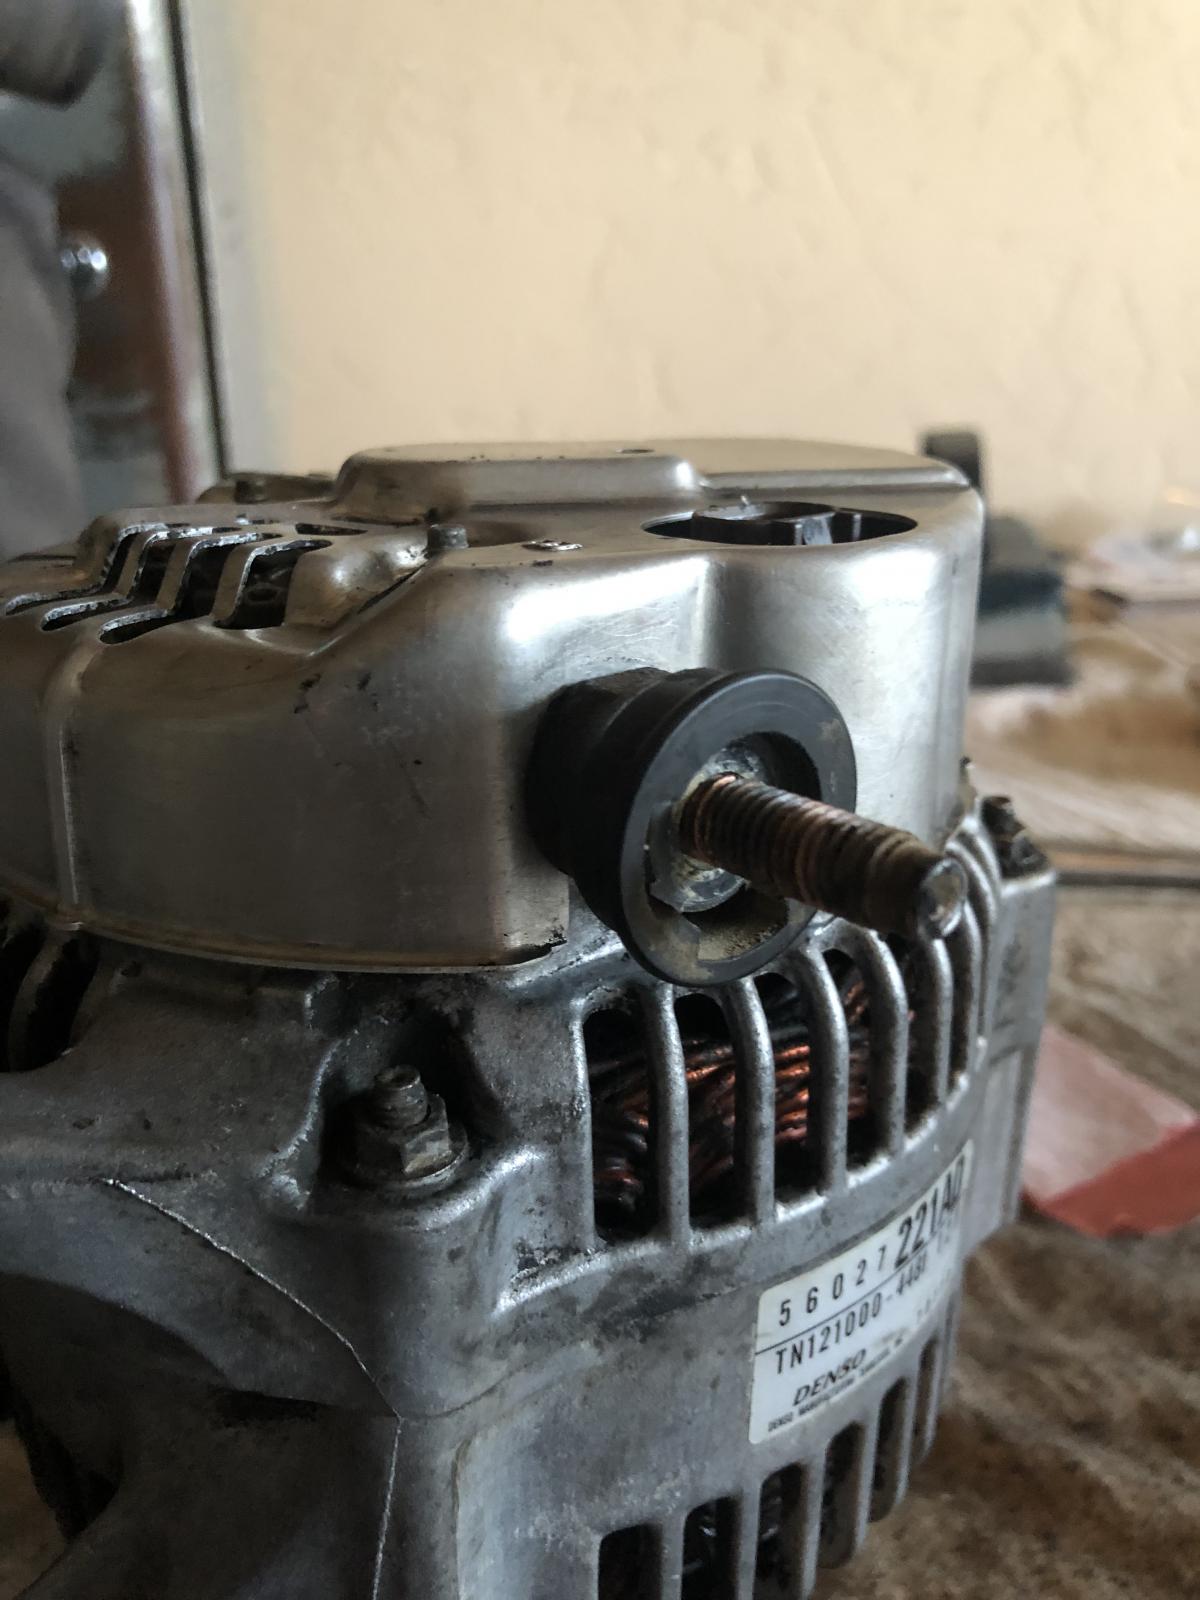
Denso Alternator Modification I'm doing this write-up in case anyone runs into the problem I did and they don't want to buy a new or find another style alternator. After I bought the diode replacement and tried to install it I realized that it was slightly different from mine. Note: The new lead is smaller in diameter and shorter than the old lead. Here is a link on how to take the alternator apart written by IBMobile. If yours is like mine and the lead comes off the side the B+ post nut sizes will be a 13mm but the steps will be the same. Tools required for modification: * Small cut off wheel or Air saw * Ball-peen hammer * Small files * Drill and bits Hardwear required: Two M6-1.0 nuts The original diode pack has the lead coming off the side sticking through 2 tabs. The new diode lead sits on top of one of the stud. Take a small cut off wheel or air saw and cut roughly where the sharpie mark is. I cut a little too much off but this is what it should look like. Drill 2 holes left of the letter B for the lead to stick through. Then use a small file to make the hole bigger. Once you can see the small U shape around the bottom of the Lead where the insulator sits, take a ball-peen hammer and bend down the metal around it so it sits flat. Youll need to trim the hole big enough that the back of the original lead insulator fits through it. Now you need to take the old lead insulator and cut out a piece for the cable to sit lower on the lead. You'll need to do this on the same side but opposite end of the flat part of the U shape. You'll also need to take a 7/16 drill bit and drill a little of the center out so the first nut you screw on can sit further down and the cable lead can sit flush on top of the nut and plastic insulator. Put everything back together and install the Alternator. Put the insulator on and tighten the first nut down. This will hold the insulator in place. Next, install the cable lead and next nut. The cable should stick out of the notch you cut. Since the diode lead is shorter there won't be much of the threads sticking out after the 2nd nut is put on.
-
Denso Alternator Modification I'm doing this write-up in case anyone runs into the problem I did and they don't want to buy a new or find another style alternator. After I bought the diode replacement and tried to install it I realized that it was slightly different from mine. Note: The new lead is smaller in diameter and shorter than the old lead. Here is a link on how to take the alternator apart written by IBMobile. If yours is like mine and the lead comes off the side the B+ post nut sizes will be a 13mm but the steps will be the same. Tools required for modification: * Small cut off wheel or Air saw * Ball-peen hammer * Small files * Drill and bits Hardwear required: Two M6-1.0 nuts The original diode pack has the lead coming off the side sticking through 2 tabs. The new diode lead sits on top of one of the stud. Take a small cut off wheel or air saw and cut roughly where the sharpie mark is. I cut a little too much off but this is what it should look like. Drill 2 holes left of the letter B for the lead to stick through. Then use a small file to make the hole bigger. Once you can see the small U shape around the bottom of the Lead where the insulator sits, take a ball-peen hammer and bend down the metal around it so it sits flat. Youll need to trim the hole big enough that the back of the original lead insulator fits through it. Now you need to take the old lead insulator and cut out a piece for the cable to sit lower on the lead. You'll need to do this on the same side but opposite end of the flat part of the U shape. You'll also need to take a 7/16 drill bit and drill a little of the center out so the first nut you screw on can sit further down and the cable lead can sit flush on top of the nut and plastic insulator. Put everything back together and install the Alternator. Put the insulator on and tighten the first nut down. This will hold the insulator in place. Next, install the cable lead and next nut. The cable should stick out of the notch you cut. Since the diode lead is shorter there won't be much of the threads sticking out after the 2nd nut is put on. View full Cummins article
-
It did not. I was caked with oil and dirt and I cleaned it off best I could but I didn’t see any numbers on it. I was planning on doing the same and trying to find the correct one but I wasnt having any luck.
-
I did some cutting, drilling and reshaping and was able to make mine work. I am going to try and do an article this weekend on how I made it work. So far so good. Truck shows it charging when engine is started.
-
So I plan on using the old plastic guard that is used on the old one. It fits the new one and serves the same purpose.
-
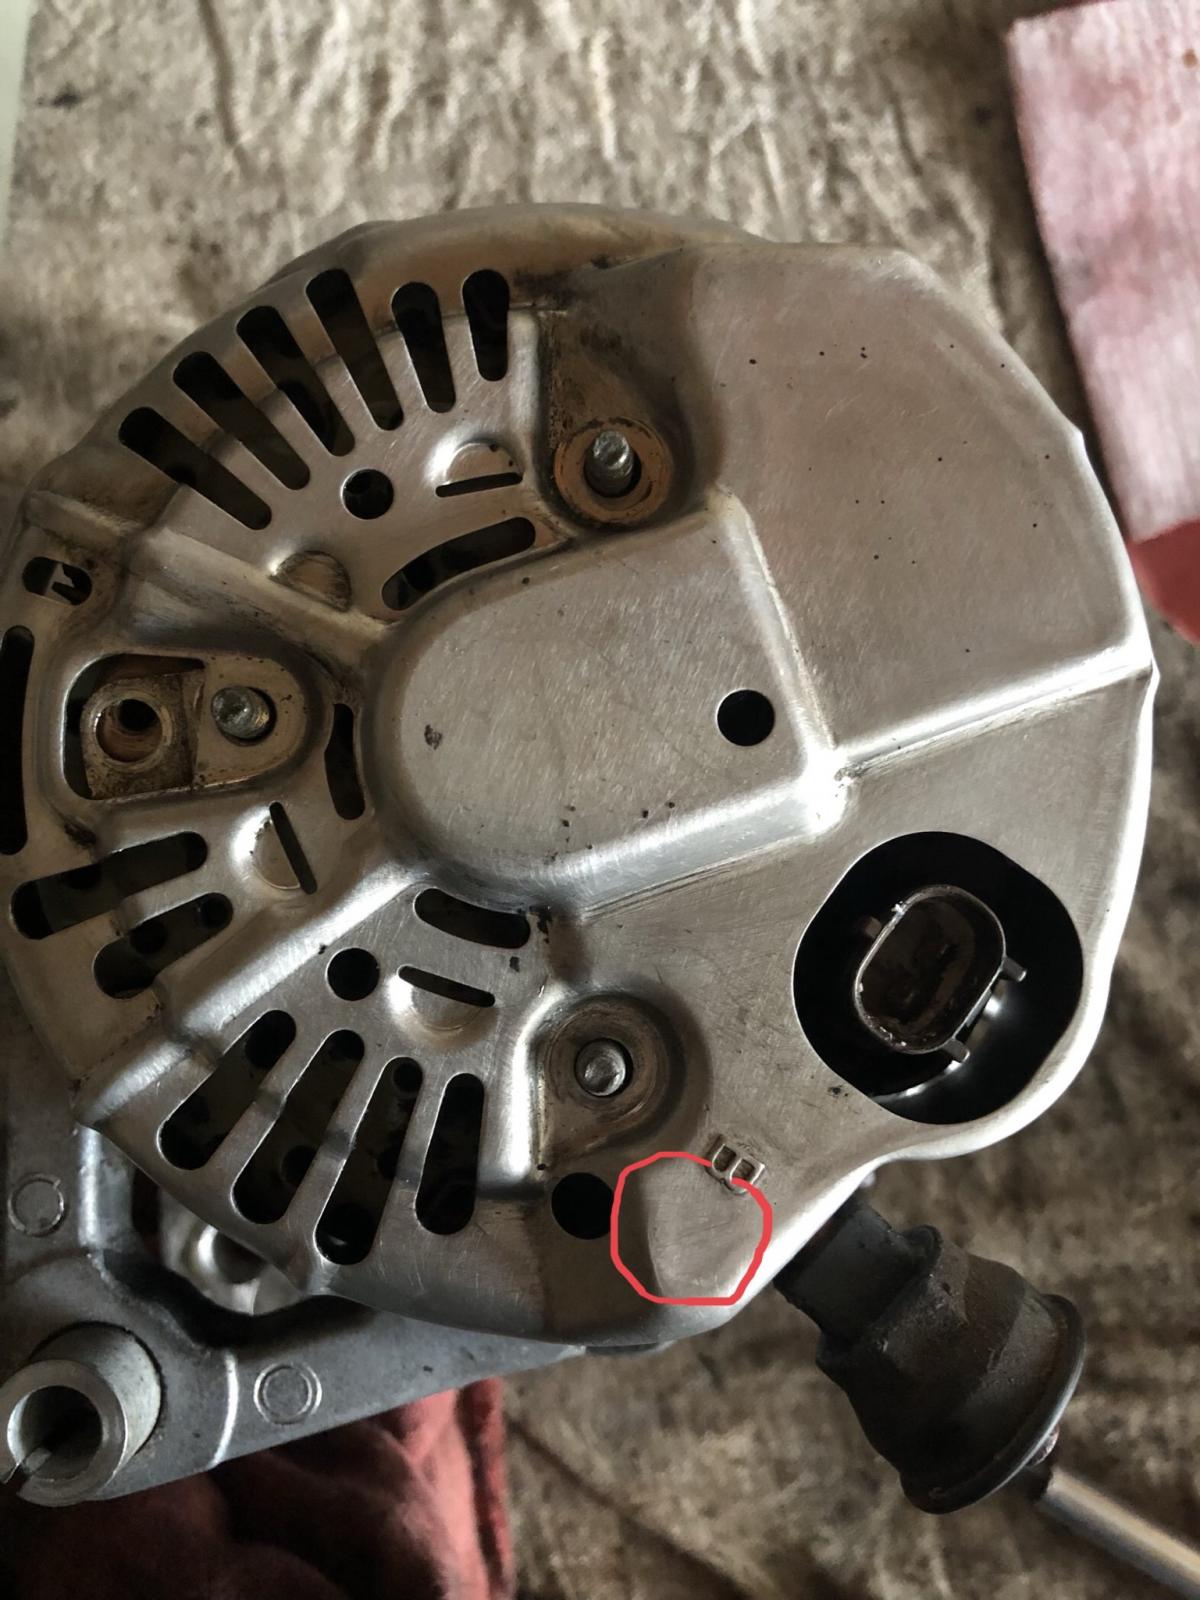
So my plan was to do a little cutting and drill a hole. so I would cut the tab inside the circle along the red line and pretty much notch the tab so the diode will sit flat. the. I would drill a hole in the back of the cover so the post can stick through where the little red circle is below. In my head it works. I mean what could go wrong. ??♂️

-
I don't mind modifying the alternator if it will still work. I just didn't know if there was a difference in the diode packs.
-
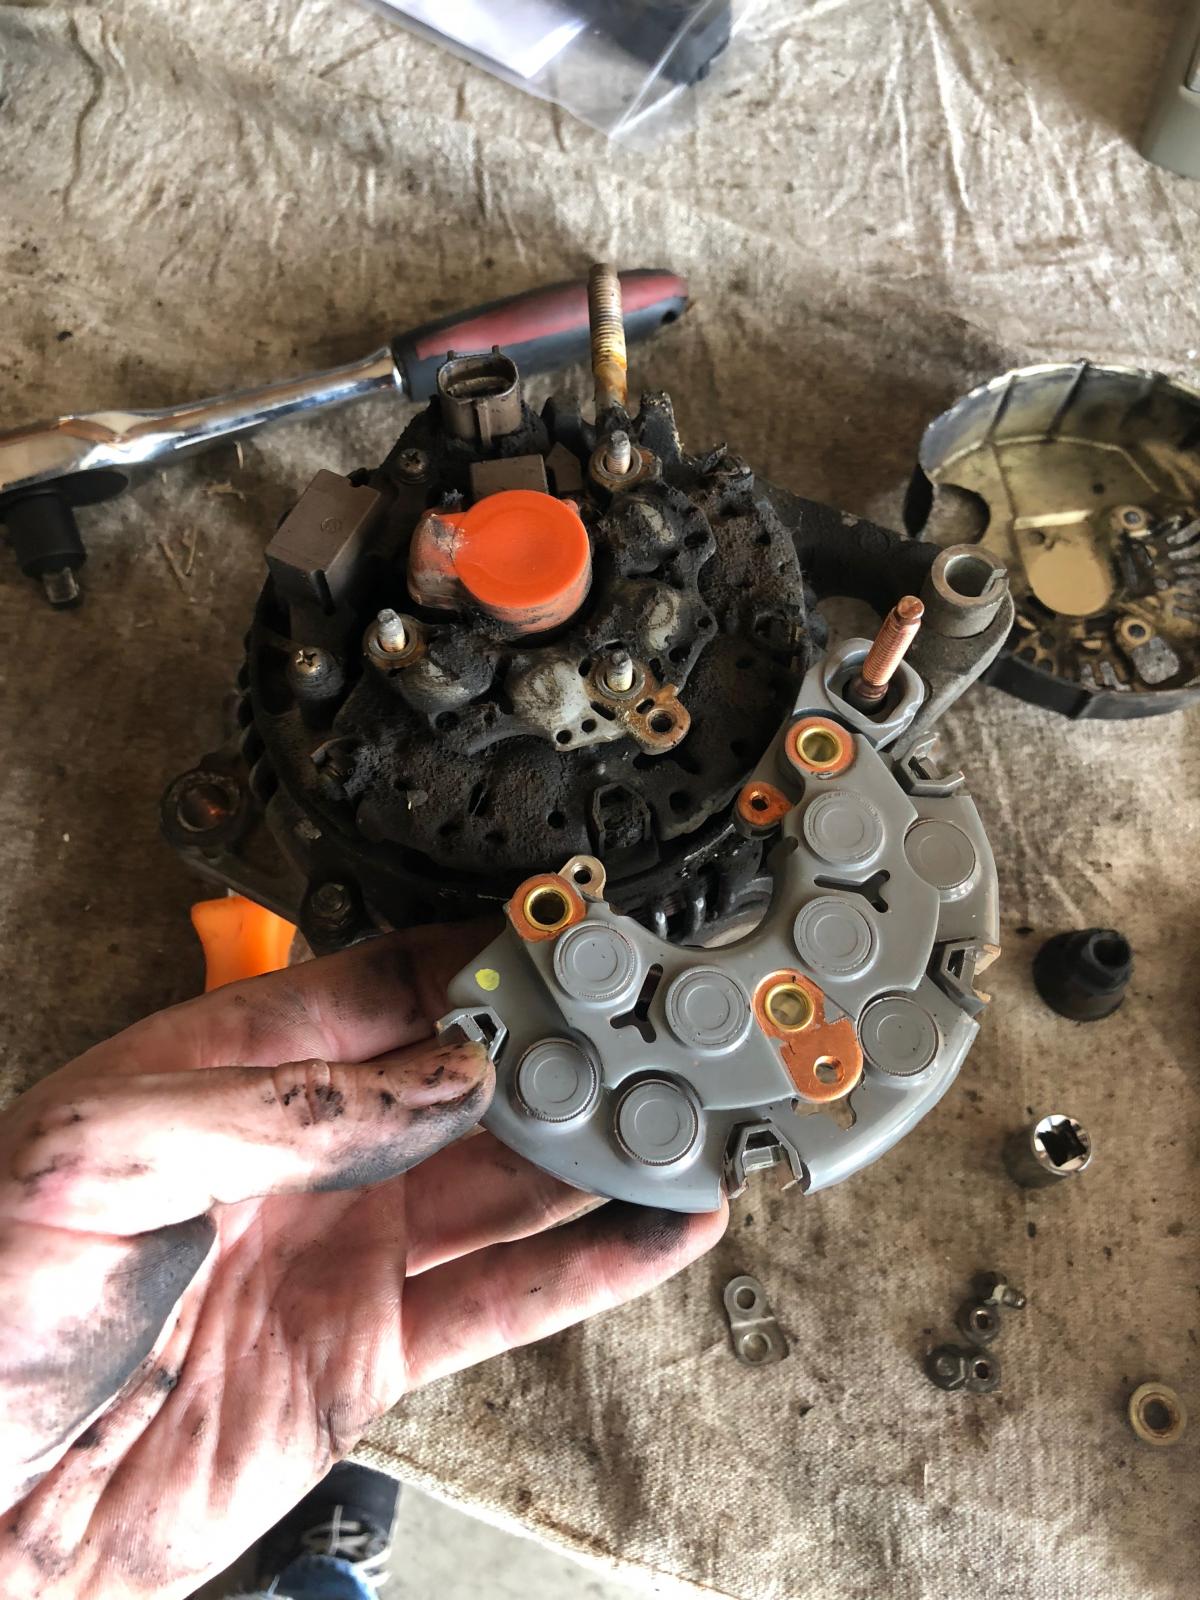
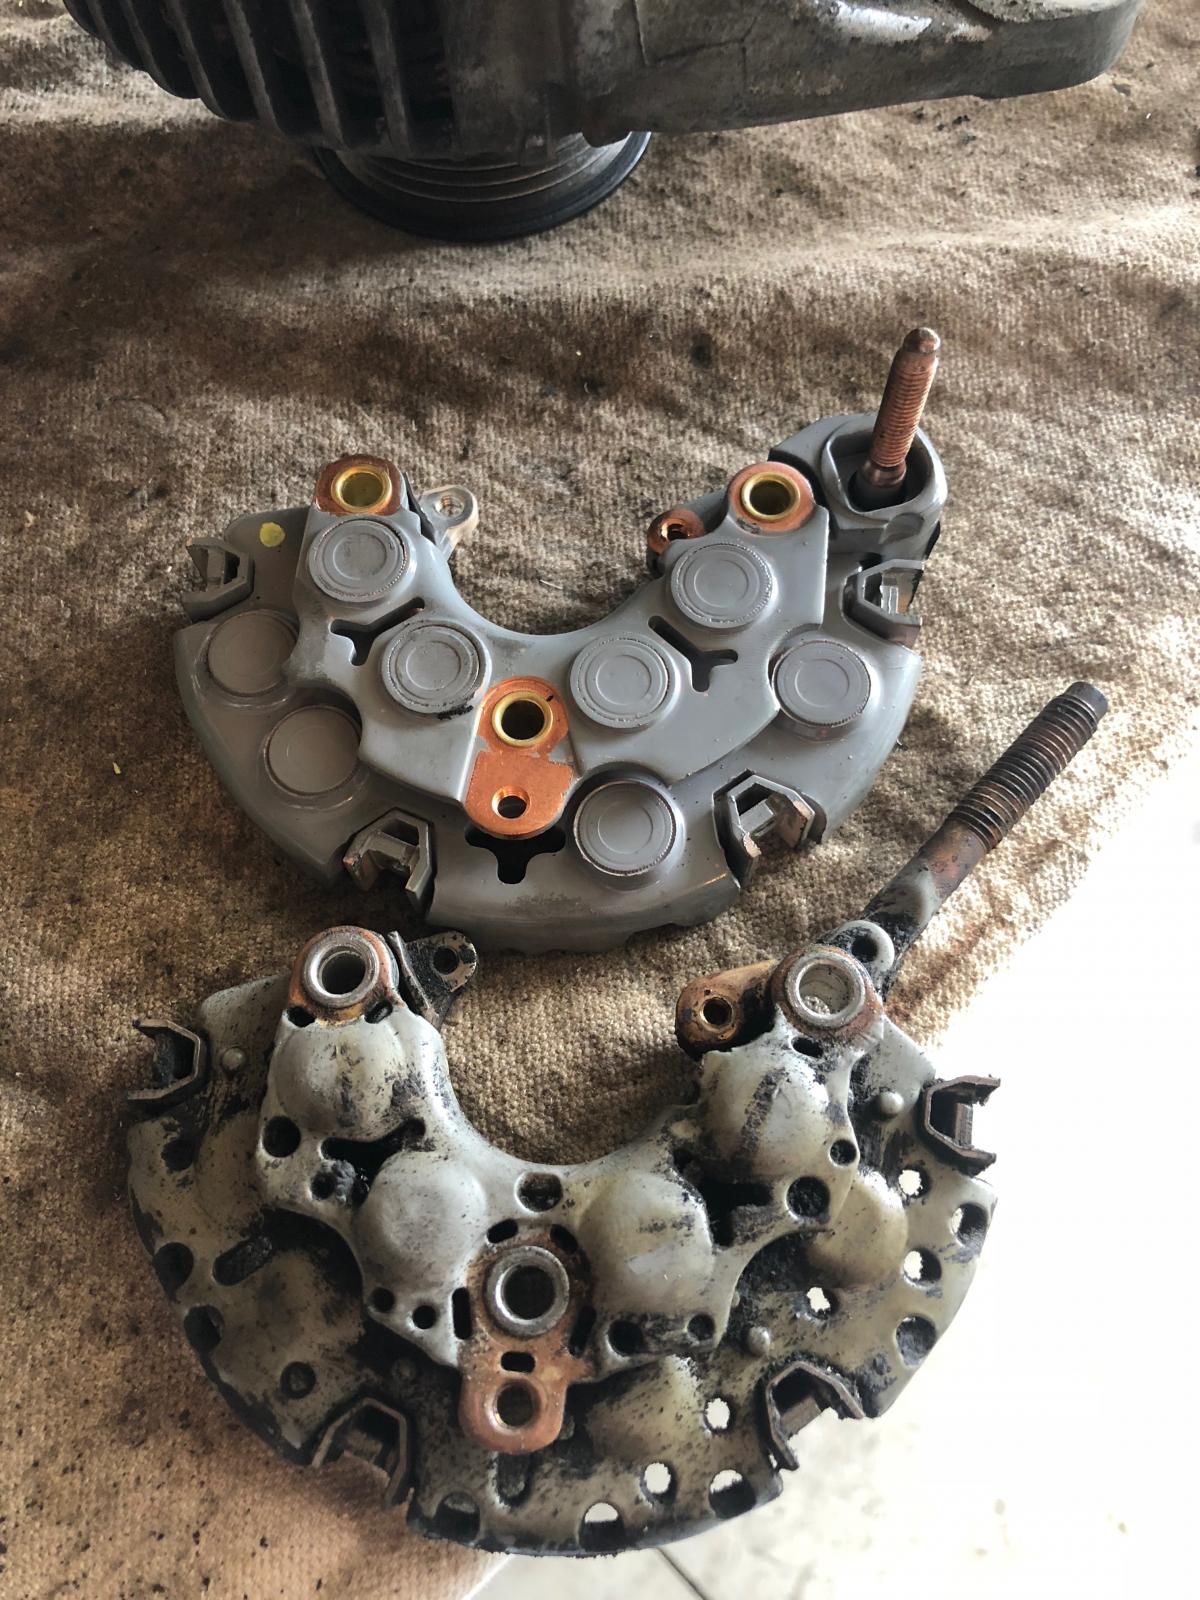
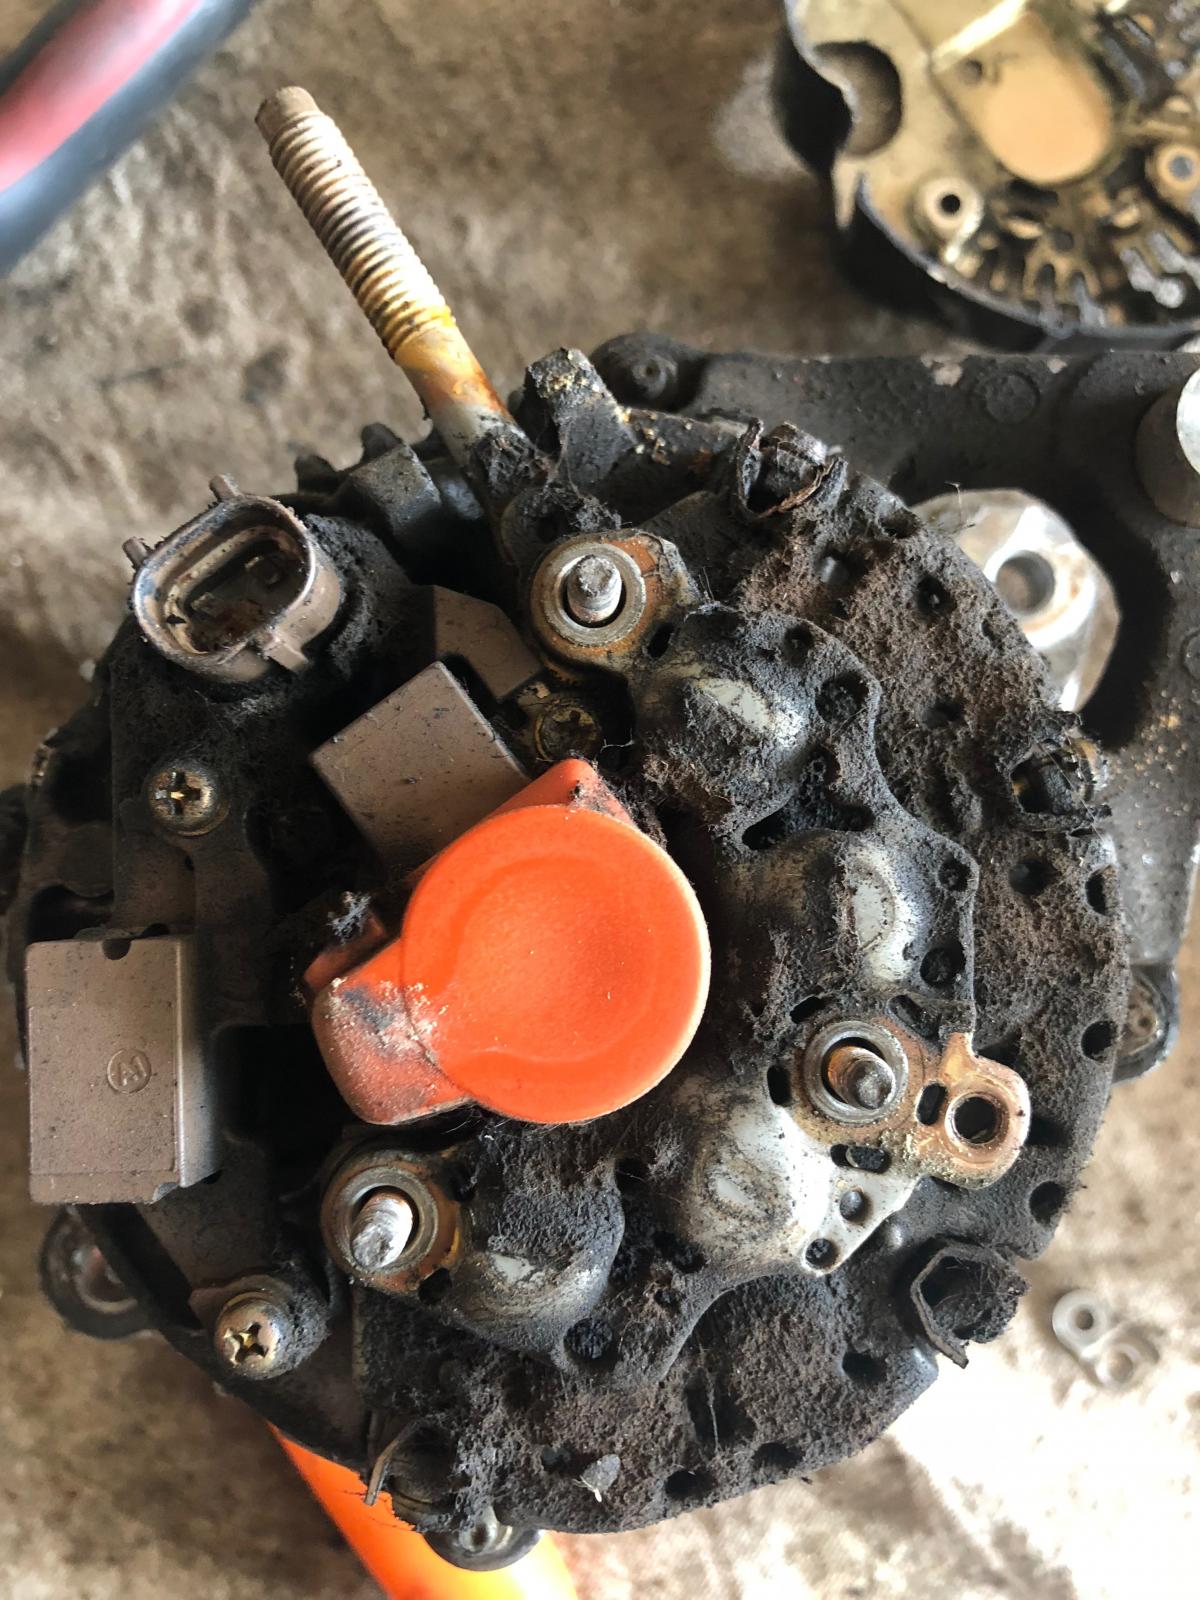
Hi everyone, I need some help, I have a 2001 dodge 24v and I bought the Denso diode pack from the site store to replace the diode in mine. I knew I had a Denso so I bought it. However, I didn't know there were different models. Can I just modify my alternator body to fit the new diode pack? All the holes line up except where the lead comes out of the alternator. Or is there something possibly different between the 2 diode packs? The only real difference is where the lead comes out. The original it comes out of the side. Where the new one comes out of the back. here you can see the new one on top with the lead pointing up and the bottom is the old one where the lead sticks out the side. you can see where the lead sticks out it has a bracket on either side. The new one the lead sits on top of that bracket. Could I just cut the tab off the bracket so the lead sits flush and cut a hole in the cover and put it all back together? Thanks in advance.