


MikeH
Unpaid Member
-
Joined
-
Last visited
Everything posted by MikeH
-
Right...they're barely scratches in the plastic plunger. Of course what you do then is to break out the JB Weld!
-
Thinking it over a little more I believe I see the reason for the "Do not reuse" warning. There's two big reasons you pulled the switch off in the first place: A. The switch internals broke or became gummed up somehow. Switch is totally inop and needs replaced. B. You pulled your brake peddle off to replace the hydro-boost or master cylinder Either one of those could cause the brake light to either not come on at all or stay on all the time. Big safety issue so there's a warning to replace it anytime it's removed. I think my switch was fine as I only rebuilt the hydro-boost so the brake rod and throw of the peddle would stay the same. Once I saw what was going on inside, and the tip from Mopar1973Man, I pry open the locking collar and extended the plunger somewhat. It should reset to the correct length if I ever install it again. Mystery solved. BTW, I found it easier to pull the whole bracket (two bolts) when removing that switch. With the bolts out the bracket, switch & elec connector are hanging down below the dash and real easy to work on.
-
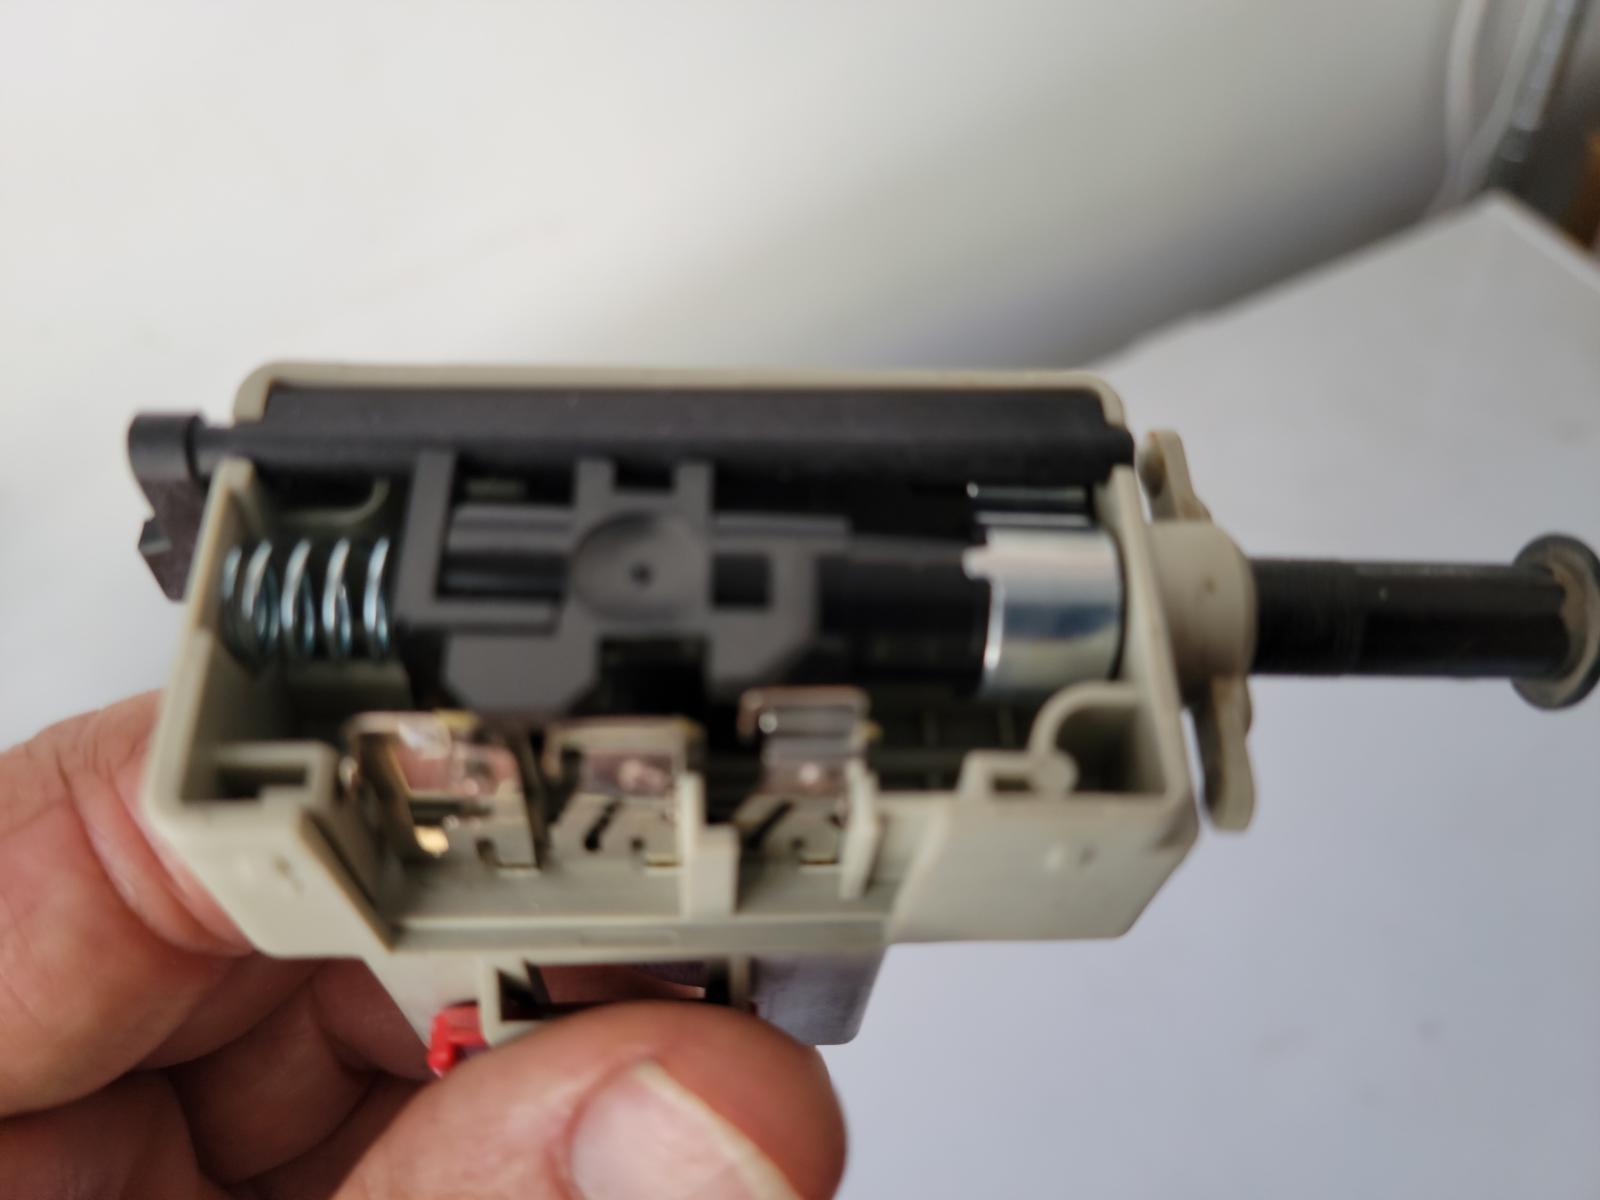
The plunger itself is two parts. Think of a 1" plastic pipe sliding into a 2" plastic pipe. As I see it the black lever on the end holds the chrome collar open to allow the two pieces to slide freely. The internal part of the plunger (that 1" pipe) has grooves or teeth. This is that ratcheting action described by MoparMan. Once the unit is installed you throw that black lever and the collar clamps down locking the outer to inner parts of the plunger. This sets the "open circuit" (i.e. no brake light) length of the plunger. Now when you hit the brake peddle the whole plunger moves hitting one of the micro-switches which turns the brake light on. I still see no reason why my old switch wouldn't work. I guess it's possible the rebuild on the hydro-boost could throw things off a little but... I think I'll just keep the old switch in the glove box.
-
Found this warning from Genos Garage: "IMPORTANT NOTE: You must read the instructions before opening box. Do not press in the switch plunger before installation as it will damage the self-adjustment mechanism and render the part unusable. The warranty will be void if this happens" It could be a liability thing! I might just have to put the old switch back on (damn the $20 bucks) and see what happens.
-
So there's the inside of the unit. The only thing I can see that might get locked into place is the broad chrome band on the far inside/right part of the housing. But even if that's it, it should still work on the original setup. I can't see how taking it off and right back on would throw it out of adjustment. If I was a gambling man I would take out the new one and try the old to see if it still works. Problem with that is if they really are "one time use" I would have to go buy another for ~$20 bucks.
-
I already have the new switch installed. I was getting ready to toss the old one but decided to have a look inside. The thing actually looks brand new inside and out. Anyway, all info online says the switch is a one time use item. I got 20 years and 200K miles out of it so no complaints. I just don't see anything that could become misaligned simply by taking it off and then back on.
-
It had a dowel pin alright but it didn't look like it had moved at all. I was around the 150k mile mark so I was going in after the crank seal anyway. I'm hoping the rear seal holds up until the clutch needs changing. That job is going to a shop. The 350lb NV5600 tranny is too much for my wife to support while I take out the bolts!!!
-
I had to rebuild the hydro-boost on my rig for a leaking seal. Found a YouTube page with very good instructions for the repair. They did recommend replacing the brake light switch also as it was a one time use only item. If you didn't replace it your brake lights would stay on all the time. Seems like it loses it's setting once the brake peddle is disengaged. Got a new switch and the install was fairly simple. Took the old unit apart to see if I could "reset" it. I was expecting a small circuit board of some kind but it was totally mechanical. Not sure I'm seeing what could be out of whack just by removing and replacing the switch on to the same peddle & rig. It's just a plunger with several ears (cams) engaging and disengaging a few micro-switches. Anyone know for sure if you can reuse these or not?
-
I did my '02 a few years back just in case. Bought the KDP and crank seal kit more for peace of mind than anything else. It occurred to me after doing this job that there might be an even simpler answer to this problem. Why couldn't you just take a center punch and give the lip of the hole a ping or two around the edge. That would expand the metal enough to make the hole a little out of round. No way the dowel could walk out now. The dowel pin is a pretty tight fit and there's no real force pushing it out. It's just engine vibrations causing it to creep out a little at a time. I think any distortion at the lip of the hole would stop it in it's tracks. JMO
-
Why does everything break when you go on a road trip. We got 100 miles from nowhere (Stanley, Id) when the Hydro-Boost started weeping. Made it to Challis, Id and found a NAPA store and picked up a few bottles of Power Steering fluid. Once I realized to stay off the brakes as much as possible we finished our little vacation and nursed the rig back home. We made it three days on two small bottle of PS fluid. I take it that the kit from Pirate Jack above is what I need for the fix. Found this YouTube clip on doing the repair. This doesn't look like too bad of a job but if someone cares to comment on this clip (where are you Mopar Man) before I jump in feel free.
-
Yep...that did it. Got them back just fine. Computers!!!
-
I could see them 10 minutes ago but they've been edited and no longer open up.
-
You gotta love the Dodge OE wire splices. I don't know where they came up with that idea but it has to be the absolute WORST way to splice wires together. The W-T ground wire mod exposed this flaw and it's something almost anyone can do with a few hand tools. I did both mods even though I had no issues. Don't forget the "fuse mod" from alt to PCM. Another easy fix that could save you problems down the road. Good luck!
-
I cheated when it came to ball joints and let my favorite shop do the job. I prefer doing my own work but have my limits. Anyway, this particular shop STRONGLY recommended Moog ball joints for my rig. Wouldn't have been my choice but the father (owner) who runs this shop along with his boys said he'll put in whatever I want but if it was his rig Moog's would be going in. So far with a few thousand miles on no issues. I do like the fact that I can grease them. OEM's were sealed.
-
I believe you just found my problem. I was starting to lean towards the camper shell plus equipment being an issue and then you posted that formula and a little bulb went off in my head "THAT'S IT". I did a few rough calculations using my vehicle weight from the dump (8300lbs) and a 60/40 ration as you mentioned. Oh man I was way over inflated so made a few adjustments. I found a CAT scale nearby (Certified Automatic Truck scale) and drove over to get a real number for front & back axles. On the way over I'm thinking dang...this thing is driving much better already! Got to the scale and here's what I found: Front: 3960 lbs Rear: 4300 lbs So my rig has 48% of the weight on the front axle and 52% on the rear. I'm running Back Country tires "E" rated to 3415 lbs @ 80psi and I had the tires up around 70psi front and rear. As you can see my tail end is a little heavier than the front. Throw a load of camping gear in the back along with the over inflated tires and BINGO the rigs a little squirrely. Now that I have the axle weights I can make one more adjustment to the tire pressure and I think I'm good to go. I'm also going to start loading as much heavy stuff (tools, water, whatever) as I can in the front when we make any long trips. I'll always be out of balance in this regard but no need to throw it out more than necessary. Thanks Mike...I owe you a beer man!
-
" What is the axle weights? Front vs rear axle?" I don't know but you may be on to something. If I had to guess I'd say I'm dead backwards with more of the weight being on the rear axle. As I mentioned the vehicle total weight is 8300 (empty) with ALL the extra weight being in the bed. Loaded for bear it could be close to 10k lbs GVW. As a matter of fact the truck drives just like you had an over loaded trailer attached...front end barely touching the road and squirrely as hell. Going to find a local scale and get some weights. I'll then adjust tire pressure and we'll take it from there. I'll be back!
-
Mine's stock too with 265/75r16 tires which are what came with the rig. I'm pretty sure this is a wear issue as it has kind of creeped up on me over the years. Also, forgot to mention bushings and end links on front/rear sway bar. I know I'm getting down to replacing the steering gearbox but I've read of several guys going that route only to comment 'Well, that didn't fix it". I'm beginning to wander if my camper and gear are part of the problem. Caravan Camper steel shells are ~700lbs. I finished the inside with pine and the vehicle empty weight is 8300lbs per the scale at the dump. Almost like a small slide-in camper. Loaded with food, water & supplies etc it just touches the rear helper springs. I also moved both batteries to the bed inside the camper and added two more for reserve power. Could that make the front end a little goosey...enough to cause my issue? Thinking out loud here but I'm running out of solutions. I'll live with it if I have to but it can get annoying on a long trip.
-
Just going to bump this thread open again. Still not happy with the steering wander especially at hwy speeds after putting a couple hundred miles on it. It just annoys the crap out of me that the rig won't track straight down the road. Anyway, I had the wife turn the steering (engine running) while I crawled underneath to see what wasn't behaving properly. Everything looked tight with no wobble, play or looseness that I could detect. Just wondering if I'm even going to see enough play in something like the pitman arm or idler arm etc to even know if they're worn slightly. The rig doesn't wander badly going down the road but it's there. I don't want to start throwing more money and parts at it and I'll replace the gearbox if that's what it takes. Just want to eliminate everything else before the box comes out. Might have posted this before but so far we've got Bearing/hub assembly, upper/lower ball joints, tie rod ends, intermediate steering shaft upgrade, new shocks, tires and alignment. Any thoughts?
-
Didn't ask about viscosity. The oil's out of his Dodge and into two of his autos so nothing lost. Apparently he never got more than 10 - 15 miles on it before noticing the label on the empty containers. Live and learn. Kinda like some folks who have dumped DEF fluid into their fuel tanks...just a dumb rookie mistake. I was discussing this with my neighbor the other day who thought we got away pretty lucky. His brother in law's wife had filled their brand new Chevy Duramax with gasoline and drove it 'til it died on the road. lot's of damage Anyway...all's well here. Thanks for the input.
-
Yeah, I'm rethinking my initial idea of running with it for a short interval and just drain it and save the oil for his cars. He doesn't have 100 miles on it yet so no damage done either way. I never heard of this Pennzoil made from natural gas. I'm sure it's a great oil just not in a Cummins. Not to get off subject but Costco is running 3 gallons of 15w/40 for like $26 bucks for anyone interested.
-
Me too Mike. Problem here is it's already in the motor. He's just concerned if he should dump it now or get a few miles on it so it's not a complete waste of money. Maybe the best bet would be to get it out of the Cummins and save it for his cars. I've used some of those "Euro" rated diesel oils in our Jetta and they were fine. Don't know if I would play with that stuff in a real diesel engine but to each his own.
-
No codes is good. That makes it a mechanical problem. The air filter also came to mind along with a plugged or leaking crankcase ventilation. Don't know how a '98 is crank ventilated but had a Jetta TDI venting near a cabin intake air vent. Same teary eyed symptom you described. Just some things to look at. Good luck!
-
Relative of my son in law wanted to try Pennzoil's new Platinum Series oil in an '03(?) Dodge Cummins. Apparently they make a Diesel rated oil, Pennzoil Platinum Euro, and others made from Natural Gas. Long story short they picked up the wrong oil, Pennzoil Ultra Platinum, which isn't CF rated and wanted to know if he should dump it immediately or run with it for a while. A well used '03 diesel engine makes plenty of blowby by now and there's no way a gasser oil will handle the soot. I'm thinking a short turn around time, 2500 miles or so, probably won't kill the engine. Also guessing the oil will turn black real quick which might be an indicator that it's time to toss it. What do you think...run it for a time or dump it immediately?
-
Having you tried putting keys in the ignition and turning to "On" three times and leave it in the "On" the third time (don't hit start!). You will be able to pick up a list of codes from the odometer. Let us know what comes up. YouTube clip for Ram 1500 but works with most Dodges:
-
Just had a local shop change out upper/lower ball joints along with some other stuff. I've used these folks before and have come to trust their work. I'm not a big fan of MOOG anything but they strongly recommended MOOG ball joints for my rig (maybe because mine's 2WD not 4...don't know) and I went with their advice. OEM's where shot but made it almost 200K miles.

