
If you own a 94-97 Ram 2500/3500 4x4 then your probably aware of the steering related issues these trucks can have, most notably the dreaded “death wobble” and steering wander. You may have replaced all the ball joints, tie rod ends, track bar, and even the control arm bushings on your truck but still have wandering or death wobble issues. Before you set your truck on fire and/or pull your hair out, you may want to consider upgrading from the factory Y style steering to the later T style.
How will converting from an inverted Y setup to a T setup improve the steering you may ask? It's simple really. Notice that the tie rod on the light duty inverted Y steering (94-97) does not directly connect both wheels together. Instead it connects to the drag link which is then connected to the knuckle. This setup allows the tie rod to pivot as the axle moves up and down during normal suspension travel, which is exaggerated even more when traveling down very bumpy roads. The problem is that as the tie rod pivots it also changes the toe-in/toe-out of the alignment, which in turn causes the front end to “walk around” or “wander”. This design can also cause death wobble, even when all new parts are installed. The heavy duty T style steering eliminates the pivot point by utilizing a one-piece tie rod which is unaffected by suspension movement.
If you do a Google search on the subject you're likely to come across numerous discussions of using the T style steering from a 4th Gen Ram for the conversion. The problem here is that the tapered holes in the knuckles will have to be enlarged in order for the 4th Gen parts to fit. As a note you can't simply drill out the tapered holes, they require a larger diameter TAPERED hole and NOT a straight diameter hole. So, besides dropping big money on a custom steering setup what other options do you have? Why converting to the 98-99 HD steering of course!
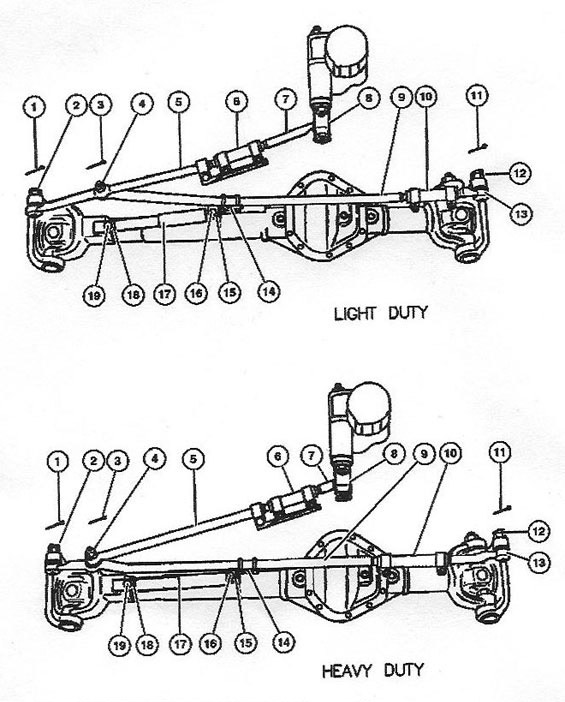
98-99 Ram 2500/3500 trucks came with either the light duty inverted Y steering or the optional heavy duty T steering. The drawing below shows the 94-97 light duty inverted Y steering and the 98-99 heavy duty T steering. The HD steering option was only available for the 98-99 model trucks. One of the best parts of this conversion is that it is a direct bolt-on for the 94-97 trucks. However, there is one catch, in order to retain the steering dampener you will need a universal style bolt-on mount. I currently do not have a dampener installed and to be honest I really don't feel the need to use one with this steering.
Here are the parts you will need for the conversion. All part numbers are AC Delco Professional. These AC Delco Pro parts are actually re-branded Raybestos Pro parts. AC Delco Pro parts are easier to locate than Raybestos, which is I why I used them. To complicate things a bit more, these same parts are offered by NAPA under their own name for about 60% more than AC Delco Pro from RockAuto. CarQuest offers these parts under Raybestos Pro and are also about 60% higher than RockAuto. They are also available in Moog.
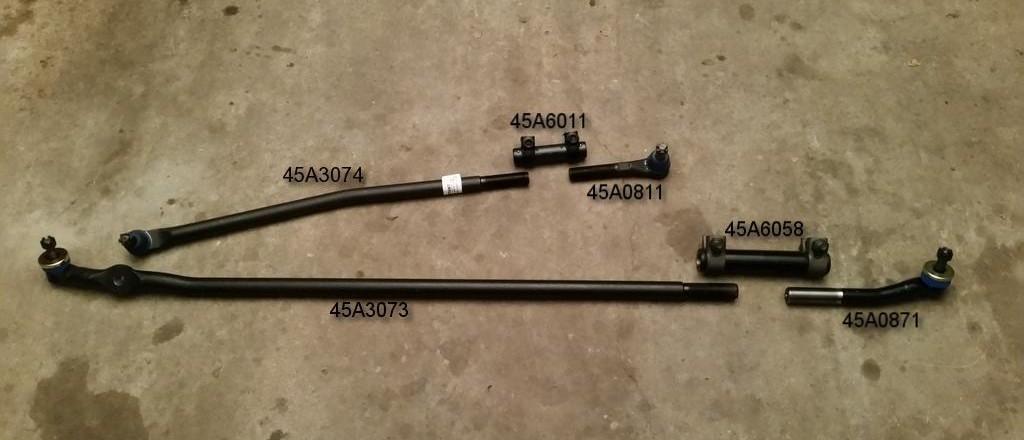
PN: 45A3074 Inner TieRod Rockauto Link
PN: 45A6011 Small Collar RockAuto Link
PN: 45A0811 TieRod End RockAuto Link
PN: 45A3073 Passenger Side Tierod RockAuto Link
PN: 45A6058 Large Collar amazon Link
PN: 45A0871 Drivers Side TieRod RockAuto link
You can do this conversion with the truck on the ground, in fact it makes keeping the alignment correct easier. Start off by making sure you're parked on level ground, wheels pointed straight ahead and the steering wheel straight. It would also be a good idea to chock the wheels as an added safety precaution.
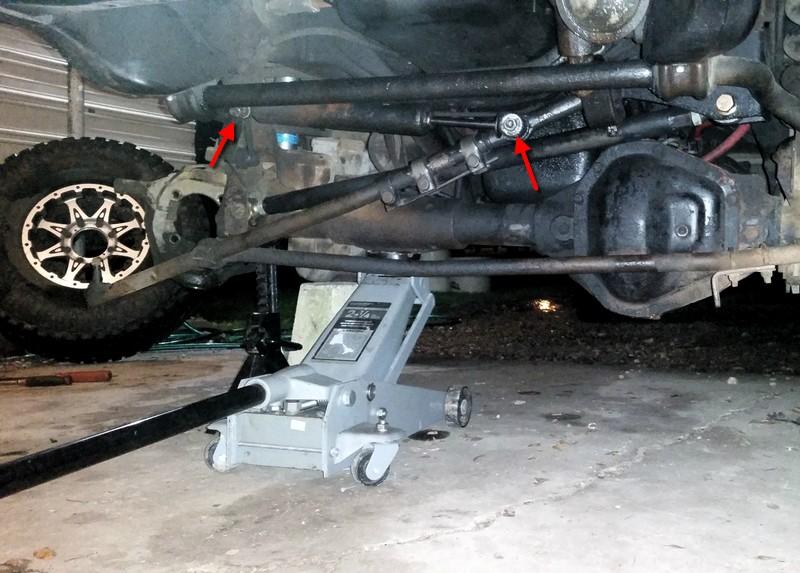
NOTE: I had the passenger side knuckle apart because I was replacing the ball joints when this picture was taken. This is NOT required for the steering conversion so please disregard.
First step is to remove the steering dampener bolts located at the arrows along with the dampener. The frame side bolt head is 15mm and the nut 18mm. The drag link side nut is 18mm.
Using needle nose pliers; remove the cotter pins from the driver, passenger, and pitman arm rod ends. Once the cotter pins are out, remove the nuts. Passenger and pitman arm nuts are 21mm, driver side is 22mm.
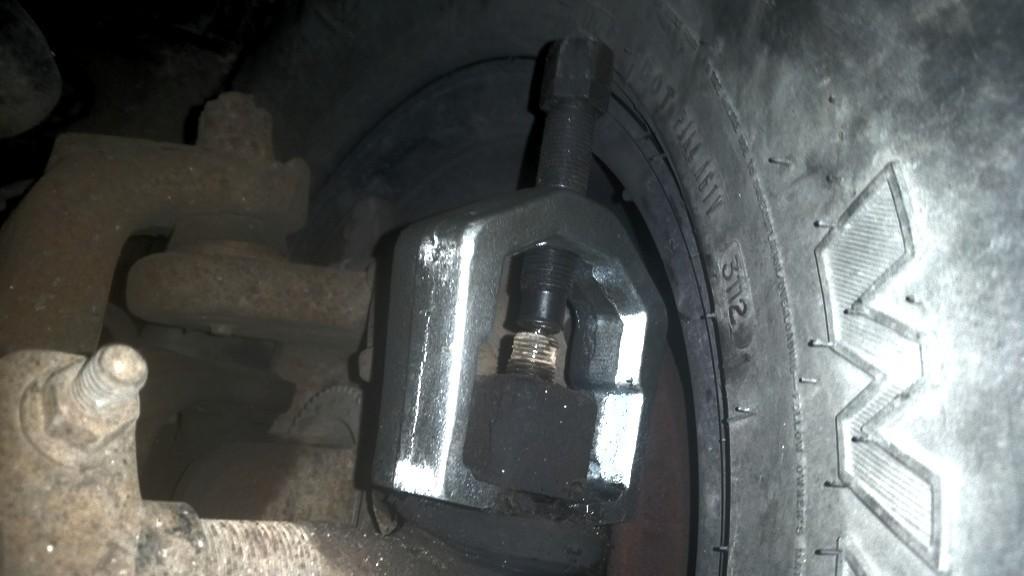
This image shows a pitman arm puller installed. It's a straight forward tool to use, just tighten down on the bolt head until the rod end pops out. I was unable to use this puller as it was damaged while removing a stubborn pitman arm.
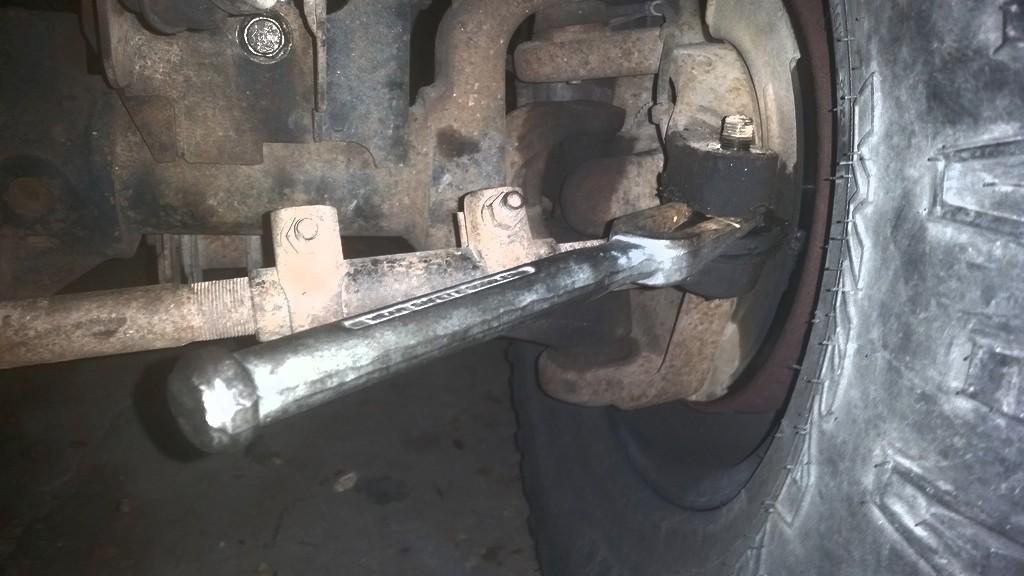
This image shows a pickle fork being used. You wedge it flat side down in between the knuckle and rod end, then drive it in with a large hammer. The process is the same for the pitman arm rod end as well. A pickle fork works great for removing rod ends that will not be reused. You do NOT want to use them on rod ends that WILL be reused as they tend to destroy the rubber grease boots.
With all three rod ends popped free, remove the old steering assembly from the truck. Below is a comparison shot of the old inverted Y steering to the 98-99 HD T steering. The old tie rod measures out to 1.000” while the new one is 1.250”. Both drag links measure out the same at 1.125”.

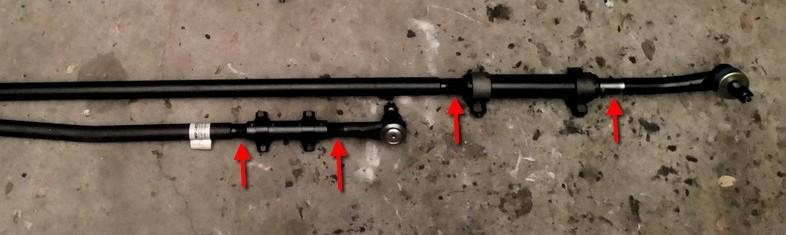
Assembling the new steering is pretty self explanatory by looking at the above picture. One thing worth noting is that when assembling the new steering, make sure that there is an equal amount of thread showing between the rod ends as shown below.
There is an alignment bar (red arrow) attached to the old drag link that needs to be removed and installed on the new piece.
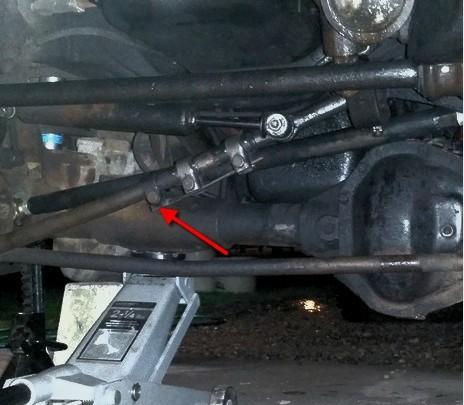
Loosen the 15mm alignment bar nut and slide it forward out of the way of the adjuster sleeve. Loosen the first adjuster sleeve screw, leaving the other tight. Unscrew the adjuster sleeve and short rod end together and remove them. Tap the alignment bar off of the old drag link and install it on the new one as shown below. Screw the new adjuster sleeve and rod end on and you're almost ready to install everything.

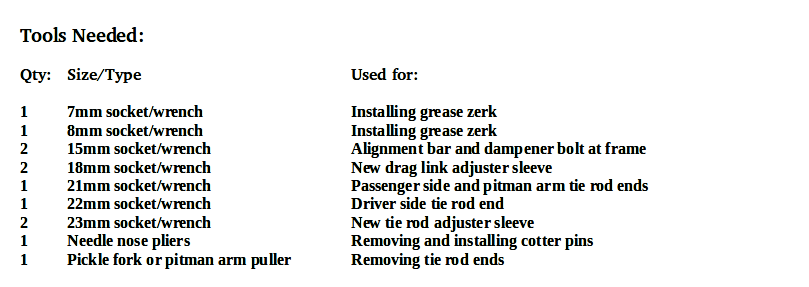
This would be a good time to install the grease zerks. The tie rod end zerks are 8mm and the drag link ends are 7mm.
Now you're going to adjust the tie rod adjuster sleeve until the tie rod fits into the knuckles WITHOUT moving the tires. Moving the tires will throw your alignment off which is what you're trying to avoid. Once the tie rod is bolted on, install the new supplied cotter pins.
Next you're going to loosely mount the drag link to the pitman arm being careful not to move it. Then adjust the drag link adjuster sleeve until the drag link reaches the mounting hole in the tie rod, again being careful not to move anything. You do NOT want your tires OR pitman arm to move. If either move, it will throw off your steering wheel alignment. Once the drag link is tightened up at both the pitman arm AND tie rod mounting points, install the new supplied cotter pins.
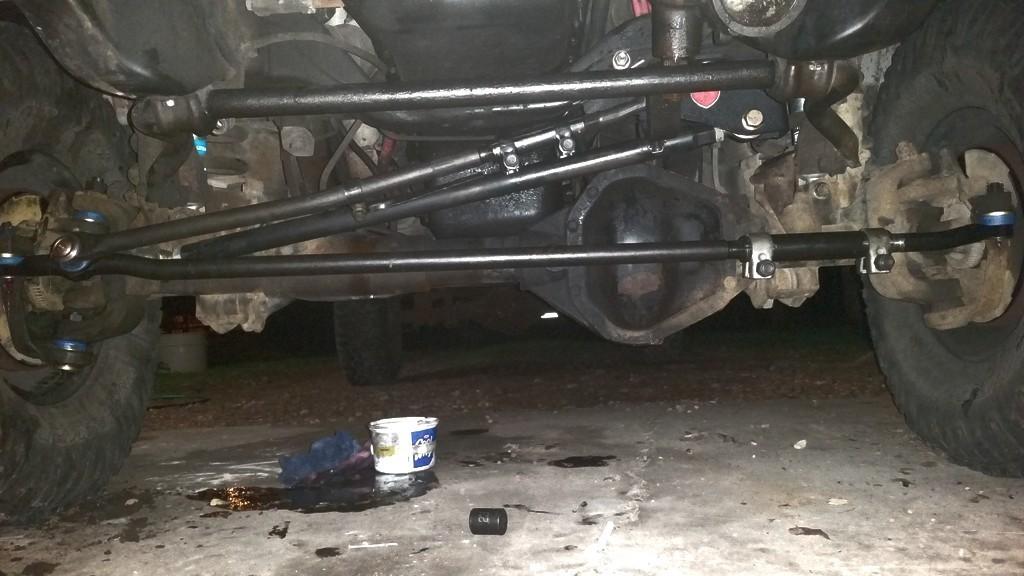
Here's everything all bolted up. I'm not running a steering dampener but they are easy enough to install if you so desire. All that is needed is a universal mounting kit and a new dampener. You can also weld on some mounting tabs as well.
A couple notes:
Even though you were careful to not move anything during the install you will still more than likely need to fine tune your alignment and steering wheel center. My alignment was darn close but my steering wheel was about a ¼ turn off.
I wasn't done centering my steering wheel yet when the picture was taken so the alignment bar was still slid down out of the way of the adjuster sleeve.
-
 5
5
-
 3
3