Jump to content
Posted
  • Owner
  • Popular Post

I'm going to refer to my VP44 post for the first part here.

So you should be to this point if you have done all the work on the link above. So we'll continue to remove the tappet cover and replace the tappet cover gasket on the driver side of the engine. On my truck, the leak is very minor but I want to get this resolved before it gets worse. Being I'm already replacing a VP44 it just a good time to do the tappet cover gasket and fix that oil leak.

DSCF6979.JPG


You need to remove the two 15mm bolts for the rear hoist ring. This is so you can gain access to the #6 injection line nut at the rear of the head.

DSCF6983.JPG


Now you need to remove the two 10mm bolts holding the 3,5,6 injection rails. This is so you can remove the 3,5,6 from the intake.

DSCF6982.JPG


Now there is a 8mm bolt holding the dipstick tube. This caught me off guard so don't forget to remove this 8mm bolt for the dipstick tube.

DSCF6984.JPG


Now loosen the 3,5,6 injection line from the head.

DSCF6981.JPG


Lift the 3,5,6 injection lines from the engine. Place them somewhere clean.

DSCF6985.JPG


Take the two 10mm bolts out holding the fuel filter housing. Then lay the fuel filter over out of the way. This might require removing the fuel lines if you still have hard lines yet.

DSCF6986.JPG


Now remove the three 10mm bolts holding the ECM to the tappet cover.  Lay it over as well toward the driver side fender.

DSCF6988.JPG


Now you need to remove the 10mm bolt on the rear most holding the return line. Then there are three 16mm standoffs bolts you need to remove. Then three 10mm bolts.

DSCF6990.JPG


You may need to lightly pry on the cover to break the seal loose from the block. Be careful not to drop or break the rubber seal into the engine while doing this. It should lift out. 

DSCF6992.JPG

DSCF6993.JPG


Now take some brake cleaner and a rag and wash down the tappet cover and clean the edge. I use a gasket tack for the edge of the cover. I had to quickly put the gasket on so it would tack it together to prevent it from slipping off. Make sure the large tab is in the front and the flat side of the tab is point outwards. The thicker side should be towards the engine. Also watch for the FRONT mark on the tappet cover. 

DSCF6994.JPG


Install. Make sure to put the right bolt in the right spots. I did not use any sealants on the face of the gasket. I highly suggest against using RTV or gasket sealant on the mating face of the tappet cover gasket. This will most likely cause issues in the future. No sealants are required.

DSCF6996.JPG


Just reverse the process to assemble.

Edited by Mopar1973Man

  • Replies 10
  • Views 9.2k
  • Created
  • Last Reply

Top Posters In This Topic

Most Popular Posts

  • No don't loctite the nuts.    Notice in the picture of the back of the motor....   your lines do not line up properly.   I have been wondering why cummins used this type of "tee" to join the

  • Mopar1973Man
    Mopar1973Man

    The only sealant I used was the copper coating used for tacking the seal to the metal cover. Wiped the block edge off and installed. No sealant used on the mating face of the seal. Left it dry and cle

  • Mariocand
    Mariocand

    "I did not use any sealants on the face of the gasket. I highly suggest using RTV or gasket sealant on the mating face of the tappet cover gasket. This will most likely cause issues in the future."

Posted Images

Featured Replies

"I did not use any sealants on the face of the gasket. I highly suggest using RTV or gasket sealant on the mating face of the tappet cover gasket. This will most likely cause issues in the future."


Maybe I am too many into this 12 pack, but I can't seem to figure this one.. I will be reassembling my block here in a few days and not sure what your trying to say here.


You highly suggest using RTV on the tappet cover seal,  but it will cause issues in future?


What about a light coat of oil? Or do you just put it on there dry?

  • Author
  • Owner

The only sealant I used was the copper coating used for tacking the seal to the metal cover. Wiped the block edge off and installed. No sealant used on the mating face of the seal. Left it dry and clean.


Installed the same way OEM did. If it worked this long don't mess with What works.

Edited by Mopar1973Man

  • Author
  • Owner

That's one thing that amazes me. People do some weird things when it comes to gaskets and seals. I can tell you that nearly all this engine from Cummins when it was first built was done without sealants. Now You find engines with RTV silicones mopped on with someone fingers every where. If the job was done right in the first place you'd never have to mess with it again. Now the few tappets I done so far you end up scrapping tons of different glues and silicones off the covers and the block. The chance of failure is much higher because of all the scrapping, wire brushing, etc to get all the old sealant off. Like my cover the old gasket peeled right off for the most part except where the gasket was harden then it broke off. The metal was clean just wipe it off an install a new gasket. 


So for most all covers and engine gasket require ZERO sealants... Thew only one I can think of is the gear case cover. That is installed with a bead of gray RTV silicone no gasket used.

  • 1 month later...

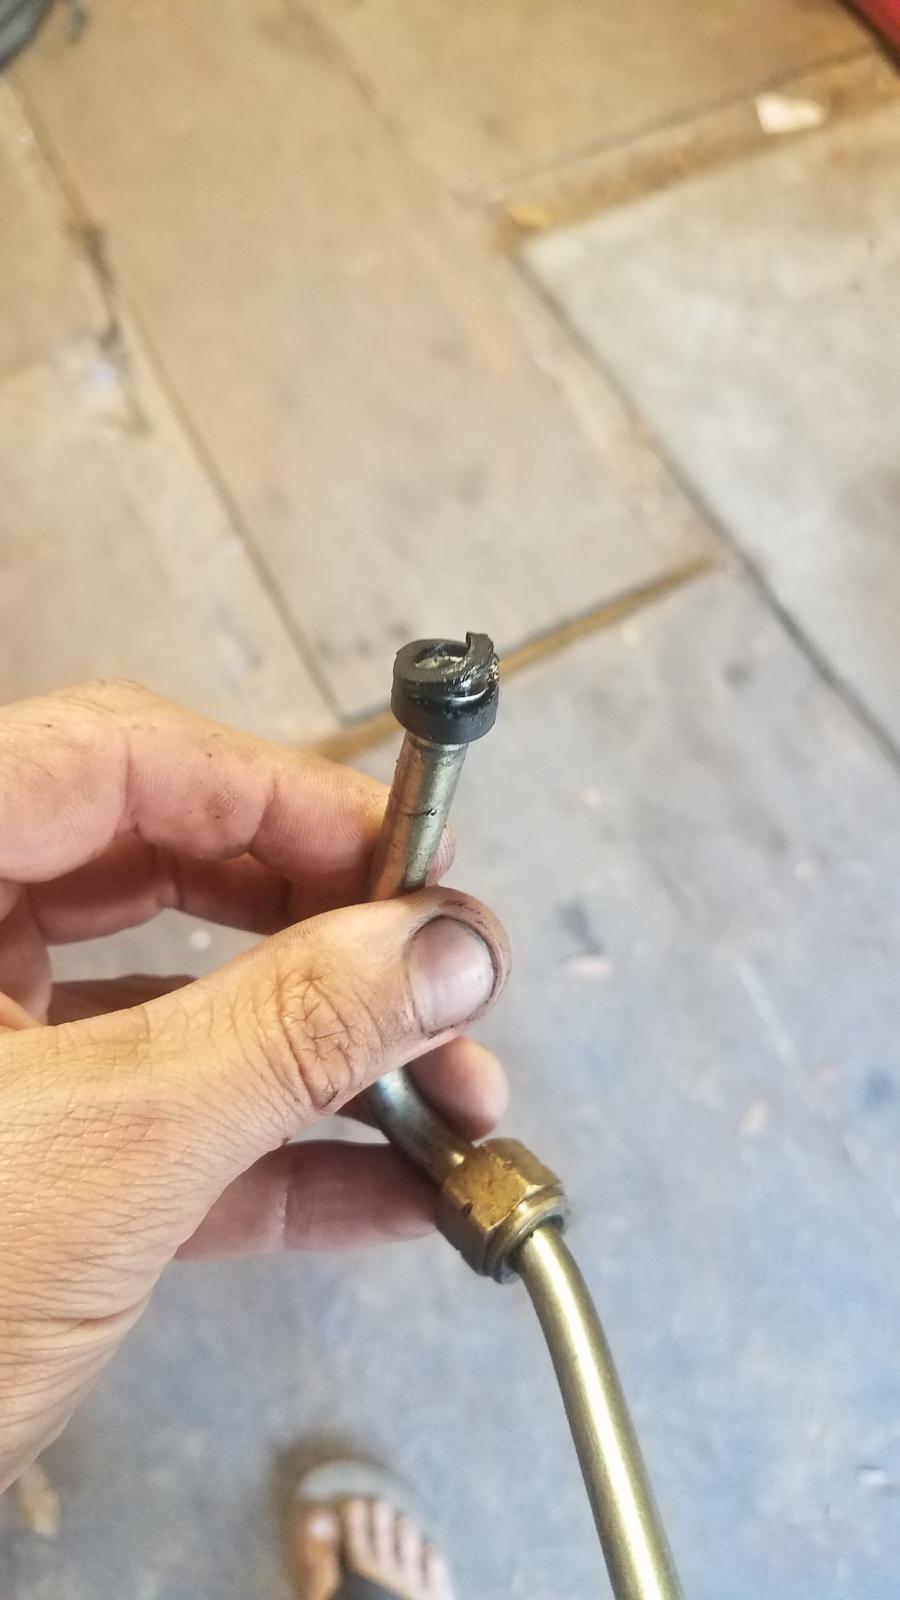
Have you ever heard of the fuel return line that goes to the T leaking? I know there are issues wirh older ones because of the rubber gaskets that are in the fittings, but I replaced all the lines and fittings, still leaks fuel. Still driveable, it is not dumping put, but I can smell it in cab while driving, and it drips off of the clutch housing when I park.  Besides the obvious, i.e. tighening the bolts, again, is there something I am missing?


This is where I suspect it is leaking from, however, as you know, it is not an easy thing to get to when the motor is in.......

20170516_125714.jpg

that's a very normal place to leak.


use the part number lookup tool we have to find the right pn for the oring.

I bought a new T, and all the lines a week ago. They came with brand new rubber on them as well as banjo bolt washers. The one in the pic is the old one. 

I had initally suspecred that I had smashed it against firewall during install. However, after tgrowing my wallet at the truck and showering it with money for new parts, I found the issue was a rubber gasket. 


The new parts did not leak for 2 days, then right back where I was... 


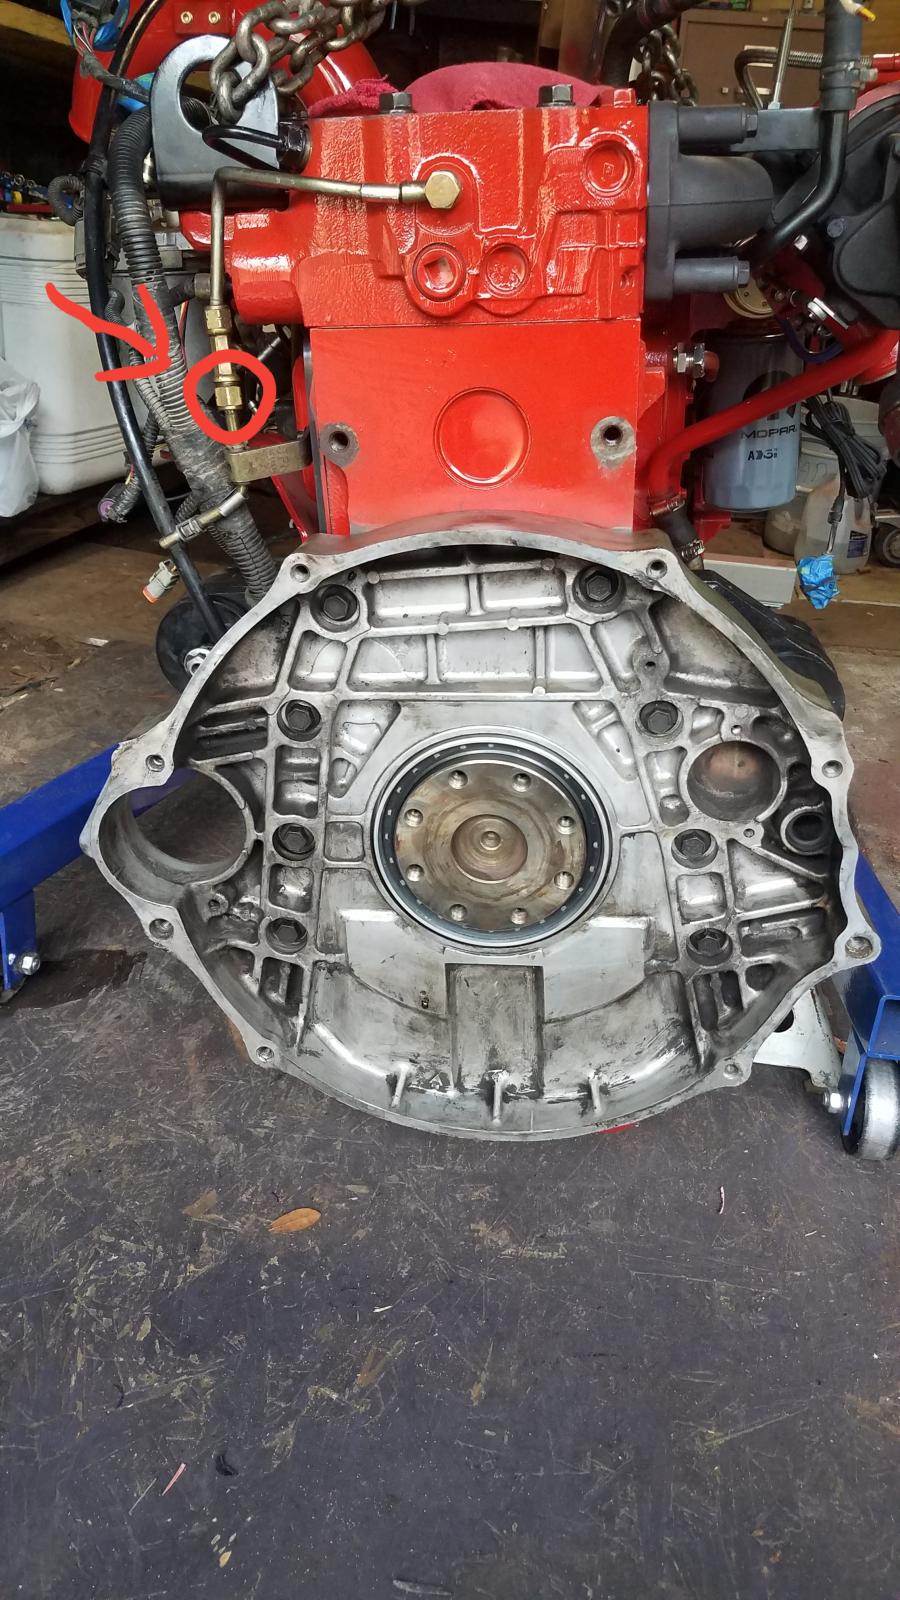
I am going to take the whole thing out again to see whats up....is it ok to locktight the bolts on the T?

20170519_184119.jpg

I wouldn't use lock tite on that fitting.  


looks like the rubber got pinched in the fitting.

No don't loctite the nuts. 


Notice in the picture of the back of the motor....   your lines do not line up properly.   I have been wondering why cummins used this type of "tee" to join the lines. (english fords and massey ferguson tractors are covered with them....)   It is to survive the vibration and to allow a "little bit" of room for mis alignment of the tubes coming to the fitting.  (but i think you have too much mis alignment)


It is hard to visualize how this fitting goes together, but,  make sure you slip the "o-ring" over the line, under the nut.  when you insert the line into the tee, theoretically there should be metal to metal contact of the tube to the tee fitting.  The nut crams the "o-ring" around the tube and inside the tee fitting. 


This has to happen in three places simultaneously....  The only way i found to do it with the motor in the truck,  loosely put the line on the back of the the head, with the tee already started.  Take the bracket loose from the block and start the return tube. Then see where those line up to the VP return.... and hope it is ok....   now try to see where the bracket on the return is compated to its proper location.....  You can't use this tab to pull all of it back into place, you have to bend tubes so it is stress free.  


I hope this helps you!   Good luck!  If I have to do this again, I will be using parker push lock banjos etc to do it.  That is a total pain.  


Hag