Ironforger
Yearly Subscription
-
Joined
-
Last visited
Everything posted by Ironforger
-
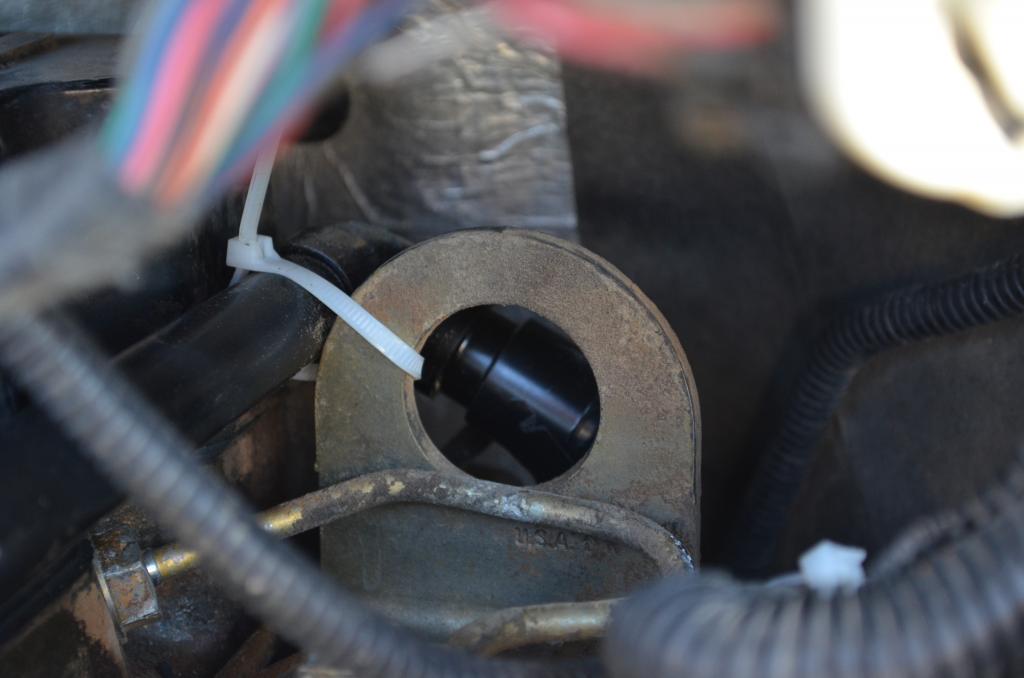
I've been down this road. Read my entire thread. Picture of the case bolt diagram on the second page. http://forum.mopar1973man.com/index.php?/topic/7533-going-to-kill-the-kdp-soon-advice/ My dowel pin was fine, but it was worth taking it apart as several of my case bolts were loose, good opportunity to change the seal & clean up the front of the engine. Deleted the puke bottle too. Additionally, the "tab" most guys are using simply is not necessary for any truck with the KDP. Once you tap the dowel pin back in, a few hits with a center punch around the circumference of the dowel pin will lock it in forever.
-
Wow, first time ever for this. Truck has been reliable for years. Always consistently started right up with just a touch of the key, cold or not. Now, suddenly one moring I go to start it up, it started for a few seconds then died. Tried it again, same thing. Tried it again, gave it some pedal then it started & ran fine afterwards. Good power idles fine. Issue only occurs when attempting to start. Seems it will only start if I pump the accelerator pedal while cranking. My first thought is fuel filter? Just picked one up yeterday, will try to install Saturday. Finally supposed to warm up here in NJ! Any tips or advice greatly appreciated. Thanks!
-
Thanks guys. I'll add this to my list of things to do, which is huge right now. Hopefully soon.
-
Thanks. 4 bolts? I see only 2 on the flange that bolts to the timing gear case. Where are the other 2?
-
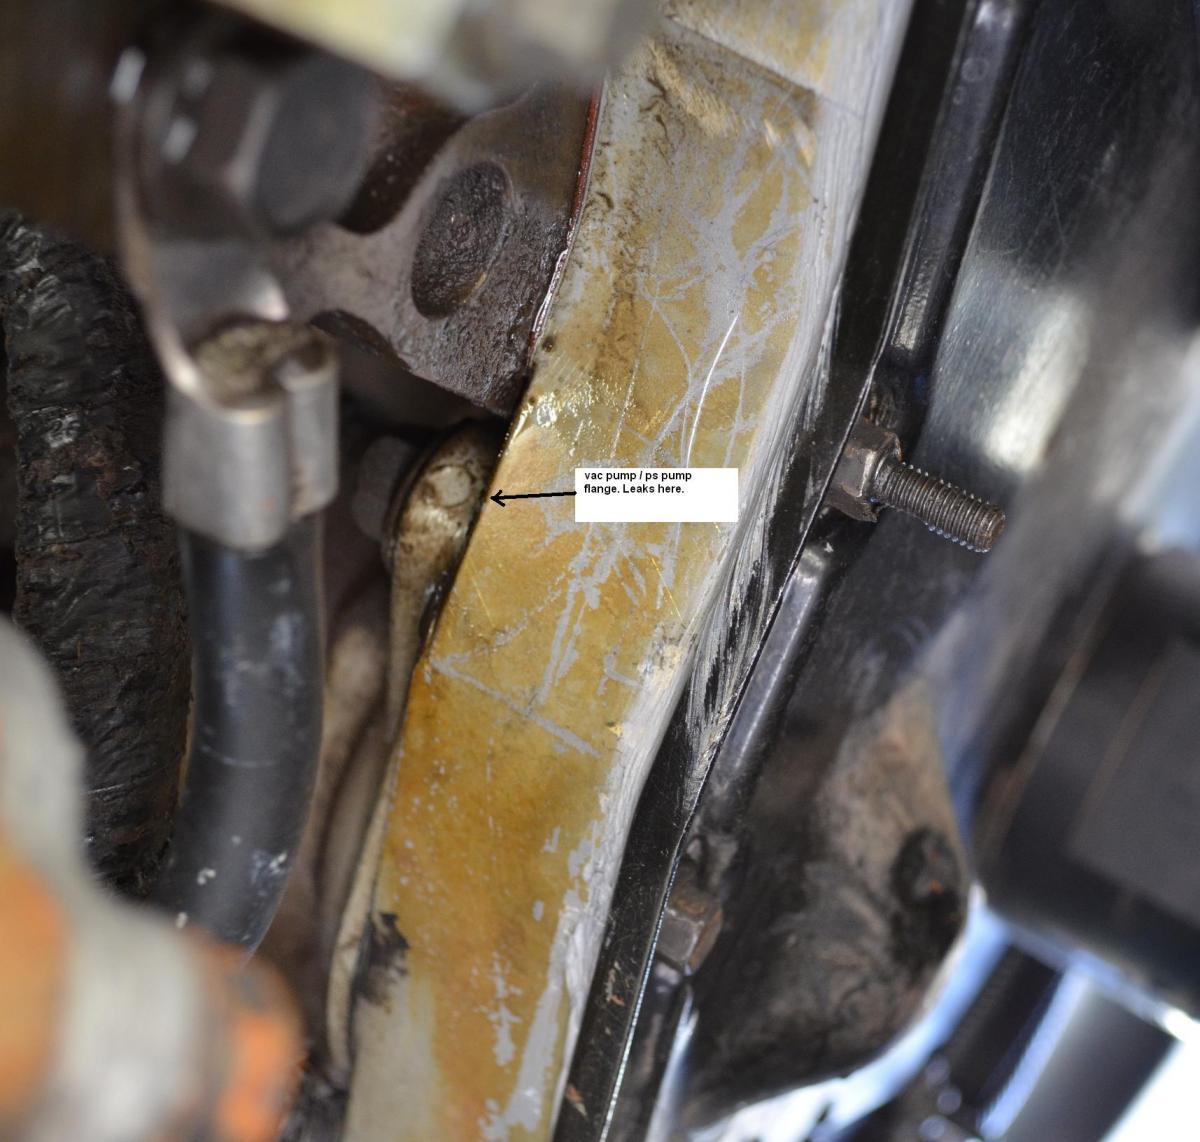
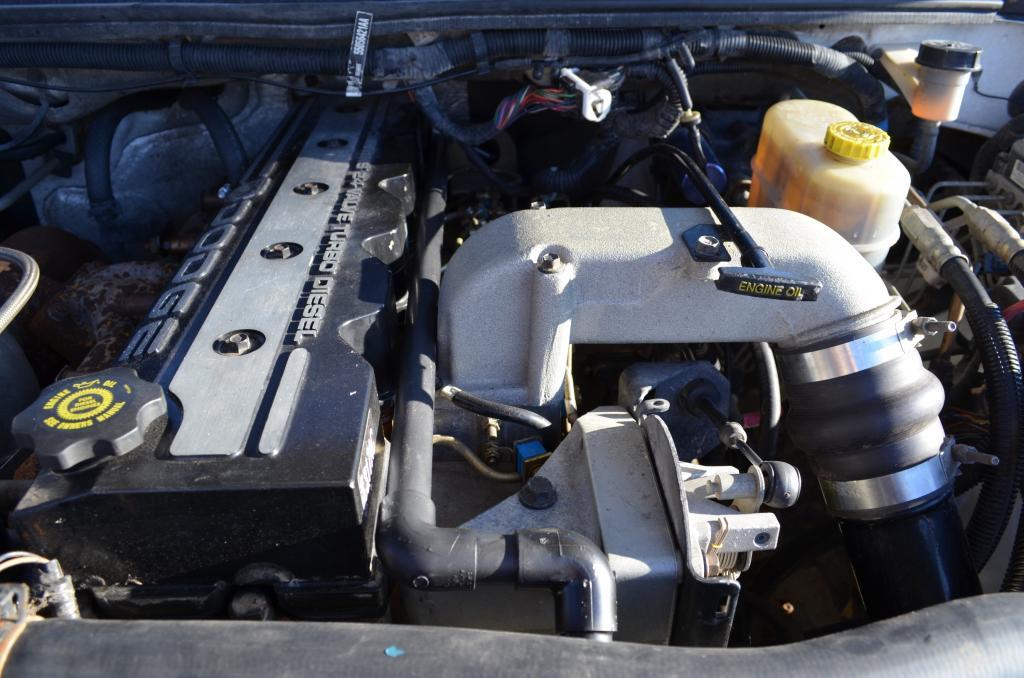
Damn. Recently pressurewashed and thoroughly degreased my engine. Yea, I know once the engine is squeaky clean this the best way to spot leaks. So, I have an oil leak where the vac pump / ps pump flange mounts to the rear of the timing case. Dammit! Hard to get to. Has anyone taken this assembly off to change the gasket & resolve an oil leak? My first gen has a leak in the SAME EXACT area. I tried to remove the assy on that truck and ended up frustated. I'm not fixing this issue on the old first gen, but my 02 is one sweet truck so I'm inclined to fix and keep it clean. Any tips or step by steps? Picture attached. (picture taken while i was laying on my back looking up, kinda hard to get the shot but I tried) Thanks! Click picture for big view.
-
Damn. Recently pressurewashed and thoroughly degreased my engine. Yea, I know once the engine is squeaky clean this the best way to spot leaks. So, I have an oil leak where the vac pump / ps pump flange mounts to the rear of the timing case. Dammit! Hard to get to. Has anyone taken this assembly off to change the gasket & resolve an oil leak? My first gen has a leak in the SAME EXACT area. I tried to remove the assy on that truck and ended up frustated. I'm not fixing this issue on the old first gen, but my 02 is one sweet truck so I'm inclined to fix and keep it clean. Any tips or step by steps? Picture attached. (picture taken while i was laying on my back looking up, kinda hard to get the shot but I tried) Thanks!
-
Nice setup. I like the guage pod option. I'm ready to buy and considering putting this on an "A" pillar gauge pod. Question: Are the leads long engough if i install this in an A pillar gauage pod? Thanks!
-
Chris, You can get the Factory service manual right here on mopar1973man.com. Go up to the downloads area. I did the puke bottle delete as detailed here: http://forum.mopar1973man.com/threads/1514-Mopar1973Man-s-Crankcase-Vent-Modification Here are a few pictures of my setup. Pretty much just like instructed in the thread with PVC and fittings. I ran it up over the motor, zip tied to the back engine lift eyelet, the a couple of 45 degree bends down, a short straight down pipe then connected 3/4 heater hose to run along the frame rail & exit out the back. Caveat: I put a male/male heater hose connector just under the drivers side floor to make an easy dissconect. Makes it easy to remove the whole over the motor PVC assembly if ever needed to work on the motor/remove tappet cover etc. On another note, if you do remove the radiator it sure makes it easier, more room to work with & if you are skinny like me you can get right in the engine bay. I replaced all coolant hoses & standing in there sure made it easy to reach the heater hoses coming off the top of the head to the heater core. Definitely order the molded 90 degree heater hoses in advance. A straight hose will kink just off the head outlet. I'll be detailing my fuel boss setup in one of my other threads as soon as I get a chance. Click images to view full size.


-
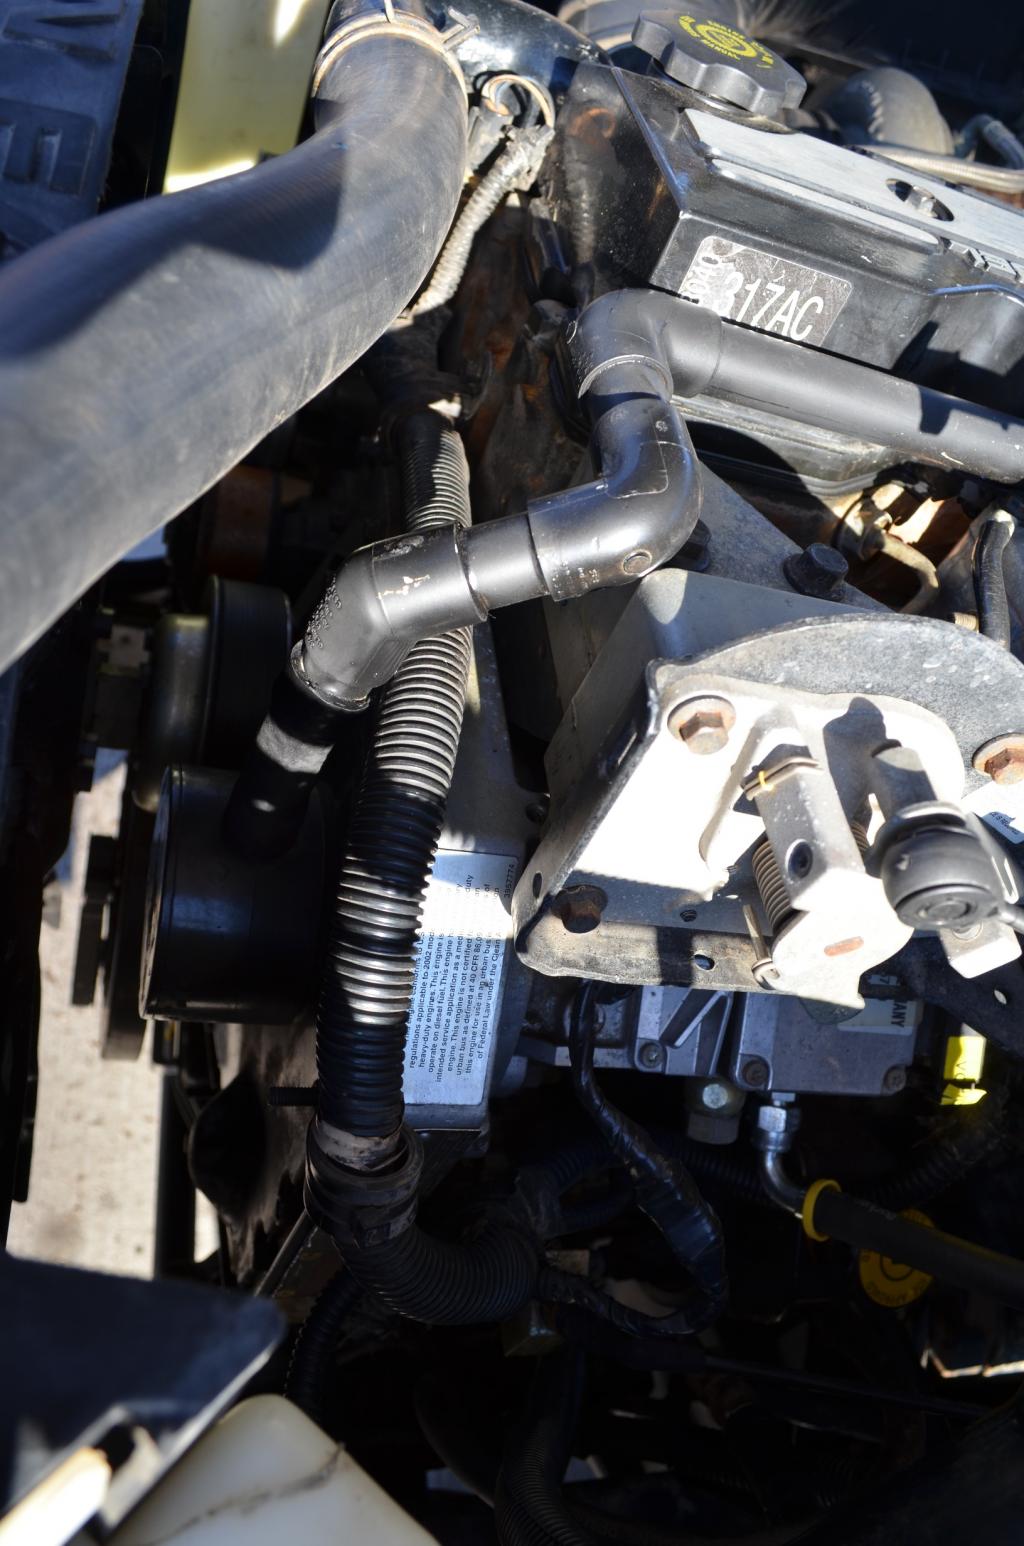
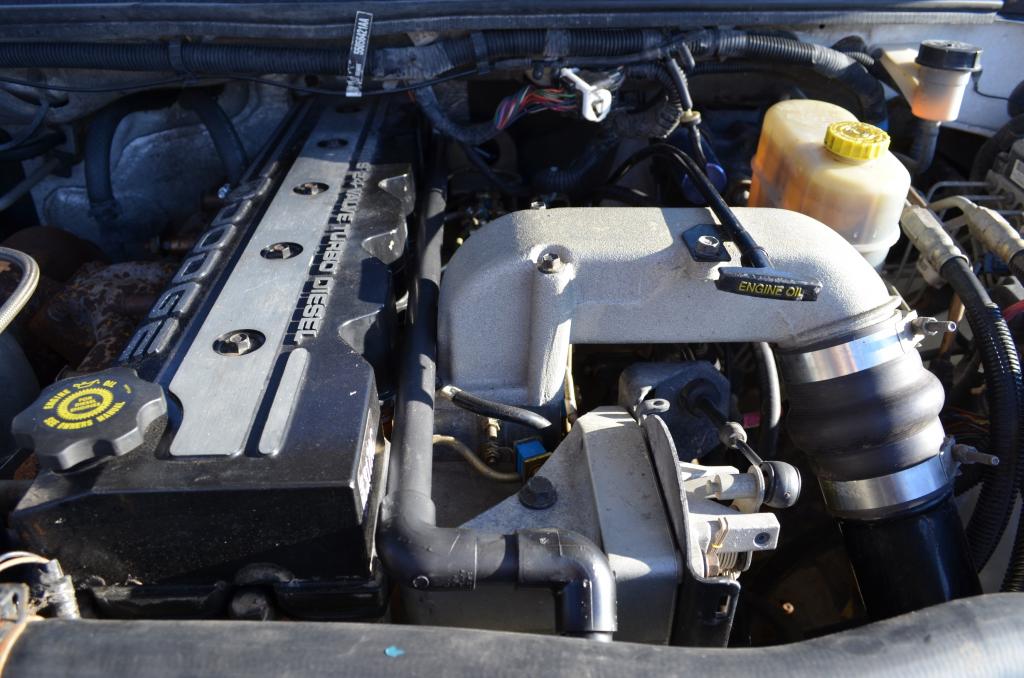
I have an 02. I just installed the fuel boss mechanical lift pump. Before I started this project my engine was a horriblle greasy mess. More than likely from the puke bottle but there was so much grease everywhere (and I mean everywhere including the radiator) that I decided to not only to delete the puke bottle, but change the front crank seal too, just to be sure. So I spent 2 days meticulously scraping/degreasing/pressure washing. Yay! finally shiny clean new looking. Took it all apart, Dowel pin was fine, Center punched the perimeter to lock it in place (no, I didnt tab it). While in there I took out all of the accessible timing case bolts, used medium strength blue loc-tie and re-torqued to spec. Some seemed sort of loose but not alarmingly so. Put in a new crank seal (take your time, it's tricky) sealed it up with grey rtv, put it all back together & no leaks. A couple points to ponder: Did not need the "special" wrenches to take fan apart. Easy to take off just undo the 10mm bolts holding it to the block. You will need to slightly grind the box end of a wrench to get the one bolt closest to the pulley. Way easier if you take the radiator out first (if you need to that is). take the the shroud off first and hang it loosely over the fan, then pull the radiator. Now you can easily remove the shroud and fan assy. If you are not removing the radiator then you gotta pull the fan and shroud out together. can be done alone but easier if you have an assistant. View my thread for details & gear case diagrams: http://forum.mopar1973man.com/threads/8556-Going-to-kill-the-KDP-soon-advice Another note, while installing my fuel boss I noticed that the majority of my oil pan bolts were way loose, litterally hand tight. Glad I noticed.
-
Yea, I was thinking about that. Figured I'd make the drain hole at least 1/2" or 3/4 npt depending on where I can source a decent magnetic plug. Quick drain and magnet plug to grab any ferrous metal slivers or pieces to exam for either normal wear or more alarming damages.
-
FeelerI know there are aftermarket coolers that bolt on in place of the NV5600 PTO cover. I'm thinking of fabricating an inexpensive/affordable alternative replacement cover, not for added cooling but more for you guys who are not as concerned about cooling but more interested in just simple mods such npt ports for temp sensor, fill and drain with a magnet. Seems silly to pull the shifter for overfilling & pulling the PTO cover to drain. Why not a just a few simple npt ports. A couple of questions:Anyone have a spare PTO cover or 2 laying around? Looking for a few covers for prototype template fabrication/testing.Most guys are overfilling the NV5600. How many quarts? And about where does that put the oil level on the PTO cover? Just so I know where to put the npt bung for the fill, or if it needs to be extended higher.Thanks
-
Good info. Thanks!
-
Has there ever been feedback from an actual pump service facility or technician regarding common failure points on these pumps?
-
Bill, Would you happen to have a picture of the routing you took for the garden house? Curious to see exactly where you ran it. Up over the engine? Off to the side? Thanks
-
He's right, If you have a puke bottle it can leave you with a huge oily mess about the front of your engine and radiator. Best to delete the puke bottle as detailed here: http://forum.mopar1973man.com/threads/1514-Mopar1973Man-s-Crankcase-Vent-Modification My truck was profound, oil everywhere, entire front of engine, fan, fan shroud and radiator all caked with oil and dirt solids just like in the picture on mopar1973mans thread above. I spent nearly 2 days degreasing/scrubbing and pressurewashing engine and everything in the vicinity. If your radiator is full of oilbound solids, best way to clean is take the fan & radiator shroud off, then remove radiaotor, i & soak with degreaser & gently (very gently) scrub with a plastic bristle brush as not to puncture or bend the fins. I then lightly hit it with a pressure washer at a 90 degree angle (dont' want to hit it sideways or you will bend fins).
-
Check out my thread. I did mine last week: http://forum.mopar1973man.com/threads/8556-Going-to-kill-the-KDP-soon-advice Caveat- you should take it apart regardles. If it's a severe leak, just to make sure it's not the kdp Since you must remove the timing cover to get to the kdp, it's a no-brainer you might as well do the crank seal since it's pressed in timing cover. The crank seal must be carefully tapped in from the back (gear side) of the cover. Just make sure it's facing the same direction as the original. Personally I would reccomend you get the replacement seal from the dealer. It comes with a plastic ramp like sleeve that allows you to install the timing cover back on the crankshaft without rolling the seal lip. I had a hell of a time installing the seal, but now that I've done it I can do it again no problem. Just take your time, keep everything clean and use the ultra-grey rtv when re-installing the cover. Also, take a good read in my thread referenced above. Make sure all the case bolts are tight (and don't over torque!).
-
I'm ready to buy. Looking forward the seeing pictures of the actual finished product, both cubby hole and guage pod. Appreciate the hard work you guys put into this device.
-
If it was me, I'd be thinking about ruling out the instrument cluster. Have you tried swapping out the instrument cluster? I know that most people might not have a spare instrument cluster laying around, but if you can find a known good used one, try swapping it out. If issue continues then the instrument cluster is ruled out and start looking elsewhere.I know I asked this before, but have you checked all of the ground to body terminals? There are quite a few under the hood alone. Did you check the ground terminals on the drivers side below the headlamp? (kind of in front of the battery) My truck has 2 in that viciniity. one looks like it's grounding a whole cluster of circuits, more than likely electronics. Grounding issues can cause all kinds of problems. A faulty ground could easily cause the issue you describe.
-
See if you have voltage at the lift pump when you bump the key.
-
Well my truck has 200k on it, and who knows what fuel pressures it was running with the previous owner or how often the fuel filter was changed etc. Sure runs great though.I purchased a fuel boss & big line kit, installing soon & guages too. I'm not running the truck until I do. Just hoping the Vp44 is ok. I'm assuming it's the original, but I'm not certain. Is there any real way to tell if my vp is orgininal or been replaced?
-
Hello from Lawrenceville, NJ. (NJ is also not considered to be a New England state!)
-
Cool info. I'm think I'm going to buy the New revised MPG/High idle switch soon. In the meantime, my brother's stepdaughter is actually a mechanic at my local dodge dealer. I'll see if I can hit her up for an ecm flash.
-
That's pretty cool. Thanks for the explanation. So, for example if the dealer flashes my truck, how then does the high idle activate? Does it come on automatically somehow? Or Do you actually need a smarty or the fooler to truly be able to activate a high idle?
-
High Idle 6 & 3 Cylinder. Can somene explain this in greater detail? If you choose 3 cyl, does it add extra fuel only to 3 cyls? Or does the 6 & 3 each represent a different high idle speed - 6 being higher? Not completely understanding this. Thanks
-
Ok, opened it back up and checked all of the bolts, 3 of which are accessible through the cam gear spoke holes. They didnt seem too loose but I took them out, used medium strength loc-tite and re-torqued to 18 ft-lbs as per the shop manual.Caveat: 18 ft lbs might seem like hand tite/nothing to the average person. I can't help thinking that this would easily be mistaken for a loose bolt as alot of us have the tendency to over-tighten and the "need" to know that a bolt "feels" tight as we're cranking it down. Small bolts, not much torque needed.I didnt see any bolts behind the IP gear. That part of the timing cover sits off to the side of the block since the IP pump is hanging off the backside of it.