Wild and Free
Unpaid Member
-
Joined
-
Last visited
Everything posted by Wild and Free
-
You were told wrong, with your head gasket kit "if it is OEM Cummins" there will be a head bolt reuse tool which consists of a plastic cut out measuring device you lay the bolt against to measure the length and it shows a good and bad reuse range on it. I have never seen a head bolt stretched out of range using their tool but have replaced most from being rusty and pitted.
-
That is a very non critical spot and is common spot to leak. How bad it leaks makes the difference in the approach. When I worked at the truck shop and saw this on a monthly basis believe it or not we got about 75% of them to seal up by adding some GM seal tabs and doing a retorque on the head if it was just showing signs of leaking, I have even seen the seal tabs alone seal up the weep in that area. If wanting to pull the head then it is very basic, no need to take the exhaust off from the head just the intake pipe and exh pipe from the rear of the turbo and pull it as a single unit. I would go right back in with the stock head bolts unless you plan to add power and boosting in the future. If the stockers are rusty and pitted then you can choose new bolts or studs but if they look fine reuse them. My 02 cummins showed the signs of this leak @ under 50K and I did the approach above and ran it hard for another 100K @ 560 hp power pulling and a few drags and it never showed up again.
-
It is truly hard to knock a Duramax as they are very good engine, I am more of an old inline diesel guy myself, if not for that I would not be looking away from a d-max.
-
The park rod is the easy part I find getting the snap ring off the shift linkage rod a bit of a pain and then going straight down and then straight back up without popping out the seal for the shift linkage shaft is the trick.
-
I thought this was the way it was done, you get your personal use from it then it is already rerolled and ready for the engine.
-
My 3rd gen 05 CR has been a fraction the cost of my 02 24v to drive and maintain. Not nearly as many upgrades needed to keep them driving nice. Lots heavier frame, tighter body with less creaks and groans, heavier drive train, interior is a wash. Ease of maintenance I think is easier too. Less quirks overall. As far as the 5.9 overhaul they all would be a wash, the new 6.7 would be higher and labor would be more as well due to the extra emissions equipment and such.
-
But they are built by big beer guzzling Germans.
-
Will do!
-
Wife has an ear to ear grin driving this thing around now with all the new found power and how fast it spools, she wants to hunt down and race all the young kids now.
-
I use a hammer all the time to do studs, maybe use a vice on some with a socket or pipe depending on the drum or hub design. As far as torque there are too many rims types and lug sizes to just throw out a number, each is different. I go with MFG specs on them or if standard lugs on steel wheels then I go with SAE torque for fastener size.
-
I have a hearing aid to the tune of 3K out of pocket expense and hearing loss that say otherwise resulting from listening to loud engines over the course of my life running them and both working on and around them.
-
On trailer rims of any sort I torque torque and then recheck the torque and then recheck again several times a year. The side radial loading when doing sharp turns tends to make things flex and loosen them up. I have a couple trailers that are bad for nuts coming loose unless I keep them constantly torqued up. My pontoon trailer is the worst, I think I have replaced 2-3 rims in the same amount of years, I have been lucky and caught them before they damaged the studs of failed completely, they crack out through the stud holes over time. Since I have done a more extensive retorque check I have stopped the issue so far.
-
Ha HA that was the better part of 10 years of my career pulling wrenches working out of a service truck for different companies. And most of the work happens when it is below zero or really hot, always the extremes that bring out the worst in equipment and never next to a wind break or shade.
-
Lol, yeah folks would rather spend 2-5K on mods and not 2000-3000 on a basic 7-9K lb hoist to make life a whole lot easier if one does a lot of wrenching. Priorities I guess. , I paid just over 2K for my used 7K lift and that was installed price to boot. Best tool I have ever gotten, I use the heck out of it. I have saved that alone and then some in Chiropratic bills, laying on a creaper is the worst thing ever on my back.
-
Most are lifting the cabs / front clip to do engine work on the Duramax too. Not sure how long it takes to lift one of those but all the guys who have done them on the Fords say 1.5- 2 hours to have it lifted off the frame.
-
Looks like a mix of adhesion and adhesive wear but hard to tell from pics totally. When looking for issues one needs to lay all bearings out from 1-6 both mains and rods to see the big picture of wear patterns which can tell a better story. Abrasive is foreign debris entry into the lube system Adhesive wear is the result of lube issues and can be caused by many different things including over speed, fuel or coolant dilution, oil level wrong oil viscosity, additives, misalignment.
-
Got her all put back together and did a highly technical patch job on the damaged wires of the egt sensor as I just couldn't wait for a new one to see if it was going to work and I had total success!!! Took her for a 25 mile test drive and ran her through the paces and she passed with flying colors. This thing runs awesome and has really nice smooth power and lays you back in the seat a bit now.
-
For some reason this came to mind with that comment. https://www.youtube.com/watch?v=F9sY6iH9Ojg
-
Not to mention 25-30 pounds lighter and a lot less heat under the hood now too.
-
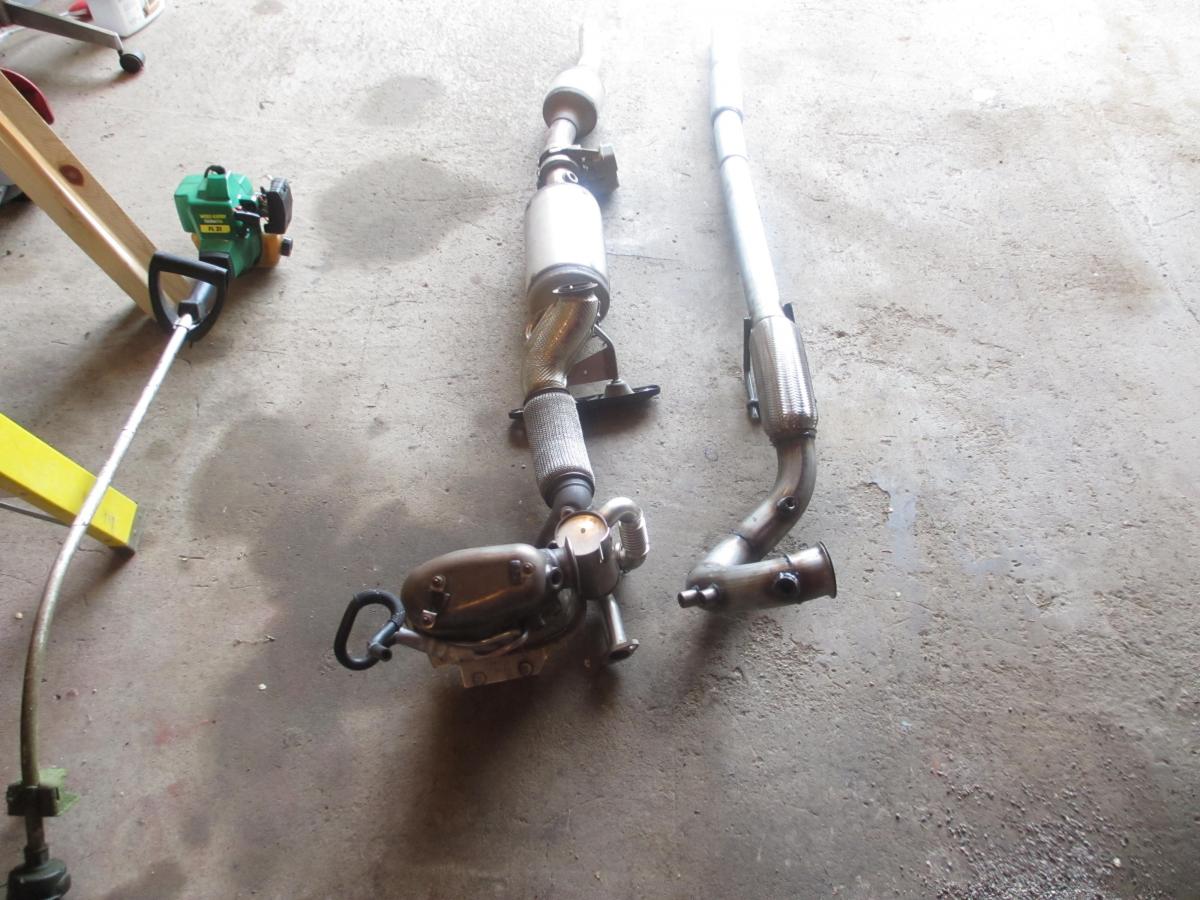
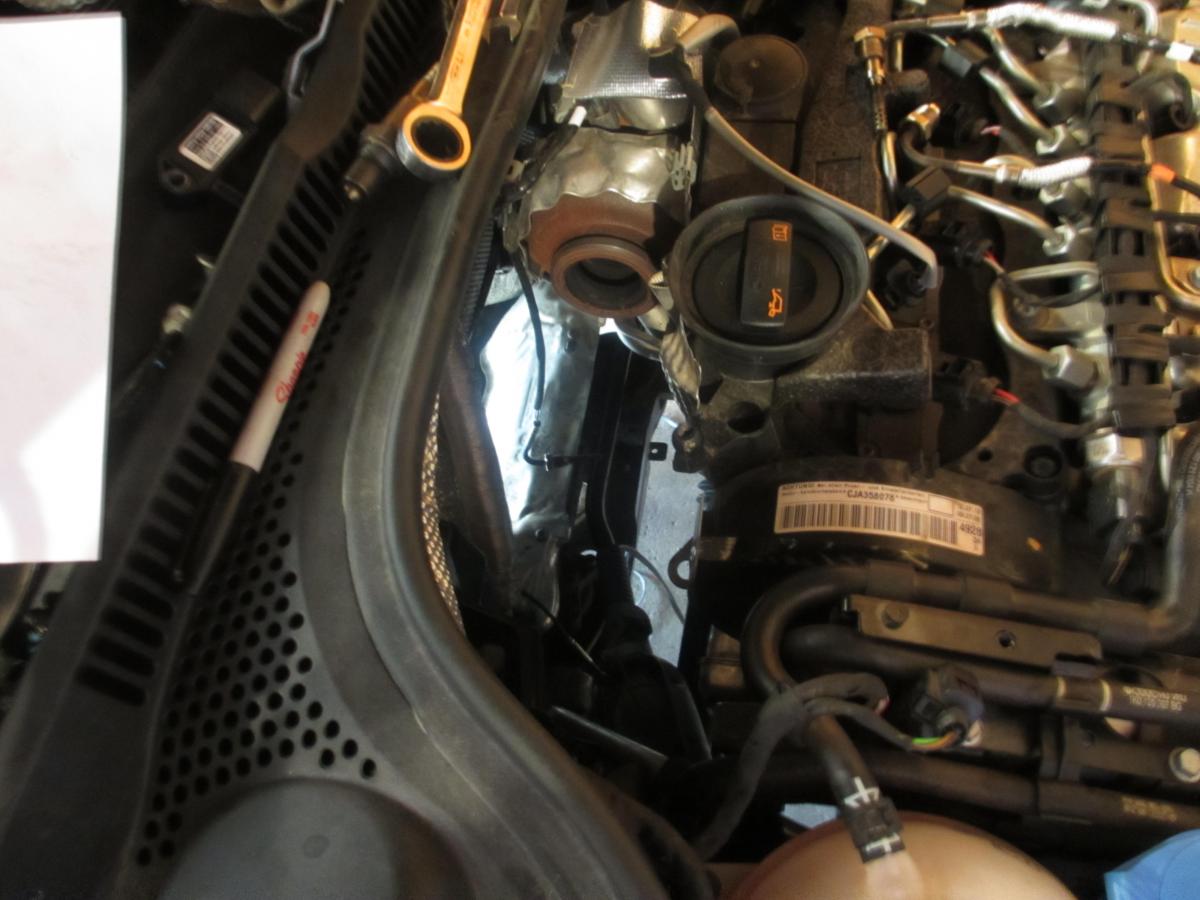
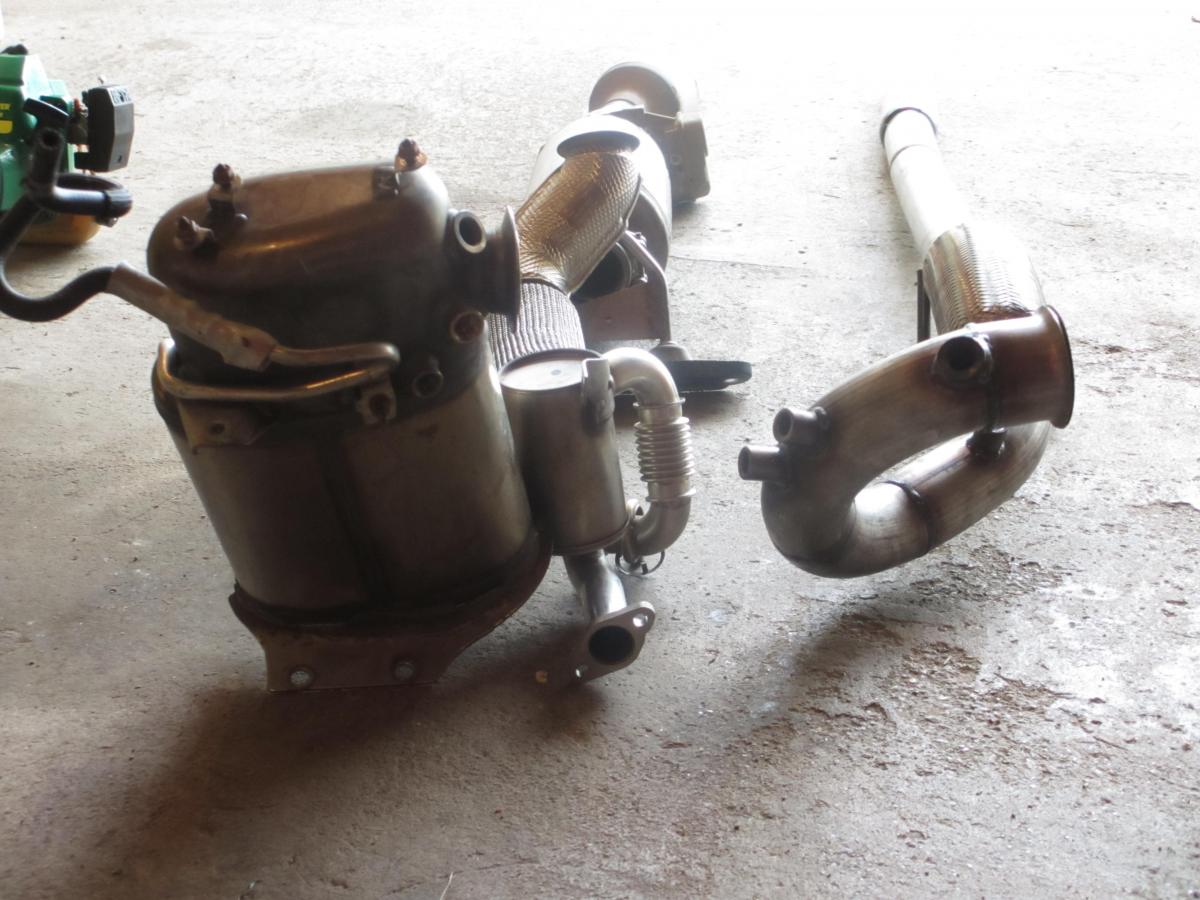
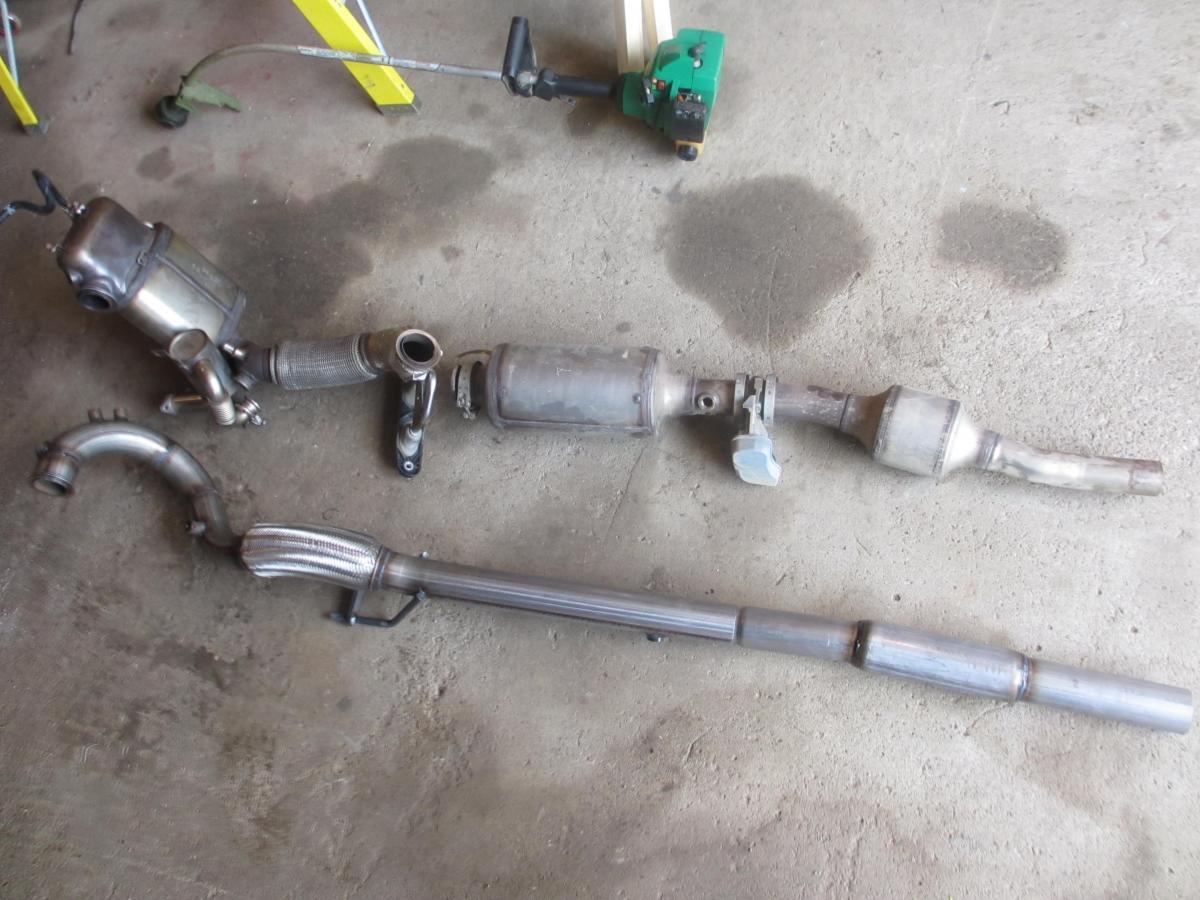
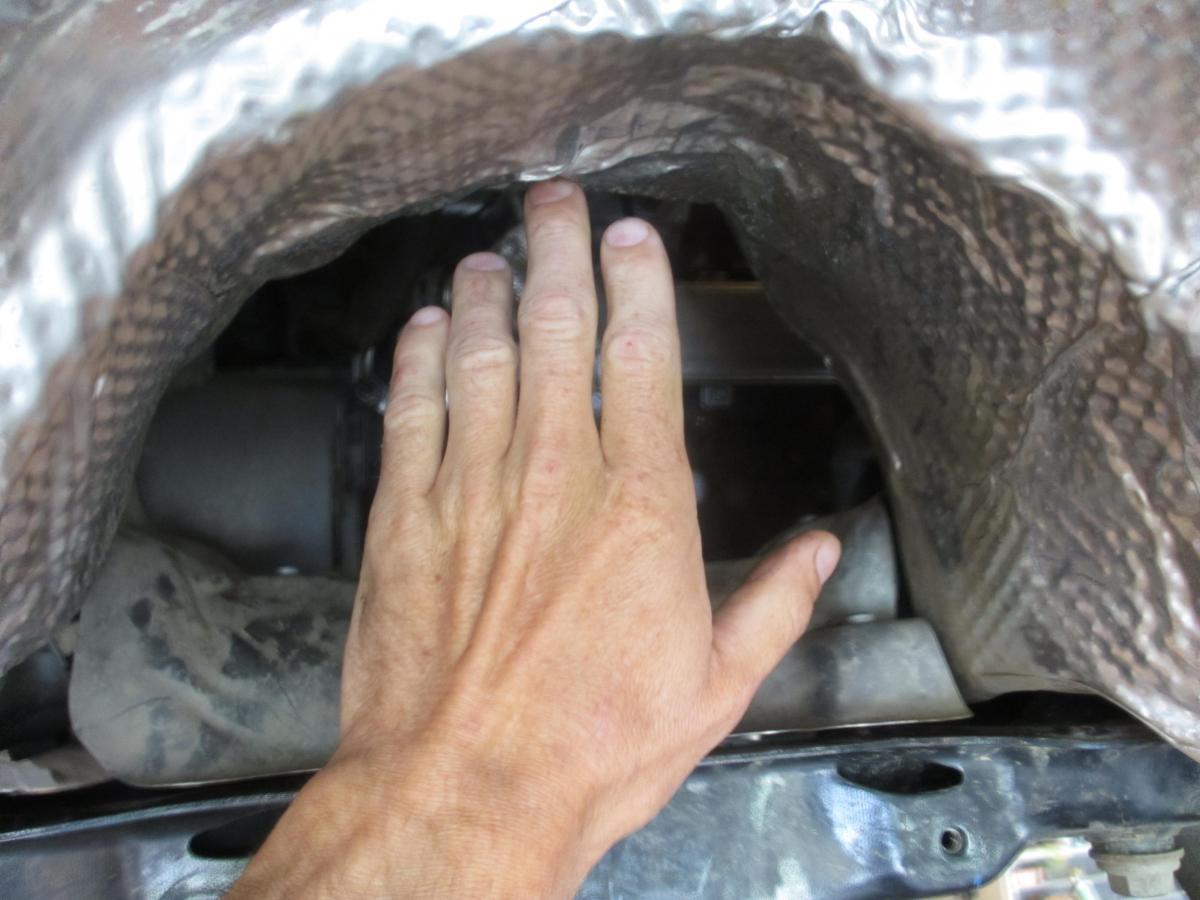
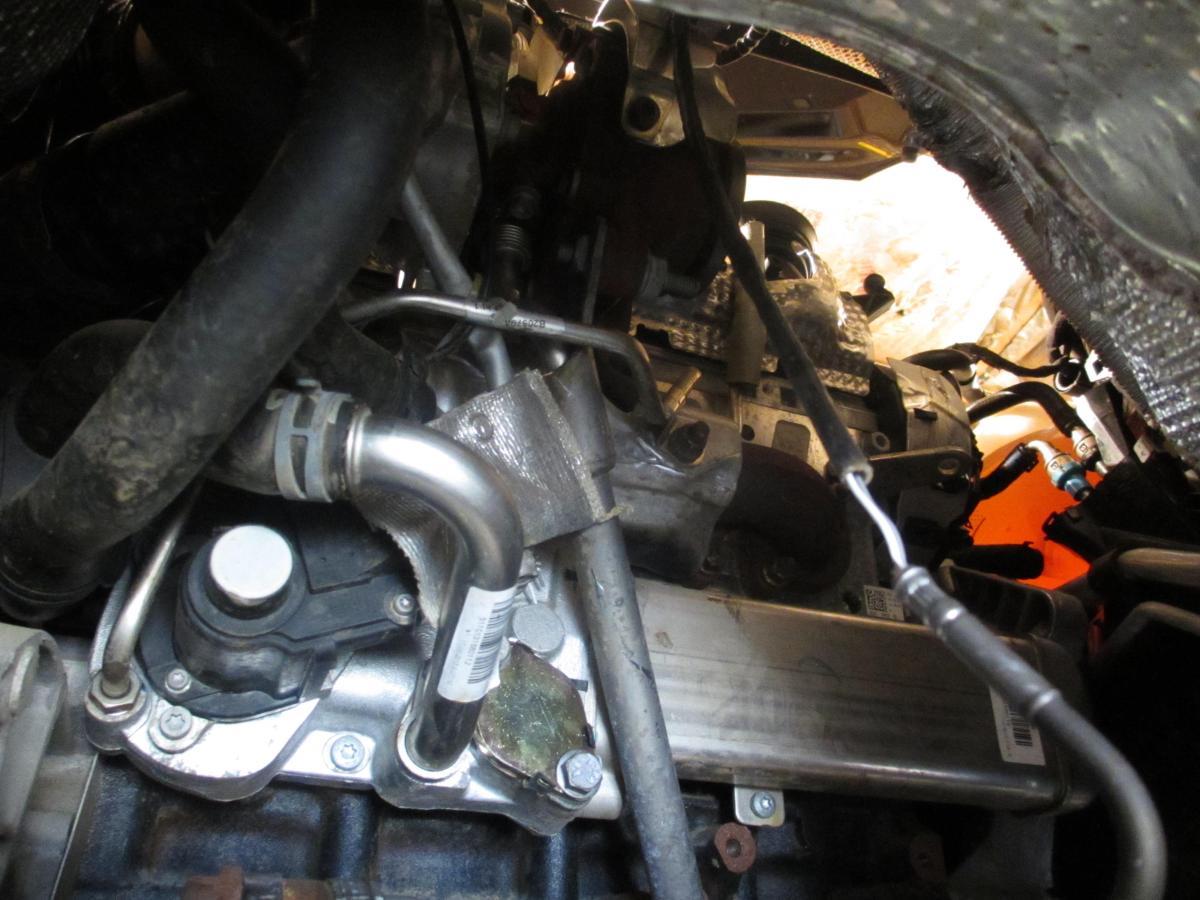
Just to give an idea of what I was dealing with, a pic of the old and new systems side by side with different angles to see all the sensor bungs. A couple shots of the engine and the back side from the top where the dpf was and from the underside with my hand in there to give an idea of the size of hole it had to come out of. Plus you can see the bright egr blocking plate under the turbo in the one pic as well. I ordered my kit with a resonator which is in the pic, didn't want a nice quiet car having drone with a straight pipe going to the factory mufflers with the dpf, cat, and factory resonator all removed.


-
Getting there real dang quick. I will reserve judgment for a bit until we get some miles on it and see the MPG and power gains from this ordeal and if any other issues pop up. If it does indeed pick up 5-10mpg with 35 extra hp with the tune it should pay back rather quick pending no other issues arise since we tend to hold on to vehicles for a while and the amount of miles my wife puts on. We are still ahead of the game with what we saved over book but this venture burned up about half that savings alone. But I don't know that I would totally count it as I would have most likely done this delete anyhow down the road, just didn't plan on doing it @ under 8K miles on the car. Time to go put things back together now, will get some pics to post later...........................................
-
RV slot, Motel???????? I thought you had a guest house, bed and breakfast, first class service with the best soap on a rope money can buy.
-
You have no idea, this is the sensor I took it to the dealer for do to needing a special tool to get to it and get it out, it is nearly impossible to get to with the DPF installed not to mention it is in the manifold and not the dpf, it got smashed against while twisting the dpf around to get it out. It is truly amazing how much crrap was stuffed in that small space between the engine and firewall. The dpf alone has 2 pressure sensors, 2 EGT sensors, and an O2 sensor directly mounted in it, then add the piping mounted to it for the pressure sensors and then the EGR canister was mounted to it and then there was a third egt sensor mounted in the pipe directly below the dpf but still part of it. There are 4 egt sensors and 2 O2 sensors on this thing. Had I seen it was going to be as close as it was I would have removed the egt sensor I damaged but it was on top and I was below and didn't realize it until I started looking at things that were holding me from turning it like it was supposed to to come out. I wish I had snapped pics before removal, I will get some of the old and new part on the floor beside each other to see how much less mass is going to be in the car. I test fit the new pipe up in the spot the dpf came out of and it is still wide open with it in there plus I will be able to change the damaged sensor quite easily as well now that the bulk is gone.
-
Finally got all the parts and pulled it all apart tonight.......................... What a pain in the @#%$&*^%@ to get the dpf shoe horned out of the car. The rotten part was it got hooked on the brand new exhaust temp sensor I just paid the dealer 500 bucks to change and tore the wire out of the sensor so there was a $165 part ruined in a heart beat. :mad: I think I taught myself about a dozen new swear words that didn't even exist until tonight. So now I have to order another sensor but I will be able to get it all together tomorrow without it as it is now going to be easy to get to without the DPF installed and no special tools required now to get to it now. so that is one plus.
-
You could have joined the group of us who got together in Florida last winter.