Everything posted by Tractorman
-
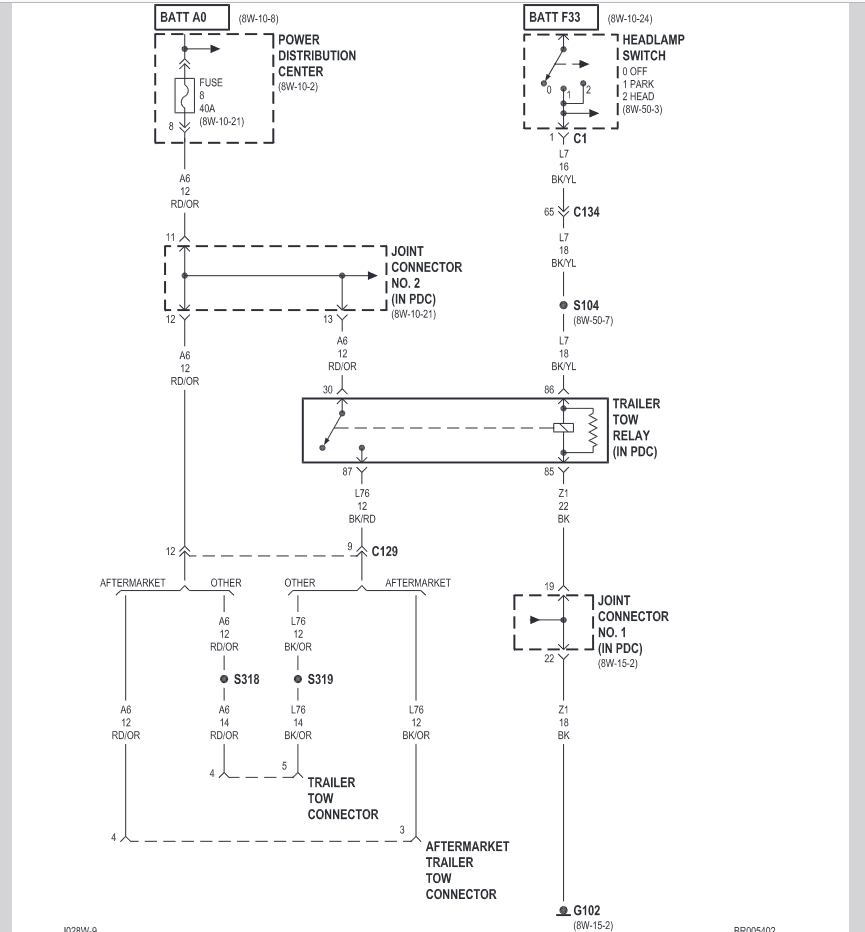
All pins on 7 round trailer plug socket work except for running lights
-
Bad wheel bearing or what?
It might be worth a try to swap front wheels left to right to see if there is a difference in sound location. What speeds do you need to attain to make the sound occur? Also, is it possible that something is rubbing (not related to wheel bearings) due to the lean of your truck when turning left? - John
-
Ecm and Dead Pedal issues
There should be a test port located on either the fuel filter housing or the VP44 inlet port. A 0-30 psi gauge would be suitable for the test. If there isn't a test port available, there is an aftermarket banjo fitting with a 1/8" female pipe port that will replace the fuel inlet fitting on the VP44. A lot of VP44 truck owners either have a dash-mounted fuel pressure gauge or a low pressure warning light for the lift pump. - John
-
Ecm and Dead Pedal issues
The P0216 code is related to injection pump timing - usually a fault inside the VP44 fuel injection pump. When that code sets, the ECM will likely de-rate the engine output. So, yes, that code will most likely be a VP44 pump failure. Before condemning the VP44, verify that you have at least 5 psi lift pump fuel pressure, especially at higher engine loads. - John
-
Ecm and Dead Pedal issues
A "dead pedal" symptom is the engine dropping to an idle and staying there. What you are describing is likely to be the ECM commanding the engine to operate in a "de-rate" condition. This can be caused by many things, but not likely to be the ECM. Need to know if you have any trouble codes displayed. This would greatly help with what direction to go with diagnosing. If there are no trouble codes set, then I would start looking for mechanical issues. Take your time - don't focus on just the ECM. - John
-
2000 Cummins Surge/Dead Pedal
Congratulations! - John
-
FASS Install
Agree with the potential serious accident / starting a fire scene if the the lift pump relay is wired to a source that is in the "Run" position of the ignition switch. Back in the early 2000's when Chrysler Daimler was warrantying VP44 injection pumps, they also retrofitted an in-tank lift pump at the same time, which was also covered by warranty. The wiring connector from the removed engine block-mounted lift pump was connected to the coil part of a new relay that was included with the retrofit. This kept the integrity of having the ECM control the lift while at the same time reducing the electrical load of the ECM. From what I have seen in the past is that FASS does not provide instruction to wire the relay in this manner. Personally, I think it is a better method to wire the lift pump control circuit to the relay coil for the added safety. - John
-
FASS Install
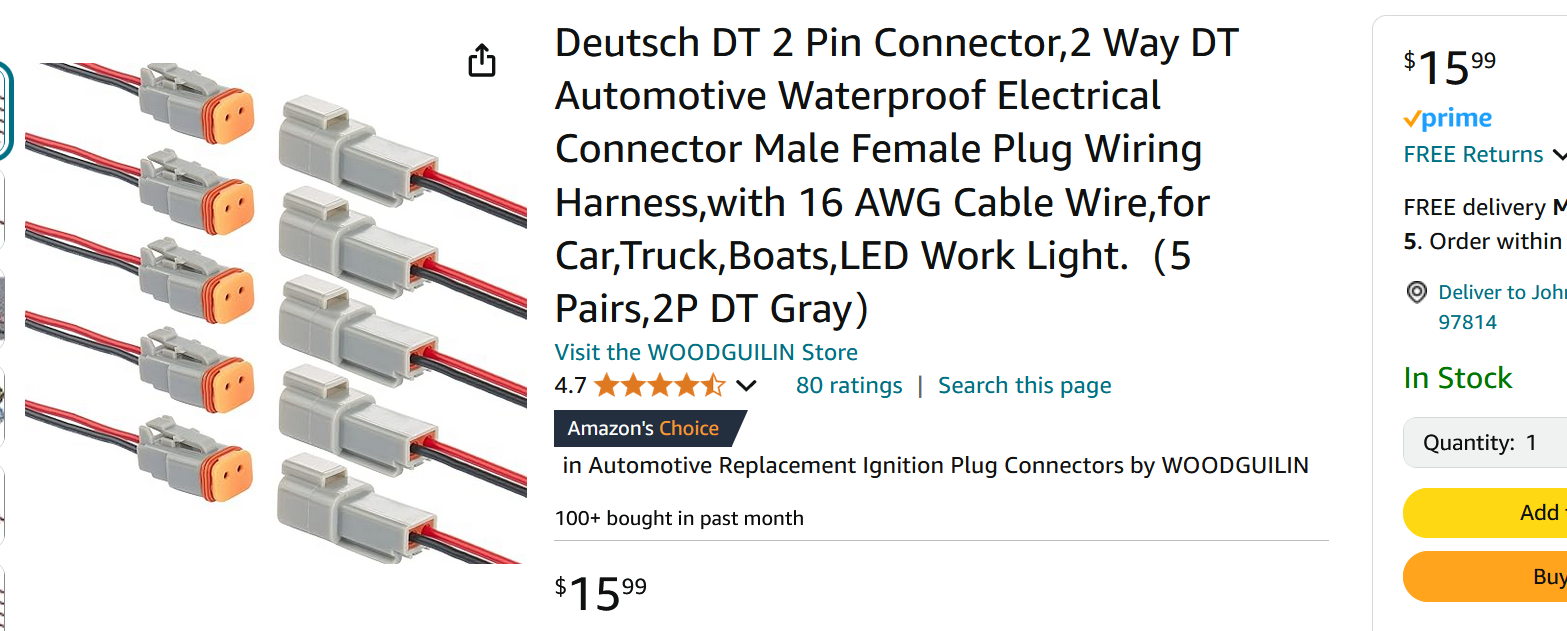
Your OEM engine block mounted lift pump is operated directly by the ECM. Lift pumps typically draw 8 to 12 amps depending on make and model. A relay will remove this heavy electrical load from the ECM. You can still use the ECM to trigger the coil on the relay (only about 200 milliamps). Deutsch 2-pn connectors should match your 2-pin connector on the OEM lift pump and are available on Amazon. This way you can easily extend the OEM wiring harness to wherever the relay is mounted. - John
-
FASS Install
Not to familiar with the FASS Titanium features, but if its filtration is equal to or exceeds OEM filtration, you could go directly to the VP44. Just make sure that your new line from the FASS system is absolutely clean before connecting to the VP44. One benefit to be gained by connecting to the OEM filter housing, besides additional filtration, would be a less likelihood of contaminating the VP44 during installation. Are you installing a relay to be triggered by the ECM on your new installation? - John
-
2000 Cummins Surge/Dead Pedal
In his first post he said that he installed new batteries last summer. - John
-
2000 Cummins Surge/Dead Pedal
Sounds like you have been thorough in taking care of things since you acquired the truck. Have you checked the conditions of all battery connections and frame / body wiring grounds? There is a wiring modification for the VP44 trucks that is called W-T ground reference wiring mod (by William Timothy Burke). The wiring modification addresses long wiring routes and poor ground connections for the PCM and the ECM. This wiring mod can reduce electrical interference in circuits joining computerized components. Here is a link to the W-T ground reference wiring mod: https://mopar1973man.com/cummins/articles.html/24-valve-2nd-generation_50/51_engine/electrical/ground-reference-vp44ecmpcmpdc-plus-tc-lockunlock-r567/?do=getLastComment&d=4&id=567 Also, check the mechanical low idle screw condition under the hood. You will have to remove the plastic throttle cover (if it is still there) to gain access. Another member posted similar symptoms as yours and it turned out to be the idle adjustment screw was loose allowing for irregular throttle positions at idle. - John
-
Bad wheel bearing or what?
I think I know what you are saying, but since there is an inner and outer bearing on each side, I would say it like this: When the vehicle is turned hard left, the inner bearing on the passenger side would have a lateral force placed against it while the outer bearing on the driver side would have a lateral force placed against it. I think that the left front wheel bearing should at least be taken apart and inspected. How many miles were / are on those front wheel bearings? - John
-
Bad wheel bearing or what?
Have you checked that the wheel lug nuts on both front wheels are tight? Also, have you checked the front wheels for any cracks? - John
-
P0216 and P0602 codes, intermittent loss of power, weird MAP reading
It's tough to have to do the job twice, but I'm glad to hear that DAP is taking care of you. - John
-
P0216 and P0602 codes, intermittent loss of power, weird MAP reading
Please let us know what DAP has to say. - John
-
P0216 and P0602 codes, intermittent loss of power, weird MAP reading
I recommend giving DAP a call and tell them what you have written here. The P0216 sounds like a timing failure and is likely to be internal to the VP44. From the FSM: P0216 (M) Fuel Injection Pump Timing Failure High fuel supply restriction, low fuel pressure or possible wrong or incorrectly installed pump keyway. Is your fuel pressure sensor located right at the VP44? If so, assuming that your reading of fuel pressure is steady, then you don't have a lift supply problem. - John
-
P0216 and P0602 codes, intermittent loss of power, weird MAP reading
Is your engine stock, or are using a tuner? I use a Smarty S03 and the 0602 code is normal (as stated by Smarty). The 0216 code does not sound good, especially with good lift pump pressure. Did the VP44 pump you bought from DAP use a remanufactured PSG or a new PSG (1 yr vs. 2 yr warranty)? You want to have a VP44 that has be run through a program on the Bosch 815 test stand - no exceptions. - John
-
Good amount of oil blew out of crank vent, freaking out
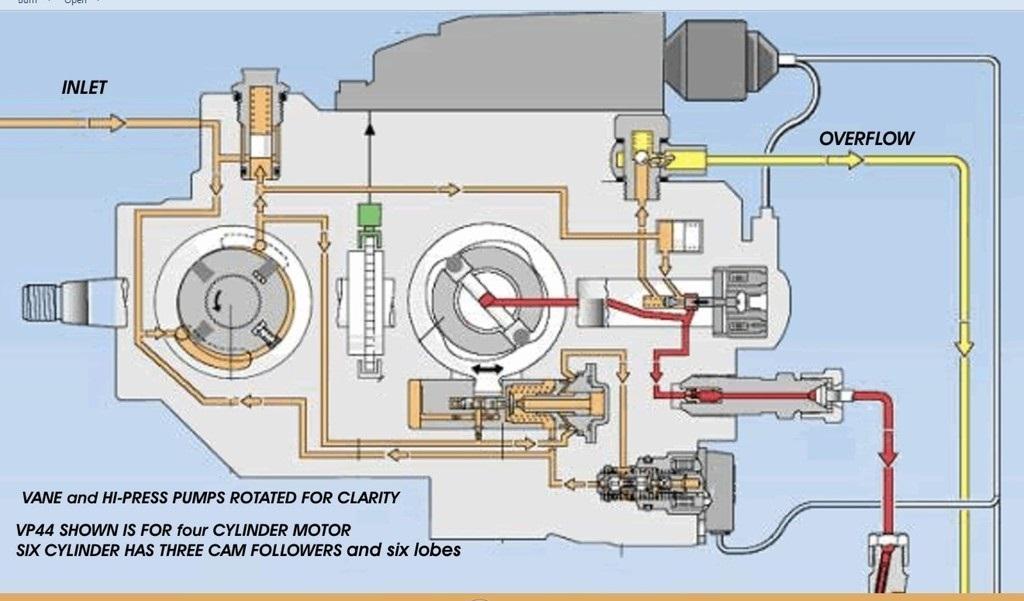
@YeaImDylan, how did the seal fail - leaking around the lip or seal pushed out? Also, did you check lift pump pressure with a mechanical gauge? What were the results? I seriously doubt there are any issues with the overflow valve. The overflow valve is of simple design and very reliable. The VP44 input shaft seal would only be exposed to lift pump pressure. Any fuel flow passing over the internal vane pump (also referred to as "feed pump") pressure regulating valve is returned directly to the suction side of the feed pump. The suction side of the feed pump is in common with fuel entering the VP44 from the lift pump. Those pressures would be equal. This is the pressure the shaft seal would see. - John
-
Good amount of oil blew out of crank vent, freaking out
So, are you saying the seal lip did not fail - the whole seal just got pushed out? - John
-
Good amount of oil blew out of crank vent, freaking out
If the engine idles smoothly and runs normally under load, I don't think the injectors would be the cause. Just curious - what is your lift pump pressure? - John
-
Good amount of oil blew out of crank vent, freaking out
You could do a quick check for engine blow-by using the bouncing oil cap method. Otherwise, I would just clean up the engine compartment, then start the engine and perform very short drives inspecting the engine compartment frequently for leaks, blow-by, etc. Doesn't sound good. - John
-
Front wheel hub
I don't have any recommendation, but Rock Auto usually has many choices ranging from economy to heavy duty parts. Just out of curiosity, how many miles on your truck. I would think that front wheel bearings on a two-wheel drive truck would last for a very long time - especially a truck with a manual transmission. Edit: Never mind my comment. I just looked up the part on Rock Auto and it appears that unit bearings are used. I thought they were the old style inner and outer bearing which would last forever. - John
-
Hunting at idle when in gear
I have been camping for the past few days, consequently I am giving a late response. The APPS is for the '98.5-'02 Cummins VP44 fueling system.
-
Hunting at idle when in gear
It appears that you have an OEM style APPS. It appears that there is a hand throttle connected to the throttle (in your photo). Make sure that the hand throttle is not interfering with the idle stop adjustment. The link below should help with checking the operation of the APPS. - John
-
Hunting at idle when in gear
I am assuming that you used a Mopar APPS to communicate with the a Cummins ECM for the era of engine you put into your F250. The idle validation switch is part of the APPS. When the throttle is released, the mechanical throttle stop should allow for the idle validation switch inside the APPS to be activated. This action removes all inputs to the ECM and allows only the ECM to maintain idle rpm. When you installed this engine and controls into your F250, did you use the ECM, PCM, APPS, etc. from a sacrificial Dodge Cummins truck? It is hard to offer help in your situation, mainly because I don't know how your conversion was done or what parts were involved. - John


