Jump to content
Mopar1973Man.Com LLC
  • Welcome To Mopar1973Man.Com LLC

    We are a privately owned support forum for the Dodge Ram Cummins Diesels. All information is free to read for everyone. To interact or ask questions you must have a subscription plan to enable all other features beyond reading. Please go over to the Subscription Page and pick out a plan that fits you best. At any time you wish to cancel the subscription please go back over to the Subscription Page and hit the Cancel button and your subscription will be stopped. All subscriptions are auto-renewing. 

Recommended Posts

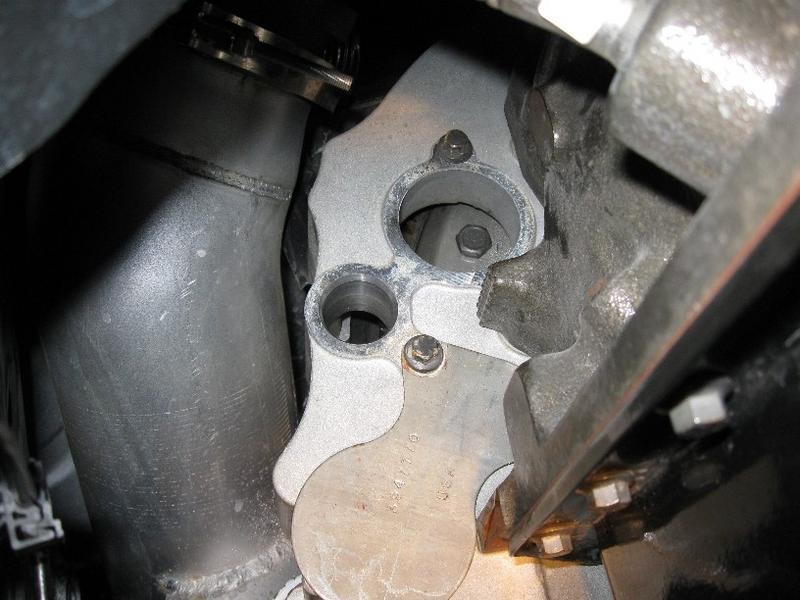
The big one is to access the converter bolts and the smaller one is what the engine barring tool slips into for turning the engine over the proper way and not by the alternator pully nut, which I have had a war of words over on other threads on other forums.

Ha You and the MM73 need to write up your own dodge tip/tricks/techniques manual and sell it through vendors/amazon :) Make a mint $$ Hey - while I am here - you never mentioned how to remove the check valve from that #part for the hot tranny cooler line - wassup with that !! :):thumbup2:
Link to comment
Share on other sites

Ha Hey - while I am here - you never mentioned how to remove the check valve from that #part for the hot tranny cooler line - wassup with that !! :):thumbup2:

Ah but I did you just need to back up a few posts to find my reply. it is just a rubber ball that pops out easily with a small screw driver or seal pick ect.
Link to comment
Share on other sites

Ah but I did you just need to back up a few posts to find my reply. it is just a rubber ball that pops out easily with a small screw driver or seal pick ect.

ok - you kinda did :) - I'll let it slide ......... this time :lmao2:

I said before leave the check ball in or you will have issues you probably won't like but to remove it is to just dig it out as it is just a rubber ball.

---------- Post added at 05:25 AM ---------- Previous post was at 04:03 AM ----------

came across this - kinda interesting

"The ATF+4® Automatic Transmission Fluid formulation is exclusive to Chrysler LLC and ATF+4® is a registered trademark. The Center for Quality Assurance (CQA) monitors quality standards through each step in the fluid's progress from license through commercialization. Each blender and re-brander involved in the production and sale of ATF+4® must be licensed, facility accredited and undergo a range of product testing prior to final licensing. Licensed brand names are periodically market-sampled to ensure consistent quality."

http://www.centerforqa.com/licensedatf4brands.html

---------- Post added at 05:31 AM ---------- Previous post was at 05:25 AM ----------

The initial tests of this VI improver in the

MS9602 test fluids were so remarkable that Chrysler modified the then-current ATF+2 spec (MS7176D) to include it. Thus ATF+3 (MS7176E) fluid was born; it remained the factory fill until ATF+4. [Lubrizol is still used in ATF+4 and is required in fluids licensed for compatibility.] In testing done during development of ATF+4, Chrysler noted the following viscosity loss from shearing for the following ATFs (20 hour KRL Shear Test):

Dexron III - 40% loss

Mercon V - 19% loss

Type 7176D - 32% loss

Type 7176E - 14% loss

Type 9602 - 10% loss <<=== ATF +4

You can see what a significant impact the new viscosity improver had on ATF+3 when you compare the 7176D and 7176E numbers. From the standpoint of viscosity loss alone you can see why Dexron III should not be used in transmissions that require ATF+3 or ATF+4. In terms of other basic performance parameters, ATF+3 (7176E) comes the closest to ATF+4, with Ford’s Mercon V a close second. [Which doesn’t mean that Mercon is acceptable.]

The goal in developing ATF+4 was to create a fluid that would match the performance characteristics of the current fluid (Type 7176D), but would retain those characteristics for at least 100,000 miles. The paper specifically notes that the anti-shudder properties of ATF+3 are usually degraded enough by 30,000 miles to cause noticeable shudder.

http://www.allpar.com/mopar/transmissions/fluids.html

Link to comment
Share on other sites

The price for ATF4 makes the switch to Amsoil well worth it also as they are roughly the same price from what I have seen. I have switched many cummins over to amsoil ATF over the years do to the price of the recommended ATF4. :2cents:Just throwing it out there not trying to push anything here.:2cents:

  • Like 1
Link to comment
Share on other sites

The price for ATF4 makes the switch to Amsoil well worth it also as they are roughly the same price from what I have seen. I have switched many cummins over to amsoil ATF over the years do to the price of the recommended ATF4.

:2cents:Just throwing it out there not trying to push anything here.:2cents:

thanks - after you posted this I was jumping around to read a bit on ATF4 and AMSOIL. Seems viscocity and other parameters are same or better. Plus recommended for ATF4 based applications also. Not that I fully understand that but assuming it 'should' last better/wear better under diff operating temps and frictions.

I did notice it comes it 2.5 gallons (I hate only being able to buy 1qt jugs) ...... nice

and even tho this was stated by a amsoil REP .... still kinda interesting:)

http://www.dodgedakotas.com/boards/v8/9656.html

I spoke with Amsoil Corporate and here are their comments:

"The AMSOIL ATF is far superior to an ATF blended with hydro treated naphthenic oil. Secondly it uses a premium additive chemistry that meets the static and dynamic coefficient of friction parameters to meet ATF+4 requirements. It also meets the coefficients of friction parameters for MERCON, MERCON V, DEXRON III, and Diamond SPIII.

Although the additive chemistry may be slightly different than the exclusive MOPAR fluid from the factory, it still follows suit with the parameters set forth by Daimler Chrysler. All AMSOIL lubricants are designed to improve performance and increase protection to engine and transmission components."

"Further more, Chrysler developed the +4 spec to "fix" an inherent chattering problem with the Chrysler transmissions. That is the sole reason why Chrysler recommends +4 fluid and this is why nobody offers a +4 fluid. On the other hand there are fluids that are far superior to Chryslers +4 specs, including AMSOIL !"

dunno - but interesting :cookoo: - thanks for the thought

Link to comment
Share on other sites

Interesting it is and I would have to agree with the reps theres nothing better than ams oil I run it in everything boats sleds bikes and almost all the vehicle have been switched what I find more interesting is one of my diffs is sealed with rtv and ams oil severe gear is not compatible with rtv thats what I find a lil :cookoo: and as for putting it back together one guy laying on each side with two to three bolts in each hand and put her up there slow and easy me and my help used a jack on the transfer case but we did the tranny without a jack it was easier :lol: I think there gets to be to much down there with the jack when your wrestling the tranny and I did it with the truck sitting on its four wheels jacked up the front to clear the frame when I pulled it out but otherwise I was like you on ground level

  • Like 1
Link to comment
Share on other sites

Thanks cool - so nothing too bad with aligning everything back up - guess she bolts in where she needs to bolt in :) Just wanted to make sure all my drive shafts etc didn't have alignmnet issues with the tranny going back in. Gotta try and fix a small seepage in the back drive shaft also where it comes into the transfer case. I decided to buy this tranny jack instead (I was going for the $75 one -*miser* but I went and looked at them and just think I am better off with the extra $50) http://www.harborfreight.com/800-lb-capacity-transmission-jack-3185.html ...... I will be giving it to my mate who's helping me anyway - and who knows might need it again if I have further issues and have to add the tranny itself !!! (just TC+VB now) Man - I am actually pretty excited to do it - never done something this large (mechanically) ........... so its kinda interesing for me. Hope I have no spare bolts left over at the end !!! HAHAHAH - its a long way to dakota with only R(everse) to have W+F fix it :lmao2:

Link to comment
Share on other sites

There are 2 alignment dowels in the bell housing to align it so you have nothing to worry about when you go in with it. You can get super freaky technical and do a flywheel hsg /rearcover alignment procedure and do a radial runout of the flywheel housing and then install adjustment dowels to get it aligned to nearly perfect if you so choose.:drool: Although this is more critical with a manual tranny and clutch.

Link to comment
Share on other sites

  • 2 weeks later...

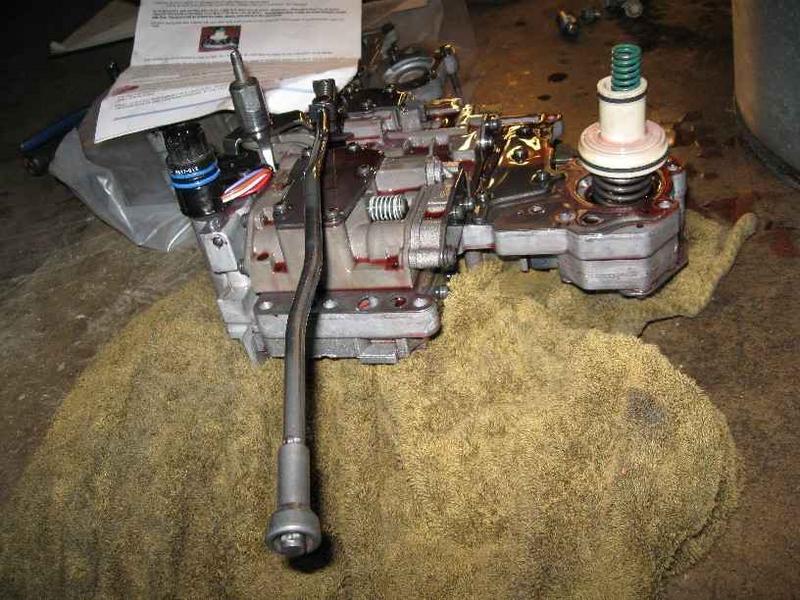
well she's not in yet - rain and a few other things prevented monday ..... shooting for friday :pray: I have two main articles (together with info here as well as 2001 servie manual) that I am using/looking at. Most of it makes sense - but I have 1 main area of concern at the moment and thats the VB drop and replace. http://www.cumminsforum.com/forum/farmboys-diesel-performance/97616-fbd-torque-converter-valve-body-install.html http://www.dieselperformance.com/productManual/10304,16,17,18,19_-_Valve_Body_Installation.pdf Specifically - (a) I was planning on doing the VB once the tranny was all the way out - but the guy in the article did it while tranny still attached - then removed for TC. Any reason ?? (b) The Park Rod part confuses me - Steps 10 and Step 12. i.e 10. Carefully remove the E-clip from the park rod, leaving the park rod in the transmission. 12. When lowering the valve body,gently work it around so that the park rod lever is left in the transmission and ensure that the electrical plug is not damaged in the removal process. OK - so is the park rod a locking lever for the 'P' shift position ? And it sits internally in the VB ? The BD diesel doco says to remove the clip and take out the VB and leave rod inside ...... the FSM says to remove VB and take parking rod out with it ?? Any thoughts on this also ? thanks guys:thumbup2:

Link to comment
Share on other sites

If you have the tranny out do it on the ground and it will be much easier. The park rod will be self explanitory once you see how it lays in there. Biggest thing I see and have happen myself is to be careful when installing the VB as the gear selector shaft can roll the seal lip up or push it out so with the tranny on the ground it will be easier to watch and guide it into place preventing seal damage versus underneath and fighting it.

  • Like 1
Link to comment
Share on other sites

If you have the tranny out do it on the ground and it will be much easier. The park rod will be self explanitory once you see how it lays in there. Biggest thing I see and have happen myself is to be careful when installing the VB as the gear selector shaft can roll the seal lip up or push it out so with the tranny on the ground it will be easier to watch and guide it into place preventing seal damage versus underneath and fighting it.

Couldn't have asked for better response - I tried to hit the 'double thanks' button - but its not there :shrug: ....... lmao :lmao2: You would also recommend disconnecting the Park Rod as per the BD instructions ...... or pull out with the VB as for FSM ? If leaving in there - is getting that E-clip back on a PITA ? :thumbup2:
Link to comment
Share on other sites

having a lil problem getting the tranny out. we got 7 out of 8 of the bell housing bolts out. one is a lil different looking not sure if it has to come out also? and does the starter motor and crank shaft sensor have to come out also or is it just suggestion?

call us. we need help! 660-973-2351

---------- Post added at 08:49 PM ---------- Previous post was at 12:55 PM ----------

Hey

ok - we got the tranny out. Just needed to buy a more powerful air wrench. Spent 2 hours almost on one bolt between fiddlng and going to 2 stores for parts.

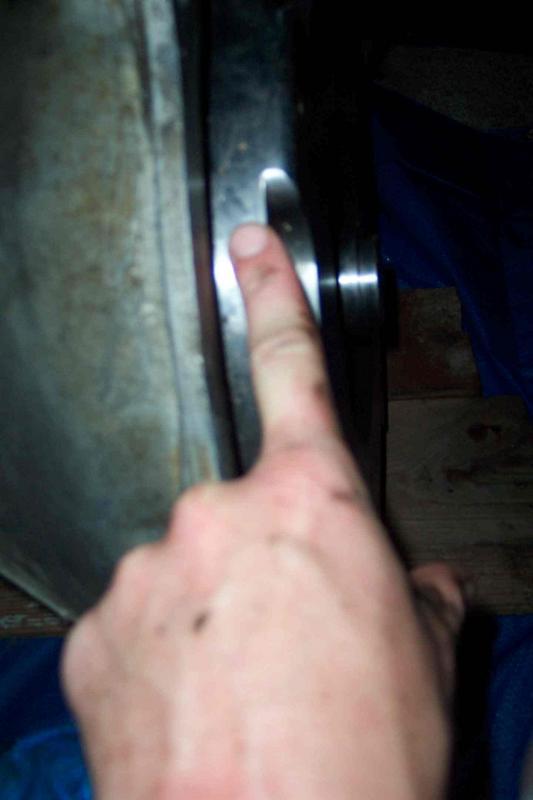
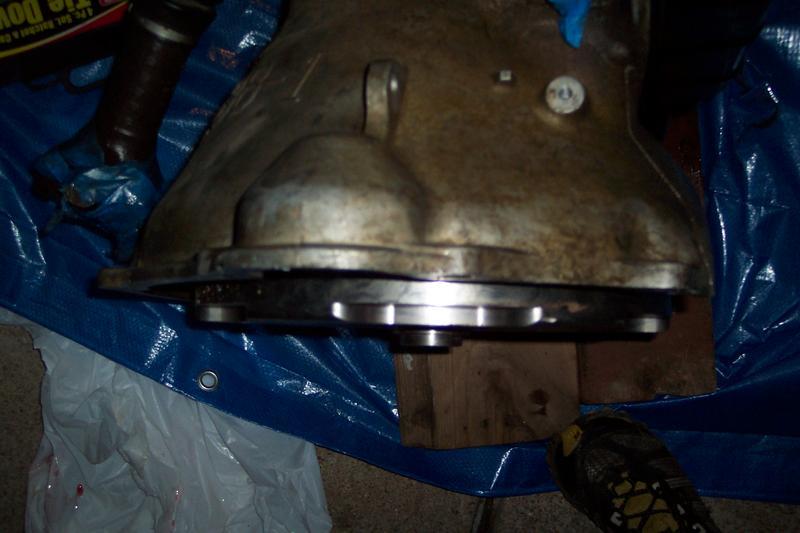
Now we have tried to put back in - and had all kinds of problems aligning it back. We think the TC might have not been seated properly. We spoke with mike (THANKS MIKE) and he thought maybe same. So we have twisted,pushed,pulled and it seemed to go in one more notch. Now its sticks out jus tabout 1 inch maybe - which seems right given it has to go into the flexplate housing about the same distance in order to bolt against the flexplate housing. We then stated to slip on tranny jack - so we had to call it a night and leave it on it side. We are going to try and reseat it tight on the jack late tomorrow.

Pics here.

So - the question is does the TC look ok ??? My mate is working tomorrow so I am going to try and clean up tranny and do the VB. And we are gonna have another attempt at it. If that fails - I may have to tow it to a mechanic. :(

Link to comment
Share on other sites

  • Owner

Yeah that's poking out a bit far... (Ugh!) But if it finally seated back behind the bellhousing then I would safely assume your in far enough...

I may have to tow it to a mechanic. :(

I doubt that you got this far and you'll make it through... Just got to get the TQ Conv. in all the way. As for the VB work you might talk to Wild & Free hes a good one for Auto's Guts... :smart:
Link to comment
Share on other sites

I guess though then... Geez... Must be the old tyme gasser I remember sitting in really deep... tHose kind of hang out a bit... wow!

Think "Lockup" clutch. This makes the converters deeper/thicker than a non lockup converter. John if it is sitting so that it looks like it is almost touching the housing on the inside of the bell housing then it is in all the way. If you noticed the 2 notches on the end of the hub of the converter before you installed it those are the last to engauge and is the pump drive.
  • Like 1
Link to comment
Share on other sites

Think "Lockup" clutch. This makes the converters deeper/thicker than a non lockup converter. John if it is sitting so that it looks like it is almost touching the housing on the inside of the bell housing then it is in all the way. If you noticed the 2 notches on the end of the hub of the converter before you installed it those are the last to engauge and is the pump drive.

Well - I can get my hand down the side - a little ways ...... but towards the back it looks like its sitting pretty close to bell housing. Don't want to damage anything - so trying to decide weather to tow to mechanic or try and finish off. Not sure if I should pull it off and try and reseat it ......... seems like its in all the way - but we thought that the first time and it definately went in an extra click / inch. :P
Link to comment
Share on other sites

×
×
  • Create New...