Jump to content
  • Welcome To Mopar1973Man.Com LLC

    We are a privately owned support forum for the Dodge Ram Cummins Diesels. All information is free to read for everyone. To interact or ask questions you must have a subscription plan to enable all other features beyond reading. Please go over to the Subscription Page and pick out a plan that fits you best. At any time you wish to cancel the subscription please go back over to the Subscription Page and hit the Cancel button and your subscription will be stopped. All subscriptions are auto-renewing. 

Engine Harness Rebuild


Recommended Posts

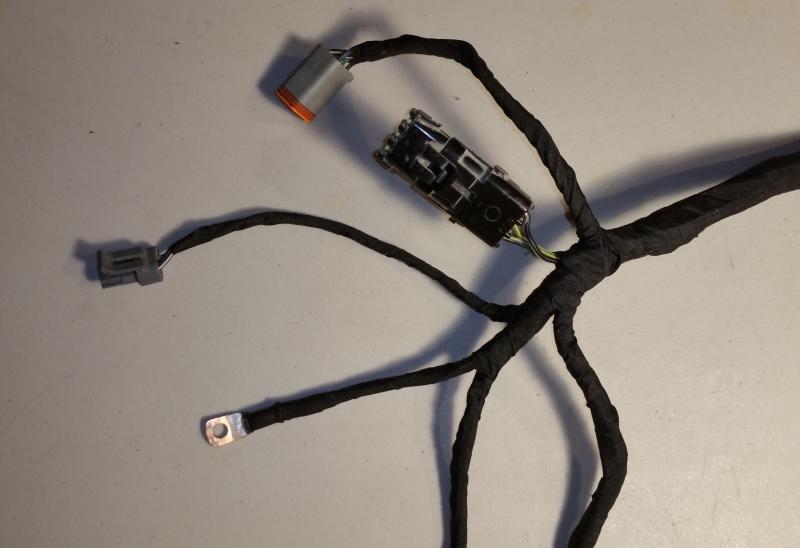
I've been ignoring this project for a few months, but I recently made some progress.    So I'll share some pictures. 


If you ever have a hankering to rebuild an engine harness, this is your future: 

TheMess_600.jpg


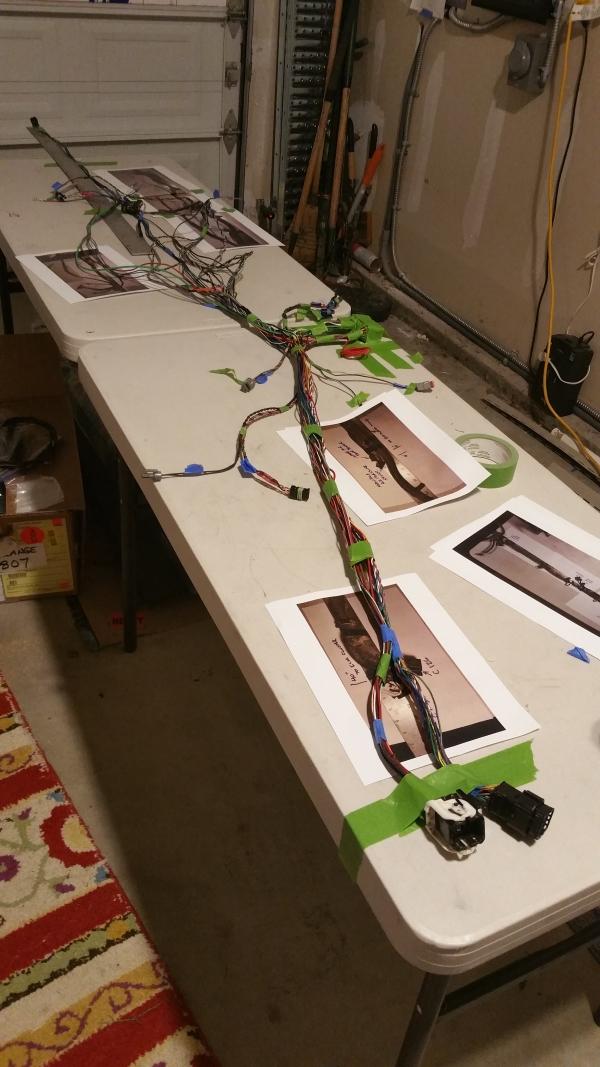
After several failed attempts to untangle that mess, I kicked the Camry out of the garage and set up some tables. 

TapeUpHarness_600.jpg


I finally got a chance to re-wrap the harness this weekend. 

RerWrappedHarness_1200.jpg


  • The coiled wire is the "computer" ground that connects to the passenger-side battery.  I will cut it to length and crimp-on the end after the harness is installed.  This entire ground-wire node was rebuilt from scratch using new wire and contacts. 
  • The VP44 connector shell is brand-new.  I replaced the entire DATA (+) and DATA(-) shielded wire, that goes from this connector to the ECU.  I replaced the contact on the #5 FUEL SHUT-OFF pin to repair the wire I damaged while troubleshooting.  And the #6 GROUND, was replaced as part of the ground wire I mentioned above. 
  • I replaced the shell on the C126 connector.   I wanted to do the same for the C125 connector but I was not able to find that shell. 
  • You might notice that the alternator-to-battery wire is no longer integrated into the same wrap.  In an earlier project, I replaced all the battery wires.  So when I took apart the harness, I removed the already abandoned B+ wire. 
  • I wanted to replace that red wire on the ECU connector, but I wasn't able to remove the pin from the shell without damaging the shell.  So I'll just put that wire back together when I install the harness. 


Edited by marked23
added comments
  • Like 1
Link to comment
Share on other sites

That is a very nice job. I have been messing around with a spare I have and can see how daunting a job this can be. Here is a link to thread about the computer grounds and a mod to improve the factory set up. It has been shown to cut down stray AC voltage from the alternator. It reduced mine from .035 to .010. Others here have seen similar reductions. It is worth the read and could be worked into what you have if you so desire. 


Link to comment
Share on other sites

Ok... I unwrapped my freshly-wrapped harness to see how I could incorporate the W-T mod.


This is my new ground wire sitting next to the stock ground wire.  I tried to line them up so I compare the splice locations.


Do I have enough length to the right-side of my splice, so that I can use the smaller connector?

Or should I maybe use the larger connector and go all-the-way to the driver-side battery? 

GroundEndOptions_Cropped_800.jpg.b240a4e96557ada306e8af2028f3eb7b.jpg

Link to comment
Share on other sites

I'm using Tesa 51036 tape.   http://www.tesatape.com/industry/tesa-51036.html

I bought three rolls on amazon.  I only used one roll to do all that wrapping. 


I have no prior experience with harness wrapping, but I found this stuff was really easy to work with.  It's not very sticky... just sticky enough.  If you accidentally stick it to itself, you can separate it without fuss.  If you need to back off a few wraps and then continue, it seems to re-apply confidently.  It's a tough cloth with a texture that feels like you could use it as armor. 


Link to comment
Share on other sites

×
×
  • Create New...