

- Replies 13
- Views 43.4k
- Created
- Last Reply
Top Posters In This Topic
-
Shainer 3 posts
-
smokeythedodge 2 posts
-
iahegdal 1 post
-
Homestead 1 post


Most Popular Posts
-
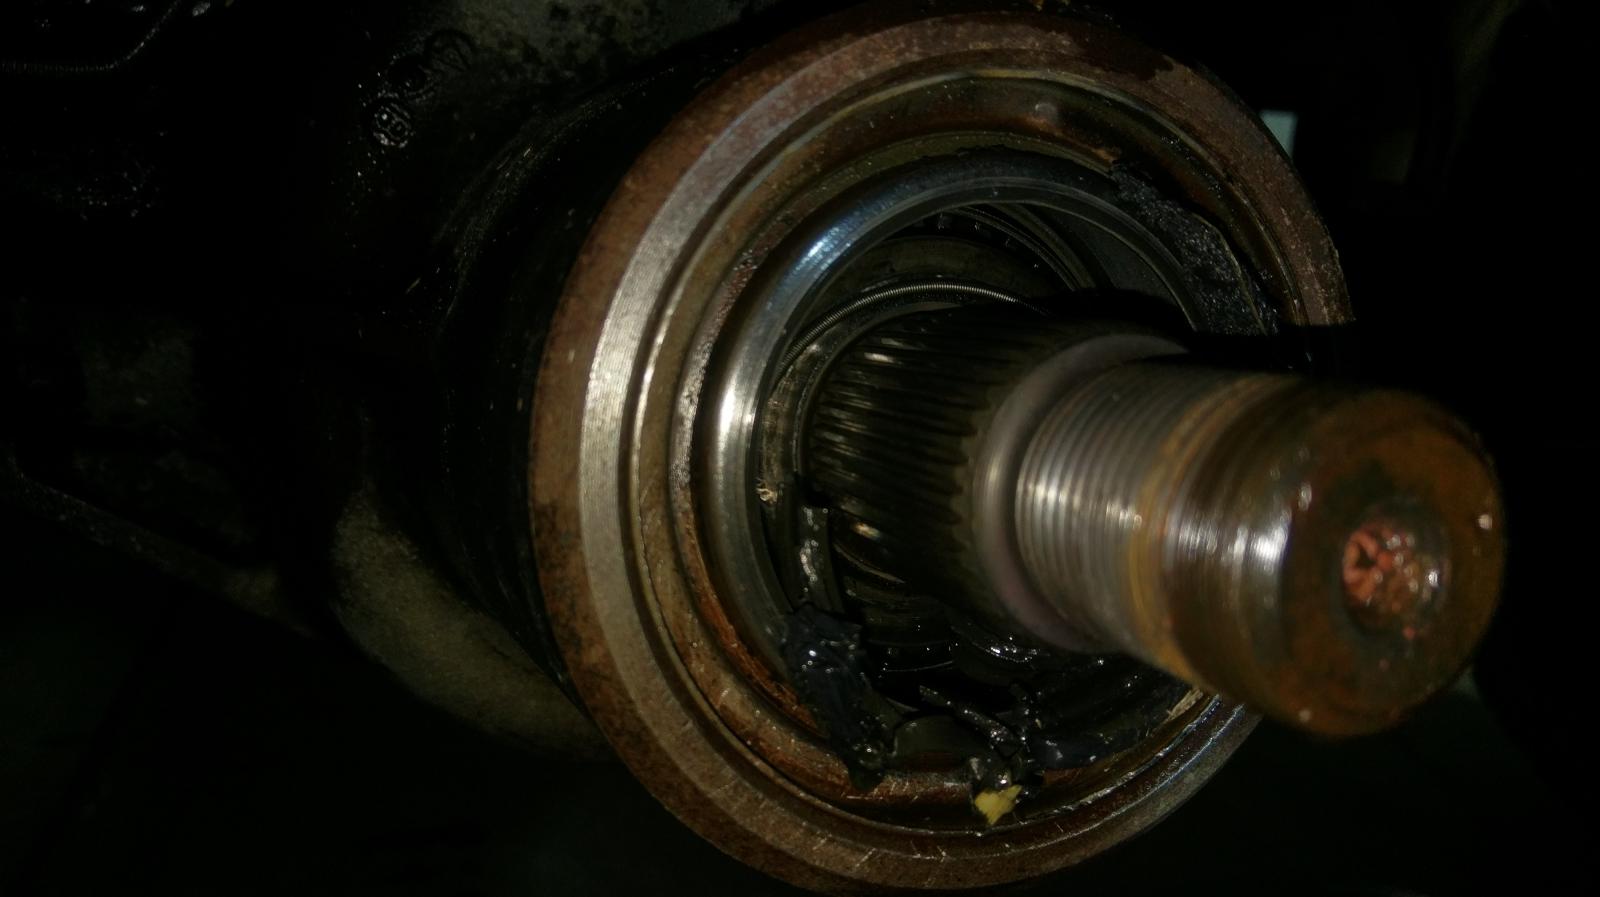
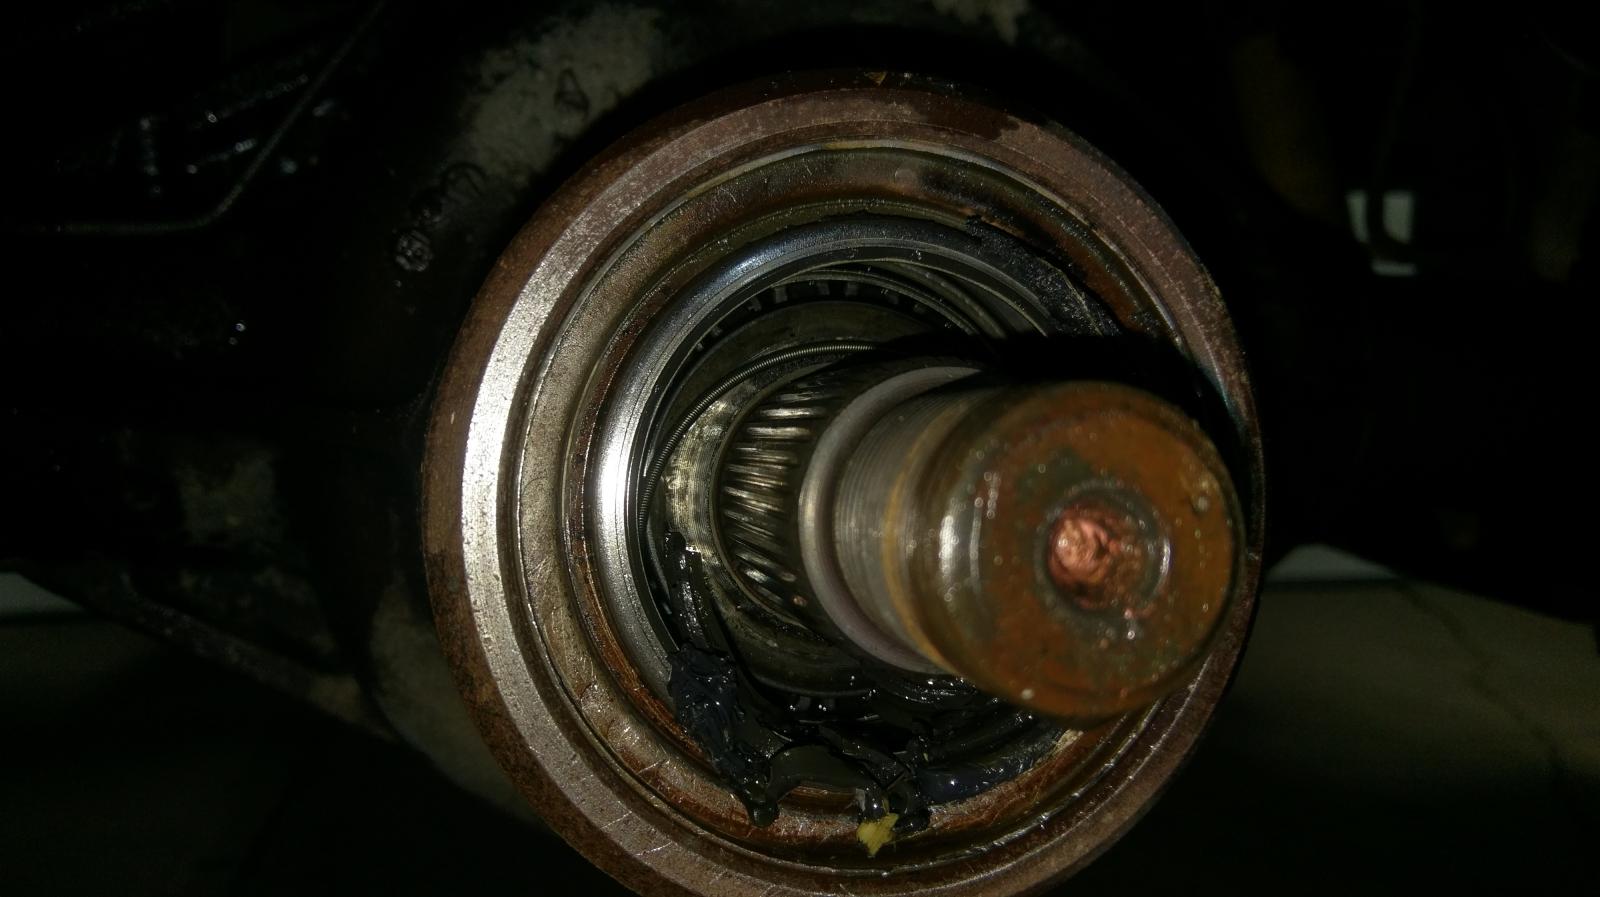
I got the seal replaced. Would have been a snap but the appropriate puller was at a friends shop, so I fabed one up. What surprised me was how much trash was jammed behind the yoke shield. It compl
-
This is what happens when you run over a mattress….https://www.youtube.com/watch?v=cDfA8idkUlA
Alright, kinda wish I would have taken more pictures, but I was hot and ready to get it back on the road... So here is what I got, perhaps this will help someone looking to replace their own.
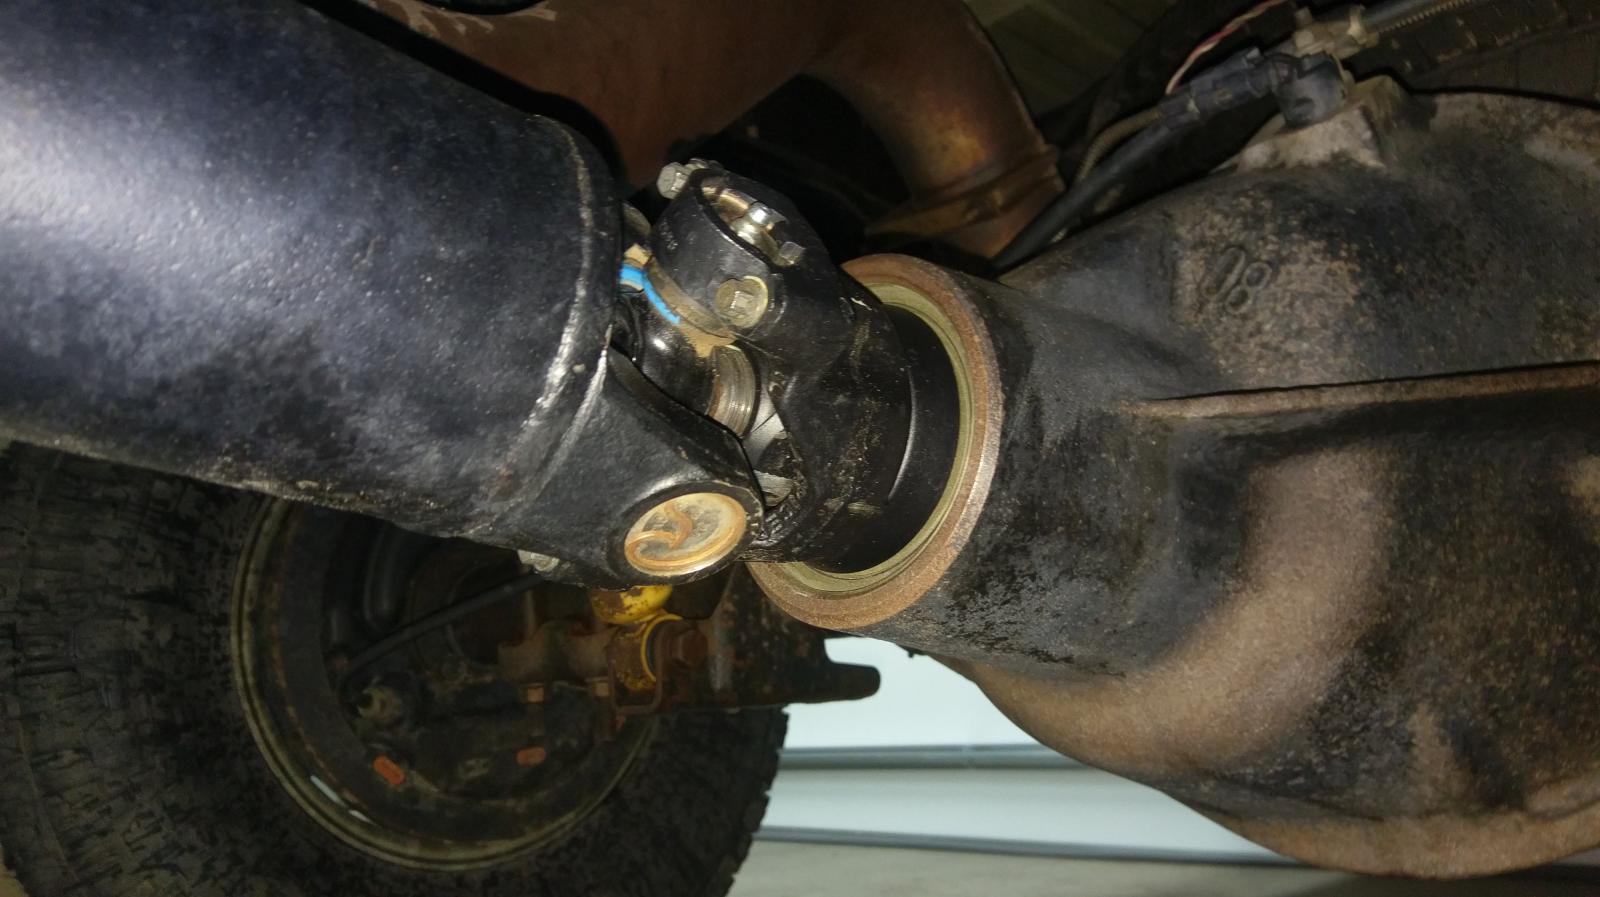
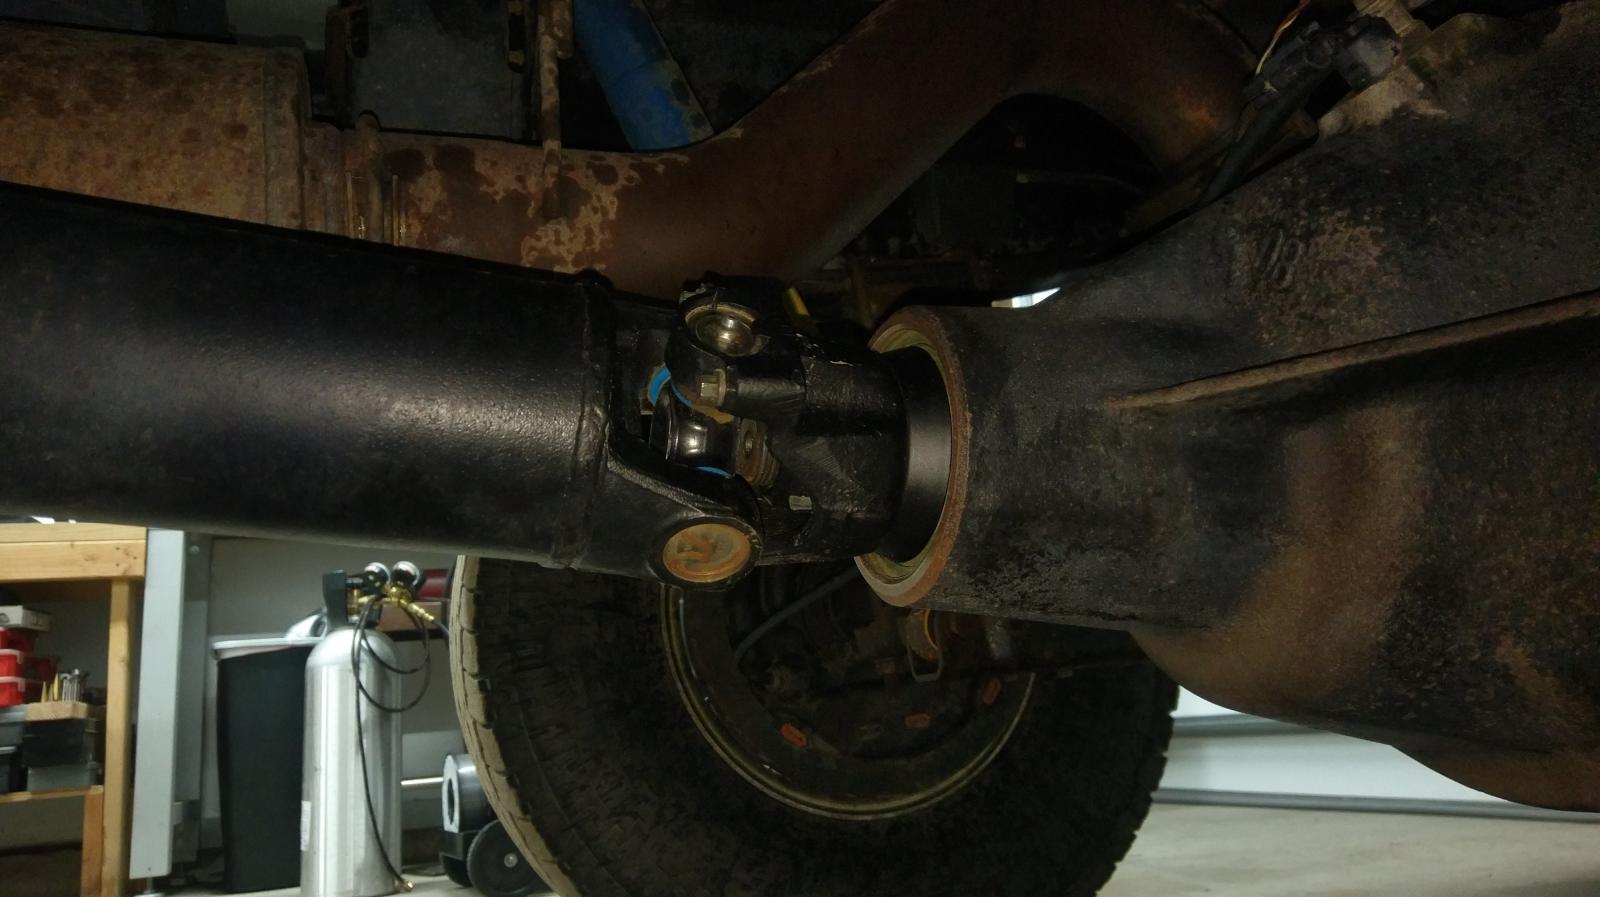
First things first. Go out and take a look at your Dana 80. Now, I don't have a photo of the other type for comparison, but there are actually two different Dana 80's in the 2001 and 2002 model year. This is important to get the proper seal. For my axle, in a 2001.5 Ram 3500 quad cab 2wd diesel 6 speed, it has the non flanged yoke and the double stepped down pinion shaft seal.
Part number is 5015618AB from Dodge...
Now the other seal (for the flanged yoke) is 5073944AA... Here is a picture of what a NON FLANGED YOKE looks like.
So.. If yours looks like this, you must go with the top seal ending in AB...
Now for the required tools.....
-Some kind of torque multiplier (Pinion nut is TIGHT)
-Various hand tools (sockets and driver to remove the driveshaft)
-Craftsman, 2 jaw puller, small one and the large one
-24" Pipe wrench or miller tool 6719 yoke holder. I am poor, so I used a pipe wrench.....
-1 7/8" craftsman 3/4" drive socket. Details later....
-torque wrench
Now, about the 1 7/8" socket... You can go try and find a thin wall socket of that size, or you can spend $25 bucks at sears for this socket and take some meat off it (yoke is thick inside around the nut for strength)
Now how to do this.... First, the service manual says you need to check pinion bearing preload with an in-lb dial type torque wrench with the wheels and brake completely removed. I did not do this. Why? Because I used to work at a Dodge dealer and we NEVER had any problems doing it the way I did mine and am about to explain to you.
This axle does not use crush sleeves for bearing pre-load... It uses shims, like most H.D. rear ends. Now, the way I do this is the same way that the FORD service manual spells out the procedure for their trucks equipped with the dana 80.
Ok, so here is the problem...
1. First thing you want to do is clean and dry up everything around the yoke as best you can.
2. Mark everything with a sharpie or paint pen to realign it later.
3. Block the front tires and support the rear of the truck with jack stands.- or do this on your lift. Also put tranny in neutral.
4. Remove the u-joint retaining hardware. The u-joint caps on mine were rusted into the yoke... Don't use a hammer to try and free it if yours is this way, you can damage the pinion bearings. Take a big pry bar and pry it apart. It will come.
--Now you can see that beast of a nut. I sprayed some penetrating oil on the treads of the pinion shaft to make it easier to unscrew.
5. Take your pipe wrench or yoke holder and pin it against the frame or put a cheater pipe over the end and brace it against the ground. You are trying to secure the pinion and yoke from rotating as you try to remove the nut.
6. Hope you ate your wheaties, if you don't have a tq. multiplier you are going to have to get a 3/4 drive breakover bar and cheater to get this thing loose or a beast of an impact... I used a 1:6 torque multiplier that is 1/2" input and 3/4 out. It was tight.
and once its loose, you can just start unscrewing it.
7. Get your 2 jaw puller and go to town on that yoke.... MARK IT FIRST!!! It needs to go back on in the same position it came off!!! It is tight all the way off!!!!
Inspect it... Probably will have a nice little groove... Mine did... If the groove is bad enough, it WILL ruin your seal quickly. You can get a SKF Speedi Sleeve for the yoke or buy a new yoke from dodge ($140)
8. Now you can pull the seal out. Mine was a bit** and I ended up just destroying it to get it out... :banghead:
Now you are almost to the finish line!!!!
9. Use a seal driver to install the seal. Make sure it is seated fully.
10. Put the yoke back on. It is tight!! You will have to use a rubber mallet probably to get it seated far enough to thread the nut and washer to get it cinched down the rest of the way....
11. Tighten it up until the yoke is back in it's home completely.
12. Get your pipe wrench again and pin the yoke where it wont try and rotate. Torque the nut to around 450-500 lbs. Most will disagree on this step, there is some debate about on the correct torque for used bearings... I have seen them do it at most shops, they just impact it off and then back on... I don't trust that method... I set my torque wrench to 80lbs through a 1:6 multiplier and came out with something close to the factory tq. spec. NOTE: most say to use a new nut, but I did NOT. WE shall see if this bites me later on. I don't THINK it will loosen up from 500 ft lbs. That is pretty tight. But who knows....