Jump to content
Mopar1973Man.Com LLC
  • Welcome To Mopar1973Man.Com LLC

    We are a privately owned support forum for the Dodge Ram Cummins Diesels. All information is free to read for everyone. To interact or ask questions you must have a subscription plan to enable all other features beyond reading. Please go over to the Subscription Page and pick out a plan that fits you best. At any time you wish to cancel the subscription please go back over to the Subscription Page and hit the Cancel button and your subscription will be stopped. All subscriptions are auto-renewing. 
Recommended Posts

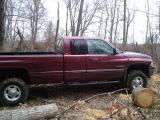
I'm thinking of rattle canning the lower part of my truck on my bed to prevent rust and spruce it up. Should I strip it to bare metal or just scuff really well? 2 coats of primer? 2-3 base and then clear? Behind the rear wheels the body is down to primer so I was thinking of just stripping it down, see photos. Duplicolor has color match paint, I was thinking of going that route. I've never done body work on a vehicle so any input would be great. I know it won't be tip top shape, but I still want it to look nice and any input would be appreciated.


Thanks,


John

post-1611-0-03009400-1421512753_thumb.jp

post-1611-0-92372500-1421512787_thumb.jp

Link to comment
Share on other sites

John, the way to prepare the panels for paint depends on how much rust there is. If the original paint is in decent shape then all you need to do is scuff the paint good, but if the paint is chipped off then there is a lot of sanding to be done. By the time you get done feathering the paint you wind up almost remiving all the paint. Once you get done with the sanding a couple of coats of primer is more than enough. The base coat is going to take enough coats to cover and hide the primer. If you are going with a clear coat, then I would put probably four or more light coats on.

Link to comment
Share on other sites

If you have rust that has pitted the metal you are wasting your time which it sounds like you don't... If you have exposed primer scuff it up or block it my suggestion is don't expose bare metal if at all possible and try to keep your feathering below the radius of the bed if you keep it on the underside it will be very hard for someone to pick out the repair if you must go above the radius I would suggest going all the way up to the first body line...  if you get to bare metal and you want it to last make sure you use an etching primer available from paint stores or in a rattle can like this http://www.homedepot.com/p/Rust-Oleum-Automotive-12-oz-Automotive-Self-Etching-Primer-Spray-Paint-249322/202097278 go slow start in one inconspicuous area maybe by the tailpipe and get a feel for what works for you.  

Link to comment
Share on other sites

No rust, southern truck, only seen 2 winters. Just chipped and missing paint and some oxidation. Great tips guys, I think I'll try a section behind the tail pipe and see how it comes out. Self etching primer, duplicolor color match and clear. One more question, temperature. It's winter in Ohio and this is getting done in my garage. I have a little heater, I know cold temperatures will slow the curing process but is it a big factor in this rattle can paint job?

Link to comment
Share on other sites

It shouldn't be to bad but but I would not suggest trying to paint below 55 degrees optimal range I feel is 55-75 with 50-85 percent relative humidity and this is just my feelings that being said since ​you have no prior experience read the directions till you absolutely and fully understand them, then follow them to the T.  Now you may find things that don't work out well and you may need to make adjustment to get what you need but that is painting for the first time...  you will find good painters take the directions and modify them to what works for them based on past experience which you have none so I fell you need a fixed baseline to start from, also keep in mind the paint you will probably be working with is an activated poly urethane which requires moisture to cure.  

Edited by MoparFreak1988
Link to comment
Share on other sites

I did the same thing with my truck but I sprayed Monstaliner instead. It is the best bed liner material on the market that's available to the public that Im aware of. Like Line-X, it is a true epoxy material and the texture is acquired either through spraying with a shutz gun or using the special rollers available through them. Every other DIY bed liner I have seen has some kind of crap you add to the paint for the textured look like ground up rubber or something similar.  While using the rollers makes for good results, spraying with the shutz gun yields a flatter more consistent texture and looks very similar to Line-X if done properly. I did the bottom 4-5" of my truck and the bed rails 2 years ago and it has held up excellent. I do have a couple of scratches on the top of the bed rail where a 6" I beam got drug across it (friend got a little lazy and decided it was easier to set his end down) but they did not go all the way  through and are not noticeable unless you are standing right on top of it. I'm so happy with it I am planning on spraying my fender flares and my truck cap this summer to match.


I have a few pictures on my phone, I will get them posted up here in a bit if you are interested.

Edited by diesel4life
Link to comment
Share on other sites

Not a good idea in humid climates to leave bare metal, but as long as the truck is parked indoors and won't be driven its doable. When you are ready to paint its best to get the panel good and warm to get the moisture off of it. Something like a heat gun or infrared heater. Just don't use a salamander heater (the ones that burn fuel oil) as the hydrocarbons will fisheye the paint. Get some MEK or xylene at a minimum and wipe everything down right before you paint.

What are you going to be using?

Link to comment
Share on other sites

Duplicolor everything. Etching primer, then filler primer and then color and clear. I ended up spraying it for piece of mind, but now I have to sand it back to bare metal in one spot to fill a dent with bondo. I should have read the bondo directions before hand, idiot! Bondo and self etching primer to get on too well I guess. So some sanding, bondo, primer filler, then primer filler everything then sanding and color. Looks better already, now I just have research how to blend color and clear in the body line.

post-1611-0-69905300-1422227281_thumb.jp

post-1611-0-33281500-1422227307_thumb.jp

Link to comment
Share on other sites

Two things

  1. primer by itself is not a complete moisture barrier if you need to metal work you take a break for whatever reason I always rattle can prime it and rattle can clear it just for protection.  Knowing it will all be sanded down when I come back to the project.
  2. if you used self a etching primer already and haven't done any other painting over that most bondo's or finish glazing compounds can be used on top of that primer coat without issue obviously clean and lightly sand first then bondo then sand then paint.

otherwise looking good seems like you are on the right path keep it up and it will look great.

If I can preach one thing about painting it is this making paint look good comes down take your time, do it right and spend the time in prep my truck will be under a spray gun at the professional shop for under two hours but they already have over two weeks worth of sanding and prep work food for thought 

Link to comment
Share on other sites

I like the thought of bedliner.

Just don't use anything with crumb in it. Most DIY bedliners use rubber grindings or something similar for the texture and they tend to rub out when objects are drug across it. The top of the line bed liners like Line X and Rhino Liner achieve their texture through a spray pattern. Monstaliner is the only DIY bed liner that I know of that does the same.

Edited by diesel4life
Link to comment
Share on other sites

×
×
  • Create New...