Jump to content

Welcome To Mopar1973Man.Com LLC

We are privately owned, with access to a professional Diesel Mechanic, who can provide additional support for Dodge Ram Cummins Diesel vehicles. Many detailed information is FREE and available to read. However, in order to interact directly with our Diesel Mechanic, Michael, by phone, via zoom, or as the web-based option, Subscription Plans are offered that will enable these and other features.  Go to the Subscription Page and Select a desired plan. At any time you wish to cancel the Subscription, click Subscription Page, select the 'Cancel' button, and it will be canceled. For your convenience, all subscriptions are on auto-renewal.

Posted

It appears my booster is leaking inside the truck. Just a drip but I saw on the floor mat today. Rebuilding it does not look that difficult. What have some of you folks done for yours?

  • Replies 29
  • Views 6.6k
  • Created
  • Last Reply

Top Posters In This Topic

Most Popular Posts

  • Drip, The booster rebuilds easily.  I have some pictures from my rebuild (it was for a GM application so a bit different on pedal end.)   I think i got all my parts from these guys and

  • WTF did you multiply?

Posted Images

Featured Replies

21 hours ago, dripley said:

I actually found this write up on it on line. Complete with pictures that are being held hostage by Photo Bucket.It was inspirational but not visual.


Here yar.


  • 3 weeks later...

So I used the above article for resealing my hydroboost, but it doesn't address replacement of the input rod seals. Reading the instructions that come with the pirate jack kit, it appears that the brake rod on our trucks use the staked design and rod has to be cut or some other way to remove, (I don't want to go thier) or am I looking at this wrong. Anybody got any input on this, I kind of would like my truck up and running this afternoon .


I did get the piston seal in, which was the major culprit of my leak, but I do have a sign of small seepage on firewall inside of cab.

  • Author

Have you had any success? I have been wondering about this ever since I read the instructions that came with my kit. I cant weld so I would have to take it somewhere and have it done. I thought maybe you could thread both pieces and use a rod coupling and lock tight on it if there is enough room. Sure would hate for it to come apart though. I am still :think: on this one though.

Yes. I put it back together last night without doing the rod seals, even though I got a welder I didn't want to cut the rod in half, and weld it back and have it look Ike a patch Job. I just replaced the piston seal and the figure 8 seal that mates the two halves together, so far no leaks. 


If I was to cut the rod I probably would do a threaded sleeve, and cut some threads on both ends of cut rod, and that would maybe allow you to reuse your original brake light switch by being able to adjust the brake rod out a little, might be worth a shot if you have to replace the rod seals. 

  • Author

That is where mine is leaking. I have a little while yet before I can do it. I cant seem to find this addressed any where except in the included instructions. Seems some of the remans come with a little shorter rod on them.

Guys,

You don't have to cut the rod....


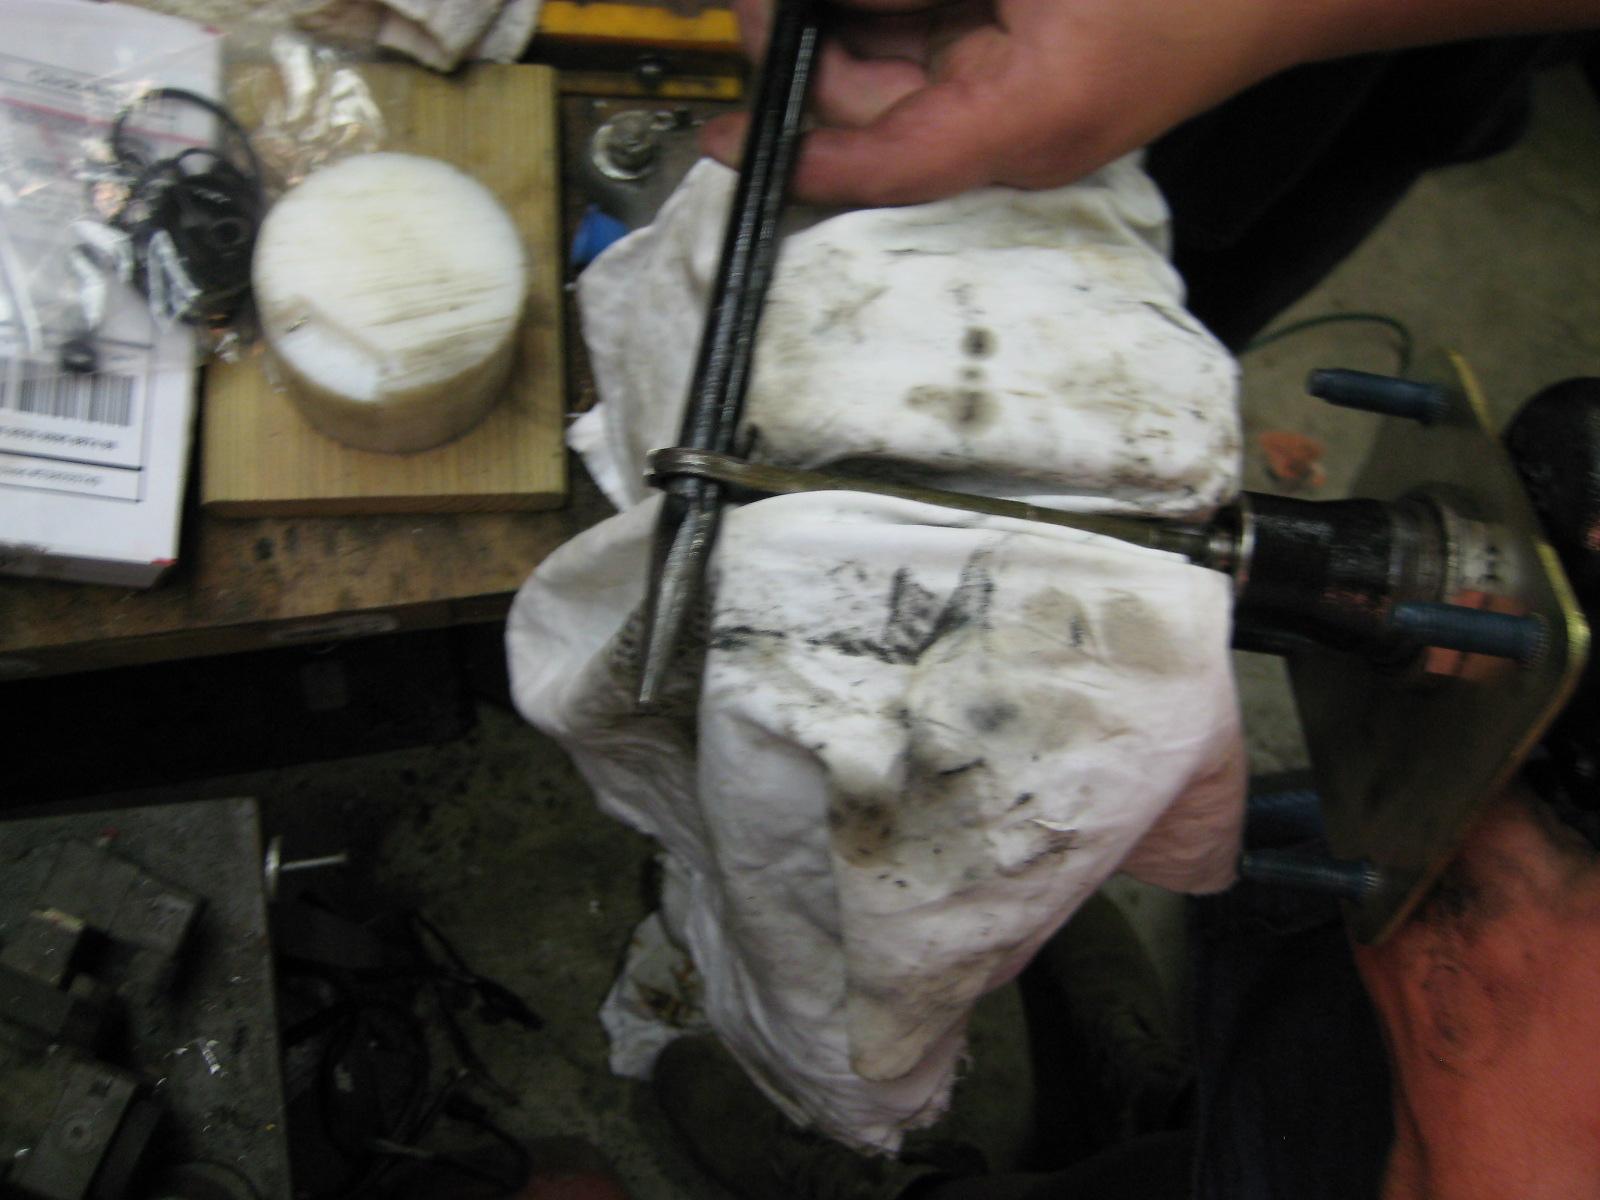
The staking is very light.  I was able to pop it out with a pry bar.  Just be careful to not make the rod hole into an eccentric (or make it round again when you put it back....) (I slightly eccentriced mine, just used a big tapered punch (like a spud wrench) to make it round again.)


Sorry the pic is not focused well.  The rag is covering my vice.  I closed the vice to use as a puller, against a shoulder on the input.  (I think you will see where it is staked it then goes to a larger diameter.)


I used a pry bar that fit the hole in the rod really well, then added shims between the pry bar and vice at the fulcrum, to pull the rod straight out. 


I am working the pry bar and shims, and my buddy is holding the rest of the hydroboost as I am not clamping it, just using it to pry against.


When I put it back together, I just re-staked it slightly with a punch.  After it is installed where's it gonna go?  (It was staked heavy to live through shipping and assembly.)


HTH


Hag


IMG_6941.jpg

  • Author

That does help a lot. Thanks.

@Haggar thanks for posting that. I went ahead and resealed mine without pulling the rod but so far so good, but if I have to go in it again this will help  

The mind is a terrible thing to waste.....


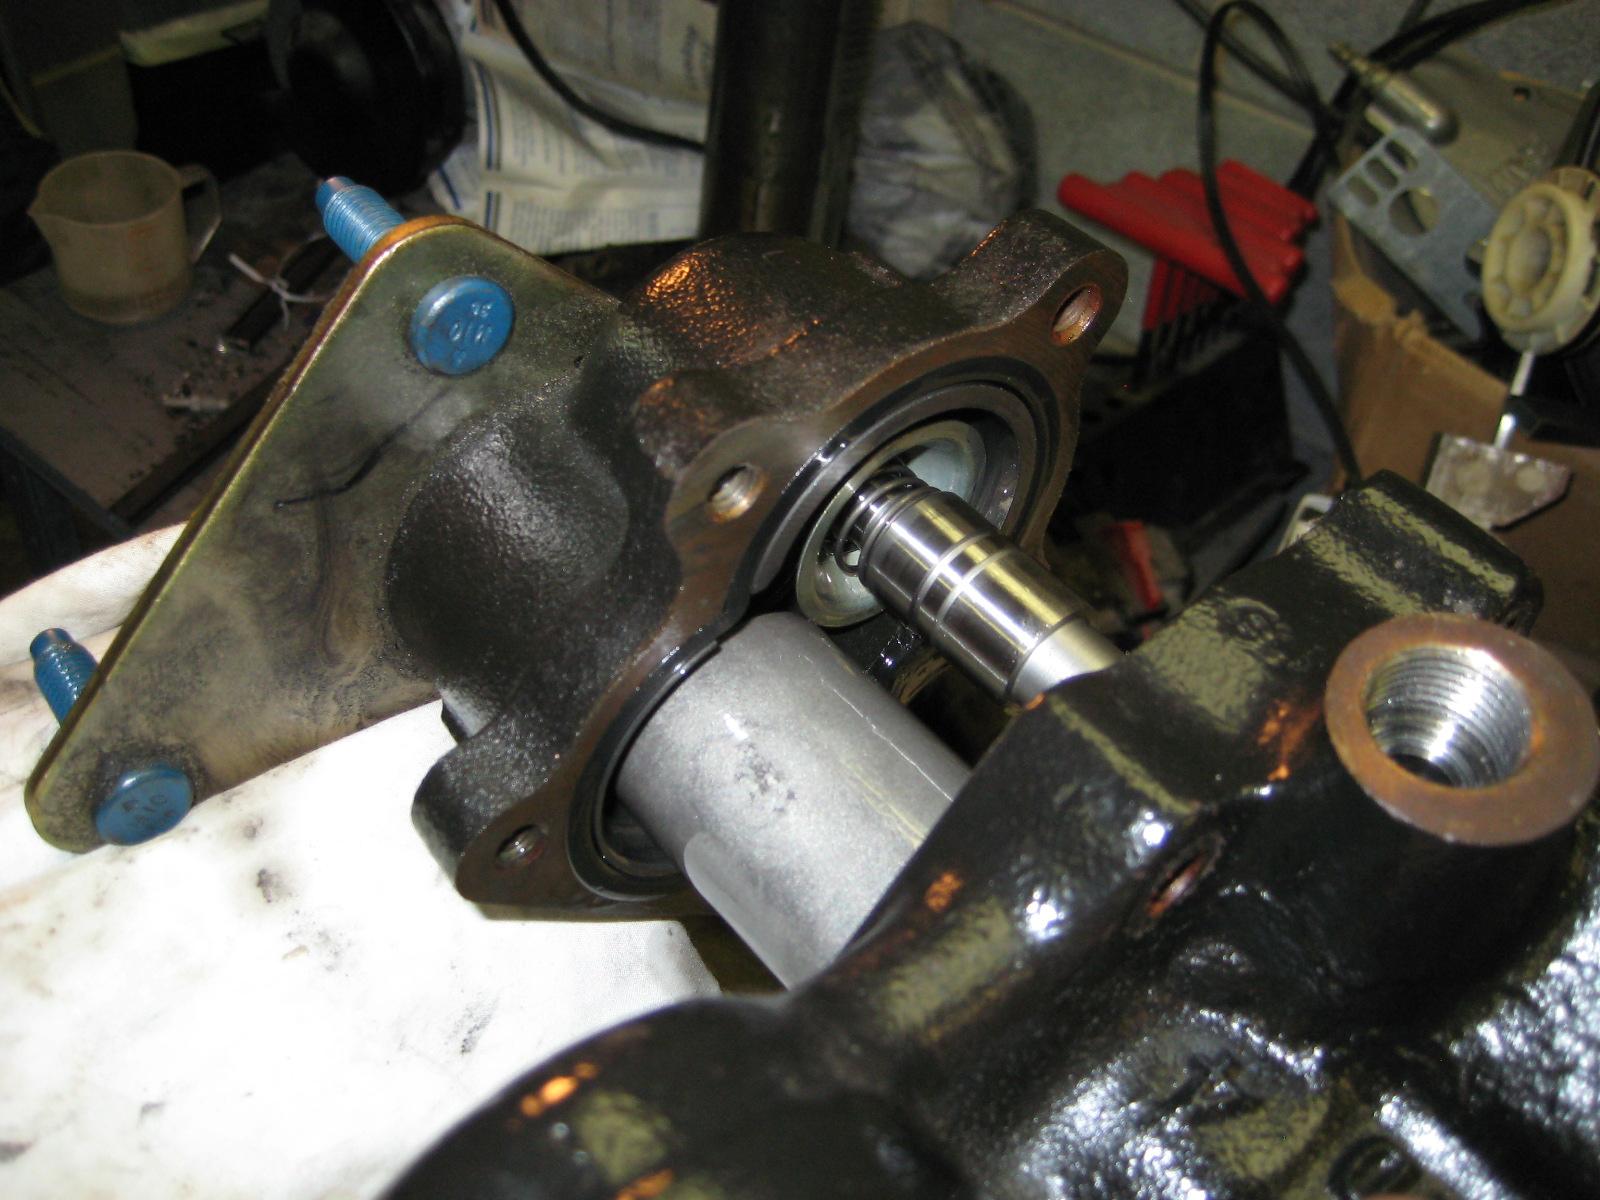
As I was going to sleep last night, I sortof remembered I may have had to grind a bit to relieve stress on the crimp points.  Just using a dremel.  In none of my pictures do I show this, but for some reason I remember it.  I may have had to grind the inside of the staked points to allow assembly without force....  sometimes I wonder why I have a brain at all....


Anyway here are a couple annotated pictures I have.  Took me a while to find them.

ROD REMOVAL 2.JPG

rod removal.JPG

Did This Forum Post Help You?

Show the author some love by liking their post!

Welcome To Mopar1973Man.Com LLC

We are privately owned, with access to a professional Diesel Mechanic, who can provide additional support for Dodge Ram Cummins Diesel vehicles. Many detailed information is FREE and available to read. However, in order to interact directly with our Diesel Mechanic, Michael, by phone, via zoom, or as the web-based option, Subscription Plans are offered that will enable these and other features.  Go to the Subscription Page and Select a desired plan. At any time you wish to cancel the Subscription, click Subscription Page, select the 'Cancel' button, and it will be canceled. For your convenience, all subscriptions are on auto-renewal.