Jump to content

Welcome To Mopar1973Man.Com LLC

We are privately owned, with access to a professional Diesel Mechanic, who can provide additional support for Dodge Ram Cummins Diesel vehicles. Many detailed information is FREE and available to read. However, in order to interact directly with our Diesel Mechanic, Michael, by phone, via zoom, or as the web-based option, Subscription Plans are offered that will enable these and other features.  Go to the Subscription Page and Select a desired plan. At any time you wish to cancel the Subscription, click Subscription Page, select the 'Cancel' button, and it will be canceled. For your convenience, all subscriptions are on auto-renewal.

Low Boost After Boost Elbow Install

Posted

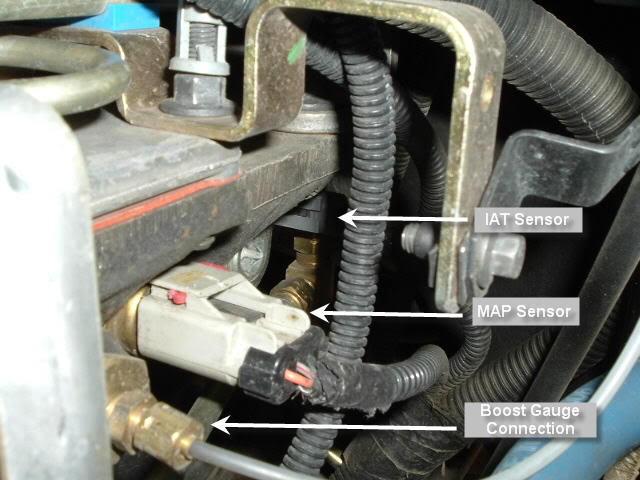
Just trying to track down the issue efficiently, if anybody has a good/better/best place to start. Did a boost leak test last week, found a few leaks, tightened some clamps, leaks gone. Threaded in a new boost elbow. Before, with leaks, I was seeing about 18-19psi max. Now I can’t get to 10psi. Set screw is turned all the way in. Bleed orifice does seem to be constantly bleeding air,  but I’m not sure if that’s by design or not. It’s the adjustable boost elbow from DAP.

  • Replies 67
  • Views 6.5k
  • Created
  • Last Reply

Featured Replies

  • Staff
2 hours ago, Andyba20 said:

Any reason not to try some high heat JB weld there?

What do you have to lose?   Clean the area with brake clean and a toothbrush before applying.  I have used JB weld on an intake manifold that was leaking coolant.  It fixed the problem. 

3 hours ago, Andyba20 said:

Any reason not to try some high heat JB weld there?

Exactly what I was going to say. You can just clean it real good with brake cleaner and cover with JB. Let it cure for 24 hrs or whatever it says on the tube. If it's awkward getting in there, take it off and then you can get at it with a Dremel or just sandpaper and REALLY clean it good. I think JB will work but it is cracked and the structural integrity is compromised. Check some local junk yards and see if you can find a replacement.


With all that said, I think JB weld will fix this problem.

It's aluminium isn't it ? just get it welded, Mig would work good but TIG is the deal, and 100% fixed, guess it depends on how close anyone is with a MIG or TIG, here they are hired out


  • Author

Everybody around here is a welder now. Matter of fact they even have little silhouette stickers on their back windows that say “welder” or “lineman”. They’re a proud people. Saw a truck the other day that said “no flux given”

  • Author

Got the turbo off finally. Checked the wastegate flapper and it seems to be opening/closing as it should. It was not stuck open. There is no play anywhere on the turbo that I can find. I saw where @Mopar1973Manhad a bearing failure that caused low boost, could this be my issue too? I think I’m pretty much to the point where I’m gonna have to let a professional look at it if nobody has anything else I should check. 
 

also- lots of carbon build up everywhere. Is this something I can/should clean? Can I use a degreaser/cleaner or should I use a brush and air? 

  • Owner

I can say the sound of the turbo was off while spooling. After seeing the rub marks yup I knew the bearings are done in the turbo. This stems from my parking brake being broke. So I'm shutting down so I can lock it down in gear. I'm pretty sure I've got a coked up shaft in the turbo.

  • Author

Anybody see anything unusual?

E7CD3EE0-913D-4FF2-8A7A-0DE334B652A2.jpeg

82CB6CFA-5410-40BB-9739-A1AAB7E85FC9.jpeg

C264F7E5-E4B8-48E6-9D93-BFD8D9EE4416.jpeg

93366D73-A8C6-4994-B854-270BA3D768DA.jpeg

  • Staff

With all that "coke" deposit at the waste gate opening, don't know how good of a seal it had. 

  • Author

That’s a good point @IBMobile thank you. I’m obviously gonna have to find a pro to look at it, but just for fun I’m tempted to fab something up and test your theory. Seems plausible. 

The first photo says a lot.  No way that wastegate is sealing.  Look at the valve face - about 40% of the valve face is not even making contact with the valve seat.


- John

  • Author

I’m all for cleaning it up and trying it out. The chain of events is what is so odd. It goes like this. Consistently made 18-20 psi, ordered boost elbow and installed, ran it to check boost, got up to 22psi (maybe more, had to look at the road too), came home and turned the adjuster in, went back out and tested again and couldn’t get over 10psi. That’s where I’ve been since. Put the old boost elbow back in and still at 10psi. So it all happened right when I got the new elbow. I did have leaks which I’ve completely mitigated since the start of this thread. 

3 hours ago, Andyba20 said:

I’m all for cleaning it up and trying it out. The chain of events is what is so odd. It goes like this. Consistently made 18-20 psi, ordered boost elbow and installed, ran it to check boost, got up to 22psi (maybe more, had to look at the road too), came home and turned the adjuster in, went back out and tested again and couldn’t get over 10psi. That’s where I’ve been since. Put the old boost elbow back in and still at 10psi. So it all happened right when I got the new elbow. I did have leaks which I’ve completely mitigated since the start of this thread. 

I'm a bit late to these pictures but the first picture is your problem as has been said and he's how it happened


Your wastegate has had carbon build up over time but still sealing in a fashion, wastegate probably not opening very often, and your 18 to 20 psi not very often

You then fit a boost elbow, your OVER 22psi event dislodged some of the carbon on the WG seat, now it won't seat at all.

I have a boost valve and it pops on a hard throttle shutoff and there is some CFM of exhaust gasses passing through that certainly enough to trash a carbon seat


No harm done, clean it up with a scraper and then a wire wheel in a drill, I'd use a brass wire wheel just because I have them, nice and steady and clean with brake cleaner

On your second picture, I'd be removing the stud (hopefully that's the only one that didn't come out) and using a fine toothed flat file dead flat on the flange to face it a bit, same with the turbo face but make sure no filings end up in the turbo, I pack the port with rag (not fluffy rag) do the facing then use a magnet  to pull most filings before removing the rag then a good blow out with air or brake cleaner


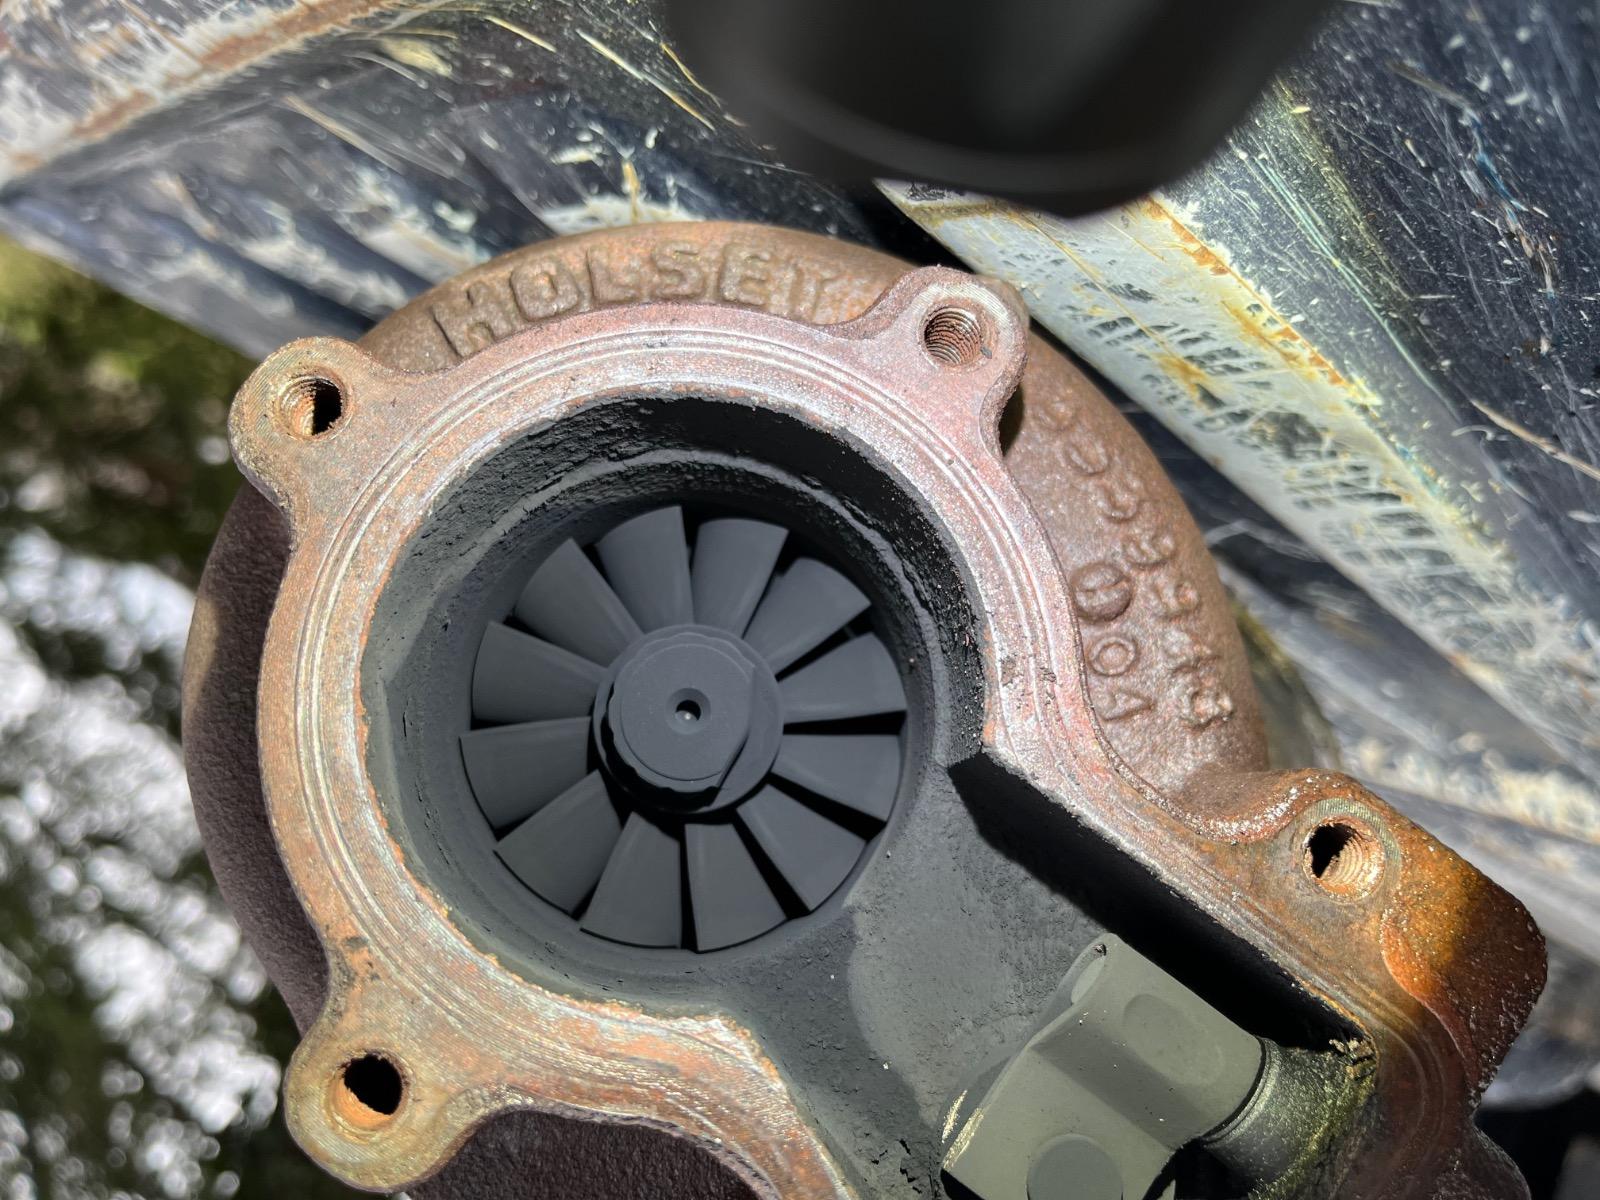
On your third picture I see a shiny ring right about half way down the vanes on the housing intake side, check that this is not the vanes contacting the housing, if it is you will see a corresponding mark on the vane edges, my guess is it's right on a slight ridge where the housing changes angle, the airflow over this will keep it clean just the same as the front edges of the vanes are always cleaner than the sides, check for shaft play, there should be some, the specs will be in the FSM, I never check specs as I've seen that many a quick wobble is enough just pay attention to how close to the housing the vanes can actually get as it's always better to change a turbo before the vanes eat the housing, if you think it's close check the specs

The shaft should turn freely BUT some removed units do have a bit of a resistance to start to spin by hand but it is only a bit, a little oil down the oil feed usually makes a difference

Also the vane at around 10 to 11 o'clock what is the mark/line check it is just carbon, check the others too because of this one


I see nothing on your 4th picture other than a face that needs facing and there are no marks on the housing so the ring on the intake side is probably an air polished ring and not vane contact 


9 hours ago, Andyba20 said:

Anybody see anything unusual?

E7CD3EE0-913D-4FF2-8A7A-0DE334B652A2.jpeg

82CB6CFA-5410-40BB-9739-A1AAB7E85FC9.jpeg

C264F7E5-E4B8-48E6-9D93-BFD8D9EE4416.jpeg

93366D73-A8C6-4994-B854-270BA3D768DA.jpeg


1st photo I definitely see a wastegate that wasn't sealing. Besides the marks on the gate itself, there are striations in the soot from high pressure being blown across it. 


2nd photo I don't see anything, besides a reminder of how small to manifold ports are..


3rd photo now things are getting interesting.. there is a lot of oil residue in the map ring. Also the shiny ring that @wil440 saw I think is the light illuminating the actual map groove. 

Were you running a K&N type (oiled) air filter ever?


4th photo is also interesting, the left and bottom side of the turbo has a damp look to the soot, but I'm also surprised that its by the wastegate hole.


I'm gonna go with @Mopar1973Man on this one, turbo needs a rebuild..

  • Author

The last owner had a K&N on it. That was 8 years and 100,000 miles ago. I’ve have a bhaf on it since I bought it, but I’ve never touched the turbo until yesterday because it’s never given me a problem. 

  • Owner

https://www.amazon.com/Turbo-Rebuild-Holset-HX35W-HE351CW/dp/B07Y2L4P5C


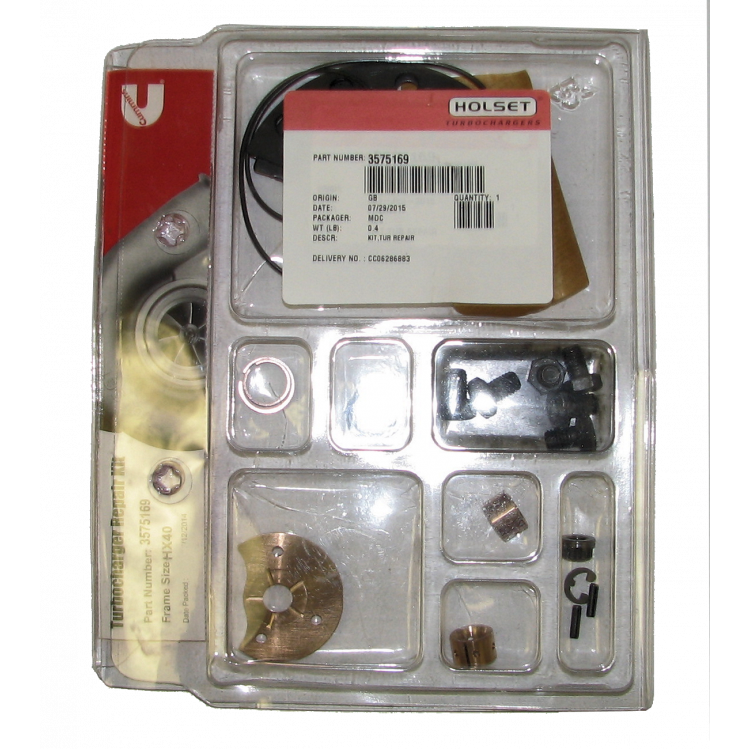
Please don't freak out and say you need a Cummins OEM or Holset OEM rebuild kit. Being I've actually order and used a Holset kit for my HX35.40 and DID NOT come with everything this kit has. That was the mistake I did I listen to everyone stating you must have the official Holset kit to make it right. Well Holset kit is missing all the o-rings this one has, missing the return oil gasket, manifold exhaust gasket, and the rear housing gasket. I HIGHLY suggest this kit over the Holset being its much more complete. 


61YALAOC-3L._AC_SL1200_.jpg


As you can see the Cummins kit is short also.. No manifold gasket, no oil return gasket, no discharge o-ring, lots of missing stuff that should be there but Hey its OEM crap once again PLEASE DO NOT BUY! Holset or Cummins kits, not good...

image.png

Never had or seen a disassembled turbo....yet. I have a question. I see in both pics, brass bushings. Are these what's referred to as bearings in a turbo? I've read about the bearings being bad and thought there were actually bearings.

  • Owner
1 minute ago, Max Tune said:

Never had or seen a disassembled turbo....yet. I have a question. I see in both pics, brass bushings. Are these what's referred to as bearings in a turbo? I've read about the bearings being bad and thought there were actually bearings.


Yes the brass sleeves are the bearings in the turbo both my HX35W or HX35/40 Hybrid use the same kit. The snap rings hold the brass sleeves in places. One on each side I will warn the pin holes in the clips are very very small. Make sure to tool up before starting. 


Yeah my first turbo rebuild make sure you really pay attention to all the parts your remove and where from, etc. Me I forgot one of the pieces for the thrust plate and you couldn't tighten the compressor without it binding up. Again make sure you paying attention all the way through if anything doesn't feel right don't force it, tighten to make it bind up, etc. Look over everything again be sure all parts are installed correctly you don't need to damaged parts.


When its done that turbo should spin smooth and be just a bit stiff at first but after ran a few minutes on the truck the bearings will settle in and spin much better. 


The worse part is getting the exhaust housing unbolted carefully without breaking the bolts off, then getting the housing to separate to expose the tubine wheel. I've tried a few others in my time to rebuild and few times I hit a wall and couldn't because bolts are frozen bad, housing rusted together, etc. 


  • Author

I’m tempted to send it off for a rebuild. I watched the one dudes video, then apparently a short time later his rebuild failed. Sounds like Moparman is on his 2nd rebuild kit. So maybe the rebuild kits aren’t that good? I’m just not a talented mechanic and there’s nobody around here that knows anything anymore. 
 

I did start cleaning up around the wastegate port and man that stuff is like iron. I’m slowly chiseling it all out with a small screwdriver. 


Archived

This topic is now archived and is closed to further replies.

Did This Forum Post Help You?

Show the author some love by liking their post!

Welcome To Mopar1973Man.Com LLC

We are privately owned, with access to a professional Diesel Mechanic, who can provide additional support for Dodge Ram Cummins Diesel vehicles. Many detailed information is FREE and available to read. However, in order to interact directly with our Diesel Mechanic, Michael, by phone, via zoom, or as the web-based option, Subscription Plans are offered that will enable these and other features.  Go to the Subscription Page and Select a desired plan. At any time you wish to cancel the Subscription, click Subscription Page, select the 'Cancel' button, and it will be canceled. For your convenience, all subscriptions are on auto-renewal.