Jump to content

Welcome To Mopar1973Man.Com LLC

We are privately owned, with access to a professional Diesel Mechanic, who can provide additional support for Dodge Ram Cummins Diesel vehicles. Many detailed information is FREE and available to read. However, in order to interact directly with our Diesel Mechanic, Michael, by phone, via zoom, or as the web-based option, Subscription Plans are offered that will enable these and other features.  Go to the Subscription Page and Select a desired plan. At any time you wish to cancel the Subscription, click Subscription Page, select the 'Cancel' button, and it will be canceled. For your convenience, all subscriptions are on auto-renewal.

Posted
  • Popular Post

I wanted more light under the hood when I am working there or when I was just checking oil or other fluid levels etc.


I decided to try installing some LED lights to see if this would improve the situation.  Since this was to be an experiment to see if it could improve things and if I would like it I didn't want to spend a lot of money to start with.


I checked around for various light options and looked at how they could be mounted.  I liked the idea of using a small multibulb bar setup because I could tuck it in an area that wouldn't come in contact with the body or engine when I closed the hood.  My thinking was that if I installed 2 of these lights I could focus the out put on each side of the engine bay.


post-558-0-04374100-1391633181_thumb.jpg


I finally opted for a small 6 bulb (6w) bar that was sold by Super Bright Led.  The output was rated at 600 lumens for each light assembly and came with its own ss mounting bracket and hardware and sold for $19.95 for a pair of lights.  This would give me 1200 lumens under the hood.


post-558-0-85356300-1391633470_thumb.jpg


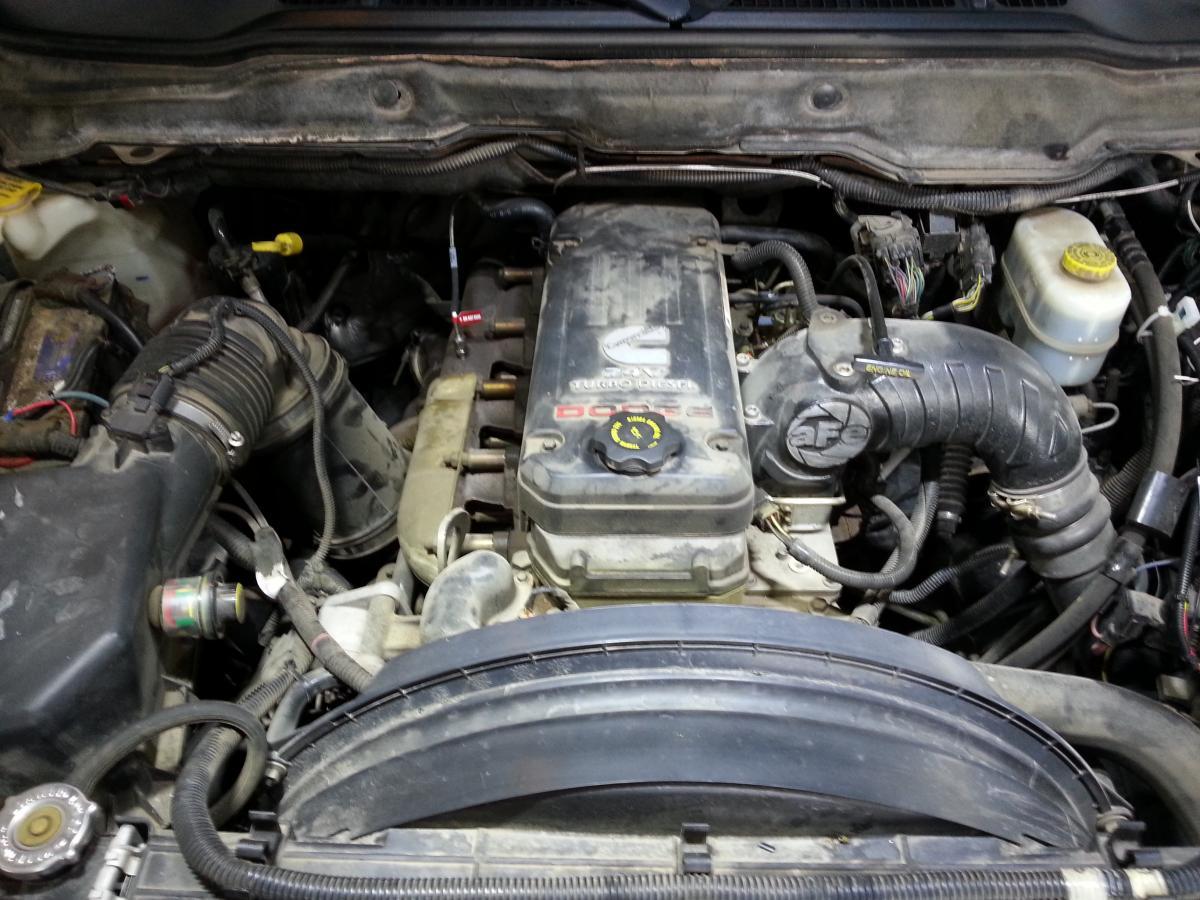
The assembly was small enough that I could mount it on the front lip of the hood (just on the backside of the grill) and I could close the hood and the lights would easily clear the radiator support cross member and when the hood was open the lights would be up high and out of the way and give a good unobstructed light input into the bay area.


So I marked the install location and mounted the brakets for the light assembly.


post-558-0-34199000-1391633756_thumb.jpg


When I installed the light assembly in its bracket I then adjusted the swivel location so the light pointed directly into the center of the engine bay.  The swivel feature also allows the light to be adjusted or re-aimed as needed.  Checking the closure of the hood verified that everything cleared with inches to spare.


post-558-0-05192500-1391633980_thumb.jpg


I wanted to have the lights operate just like the stock underhood light (open the hood and the light comes on and close the hood and the light goes out).  Keep it simple with no additional wiring or switches.  This dictated that I would just connect my wiring to the stock underhood light.


post-558-0-82853400-1391634252_thumb.jpg


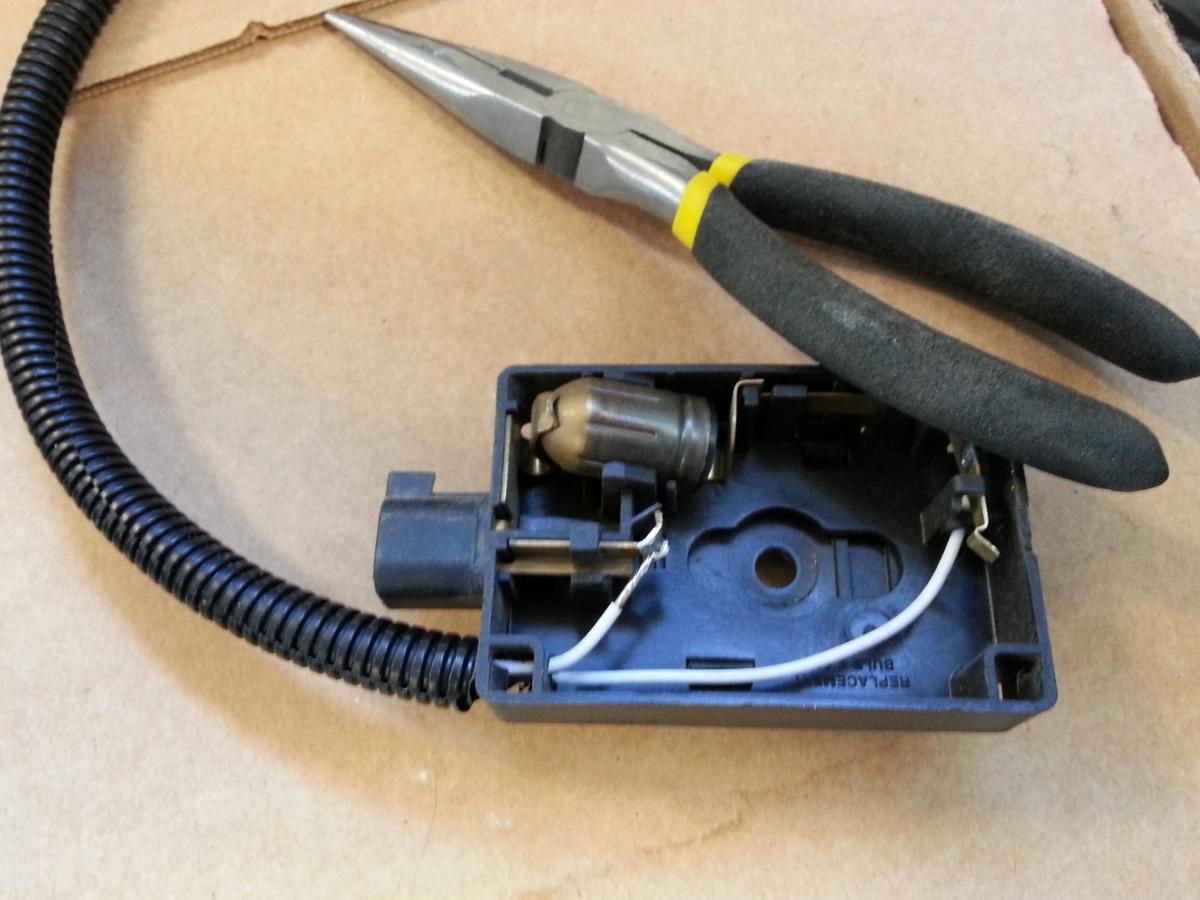
After removing the stock light assembly I drilled 2 small holes in the plastic housing for a place to have the  18ga wiring enter into the assembly and connect to the existing light setup.  I decided to solder my leads onto the existing brass tangs built into the stock light assembly.


post-558-0-52350800-1391634434_thumb.jpg


After soldering the leads in place I then installed a 1/4" wire loom covering to keep these new wires from be abraded of scuffed when they were finally installed inside the hood stiiffening bracket.  This bracket proved a natural channel for the wire to be housed in and it led to the front of the hood near where I had mounted my LED light assemblies.


post-558-0-27960100-1391634906_thumb.jpg


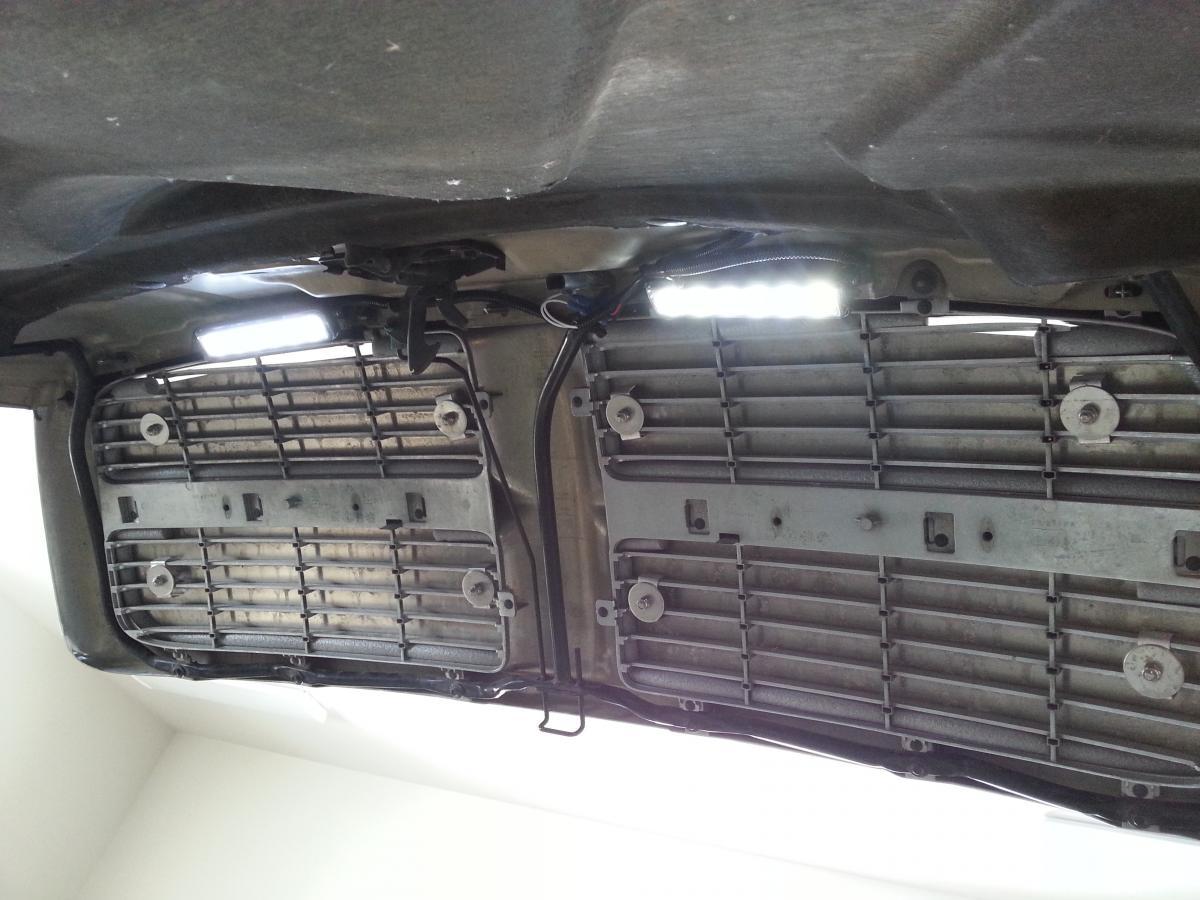
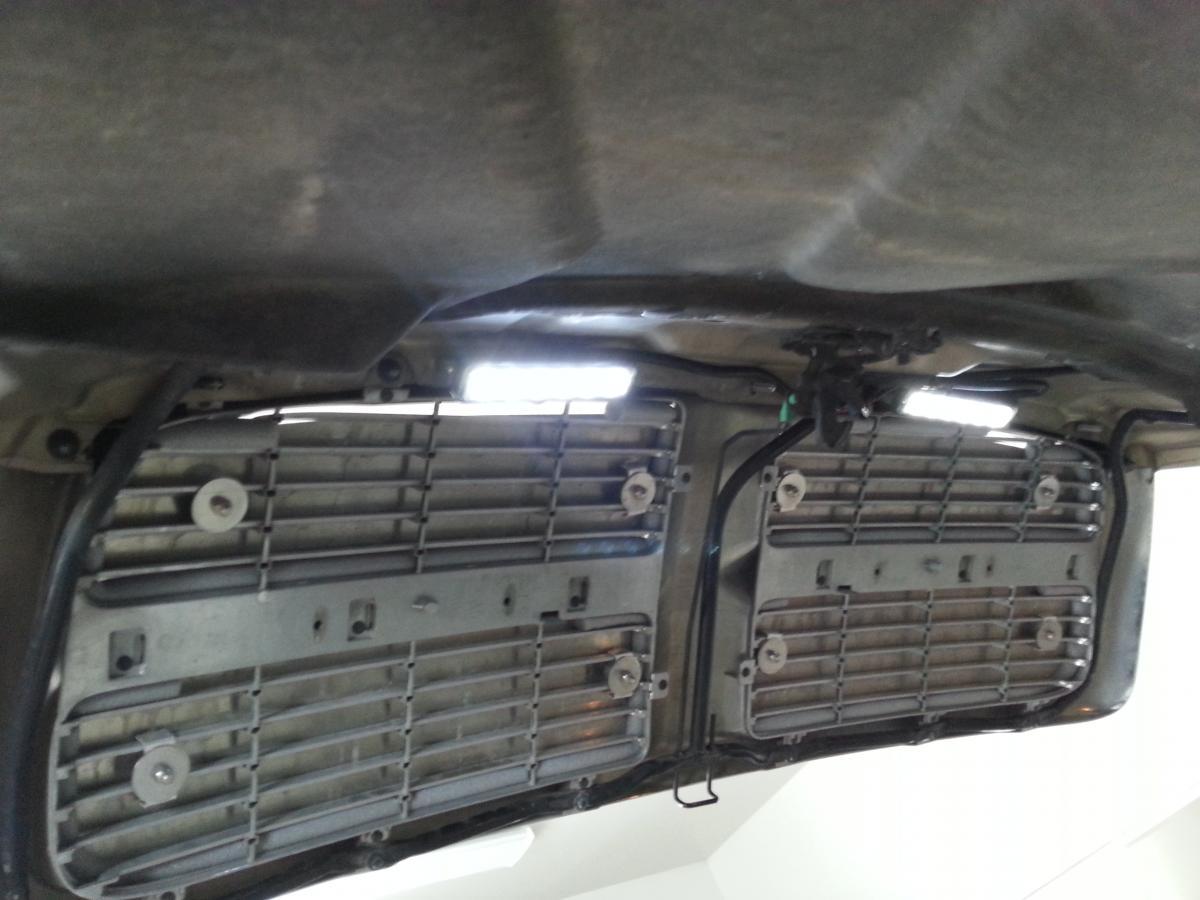
After I hooked everything up I replaced the IOD fuse to check if the lights worked as I had hoped for.  They did and here is a picture of the assembly lighted.  It was a little hard to get a picture of the lights on because they over powered the eye sensor on the camera so I had to point the camera away from the lights so I could take a picture.  Of course when you do that you can't see how bright the lights are.  But it will give you an idea of the finished set up with the wires tir wrapped up out of the way.  I also placed plug-in barrel connectors on my connections to the LED lights so if I decide to use a different light then I don't have to cut wire or run new wiring.


post-558-0-50991900-1391635386_thumb.jpg


post-558-0-49844500-1391635463_thumb.jpg


Here is a picture of the underhood light that is put out by these LED assemblies.  This is no flash and the time is at dusk.  This is a big improvement (over the weak stock light) and I have light enough to even easily read a paper by.


post-558-0-12840500-1391635756_thumb.jpg

  • Replies 13
  • Views 7.7k
  • Created
  • Last Reply

Top Posters In This Topic

Posted Images

Featured Replies

  • Author

WOW!  So I am a published author.  Does that mean I have tenure now?  :thumb1:

Think it would fit under the second gen hood? In the battle over halogen vs LED, this one wins. Those lights are crazy cheap. Great mod. Fits my criteria. Inexpensive and effective. More work than cost. Great job! With the insulator taken off my hood, that light should just blast down onto the engine. White paint on my truck ;-)

Edited by joecool911

  • Author

Actually I would love to see more articles like this. If you want I can build you account on the article database and save me the time of converting everything...

I am planning to install the following items on my truck so if you want those kinds of things detailed in a write up then go ahead and sign me up: Hydraulic winch, free spin hubs, exhaust brake, front receiver and I may take a shot at LED foglights.


There could be other things as I go down the road. :spend:

  • Author

Think it would fit under the second gen hood? In the battle over halogen vs LED, this one wins. Those lights are crazy cheap. Great mod. Fits my criteria. Inexpensive and effective. More work than cost. Great job! With the insulator taken off my hood, that light should just blast down onto the engine. White paint on my truck ;-)

I will check on my 2nd gen and let you know if this same assembly will fit.  Got about 10 inches of new snow last night so it may be a few days before I can get everything uncovered and check out the fit.

Would that light be bright enough to use as a backup light? My canopy is about 2' over cab height. Backing a trailer can be difficult in the dark. My thought was to cast a light from the drivers side top of the canopy and shine it back to be able to see the rear of my dumping trailer, which is dark blue and not visible in my outside mirrors.

  • Author

Think it would fit under the second gen hood? In the battle over halogen vs LED, this one wins. Those lights are crazy cheap. Great mod. Fits my criteria. Inexpensive and effective. More work than cost. Great job! With the insulator taken off my hood, that light should just blast down onto the engine. White paint on my truck ;-)

Just looked at my 2nd gen truck and this LED light assembly will also work in the same location as on my 3rd gen.


The lip of the hood on the 2nd gen is several inches foward of the radiator support cross member.


Would that light be bright enough to use as a backup light? My canopy is about 2' over cab height. Backing a trailer can be difficult in the dark. My thought was to cast a light from the drivers side top of the canopy and shine it back to be able to see the rear of my dumping trailer, which is dark blue and not visible in my outside mirrors.

No this light wouldn't work well for that application at all.  I think you would want something that has a higher lumen out put and higher intensity light and something that is able to throw light at a longer range.  Of course they are going to be priced higher as well but there are a lot of very nice lights that would work well as backup lights or area work lights etc.

Did This Forum Post Help You?

Show the author some love by liking their post!

Welcome To Mopar1973Man.Com LLC

We are privately owned, with access to a professional Diesel Mechanic, who can provide additional support for Dodge Ram Cummins Diesel vehicles. Many detailed information is FREE and available to read. However, in order to interact directly with our Diesel Mechanic, Michael, by phone, via zoom, or as the web-based option, Subscription Plans are offered that will enable these and other features.  Go to the Subscription Page and Select a desired plan. At any time you wish to cancel the Subscription, click Subscription Page, select the 'Cancel' button, and it will be canceled. For your convenience, all subscriptions are on auto-renewal.