Mopar1973Man
Owner
-
Joined
-
Last visited
Everything posted by Mopar1973Man
-
https://www.tiktok.com/t/ZTFyBMhTs/ Here you go gang.
-
Yeah you could manage your fuel and timing better with a Quadzilla. I tend to add fuel AFTER turbo is spooled. Basically I'm running only +150HP injectors till 15 PSI Boost. Then I pour the fuel to the engine above 15 PSI.
-
Yeah I missed that thanks. The tires are OK for size. With an automatic with a 0.68 final ratio might bring the cruising RPM too low and might create lugging and EGTs will rise sharply. Proper cruising RPM should be1,800 RPM or higher. No, because HY35W is a 9cm2 turbine housing like the HE351CW (60/60/9) is also a 9cm2 housing choke point that comes in very low at about 30 PSI. Now an HX35W is (54/60/12) and then an HX35/40 Hybrid is a (60/60/12) which is good till about 35 to 38 PSI without going to deep in the choke point.
-
No timing and fuel control on the Edge Comp. I left the Edge Comp and went to a Quadzilla Adrenaline. Your running excessively advanced timing and not enough retard to build boost and control EGTs. I'm running custom 7 x 0.010 +150HP DAP injectors popped at 320 bar. Stock HX35W turbo (54/60/12). No EGT issues all the way to 100 MPH. Now switch to my tow tune I can stand on the throttle and never exceed 1,200°F EGT even towing my 31 foot RV. I've gotta ask what size tires are you running?
-
Personally, I like the ND alternator over the Bosch alternator because you can rebuild the ND really easy and way cheaper. Diode packs are super cheap if you know where to get them. Bearings and brushes are cheap too. Either a reman'ed or new alternator make sure to have it tested before you leave the store. I've seen brand NEW alternators dead in the box and never been used. The second thing is to do the W-T ground wire mod. Alternators last much longer after this fix. No more failing diodes and burned-up brushes. Then you need the PCM protection fuse mod.
-
Nope. Because knowing that if I did have 35" tires my truck would have been a trainwreck and worthless. 35 inch tires on 3.55 gears would net a final ratio of 3.21:1 way too much stress on drivetrain parts. So in the first place I'd never put anything larger than a 31 inch tire on any 3.55 gear axle. This is highly damaging to both axles, suspension and brakes parts. Too much leverage and torque trapping before the axles on the other parts like U joints, transmission and transfer case. Brace is not going to fix any of that. So in my case I dropped to 245/75 R16 tire from the stock 265/75 R16 tire and that changed me to 3.69:1 final ratio and reduced stress on everything and increased my MPG to nearly 30 MPG. Yes, I've crossed the entire state of Washington from Seattle, WA to the Idaho border for only a 1/4 tank of fuel for 300 mile trip. With 30 inch tires I can use a quick ratio steering box (Blue Top Steering) WITHOUT a brace and enjoy snappy steering with little wear to all suspension parts and brakes last forever. This is not an option for you because the 35 inch tires place too much stress on the steering box and will cause damage to a quick ratio so you need the standard ratio box. Now with a quick ratio I got a truck that drives like a sports car. Ball joints that last 200K to 300K (AC Delco) Tie Rod ends last 250K (AC Delco) Brakes 250K (Economy pads NAPA) Tires 60K to 80K (Hankook AT2 245/75 R16) Sadly you need 2 inches of tire to lift the axle 1 inch. Then to increase the tire size you add spinning weight for every 1 pound of rotational mass you can drop like removing 8 pounds off the frame. In my case dropping from 265's to 245's dropped about 20 pounds per tire off which is about 640 pounds off the frame in performance and acceleration is much quicker without the EGT's. Even towing my utility trailer and my tow tune I can stand on the throttle and never really reach too hot touching 1,200 EGT's but that's all. Yeah my truck is used offroad quite a bit. You got to look at all angles of the impact of the tires and weight vs just a brace and steering box. With my Jayco trailer and truck on the scale is roughly 17,500 pounds rolling load. Again snappy steering and way better acceleration for towing with little EGT's. Yes, I tow trailers a lot in the summertime, and then in the winter time I might have to travel long distances to get supplies like Lewiston or Boise (3 hours) to get food and supplies. So efficiency and longevity mean way more than appearance. So this is why I wouldn't have the brace nor the 35's tires. Too damaging being that is EXACTLY how I killed my 1972 Dodge Power Wagon and broke a front axle because of oversized tires. Another trick. In the winter I can out-drive anyone with big tires. If you to walk out in the snow your foot will compact snow. Now if you put on snow shoes you can walk on top of the snow. This is why I can't run big tires in the winter because the 245's provide way more traction on ice than a 35 inch would. I've out run other diesels at 55 to 65 MPH on snow covered roads and they can't keep up. Lack of traction due to oversized tires and then more likely to roll over because center of gravity is much higher. Staying low to the ground is much safer.

-
Flat bed with stake pockets. Going to be sweet truck.
-
Problem isn't the bearing mounting. Like here in Idaho the bearing only last about 2 to 3 years because of mud and salt from winter driving. Then the set screws rust in place making a bearing change nearly impossible. Last one I had to cut off with a torch (hot knife) and replace the entire bracket and bearing. The other problem is where it mounts to the frame it will break the nuts off in the frame too. Rust issues are nuts. So that truck wound up with a sway bar delete.
-
Storm fell stuff. Laying over roads.
-
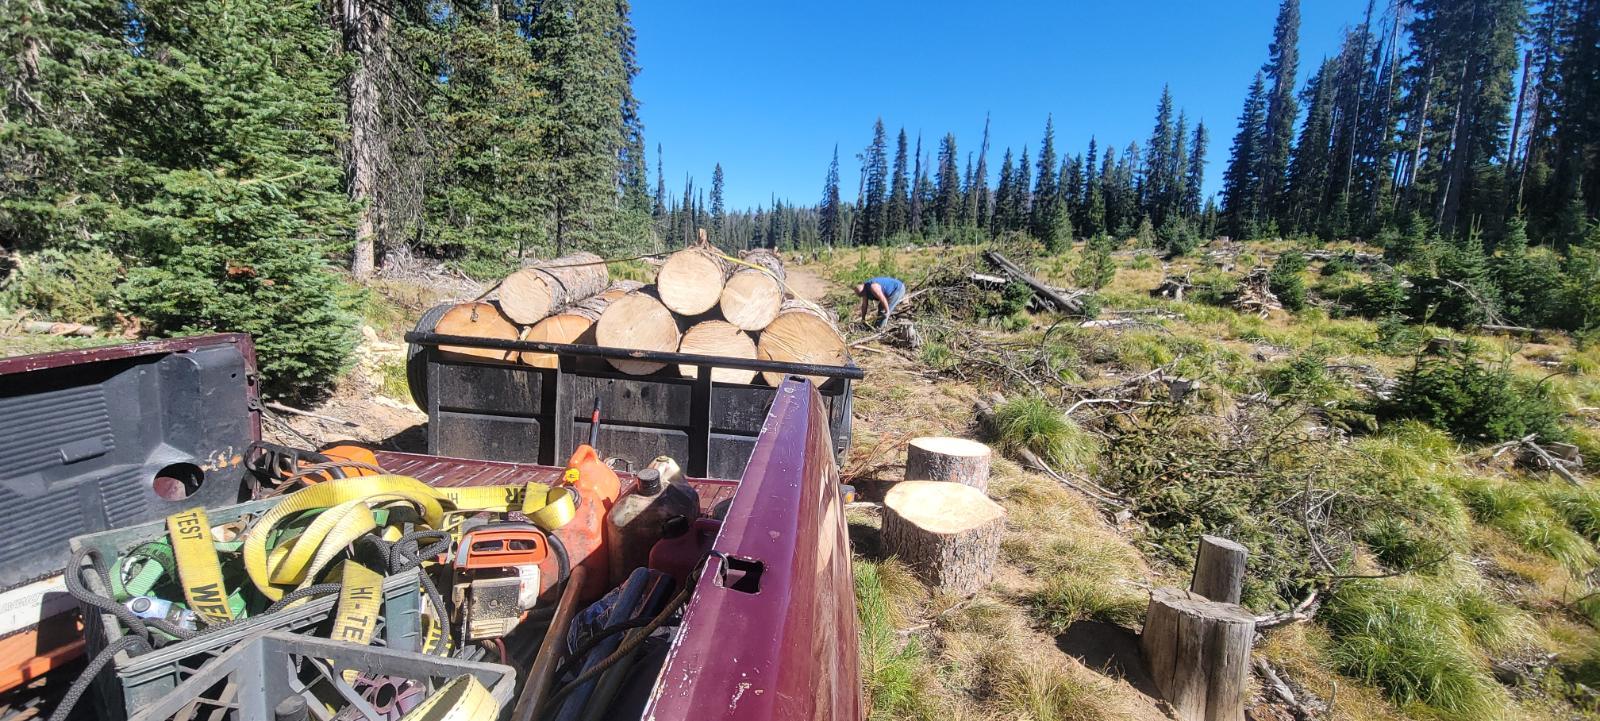
Did a bit of truck driving and got a friend to help get firewood loaded. Yeah Beast is back in action just myself I cannot lift anything heavy yet. I can do light function ls like fueling saws, sharpen chains, etc. Again I don't have the strength to lift nor do I want a hernia from lifting.
-
No. I'm nearly 500k miles on all factory steering equipment and no issues. I'm also a quick ratio steering box which you cannot use till your a 31 or smaller tire. Ball joint 350k miles, tie rods 250k miles. Brakes every 200 to 250k miles. Steering box brace is a huge pain in the rear. Being your still going to wear the steering box out and try to remove that brace you end up losing parts that are rusted or lose the core because you cannot remove the brace completely. Yeah been there on customers trucks.
-
Yesterday was a run to Lewiston and get supplies for the house. For me it's very draining to walk all over Walmart then go to Home Depot and walk all over too. Strange enough a nice gent wanted a photo of me. After the photo the fine gent prayed over both Suzanna and myself for help from the Good Lord to aid both of us on our road to recovery. Then headed over to WinCo for a few food items. Yeah I'm wore out energy wise today but gain ground. Health wise my blood pressure is in check and doing good just out of shape. Even my weight is down 5 pounds and doing better.

-
Sadly all wear issues are results of lift kits and large tires either T or Y steering will still wear quickly because neither set up will support wide tire or lift kits. Sadly this mod will not stop wear issues.
-
Yes you need to do a W-T ground wire mod. This is suggested even by Auto Computer Specialists for ECM protection. Means the boost went too high because of no boost fooler. I would skip the intake elbow because there is only a 10 HP gain over 600 HP of engine power. There is nothing to gain really for a daily driver because we never just hold the throttle wide open for miles. Second thing is warm air in the manifold is desired really after all my study work. I'm running a 200℉ thermostat from a 6.7L Cummins and pushing intake temperatures in the 80℉ to 140℉ realm for efficiency reasons. My EGT's are super low and Engine oil temperatures are always 30℉ to 35℉ below coolant temperatures. Cold air intake steal efficiency from the engine because cold air CANNOT ignite fuel in proper timing.
-
I'm still alive and still battling away at figuring out my new life with an ostomy bag. I even tried to do some shop work yesterday helping Mark a bit but man after being laid up for over 8 months with surgeries and chemo treatments I'm still fragile and have issues with holding even small amounts of weight for any length of time. I am still having issues with my kidneys and need to work at getting my kidney function back to the good realm. Part of my kidney issues could be because of the head cold I had and then I had an issue with food that made me sick. That may be fouling my labs. We will see soon. Now my race is on to figure out finding enough help and support to get firewood onto the property. Typically I need about 9 to 12 cords to keep the property warm and not freezing. Being my income is extremely limited I can't afford to heat with an electric heat pump for this winter. This is a problem I'll have to visit soon. Beast is going to need a set of wheel joints in the front axle I "think" I can get the job done with a bit of help from friends. Holloween is coming soon so I've been working on my look. This is the way I went to McCall hospital for my labs and handled my Norco supplies for my ostomy. Still is all I get people that come up to me and give me huge hugs and give me great comments.

-
Impatiently waiting...
-
What size injectors are you running? Strangely enough I'm running 150's and still running the stock HX35W (54/60/12). I might be able to tweak your tune a bit and help out with keeping the EGT's down. There is several tricks I've learned about tuning that managed to allow me to run most daily driving and towing without issues of EGT's. Might give me a call and I'll do what I can to aid in this build.
-
Well I know I need to keep you all updated and what's going on. Life continues for me. I'm starting to learn how to live with my new body. Yeah it going to take a bit of time to learn all the little things and the mistakes I've made so far. I've had some of my mounting wafers fail in weird times and start leaking. I'm getting better at swapping out the old wafer and bag fairly quick. My skin is starting to toughen up to the adhesives and my rash is getting better with time. Still can be a rather delicate process of even keeping me drained out and moving. I tend to cheat as much as possible like being I'm down at the GF place in Nampa right now I'll leave my bag hang out under my shirt which gives my full capacity of the bag. If I tuck it in then I loose part of my capacity and if I wear a seat belt it will possibly blow the bag out or my wafer, I wound up coming down here to get my ostomy supplies sorted out with Norco so I get my full monthly allotment of wafers, bags, sealant, solvent and other supplies. TNorco kept splitting my order and half was in the beginning of the month and then the rest would come at the end of the month late. Yeah its rather tough to mount a new wafer without the sealant ring, the wafer would leak pretty quickly. There is other things like me being out and start sweating which could make the sealant ring fail in a short time. I have to keep my belly dry and try not to sweat much if possible other than that I might be changing wafer and bag pretty quickly. Next step is to visit the Social Security office and and deal with paperwork as well. Yes my wild side continues.

-
I'm running 26 to 27 degrees at 2,000 RPM's. Then yesterday I was on I84 running 82 MPH which is 2500 RPM and just about maxed out at 29 degrees of timing. Bigger the injectors more timing is needed. You need to base the timing off your engine oil temperature like I do then you'll find a happy spot in the timing. Keep in mind I'm running a 200℉ thermostat from a 6.7L Cummins and then the high timing. This brought down my EGT's and boost pressure considerably making the engine much more efficient. My engine oil temperature is roughly 30 to 35℉ cooler than coolant temperatures. I would suggest you give me a call and I'll work through your tune with you. The ideal oil temperature for a 190℉ thermostat is about 160 to 165℉. Some of this could be your light throttle timing limit too. You can hold cruise timing, if more than 5 PSI of boost above that pressure you are asking for head gasket issues.
-
Yeah good point low stall converter can drag the engine down. But in Neutral it should go away same with park.
-
Special tools are required to read ABS codes. 2nd gen truck you need a DRBIII tools or equivalent tool to read those codes.
-
Basically you need to have both ends open then ohm test from pin to pin and greater than 5 ohms is a fail. Second test is pin to ground with both unplugged. There should be infinite ohms to pass but if you see ohms then you have a short to ground.
-
Problem is taking all the driveline off and transfer case so you can balance the transmission. I typically drain the transfer case and pull it off. Then the transmission can be slid back and change the throw bearing. I'd be careful it's very possible the clutch is nearing the end of life. The other fail would be someone got the clutch hot and cooked the grease out of the bearing.
-
This should help. https://mopar1973man.com/cummins/articles.html/24-valve-2nd-generation_50/51_engine/electrical/ccd-chrysler-collision-detection-data-bus-r329/
-
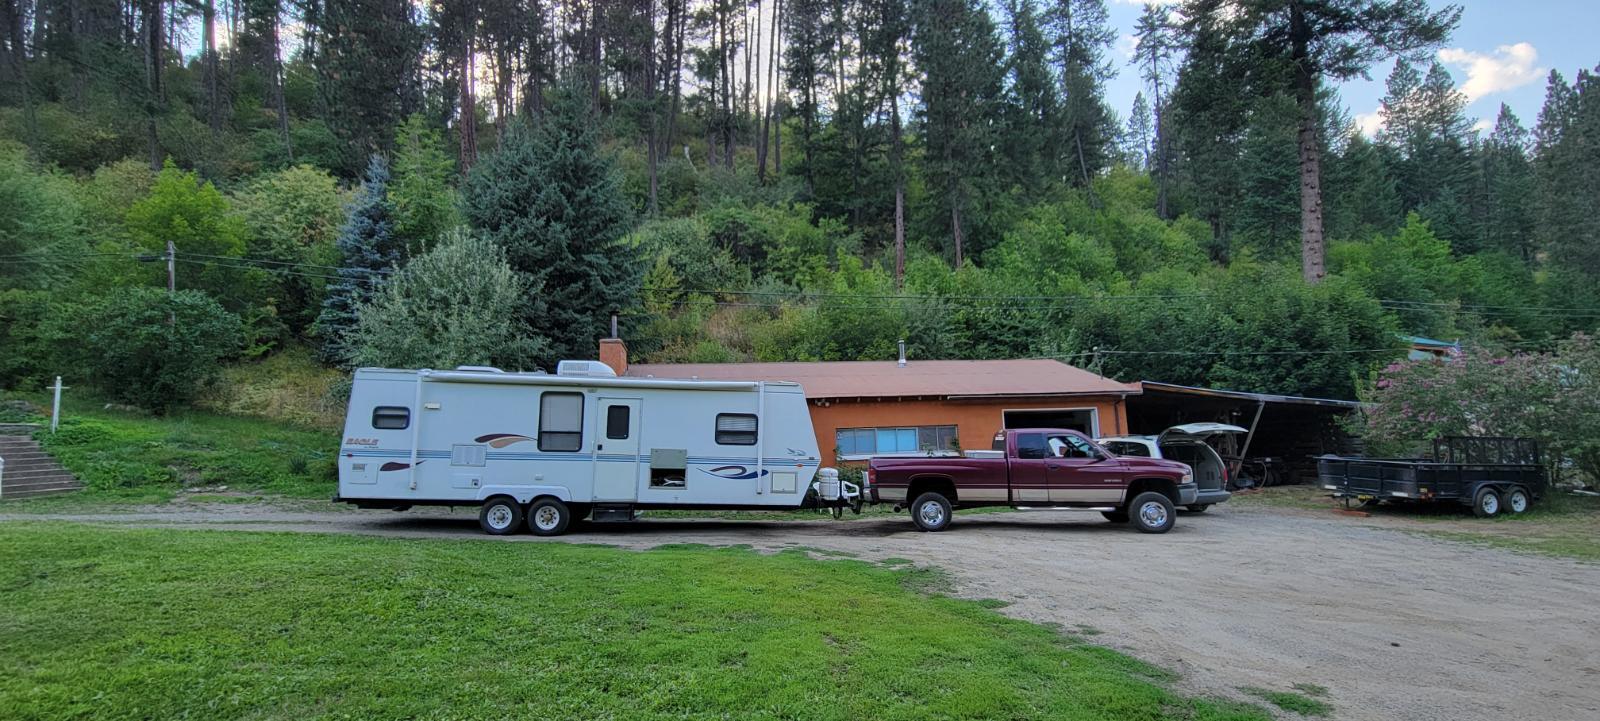
So my trips back and forth to medical appointments are coming to a end. I'm attempting to get my disability fired up but I've got to play ball with all the different agencies and play by their rules. Social Security limits me on the amount of hours I'm allowed to work my website currently. Then Welfare limits me on how much income I'm allowed to have as well. As for information, I'm still helping guys with different truck issues. I have to do it where I'm not in public view sadly. Like I got to run and get a plumbing part today. I'm trying to build my strength up and return to my old self. Sadly I'm still very weak and have issues just holding my 1/2" impact gun in my hand it too heavy to do much work with it yet. My belly I've lost most of my muscles through my abdomen and gained more fat more so. Ugh! Yeah I still weigh the same old 235 pounds but my body fat content is higher. Ugh. I took a break and went camping for 3 days at Smokey Boulder Rd. Yeah, it was great, the simple task of hitching the RV will wear me down and get me huffing and puffing to catch my breathe at times. Not having the endurance I used to have... But I didn't get here overnight it was 8 months of cancer treatments and surgeries that did this and will take me time to recover my strength. I'm working at smaller and lighter jobs like picking up the loose stones in the yard and cleaning up the yard carefully and slowly. I'm a high-risk hernia patient now. I'm no longer capable of heavy lifting of anything now. Like doing a transmission or clutch job is out of my range of work forever sadly. My endurance last about 4 to 5 hours on average before I'm too tired to work anymore. I still have to monitor my blood pressure since I can't feel pain internally in my back or around my kidneys. When my blood pressure rises I've got to go lay down and let my pain levels back down to get my blood pressure back to normal realm. You have no idea how much not being able to handle my business and work on truck affects me mentally. It absolutely sucks and very depressing. Then not looking forward to more medical visits all the time you are doing this. 3.5 hour drive to Boise to be poked at by a doctor for one reason or another. Running across town to handle Norco Inc for my Ostomy supplies I'll be using forever. How about sitting on my riding lawn mower (zero turn) and have your ostomy bag blow out and soak you in your own urine? Yup this happened twice now. I've even have to be careful standing up if my bag is nearing full. I can catch it between my thigh and squeeze the bag and blow it out over my lap. I've done that too. I'm still learning and still trying to get all this figured out. My fun stuff... I still enjoying making smiles as I travel back and forth to places.