notlimah
Unpaid Member
-
Joined
-
Last visited
Everything posted by notlimah
-
Alright cool. Do you have to remove the fuel lines completely? Like from the vp44 and all? Or can they just slide out of the way?
-
So I've been digging through some old threads from people with similar issues. Some things I've found and will be doing soon. - Connector tube o-rings - T fittings - Check valve at VP - Injector o-rings I'm doing my best to avoid buying the o-rings for the T fitting since they're 13 bucks EACH (unless someone knows a cheaper alternative?! ), I already have a new check valve so I'll install that when I can. Couple questions. . . Where are the connector tube o-rings? Are they on the outside where you tighten down your fuel lines to your the head? Or are they on the crossover tubes? Either one of those sounds like a fairly easy fix, just not sure which ones they are. I also noticed that a few of my tube braces are missing. Is there any need for concern here? Not sure how they came undone, but I remember finding one when I first bought the truck and didn't think much of it.
-
Hmm I'll have to look for that thread. Thanks!
-
Yea I don't have any stubbys either or I would've gone that route as well. I'm hoping that the old seals were the cause of me loosing prime parked uphill. Otherwise I'll be replacing the grommets at the T and probably the return line banjo at the VP.
-
Good to hear! Larger tires FTW!!
-
Man that trans looked really nice all painted and CLEAN!
-
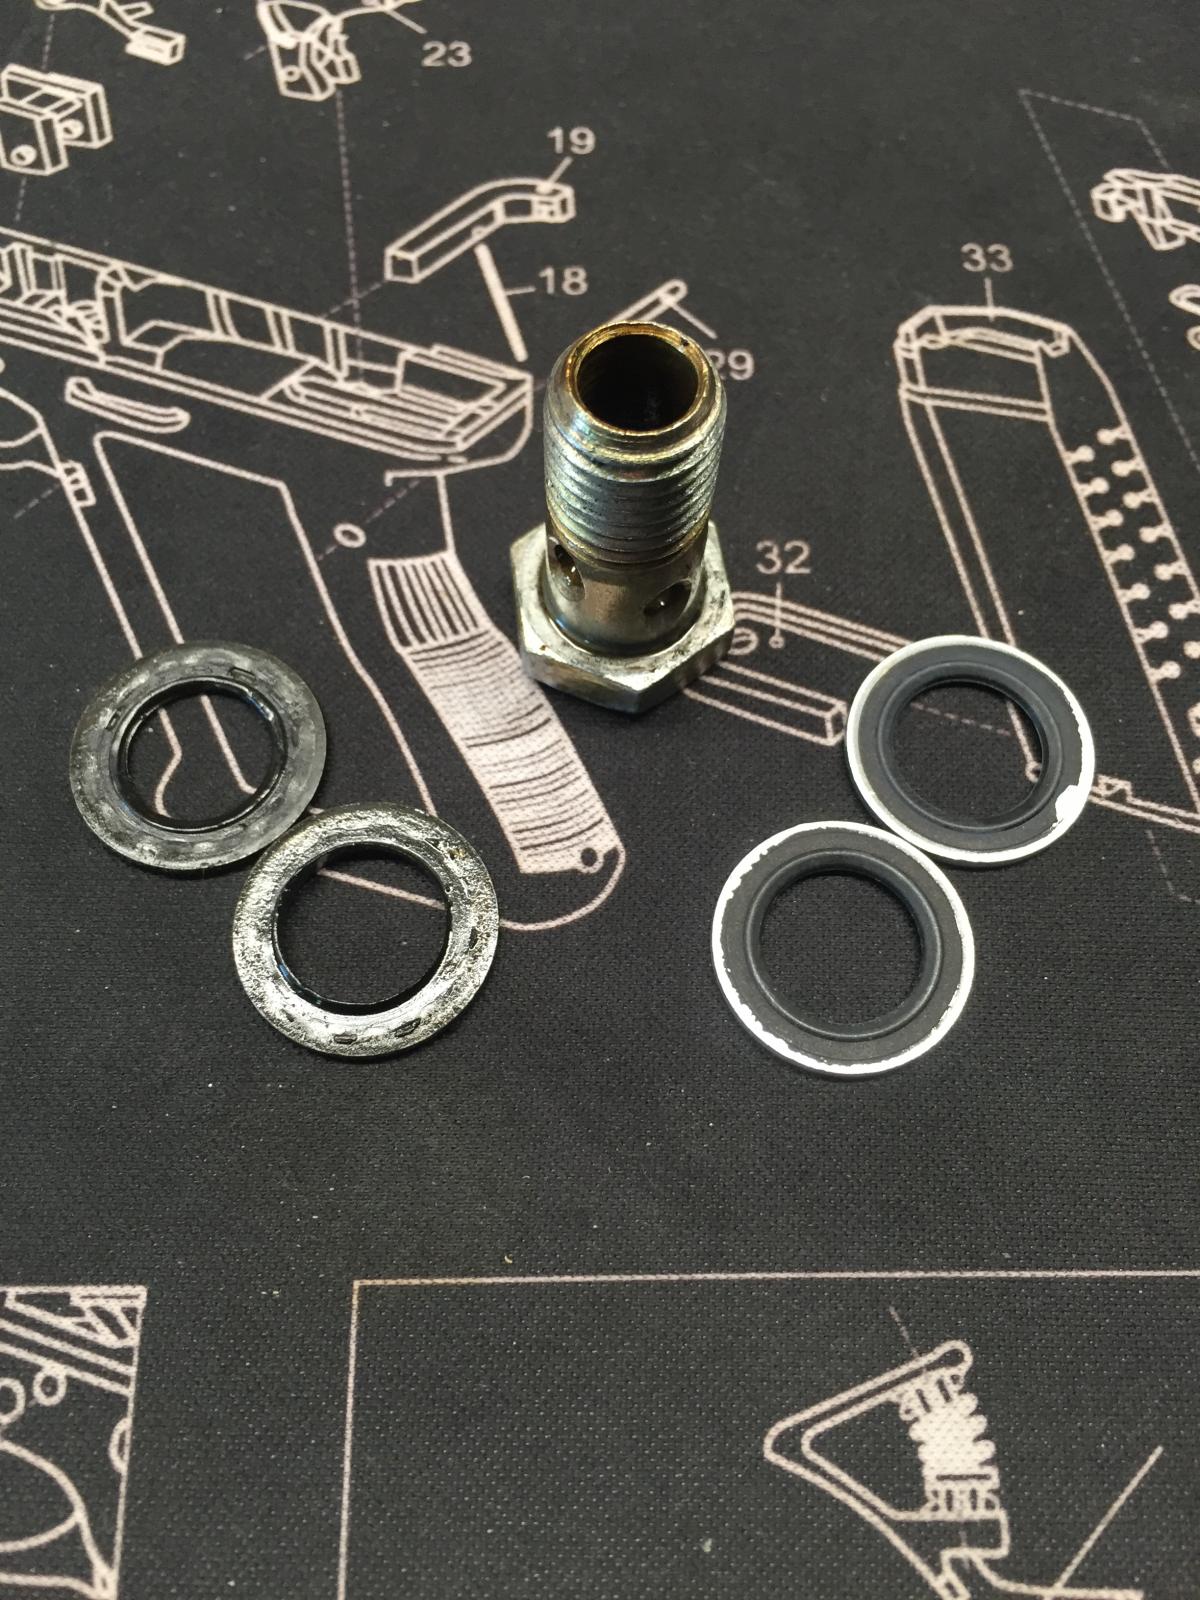
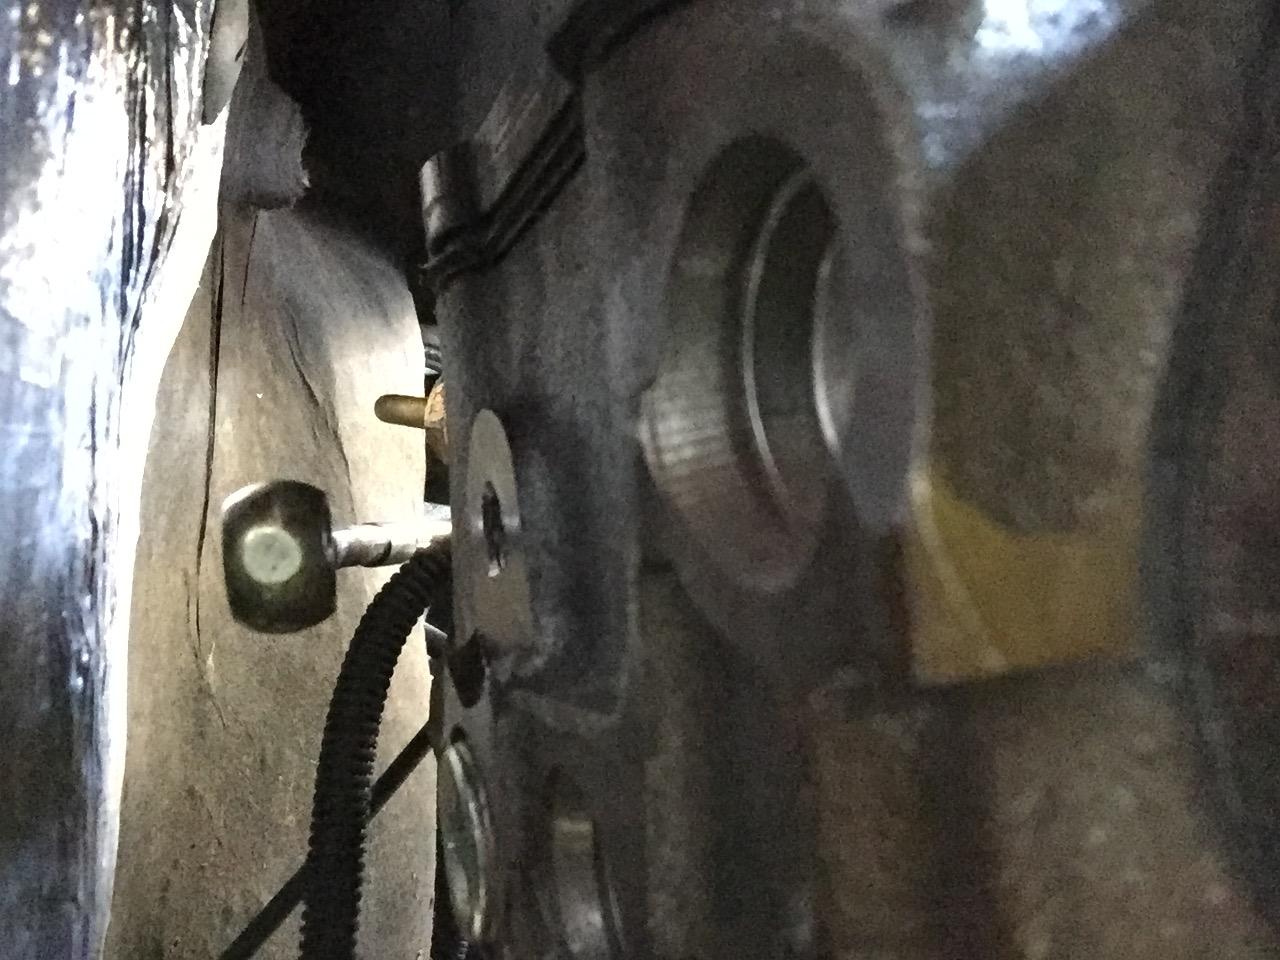
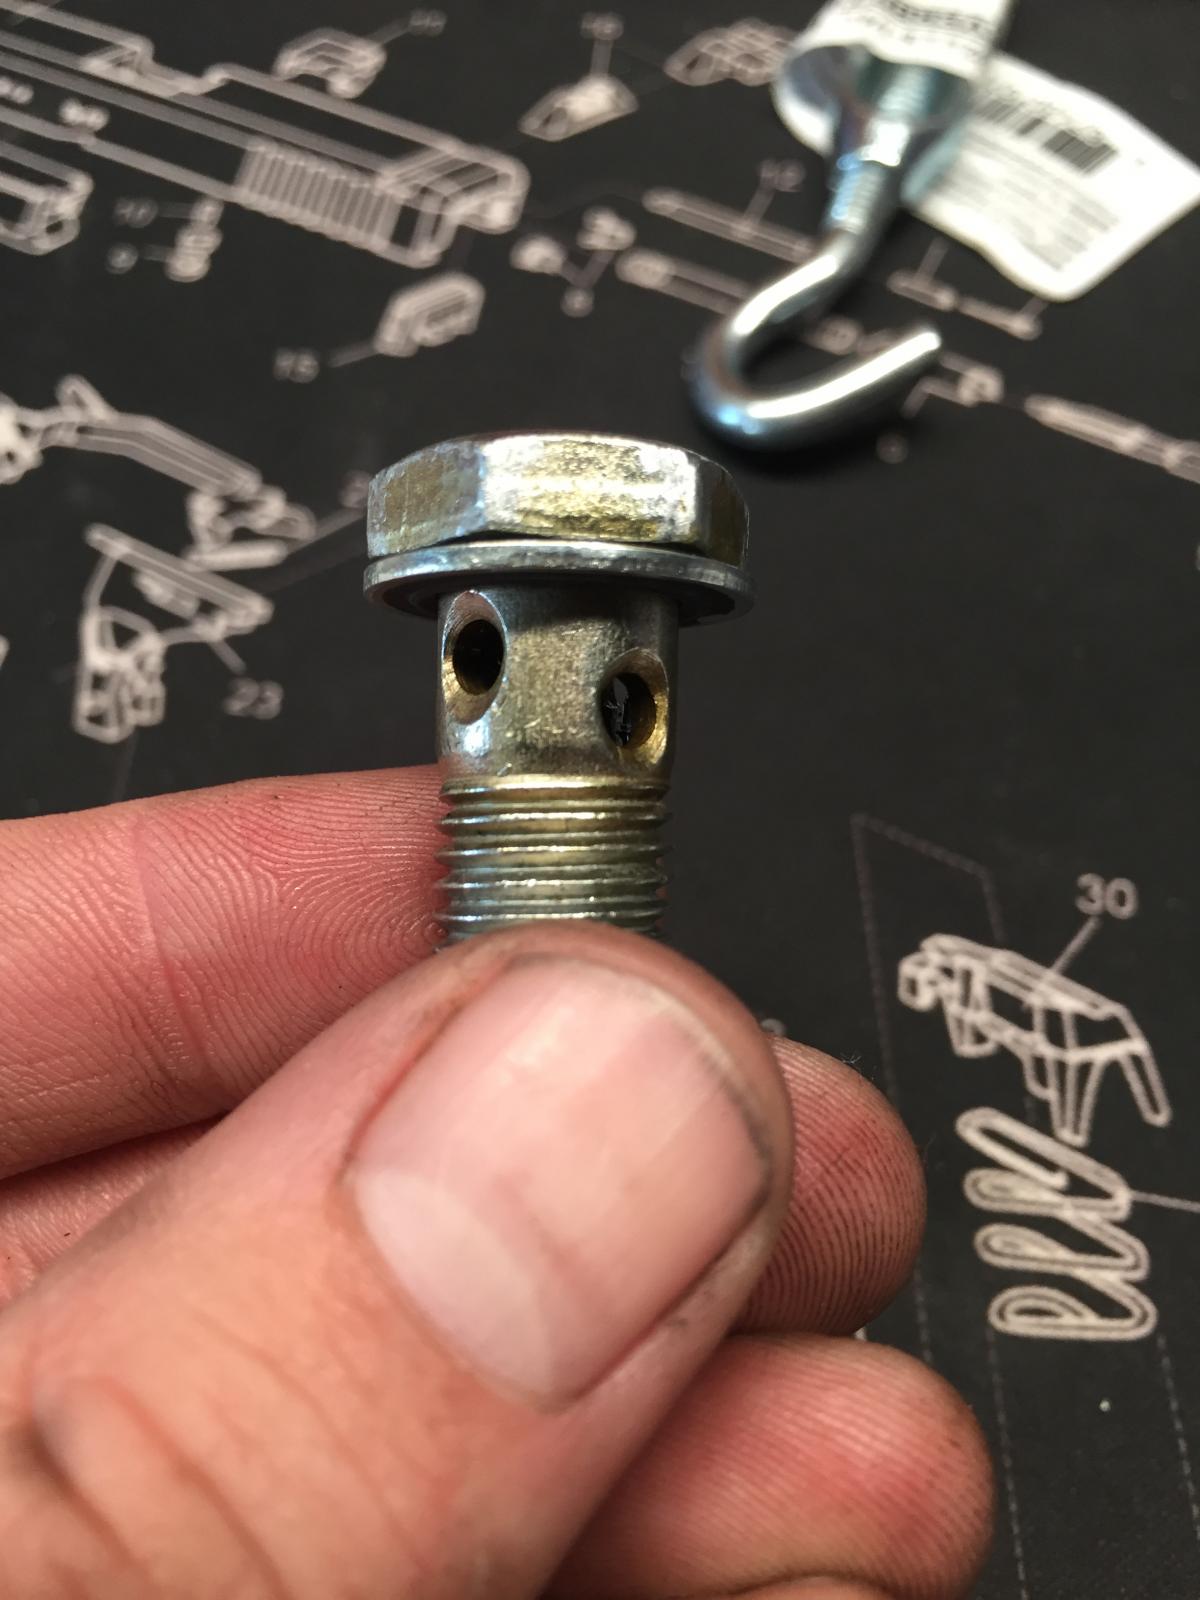
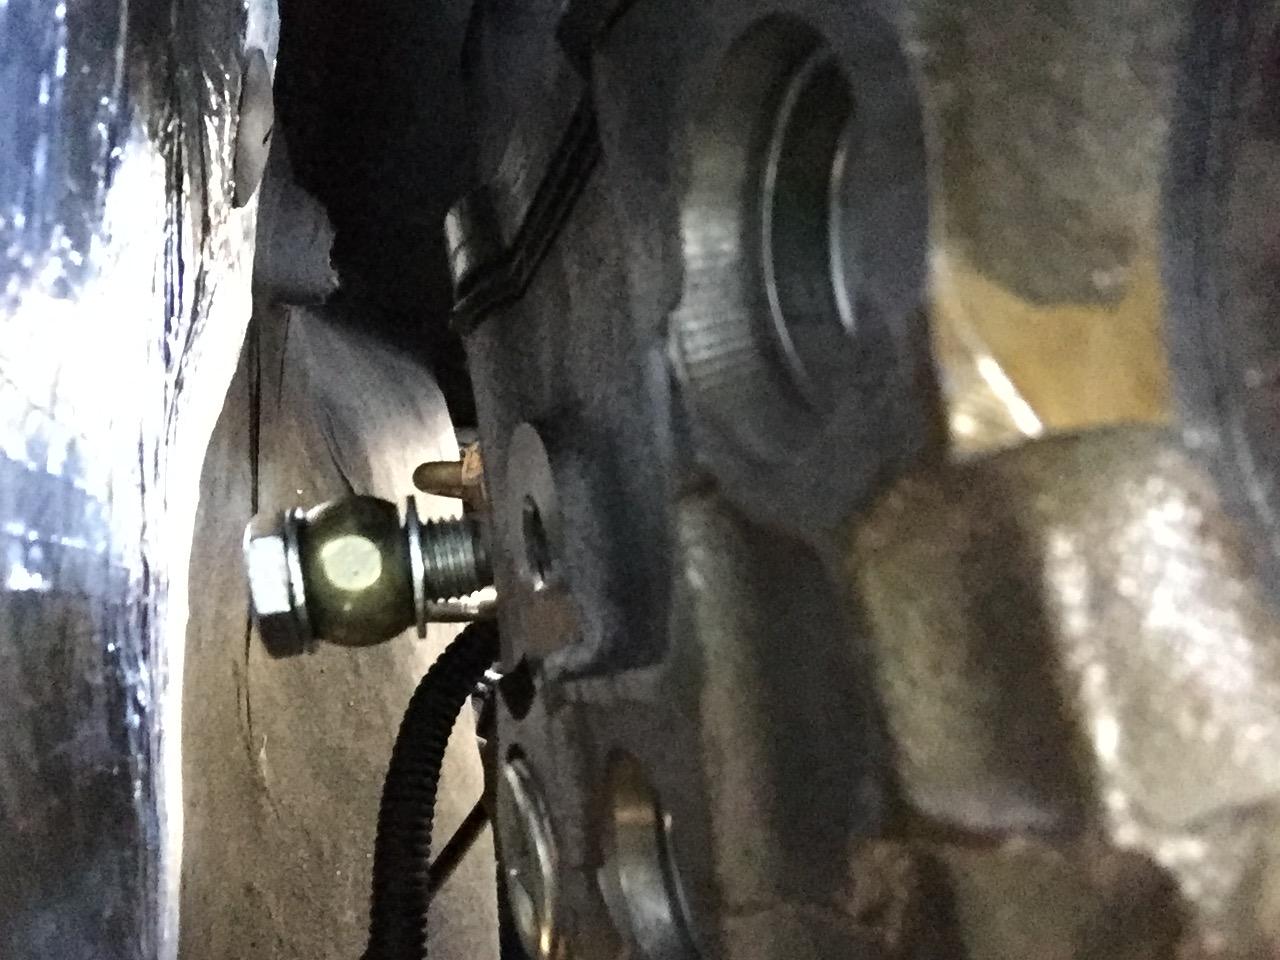
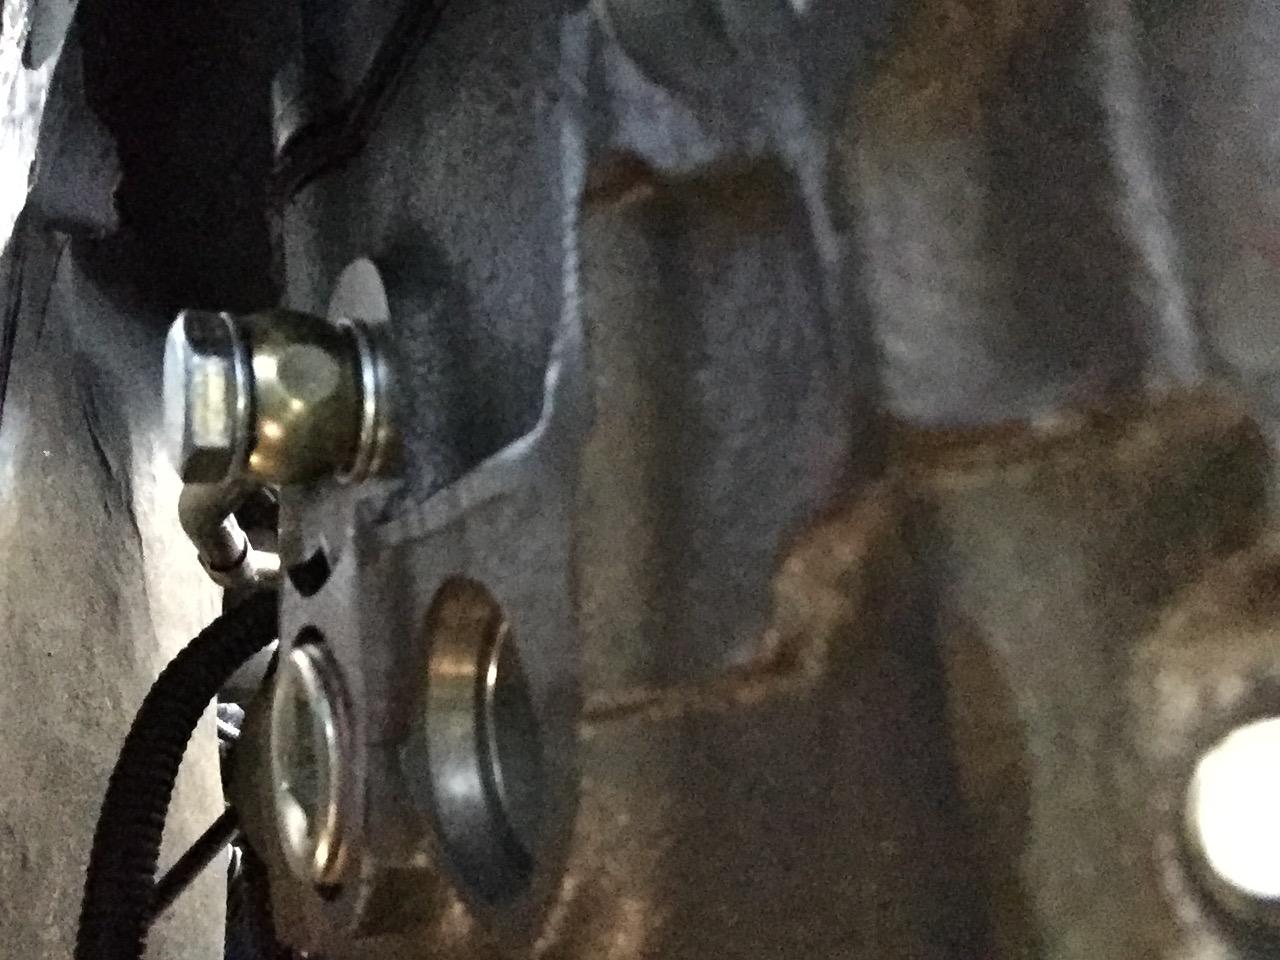
@dripley I only bought the banjo bolt seals @leathermaneod that looks like a pretty good resource, I'll check it out. I ended up getting the new banjo bolt seals installed tonight. Took maybe 20 minutes, but it is a pita! If you don't have a ratcheting 17mm wrench I'd recommend it before doing this. I don't have one but will be getting a set soon due to things like this! Anyways, for some pics. What the banjo will look like in-bolted. I had to get a small flat head screw driver to scrape off the old deal from the head. Banjo removed with old and new seals. What the banjo looks like. Ready to be re-installed with seals on both sides of the banjo. And installed again and tightend pretty tight.
-
So I talked to the dealership today after I picked up my truck. I got the banjo bolt fittings, 4 bucks each! He said that the fittings for the 'T' came in a pack of 3, but had to be sold individually at 15 bucks a piece!! I can't believe these things are that expensive! Hopefully the banjo bolt fittings are the problem.
-
Good idea with the magnets. That definitely shouldn't come loose. But judging by the looks of your truck, you might give it a good run for its money!
-
That's what I figured. That should be the same part for the back of thof head, but it seems too big for the fittings at the T
-
Yea I was going to replace that as well but that one is priced at a more reasonable 2 dollars or so. Does that line just come out of the head once the banjo is loosened? Then you can slide the new gasket on there?
-
Yea that price seems way off but that's what I saw as well. I'll have to look into it a little more and see if I can find a more reasonable price or just what size they are and find a cheaper alternative. Either way they did tighten down a bit so I'll see if that was the problem.
-
Thanks for the advice. I ordered new cables from custom battery cables, just waiting to get them installed.
-
Hmmm did you get it online? Also how'd you get in there to install them. Just trying to tighten them down was a sob!
-
Yea I went out and looked at it in the truck and the parts diagram doesn't do a very good job at describing exactly how it is under there. Right now my old sending line is disconnected and running straight to the stock fuel filter canister. Nothing is connecting it to my current fuel setup so it's not causing the problem. I did reach in and crank down the fittings at the 'T' and they snugged up a bit so I'll see if that fixes anything.
-
After looking through the parts diagram I realized something. I'm not using the stock fuel filter, just running 1/2in straight from the FASS to the VP. Should I have capped something off in the stock fuel filter area or anything? Just wondering if that's actually what's causing my hard starting issues because I looked at parts and the grommets for the 'T' fitting are 13 bucks a piece!! Trying to avoid that if possible!
-
OK so seems like whatever I thought I fixed earlier did not fix it! Now I have to crank at least 5seconds or so on each start after sitting for 12+ hours parked up hill. Seems like I need to start replacing o-rings and such. Should I just start with getting replacements for the banjo on the back of the head and all the o-rings/gaskets at the 'T' and go from there? Anything else I'm missing?
-
Thanks for that pic CT! I wanted to get the ends replaced until I upgraded the entire component. I might just wait until synergy releases their new t-style. I still might replace a couple of the ends that are really bad.
-
Maybe it's just me, or it's too late for me to be looking at rock auto but I can't figure out which specific ones I'd need to replace all 3 under there.
-
How'd you manage to get that straight a cut, at that angle, with a sawzall!? ...
-
I guess you could ask if having low/no pressure would throw the p0216 code. Or if a wire shorting out would. If that's possible then I'd say you probably found your problem, if not, then keep looking.
-
So my brothers in town and convinced me to watch this. I gotta say, it's pretty awesome. I'm typically the opposite in my 'fix it' mentality but man it's fun to watch those guys piece together stuff just to get by!
-
So I was looking at replacing my stock tie rod ends until I replace the entire steering unit, but I don't know which ones to get off rock auto!? There's too many!
-
Yea, that's the only reason I went with this track bar, since it was built specifically for the 2nd gens. Just wish I didn't have drill out the bracket, but in the end, I'll take the 3/4in strength over the stock 5/8ths. I'm gonna have to get the run down from you on steering boxs here soon.
-
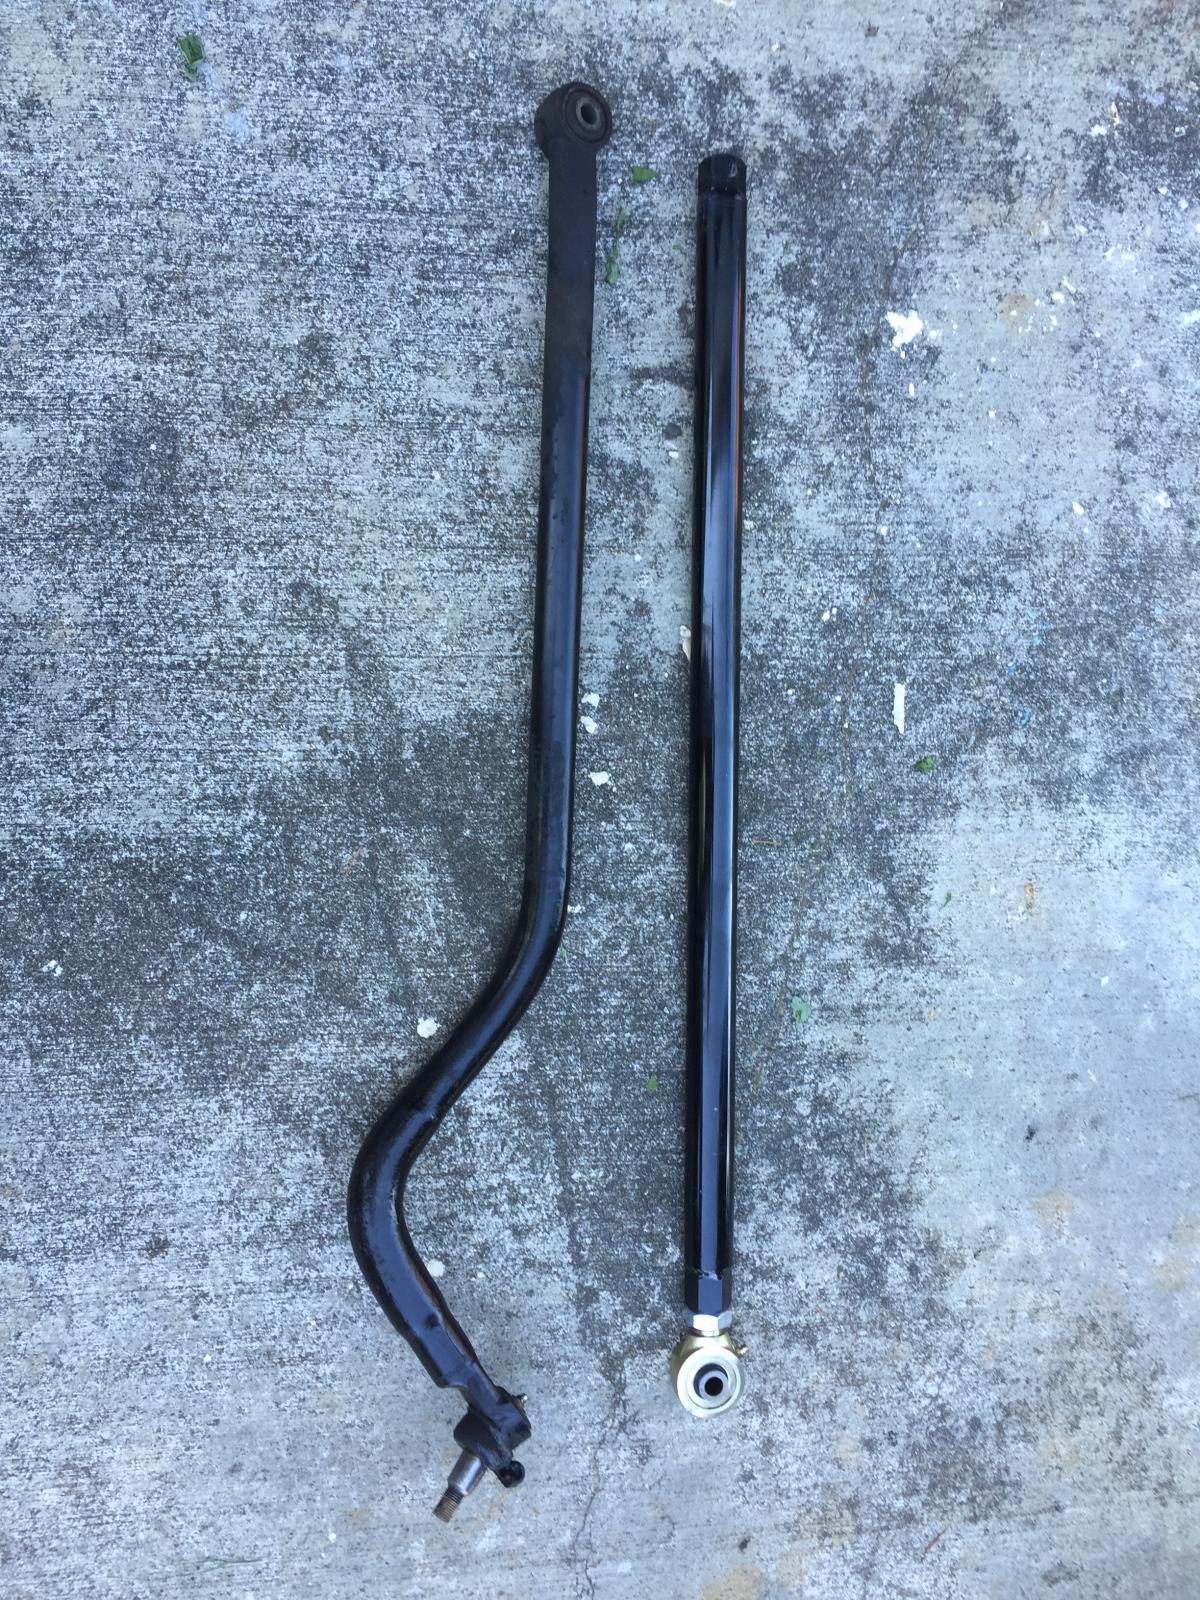
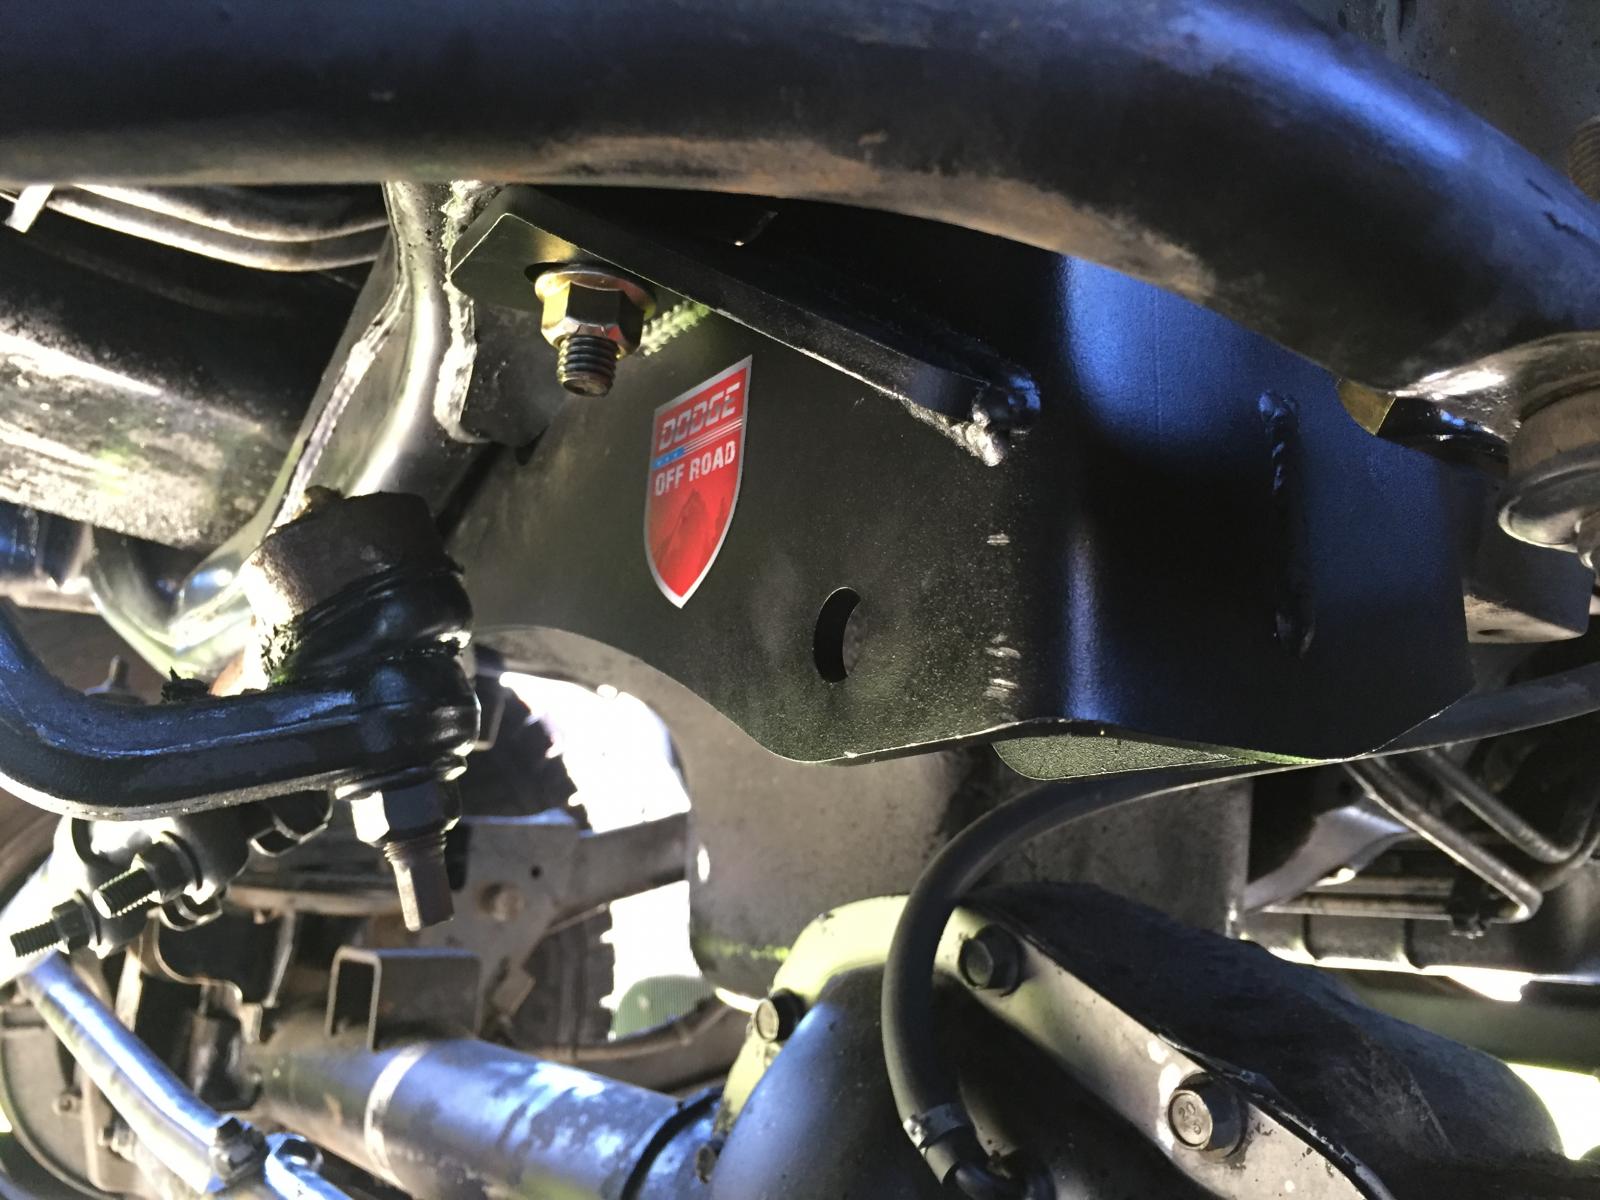
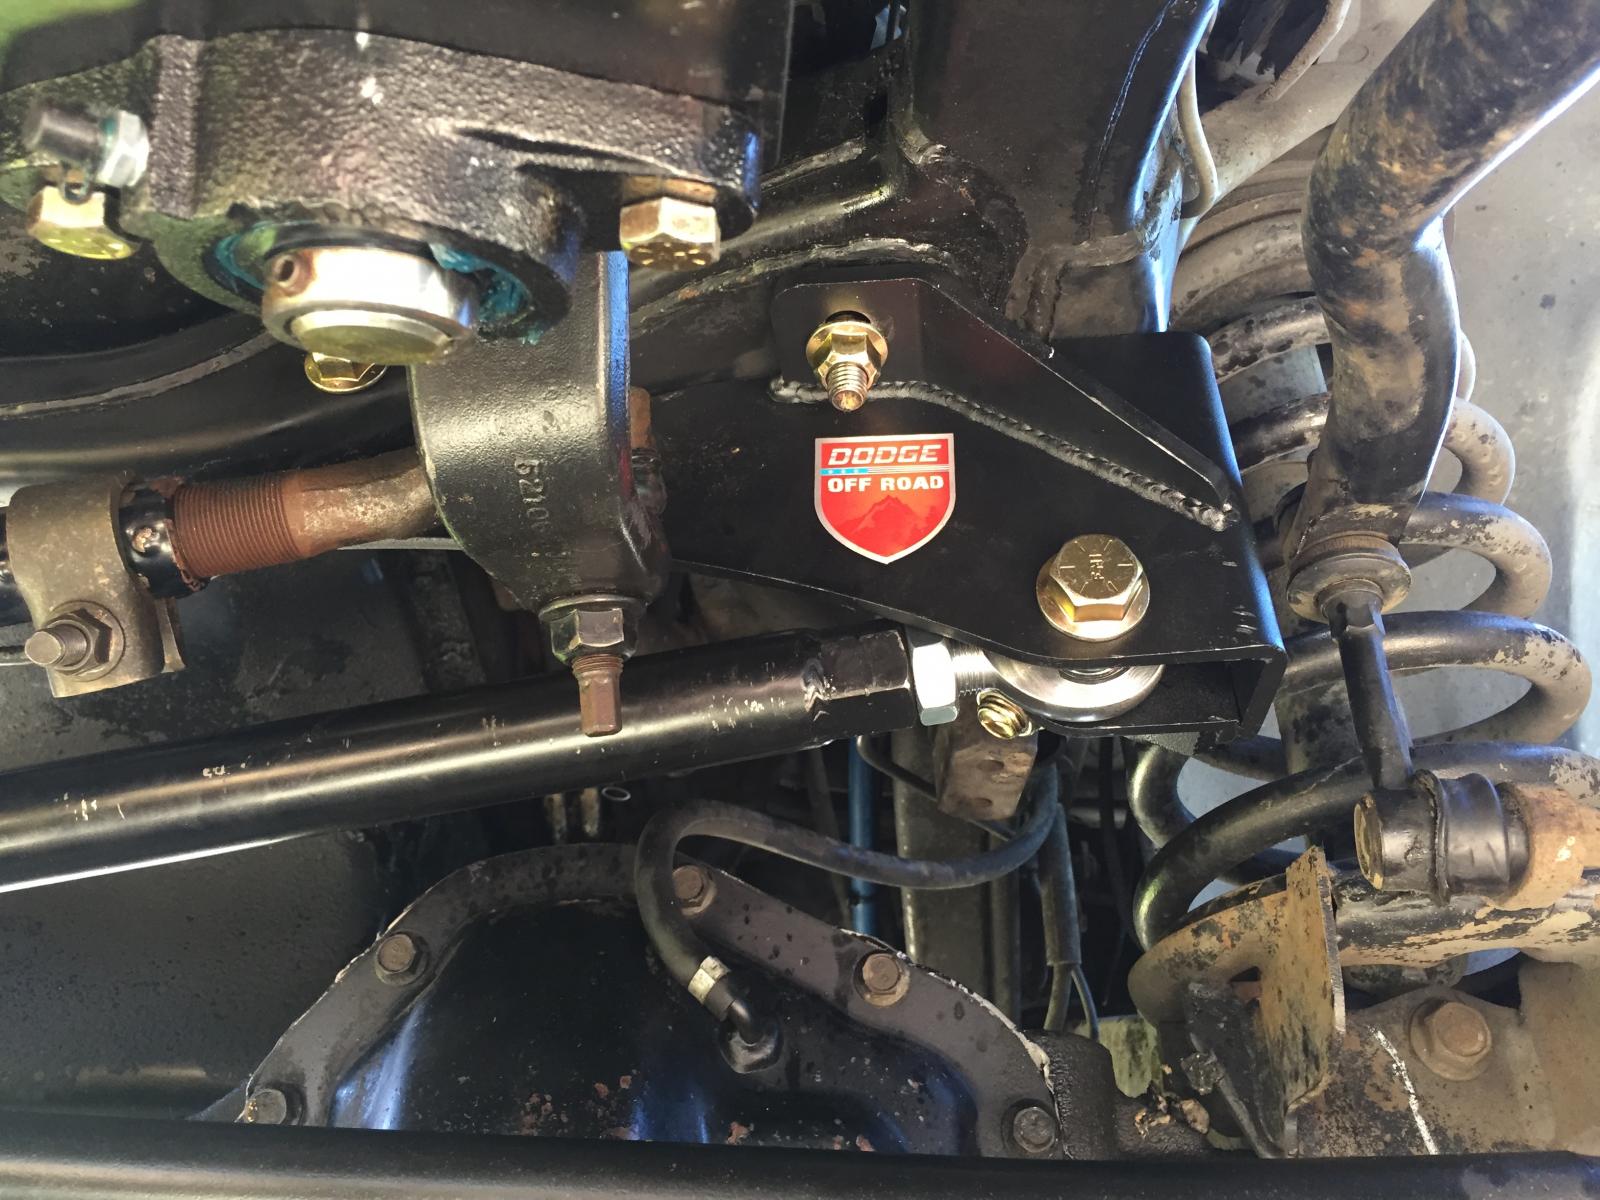
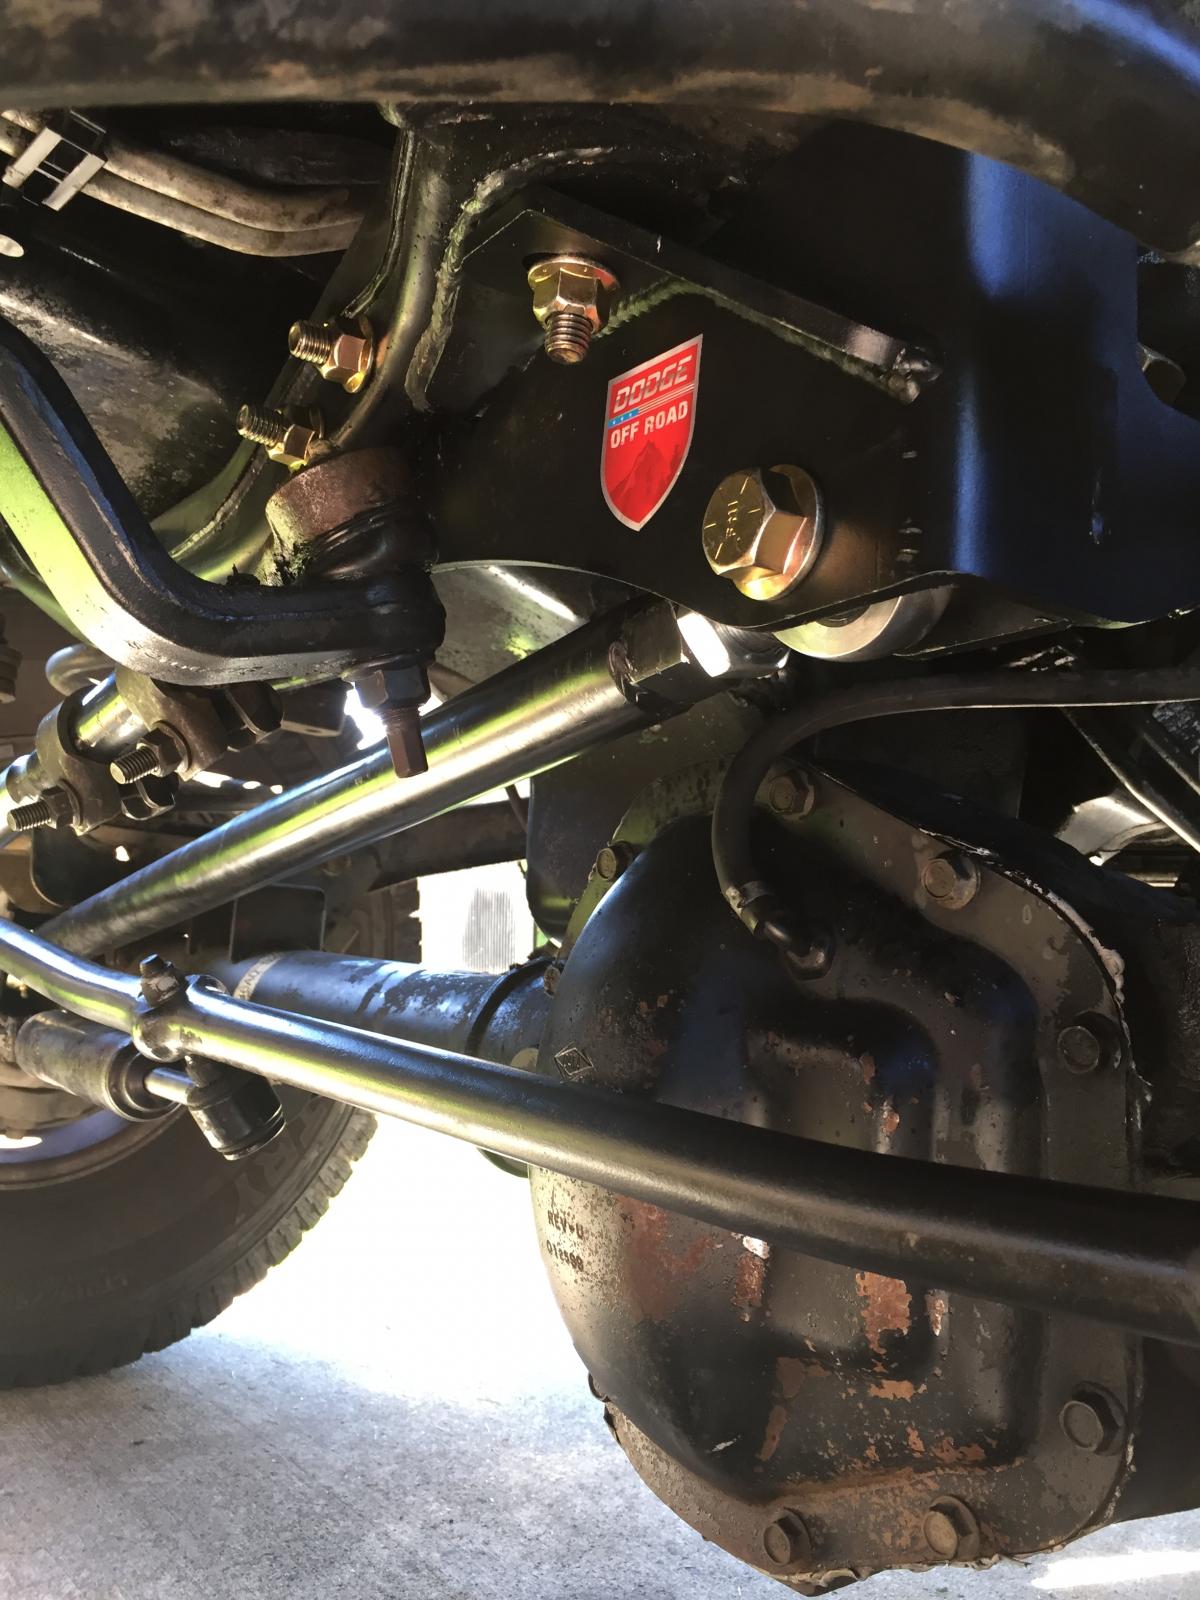
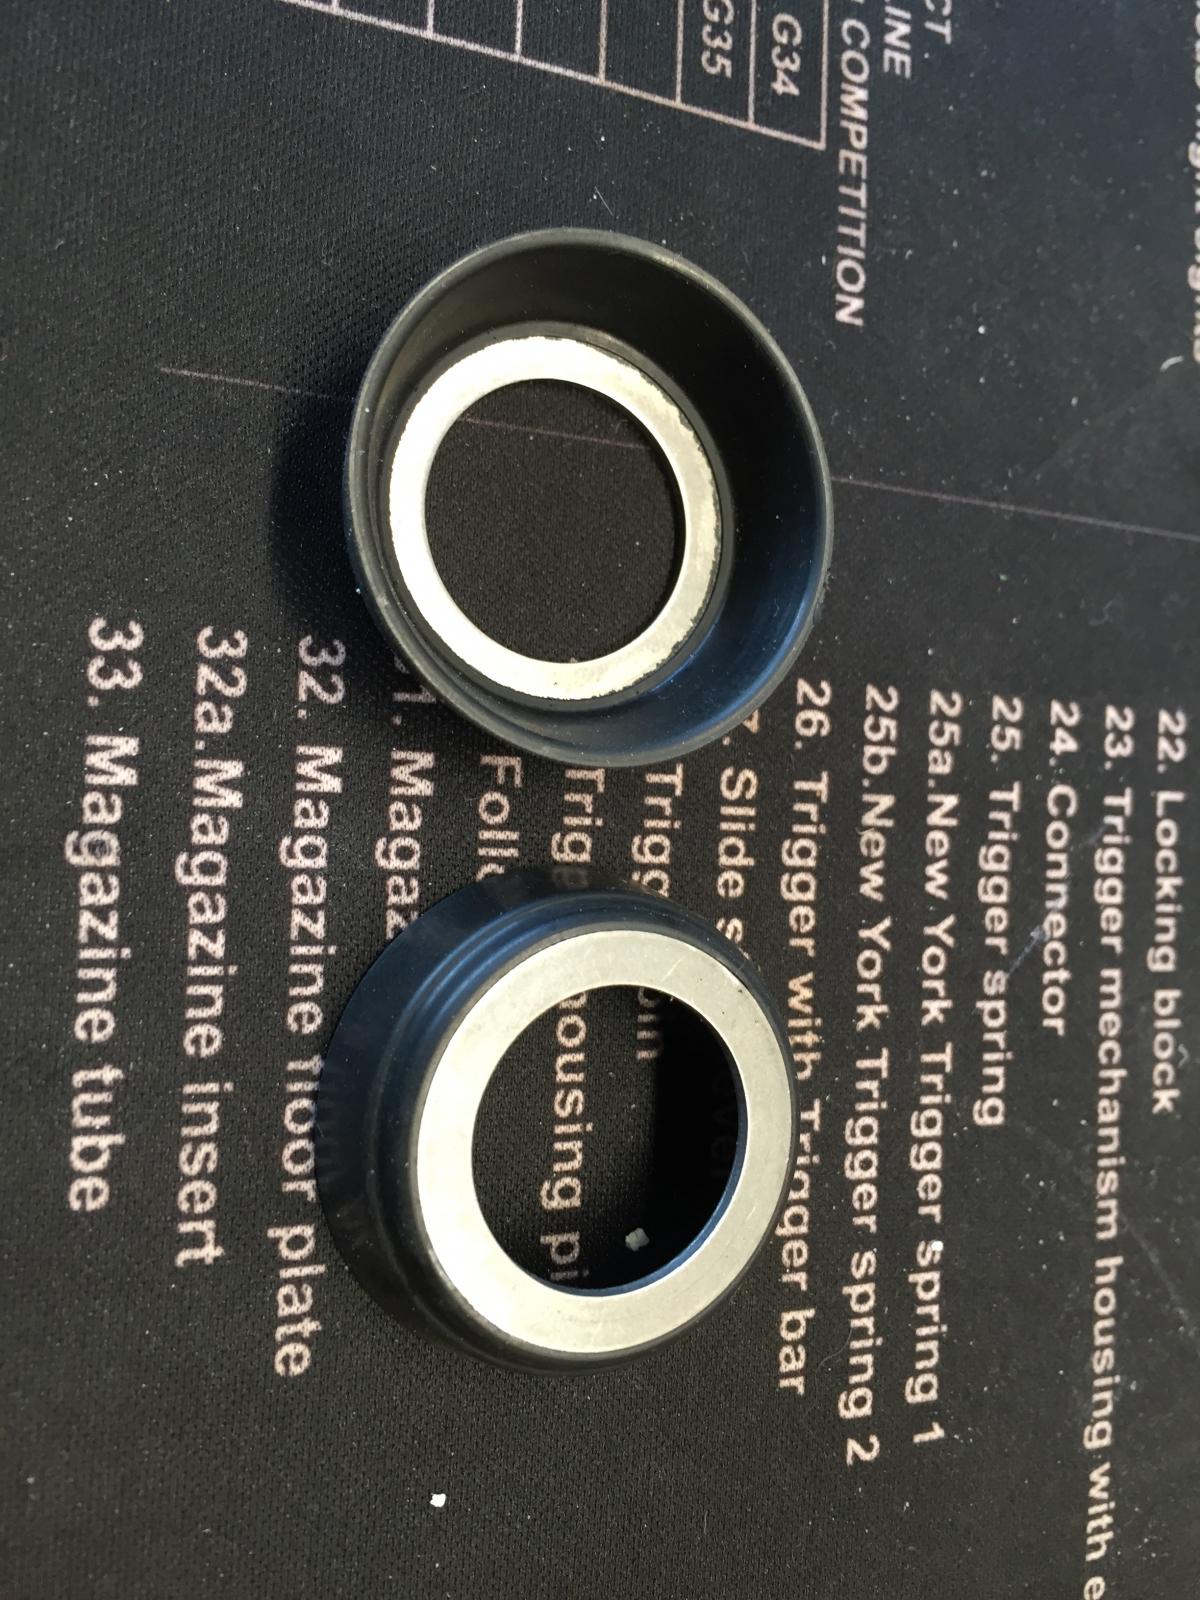
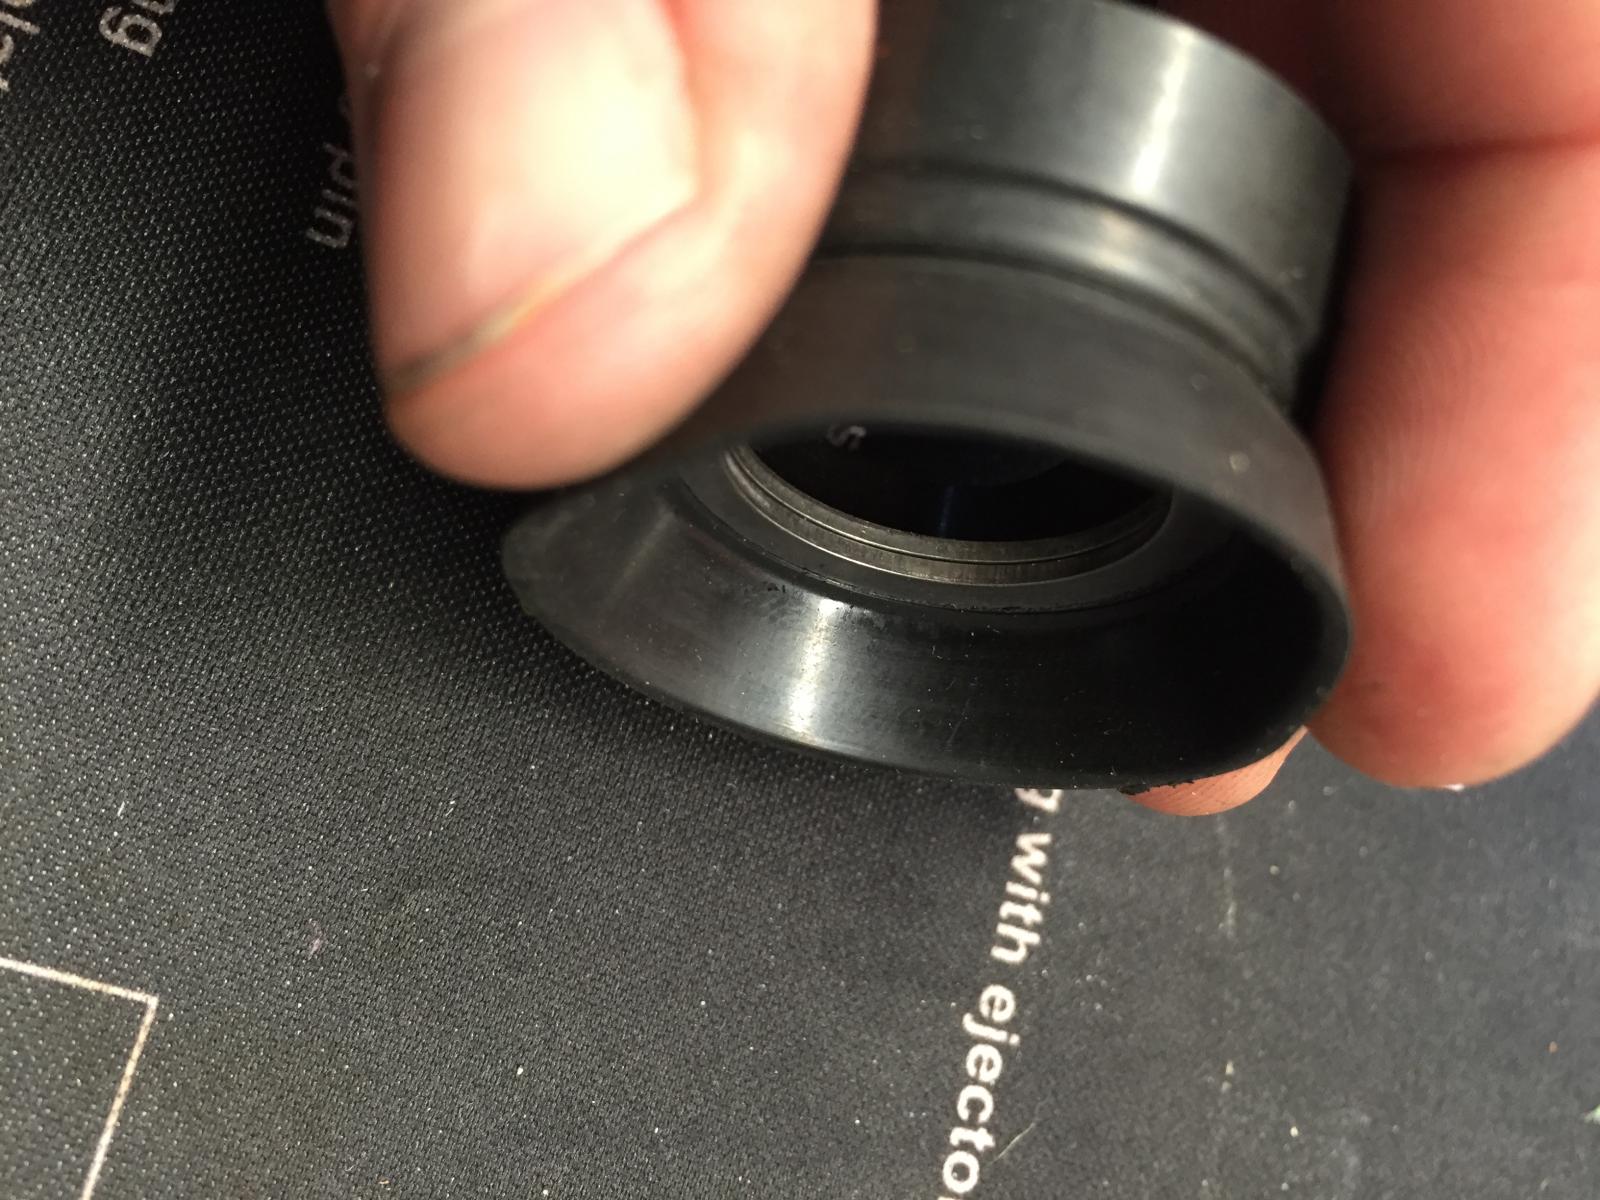
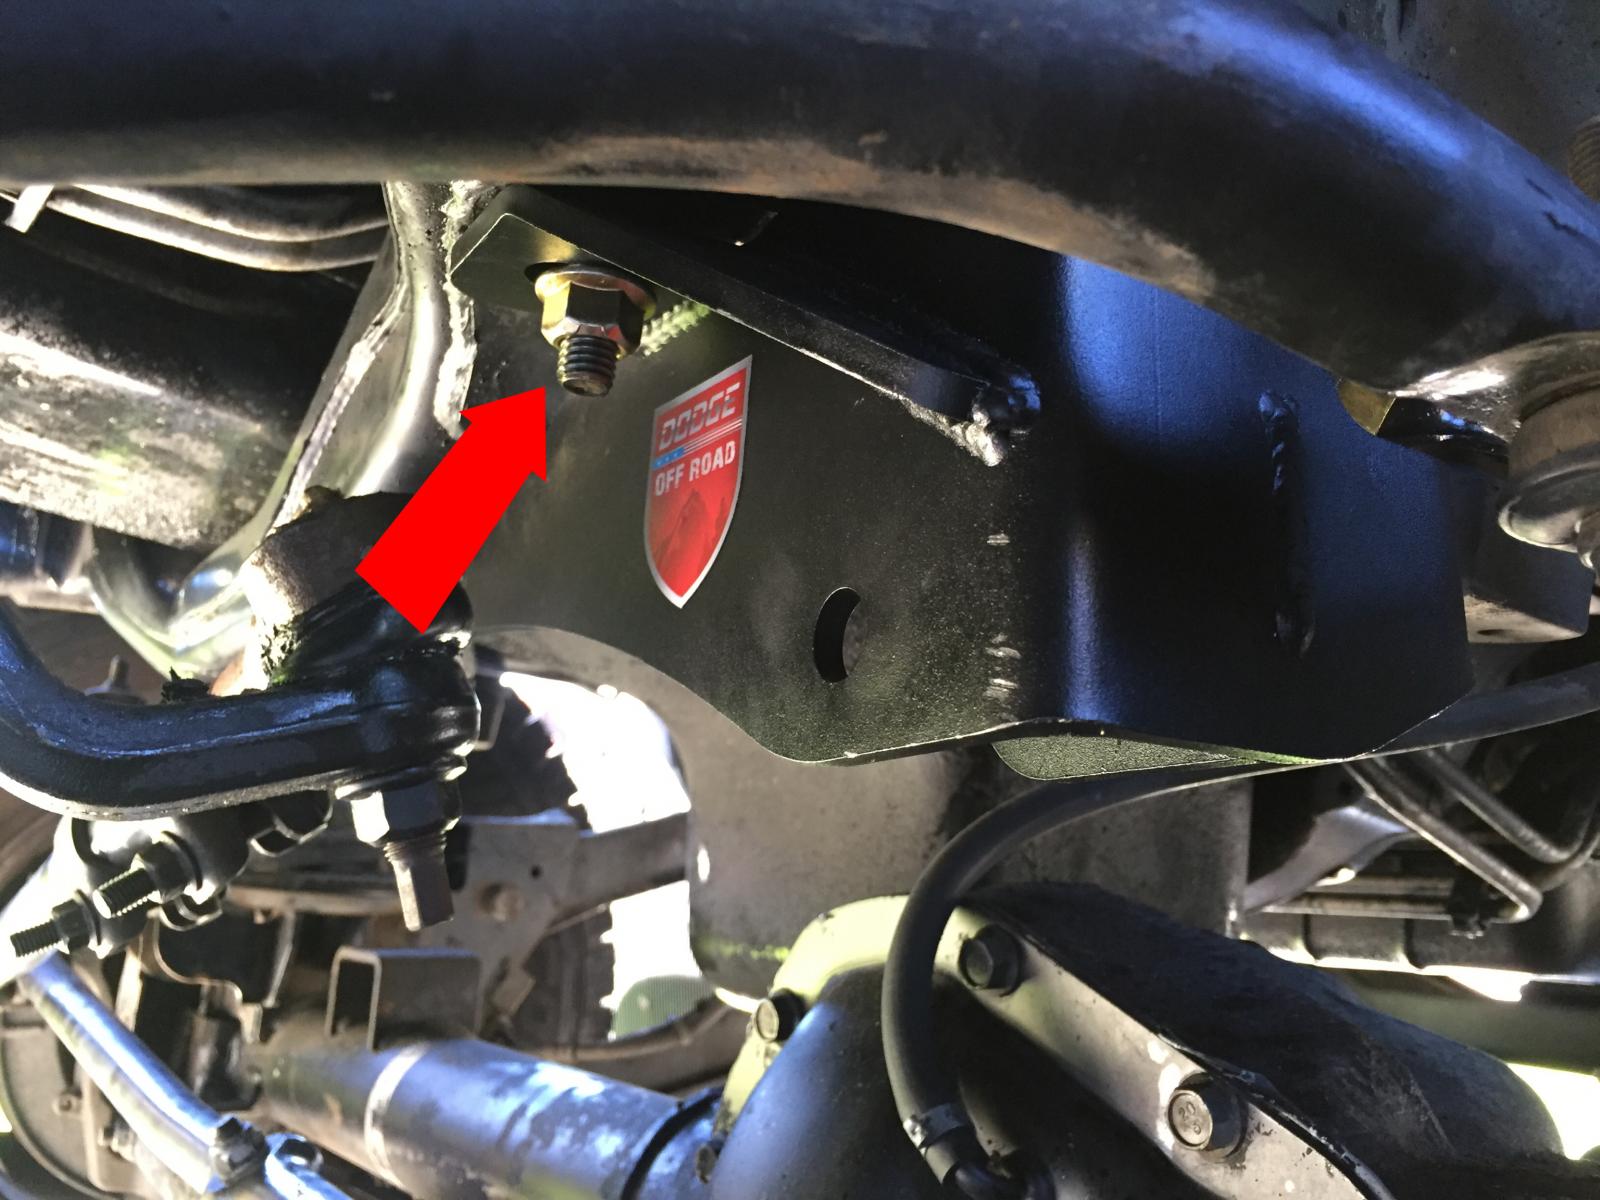
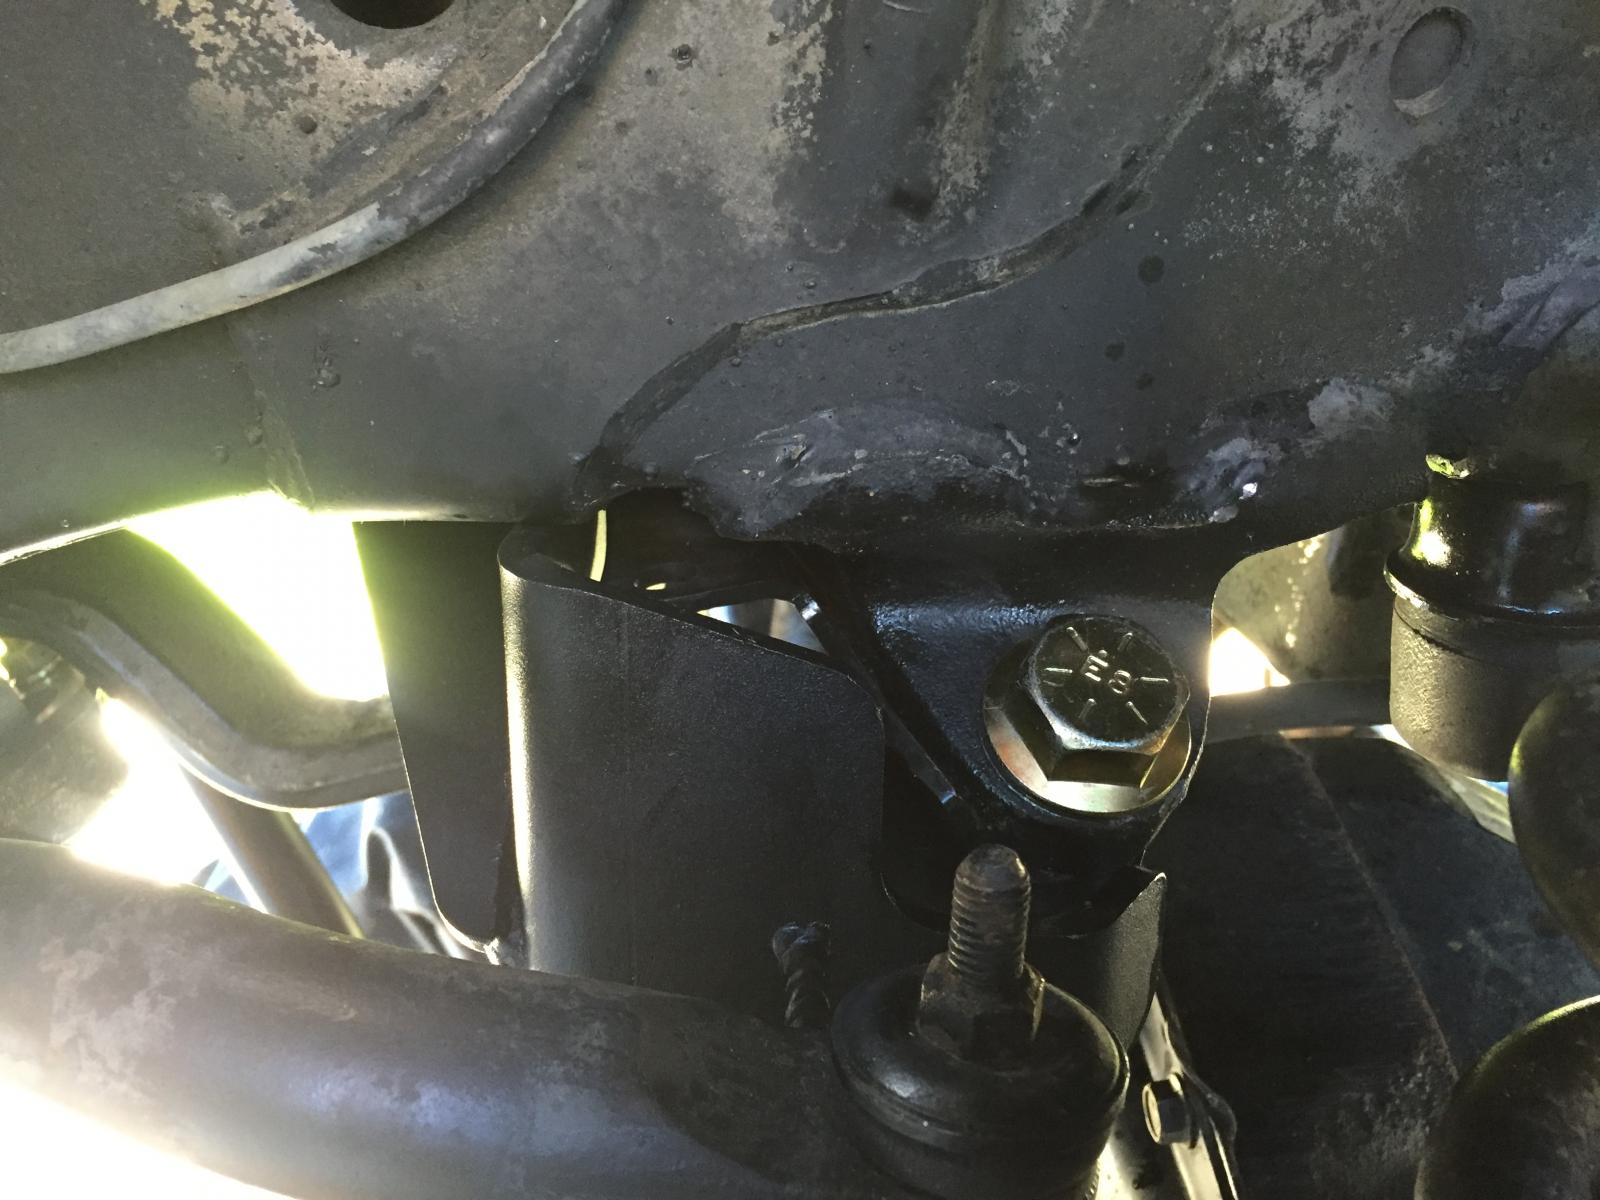
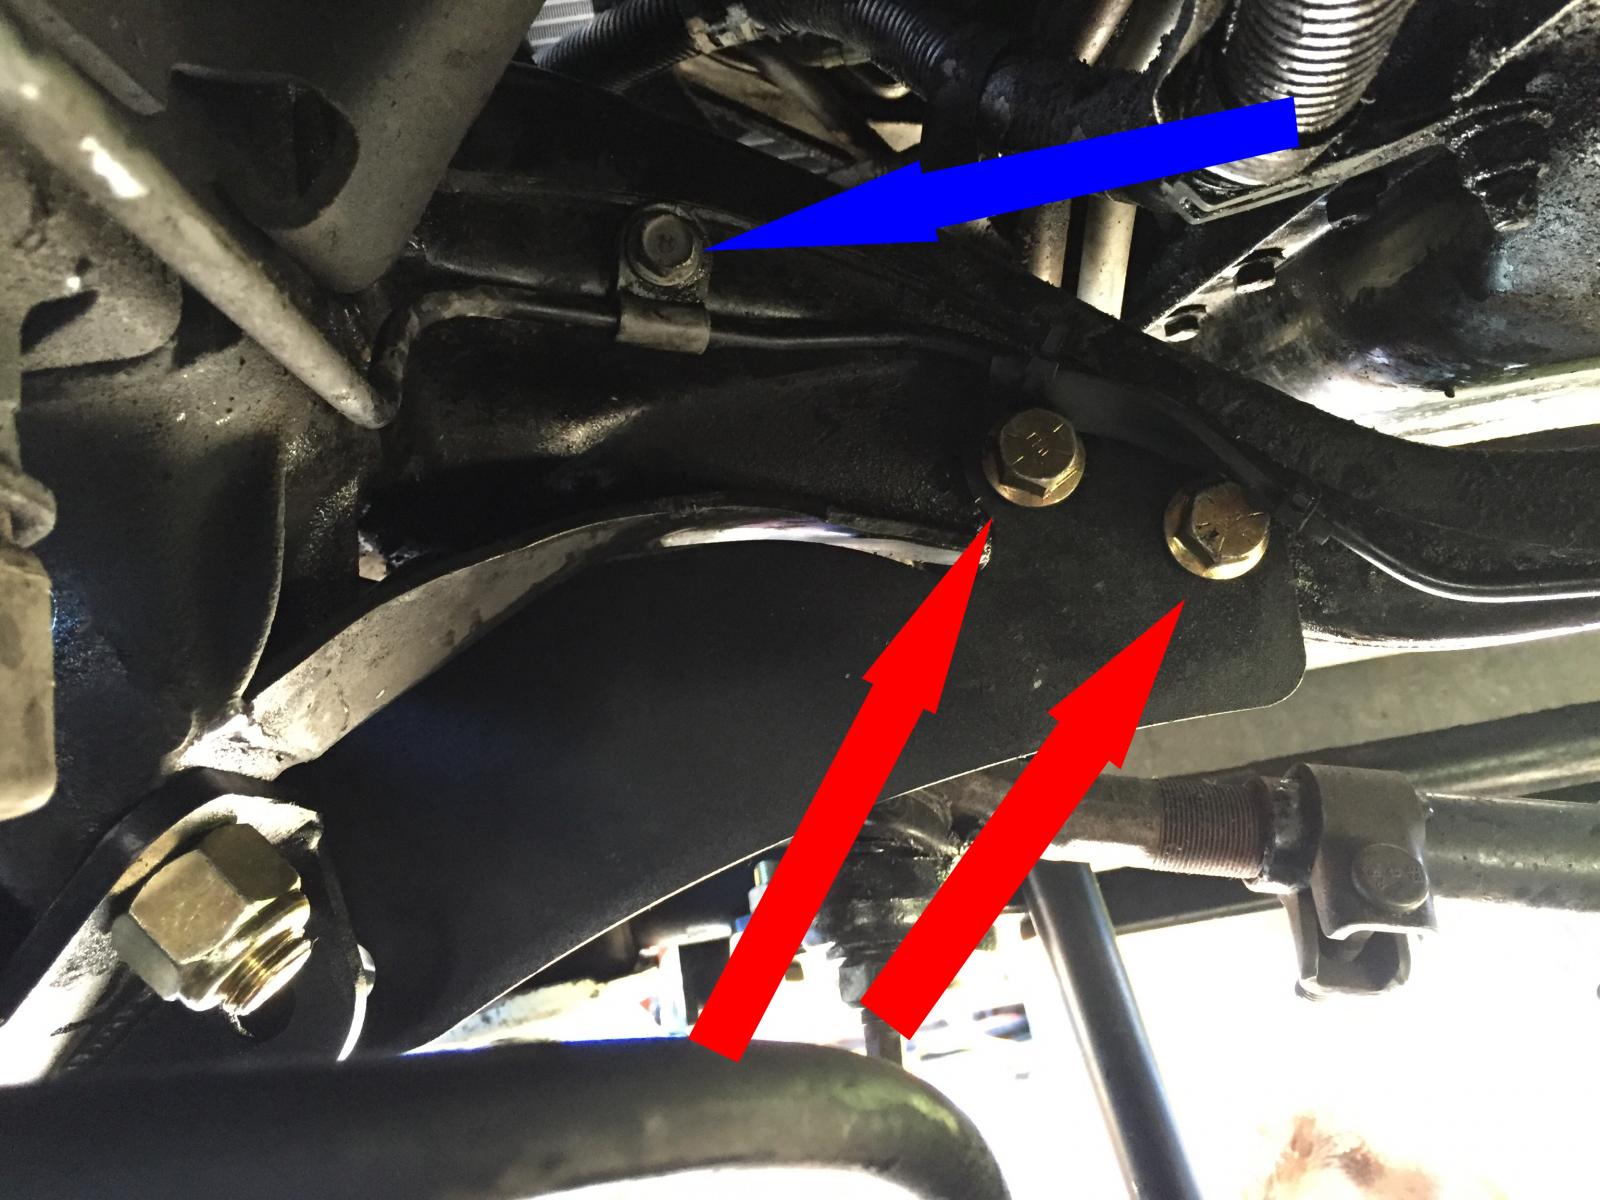
Alright well my brother and I tackled the install of the DOR track bar. It definitely turned out to be more difficult then we planned but overall, job done. Here's the details. So getting the stock track bar out is fairly straight forward. Took a few good whacks to get the stock ball joint end out but after that smooth sailing. The difference between the two without heim on the DOR yet. Well we got the bracket in place and had the top 5in bolt down through the cross member and that's when we realized that the bolt that replaced the stock ball joint end was missing! At this point (after we searched the garage) we were getting close to calling it a day and having to get the part from DOR. I decided to attempt to email Danny at DOR and see if he could overnight me the parts. In the meantime we headed to Ace to get a bolt for temp use so we could at least get holes drilled. By by the time we got to Ace Danny had already emailed me back (there's that famous terrible customer service right?! WRONG!) and he said to get a 3/4x2.5in GR8 bolt with a couple washers and lock nut. We'd have to drill out the frame and bracket to 3/4 but we'd have a stronger setup. So we drilled out the frame mount which really wasn't that much material to take out. Then the bracket, which was a little tougher because it's a slotted hole, but a step drill got the job done. It wasn't the prettiest but it got the job done and the 3/4in bolt is BEEFY! From here it it was pretty smooth sailing. We got the 2 holes drilled through the crossmember (red arrow) with a 3/4in hole on the side showing and 1/2in on the forward portion. We moved the brake line up above the bracket (blue arrow), re drilled a 1/4in hole and the screw is already self taping so straight forward. We did wrap some rubber around the brake line near the the two bolts just in case but it shouldn't be an issue. Either way, I'll be checking it when I check the bolts for tightness every 5k or so. Next up we finally installed the track bar itself. We attempted to installed it with the heim joint seals... no go. It could've been possible to get them installed if we filed down part of the bracket but it adds around 1.3mm PER seal. Stacked together you can see just how much extra space you need. So after the day we'd had we decided to say screw it and install it without it. It went in no problem without the seals. All ill in all, if I hadn't of lost the bolt the install would've gone a lot quicker. Once installed my steering wheel was about 90* off so we had to adjust the upper steering link to get that straightend out. The he truck feels a lot better. The only play I have now is from the stock steering box (which will hopefully be replaced in the near future) and my busted tie rod ends. If you're looking for a new track bar I'd say go with DOR! I've had nothing but a good experience with them despite what people tend to say about them.