
Rogan
Retired Staff
-
Joined
-
Last visited
Everything posted by Rogan
-
I just tack-welded the locknut to the gear and called it done. 3 yrs running and it's still snug as a bug.
-
I got most of my stuff from quad4x4.com, but I'm sure someone here may have another (better?) solution for parts.
-
The 5.2 and 5.9s are EFI, they just have that TBI looking plate (resembling the TBI setup of the 5.7L GM.)Mike, I had 2 Jeep Grand Cherokee Ltds, one with a 5.2L, the other with a 5.9L. Both were AWD, both with 44RE, and all the same options (other than c.i.d.) The 5.2 would get 13-14mpg/City, and ~21-22mpg highway. The 5.9L was just slightly less on the highway, but same in city.My dad's 4.7L, on it's best day (flat, Texas highways) @ 65mph is a steady 18-18.4mpg. 75mph, and that will drop to high 15s, low 16s.. Empty, mind you...
-
..until they wrap the driveshaft out of the t-case, then wonder WTF just happened
-
<-- jealous of the 13-holer.. ;)
-
Just remember that the taller the block, the more fulcrum advantage the axle has on the spring packs, and the better the chance of spring-wrap under torque loads. (i.e. advancing the spring fatigue) Adding a properly made leaf to your existing pack is the best way to do it, IMHO.
-
A local guy here has one that's been bobbed to a single rear axle. He says it turns so much easier, although he lost some GVW, but for what he uses it for (landscaping) the maneuverability outweighs the loss of capacity.It does look cool, though. I'll try to get a pic when I see it again. He's also got a couple Unimogs.I've always wanted a deuce and a half, but I would really like an old gama goatEspecially like THIS..
-
I'd replace the main bearings while you're tearing it apart. At least the front one. And the input shaft seal.As long as you don't need to remove the countershaft for anything, I'd just check the teeth and such on it. 5th gear nut, output shaft seal, etc.. they're not that much $ but well worth not having to pull the trans again because they started leaking. :banghead:trust me, I know.
-
70 pounds of air pressure doesn't count
-
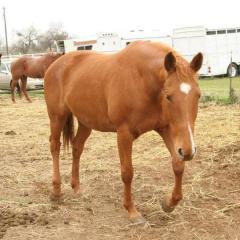
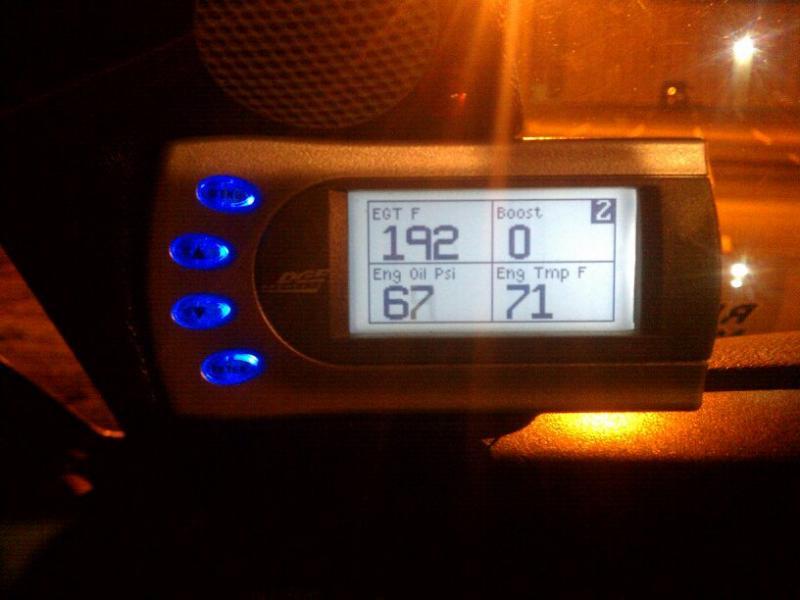
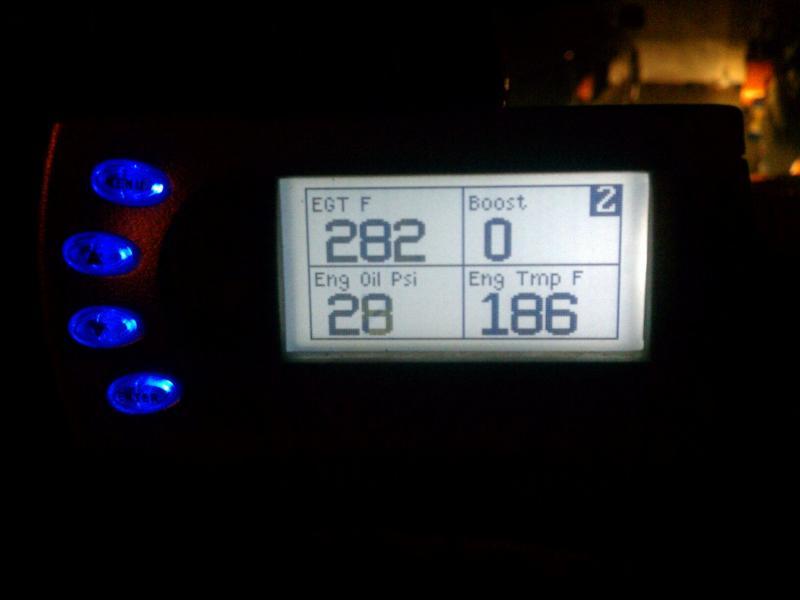
So I took a few pics.First is at startup, [ATTACH]3280[/ATTACH] then cold @ 25mph. [ATTACH]3281[/ATTACH]Then idle for the others (note coolant temps) [ATTACH]3282[/ATTACH]Note that just before last pic, at 2000rpm/40mph, it was 65psi. Sitting in my driveway [ATTACH]3284[/ATTACH]Sent from my rooted EVO's tiny keyboard with my opposable thumbs...


-
I don't know the split weight, but full tank, + my fat ___ in it, the QCSB tips in at 7270 with the bed empty.
-
Hmm.. I'll double-check it this evening on the way home from work then..
-
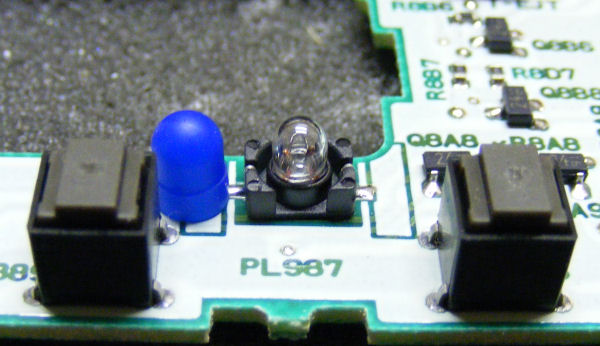
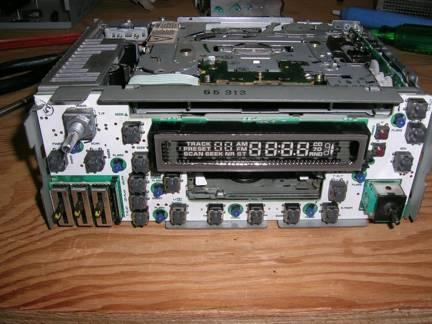
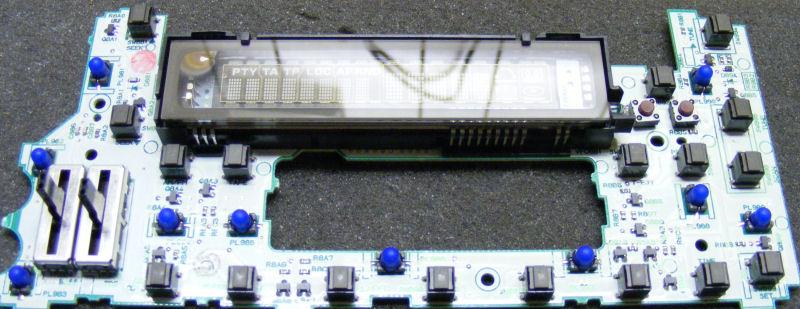
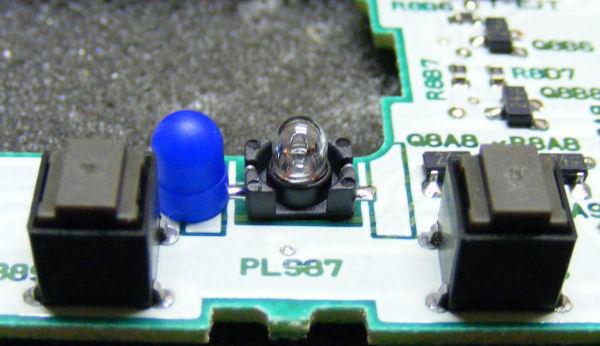
http://www.mouser.com/Search/ProductDetail.aspx?qs=6YhTptf0WO1dQPp6ZqLy%2bw%3d%3d The bulbs are 3mm size, 14.0V, 40mA and are installed in a twist lock base which is 8mm in diameter and 9mm in height. These are also known as 3mm T-1 Neo-Wedge base bulbs. There are some companies who sell LED's that use the same base, but I have not used and therefore cannot vouch for them. Note that LED's do not have the same dispursion of light as incadecent bulbs, so they may not light the radio display properly anyway. To replace them, remove the dash trim around the radio and remove the 2 x 10mm bolts securing the radio. The radio does not neen to be removed entirely fron the dash, but enough to have access to the 2 x phillips screws on each side of the faceplate. Remove the screws (4 total, 2 on each side) and then remove the volume knob and EQ knobs if your radio has them. Next remove the faceplate by prying under the plastic sides of the faceplate where it snaps over the metal bumps on the radio. Once the faceplate is removed, remove 2 x phillips head screws holding the display to the front of the radio and pull it off from the left side. You will notice that there is a notch on the right side that forces you ro remove the left side first and it will automatically unplg itself from the rest of the radio chassis. With the display removed, you can see the grey bulbs on the back with a regular screwdriver indent in them. Simply turn 1/4 turn to remove. The new bulbs do not come with the green filters that the OEM radio has, so you will need to pull off the blue/green filters from the burnt-out OEM bulbs and slide them on to the replacement bulbs. Reverse the procedure to reasseblre everything. Take care when reinstalling the display as there is the notch on the left side you must slide the display under first and a pin that inserts through the display on the left side that must be aligned for the display to install correctly and the display plugs to mate correctly. This is actually a fairly easy job for anyone who is mechanically inclined and is cheaper than a new or rebuilt OEM radio. If you replace the OEM radio with an aftermarket radio you lose the steering wheel controls, so this is a way to get more life from your factory radio. Note that some of the neo-wedge base bulbs in the dash use a longer base. I found one of these in my rear defroster switch that was burnt out. The base was the same 8mm, but the height was 20mm. I suspect mouser sells these also but used the bare baseless bulbs below from Allelectronics instead. and simply unwound the bulb wires from the OEM base, removed it and replaced it with one of the bulbs below since I already had them on hand. http://www.allelectronics.com/make-a-store/item/LP-23/14V-40MA-T-1-3M... One final note, Allelectronics does sell a Neo-Wedge bulb with green filters at the link below, but they are 4mm bulbs with a 10mm base and 12mm height and will not work for the radio application because they are too large. http://www.allelectronics.com/make-a-store/item/LP-70/14V-NEO-WEDGE-B... Here are a few other useful links I found during this ordeal if you want to post them: OEM new and refurbished factory radios: http://oem-auto-accessory.com/factory_oem_chrysler___jeep_radios.html Neo-Wedge and other LED auto bulbs, note as stated earlier I did not try these and cannot vouch for them: http://www.superbrightleds.com/instrument.html 2002+ style, surface-soldered: 99-2000 style, twist-in:
-
That sucked.. My arm is all scratched up from givin' the ol' Cummins the 'reach-around' At any rate, the old sender was bad; it stayed at 70psi, even with the engine not running.. So dually was kind enough to send me a spare he had (many, many thanks, dually, btw!) Now, the OP gauge is working properly, and the Edge is now reading oil pressure.. idle, operating temp, is ~55psi, and 2100rpm is 77psi. 184k mi, and due for an oil change.. At any rate, thank you, dually !
-
Closest i have right now. Ill have some soon, I hope. Sent from my rooted EVO's tiny keyboard with my opposable thumbs...

-
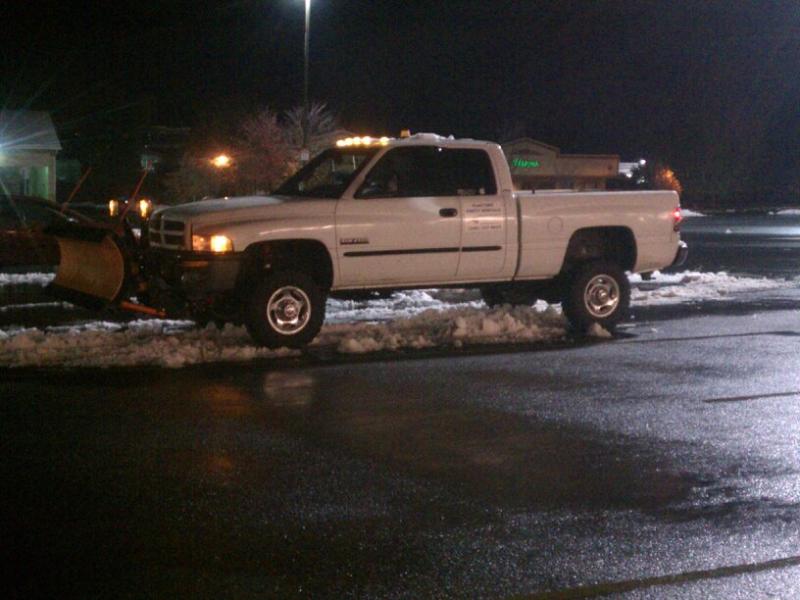
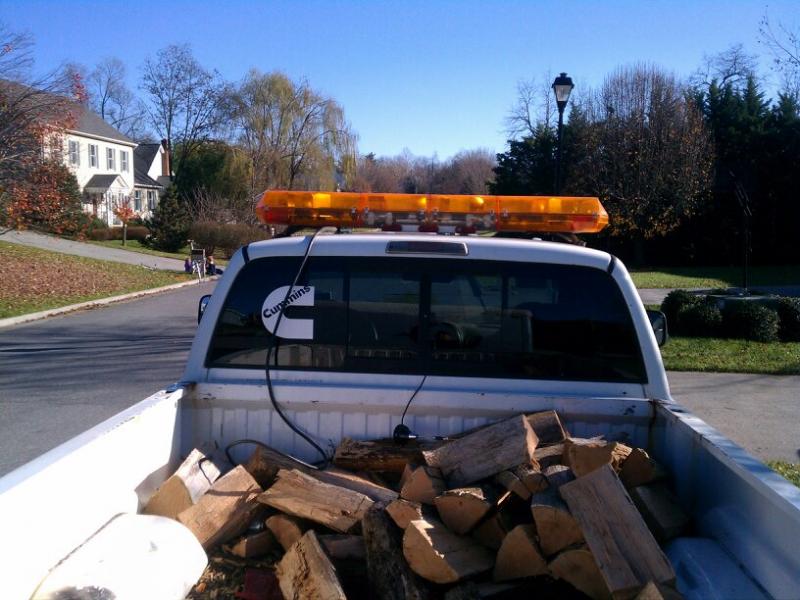
Light sitting on the roof. Sent from my rooted EVO's tiny keyboard with my opposable thumbs...


-
On a 2gen, it's a cake walk. Pedals (brackets are same), slave master clutch assy, transfer case shift and transfer mount brackets are different, cross member is same, sclb tear driveshaft if a hair shirt, front shaft a hair long, cut a hole for the shifter. Starter same, midplate same, etc. If using 5 speed. If u have all the parts swap can be done in a day on jackstands. I've done it in my 96 sclb. Sent from my rooted EVO's tiny keyboard with my opposable thumbs...
-
I could've gotten an LED mini bar for what I paid for this (and probably should have) but this was a fun little project, and adding different options to it is quite inexpensive. Something to tinker with for my snow plowing, I guess
-
Sent from my rooted EVO's tiny keyboard with my opposable thumbs...

-
that is a helluva lot lighter!
-
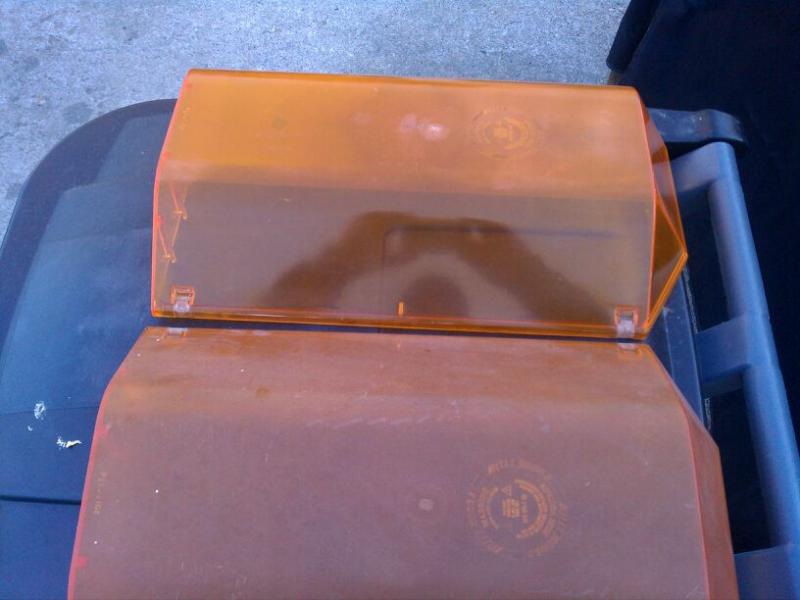
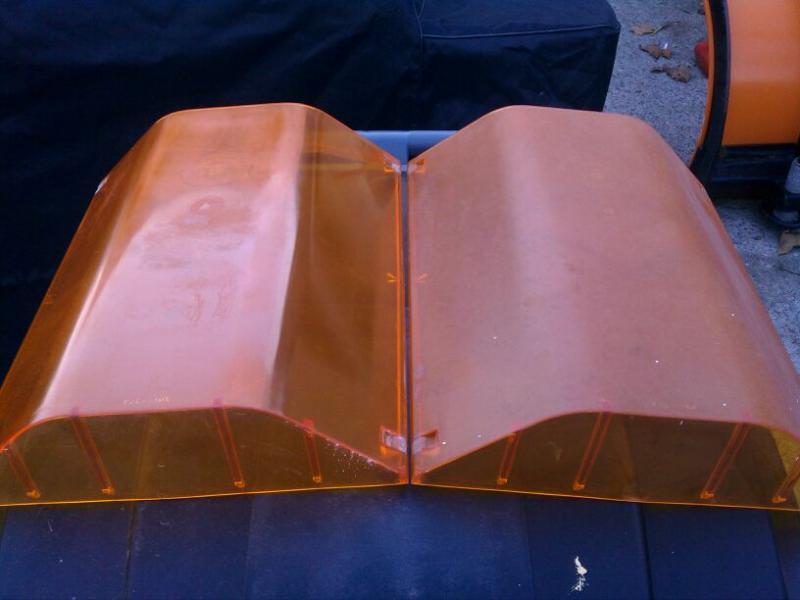
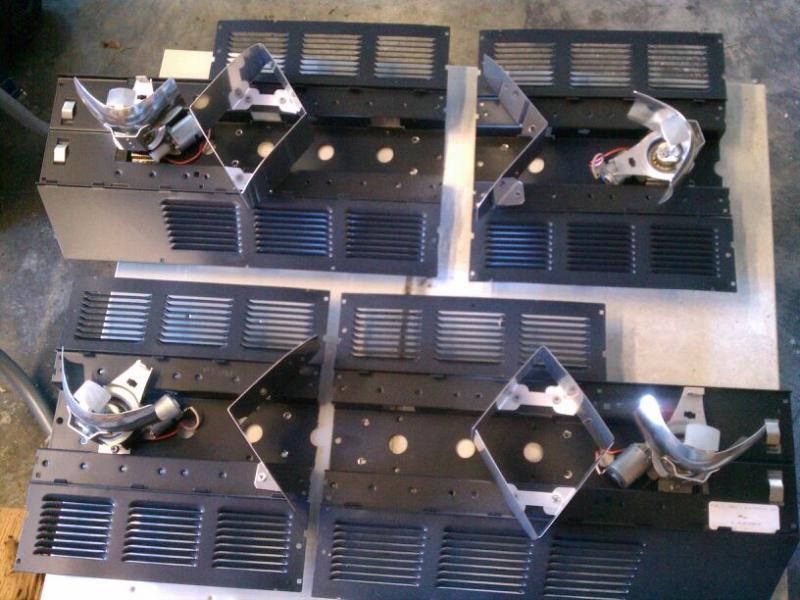
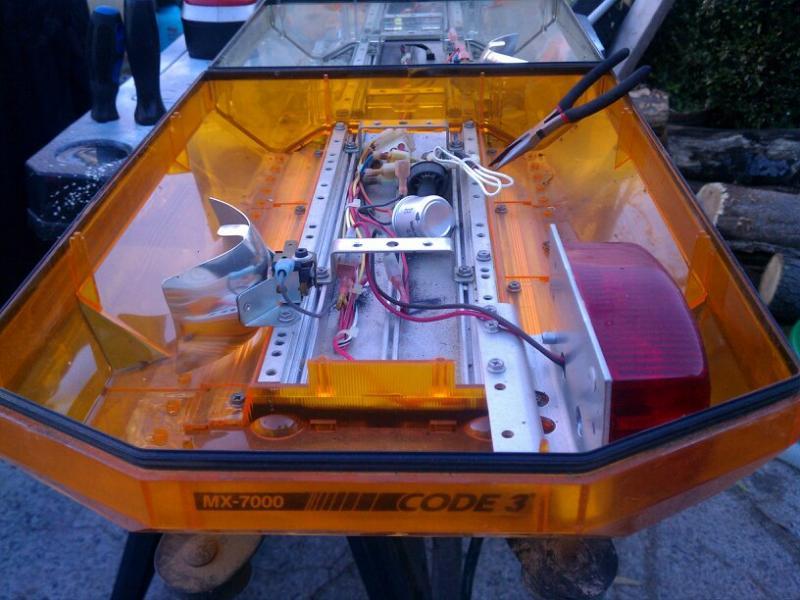
I picked up a Code 3 MX-7000 58" light bar for my truck to plow snow this winter.. I paid too much (found out after the fact) for it($300). It had extremely oxidized lenses, bulbs out, failed flashers, and a draggy rotater. No switch head, no gutter brackets, the list goes on. Most was found out after I got it home. So I: [*]disassembled it COMPLETELY [*]rewired portions that needed attention [*]rebuilt rotator motor (turned armature, re-faced brushes, etc.) [*]sanded and polished every lens [*]replaced all bulbs [*]replaced flashers I'll be making a 5-switch control box for it, possibly this week. A fuse block and Bosch SPST relays will be used for each light circuit. As it sits right now.. I'll get more pics up, this evening..
-
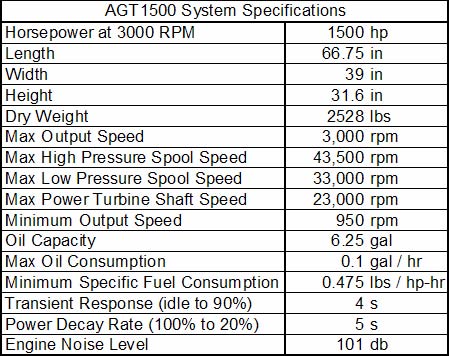
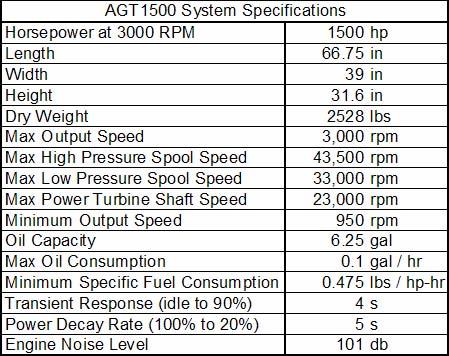
Nice!!Wonder how that compares to the Honeywell AGT-1500C?I think the 101db is a massaged number ;)
-
It's not the ebrake solenoid you hear clicking, is it? I know my Banks clicked; it was mounted to the firewall so was quite noticeable..
-
makes no sense to me. obviously, the higher the engine rpm, the more braking HP is created.In my 4500 I'd use it in just about every gear..Now, do keep in mind that high hp engine-braking in lower gear is "reverse-loading" the gear sets, but still, never had an issue with the 4500. I don't have an EB on my 5600 (yet) but plan to do so, as soon as funds are available.
-
My father in law has had a few of the 80's era 300Ds Not 300TD. They run like tanks, ride like couches, smell like german ponies inside.Rust is factor #1Injector pumps are factor #2Window regulators are factor #3Other than that, I know of no complaints from him about the 3.0L I-5 diesel (yes, 5-cylinder..)