Silverwolf2691
Yearly Subscription
-
Joined
-
Last visited
Everything posted by Silverwolf2691
-
There is one other way to get diesel in oil.. blown out/worn piston rings. They allow fuel to wash the cylinder down. Simple test: start engine, and take the oil cap off and place either upside down over the hole or gently rest in the hole. If it doesn't pop off you should be fine. When its really bad the blow by smoke will look like a steam train coming out of the filler hole. But the part I'm stuck on is that a warm engine would make this occur less because of tighter tolerances, but you are saying the issue only occurs once warmed up..
-
Hoping to learn, why this particular combo? Does it have to do with the different formulas of brake cleaner? (acetone, chlorinated, non-chlorinated)
-
Didnt realize the VE trucks had a different cam.. Colts stage 1 is a 175/206 stage 2 is a 175/210 I haven't done a cam swap, but from what I've read over the years, its not worth the money. Boils down to its really expensive for very little horsepower gain. Mostly it open up breathing on the motor and, when you get into the larger cams, moves the power band up. And there will be no thumpa thumpa from a diesel with a cam. The "cammed" idle sound is due in part to vacuum and partly to valve overlap and Lobe Separation Angle (LSA). I've wanted to do free spins on my truck, but first and foremost is the price. That's a tough nugget to swallow initially. The other thing is how far they stick out. Supposedly the shortest free spin is a Spyntec shorty with Dynatrac Dynalocks. But you are right, I haven't found anyone who said they regret doing the swap. Might have to eventually put them on my truck depending on what I do with my sled pulling and how far I want to go.
-
The ash tray yes but the cubby should just unscrew from the top and fall out. I replaced the bulb in that. Its a sheet of colored plastic and you cannot put an oversized bulb in there. In fact I think I had to have mine some amount pulled out otherwise the pattern wasnt right. 194 for the glove box. Keep the button pushed in for the switch so the bulb doesn't get hot. Switch and bulb are all one piece too, I think I pulled mine all the way out to do it. Dont remember why, was one of the first things I did on the truck 5 years ago.
-
https://www.superbrightleds.com/cat/instrument-cluster-gauge/filter/Reference_Number,NEO4,1,5030: I don't remember the size but this is what I would replace it with. Normal color is green. measure the part between the copper tabs in the hole and find the one that would fit. I think myself and MoparMan went through retroshop.us for our headlights. Have had them for about 4 years and my only issue was with the Morimoto Motocontrol harness that was included. The pins on the harness side for the relay box connector fit loosely with their counterparts and caused the lights to randomly die and high beams not to work on me. Bent the pins out a bit and problem solved. But that's a Morimoto thing not a retroshop thing.
-
Max would be like a 178/208 from Hamilton Cams, or a 186/209 from No Limit Mfg, if you want to pursue that. As for cam bearings, there is only one, possibly two, on a Cummins. all the others ride right on the block. Again, if you aren't competing or spinning to 4-4.5k+ rpm, it's not something to worry about, people have gone a million miles on the factory setup with no issues. The bearing is located closest to the gear. There might be another on the last journal as well but that might be on CR engines. There are zero posts about cam bearings here because most of the population of the site isn't competing or trying to push 700-1000hp. Its not needed for the average injectors/tuner/turbo crowd. I think jlbayes, TFaoro, treed (maybe), and myself were/are some of only ones on here that were either competing or just trying to push the limits on horsepower. I think TFaoro had a build on here or Cummins Forum of his truck. Ended up p-pumped with twins and huge injectors. You can find the engine rebuild in the engine articles section as well.
-
I fixed the high beam cut out with a fused jumper in place of a relay, ill have to double check what pins I put them in. Where I am is semi wooded to nearly claustrophobic with the woods. But we have plenty of state routes at 50+mph that the woods are like a cars width off the road. Then we have some side roads that at certain sections are only comfortable for two motorcycles to pass side by side. When my trucks or my brothers dually are going through there we have to look ahead for other cars because we have to own the road. Oh and the same stretch has 3 full right angle turns one right after another then a blind hill with a corner on top. All because of property lines. That side road is dangerous no matter what, but the state route is where the extra light comes in. Not a lot of street lights on those routes so all you have is what you have on the car.
-
-Check all your hoses -Check the intercooler boots -Fan hub bearing or the entire unit -Check water pump for play, or just replace Since its 2 bolts and you have the coolant drained. -Fan clutch looked over -Balancer/damper, look for what @dripley said, alignment between the pieces and make sure the rubber is still there. Technically, if the rubber is cracked it should be replaced. -Check your fan blades for cracks, your fan at full lock up is spinning faster than the engine itself and I think is capable of 10-11k CFM. That's a lot of stress to be putting on a cracked fan blade. -Replace the A/C drier as well, especial if you have the system open for any extended amount of time. -Check for the KDP/updated timing case, I think my truck might have been unlucky with the KDP before I got it. I have the new style case but I am missing my data card. -Be careful with the front main, it goes on dry, then turn the motor over a couple times by hand to wear in the Teflon before the oil gets to it. Otherwise it will leak. And if you can feel any catches/wear marks on in the crank snout, get a speedy sleeved version. Oh and DO NOT remove the installation cone until after you have tightened down the cover. Easiest way to destroy the seal that way. -Other than that, just look for leaks, check wear on things, stuff like that. -A cam isn't really needed unless you are competing or spooling a big turbo (like s465 as a single kind of big) . There are plenty of guys that are making a lot of power on the stock cam. -While everything is of and easy to get to, might as well adjust the steering box. -Vacuum pump is up to you, with 345k on it it wouldn't hurt. I have used the Gould's gear kit and I highly recommend it. Bit expensive but it it comes with tools, an instructional dvd and extras of seals commonly messed up on install just in case. -the timing cover is stamped sheet metal bolted to an aluminum case, there is a gasket for the cover but everyone recommends RTV because the sheet metal is usually warped slightly and wont seal very well with the gasket.
-
Bulb socket is empty because that switch isn't a fog light switch. The rotary switch pulls out for fog lights, says pull with the fog symbol on it, and you can see the fog light symbol that lights up. If you have all the wiring, I think you can get the switch at an advance auto or similar, plug it in and see if it works. Fair warning its like $60-$80 (least it was a few years ago).
-
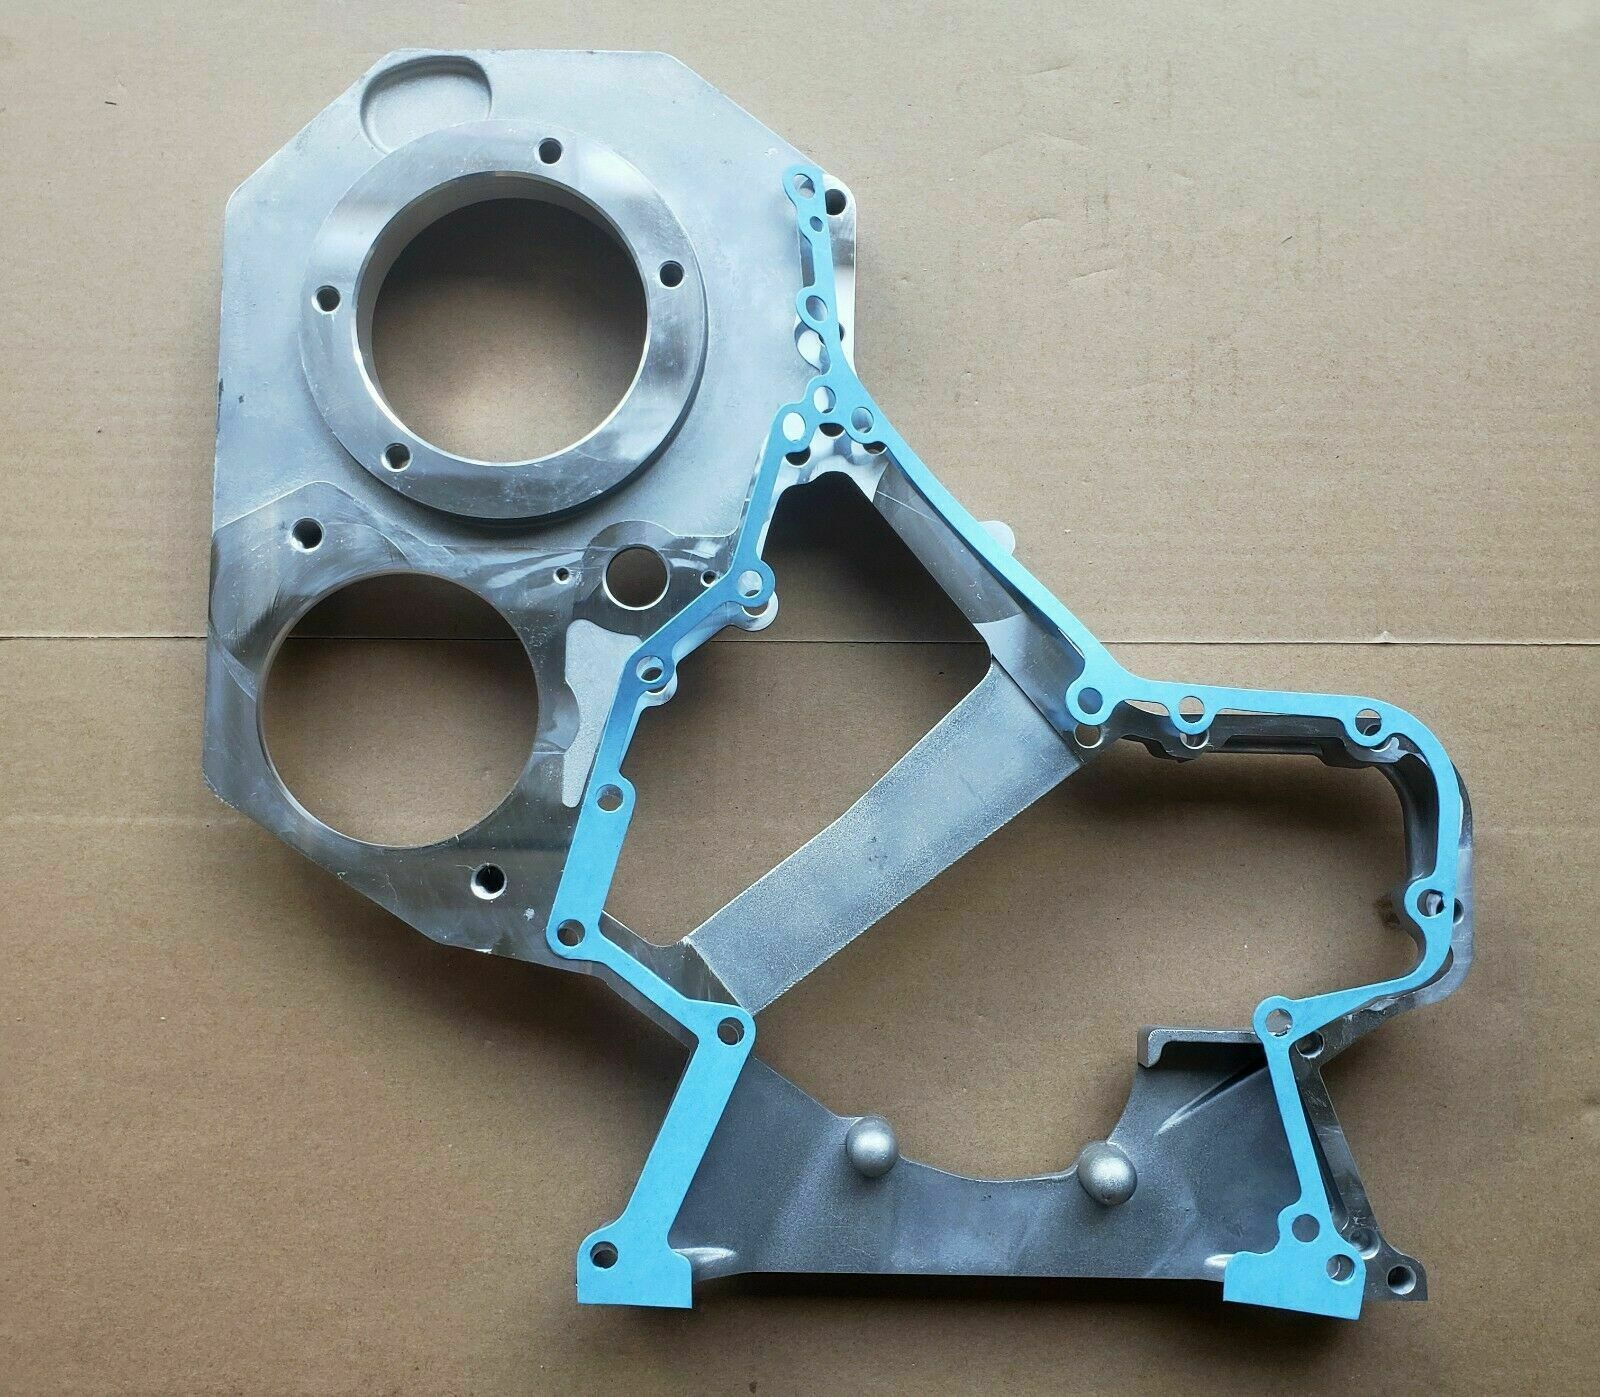
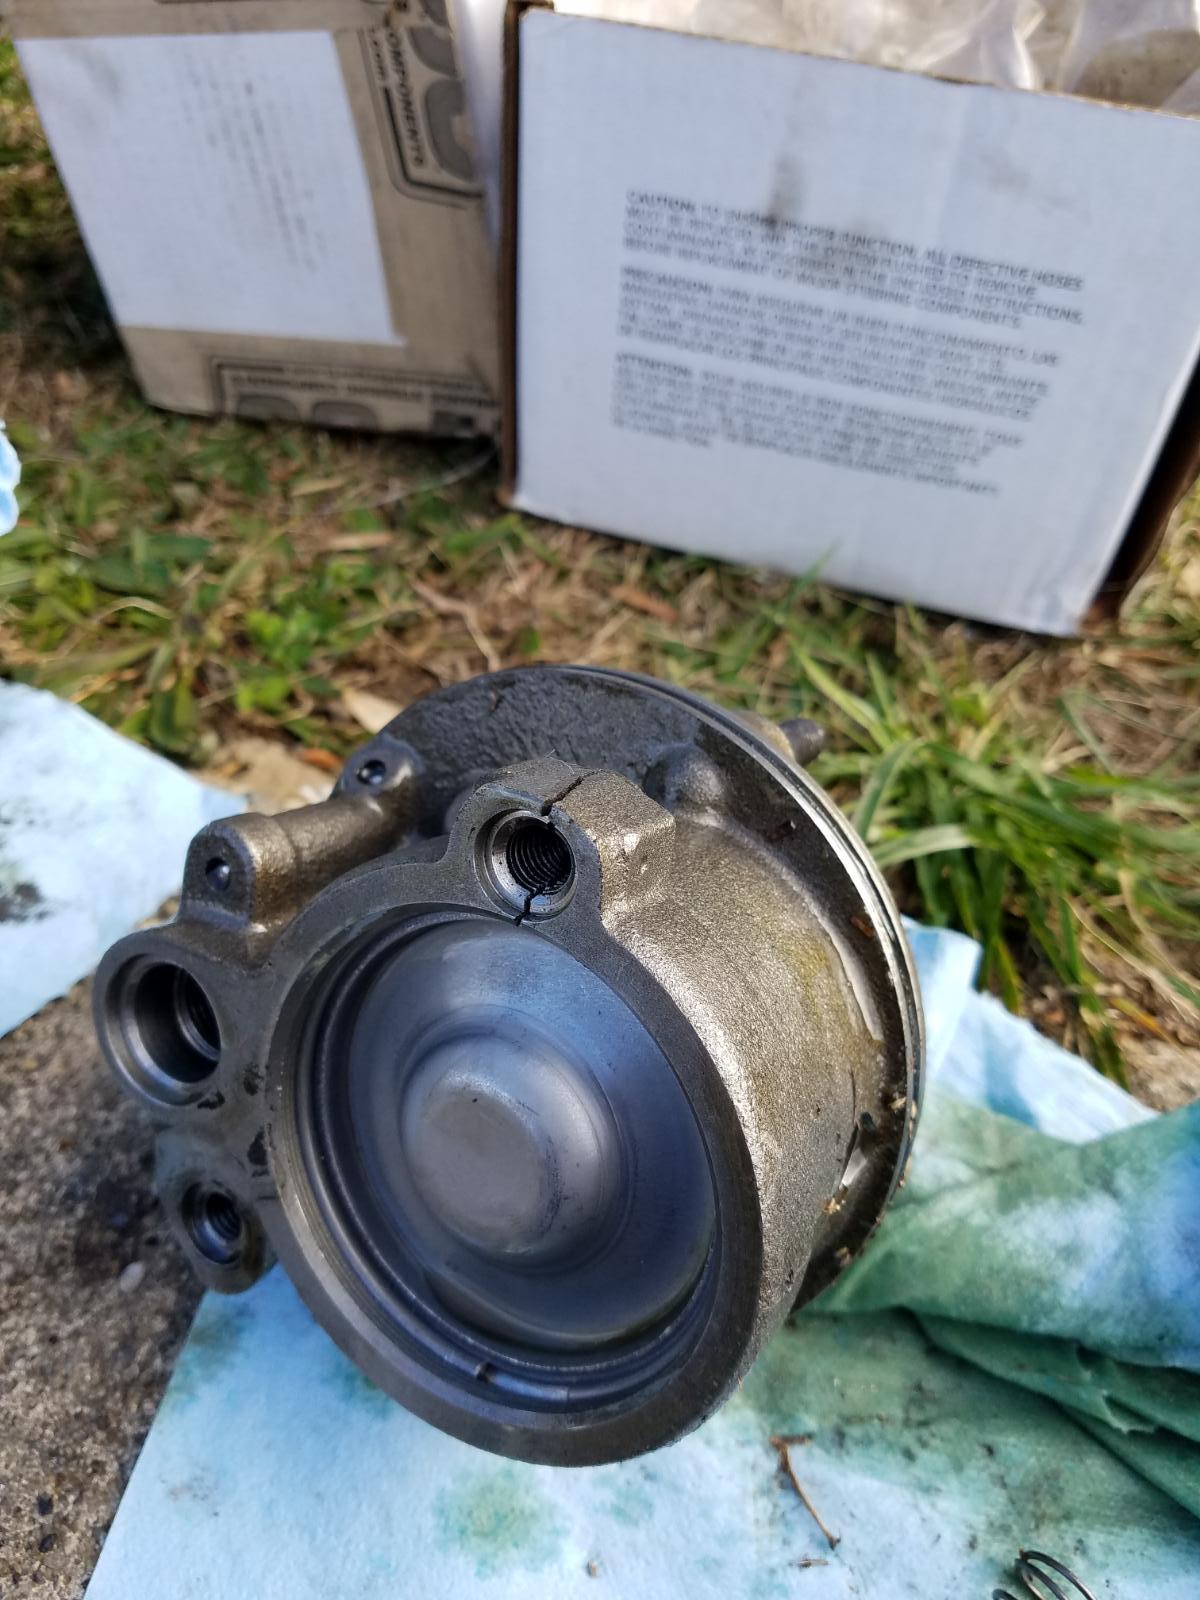
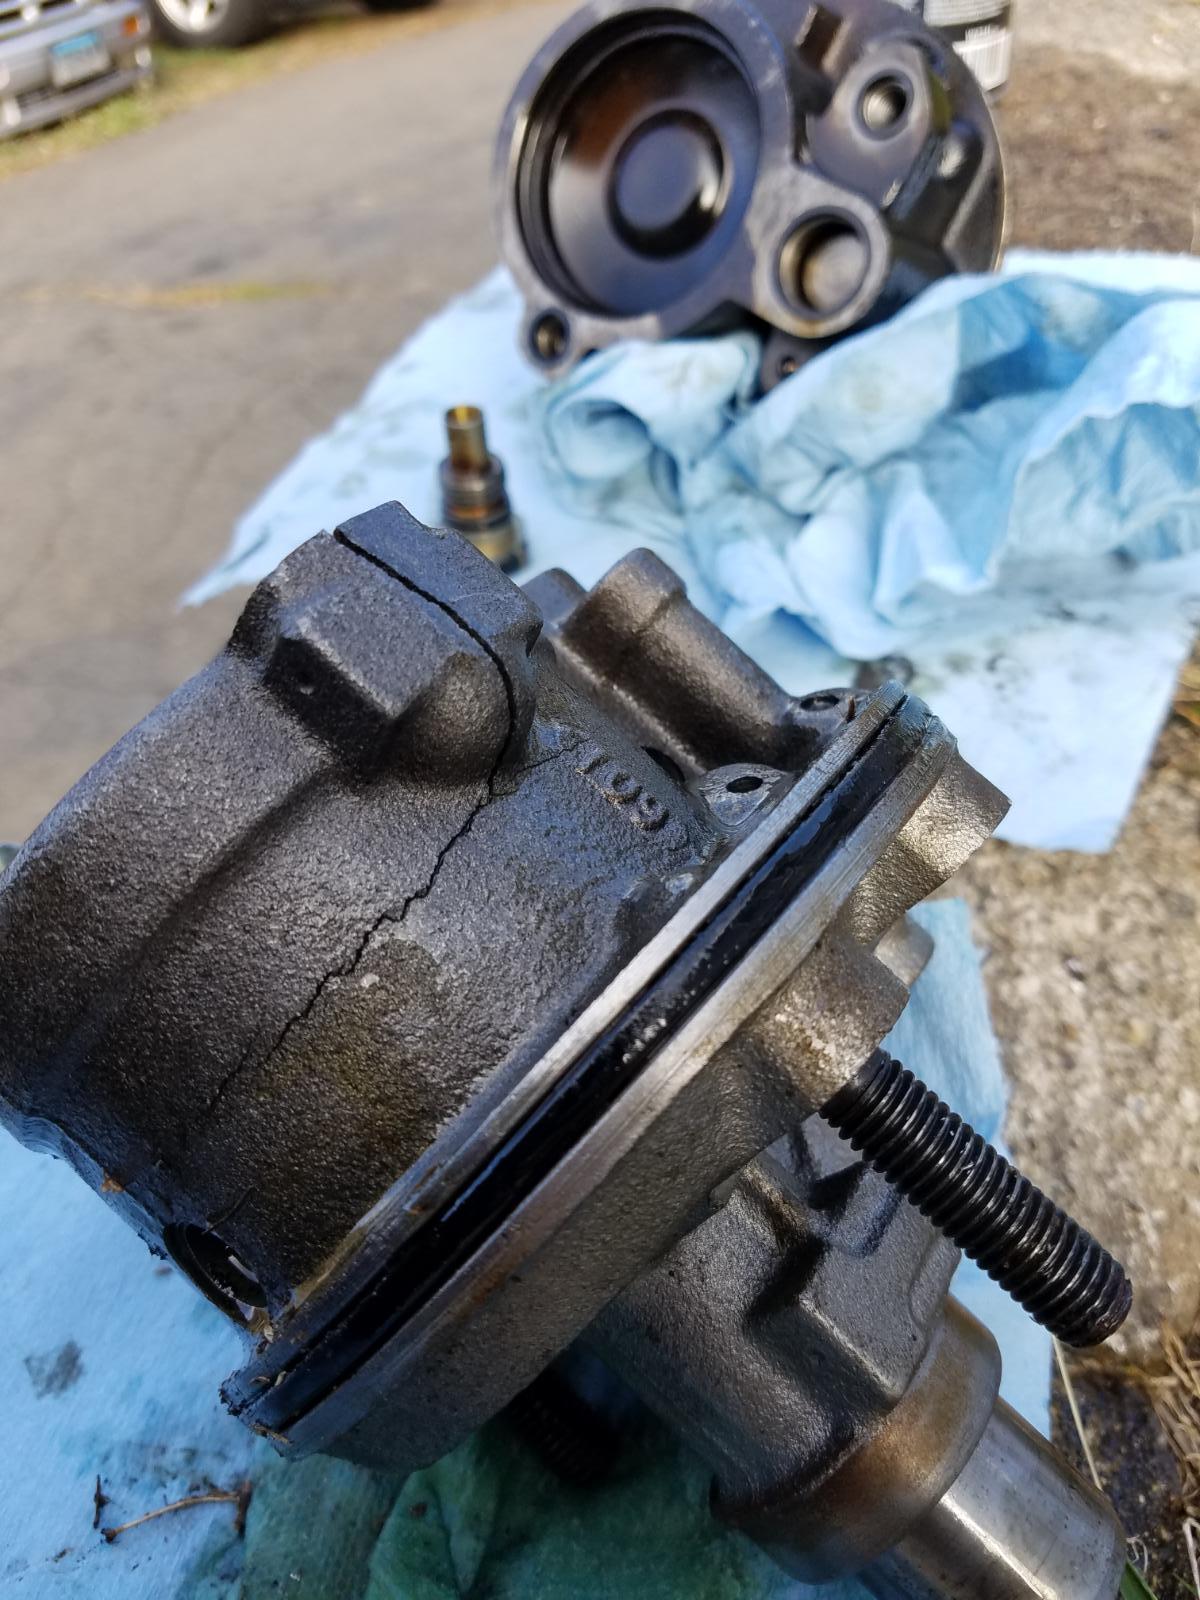
What MoparMan said, grey RTV to quick fix or you have to strip almost the entire front of the truck off. I think the alternator and A/C can stay but VP44 on down including the cam.. and the cam means rockers and pushrods out too. Im kinda worried where that part of the gasket went.. The photo is from the engine, looking at the radiator. You seem to be missing the long piece with no holes at a 45° angle that heads up to where the VP44 is.
-
TIPM = totally integrated power module runs everything other than the trans and engine, more or less. That's how 3rd/4th/5th gen trucks (more so on the 4th and 5th gens) can just go into the computer and turn settings on and off to add higher trim things to lower trim trucks. (headlights, tail lights, power seats, fog lights, fogs on with highs, turn off PWM in the head lights/tail lights to run hids or leds, keep hyperflash away with led turn signals and no resistors.) edit: I think I was thinking the body control modules. oops..
-
there was actually a TSB or recall (TSB 09-011-20) for the new Cummins trucks to have the oil swapped out. IIRC, it was actually causing damage to parts because 15w-40 is too thick(forms deposits actually). owners manual states 10w-30 above 0°F and 5w-40 below 0°F. so water or WD-40? Jeez. That's starting to get worryingly thin.
-
@Doubletrouble, studs go in after placing head on dowel pins. @Tex_usa, you have to remove the wiper cowl and a plug from the underside of the wiper area. It's the only way (I think) to get the push rods out. The studs if I remember right are short enough to come out without needing the plug removed. Just takes a bit of finding the right angles. And if you still have the insulation still its a bit harder because you loose about a 1/2" of clearance.
-
Might have to pull the timing down. Some of the tunes were created before we figured out how low we can push timing. So you have a S.O. engine with an H.O. vp44 on it correct? I've heard of issues going that direction, but then why does the other direction work? (H.O. pump to S.O.) Just things I've read from forums dated like 2008.. If it was a used quad, is it updated to V2? Otherwise it causes issues.. But like @Threadzy said, you might need to call Quadzilla to get it looked at, but double check all of your connections first. Free fixes are the best fixes.
-
You have a lot of things going on with your truck. I would say remove all of those filters and "sponges" you added then test again. They are a band-aid at best and snake oil otherwise. They could be hiding your issue as well. The wait to start light comes on no matter what as a check that the ecm is booted up. Bar none. so if the light isn't coming on your ecm isn't booting. ummm.. what? care to share with the class?
-
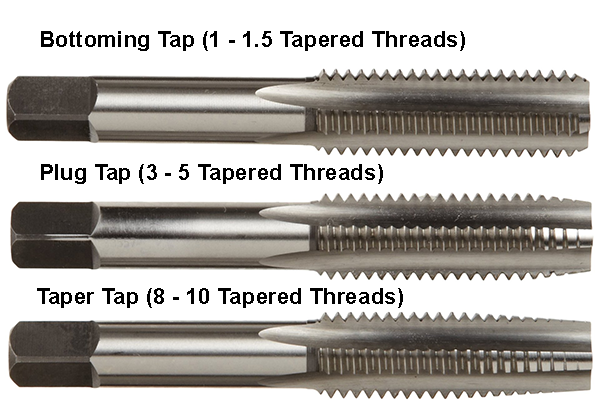
Not entirely sure on the o-ringing. I don't know if its a static diameter or if the o-ring diameter is based on the cylinder bore diameter, I don't think it is based on just sending the head out to places to get machined. Before I scare you into spending money you don't need to, Odds are highly likely that the engine hasn't been bored over. Just measure it before putting the gaskets on just in case. You are looking for Ø4.02". (Over bores are Ø4.04 (+.020) and Ø4.06(+.040)). Usually boring is either for more power or to repair damage, but in a Cummins its not done often because its not a big power adder and that type of damage (piston scoring) doesn't happen very often. I pulled my head at 180k and the crosshatching was still there, I think others with a lot more miles than me still had their cross hatching as well. Its not a drill and tap. You run a bottoming tap to clear out any junk and run the threads down farther for a stud. You are not changing the size of the treads. Most taps are taper or plug, but with a stud you don't want to tighten against the tapered, uncut threads. You just want it to tighten on the full threads. (read this when I did my head gasket, I don't remember specifically why you don't want it to tighten on the uncut threads. I think it has something to do with torque accuracy). I hope this is making sense and I'm not adding to the worry of the job.
-
Fair warning about doing it yourself, the head weighs right around 150lbs. Helps to have an engine hoist to help pick it off the motor and put it back on. Only if you fire ring. O-ring heads compress the metal ring that's already there in the oem head gasket. Personally, head studs and springs should be enough for a daily driver with 7x010s and an s363. and the springs are only because you hinted at turning up the boost. An s363 should be able to clear 50+ psi with enough fuel. I know @Mopar1973Man is over 45-50? psi with the 60/60/12 he runs. Do you know the history of the block? if it was bored over, you need a different gasket for that bore. DO NOT wet sand the block. You will put water and metal and sand into areas you don't want them. The push rod holes (more or less) drain right onto the cam which drains right onto the crank throws. Once you get the head off, and dry the surface, you can go with a razor blade and scrape up anything remaining on the deck surface. I did follow that up with a brass wire wheel just the give the surface a bit of tooth for the gasket to bite into and to clean up the stuff the razor couldn't get. Just try to not push anything into the holes on the deck surface. For the head studs you will have to tap/thread chase the holes deeper so fair warning about that as well.
-
Not this year but a few years ago I replaced my head gasket as well. Granted I didn't do the other upgrades like top hat seals or trunnions or springs, just injectors and head studs as upgrades. my advice is doing a head gasket in a weekend is entirely doable, if you are not machining the head and you are replacing everything or have everything you need. Like others had said, the machine shop is the longest part to wait on. I think it took me and my best friend about 8 hours to take the engine completely down to head off, "ready" to go back on. But the biggest hinderances are all of the stuff you come across while you are in that far. My replacement of the head gasket took 3 weeks because of weather/no garage, machining time, and shipping time for some of the odds and ends. Also working a full time job and a then girlfriend that worked 3rd shift. (Only time I got to see her was between 6 and 10 pm on week days.) As for the upgrades when having the head rebuilt, like @Dieselfuture said, there's a lot you can do, everything just comes down to money and how much are you willing to spend. What are your plans for the truck? That will help us be able to guide you with the parts needed. Missed this the first time I read through, this would be another machining step in addition to the decking of head. Also what kind of "rings"? o-rings are machined into the head and compress on the head gasket fire ring as well. Good to about 70 psi. fire rings take the place of the metal ring in the head gasket and depending on the shop are machined into the block or the head. Good to about 120 psi. I'm assuming o-rings, but I've been wrong before. Unless you are planning on competition or going up to twins, I would pass on the rings. If you are around the 60 psi mark, the 103 valve springs would probably be a worth while investment. Is the engine not in a dodge?
-
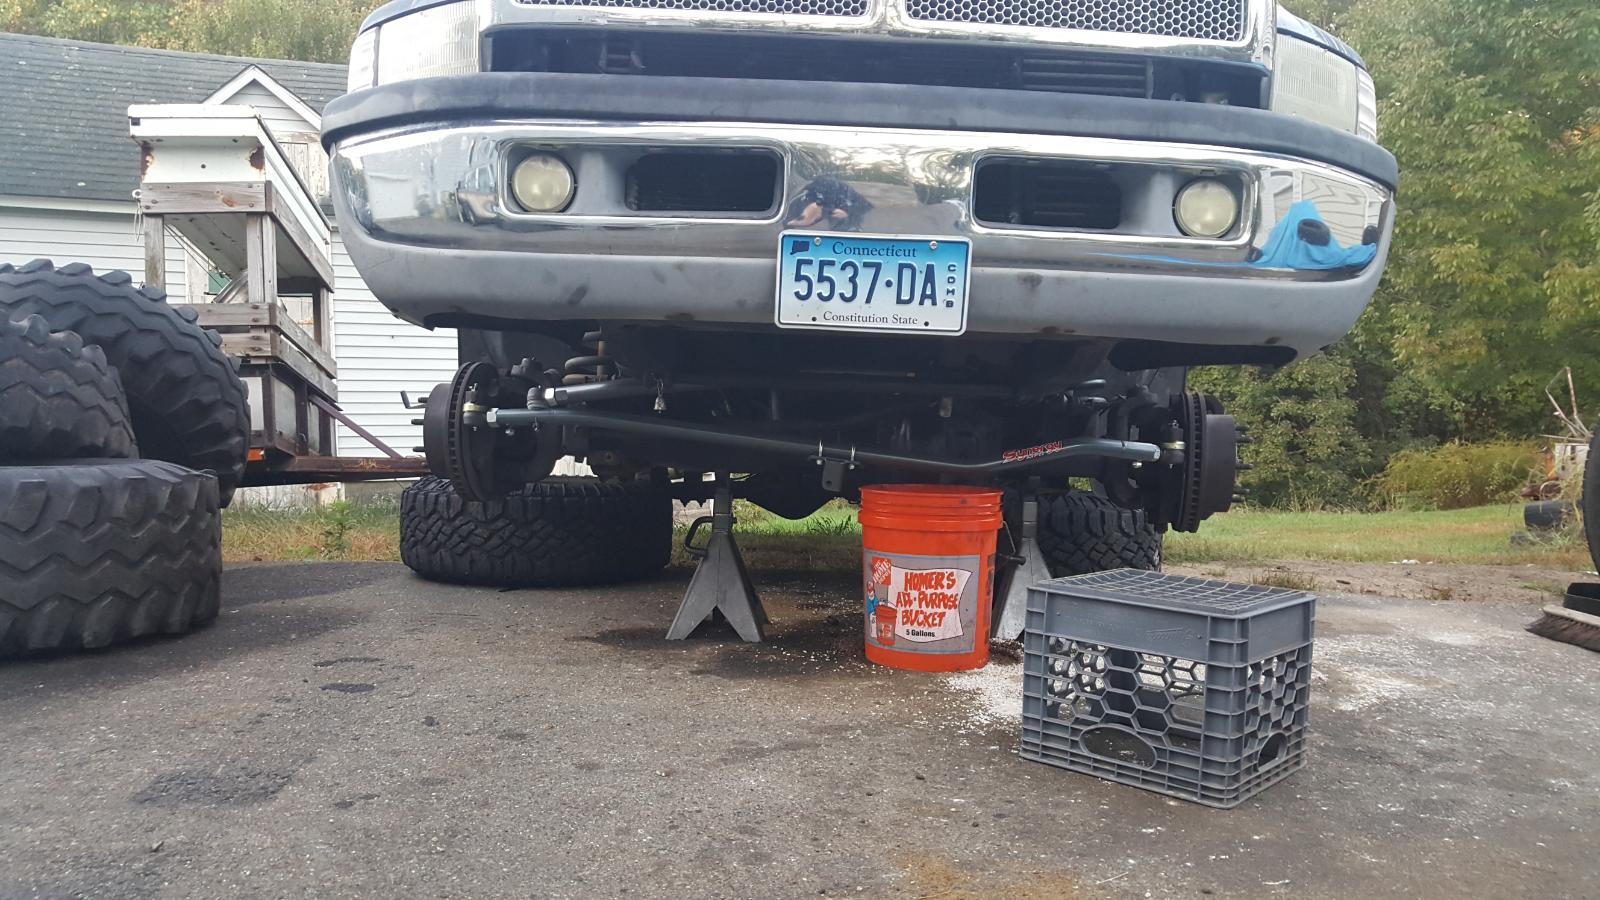
Rebuilt the front end entirely except the steering box at this time. hubs, u joints, Synergy ball joints, Synergy t-style steering linkages, DOR tack bar, swapped the steering box brace from my 1500 onto my Cummins, and attempted a PSC power steering pump, rebuilt the vacuum pump. And this is what happens when you don't clean the reservoir very well of the power steering pump after sand blasting it so I could paint it.. PSC pumps now come with a reservoir so you dont have to swap them over. I had issues getting the new pump to reservoir o ring to fit so i reused the old one to fit.
-
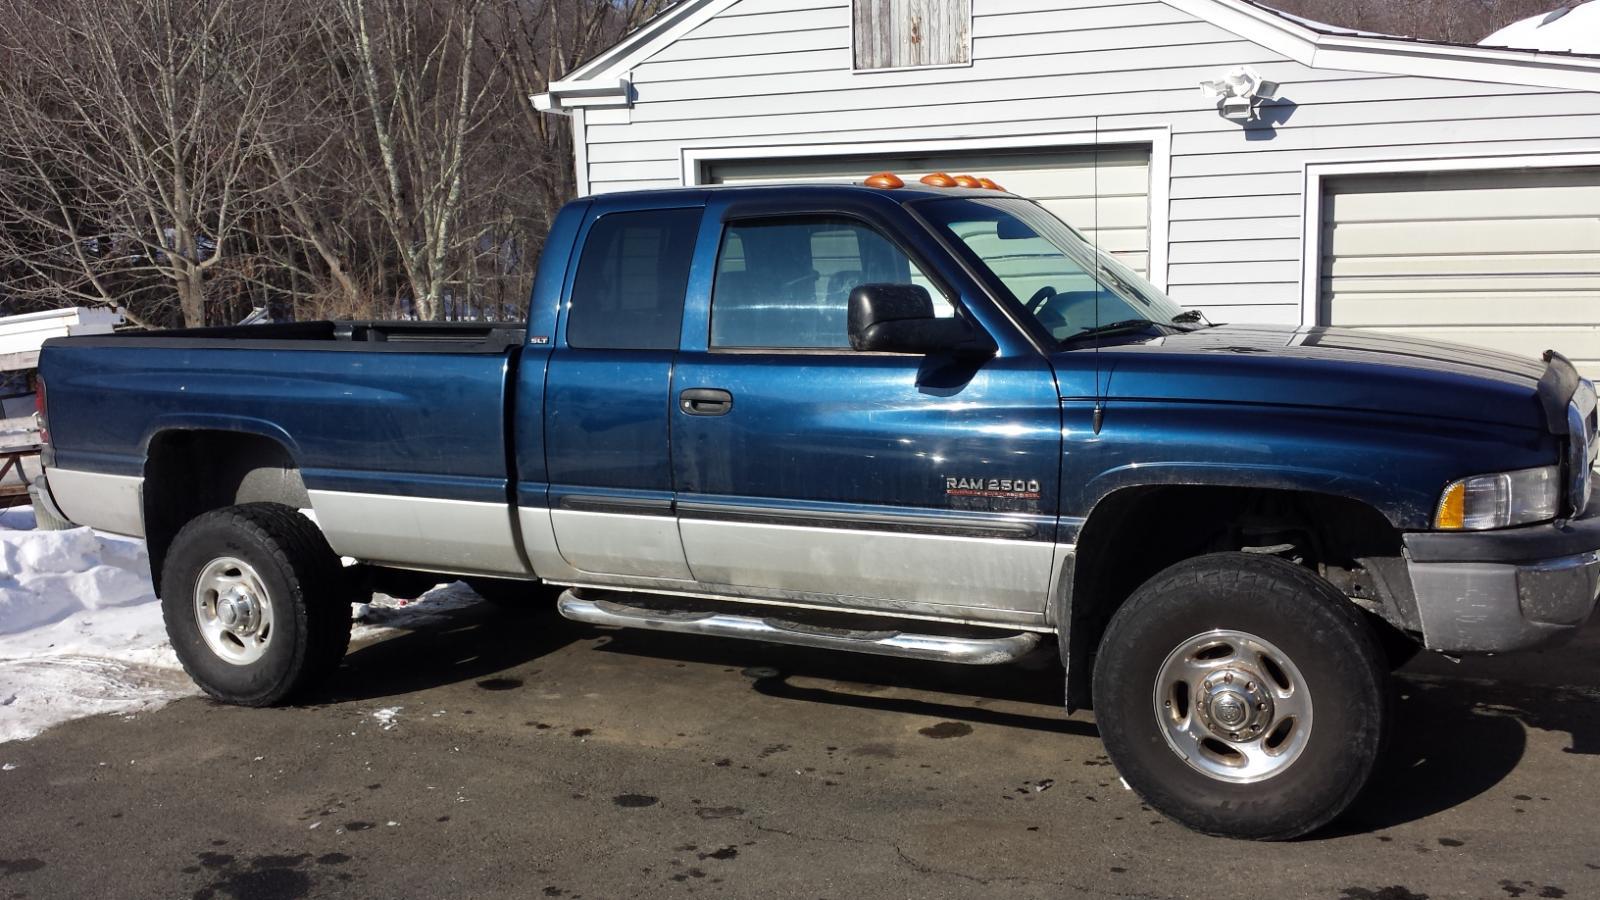
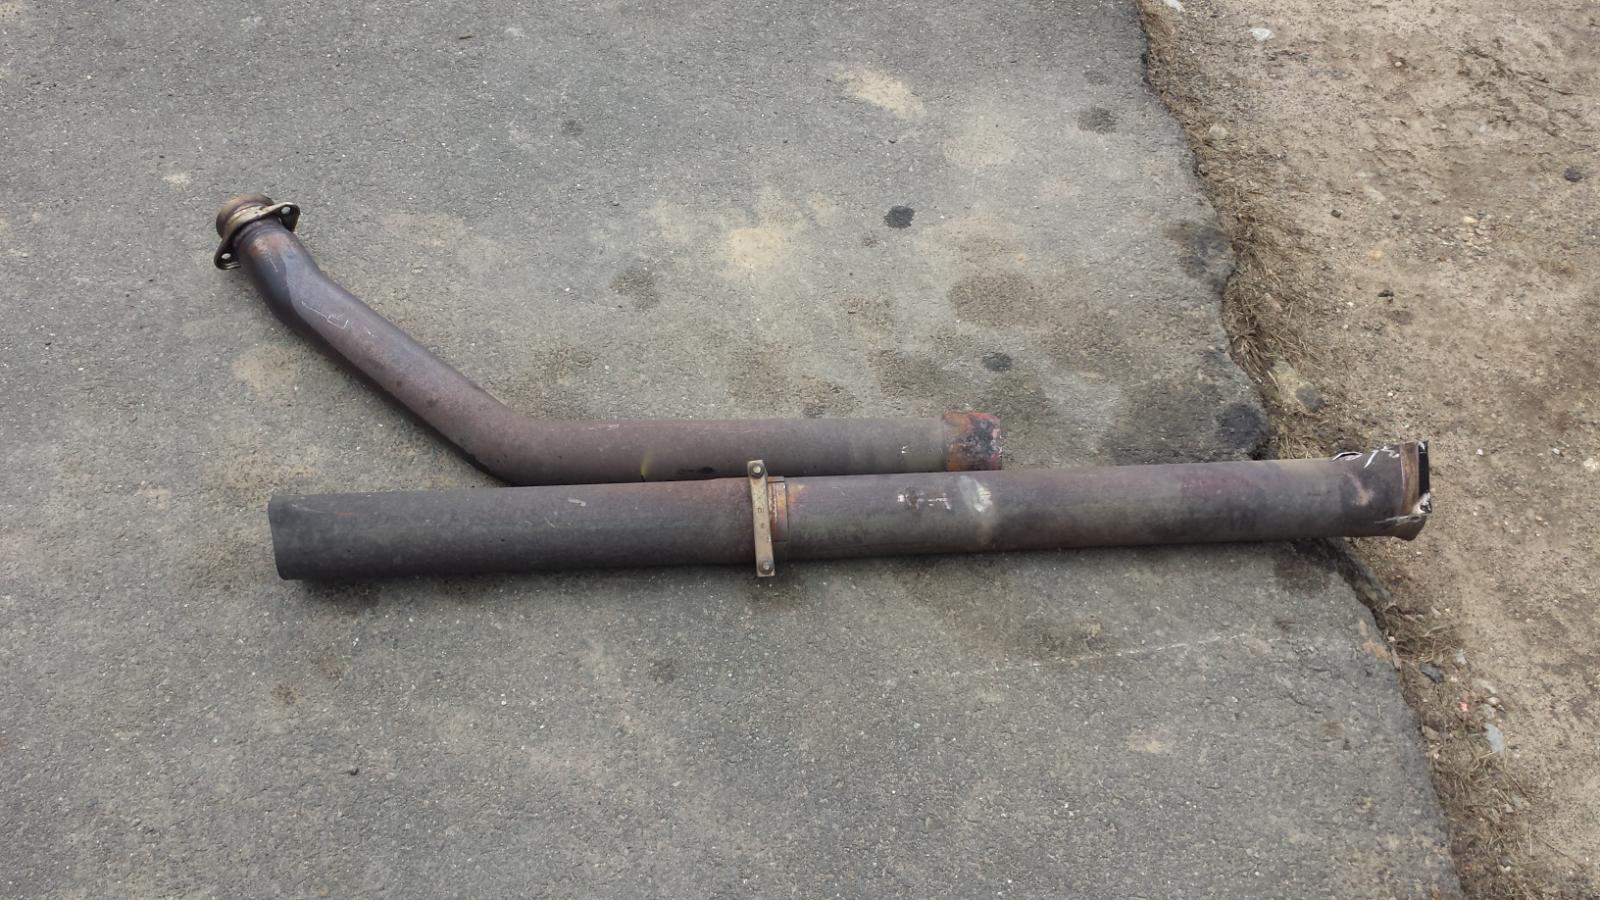
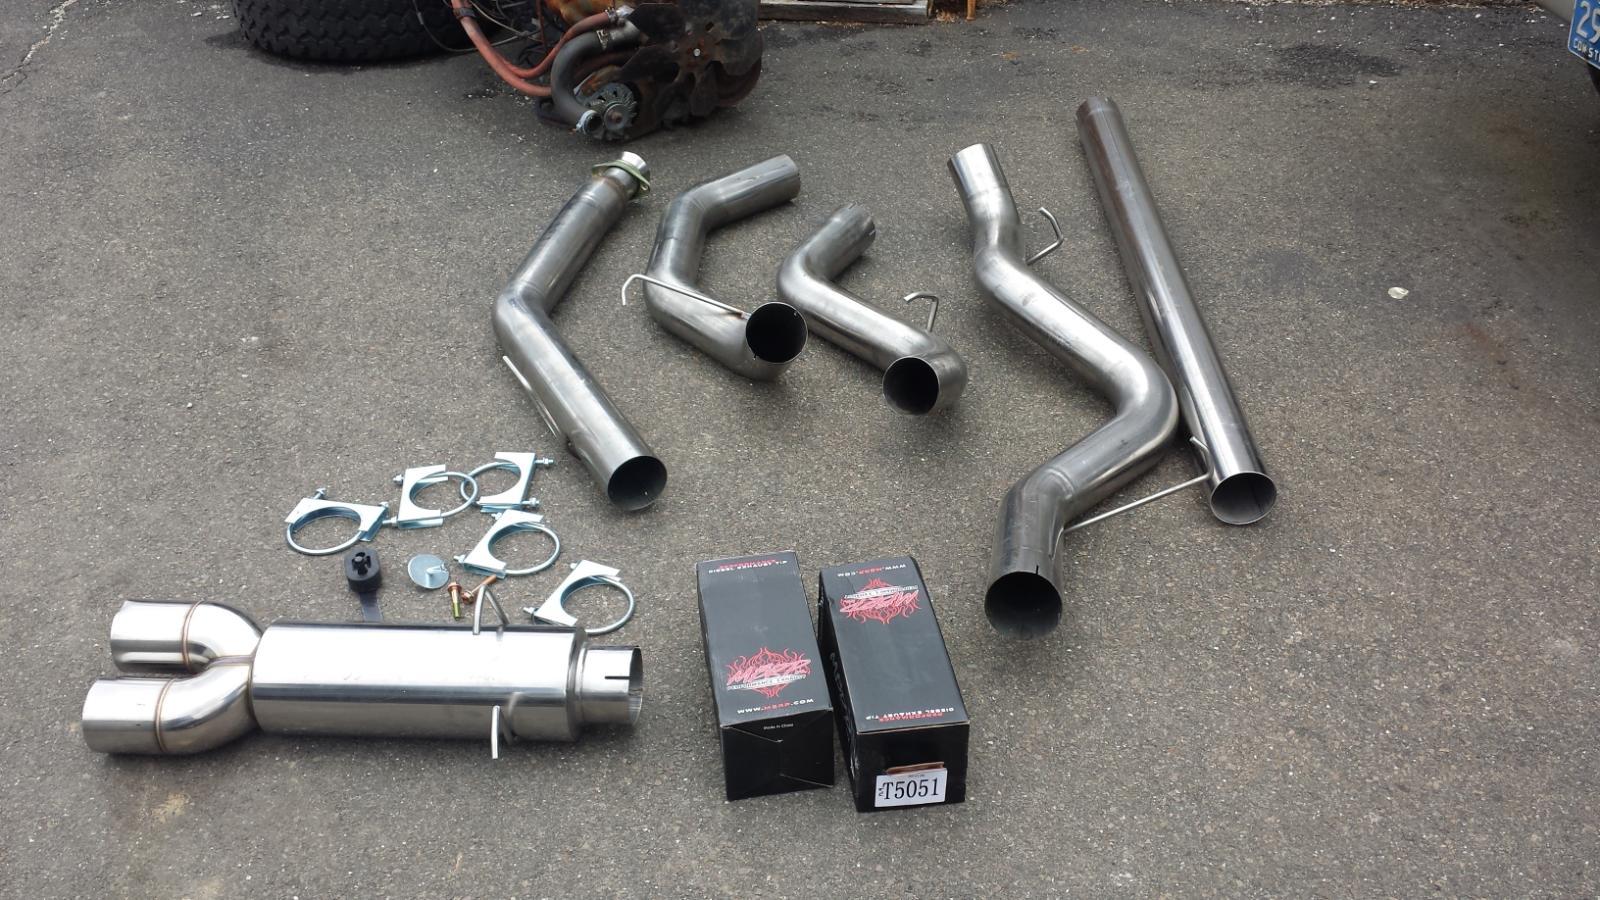
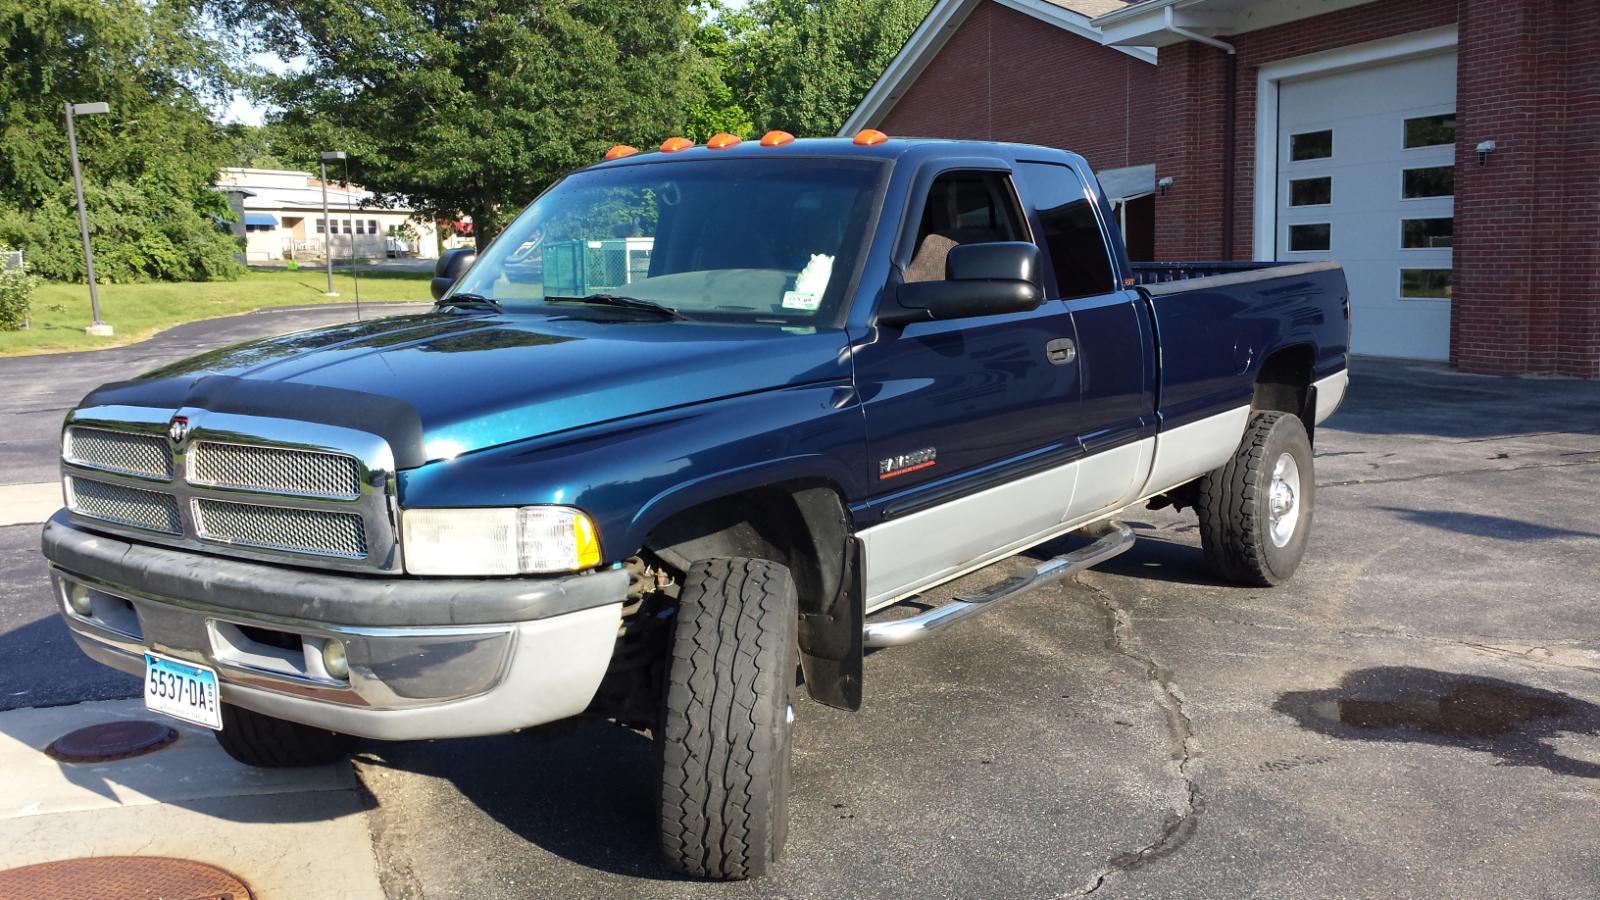
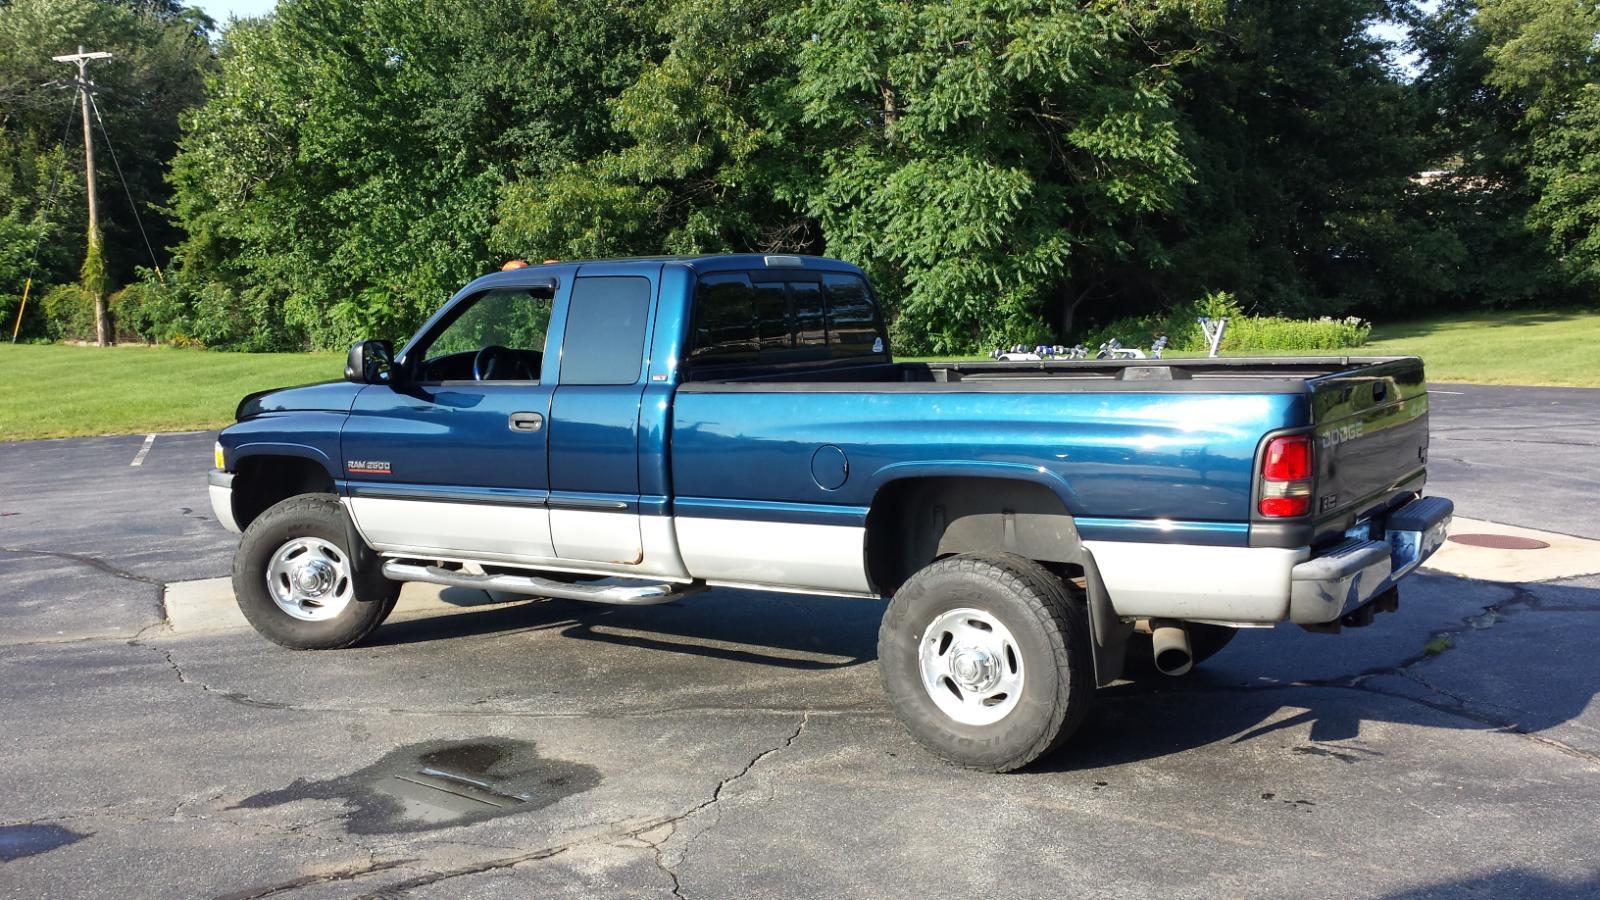
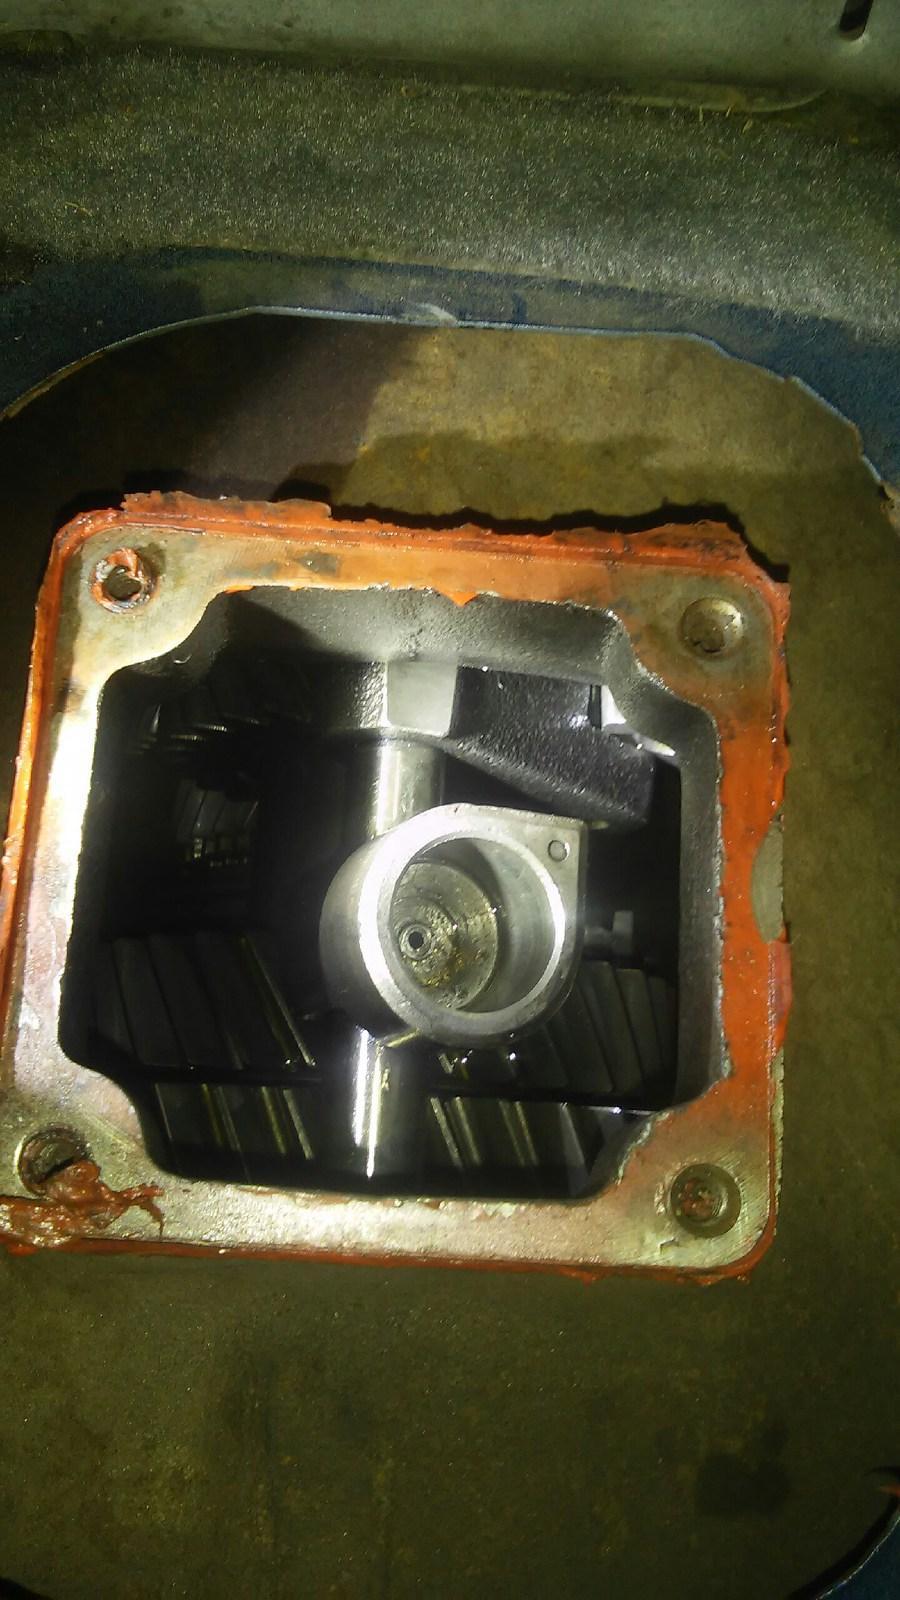
Hope this is ok to put here. I wanted to put the history and semi build up of my truck so far for both record and might be able to help others some how. So, I have been a dodge fan for years, partly because my father works at a dodge dealership and because the only non dodge product we have ever had in the family was a mid 2000s Subaru Legacy. My first time driving anything was when I was like 3-6 years old, my father let me steer his Jeep Grand Wagoneer down the road. We actually still have that jeep but it has fallen into disrepair because of reasons. I personally have had a 1999 Jeep Cherokee (on loan from the parents), 2001 Dodge Ram 1500 (was my first vehicle I could call my own, sold a few years ago), 2001 Dodge Ram 2500 (nearly my dream truck, needed to be a sport to be my 100% dream truck), currently also own a 2019 Ram 2500 (needed because I chose to start sled pulling with the 2001 Cummins and I needed a second vehicle). Also have a 2016 Yamaha Stryker for a motorcycle. So this was the morning after it was dropped off to me in 2015: I actually bought the truck off of a classmate of mine so that was a fun surprise. And so began my foray into the world of diesels. Unfortunately, previous owner didn't take good care of the truck. No power steering fluid, and it was really low on oil, like half of the required amount drained out my first oil change, and the steering was really all over the place. Also, the exhaust was cut off right at the end of the cab, and the mounting rod that attaches to the tranny had broken off allowing the exhaust to just rattle against the tranny crossmember. So I swapped it to a set of MBRP cool duals. Out with the old In with the new. Few months later gave the truck a bath. Also after, digging through my photos, I don't take a lot of photos of the projects I've done. Or I cant find them. First big issue was that when I went and got new tires for the truck, the place that was doing the alignment broke my nv5600. Unfortunately, said place is a regional chain in the northeast and gave me $500 as compensation after the company that rebuilt the tranny said that they had seen this kind of failure quite often. they forced the shifter into a place it wasn't supposed to be and separated the circular thing from the actual shift rails. Top right corner is where it was disconnected. So i used this time to get a fresh rebuilt tranny, rebuilt driveshafts, a Valair dual disk clutch and new shift tower.
-
Supersonic lead slinger ammo? Dunno, I'm in cali junior, aka Connecticut..
-
CCD bus for sure, I think that both individually or one feeding the other also send info to the cluster.
-
Update, and not a great one.. The place I was looking at for the new job disappeared. Website was still up, google still says they are open. Their Facebook page is a bit deserted, nothing new since 2019. Went by the place and the building has a different name on it plus no diesel trucks waiting to go into the shop. Did more digging and found apparently the owner of the company on Facebook. Going back to early-mid may he has a post for the dyno his shop had up for sale. digging a bit deeper I found some state paperwork filings that showed the place changing locations to a residential address. Moral of the story, tread carefully with job postings that say over a month ago. Still trying to find something, just trying to figure out what else I want to do for the foreseeable future, so the hunt continues.
-
Hope this can get you started. Follow the instructions to the letter and it should get you some answers. I think that 14 ohms to ground could be playing a part in this.
-
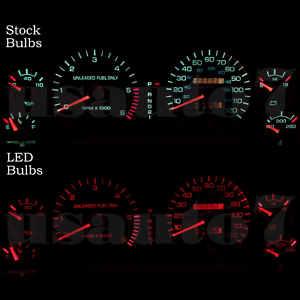
So the cluster is made up of 4 or 5 "layers". You have the fiberboard cover, the white plastic surround, the circuit board, the diffuser/needle motor mount, and then the gauge faces. The gauge faces are where the tint is. Its a light blue and not over powering. I think that is why you can run other colors, its not "colored enough (?)" to completely block the other colors. In the photo, the difference between the redline and normal gauges is all the tint is cutting out. If one were to attempt something like the gels in the CF link, you would have to put the lighting gel between the diffuser and the gauge faces for a later style cluster.