


Me78569
Unpaid Member
-
Joined
-
Last visited
Everything posted by Me78569
-
how many hours does it have? I'd be curious if it was worked or if it just sat there and idled.
-
Ill look into regency, I think I will just do a flue liner, it is cheap peace of mind and makes it easy to never think about it again.
-
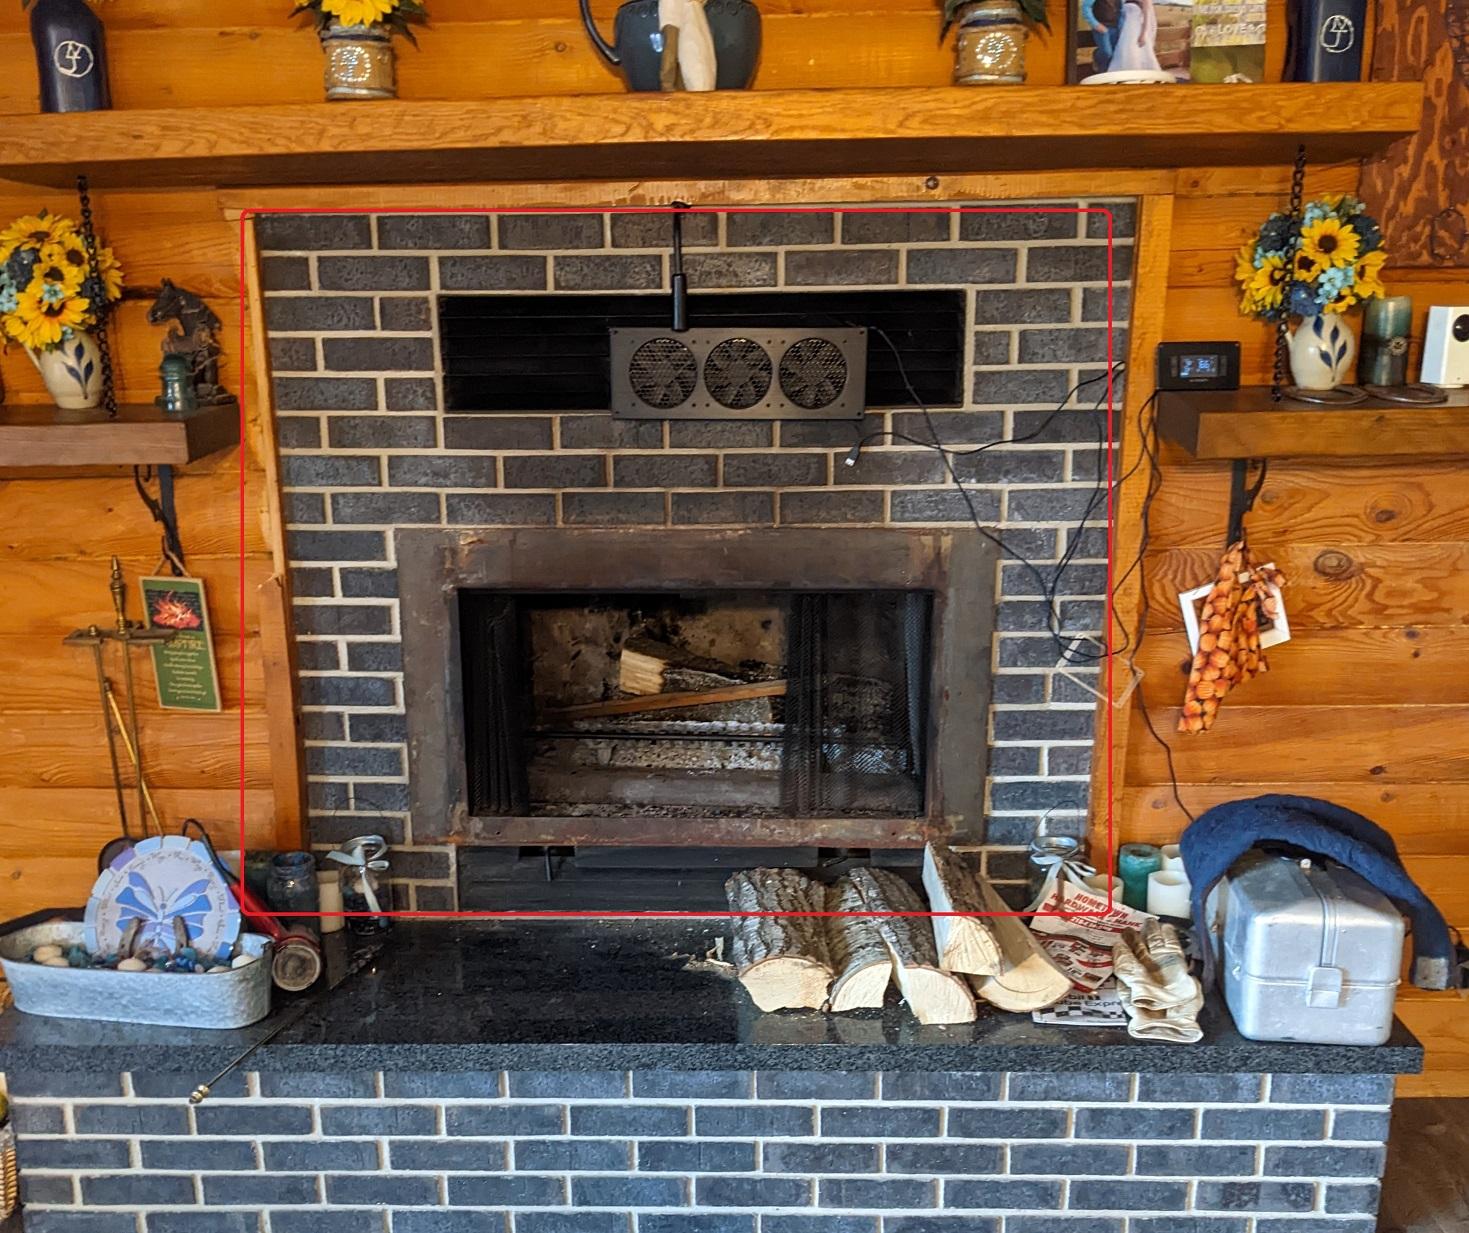
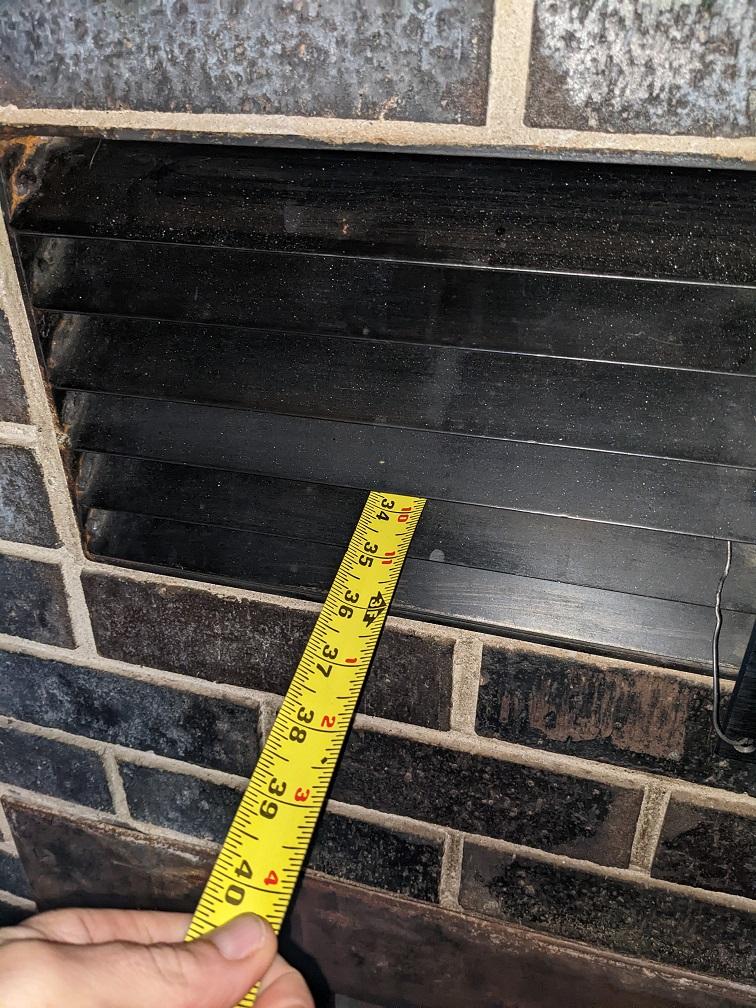
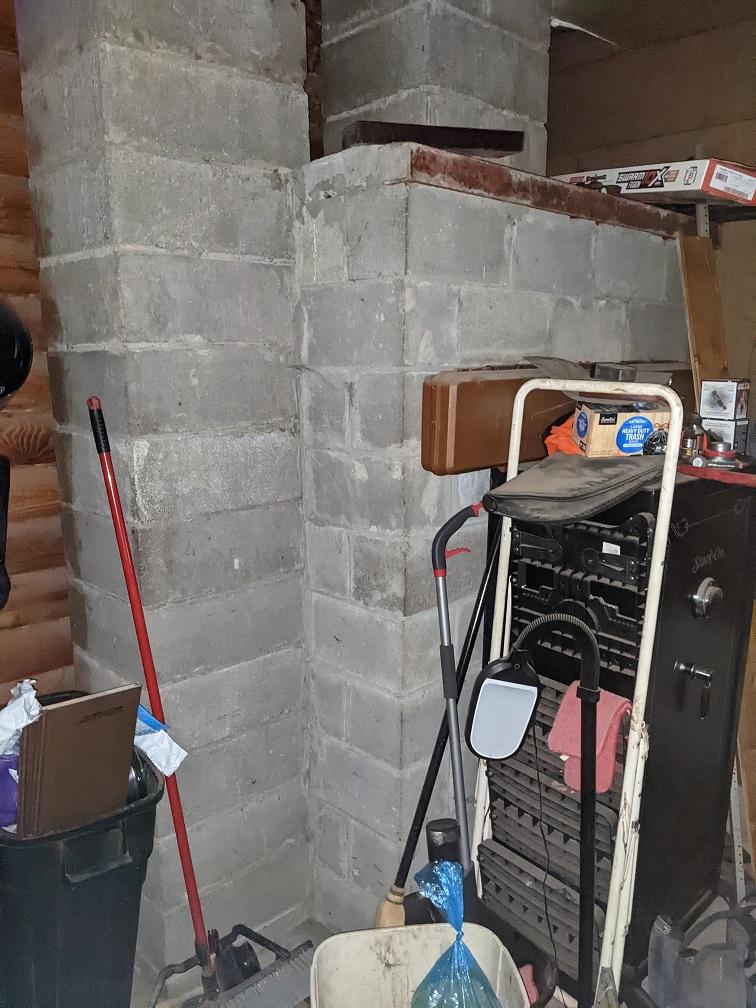
Our house has an old Heatilator metal liner fireplace which is piped into a Cinder Block with Clay Flue chimney. It burns through wood like it is going out of style so I would like to get something more modern in with a bit longer burntime. I can't do an insert replacement as the heatilator front opening for the firebox is 20" tall and all of them I can find at 22" required to fit. I was looking at this from Menards. USA made and heats 1800 sq/ft which our heated area is ~900 sq/ft It is 27" deep and 28" wide and 31" tall https://www.menards.com/main/heating-cooling/fireplaces-stoves/wood-stoves/pleasant-hearth-wood-stove-1-800-sq-ft-with-variable-speed-blower/mws-1800/p-1560752890938-c-6884.htm Here is what I am working with. My plan at this point is to remove all the brick I have circled in red and then refinish the interior wall with some stone looking stuff. Depth of the area is ~34" from the front face And here is the backside in the garage. Couple questions I have from folks that might know is should I run a flexible 6" steel liner up inside the clay or just run a 6" to 9x13" adapter for the clay flue? The entire area where the current fireplace sits is cinder block and concrete so I don't forsee any issues with the stove sitting in the nook, but the nook is only ~55" tall so that would leave 20" between the top of the stove and the top cinder blocks. Anything else I am missing here? I don't really want to go through the effort of tearing out this old heatilator without good results.
-
Snow is here, getting things setup to start snowblowing. Tile for the shower needs to be picked up and installed. Then finish the drywall and prep for windows next year. River should freeze in the next month hopefully. Other than that just trying to keep things going with life.
-
true, regardless I would call DAP and see what they can do for you. I wouldn't spend a lot and I would worry about extra flow with your current setup.
-
stock one lasted 21 years. that's pretty reliable
-
I prefer the old theme on both desktop and mobile. The non Halloween dark theme is a lot better, but the blue thread title text is hard on the dark background.
-
I would call DAP up and ask what they have. I think for your setup you would be hard pressed to notice a difference in the manifold you put on.
-
I had one. They are pretty much the go to damper for multiple classes of vehicle.
-
3.42 is the default, they seem like they might be too long, but they are actually fine.
-
Yea lines come off with the pump. I'd do the intake manifold gasket when you are in there to assuming it wasn't just replaced
-
Pull the vp, intake and block mounted filter,. It's easy from there
-
I'd be watching the pump honestly, sounds very much like a sticking timing piston. I'd just keep an eye on things until you have a code or more to go on.
-
White smoke?
-
Sounds like maybe your vanes are getting sticky and it frees up after some heat is applied.id pull the exhaust housing off the turbine and see how it looks. Knowing the code that you did find would help.
-
sweet. looks great then
-
that boost elbow gonna rub on your coolant line? hard to see in the image
-
you might be best recording the whistle the burning it to a cd etc and playing it on the stereo in the truck. Should solve your issue.
-
the motor that spins doesn't really have a start and end position, that is where the calibration comes in. The calibration sets the limit of travel so the motor doesn't try and force the arm beyond the limit.
-
This has the method to calibrate the actuator hardware.
-
the approx conversion of opening size is right at the bottom area of the image I linked this morning.
-
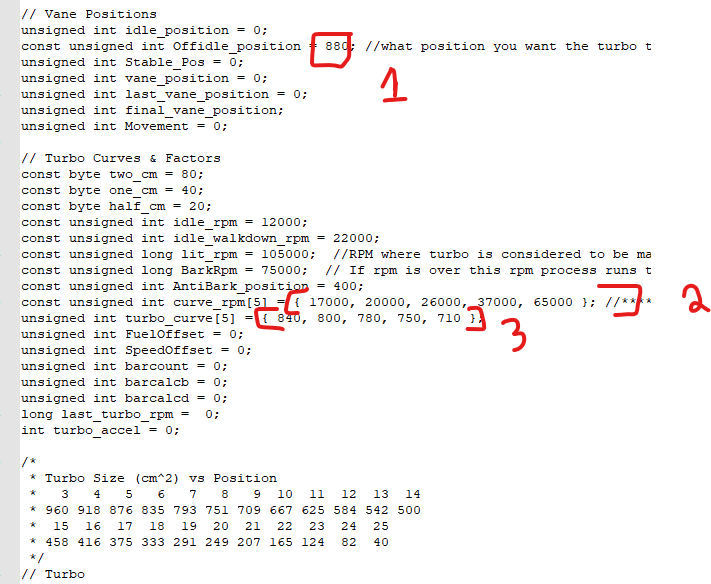
your drive to boost should be like 1.5:1 untl shaft speeds are above 100,000 rpm. i wouldn't mess with the rpm curve, only the position curve. each "50" is .5 cm of housing size.
-
1 is where the turbo starts when you leave a stop 2 is the rpm limits for each step of the turbo related to shaft speed. 3 is the limit for vane position when the rpm range from 2 is reached. If you are having trouble getting the turbo over 80,000 rpm then I would make #3 be something like {840,800,780,760,740} and try again. for the calibration function the turbo should walk %100 open then walk back to %100 close and then be done.
-
You'll want to tighten the positions for the 40,000 rpm and above band. I can look at the code and refresh myself later and tell you the line number to adjust.
-
give the deal the vin


