AH64ID
Unpaid Member
-
Joined
-
Last visited
Everything posted by AH64ID
-
With my mechanical gauge I get about 20-22 at idle, and 58-62 when cruising. As high as 80 with a cold block and cold oil. That's with the sender on the drivers side of the block by the ECM and Amsoil 15w-40 AME.
-
Looks good... I wish I could keep my soot that low. Hopefully my new cam will help. I also use those guys for my reports.
-
I too find it interesting... But I don't see a exhaust brake in your sig, and that was the only place I saw issues.. and only becuase I have a back pressure gauge.. otherwise I wouldn't have had issues, nor known about the one I had... As far as EGT's.. .I run about the same... I was referring to accelerating.. cruise I cool off, but the lower airflow on the 3rd gens allows them to warm up pretty easy at low load/low boost. For me to get EGT's above 1100 when towing I have to be in 4th or 5th and really pulling hard at rpms above 2500. I don't know that I have ever done it in 6th... So we see about the same.
-
Wally world oil, only 10oz per tank (416:1), and 3rd gens run pretty hot... I wouldn't ever move if I obeyed your 5psi and 600* rule.. On a 3rd gen its more like 5psi and 800-900*.
-
Below 1500 rpms mine always engaged first time, every time. It was at higher rpms and air flow it would only close about 80%, then as soon as i down shifted or slowed down it would fully close. Not saying everyone will have the issue, but thats what mine did... I also noticed my soot in the tail pipe was "sticky" and harder to clean off when washing the truck.
-
Do you have a back pressure gauge? I wouldn't have seen the issue without one.
-
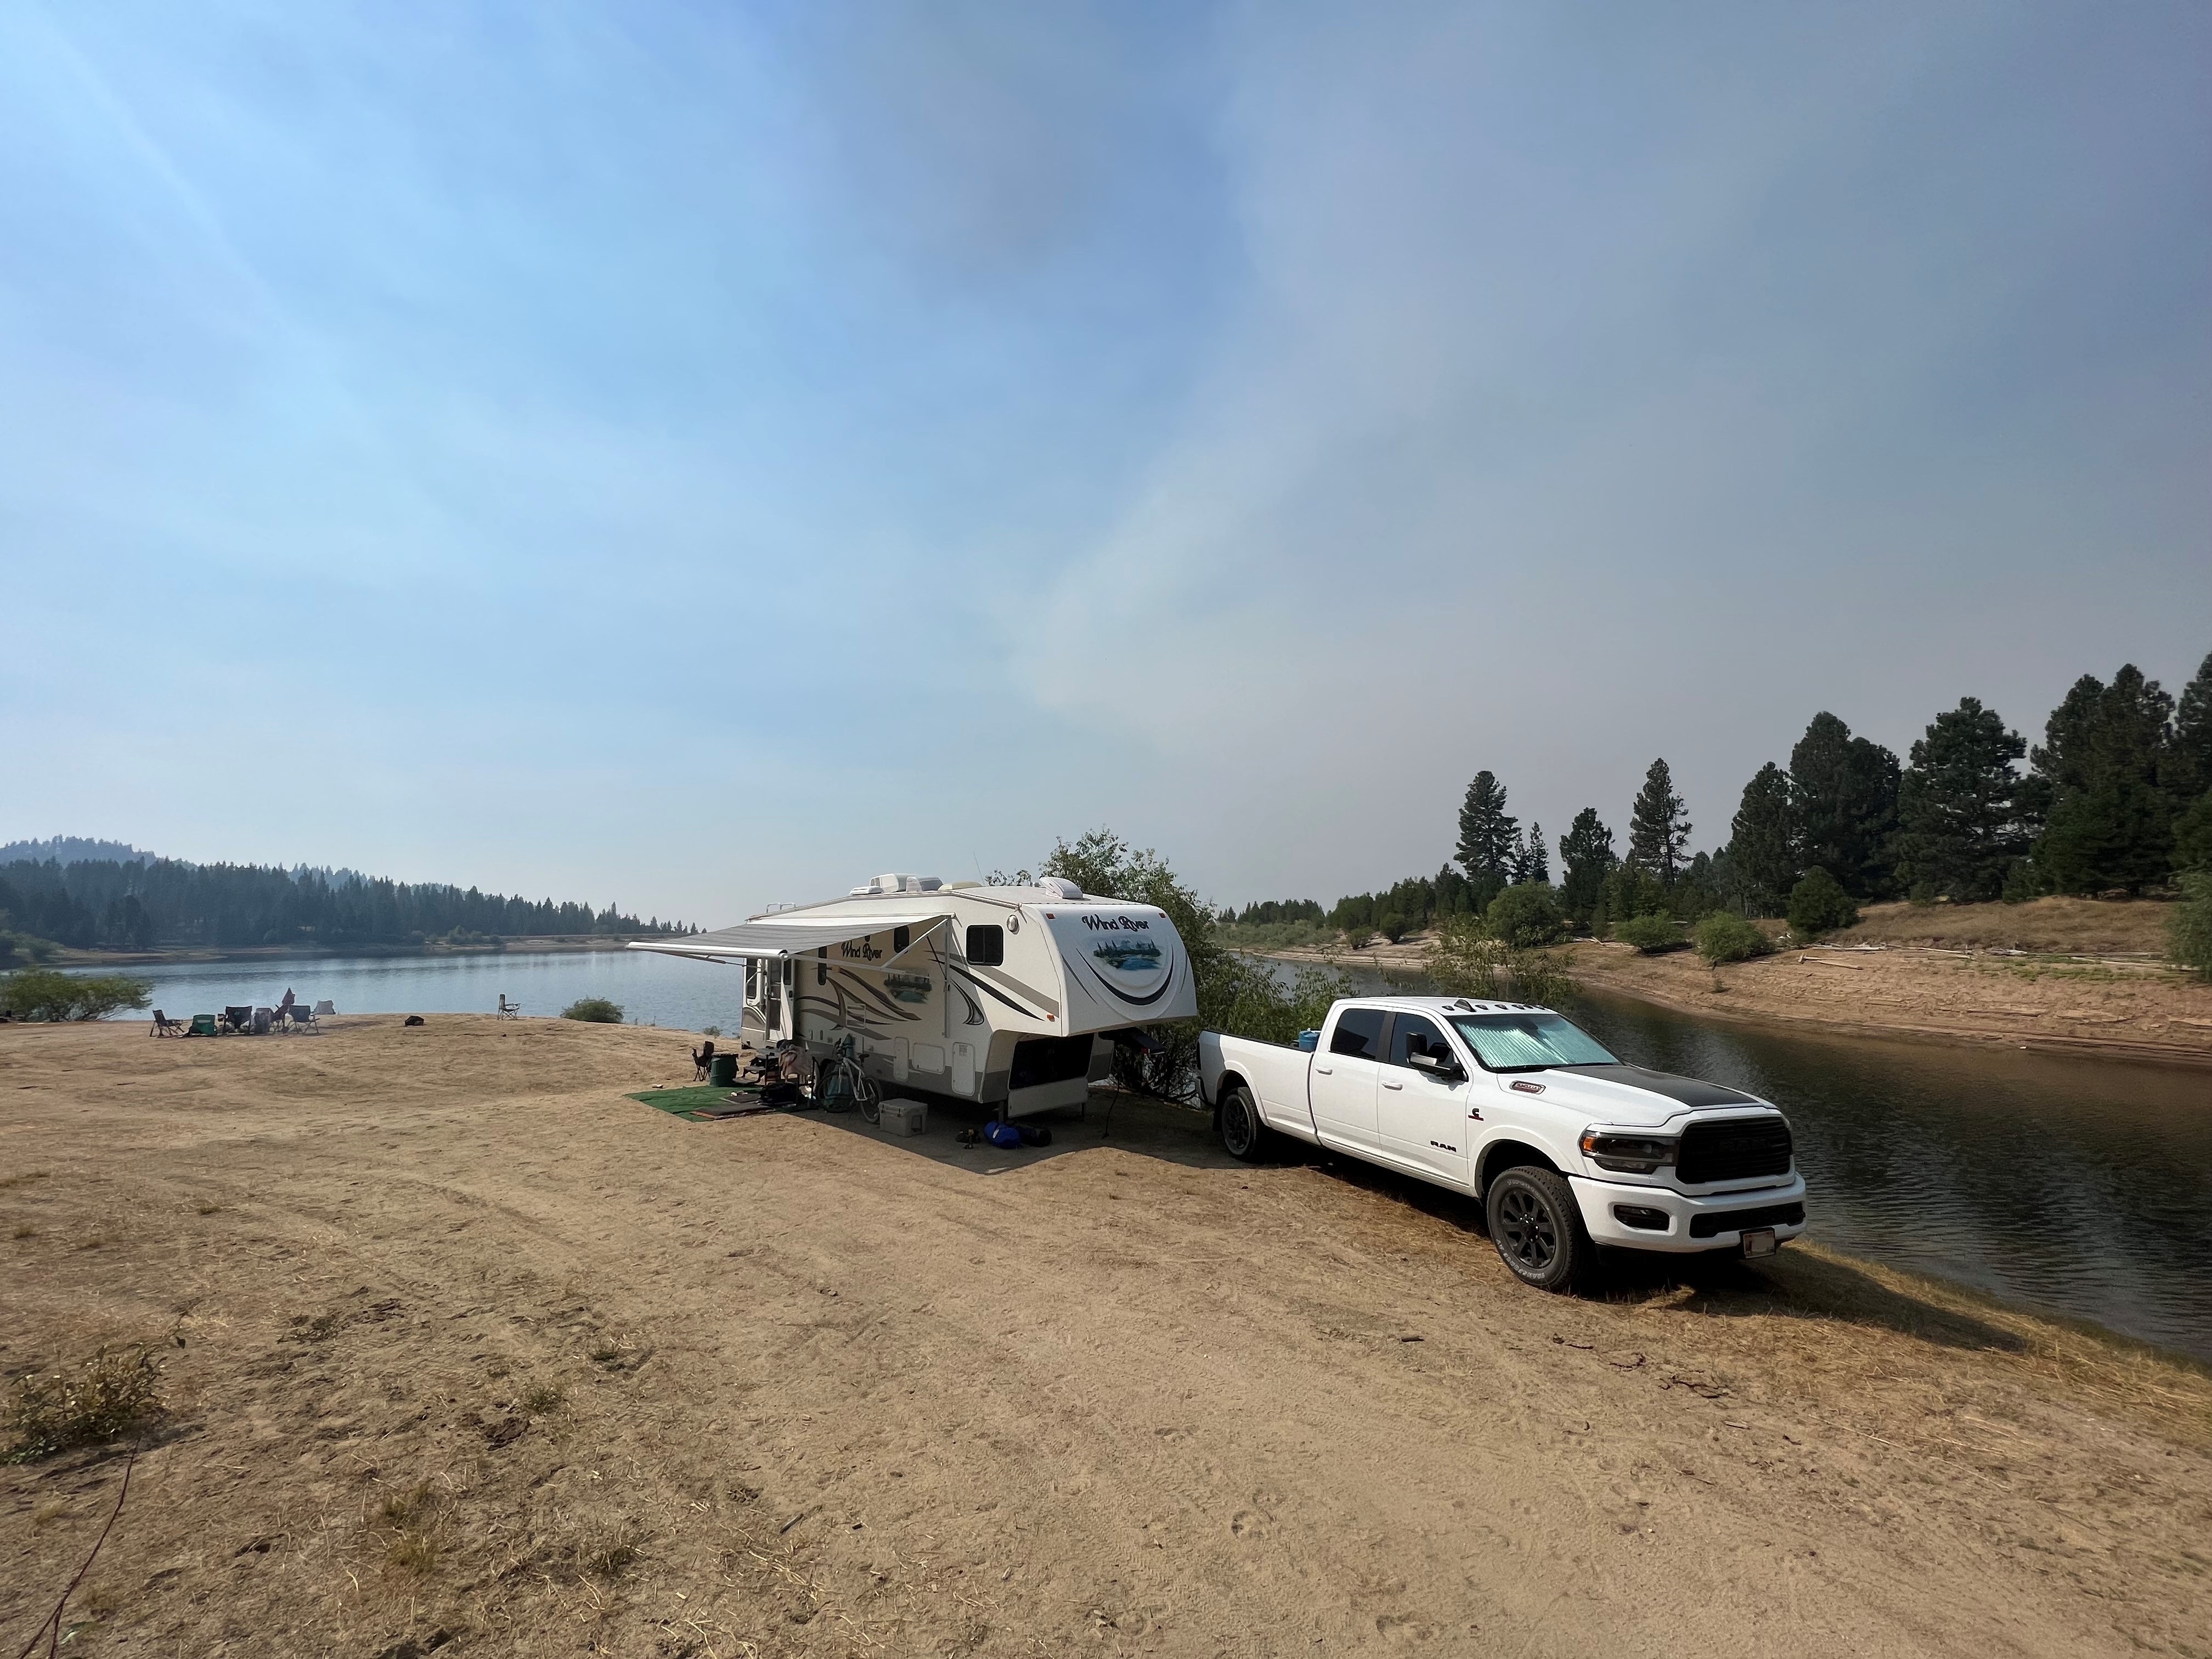
Travel trailers are just hard on fuel. Its the windage. I can dip below 12 pretty easy with my 5K lb TT. I have a friend with an 02, Auto on 315's. He gets about 10-10.5 towing a TT or 5er. His TT is about 5K, his 5er was a 30' and he had an enclosed trailer behind it... Both got the same mileage. Windage kills, not weight.
-
Nice... looks like a TON of work.
-
Yeah hard to show.. But if you have a pump that can push the GPH then you are fine... Its a little more trickey on a VP as you need 10-20 psi for lube, on a 3rd gen you just need flow. And really if you drop from 20 to 10 on a VP truck you are fine, still have all the flow/pressure you need.
-
If the test port is on the outlet side of the filter then you will not be able to measure the differenc between the FF and VP. If its on the inlet side thats a different story.
-
3/8" fuel line is more than enough for LOTS and LOTS of hp... While I don't have any numbers of proof, I would say that you can easily get 700-800 on 3/8" line without issue.
-
The hardest level cruise I have done was at 70 with a 30-35mph head wind. I sat at 24-28psi boost and ~1000* the whole time. That was with my 5K TT (frontal area killed me, not weight). I can see 1350* if I try really hard on a hill, but pull most hills at 20-25psi and 1200*.
-
Looking at the coolant I pulled out, there probaly was no "need" but whate the heck... cant hurt :-) The OEM coolant is pretty good stuff.
-
I have only changed it once, but it didn't leak very much at all. I did it cold and put a bucket under it and cracked the threads.. In fact I dont really recall any leakage... I am coming up on a filter change in the next 1-3 months, so i'll report back.
-
I have been bugging them for 2+ years about Dodge codes... Yeah boost would be real easy, equal to MAP-IAT pressure.
-
According to SG its the OBDII on the 3rd gens, all of them do it. It shows less fuel being burned at 1500 rpms than at idle. At low load and low speed its not accurate. Part of the issue is LOD is FCA, not injectors... Its actually a little better with RATE at FAST, but RATE resets to NORM after each power off... so I don't mess with it. It would be really nice if they came out with some xGauge stuff for the Dodges.
-
No problem..
-
On my Toyota's it was always within .5mpg. Now on my Dodge its all over the place, but the 3rd gens don't do a very good job of transmitting load/fuel data thru the OBDII port. As far as the power issue, that seems a bit odd. Have you verified nothing is draging on the trailer brakes?
-
I have a Pricol 0-30 elec gauge that has been working great.
-
Are you feeding that with 2 Walbro's? Looks good!
-
This is a pretty simple maintenance procedure, but I thought I would throw my .02 out here for everyone to read. First off the service manual has the procedure, and it really is quite simple. In addition to the coolant flush I changed the thermostat. That procedure can also be found in the service manual. I started off by simply draining the OE fluid into a bucket. It was still very red, no oil, or any contaminates that I could see. There was a little bit of some contaminate the showed up on the 3rd flush in the radiator, but looked liked what I have seen in every cooling system. On my 2nd flush the coolant was much warmer and now had a small oil film on the top. But my buckets were new and I attribute that to the new plastic and warm water, something to consider if you find the same conditions when you flush your system. Since it was in the 20's and snowing yesterday I knew I would have a hard time making the coolant warm enough to open the thermostat to get a good flush, and removing the thermostat would cause a leak so I modified my OE thermostat. A freind of mine calls this a "Hawaii T-Stat". So I drained the block/radiator 5 times. This may seem excessive, but consider this. A drain only gets about 4-5 gallons out, and its a 7.4 gallon system. So I wanted to ensure that I had as much of the old coolant out as possible. What I would do is drain it, very slow about 30 minutes to drain, then fill it with distilled water, and start it. I would then top it off with the engine idling, put the pressure cap back on and bump the idle to 1100 and turn the EB on to get some heat. With my Hawaii T-stat and a 30ish degree garage (cant fit the truck in with the door closed) and the hood open the coolant would only get to 114*. I would let it get to 114* then turn the EB off and bump the idle to 1500 for a few minutes. Then shut it down, drain, and repeat. This photo shows 1 gallon from each flush, with the full strength OE fluid on the left and an unopened gallon of water on the right. Drains 4 and 5 were identical in color, so I assumed that was about my point of diminishing returns. For coolant I chose Zerex G-05, its HOAT and the factory fill. HOAT coolant is very difficult to find, and HOAT is not compatible with non-HOAT. I think I paid about $11/gal for it at NAPA. (Even thou its the OEM fluid, its not pink it's a yellow, which is really hard to see in the overflow tank) Since its a 7.4 gallon system and only 4-5 gallons drain you MUST, I repeat MUST, use concentrated coolant, not a 50:50 pre-mix (even thou the service manual states 50:50 you don't want to do this, it will yeild you a 25-40% mix at most). You need to add 3.7 gallons of coolant to the system to have a 50:50 mix. First thing to do is to make 1.5 gallons of pre-mix, this is for the overflow tank. Fill the overflow tank to the FULL line and pour the rest of the 50:50 in the radiator. Now add the remaining 3 gallons to the radiator. Now, and only now, will you and any straight distilled water to the radiator. I was only able to get about .5gallons of distilled water in after the coolant, so even adding a gallon of distilled first will mess up your 50:50 desierd mix. Now start the enigne with the heater still on full and let it idle for a minute. Then add more distilled water to top it off. Repeat this once. Now you should be full enough that you won't pull your overflow reservoir below ADD. Take it for a test drive, try to drive it a few miles after you have reached operating temp to get the coolant and water to properly mix throughout the block, radiator, and heater core. This was the hardest part for me, it was 19* outside, and there was 1-3" of snow on the roads. Even with my winter front fully closed I had to get up to 65-70 to get the T-stat to open and mix, then slow and accelerate again... But I got the t-stat to open 6-8 times and am confident I got a good mix. I used 3.7 gallons of G-05 and approx 23 gallons of distilled water. A little trick for pouring the coolant into smaller containers from the bucket. If you have ever put a funnel in a gallon container you know it bubbles and spills since the air cant escape. Try putting a toothpick in the opening of the container with the funnel, works great.
-
0-30 psi Pricol fuel gauge How it sits now on the GDP PFI Horn.
-
Hi-flow fittings in the OE canister and CP3 Final Install of 1R-0750 “T” for fuel psi sender
-
While there are two decent filter choices for the OE filter canister on the 3rd gen (OEM and Baldwin) I wanted better filtration. Bosch would like to see 5 micron filtration on the CP3 and injectors and Dodge only supplies 7. The Baldwin PF7977 is 5 microns, but I still wanted more. After hours of research online and with filter manufactures I decided on adding 2 additional filters to my system. I added a Baldwin BF1212 on between the tank and the OE filter bowl and a Cat 1R-0750 between the OE filter bowl and the CP3. Why these filters. The BF1212 is a 20 micron absolute (97.88% actually, so not quite absolute), 4 micron nominal filter that has fuel/water separation ratings of 97%-99% efficient for removing free water and 92%-95% efficient for removing emulsified water. It is the cross reference for the Fleetguard FS1212 (20 microns at 95%, 10 microns at 79% and 90% for both free and emulsified water removal), but is cheaper and offers slightly better initial filtration. This is my first filter and is more than adequate for initial filtering and f/w separation. The Cat 1R-0750 is a 2 micron absolute (old data) or 4 microns absolute (new data) final fuel filter. It is rated the best in its size/series of any of the like filters. (Fleetguard FS5320 is 5 microns absolute (old data), and the Baldwin BF7633 is 7 microns absolute (old data)).. The old vs new data is simply a change in measuring filter efficiency. According to the new test standard 4 microns is a good of a measurement as you can obtain, thou nothing is physically different on the 1R-0750.. so I say it’s a 2 micron filter as most people are familiar with that style of reporting. The Donaldson P551313 is also rated at 2 micron absolute, but the Cat is easier for me to obtain. Mounting: Both filters are mounted on Baldwin FB1311 filter bases. The BF1212 is mounted to a piece of steel that uses longer driver’s seat bolts and one time use nuts. To tap into the OE steel fuel line I used 3/8 compression fittings and 3/8 push-lok hose. To mount the Cat 1R-0750 I used the GDP MK2+ Big Line Kit as the starting point. I ordered the kit without the filter base, filter, and fuel pressure sender “T”. The GDP kit was complete and easy to install. At the same time I also replaced the banjo on the inlet side of the OE filter bowl with a high-flow banjo from GDP. All my fittings are now high flow. Baldwin PF7977: In the stock fuel canister I am running the Baldwin PF7977. This filter is rated at 5 microns absolute and 1-2 microns nominal. It also has fuel/water separation ratings of 97%-99% efficient for removing free water and 92%-95% efficient for removing emulsified water. Pressure: Because I am now running 3 filters on the stock in-tank LP I wanted to get a gauge on my setup to ensure I am not starving the CP3 of fuel. I installed a Pricol 0-30 psi electric gauge between the OE canister and the CP3. At idle I see 9 psi. (From what I gather most folks running a stock setup see ~11psi at idle). I attribute the 2 psi loss to two things, one there is some increases restriction from the filters but I feel the largest drop comes from the big line kit and hi-flow banjos. Because the elec fuel pump always has the same flow, based on constant voltage, and that pressure is directly related to flow/resistance I think the decreased resistance from the big line kit and hi-flow banjos has dropped the pressure, thou the flow is the same. Off idle I have yet to see below 5psi of pressure, thou I don’t run lots of hp and haven’t towed with the setup yet. But for my needs I have adequate fuel pressure, thou I will upgrade when/if the OE LP fails. If you need more flow I recommend the setup like I have with a AD Raptor 100 plumbed between the BF1212 and the OE canister. The BF1212 is actually a vacuum filter and will act as a good pre-screen for the LP, and will catch any water before the LP emulsifies it. This setup could be used with the stock 3/8 line for stock-mild hp, or with ½” line and a larger LP for high HP. Personally I don’t recommend deleting the OE filter bowl. 2 reasons. 1 is the WIF sensor (yes I know its mediocre at best, but it’s better than nothing) and 2 is the fuel heater. 2 microns is a tight filter, so I like to know that the heater is there. Photos: BF1212 mounted just behind the xcase above the xcase skid plate. 3/8 Compression fitting GDP MK 2+ Big Line kit with the Cat 1R-0750 and Baldwin FB1311 base.
-
I looked thru all the bypass threads and found some nice places to mount it, but either the EaBP-110 was too long, I don't have a aftermarket intake, or I have the OEM Jake. So I went with where my dad mounted his, on the pass frame rail. Looking at my dads it was great, but he only had a skid across the bottom, and I really wanted the leading edge covered, so I made a cardboard example last weekend and took it to the local machine shop, 4 days and $40 later I had a skid. I wanted 3/16 alum, but they were out so he used 1/4"... talk about beefy. As far as the bypass kit itself I did the pricing on getting the BMK-11, or just the mount and getting the fittings and hoses locally... I saved about $30 getting it all locally, so all I ordered from amsoil was the mount and the oil cap adapter. So on friday I stopped by the parker store and got 10' of hose for measuring. I then held the skidplate to the frame and drilled and tapped the holes for the skid. I then bolted it up, loosely, and figured out where to put the filter mount. Once I had that marked I removed the skid and drilled the first hole. I then printed the BMK-11 instructions with a 1:1 scale of the mounting holes, cut the center hole out and bolted it to the hole I had drilled and tapped. I then center punched the second hole, drilled and tapped it. Cut the next hole from the template out and center punched the 3rd hole, drilled and tapped... I mocked it all up and made sure everything fit, which it did (after a little filing, my center punch must have walked a little.).. Time to mock the hoses up, so I ran the hose from the mount to the engine oil filter housing (where there is a 1/8 port on top.. makes it REALLY easy), and marked the hose. I moved the hose to the oil filter cap and did the same, then uninstalled everything.... Now I wait for Monday... Fast Fwd to this morning, I get up and go to the parker store, get some fittings, do some pre-coffee math (it actually worked) and told him what lengths to cut the hose, and crimp the ends... And back to the house... I bolted the mount to the frame, put the fitting in the oil cap, screwed that in place, and put the fitting in the oil filter housing. I used 1/8" NPT to -4 female JIC everywhere. I then ran the hoses (where I found that math can be done pre-coffee) and tightened them all down. I then zip tied the hoses clear of the exhaust and suspension, added 1.5 qts of oil and fired it up. The filter was dry, because of the horizontal attitude I couldn't pre fill it. It took about 20 seconds with the engine idling to fill the filter, and oil came out the cap... I let it run for another minute, and shut it off. While I waited for the oil to drain I checked for leaks and bolted the skid plate up, no leaks and it all fit great... I checked the oil, added another .5 qt (Now about 13-14 qts in the system) and went for a test drive to get oil pressure up. No leaks, and my engine will be much happier.... I added a "T" here so I can put a oil psi sender in down the road, thanks to the OEM idiot gauge. Just the right amount of clearance